RJ Series Slim Power Relays SJ Series Relay Sockets - Idec ...
RJ Series Slim Power Relays SJ Series Relay Sockets - Idec ...
RJ Series Slim Power Relays SJ Series Relay Sockets - Idec ...

Create successful ePaper yourself
Turn your PDF publications into a flip-book with our unique Google optimized e-Paper software.
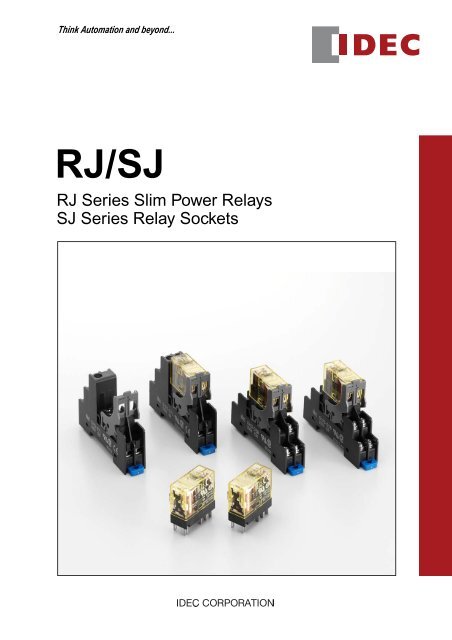
Think Automation and beyond...<br />
<strong>RJ</strong>/<strong>SJ</strong><br />
<strong>RJ</strong> <strong>Series</strong> <strong>Slim</strong> <strong>Power</strong> <strong><strong>Relay</strong>s</strong><br />
<strong>SJ</strong> <strong>Series</strong> <strong>Relay</strong> <strong>Sockets</strong>
<strong>RJ</strong> <strong>RJ</strong> <strong>Series</strong> <strong>Slim</strong> <strong>Slim</strong> <strong>Power</strong> <strong><strong>Relay</strong>s</strong><br />
Compact housing, large switching capacity.<br />
Plug-in terminal relays suitable for control panels,<br />
machine tools, and a wide variety of applications.<br />
Large Switching<br />
Capacity<br />
Excellent<br />
Durability<br />
•Large Switching Capacity<br />
Highly conductive materials<br />
ensure stable electric<br />
conduction of current.<br />
•Excellent Durability<br />
Our unique return spring<br />
structure provides improved<br />
durability and reliability of all<br />
mechanical parts.<br />
Large Switching Capacity vs. Competitors<br />
(maximum allowable switching current)<br />
22<br />
12A<br />
10A<br />
<strong>RJ</strong>1 Competitors (Note)<br />
•IDEC’s Unique Light Guide Structure<br />
An <strong>RJ</strong> relay can be easily identified with<br />
the illuminating LED.<br />
•IEC-compliant Green Indication<br />
8A<br />
REG.-Nr. B312<br />
5A<br />
<strong>RJ</strong>2 Competitors (Note)<br />
Long Mechanical Life vs. Competitors<br />
AC Coil DC Coil<br />
30 million<br />
operations minimum<br />
3 times<br />
more!<br />
10 million<br />
operations<br />
<strong>RJ</strong> Competitors (Note)<br />
50 million<br />
operations minimum<br />
2.5 times<br />
more!<br />
20 million<br />
operations<br />
<strong>RJ</strong> Competitors (Note)<br />
Note: According to published specifications in other manufacturers’ catalogs. Note: According to published specifications in other manufacturers’ catalogs.<br />
with a<br />
High VisibilityEasy recognition<br />
LED Indicator<br />
Light<br />
Guide<br />
Two Bobbin Colors<br />
Black: White:<br />
AC Coil DC Coil<br />
large illumination area!
<strong>SJ</strong> <strong>Series</strong> <strong>Relay</strong> <strong>Sockets</strong><br />
<strong>SJ</strong> <strong>Series</strong> <strong>Relay</strong> <strong>Sockets</strong><br />
<strong>Slim</strong> sockets save space.<br />
<strong>RJ</strong> series relays can be mounted on DIN rails or panels using<br />
<strong>SJ</strong> series relay sockets.<br />
<strong>SJ</strong> Socket<br />
Versions<br />
Release Lever<br />
<strong><strong>Relay</strong>s</strong> can be easily removed<br />
using release levers.<br />
• Standard Screw Terminal Type<br />
• Finger-safe Screw Terminal Type (IP20)<br />
RoHS directive compliant (2002/95/EC)<br />
The <strong>RJ</strong> series relays and the <strong>SJ</strong> series sockets do not contain<br />
lead, cadmium, mercury, hexavalent chromium, PBB, or PBDE.<br />
15.5 mm<br />
Easy Wiring!<br />
71 mm<br />
<strong>RJ</strong> <strong>Series</strong> <strong><strong>Relay</strong>s</strong> RU <strong>Series</strong> <strong><strong>Relay</strong>s</strong><br />
By combining with the RU series relays, the<br />
contact capacity increases and more contact<br />
configuration types become available.<br />
Because the screw terminal size is M3 on both<br />
sockets, wiring can be completed easily and<br />
efficiently.<br />
3<br />
Similar Dimensions
4<br />
<strong>RJ</strong> <strong>Series</strong> <strong>Slim</strong> <strong>Power</strong> <strong><strong>Relay</strong>s</strong><br />
Compact and rugged power relays. Large switching capacity.<br />
• Compact housing only 12.7-mm wide.<br />
Large contact rating<br />
<strong>RJ</strong>1S (1-pole): 12A<br />
<strong>RJ</strong>2S (2-pole): 8A<br />
• Non-polarized LED indicator available. IDEC’s unique light guide<br />
structure enables high visibility of coil status from any direction.<br />
• Excellent electrical and mechanical life.<br />
Electrical life: 200,000 operations (AC load)<br />
Mechanical life: 30 million operations (AC coil)<br />
• Environmentally friendly, RoHS directive compliant (EU directive<br />
2002/95/EC). Contains no lead, cadmium, mercury, hexavalent<br />
chromium, PBB or PBDE).<br />
• Diode type<br />
Diode reverse withstand voltage: 1000V<br />
• UL recognized, CSA certified, EN compliant.<br />
Standard Mark Certification Organization / File No.<br />
UL508 UL File No. E55996<br />
CSA C22.2 No. 14 1608322 (LR35144)<br />
EN61810-1<br />
Types<br />
Contact Ratings<br />
No. of<br />
Poles Contact<br />
1<br />
2<br />
NO<br />
NC<br />
NO<br />
NC<br />
Reg.-Nr. B312<br />
• Plug-in Terminal Type<br />
Type<br />
Allowable Contact <strong>Power</strong> Rated Load<br />
Resistive<br />
Load<br />
3000VA AC<br />
360W DC<br />
3000VA AC<br />
180W DC<br />
2000VA AC<br />
240W DC<br />
2000VA AC<br />
120W DC<br />
VDE (REG.-Nr. B312)<br />
EC Low Voltage Directive<br />
Inductive<br />
Load<br />
1875VA AC<br />
180W DC<br />
1875VA AC<br />
90W DC<br />
1000VA AC<br />
120W DC<br />
1000VA AC<br />
60W DC<br />
1-pole (SPDT) 2-pole (DPDT)<br />
Type No. Code Type No. Code<br />
A24<br />
A110<br />
Standard (with LED Indicator) <strong>RJ</strong>1S-CL-∗ A120<br />
A220<br />
A230<br />
A240<br />
D12<br />
<strong>RJ</strong>2S-CL-∗<br />
Simple (without LED Indicator) <strong>RJ</strong>1S-C-∗ D24<br />
D48<br />
D100<br />
<strong>RJ</strong>2S-C-∗<br />
With diode (DC coil only) (with LED indicator)<br />
A1: –, A2: +<br />
<strong>RJ</strong>1S-CLD-∗<br />
<strong>RJ</strong>2S-CLD-∗<br />
With diode (DC coil only)<br />
A1: –, A2: +<br />
<strong>RJ</strong>1S-CD-∗<br />
D12<br />
D24<br />
<strong>RJ</strong>2S-CD-∗<br />
With diode (DC coil only) (with LED indicator)<br />
A1: +, A2: –<br />
<strong>RJ</strong>1S-CLD1-∗<br />
D48<br />
D100<br />
<strong>RJ</strong>2S-CLD1-∗<br />
With diode (DC coil only)<br />
A1: +, A2: –<br />
<strong>RJ</strong>1S-CD1-∗ <strong>RJ</strong>2S-CD1-∗<br />
Voltage<br />
Resistive<br />
Load<br />
Inductive<br />
Load<br />
cos ø = 0.3<br />
L/R = 7 ms<br />
250V AC 12A 7.5A<br />
30V DC 12A 6A<br />
250V AC 12A 7.5A<br />
30V DC 6A 3A<br />
250V AC 8A 4A<br />
30V DC 8A 4A<br />
250V AC 8A 4A<br />
30V DC 4A 2A<br />
A24<br />
A110<br />
A120<br />
A220<br />
A230<br />
A240<br />
D12<br />
D24<br />
D48<br />
D100<br />
D12<br />
D24<br />
D48<br />
D100<br />
Allowable<br />
Switching<br />
Current<br />
Note: Measured at operating frequency of 120 operations per minute (failure rate level P, reference value)<br />
12A<br />
8A<br />
• Coil Voltage Code ∗<br />
Code Rated Coil Voltage<br />
A24 24V AC<br />
A110 110V AC<br />
A120 120V AC<br />
A220 220V AC<br />
A230 230V AC<br />
A240 240V AC<br />
D12 12V DC<br />
D24 24V DC<br />
D48 48V DC<br />
D100 100-110V DC<br />
Note: Specify a coil voltage code<br />
in place of ∗ in the Type No.<br />
Allowable<br />
Switching<br />
Voltage<br />
250V AC<br />
125V DC<br />
250V AC<br />
125V DC<br />
Minimum Applicable<br />
Load (Note)<br />
5V DC, 100 mA<br />
(reference value)<br />
5V DC, 10 mA<br />
(reference value)
Approved Ratings<br />
Note: According to the utilization categories of IEC60947-5-1<br />
Coil Ratings<br />
Note: Maximum continuous applied voltage is the maximum voltage that can be applied on relay coils.<br />
Specifications<br />
Note: Above values are initial values.<br />
∗1: Measured using 5V DC, 1A voltage drop method.<br />
∗2: Measured at the rated voltage (at 20°C), excluding contact bounce time.<br />
∗3: 100% rated voltage.<br />
<strong>RJ</strong> <strong>Series</strong> <strong>Slim</strong> <strong>Power</strong> <strong><strong>Relay</strong>s</strong><br />
UL CSA VDE<br />
Voltage<br />
Resistive Resistive Inductive Resistive<br />
AC-15, DC-13<br />
(Note)<br />
<strong>RJ</strong>1 <strong>RJ</strong>2 <strong>RJ</strong>1 <strong>RJ</strong>2 <strong>RJ</strong>1 <strong>RJ</strong>2 <strong>RJ</strong>1 <strong>RJ</strong>2 <strong>RJ</strong>1 <strong>RJ</strong>2<br />
NO NC NO NC NO NC NO NC NO NC NO NC NO NO NO NO<br />
250V AC 12A 12A 8A 8A 12A 12A 8A 8A 7.5A 7.5A 4A 4A 12A 8A 6A 3A<br />
30V DC 12A 6A 8A 4A 12A 6A 8A 4A 6A 3A 4A 2A 12A 8A 2.5A 2A<br />
Rated Voltage<br />
AC<br />
50/60 Hz<br />
DC<br />
Coil<br />
Voltage<br />
Code<br />
Without LED Indicator With LED Indicator<br />
Rated<br />
Current (mA)<br />
±15% (at 20°C)<br />
Coil<br />
Resistance (Ω)<br />
±10% (at 20°C)<br />
Rated<br />
Current (mA)<br />
±15% (at 20°C)<br />
50 Hz 60 Hz 50 Hz 60 Hz<br />
Coil<br />
Resistance (Ω)<br />
±10% (at 20°C)<br />
24V AC A24 43.9 37.5 243 47.5 41.1 243<br />
110V AC A110 9.6 8.2 5270 9.5 8.1 5270<br />
120V AC A120 8.8 7.5 6400 8.7 7.4 6400<br />
220V AC A220 4.8 4.1 21530 4.8 4.1 21530<br />
230V AC A230 4.6 3.9 24100 4.6 3.9 24100<br />
240V AC A240 4.3 3.7 25570 4.3 3.7 25570<br />
12V D12 44.2 271 48.0 271<br />
Operating Characteristics<br />
(against rated values at 20°C)<br />
Minimum<br />
Pickup<br />
Voltage<br />
80%<br />
maximum<br />
Dropout<br />
Voltage<br />
30%<br />
minimum<br />
Maximum<br />
Continuous<br />
Applied Voltage<br />
(Note)<br />
140%<br />
<strong>Power</strong><br />
Consumption<br />
Approx.<br />
0.9 VA (60Hz)<br />
24V D24 22.1 1080 25.7 1080 70% 10% 170% Approx.<br />
48V D48 11.0 4340 10.7 4340 maximum minimum<br />
0.53W<br />
100-110V D100 5.3-5.8 18870 5.2-5.7 18870 160%<br />
Type <strong>RJ</strong>1S <strong>RJ</strong>2S<br />
Number of Poles 1-pole 2-pole<br />
Contact Configuration SPDT DPDT<br />
Contact Material Silver-nickel alloy<br />
Degree of Protection IP40<br />
Contact Resistance (initial value) (∗1) 50 mΩ maximum<br />
Operate Time (∗2) 15 ms maximum<br />
Release Time (∗2) 10 ms maximum (with diode: 20 ms maximum)<br />
Dielectric<br />
Strength<br />
Vibration<br />
Resistance<br />
Shock<br />
Resistance<br />
Electrical Life (rated load)<br />
Mechanical Life (no load)<br />
Between contact and coil 5000V AC, 1 minute 5000V AC, 1 minute<br />
Between contacts of the same pole 1000V AC, 1 minute 1000V AC, 1 minute<br />
Between contacts of different poles — 3000V AC, 1 minute<br />
Operating extremes 10 to 55 Hz, amplitude 0.75 mm<br />
Damage limits 10 to 55 Hz, amplitude 0.75 mm<br />
Operating extremes NO contact: 200 m/s 2 , NC contact: 100 m/s 2<br />
Damage limits 1000 m/s 2<br />
Operating Temperature (∗3) –40 to +70°C (no freezing)<br />
Operating Humidity 5 to 85% RH (no condensation)<br />
Weight (approx.) 19g<br />
AC load: 200,000 operations minimum (operation frequency 1800 operations per hour)<br />
DC load: 100,000 operations minimum (operation frequency 1800 operations per hour)<br />
AC coil: 30,000,000 operations minimum (operation frequency 18,000 operations per hour)<br />
DC coil: 50,000,000 operations minimum (operation frequency 18,000 operations per hour)<br />
5
<strong>RJ</strong> <strong>Series</strong> <strong>Slim</strong> <strong>Power</strong> <strong><strong>Relay</strong>s</strong><br />
Dimensions<br />
• <strong>RJ</strong>1S Type • <strong>RJ</strong>2S-CL Type<br />
Internal Connection Diagrams<br />
6<br />
27.0<br />
ø1.8 × 3 hole<br />
1<br />
5<br />
4.8<br />
31.1<br />
2<br />
28.8<br />
• <strong>RJ</strong>1S-CL-∗ Standard Type (w/LED Indicator)<br />
1<br />
(A1)<br />
5<br />
(A2)<br />
2(12) 4(11) 3(14)<br />
Coil voltage 24V AC/DC and below<br />
• <strong>RJ</strong>1S-C-∗ Simple Type<br />
1<br />
(A1)<br />
5<br />
(A2)<br />
1<br />
(A1)<br />
5<br />
(A2)<br />
–<br />
+<br />
2(12) 4(11) 3(14)<br />
2(12) 4(11) 3(14)<br />
• <strong>RJ</strong>1S-CD-∗ With Diode<br />
0.5<br />
4<br />
3<br />
1<br />
(A1)<br />
5<br />
(A2)<br />
5.0 28.0<br />
12.7<br />
0.5<br />
4.8<br />
2(12) 4(11) 3(14)<br />
Coil voltage greater than 24V AC/DC<br />
• <strong>RJ</strong>1S-CLD-∗ With Diode (w/LED Indicator)<br />
1<br />
(A1)<br />
8<br />
(A2)<br />
2(12) 4(11) 3(14)<br />
Coil voltage 24V DC and below Coil voltage greater than 24V DC<br />
(A1) 1<br />
–<br />
5<br />
(A2)<br />
1<br />
(A1)<br />
5<br />
(A2)<br />
+<br />
–<br />
+<br />
2(12) 4(11) 3(14)<br />
• <strong>RJ</strong>1S-CLD1-∗ With Diode (w/LED Indicator)<br />
2(12) 4(11) 3(14)<br />
1<br />
(A1)<br />
8<br />
(A2)<br />
–<br />
+<br />
2(12) 4(11) 3(14)<br />
Coil voltage 24V DC and below Coil Voltage greater than 24V DC<br />
• <strong>RJ</strong>1S-CD1-∗ With Diode<br />
1<br />
(A1)<br />
+<br />
(A2) 5 –<br />
2(12) 4(11) 3(14)<br />
+<br />
–<br />
ø1.2 × 3 hole<br />
0.5<br />
1<br />
8<br />
2.6<br />
31.1<br />
2<br />
7<br />
28.8<br />
3<br />
6<br />
0.5<br />
4<br />
5<br />
27.0<br />
6.0<br />
12.7<br />
2.6<br />
All dimensions in mm.<br />
• <strong>RJ</strong>2S-CL-∗ Standard Type (w/LED Indicator)<br />
1<br />
(A1)<br />
8<br />
(A2)<br />
2(12) 3(11) 4(14)<br />
7(22) 6(21) 5(24)<br />
1<br />
(A1)<br />
8<br />
(A2)<br />
2(12) 3(11) 4(14)<br />
7(22) 6(21) 5(24)<br />
Coil voltage 24V AC/DC and below Coil voltage greater than 24V AC/DC<br />
• <strong>RJ</strong>2S-C-∗ Simple Type<br />
1<br />
(A1)<br />
8<br />
(A2)<br />
(A1)<br />
1<br />
(A2)<br />
8<br />
–<br />
+<br />
2(12) 3(11) 4(14)<br />
7(22) 6(21) 5(24)<br />
• <strong>RJ</strong>2S-CLD-∗ With Diode (w/LED Indicator)<br />
2(12) 3(11) 4(14)<br />
7(22) 6(21) 5(24)<br />
Coil voltage 24V DC and below<br />
• <strong>RJ</strong>2S-CD-∗ With Diode<br />
(A1)<br />
1<br />
(A2)<br />
8<br />
(A1)<br />
1<br />
+<br />
–<br />
+<br />
2(12) 3(11) 4(14)<br />
7(22) 6(21) 5(24)<br />
2(12) 3(11) 4(14)<br />
(A1)<br />
1<br />
–<br />
2(12) 3(11) 4(14)<br />
(A2)<br />
7(22) 6(21) 5(24)<br />
Coil voltage greater than 24V DC<br />
8<br />
+<br />
• <strong>RJ</strong>2S-CLD1-∗ With Diode (w/LED Indicator)<br />
(A1)<br />
1<br />
2(12) 3(11) 4(14)<br />
(A2)<br />
7(22) 6(21) 5(24)<br />
8<br />
(A2)<br />
8<br />
–<br />
–<br />
7(22) 6(21) 5(24)<br />
Coil voltage 24V DC and below Coil voltage greater than 24V DC<br />
• <strong>RJ</strong>2S-CD1-∗ With Diode<br />
(A1)<br />
1 +<br />
(A2)<br />
8<br />
–<br />
2(12) 3(11) 4(14)<br />
7(22) 6(21) 5(24)<br />
+
Electrical Life Curve<br />
• <strong>RJ</strong>1 (resistive load) • <strong>RJ</strong>2 (resistive load)<br />
Life (× 10,000 operations)<br />
1000<br />
100<br />
10<br />
1<br />
30V DC Resistive Load<br />
(NO Contact)<br />
0.1 1<br />
12<br />
Load Current (A)<br />
Maximum Switching Capacity<br />
Load Current (A)<br />
12<br />
10<br />
1<br />
AC Resistive (NO Contact)<br />
DC Resistive (NO Contact)<br />
0.1<br />
1 10 100 250<br />
Load Voltage (V)<br />
250V AC Resistive Load<br />
(NO contact)<br />
Operating Temperature and Coil Temperature Rise<br />
Life (× 10,000 operations)<br />
Load Current (A)<br />
<strong>RJ</strong> <strong>Series</strong> <strong>Slim</strong> <strong>Power</strong> <strong><strong>Relay</strong>s</strong><br />
1000<br />
100<br />
10<br />
1<br />
10<br />
8<br />
1<br />
0.1<br />
1 10<br />
30V DC Resistive Load<br />
(NO Contact)<br />
• <strong>RJ</strong>1 (resistive load) • <strong>RJ</strong>2 (resistive load)<br />
• <strong>RJ</strong>1<br />
Temperature Rise (°C)<br />
• <strong>RJ</strong>2<br />
Temperature Rise (°C)<br />
AC Coil (60 Hz)<br />
130<br />
120<br />
110<br />
100<br />
90<br />
80<br />
Load Current 12A × 1 pole<br />
70<br />
60<br />
50<br />
40<br />
30 No Load Current<br />
20<br />
10<br />
130<br />
120<br />
110<br />
100<br />
90<br />
80<br />
70<br />
60<br />
50<br />
40<br />
30<br />
20<br />
10<br />
0 10 20 30 40 50 60 70<br />
0<br />
Ambient Temperature (°C)<br />
AC Coil (60 Hz)<br />
Load Current 8A × 2 poles<br />
10<br />
No Load Current<br />
20<br />
30<br />
40<br />
50<br />
60<br />
Ambient Temperature (°C)<br />
70<br />
Temperature Rise (°C)<br />
Temperature Rise (°C)<br />
AC Coil (50 Hz)<br />
130<br />
120<br />
110<br />
100<br />
90<br />
80<br />
Load Current 12A × 1 pole<br />
70<br />
60<br />
50<br />
40<br />
30 No Load Current<br />
20<br />
10<br />
0 10 20 30 40 50 60 70<br />
Ambient Temperature (°C)<br />
AC Coil (50 Hz)<br />
130<br />
120<br />
110<br />
100<br />
90<br />
80<br />
70 Load Current 8A × 2 poles<br />
60<br />
50<br />
40<br />
30 No Load Current<br />
20<br />
10<br />
0 10 20 30 40 50 60 70<br />
Ambient Temperature (°C)<br />
0.1 1 8<br />
Load Current (A)<br />
AC Resistive (NO Contact)<br />
DC Resistive (NO Contact)<br />
Load Voltage (V)<br />
The above temperature rise curves show characteristics when 100% the rated coil voltage is applied.<br />
The slanted dashed line indicates allowable temperature rise for the coil at different ambient temperatures.<br />
Temperature Rise (°C)<br />
Temperature Rise (°C)<br />
100 250<br />
250V AC Resistive Load<br />
(NO contact)<br />
DC Coil<br />
130<br />
120<br />
110<br />
100<br />
90<br />
80<br />
70<br />
60<br />
Load Current 12A × 1 pole<br />
50<br />
40<br />
30<br />
20<br />
No Load Current<br />
10<br />
0<br />
0 10 20 30 40 50 60 70<br />
Ambient Temperature (°C)<br />
DC Coil<br />
130<br />
120<br />
110<br />
100<br />
90<br />
80<br />
70<br />
60<br />
50<br />
Load Current 8A × 2 poles<br />
40<br />
30<br />
20 No Load Current<br />
10<br />
10 20 30 40 50 60<br />
Ambient Temperature (°C)<br />
70<br />
7
<strong>RJ</strong> <strong>Series</strong> <strong>Slim</strong> <strong>Power</strong> <strong><strong>Relay</strong>s</strong><br />
8<br />
Instructions<br />
Driving Circuit for <strong><strong>Relay</strong>s</strong><br />
1. To make sure of correct relay operation, apply rated voltage to the<br />
relay coil.<br />
2. Input voltage for the DC coil:<br />
A complete DC voltage is best for the coil power to make sure of<br />
stable relay operation. When using a power supply containing a<br />
ripple voltage, suppress the ripple factor within 5%. When power<br />
is supplied through a rectification circuit, the relay operating characteristics,<br />
such as pickup voltage and dropout voltage, depend<br />
on the ripple factor. Connect a smoothing capacitor for better<br />
operating characteristics as shown below.<br />
Smoothing<br />
Capacitor<br />
+<br />
–<br />
R <strong>Relay</strong><br />
Pulsation<br />
Emin Emax Emean DC<br />
Emax – Emin<br />
Ripple Factor (%) × 100%<br />
Emean<br />
Emax = Maximum of pulsating current<br />
Emin = Minimum of pulsating current<br />
Emean = DC mean value<br />
3. Operating the relay in synchronism with AC load:<br />
If the relay operates in synchronism with the AC power voltage of<br />
the load, the relay life may be reduced. If this is the case, select a<br />
relay in consideration of the required reliability for the load. Or,<br />
make the relay turn on and off irrespective of the AC power phase<br />
or near the point where the AC phase crosses zero voltage.<br />
Vin<br />
R<br />
TE<br />
Load<br />
EAC<br />
4. Leakage current while relay is off:<br />
When driving an element at the same time as the relay operation,<br />
a special consideration is needed for the circuit design. As shown<br />
in the incorrect circuit below, leakage current (Io) flows through<br />
the relay coil while the relay is off. Leakage current causes the<br />
coil release failure or adversely affects the vibration resistance<br />
and shock resistance. Design a circuit as shown in the correct<br />
example.<br />
R<br />
Io<br />
TE<br />
5. Surge suppression for transistor driving circuits:<br />
When the relay coil is turned off, a high-voltage pulse is generated,<br />
causing the transistor to deteriorate and sometimes to<br />
break. Be sure to connect a diode to suppress the counter electromotive<br />
force. Then, the coil release time becomes slightly<br />
longer. To shorten the coil release time, connect a Zener diode<br />
between the collector and emitter of the transistor. Select a Zener<br />
diode with a Zener voltage slightly higher than the power voltage.<br />
Protection for <strong>Relay</strong> Contacts<br />
1. The contact ratings show maximum values. Make sure that these<br />
values are not exceeded. When an inrush current flows through<br />
the load, the contact may become welded. If this is the case, connect<br />
a contact protection circuit, such as a current limiting resistor.<br />
2. Contact protection circuit:<br />
When switching an inductive load, arcing causes carbides to form<br />
on the contacts, resulting in an increased contact resistance. In<br />
consideration of contact reliability, contact life, and noise suppression,<br />
use of a surge absorbing circuit is recommended. Note that<br />
EAC<br />
Incorrect Correct<br />
Vin<br />
Counter emf<br />
suppressing diode<br />
R<br />
+<br />
R <strong>Relay</strong><br />
–<br />
the release time of the load becomes slightly longer. Check the<br />
operation using the actual load. Incorrect use of a contact protection<br />
circuit will adversely affect switching characteristics. Four typical<br />
examples of contact protection circuits are shown in the<br />
following table:<br />
This protection circuit can be used when the<br />
load impedance is smaller than the RC impedance<br />
in an AC load power circuit.<br />
<strong>Power</strong><br />
Ind. Load R: Resistor of approximately the same resis-<br />
C R<br />
tance value as the load<br />
C: 0.1 to 1 µF<br />
RC<br />
Diode<br />
Varistor<br />
<strong>Power</strong><br />
C<br />
R<br />
Ind. Load<br />
+<br />
<strong>Power</strong> D Ind. Load<br />
–<br />
Varistor<br />
<strong>Power</strong> Ind. Load<br />
This protection circuit can be used for both AC<br />
and DC load power circuits.<br />
R: Resistor of approximately the same resistance<br />
value as the load<br />
C: 0.1 to 1 µF<br />
This protection circuit can be used for DC load<br />
power circuits. Use a diode with the following<br />
ratings.<br />
Reverse withstand voltage:<br />
<strong>Power</strong> voltage of the load circuit × 10<br />
Forward current:<br />
More than the load current<br />
This protection circuit can be used for both AC<br />
and DC load power circuits.<br />
For a best result, when using on a power voltage<br />
of 24 to 48V AC/DC, connect a varistor across<br />
the load. When using on a power voltage of 100<br />
to 240V AC/DC, connect a varistor across the<br />
contacts.<br />
3. Do not use a contact protection circuit as shown below:<br />
C<br />
<strong>Power</strong><br />
C<br />
<strong>Power</strong><br />
Load<br />
Load<br />
This protection circuit is very effective in arc suppression<br />
when opening the contacts. But, the capacitor is charged<br />
while the contacts are opened. When the contacts are<br />
closed, the capacitor is discharged through the contacts,<br />
increasing the possibility of contact welding.<br />
This protection circuit is very effective in arc suppression<br />
when opening the contacts. But, when the contacts are<br />
closed, a current flows to charge the capacitor, causing<br />
contact welding.<br />
Generally, switching a DC inductive load is more difficult than<br />
switching a DC resistive load. Using an appropriate arc suppressor,<br />
however, will improve the switching characteristics of a DC<br />
inductive load.<br />
Other Precautions<br />
1. General notice:<br />
To maintain the initial characteristics, do not drop the relay or<br />
shock the relay.<br />
The relay cover cannot be removed from the base during normal<br />
operation. To maintain the initial characteristics, do not remove<br />
the relay cover.<br />
Use the relay in environments free from condensation, dust, sulfur<br />
dioxide (SO2 ), and hydrogen sulfide (H2S). Make sure that the coil voltage does not exceed the applicable<br />
coil voltage range.<br />
2. Connecting outputs to electronic circuits:<br />
When the output is connected to a load which responds very<br />
quickly, such as an electronic circuit, contact bouncing causes<br />
incorrect operation of the load. Take the following measures into<br />
consideration.<br />
• Connect an integral circuit.<br />
• Suppress the pulse voltage due to bouncing within the noise<br />
margin of the load.<br />
3. UL- and CSA-approved ratings may differ from product rated values<br />
determined by IDEC.<br />
4. Do not use relays in the vicinity of strong magnetic field, as this<br />
may affect relay operation.
<strong>SJ</strong> <strong>Series</strong> <strong>Relay</strong> <strong>Sockets</strong><br />
<strong>Slim</strong>, space-saving relay sockets.<br />
Release lever allows for easy maintenance in narrow spaces.<br />
• 15.5-mm wide<br />
• Standard screw terminal and finger-safe screw terminal are<br />
available.<br />
• Degree of protection IP20 (finger-safe screw terminal)<br />
• The release lever makes installation and removal of relays inside<br />
small panels simple and quick.<br />
• RoHS compliant (EU directive 2002/95/EC)<br />
• UL recognized, CSA certified, EN compliant.<br />
Types<br />
Standard Mark Approval organization / File No.<br />
UL508 UL File No. E62437<br />
CSA C22.2 No. 14 166730 (LR84913)<br />
EN60999<br />
Type<br />
1-pole<br />
Type No.<br />
2-pole<br />
Standard Screw Terminal <strong>SJ</strong>1S-05B <strong>SJ</strong>2S-05B<br />
Finger-safe Screw Terminal <strong>SJ</strong>1S-07L <strong>SJ</strong>2S-07L<br />
Note: Release lever is supplied with each socket.<br />
Specifications<br />
Type <strong>SJ</strong>1S <strong>SJ</strong>2S<br />
Rated Current 12A 8A<br />
Rated Insulation Voltage 250V AC/DC<br />
Applicable Wire 2 mm 2 maximum (14 AWG)<br />
Applicable Crimping Terminal 2 mm 2 × 2<br />
Recommended Tightening Torque 0.6 to 1.0 N·m (maximum tightening torque: 1.2 N·m)<br />
Screw Terminal Style M3 slotted Phillips screw<br />
Terminal Strength Wire tensile strength: 50N minimum<br />
Between live and dead metal parts: 2000V AC, 1 minute<br />
Dielectric Strength<br />
Between contact and coil: 4000V AC, 1 minute<br />
Vibration Resistance<br />
Between contacts of the same pole: 1000V AC, 1 minute<br />
Damage limits: 90 m/s2 Resonance: 10 to 55 Hz, amplitude 0.75 mm<br />
Shock Resistance Damage limits: 1000 m/s2 Operating Temperature –40 to +70°C (no freezing)<br />
Operating Humidity 5 to 85% RH (no condensation)<br />
Degree of Protection IP20 (finger-safe screw terminal)<br />
Weight (approx.) 30g 34g<br />
Applicable Crimping Terminals<br />
Standard Screw Terminal Finger-safe Screw Terminal<br />
5.9 max.<br />
4.0 max.<br />
5.9 max.<br />
3.2 min.<br />
4.0 max.<br />
ø3.2 min.<br />
5.3 min.<br />
5.3 to 6.5<br />
EC Low Voltage Directive<br />
(Finger-safe screw terminal only)<br />
5.9 max.<br />
3.2 min.<br />
4.0 max.<br />
Note: Ring tongue terminals cannot be used on finger-safe sockets.<br />
5.3 to 6.5<br />
All dimensions in mm.<br />
9
<strong>RJ</strong> <strong>Series</strong> <strong>Relay</strong> <strong>Sockets</strong><br />
Dimensions<br />
• <strong>SJ</strong>1S-05B M3 Terminal Screws<br />
• <strong>SJ</strong>2S-05B<br />
Replacement Parts<br />
Accessories<br />
10<br />
Description Appearance Material Type No. Ordering Type No. Package Quantity<br />
Release Lever Plastic (gray) <strong>SJ</strong>9Z-C1 <strong>SJ</strong>9Z-C1PN05 5<br />
Description Appearance Material Type No.<br />
DIN Rail<br />
15.5<br />
Mounting Clip<br />
4.3 71<br />
5 (A2) 3 (14)<br />
(A1)<br />
1 2<br />
(12)<br />
6<br />
(TOP VIEW)<br />
29.7<br />
55.7<br />
2<br />
ø4<br />
4<br />
(11)<br />
•• <strong>SJ</strong>1S-07L • <strong>SJ</strong>2S-07L<br />
15.5<br />
29.7<br />
4.3<br />
5 (A2)<br />
1 (A1)<br />
71<br />
(TOP VIEW)<br />
M3 Teminal Screws<br />
ø5.6<br />
2 21.5<br />
35.5<br />
49.5<br />
55.7<br />
3 (11) 4<br />
(14)<br />
2 (12)<br />
ø3<br />
Aluminum<br />
Weight: Approx. 200 g<br />
Steel<br />
Weight: Approx. 200 g<br />
Metal (zinc plated steel)<br />
Weight: Approx.15 g<br />
Ordering<br />
Type No.<br />
BAA1000 BAA1000PN10<br />
BAP1000 BAP1000PN10<br />
BNL5 BNL5PN10<br />
BNL6 BNL6PN10<br />
Package<br />
Quantity<br />
DIN Rail Spacer Plastic (black) SA-406B SA-406B 1<br />
15.5<br />
4.3<br />
15.5<br />
29.7<br />
8<br />
(A2)<br />
71<br />
(22)<br />
7<br />
(24)<br />
5 6<br />
(21)<br />
(A1)<br />
(11)<br />
1 2<br />
(12)<br />
4<br />
(14)<br />
3<br />
(TOP VIEW)<br />
4.3 71<br />
(A2)<br />
8<br />
1<br />
(A1)<br />
10<br />
M3 Teminal Screws<br />
6<br />
29.7<br />
55.7<br />
2<br />
ø4<br />
M3 Terminal Screws<br />
21.5<br />
35.5<br />
49.5<br />
55.7<br />
2<br />
ø5.6<br />
5 7<br />
(21)<br />
6<br />
(24) (22)<br />
(14) (12)<br />
4<br />
(TOP VIEW)<br />
2 3<br />
(11)<br />
ø3<br />
All dimensions in mm.<br />
Note<br />
Length: 1 m<br />
Width: 35 mm<br />
Used on a DIN rail to<br />
fasten relay sockets.<br />
To prevent the sockets<br />
from damage, position<br />
the clip before fastening.<br />
Thickness: 5 mm<br />
Used for adjusting spacing<br />
between sockets<br />
mounted on a DIN rail
Instructions<br />
Installing relays<br />
1. Unlock the release lever by pulling down as shown with arrow<br />
➀.<br />
2. Press relay against the socket as shown with arrow ➁. Make<br />
sure that the relay is firmly in place.<br />
3. Confirm that the relay is securely installed in the socket.<br />
When installed properly, the relay and the socket look as<br />
shown in ➂.<br />
➀<br />
Latch is inserted into the<br />
groove on top of the relay.<br />
Caution<br />
• Ensure that the relay is installed in the socket completely.<br />
When installed loosely, the relay may fall out, resulting in possible<br />
damage to the relay.<br />
Removing the relay<br />
• Pull down the release lever until the relay pops out of the<br />
socket. When removing, prevent the relay from falling out by<br />
lightly pressing the relay as shown below.<br />
Caution<br />
• The release lever is removable. Do not apply excessive force,<br />
otherwise the lever is removed from the socket causing the<br />
relay to fall out.<br />
• When removing, take care that your finger is not caught<br />
between the release lever and the socket.<br />
Panel mounting<br />
• Insert the anti-rotation projection into the anti-rotation hole.<br />
Mount the socket onto the panel using M3 screws (not provided).<br />
Use a screwdriver with diameter of ø5.5 mm maximum.<br />
Mounting Hole Layout<br />
➁<br />
The latch is not inserted into<br />
the groove on top of the relay.<br />
➂<br />
Correct Incorrect<br />
(<strong>SJ</strong>1S-05B, <strong>SJ</strong>2S-05B)<br />
ø3.5 hole 30.0 ø4.2 hole<br />
(or M3 hole)<br />
(anti-rotation hole)<br />
±0.1<br />
(<strong>SJ</strong>1S-07L, <strong>SJ</strong>2S-07L)<br />
ø3.5 hole<br />
(or M3 hole)<br />
39.5 ±0.1<br />
ø3.2 hole<br />
(anti-rotation hole)<br />
Screw Hole ø5.6 mm<br />
Anti-rotation Projection<br />
<strong>RJ</strong> <strong>Series</strong> <strong>Relay</strong> <strong>Sockets</strong><br />
Caution<br />
When the release lever prevents the socket from being mounted<br />
on the panel directly, remove the release lever as instructed<br />
below. Ensure to reinstall the release lever after completing<br />
panel mounting.<br />
Removing the release lever<br />
• Pull down the release lever to the<br />
direction shown by the arrow until it<br />
touches the socket. Pull down further,<br />
and the lever will be detached<br />
from the socket.<br />
Caution<br />
• Make sure that the relay has been<br />
removed from the socket before<br />
removing the release lever. If the release lever is removed<br />
when the relay is installed on the socket, the relay may fall out.<br />
Installing the release lever<br />
1. Attach part A to part B.<br />
2. Slide the release lever in the direction of the arrow until part A<br />
runs out of part B.<br />
3. Rotate the release lever, with the center of rotation at part C<br />
until part A touches the rotation axis.<br />
4. Push the rib of the release lever against the socket.<br />
5. Complete the installation.<br />
Part A<br />
1.<br />
4.<br />
Rib<br />
Part B<br />
Rib<br />
2. 3.<br />
Applicable Screwdriver<br />
• Standard Screw Terminal Type<br />
Phillips: ø6.4 mm maximum<br />
Slotted: Shown at right<br />
• Finger-safe Screw Terminal Type<br />
Phillips: ø5.5 mm maximum<br />
Slotted: Shown at right<br />
5.<br />
Rotation Axis<br />
Part C<br />
0.8 mm max. 6.0 mm max.<br />
0.8 mm max.<br />
5.5 mm max.<br />
Diameter:<br />
ø6.0 mm max.<br />
Diameter:<br />
ø5.5 mm max.<br />
11
RU <strong>Series</strong> Universal <strong><strong>Relay</strong>s</strong><br />
Full featured universal miniature relays<br />
Designed with environment taken into consideration<br />
• Two terminal styles: plug-in and PCB mount<br />
• Non-polarized LED indicator available on plug-in relays<br />
• Mechanical flag indicator available on plug-in relays<br />
• Manual latching lever with color coding for AC or DC coil<br />
• Snap-on yellow marking plate; optional marking plates are<br />
available in four other colors<br />
• Maximum contact ratings: 10A (RU2), 6A (RU4), 3A (RU42)<br />
• UL, CSA, c-UL, EN compliant<br />
Safety Precautions<br />
• Turn off power to the relay and the socket before starting installation, removal, wiring, maintenance, and inspection of the<br />
relays. Failure to turn power off may cause electrical shock or fire hazard.<br />
• Observe specifications and rated values, otherwise electrical shock or fire hazard may be caused.<br />
• Use wires of the proper size to meet the voltage and current requirements. Tighten the terminal screws on the relay socket<br />
to the proper tightening torque.<br />
Specifications and other descriptions in this catalog are subject to change without notice.<br />
www.idec.com<br />
IDEC CORPORATION (USA)<br />
1175 Elko Drive, Sunnyvale, CA 94089-2209, USA<br />
Tel: +1-408-747-0550, Toll Free: (800) 262-IDEC, Fax: +1-408-744-9055<br />
E-mail: opencontact@idec.com<br />
IDEC CANADA LIMITED<br />
Unit 22-151, Brunel Road Mississauga, Ontario, L4Z 1X3, Canada<br />
Tel: +1-905-890-8561, Toll Free: (888) 317-4332, Fax: +1-905-890-8562<br />
E-mail: sales@ca.idec.com<br />
IDEC ELECTRONICS LIMITED<br />
Unit 2, Beechwood, Chineham Business Park, Basingstoke, Hampshire<br />
RG24 8WA, UK<br />
Tel: +44-1256-321000, Fax: +44-1256-327755<br />
E-mail: idec@uk.idec.com<br />
IDEC ELEKTROTECHNIK GmbH<br />
Wendenstrasse 331, D-20537 Hamburg, Germany<br />
Tel: +49-40-25 30 54 10, Fax: +49-40-25 30 54 24<br />
E-mail: service@idec.de<br />
IDEC AUSTRALIA PTY. LTD.<br />
2/3 Macro Court, Rowville, Victoria 3178, Australia<br />
Tel: +61-3-9763-3244, Toll Free: 1800-68-4332, Fax: +61-3-9763-3255<br />
E-mail: sales@au.idec.com<br />
7-31, Nishi-Miyahara 1-Chome, Yodogawa-ku, Osaka 532-8550, Japan<br />
Tel: +81-6-6398-2571, Fax: +81-6-6392-9731<br />
E-mail: products@idec.co.jp<br />
IDEC IZUMI ASIA PTE. LTD.<br />
No. 31, Tannery Lane #05-01, Dragon Land Building, Singapore 347788<br />
Tel: +65-6746-1155, Fax: +65-6844-5995<br />
E-mail: generalinfo@idecasia.com.sg<br />
IDEC IZUMI (H.K.) CO., LTD.<br />
Unit 1505-07, DCH Commercial Centre No. 25, Westlands Road,<br />
Quarry Bay, Hong Kong<br />
Tel: +852-2803-8989, Fax: +852-2565-0171<br />
E-mail: idec@idechk.com<br />
IDEC IZUMI (Shanghai) Co., Ltd.<br />
Room E, 15F, Majesty Building, No. 138 Pudong Avenue,<br />
Shanghai 200120, P.R.C.<br />
Tel: +86-21-5887-9181, Fax: +86-21-5887-8930<br />
E-mail: idec@cn.idec.com<br />
IDEC TAIWAN CORPORATION<br />
8F, No. 79, Hsin Tai Wu Road, Sec. 1, Hsi-Chih, Taipei County, Taiwan<br />
Tel: +886-2-2698-3929, Fax: +886-2-2698-3931<br />
E-mail: service@idectwn.com.tw<br />
Cat. No. EP1102-0 OCTOBER 2005 10DNP PRINTED IN JAPAN