The Taylor SolidBody: Action And Intonation - Taylor Guitars
The Taylor SolidBody: Action And Intonation - Taylor Guitars
The Taylor SolidBody: Action And Intonation - Taylor Guitars

Create successful ePaper yourself
Turn your PDF publications into a flip-book with our unique Google optimized e-Paper software.
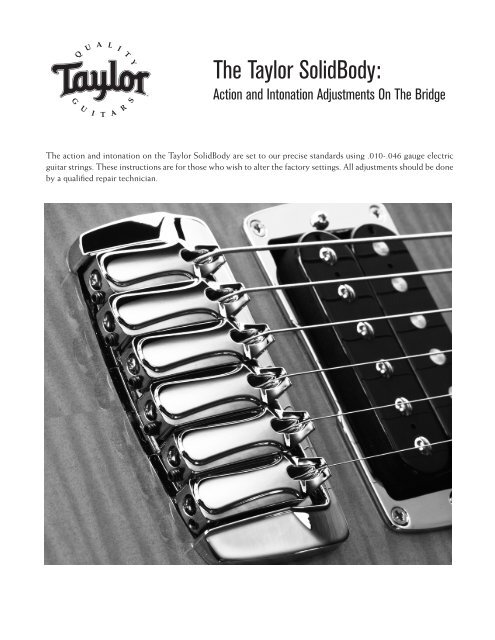
<strong>The</strong> <strong>Taylor</strong> <strong>SolidBody</strong>:<br />
<strong>Action</strong> and <strong>Intonation</strong> Adjustments On <strong>The</strong> Bridge<br />
<strong>The</strong> action and intonation on the <strong>Taylor</strong> <strong>SolidBody</strong> are set to our precise standards using .010-.046 gauge electric<br />
guitar strings. <strong>The</strong>se instructions are for those who wish to alter the factory settings. All adjustments should be done<br />
by a qualified repair technician.
Tools You’ll Need:<br />
• 3/8 (10 mm) socket or nut driver (anchor nuts) • 3/32 Allen wrench (action height adjustment screws)<br />
• .050 Allen wrench (intonation set screws) • 1/16 Allen wrench (saddle locking screws)<br />
Bridge Components<br />
<strong>The</strong> bridge consists of three main parts:<br />
1. Stoptail Assembly: <strong>The</strong> stoptail can<br />
be adjusted up or down to change the<br />
bridge height. It holds the individual<br />
saddle pieces, which can be shifted<br />
forward or backward to adjust the<br />
intonation.<br />
2. Bezel: <strong>The</strong> bezel sits in a shallow pocket<br />
in the top of the guitar and houses the<br />
stoptail assembly.<br />
3. Bottom Plate: <strong>The</strong> bottom plate is<br />
accessible from the back of the guitar and<br />
sandwiches the guitar body between the<br />
plate and the bezel.<br />
<strong>Action</strong> Adjustment Quick Tips<br />
• Two anchor nuts (Fig 2) hold the bridge<br />
assembly together. Do not remove them<br />
or the bridge will come off.<br />
• Three action height adjustment screws<br />
(Fig 3) are used to lower and raise the<br />
action. Two are located on the outside of<br />
the bottom plate (treble and bass) and<br />
one in the center toward the back. <strong>The</strong> center screw is used to stabilize the bridge, not raise or lower it.<br />
It should be set after the desired bridge height is secured.<br />
• Each time you raise the bridge on either the treble or bass side, you will need to loosen the anchor nut (Fig 2)<br />
prior to raising it to relieve clamping tension.<br />
• Each time you lower the bridge on either the treble or bass side, you will simply need to re-tighten the anchor<br />
nut after lowering the height to reestablish clamping tension. Do not over-tighten the nut — it only needs to<br />
be snug.<br />
• After making treble and bass height adjustments, raise the center adjustment screw until it is snug and just<br />
starts to lift the back of the bridge. Do not over-tighten this or it could break the bridge.
Adjusting the Bridge Height: Step-by Step Instructions<br />
Note: <strong>The</strong> strings do not need to be loosened to make bridge height adjustments.<br />
To access the action height adjustment screws, remove the four cover plate screws (Fig 1), then remove the plate.<br />
Raising the <strong>Action</strong><br />
1) Using a 3/8 (10 mm) socket or nut driver, carefully loosen the<br />
treble side anchor nut ½ turn counter-clockwise.<br />
Note: Usually a ½ turn counter-clockwise is enough to allow the height adjustment<br />
screw to then be raised. Do not remove the anchor nuts or the bridge will come off.<br />
2) Using a 3/32 Allen wrench, turn the height adjustment screw ½ turn clockwise to raise the bridge. (<strong>The</strong><br />
locking nut will get tight again as you raise the height.)<br />
FIGURE 1 - Cover Plate Screws<br />
3) Tune and check the string height.<br />
4) Repeat the process until the desired action is achieved, then follow the same steps for the bass side.<br />
5) Tighten the anchor nuts. Do not over-tighten them or it could<br />
break the bridge.<br />
Lowering the <strong>Action</strong><br />
Note: <strong>The</strong> anchor nuts do not need to be loosened to lower the bridge height.<br />
<strong>The</strong>y will, however, need to be retightened as the action is lowered. Snug tension<br />
is all that is required. Do not over-tighten the anchor nuts.<br />
1) Using a 3/32 Allen wrench, loosen (lower) the center height<br />
adjustment screw one full turn counter-clockwise. This will back the<br />
center pivot point away from the bridge, allowing it to be lowered.<br />
2) Using a 3/32 Allen wrench, loosen (lower) the treble side height<br />
screw ½ turn counter-clockwise.<br />
3) Using a 3/8 (10 mm) socket, retighten the anchor nut after<br />
each lowering adjustment is made. Only snug pressure is needed.<br />
4) After making treble and bass side height adjustments, raise the<br />
back height adjustment screw until it just starts to lift the back<br />
of the bridge.<br />
FIGURE 2 - Anchor Nuts<br />
FIGURE 3 - <strong>Action</strong> Height Adjustment Screws
<strong>Intonation</strong> Adjustments<br />
All six strings can be adjusted forward and backward to set perfect intonation for your playing style.<br />
<strong>Intonation</strong> Quick Tips<br />
• <strong>The</strong> action should be at the desired height before intonation begins.<br />
• <strong>The</strong> neck relief should be correct for the playing style before intonation begins.<br />
• New strings should be installed before intonating. Old strings will not be accurate and are one of the main<br />
causes of poor intonation and tuning.<br />
• Moving the saddle piece forward (toward the neck) will sharpen the note at the 12th fret.<br />
• Moving the saddle piece backward (away from the neck) will flatten the note at the 12th fret.<br />
Each saddle piece has a small Allen head at its end for intonation adjustments (Fig 4, size .050 Allen wrench).<br />
This allows the saddle piece to shift forward and backward.<br />
To flatten the note at the 12th fret: Tune the string down slightly<br />
and move the saddle piece back by simply turning the intonation<br />
set screw clockwise using a .050 Allen wrench. To sharpen the<br />
note at the 12th fret: Turn the intonation set screw counterclockwise<br />
and tap the piece forward lightly with something like<br />
the plastic end of a screwdriver.<br />
Note: <strong>The</strong> saddle pieces are held in place from the underside of the bridge by<br />
nylon-tipped locking screws that push up on them. (Fig 5)<br />
<strong>The</strong>se screws do not need to be loosened to move the saddles.<br />
If for some reason a saddle slides loose when the strings are<br />
removed, or it begins to buzz while in play, you can easily<br />
retighten the locking screw that secures each saddle with a<br />
1/16 Allen wrench. You do not have to remove the bridge to do this.<br />
If you remove the back cover plate to expose the underside of the<br />
bridge (Fig 2,3) you will see the six small holes to access the saddle<br />
locking screws on the inside back plate. Turn the screws clockwise<br />
to snug them up.<br />
Note: You will need to remove the anchor nut from the treble side to access the<br />
high E string saddle locking screw.<br />
FIGURE 4 - <strong>Intonation</strong> Set Screws<br />
FIGURE 5 - Nylon-Tipped Locking Screw<br />
For additional information, contact the <strong>Taylor</strong> <strong>Guitars</strong><br />
Customer Service Department at (800) 943-6782.<br />
<strong>Taylor</strong> <strong>Guitars</strong> • 1980 Gillespie Way • El Cajon, CA 92020-1096 • (800) 943-6782 • (619) 258-3797 fax • www.taylorguitars.com