Screen Coating Techniques - KIWO
Screen Coating Techniques - KIWO
Screen Coating Techniques - KIWO
Create successful ePaper yourself
Turn your PDF publications into a flip-book with our unique Google optimized e-Paper software.
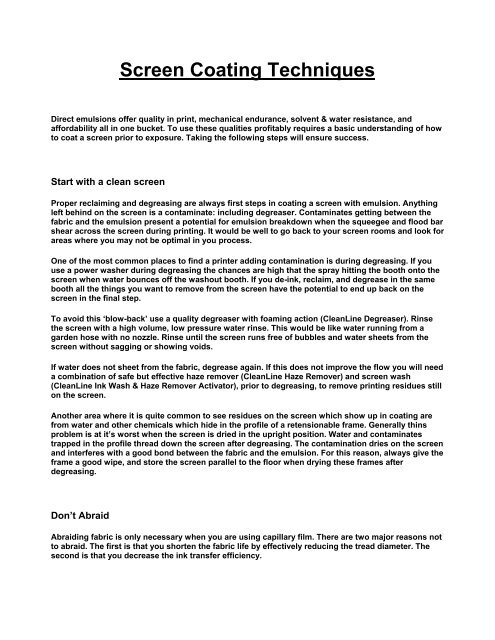
<strong>Screen</strong> <strong>Coating</strong> <strong>Techniques</strong><br />
Direct emulsions offer quality in print, mechanical endurance, solvent & water resistance, and<br />
affordability all in one bucket. To use these qualities profitably requires a basic understanding of how<br />
to coat a screen prior to exposure. Taking the following steps will ensure success.<br />
Start with a clean screen<br />
Proper reclaiming and degreasing are always first steps in coating a screen with emulsion. Anything<br />
left behind on the screen is a contaminate: including degreaser. Contaminates getting between the<br />
fabric and the emulsion present a potential for emulsion breakdown when the squeegee and flood bar<br />
shear across the screen during printing. It would be well to go back to your screen rooms and look for<br />
areas where you may not be optimal in you process.<br />
One of the most common places to find a printer adding contamination is during degreasing. If you<br />
use a power washer during degreasing the chances are high that the spray hitting the booth onto the<br />
screen when water bounces off the washout booth. If you de-ink, reclaim, and degrease in the same<br />
booth all the things you want to remove from the screen have the potential to end up back on the<br />
screen in the final step.<br />
To avoid this ‘blow-back’ use a quality degreaser with foaming action (CleanLine Degreaser). Rinse<br />
the screen with a high volume, low pressure water rinse. This would be like water running from a<br />
garden hose with no nozzle. Rinse until the screen runs free of bubbles and water sheets from the<br />
screen without sagging or showing voids.<br />
If water does not sheet from the fabric, degrease again. If this does not improve the flow you will need<br />
a combination of safe but effective haze remover (CleanLine Haze Remover) and screen wash<br />
(CleanLine Ink Wash & Haze Remover Activator), prior to degreasing, to remove printing residues still<br />
on the screen.<br />
Another area where it is quite common to see residues on the screen which show up in coating are<br />
from water and other chemicals which hide in the profile of a retensionable frame. Generally thins<br />
problem is at it’s worst when the screen is dried in the upright position. Water and contaminates<br />
trapped in the profile thread down the screen after degreasing. The contamination dries on the screen<br />
and interferes with a good bond between the fabric and the emulsion. For this reason, always give the<br />
frame a good wipe, and store the screen parallel to the floor when drying these frames after<br />
degreasing.<br />
Don’t Abraid<br />
Abraiding fabric is only necessary when you are using capillary film. There are two major reasons not<br />
to abraid. The first is that you shorten the fabric life by effectively reducing the tread diameter. The<br />
second is that you decrease the ink transfer efficiency.
Because the surface of the thread is effectively larger, the ink clings to the threads for the same<br />
reasons that capillary film clings better. This means that less of the ink available in the fabric will<br />
transfer to the substrate. For the same fabric you will not be able to print copy as fine as you would<br />
otherwise.<br />
There is really only one reason for using capillary film which is still valid today; small screens can be<br />
made quickly. All other arguments regarding quality do not hold up when compared with direct<br />
emulsion of he same family used properly.<br />
Stencil Parameters<br />
The list of jobs a stencil performs usually includes the following:<br />
A) Duplicate the film image. This role is further defined by terms like:<br />
• Edge Definition<br />
• Mesh Bridging<br />
• Resolution<br />
These abilities vary dramatically for any given emulsion because of several factors related to coating<br />
and exposure as well as the chemical qualities of the emulsion. We will talk about how coating effects<br />
them.<br />
B) Create a gasket (Rz). The popularity of capillary films was partially due to getting a good<br />
gasket form your emulsion right off the roll. The study of Rz value (measure of surface smoothness)<br />
and how to achieve control of these values for different substrates has popularized direct emulsion<br />
for high quality print applications.<br />
Roughness Measurement<br />
Basically, the lower number, the smoother the surface, and therefore the better substrate and stencil.<br />
<strong>Coating</strong> technique allows a direct emulsion user to fine-tune their coating Rz for any particular<br />
substrate. This is necessary for perfect printing on all substrates and is not an option with capillary<br />
films.
C) Emulsion Over Mesh. It’s a simple fact of out natural world that we cannot get ink to go<br />
through a thread. having an amount of emulsion over mesh, or proud of the mesh, is critical for<br />
printing fine detail, and in avoiding ‘sawtooth’.<br />
One way fine detail could be defined is: any artwork who’s finest details approach two threads and<br />
two mesh openings in width on any chosen fabric. You can test this by laying your artwork right on<br />
the fabric and looking through a minimum 30 power microscope.<br />
If your smallest dots or lines are not much larger than two threads and two mesh openings, you have<br />
fine detail. If you do not have enough emulsion over mesh the threads will create a dam just as the<br />
stencil does. In halftone printing, this results in dot loss as the highlight dot is cut into pieces by the<br />
threads.<br />
It is necessary even in general printing to maintain correct emulsion over mesh (EOM) for proper print<br />
quality. Let’s take the example of opaque white ink on black acrylic plastic. The printer selects a 156 T<br />
fabric to give the appropriate wet ink thickness. But when the job is printed, the finished print suffers<br />
from ‘sawtooth’, or ‘stairstep’ edges.<br />
If the EOM was too low, the threads were not held up off the substrate during printing. The thread<br />
blocks the flow of ink with a very regular pattern that we recognize as ‘sawtooth’.<br />
In this example, it is also quite likely the screen also suffered from an Rz value which was too high.<br />
Both high Rz and low EOM results from poor coating techniques. The poor gasket from the Rz allows<br />
the ink to leak into the valleys of the stencil. This results in dot gain. The ‘sawtooth’ from low EOM<br />
resulted in dot loss.<br />
The printer never had a chance to produce a print with a sharp edge. These interactions are common.<br />
Proper coating techniques allow the screen maker to adjust their stencil parameters for perfect<br />
stencils everytime.<br />
Wet-on-wet <strong>Coating</strong><br />
Creating the base of emulsion on the screen is typically referred to as wet-on-wet coating. Each<br />
successive pass with the coating trough applies emulsion in addition to emulsion which is still wet on<br />
the fabric.
The first rule is: wet-on-wet coatings accumulates emulsion on the side of the screen opposite the<br />
coating trough.<br />
For most mesh counts you will do all your wet-on-wet coating with a round edge coater. Always start<br />
coating from the printing side of the screen. coat as many times from the print side as is necessary to<br />
cause the emulsion to visibly gloss on the squeegee side. The purpose is to push out all the air<br />
bubbles which may be trapped in the openings of the fabric. This air left in the mesh may cause print<br />
quality defects, or pin-holing on press.<br />
The second rule is: Finer mesh counts require more coats than courser mesh counts.<br />
This visual clue of gloss on the squeegee side of the screen is a good indicator of coating to an<br />
absolute minimum EOM. Fabric regulates emulsion flow in the same way that fabric meters, or<br />
regulates the amount of ink going to the substrate.<br />
As the percent open area of a fabric decreases it restricts the flow of emulsion. For example, a 390 tpi<br />
33 micron thread fabric may require 3 coats from the print side followed by 2 coats from the squeegee<br />
side to build a 5 microns EOM. A 390 tpi 27 micron fabric might be at 9 microns EOM with a 1 coat<br />
print and 1 coat squeegee side coating. With the mesh count the same, the 27 micron thread fabric<br />
has much more open area and less resistance to flow since the emulsion doesn’t have to push<br />
against so much thread.<br />
Watching for this gloss to occur on the squeegee side shows you the first moment where the<br />
emulsion has filled the mesh. Each pass with the coater after this point causes the EOM to build. This<br />
change in thickness is fairly predictable.<br />
To continue building up your EOM you simply turn the screen around and begin coating from the<br />
squeegee side. Each pass with the coater will continue to build wet emulsion thickness proud of the<br />
mesh. Of course, how much it builds is dependent on several factors; one of them being coater<br />
design.
Dry the Base Coat<br />
The base coat is then dried with the print side down and the squeegee side up. This allows gravity to<br />
pull emulsion to the print side of the screen where you want it. Not only will you build EOM, but you<br />
will lower the Rz values.<br />
<strong>Coating</strong> Trough Design<br />
The shape of the lip of the coating trough has a great influence on the amount of emulsion which is<br />
deposited with each pass of the coater. It is necessary to use a round edge (approx. 1/8 inch<br />
diameter) with the wet-on-wet coats to have much influence on building EOM. In fact, a sharp coater<br />
will leave little to no EOM with many passes of the coater.<br />
Common build-up with a round edge coater during wet-on-wet.<br />
<strong>Coating</strong> Build-up<br />
2+1: 4 micron<br />
2+2: 12 micron<br />
2+3: 19 micron<br />
2+4: 24 micron<br />
Common build-up with a sharp edge coater during wet-on-wet.<br />
<strong>Coating</strong> Build-up<br />
2+1: 3 micron<br />
2+2: 4 micron<br />
2+3: 5 micron<br />
2+4: 6 micron<br />
The third rule is: <strong>Coating</strong> trough design partially determines the results.<br />
Keep SUFFICIENT EMULSION in the coater<br />
The driving force for pushing emulsion through the mesh is the fill level of the coater. If this level<br />
varies, so will your results. If you have large screens, fill the coater each time you begin to coat a new<br />
screen to keep the coating thickness consistent.
Thin Stencils for Detail<br />
All stencils must have some EOM for proper printing. But, a stencil can be too thick as well. For<br />
printing inks the stencil thickness should be a maximum of 20% of the fabric thickness. If the screen<br />
is coated with the wet-on-wet technique, this will produce a stencil with a reasonable Rz value as well.<br />
For detail printing, the EOM should not exceed 10% of the fabric thickness. If the stencil becomes<br />
thicker, if makes ink transfer difficult. For excellent printing on most substrates, the stencil will also<br />
need a low Rz value (approx. 6 microns).<br />
Consider Rz While <strong>Coating</strong><br />
Wet-on-wet coating has a second advantage in that it lowers the Rz wile building EOM. Unfortunately,<br />
printers who rely solely on wet-on-wet coating may have a stencil which is too thick before they reach<br />
an acceptable Rz value.<br />
The forth rule is: Maintain a thin coating with a low Rz for fine detail.<br />
Face <strong>Coating</strong><br />
Face coating is applied for the purpose of leveling the screen which reduces the Rz value. When face<br />
coating is done with a sharp edged coater, it has the advantage of lowering the Rz with little change in<br />
stencil thickness (typically, less that a micron per). This is done from the print side of the screen.<br />
This happens because the coater rides on the high spots (knuckles of the fabric) and leaves emulsion<br />
only in the low spots.<br />
With the combination of wet-on-wet bases coats and face coating on the print side of the screen, the<br />
printer has the opportunity to adjust the stencil for any substrate and for any type of printing.
The fifth rule is: Use a combination of wet-on-wet and face coating techniques for a thin stencil<br />
with low Rz.<br />
Build in CONSISTENCY<br />
Design your coating area so that your staff may make a consistent coating. It is important that the<br />
screen be at the same angle each time it is coated. A coating stand works best for this. The coaters<br />
must coat at the same speed. As one speeds up, or slows down, there will be more or less emulsion<br />
on the screen. Maintain the same angle with the coater. Changes in the angle changes the amount of<br />
emulsion which passes through the mesh. Ideally, an automatic coating machine is used to achieve<br />
constant coating from screen-to-screen.<br />
The sixth rule is: Dry the screen print side down, squeegee side up.<br />
Conclusion<br />
Wet-on-wet coatings work for most applications. Knowing when and how to use a combination of weton-wet<br />
and face coating can deliver the ‘ultimate’ stencil to the press.<br />
Follow these simple steps and you will be rewarded with consistent quality stencils.


