April - Model Ship Builder
April - Model Ship Builder
April - Model Ship Builder

Create successful ePaper yourself
Turn your PDF publications into a flip-book with our unique Google optimized e-Paper software.
The MSB Journal<br />
Helping preserve the art of model ship building<br />
and the Age of Sail for new Generation<br />
<strong>April</strong> 2011<br />
www.modelshipbuilder.com www.tallshipmodeling.com
The MSB Journal<br />
ISSN 1913-6943<br />
<strong>April</strong> 2011<br />
© www.modelshipbuilder.com<br />
All rights reserved.<br />
This is a joint publication from the owners<br />
of www.modelshipbuilder.com and<br />
Tall <strong>Ship</strong> <strong>Model</strong>ing Down Under.<br />
"Comments and opinions are that of individual<br />
authors; The MSB Journal claims<br />
no responsibility thereof."<br />
Published by<br />
www.modelshipbuilder.com<br />
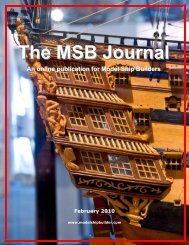
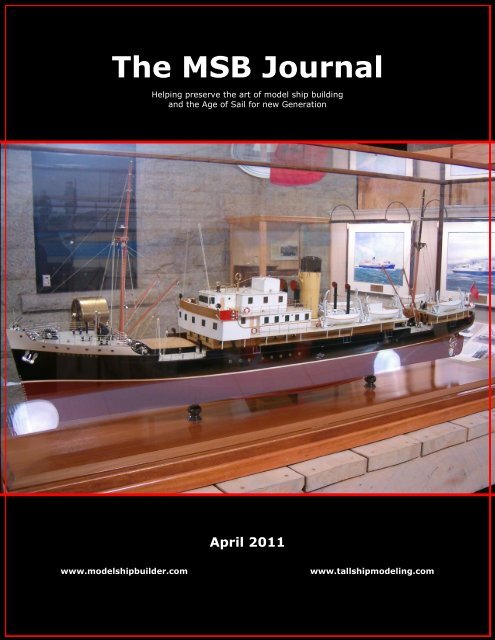
On the Cover<br />
The Coastal Vessel Baccalieu<br />
How to Contact The MSB Journal<br />
By email: editor@msbjournal.com<br />
By Snail-Mail<br />
Canada<br />
The MSB Journal<br />
c/o Winston Scoville<br />
2 St. Charles Place RR5<br />
Clinton, Ontario, N0M 1L0<br />
Canada<br />
Australia<br />
The MSB Journal<br />
c/o Marty Cord<br />
13 Lukela Avenue<br />
Budgewoi, NSW<br />
Australia 2262<br />
Article / Content Contributions<br />
Please submit all article and content<br />
contributions to:<br />
editor@msbjournal.com<br />
Table of Contents<br />
Scuttlebutt 3<br />
Tidbits from the Past 4<br />
Historic Naval <strong>Ship</strong>yards 5<br />
The Yacht Chatham c. 1741 7<br />
The <strong>Model</strong> <strong>Ship</strong>wrights Apprentice 8<br />
Badges: Heraldry of Canadian<br />
Naval <strong>Ship</strong>s<br />
18<br />
The Book Nook 19<br />
Contributors Pictures 21<br />
Gene‘s Nautical Trivia 22<br />
<strong>Model</strong>ing Clubs 31
Scuttlebutt<br />
I was following along with the General<br />
Hunter build but haven‘t seen any progress<br />
over the past couple of months. Is<br />
this project still going ahead?...Bob F<br />
Hi Bob, yes, this project is still very active<br />
behind the scenes. You should see<br />
some updates in the very near future...MSBJ<br />
I really like the images on the front<br />
page of the site showing the rebuild of<br />
the Bluenose II. Thanks for posting<br />
them...Dave S<br />
Hi Dave, glad we can bring them to you.<br />
Its not often we get a chance to follow<br />
the build of a wooden ship these days so<br />
when I was contacted about the rebuild<br />
I was more than willing to post the images.<br />
In fact, these two images actually<br />
update on a regular basis. They are<br />
from the feed of live web cams...MSBJ<br />
Just wanted to send a special thank-you<br />
3<br />
www.modelshipbuilder.com<br />
to all who are posting to build logs on<br />
the site. I find them very helpful...D.King<br />
Yes, I find them quite helpful myself. Its<br />
always nice to be able to view models<br />
under construction. You never know<br />
when you are going to learn something<br />
new...MSBJ<br />
Do you plan on running any online<br />
builds where your members can get involved?<br />
I am just finishing up on the<br />
Bluenose model that you had run the<br />
online build on your other site Navy<br />
Board <strong>Model</strong>s and look forward to starting<br />
a new build...Fred<br />
We sure do Fred. There will be some<br />
coming up later this year. But, with the<br />
summer months coming up, they will<br />
most likely not start until some time in<br />
the fall, unless we see a large interest<br />
before then. Summer months are usually<br />
pretty quiet for model building...MSBJ<br />
Send your comments & questions to info@modelshipbuilder.com
Tidbits from the Past by Gene Bodnar<br />
In George Jones‘s ―Sketches<br />
of Naval Life,‖ a book written<br />
in 1829, he records the<br />
cheering given to Lafayette<br />
as he departed from the<br />
U.S.S. Brandywine as he<br />
went ashore in France after<br />
his last visit to the United<br />
States. In the same book,<br />
Jones records the three<br />
cheers given when Captain<br />
Patterson received command<br />
of the U.S.S. Constitution.<br />
4<br />
“Hip, Hip, Hooray!”<br />
Not long afterwards, the<br />
cheering became a command<br />
called ―Manning the<br />
Yards and Cheering.‖ It<br />
consisted of three separate orders. At the order, ―Lay aloft,‖ all hands would spring up the<br />
rigging, gather round the tops, crosstrees, and topgallant masthead. At the second command,<br />
―Lay out upon the yards,‖ the men would support themselves by means of life lines<br />
that were fastened to the lifts and masts. Finally, the order ―Cheer‖ is issued. The men<br />
would then take off their hats and wave them while shouting three cheers.<br />
Manning the rail and cheering is a very old custom recorded as early as 1596. At the<br />
sounding of the master‘s whistle, men would give ―a marvelous shout, with as much mirth<br />
and rejoicing as they can.‖<br />
On the other hand, the U.S. Navy Regulations of 1920 state that ―Cheering shall not be<br />
given any officer.‖ Instead, officers are saluted.<br />
Today, national salutes are based upon the equality of sovereign states, but in times gone<br />
by, the weaker saluted the stronger, and the stronger usually saluted the country which<br />
claimed jurisdiction over the waters he entered.<br />
The old English Navy demanded respect from foreigners and English merchantmen. In<br />
1638, the captain of the H.M.S. Nicodemus was given severe punishment for not having<br />
enforced a French ship of war to salute him. In another instance, an English merchant ship<br />
was fined 500 pounds for now lowering its topsails to Charles‘ fleet.<br />
Cheering and saluting have long been a maritime customs of respect.<br />
www.modelshipbuilder.com
Historic Naval Dockyards<br />
A new section in the MSB Journal over the upcoming year we hope to bring you a little background<br />
on some of the important Naval <strong>Ship</strong>yards from the present and the past from around the world.<br />
During the French colonization of New France,<br />
Navy Island was known as Île de la Marina. The<br />
French build four ships here that they used to<br />
service the Great Lakes. New France was ceded<br />
to the British in 1763 and the British set up a Naval<br />
yard there..<br />
The Royal Navy used the shipyard for their Lake<br />
Erie fleet during the War of 1812. However,<br />
shortly after that it was abandoned by the Royal<br />
Navy. It was formally acquired by Canada in<br />
1822.<br />
Today the site is a National Historic site and<br />
managed by Niagara Parks Commission. It is also<br />
the only Canadian owned island on the Niagara<br />
River.<br />
Navy Island was proposed to be the new World<br />
Peace Capital and headquarters of the United Nations<br />
by an international committee in 1945 and<br />
1946. The island was considered to be an ideal<br />
location as it lay on the boundary between two<br />
peaceful countries. It was later voted down in<br />
favour of the United Nations current location in<br />
New York due to its accessibility.<br />
The following is a list of ships built (two sloops<br />
and three schooners), repaired, stationed or<br />
known to have defended the base:<br />
Huron - schooner 1761<br />
Michigan - sloop 1762<br />
Royal Charlotte - sloop 1764<br />
Boston - schooner 1764<br />
HMS Victory - schooner 1764<br />
Gladwyn - schooner 1764<br />
Newash - schooner 1815<br />
Minos - steam vessel 1840<br />
5<br />
Navy Island - Royal Naval <strong>Ship</strong>yard<br />
HMS Tecumseth - schooner 1814<br />
HMS Detroit<br />
HMS Hunter<br />
HMS Chippewa<br />
HMS Queen Charlotte<br />
HMS Lady Prevost<br />
HMS Little Belt<br />
www.modelshipbuilder.com
6<br />
Help Support the 2012<br />
USS Constitution Cutaway <strong>Model</strong><br />
Proto-type model<br />
Your support is requested in making this model a reality. Design and build to be<br />
conducted by noted New England <strong>Model</strong>er and Maritime Artist Rex Stewart.<br />
Over thirty years of in-depth research has gone into its design and development<br />
so far.<br />
The goal is to build a 1:24 scale cutaway model of the<br />
USS Constitution which will measure over 5 ft in length.<br />
Will also include hand carved figurines.<br />
The completed model is to be displayed at the USS Constitution<br />
Museum during and after the highly anticipated<br />
2012 bi-centennial celebration of the USS Constitutions<br />
entry into the War of 1812.<br />
“This model will truly be one of a kind and the envy<br />
of any maritime museum.”<br />
To make a donation contact Rex through his website:<br />
www.rexstewartoriginals.com<br />
www.modelshipbuilder.com
7<br />
The Yacht Chatham c.1741<br />
From the National Maritime Museum Collection<br />
www.nmm.ac.uk<br />
Scale: 1:32. A contemporary<br />
full hull model of<br />
the yacht 'Chatham'<br />
circa 1741, built in the<br />
Georgian style. The<br />
model is decked and is<br />
complete with a variety<br />
of fittings. It illustrates<br />
well the carved and<br />
painted decoration of<br />
the mid-18th century<br />
models. It is one of a few models in the collection that has the individual hull planking<br />
applied onto the wooden core and held in place by small wooden treenails.<br />
The ‗Chatham‘ yacht was launched circa<br />
1741 and measured 59 feet along the deck<br />
by 17 feet in the beam. She had a tonnage<br />
of 90 and carried six guns. As with most of<br />
these state yachts, they were built for the<br />
use of the officers of the Dockyards for<br />
transport between London and the various<br />
yards. Rigged as a single-masted cutter,<br />
most of the after portion of the hull was used<br />
for the accommodation of the officers. The<br />
‗Chatham‘ underwent a ‗large repair' in 1765<br />
and was re-built in 1793. It underwent another<br />
refit in 1826 before finally being broken<br />
up in 1867.<br />
www.modelshipbuilder.com
8<br />
The <strong>Model</strong> <strong>Ship</strong>wrights Apprentice<br />
Information & Project area for novice model builders<br />
In the last two issues we covered plans and pointed out to you some information that you<br />
can derive from them when building your model. In this issue we‘re going to jump out of<br />
the pot and into the fire as the old saying goes.<br />
We‘re going to start you right into a project. This project was originally posted on our other<br />
site (www.navyboardmodels.com). However, the online project was lost due to the closure<br />
of that site to the general public. It was a very popular project which I receive emails on<br />
weekly so we thought we could resurrect it here. So, without being long winded lets get<br />
right too it. I hope you enjoy the build. If ever there was a time to get your hands wet with<br />
a scratch build this is certainly the time to do it. Jump right in and have fun. If you have<br />
any questions on the build be sure to post them at the site forum. I‘m sure that either<br />
Gene (the original project leader) or others who have built the model will be happy to answer<br />
any questions you may have.<br />
The intention of this practicum is to provide the scale model builder with detailed instructions,<br />
supported by numerous illustrations for building a model of a whaleboat on a scale<br />
of ¾‖ = 1‘ (1:16). The finished model, without its davits or rigging tackle, will look like the<br />
photo below.<br />
The finished whaleboat.<br />
www.modelshipbuilder.com
9<br />
In order to participate in building the whaleboat, you are going to be required to purchase<br />
a set of 6 plans (3 sheets printed on both sides) for the vessel, along with a 150-page<br />
book entitled ―To Build a Whaleboat‖ by Erik A. R. Ronnberg. Both the plans and the book<br />
may be purchased from <strong>Model</strong> Expo. For obvious copyright reasons, no plans for the vessel<br />
will be published here in the MSB Journal or on the MSB site.<br />
The plans consist of the following sheets:<br />
Sheet 1 – The lines of the whaleboat.<br />
Sheet 1A – Construction Mold Set-Up.<br />
Sheet 1B – Patterns.<br />
Sheet 2 – Hull Construction.<br />
Sheet 3 – Whaling and Boat Gear.<br />
Sheet 4 – Davits and Cranes; Sail Plan.<br />
I recommended that you study the plans thoroughly before diving into the project. Read<br />
Mr. Ronnberg‘s notes on the plans, and also skim over his book to get an idea of the general<br />
construction methods that are required for the project.<br />
A Brief History of the Whaleboat Lagoda—the mother ship<br />
In his book, Mr. Ronnberg provides a fairly<br />
comprehensive history of whaleboats. He<br />
also tells us that the particular whaleboat<br />
that we will be building in this project actually<br />
originated from the whaler<br />
―Lagoda.‖<br />
The ―Lagoda‖ was built in 1826 as a merchant<br />
ship, not as a whaler. Originally<br />
intended to be named "Ladoga" after Lake<br />
Ladoga in Russia, the letters "d" and "g"<br />
were accidentally switched and, due to the<br />
superstition that correcting the name of a<br />
vessel would bring bad luck, it remained<br />
as the "Lagoda" The ship was a threemaster<br />
constructed of oak.<br />
In 1841, it was purchased by Jonathan Bourne of New Bedford who converted it into a<br />
whaling vessel by adding a trywork - an onboard hearth to convert blubber into whale oil.<br />
In 1860, the ship was converted to a barque rig in order to reduce the crew needed and to<br />
allow the ship to sail closer to the wind.<br />
In 1871, the Lagoda was among 40 ships whaling in the Arctic. Toward the end of the season,<br />
the ice began to surround the ships, and crushed 33 of them. The Lagoda narrowly<br />
escaped and, with the remaining ships, picked up some of the 1200 survivors.<br />
In total, the ship made almost $652,000 of profit for Bourne until he sold the ship in 1886.<br />
It sailed from the United States in 1889 and worked as a coal hulk, being used to fuel<br />
steamboats in Yokohama, Japan until it was sold again and eventually broken up in 1899.<br />
www.modelshipbuilder.com<br />
The Whaler ―Lagoda‖
10<br />
In 1915, Jonathan's daughter Emily donated the Bourne Building to the New Bedford Whaling<br />
Museum in memory of her father, and the Museum commissioned shipwrights to build<br />
the half-size model of the Lagoda (shown on the previous page) in 1916 with funds also<br />
provided by Emily. At 89 feet in length, it remains the largest whaling ship model in existence.<br />
You can visit the museum and see the model at this website:<br />
http://www.whalingmuseum.org/exhibits/lagoda.html<br />
Principles That Apply to All <strong>Model</strong>ing<br />
1. First and foremost, take your time. If you haven‘t completed the first section of the<br />
project before the next part begins in the next issue, don‘t worry about it. Take your<br />
time and complete it to the best of your ability then move on to the next section.<br />
2. If something goes awry, do it over. Do not settle for a second-rate model. The second<br />
time around will be much better.<br />
3. Do not make a difficult thing simple, and do not make a simple thing difficult. Think<br />
it through first, then build.<br />
4. Use tools that you are comfortable with. Many different kinds of tools can be substituted<br />
for those used in this practicum.<br />
5. Enjoy yourself and have fun. This is the ultimate goal of our hobby.<br />
6. You do not have to religiously follow every step of this practicum. Think for yourself.<br />
It quite common that each modeler finds ways and methods that work better for<br />
them.. So, with every step, think things through and if you find a way that works<br />
better for you, do it your way. While this practicum contains detailed instructions on<br />
how to build the model, it is first and foremost a guide to keep you on track.<br />
Tools And Supplies You May Find Helpful<br />
Cutting tools:<br />
1. Jig saw or band saw.<br />
2. X-Acto knives, especially a #11 blade.<br />
3. Razor saw.<br />
4. Single-edged razor blades.<br />
5. Small chisels for cutting rabbets.<br />
6. Small pair of sharp scissors.<br />
Files and Sandpaper:<br />
1. A set of needle files.<br />
2. Hand files.<br />
3. Medium and fine grit sandpaper.<br />
4. Sanding sticks.<br />
www.modelshipbuilder.com<br />
Clamps:<br />
1. Spring clothespins.<br />
2. ―Bulldog‖ clamps<br />
3. Rubber bands.<br />
Boring Tools:<br />
1. 1/16‖ drill bit.<br />
2. #60-#80 set of drill bits.<br />
3. Pin vise.
Miscellaneous Tools:<br />
1. Tweezers.<br />
2. Miniature pair of pliers.<br />
3. Soldering iron, with solder and flux.<br />
4. Thread for sail and rigging.<br />
5. Beeswax (for thread)<br />
6. Masking tape.<br />
7. Assortment of paint brushes.<br />
Construction Materials<br />
11<br />
Mr. Ronnberg recommends cherry or maple wood for the hull planking, with woods of contrasting<br />
color for other parts. For metal parts, he recommends photo-etched nails, brass<br />
straps for the mast hinge, turning and photo-etchings for rowlocks, castings for the compass<br />
bowl and the whaling gun, and various wire and copper shim.<br />
HOWEVER, as with everything else, substitutes may be chosen by each modeler himself,<br />
based on his own personal preferences. For this practicum, the only wood employed on<br />
the model will be basswood, which can be stained to look like any other wood one chooses.<br />
If one chooses to avoid working with metal, many metallic parts can be constructed of<br />
wood and treated to look like metal. Various options will be discussed throughout this<br />
practicum as the need arises.<br />
MSB Note: If you order your wood may I suggest that you contact Dave Stevens at The Lumberyard for<br />
<strong>Model</strong> <strong>Ship</strong>wrights (www.dlumberyard.com) and check out his offerings. I „m sure that The Lumberyard<br />
will be able to provide you with all the wood materials you need to build this project.<br />
Stage 1: Building the Mold<br />
The ―mold‖ is the framework upon which the whaleboat itself is built. The mold is affixed<br />
on top of three ―horses‖ for support, and the horses are pinned and glued to a baseboard<br />
that is slightly longer and slightly wider than the whaleboat. The mold, horses, and baseboard<br />
are temporary structures that allow you to build the whaleboat. All planking is<br />
shaped, fitted, and installed in upside-down fashion upon the mold.<br />
Step 1: Laying Out the Parts on Basswood Sheets<br />
Supplies:<br />
Using 1/8‖ basswood, carefully lay out all the required parts of the mold found on Sheet 1A<br />
of the plans. All the parts are 1/8‖ thick, and you will need about a sheet and a half of 6‖<br />
x 24‖ basswood for all of them.<br />
How do you get the lines on the plans onto the basswood? Here are several suggestions:<br />
If you are lucky enough to have 6 separate sheets of plans, you can merely cut out<br />
each part and rubber-cement it to the basswood.<br />
www.modelshipbuilder.com<br />
1. Primer.<br />
2. Paint.<br />
3. Sanding sealer.<br />
4. Stains.<br />
5. Varnish.<br />
6. White glue.<br />
7. Cyanoacrylate (CA) glue<br />
8. Wood filler.
12<br />
If you don‘t wish to destroy your set of plans, you can duplicate each part with your<br />
copier and then cut it out and rubber-cement it to the basswood. Beware of this<br />
method, however, because many copiers do not copy at 100% of the original size;<br />
99% or less is common. Test your own copier before using this method.<br />
Alternatively, you can trace each part onto another piece of paper or the basswood<br />
itself with carbon paper.<br />
As you lay out each of the following parts, make sure you include the lines described below<br />
for each part, where noted, especially if you are tracing with carbon paper:<br />
Profile Mold – This is the ―backbone‖ of the mold. Use the inner line of its shape on<br />
the plans for laying it out for cutting. Do NOT include the Profile Mold Cap Strip, the<br />
stem post, or the keel. You should definitely include the bow and stern bevel lines<br />
that receive seam battens. Locate and draw Waterlines 2, 3, and 4 on at least one<br />
side of the mold. Note that the cutaway of the bottom of the Profile Mold follows Waterline<br />
1.<br />
Section Molds #1-#5 – Do NOT include the Cap Strips in your layout. Note that the<br />
slots that will be cut out will only extend to the solid line, not the dashed line.<br />
Bow Horse<br />
Bow Horse Cross Member<br />
Midship Horse<br />
Midship Horse Cross Member – Note that 2 are required.<br />
Stern Horse<br />
Stern Horse Cross Member<br />
Cap Strips of varying sizes (10) – Each Section Mold requires 2 cap strips. The<br />
length of each pair is measured from the edge of the Profile Mold Cap Strip to its<br />
outer edge shown on the plans.<br />
Step 2: Cutting Out All the<br />
Parts<br />
You can use either a band saw, jig<br />
saw or coping saw to cut out the<br />
parts. The more accurately you<br />
cut out each part, the more accurate<br />
the resulting model will be.<br />
Stay just outside the lines when<br />
you make your cuts. Sand all cuts<br />
smooth. Figure 1-1 shows most of<br />
the parts cut out and sanded<br />
smooth.<br />
www.modelshipbuilder.com
13<br />
Step 3: Finishing the Profile Mold<br />
Bevel the bow and stern areas that you marked previously for the seam battens.<br />
There should be a maximum of 1/16‖ between Waterlines 2 and 4. The area between<br />
Waterlines 1 and 2 will taper gradually to its 1/8‖ width. This can be seen in<br />
Figures 1-2 and 1-3.<br />
If you haven‘t already done so, make sure you mark Waterlines 2 through 4 at least<br />
on the bow and stern areas.<br />
Using the top drawing on Plan Sheet 2 as your guide, mark the locations of the plank<br />
laps and seam battens on the edges of the Section Molds. These marks will help<br />
guide you to the approximate placement for all planking on the whaleboat. Do this at<br />
both the bow and stern areas of the Profile Mold.<br />
Bevel the edges of Section Molds 1,<br />
2, 4, and 5, as shown in Figure 1-4<br />
and as shown in the Top View of<br />
Plan Sheet 1A. Note that only onehalf<br />
of the edge requires a bevel,<br />
and the required bevel is on the<br />
same have that points either to the<br />
bow or stern. In other words, Section<br />
Molds 1 and 2 will be beveled<br />
on the side facing the bow, and<br />
Section Molds 4 and 5 will be beveled<br />
on the side facing the stern.<br />
Note that Section Mold 3 requires<br />
no bevels.<br />
Step 4: Finishing the Section Molds 1-5<br />
Mark Waterlines on at least one side of each of the Section Molds. These lines are<br />
found on the bottom right-hand drawing of Plan Sheet 1.<br />
Mark the locations of the plank laps and seam batten on the edges of all five Section<br />
Molds. These are found on the same drawing as the above Waterlines. Mark them<br />
www.modelshipbuilder.com
on the port and starboard sides of each<br />
Section Mold. They provide the approximate<br />
location for all planking for<br />
the whaleboat. An example is shown<br />
in Figure 1-5.<br />
Next, fit the Section Molds to the Profile<br />
Mold in their proper slots, but do<br />
not glue them in place yet. Check to<br />
ensure that the Waterlines on the Section<br />
Molds align with the Waterlines on<br />
the Profile Mold. See Figure 1-6.<br />
While the Section Molds are still inserted<br />
in their slots on the Profile Mold,<br />
note that the top edges of Section<br />
Molds 1, 2, 4, and 5 require a slight<br />
bevel so that they follow the sheet of<br />
the top edge of the Profile Mold. This<br />
requirement can also be observed in<br />
the Side View Plan on Sheet 1A. Using<br />
a file or a sanding stick, bevel these<br />
areas carefully. Section Mold 3 has no<br />
bevel.<br />
Next, fit the Section Molds to the Profile<br />
Mold in their proper slots, but do<br />
not glue them in place yet. Check to<br />
ensure that the Waterlines on the Section<br />
Molds align with the Waterlines on<br />
the Profile Mold. See Figure 1-6.<br />
14<br />
While the Section Molds are still inserted<br />
in their slots on the Profile Mold,<br />
note that the top edges of Section<br />
Molds 1, 2, 4, and 5 require a slight<br />
bevel so that they follow the sheet of<br />
the top edge of the Profile Mold. This<br />
requirement can also be observed in<br />
the Side View Plan on Sheet 1A. Using<br />
a file or a sanding stick, bevel these areas carefully. Section Mold 3 has no bevel.<br />
Step 5: Finishing the Mold Assembly<br />
Cut out the Profile Mold Cap Strip shown in the Top View of Sheet 1A. Note that it,<br />
too, is cut from 1/8‖ basswood and has a 1/8‖-wide notch on each end.<br />
www.modelshipbuilder.com
15<br />
Glue and pin it in place on the top edge of the Profile Mold directly in the center, as<br />
shown in Figure 1-7. Make sure that it is perfectly perpendicular to the Profile Mold<br />
and that the notches at each end will be exposed to accept the keel material. Allow<br />
the glue to dry thoroughly.<br />
Next, test the fit of each of the five Section Molds, ensuring that Water-lines are still<br />
aligned. Also be sure that the top edges of each Section Mold reaches the bottom<br />
edges of the Profile Mold Cap Strip. If everything is properly aligned, glue the five<br />
Section Molds in place, checking to ensure that each mold is perfectly perpendicular<br />
to the Profile Mold. This is shown in Figures 1-8 and 1-9.<br />
Finally, install the Cap Strips by pinning them and gluing them on the top edges of<br />
the Section Molds, abutting them to the Profile Mold Cap Strip and centering them as<br />
neatly as possible. Note that they protrude about ¼‖ beyond the edges of the Section<br />
Molds. This is shown in Figures 1-10 and 1-11.<br />
www.modelshipbuilder.com
16<br />
The ―mold‖ upon which the whaleboat will be built is now finished. Next, we will build the<br />
horses upon which the mold will be affixed.<br />
Step 6: Installing The Horses on the Construction Board and Finishing the Mold<br />
Assemble and glue the 7 parts for the three Horses that you have previously cut out.<br />
Remember to cut out notches on the Bow and Stern Horses before assembling them<br />
permanently (see the Top View on Sheet 1A). Make sure that the cross members are<br />
perpendicular to the Horse parts when you glue them together.<br />
Prepare a Construction Board, which is a piece of wood measuring 7‖ wide by 23‖<br />
long. Its thickness should be a minimum of ¼‖, but ½‖ or ¾‖ is better, and it should<br />
be free of any warp. Draw a pencil line directly down the full length of the Construction<br />
Board. Draw another centerline (11 ½‖ from one end) perpendicular to this one.<br />
The Midship Horse will rest on this latter line.<br />
Glue the Midship Horse to the Construction Board, centering the Horse perfectly.<br />
Position the Bow and Stern Horses at their approximate locations, as seen from the<br />
Top View on Sheet 1A, but do not glue<br />
them in place yet.<br />
Place the assembled Mold upside down<br />
on the Horses, with the Midship Mold<br />
centered over the Midship Horse. Now,<br />
while keeping the Midship Mold perfectly<br />
centered, align the Bow and<br />
Stern Horses by shifting them slightly<br />
until the ends of the Profile Mold are in<br />
alignment with the ends of the Horses<br />
at both ends. Make sure that both are<br />
perfectly aligned, because the trueness<br />
of the whaleboat planking depends on<br />
it. This is shown in Fig. 1-12 to the<br />
right.<br />
www.modelshipbuilder.com
Mark the locations of both Horses on<br />
your Construction Board with a pencil.<br />
Remove the Mold and glue the<br />
Horses in place at your markings.<br />
See Fig. 1-13.<br />
Now place the Mold back on the<br />
Horses. Does the Mold rest comfortably<br />
on the Horses without any<br />
rocking motion? If not, gently file<br />
the Horses down a bit in appropriate<br />
areas until the Mold makes contact<br />
with all three Horses. Perfection is<br />
not necessary here – only good contact<br />
is required.<br />
Finally, SPOT-GLUE the Mold onto<br />
the Horses. Only five spots are sufficient,<br />
because you want to be able<br />
to remove the Mold easily when you<br />
begin the framing. First, spot-glue<br />
the Midship Horse with a spot of glue<br />
at its very center and place the Mold<br />
in its proper position. The other four<br />
spots require ―glue tabs,‖ as shown<br />
in the End View of Bow or Stern<br />
Horse on Sheet 1A and in Fig. 1-14<br />
below.<br />
17<br />
When the glue dries, you will then be ready to begin construction of the whaleboat itself<br />
and we‘ll start that in the next issue. The finished Mold appears in Fig. 1-15. <br />
www.modelshipbuilder.com
18<br />
Badges:<br />
Heraldry of Canadian Naval <strong>Ship</strong>s<br />
HMCS Athabaskan<br />
Blazon: On a field of argent a North American Indian clad in buckskin leggings<br />
and beaded moccasins but bare to the waist except for a necklace of bear claws<br />
and ear ornaments. The Indian wears the full feathered headdress and is mounted<br />
bare back upon an indian pony being halted from the trot. The Indian holds a red<br />
bow and arrow in the ready position, the latter pointing down.The badge design is<br />
based on the one which had been planned by Officers of the original ATHABASKAN,<br />
but was not completed before their ship was lost in action.<br />
<strong>Ship</strong>s Colours: White and Scarlet<br />
Motto: We fight as One<br />
Battle Honours:<br />
Arctic: 1943-1944<br />
English Channel: 1944<br />
Korea: 1950-1953<br />
Persian Gulf: 1991<br />
www.modelshipbuilder.com<br />
1941 Athabaskan<br />
Current Athabaskan
19<br />
The Book Nook<br />
Books of interest for the <strong>Model</strong> <strong>Ship</strong> <strong>Builder</strong><br />
The Fully Framed <strong>Model</strong>, Rigging A Sixth<br />
Rate Sloop of 1767-1780, Volume IV<br />
By David Antscherl<br />
Naval Institute Press; 1 edition (February 1, 2002)<br />
ISBN-978-0-9820579-8-8<br />
Get your copy at<br />
Seawatch Books<br />
In 2005 I started modeling. As with all model builders, struggling through<br />
that first model was a major test to my constitution. Not only was building<br />
the model a challenge in itself, but learning an entirely foreign terminology<br />
was an even bigger challenge to me. In fact it took a few models before I became<br />
comfortable with even the basics.<br />
One area however had eluded me for years. That was in the area of masting<br />
and rigging. There are numerous books out there on the subject, but to me,<br />
they just didn‘t do the trick. In fact, I came to the conclusion that while they<br />
may be great books on the subject, they are only great reference material to<br />
people who already knew the subject matter.<br />
This past month a book came across my desk. ―The Fully Framed <strong>Model</strong>, Rigging<br />
a Sixth Rate Sloop of 1767-1780, Volume IV‖ by David Antscherl. I initially<br />
thought, oh great another book on rigging to sit on my bookshelf and<br />
collect dust. That was until I sat down and cracked the cover.<br />
At over 200 pages and hundreds of photos this is by far the best book I<br />
have ever seen on the subject of masting and rigging as it pertains to model<br />
building. The author takes you through the entire process fully describing the<br />
steps taken, from drafting the mast and spars to tying the final knot. This<br />
will definitely be one of the reference books you want in your modeling library,<br />
whether you are a novice builder or experienced pro.<br />
www.modelshipbuilder.com
20<br />
The Bomb Vessel<br />
Cross Section <strong>Model</strong><br />
An exclusive <strong>Model</strong> <strong>Ship</strong> <strong>Builder</strong><br />
<strong>Model</strong>ing Project<br />
“Extremely detailed plans for a model. I have to<br />
say, I’m very impressed. Great Job!“<br />
Alfred Anderson—U.K.<br />
“...This is the finest set of<br />
drawings I ever worked with!“<br />
Mike. Rohrer—Proto-type builder<br />
“These drawings are amazing! I’m<br />
looking forward to building this<br />
model“<br />
Daniel Richardson—USA<br />
Plans now Available at the <strong>Model</strong> <strong>Ship</strong> <strong>Builder</strong> web site!<br />
A 1:24 scale model based on Peter Goodwins ―Anatomy of the <strong>Ship</strong>—Bomb Vessel<br />
Granado and original Bomb Vessel drawings by Thomas Slade.<br />
Contains 63 pages of detailed drawings and templates of every part of the model.<br />
Numerous 3-dimensional constructional drawings provide you all the information<br />
you need to know to build this model. As well, it is supported by an online forum<br />
where you can ask questions, view other builds as they occur and even display<br />
your build if you wish.<br />
All pages are printed on 11‖ x 17‖ stock.<br />
Future plans include a 1:48 scale model timbering kit<br />
Plans: $45.00 CND set + <strong>Ship</strong>ping/Handling<br />
Available at www.modelshipbuilder.com<br />
www.modelshipbuilder.com<br />
“Plans arrived today… They far exceeded my<br />
expectations… Thank you!<br />
Tristan Rockstrom—Canada
21<br />
Contributors Pictures<br />
Area for displaying submitted pictures by the readers<br />
Here‘s a picture sent in by Philip Murphy of St. John‘s Newfoundland of the coastal vessel<br />
Baccalieu. He saw our short article on the ships of the Alphabet Fleet. This is a model of<br />
one of those ships. The model is located at the Newfoundland Railway Museum in St.<br />
John‘s, Newfoundland (in the period they also owned the ships of the Alphabet Fleet.)<br />
Send in pictures of your model for others to see.<br />
To send hard copy pictures or CD see mailing information on page 2.<br />
Or you can send images by email to editor@msbjournal.com<br />
Please note: send high resolution images. Low resolution images may not covert to PDF properly<br />
so they may not be able to be used.<br />
www.modelshipbuilder.com
22<br />
Gene’s Nautical Trivia<br />
In the Hold<br />
Fill in the blanks in this puzzle grid from the word list provided below the puzzle grid.<br />
7 letters 8 letters<br />
KEELSON FOREMAST<br />
LANTERN MAINMAST<br />
SCUTTLE PLANKING<br />
10 letters 11 letters<br />
BREAST HOOK FILLING ROOM<br />
GUNNER’S ROOM HANGING KNEE<br />
SHOT LOCKER<br />
13 letters<br />
CARPENTER’S ROOM<br />
www.modelshipbuilder.com
23<br />
NAME THAT SHIP<br />
Choose the correct answer from the list of ships supplied at the bottom of this page.<br />
1. _____ <strong>Ship</strong> sunk by a torpedo in May 1915.<br />
2. _____ Yacht in which Alex Rose sailed alone around the world.<br />
3. _____ Passenger liner destroyed by fire in New York Harbor in 1941.<br />
4. _____ The first nuclear-powered vessel launched by the Soviet Navy.<br />
5. _____ <strong>Ship</strong> captured and used by the pirate Blackbeard.<br />
6. _____ The first submarine to surface at the North Pole in 1959.<br />
7. _____ Jack London’s custom-built yacht on which he lived and sailed<br />
from 1906 to 1908.<br />
8. _____ <strong>Ship</strong> deemed not seaworthy enough to sail with the Mayflower<br />
on its 1620 voyage.<br />
9. _____ American submarine that sank itself with its own torpedo in<br />
October 1944.<br />
10. _____ Whaling ship in which the first mate, Starbuck, sailed in<br />
Melville’s “Moby Dick.”<br />
A. LENIN F. SNARK<br />
B. QUEEN ANNE’S REVENGE G. TANG<br />
C. PEQUOD H. LIVELY LADY<br />
D. SKATE I. NORMANDIE<br />
E. LUSITANIA J. SPEEDWELL<br />
www.modelshipbuilder.com
24<br />
NAME THE GUN TACKLE PARTS<br />
1. _______________ 11. _______________ 21. _______________<br />
2. _______________ 12. _______________ 22. _______________<br />
3. _______________ 13. _______________ 23. _______________<br />
4. _______________ 14. _______________ 24. _______________<br />
5. _______________ 15. _______________ 25. _______________<br />
6. _______________ 16. _______________ 26. _______________<br />
7. _______________ 17. _______________ 27. _______________<br />
8. _______________ 18. _______________ 28. _______________<br />
9. _______________ 19. _______________ 29. _______________<br />
10. _______________ 20. _______________ 30. _______________<br />
SALTY SAYINGS<br />
By Harry Campbell<br />
TOP GEAR: A seaman‘s upper garments.<br />
TOM COX’S TRAVERSE: Tricks of a sailor who gives the appearance of<br />
working but in fact accomplishes nothing.<br />
SHONKY: A messmate who will drink but avoid paying his round.<br />
WRINKLE: A smart way of doing something or, perhaps, of dodging it.<br />
www.modelshipbuilder.com
In the Hold<br />
S H O T L O C K E R<br />
C A<br />
A G U N N E R S R O O M<br />
R T<br />
P E H<br />
E R A M<br />
N P L A N K I N G A<br />
T E G F I<br />
E E I O N<br />
R F I L L I N G R O O M<br />
S S G E A<br />
B R E A S T H O O K M S<br />
O N N A T<br />
O E S<br />
M S C U T T L E T<br />
NAME THAT SHIP: 1-E, 2-H, 3-I, 4-A, 5-B, 6-D, 7-F, 8-J, 9-G, and 10-C<br />
25<br />
Gene’s Nautical Trivia<br />
Answers<br />
NAME THESE CLIPPERS: 1-Challenge, 2-Cutty Sark, 3-Flying Cloud, 4-Glory of the Seas,<br />
5-Great Republic, 6-Lightning, 7-Red Jacket, 8-Sea Witch, 9-Stag Hound, 10-Thermopylae.<br />
NAME THE GUN TACKLE PARTS: 1-Gangboard, 2-Skid beam, 3-:Ledge, 4-Lantern, 5-<br />
Port tackle cleat, 6-Gun tackle implements, 7-Fire bucket, 8-Gun port tackle, 9-Port<br />
laniard, 10-Laniard ring, 11- Gun port lid, 12-Eyebolt, 13-Gun port lid strap, 14-Port hinge,<br />
15-Port lid lining, 16-12-pounder run out, 17-Through hull bolts, 18-Breeching bolt, 19-<br />
Gun tackle ringbolt, 20-Shot rack, 21-Sponge tub, 22-Crooked hand spike, 23-Gun deck,<br />
24-Carriage, 25-Gun tackle, 26-Train tackle, 27-Pillar, 28-Ringbolt for train tackle, 29-<br />
Breeching rope, 30-Securing eyebolt.<br />
www.modelshipbuilder.com
<strong>Model</strong>ing Clubs<br />
Wish to have your club info displayed? Send an email to info@modelshipbuilder.com<br />
Hyde Street Pier <strong>Model</strong> <strong>Ship</strong>wrights<br />
Meet at the club's model shop aboard the<br />
Eureka, Hyde Street Pier, a National Park<br />
Service historic site in San Francisco on the<br />
third Saturday of every month @ 9:30 a.m<br />
Contact: Leo Kane<br />
Ph: (415) 821-0449<br />
kanebulota@comcast.net<br />
Tampa Bay <strong>Ship</strong> <strong>Model</strong> Society<br />
Meet in downtown St. Petersburg, FL on the<br />
fourth Tuesday of the month at 7:00 p.m.<br />
except December.<br />
www.tbsms.org<br />
Contact: George Shaeffer<br />
georgeshaeffer@gmail.com<br />
Ph: (727) 798-0943<br />
Cape Ann <strong>Ship</strong> <strong>Model</strong>ers Guild<br />
Meeting at 7:00 PM the second Wednsday of<br />
every month at the Veterans Center, 12 Emerson<br />
Avenue, Gloucester, Massachusetts.<br />
www.casmg.org<br />
Contact: Tony Ashdon<br />
tony@capeannshipmodelersguild.org<br />
Ph: (978) 546-7222<br />
26<br />
www.modelshipbuilder.com<br />
Golden Triangle Marine <strong>Model</strong>ers<br />
The club meet on the second Wednesday of each<br />
month at 8:00 pm at the Albert McCormick<br />
Arena, 500 Parkside Drive, Waterloo. Their main<br />
focus is R/C and static models. During the summer<br />
they usually break from their Wednesday<br />
meetings to run their boats at the pool in front of<br />
Kitchener City Hall, plus, once a week their Sail<br />
division travel to the pond in Wellesley to race<br />
their sailboats.<br />
Contact: Paul Dreher (Secretary)<br />
101 Harcourt Cres.<br />
Kitchener, Ontario<br />
N2P 1M1<br />
Ph: 519-748-0449<br />
pcadreher@sympatico.ca<br />
Southwest Florida <strong>Ship</strong>modeler's Guild<br />
Meets at the - City of Bonita Springs Recreation<br />
Center 26740 Pine Ave, Bonita Springs, FL 34135<br />
on the 2nd and 4th Saturday's each month, except<br />
December, at 0900 am<br />
Contact: John Weliver<br />
Ph: 239-561-5777<br />
jweliver@comcast.net
Sponsors <strong>Model</strong> Shops and Links<br />
27<br />
Australian National Maritime Museum – 2 Murray Street, Sydney NSW, Australia 2009<br />
Web: www.anmm.gov.au Ph: +61 2 9298 3777 Email: info@anmm.gov.au<br />
HMS Bounty- HMS Bounty Organization LLC, 20 Cedar Lane, Setauket, NY 11733<br />
Web: www.tallshipbounty.org Ph: 631 584-7900 Email: tsimonin@tallshipbounty.org<br />
Sea Watch Books - SeaWatch Books, LLC<br />
19 Sea Watch Place, Florence, USA OR 97439<br />
Web: www.seawatchbooks.com<br />
Ph: (541) 997 – 4439<br />
Email: seawatchbooks@gmail.com<br />
<strong>Model</strong> <strong>Ship</strong> World – Web: www.modelshipworld.com<br />
Tall <strong>Ship</strong> <strong>Model</strong>ing Downunder – 13 Lukela Ave, Budgewoi, NSW, Australia 2262<br />
Web: www.tallshipmodeling.com Ph: +61 423 587 564 Email:<br />
admin@tallshipmodeling.com<br />
JB <strong>Model</strong>.eu: Cothmanstrasse 5-7 Top 22, 1120 Vienna, Austria<br />
Web: www.jbmodel.eu/index.php Ph: +43 (0)664 46 16 444 Email: info@jbmodel.eu<br />
Polly Woodside Vol Ass’ – Web: www.pwva.org.au Ph: 61 395 315 626 Email:<br />
jacwroe@bigpond.net.au<br />
<strong>Model</strong>ers <strong>Ship</strong>yard - PO Box 150, Blaxland, NSW, AUSTRALIA, 2774<br />
WEB: www.modelshipyard.com.au PH: +61 (0) 2 4739 3899 EMAIL:<br />
info@modelshipyard.com.au<br />
Byrnes <strong>Model</strong> Machines - WEB: www.byrnesmodelmachines.com<br />
www.modelshipbuilder.com