4-H Cloverbud Activity Book A - Taylor County - University of ...
4-H Cloverbud Activity Book A - Taylor County - University of ...
4-H Cloverbud Activity Book A - Taylor County - University of ...

You also want an ePaper? Increase the reach of your titles
YUMPU automatically turns print PDFs into web optimized ePapers that Google loves.
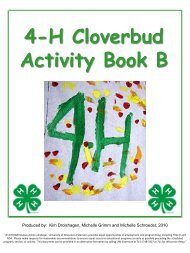
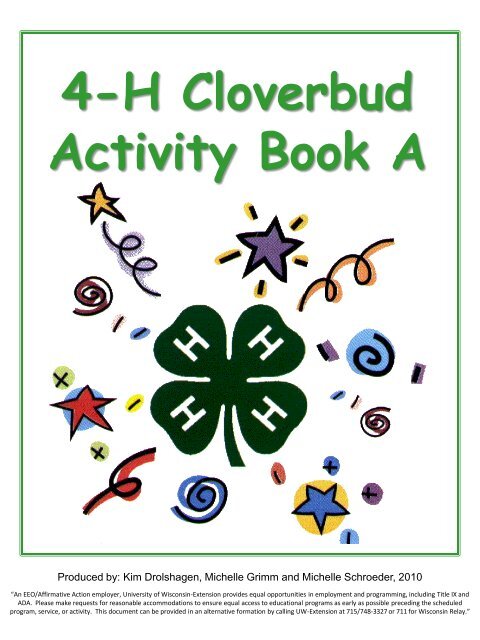
4-H <strong>Cloverbud</strong><br />
<strong>Activity</strong> <strong>Book</strong> A<br />
Produced by: Kim Drolshagen, Michelle Grimm and Michelle Schroeder, 2010<br />
“An EEO/Affirmative Action employer, <strong>University</strong> <strong>of</strong> Wisconsin-Extension provides equal opportunities in employment and programming, including Title IX and<br />
ADA. Please make requests for reasonable accommodations to ensure equal access to educational programs as early as possible preceding the scheduled<br />
program, service, or activity. This document can be provided in an alternative formation by calling UW-Extension at 715/748-3327 or 711 for Wisconsin Relay.”
• My 4-H Club p. 3<br />
• A Little Bit About Me p. 4<br />
• About 4-H p. 5<br />
• 4-H Pledge p. 6<br />
• My Club and <strong>County</strong> Activities & Events p. 7<br />
• Create-A-Critter p. 8<br />
• Ant ANTatomy p. 9<br />
• Create a Habitat p. 10<br />
• Let’s Make Sidewalk Chalk p. 11<br />
• Puppet Creations p. 12<br />
• Sand Painting p. 13<br />
• Beanbag Socks p. 14<br />
• Graham Cracker Scram p. 15<br />
• Kitchen Safety p. 16<br />
• First Aid p. 17<br />
• Let’s Learn About Sound! p. 18<br />
• Make a Constellation p. 19<br />
• Examples <strong>of</strong> Constellations p. 20<br />
• Sink or Float? P. 21<br />
• All About Leaves p. 22<br />
• Leaf Identification Guide p. 23<br />
• Let’s Grow Vegetables! P. 24<br />
• Measuring Rain p. 25<br />
• References p. 26<br />
2
My 4-H Club<br />
My Name: ______________________________________<br />
4-H Club Name: _________________________________<br />
4-H Leader’s Name: ______________________________<br />
Phone Number:____________________________<br />
Other Club Members: _____________________________<br />
______________________________________________<br />
4-H Youth Development Agent’s Name:________________<br />
Phone Number:____________________________<br />
3
Place<br />
Your<br />
Picture<br />
Here<br />
Name:_______________________________<br />
Age:______________<br />
My Family members: ______________________________<br />
______________________________________________<br />
______________________________________________<br />
My favorite activities: ____________________________<br />
______________________________________________<br />
______________________________________________<br />
4
4-H Club Emblem<br />
The four leaf clover with the<br />
letter “H” on each leaf, which<br />
stands for head, heart, hands<br />
and health. The colors <strong>of</strong> the<br />
emblem are green and white.<br />
4-H Motto<br />
“TO MAKE THE BEST BETTER”<br />
This motto challenges everyone<br />
involved in 4-H to do the very<br />
best job they can.<br />
4-H Slogan<br />
“LEARN BY DOING”<br />
5
I pledge:<br />
4-H Pledge<br />
My Head to Clearer Thinking (Right hand points to forehead)<br />
My Heart to Greater Loyalty (Right hand over heart)<br />
My Hands to Larger Service (Arms slightly bent, palms up)<br />
And My Health to Better Living for My Club,<br />
My Community, My Country and My World (Arms at side)<br />
6
My Club and <strong>County</strong><br />
Activities and Events<br />
Activities and events I was part <strong>of</strong>:<br />
Event Date<br />
7
Create – a - Critter<br />
Make up a brand new critter. Construct your critter by using some<br />
<strong>of</strong> the materials listed below, and then draw a picture <strong>of</strong> your<br />
creation. Decide the details by completing the sentences below.<br />
Draw a picture <strong>of</strong> your critter here.<br />
My critter’s name is _______________________.<br />
It lives in the ____________________________.<br />
It eats _________________________________.<br />
It moves by _____________________________.<br />
It is special because it _____________________.<br />
Materials: straws, toothpicks, paper,<br />
paper plates, modeling clay, crayons, any<br />
other items you may have<br />
Animal Sciences<br />
Animal Life<br />
8
Ant ANTatomy<br />
Create your own ANT!<br />
Ants are a type <strong>of</strong> insect that have six legs, two antennae and three<br />
body sections. The three body sections are the head, thorax and<br />
abdomen.<br />
Ants live in colonies made up <strong>of</strong> queens, males and workers. They are<br />
amazing creatures that come in different colors, with black being the<br />
most common. Ants can carry up to 27 times their body weight!<br />
Where do you see ants? ___________________________<br />
______________________________________________<br />
What color ants have you seen before? ________________<br />
______________________________________________<br />
How many antennae do ants have? ____<br />
Can you name the three body sections <strong>of</strong> an ant? _________<br />
______________________________________________<br />
How many legs do ants have? ____<br />
Time to make your ant!<br />
Animal Sciences<br />
Animal Life<br />
Materials: three large marshmallows, 4 large pipe cleaners cut in half,<br />
2 toothpicks, scissors and markers.<br />
Procedure:<br />
1. Use the three large marshmallows as the body sections and<br />
connect them using toothpicks.<br />
2. Cut 4 large pipe cleaners in half to make 8 small pipe cleaners.<br />
Use 6 for the legs and insert 2 for the antennae.<br />
9<br />
3. Decorate your ant using markers.
Create a Habitat<br />
Draw a picture <strong>of</strong> your habitat here.<br />
Choose an animal and create its habitat!<br />
Animal Sciences<br />
Animal Life<br />
For this activity, choose any animal and look up its habitat. An<br />
animal’s habitat is the area in which it lives. For example, your<br />
habitat is your house because it is where you live.<br />
You can make your habitat out <strong>of</strong> anything you would like. A<br />
few suggestions are: shoebox, construction paper, glue,<br />
markers, grass and twigs.<br />
My animal is a _______________. It lives _____________<br />
______________________________________________.<br />
It eats ________________________________________.<br />
10
Let’s Make Sidewalk Chalk<br />
Place a picture <strong>of</strong> your artwork here.<br />
Expressive Arts<br />
Materials: 2 cups water<br />
2 cups Plaster <strong>of</strong> Paris<br />
2 Tablespoons Tempera Paint (wet or dry)<br />
Toilet paper tubes with duct tape over one end<br />
Cookie sheet lined with aluminum foil or waxed<br />
paper<br />
Procedure:<br />
1. Combine and stir together all ingredients, and let stand<br />
for a few minutes.<br />
2. Place prepared toilet paper tubes on cookie sheet lined<br />
with aluminum foil or waxed paper.<br />
3. Pour mixture into holders, let stand until semi-firm.<br />
4. Remove holders and let dry completely.<br />
5. Ready to use in 1 ½ hours.<br />
6. Now use your sidewalk chalk to draw a picture outside!<br />
CAUTION: DO NOT POUR PLASTER DOWN THE DRAIN 11<br />
AND MAKE SURE ADULTS SUPERVISE THE MIXING!
Puppet Creations<br />
Let’s create a puppet and perform a puppet show!<br />
Materials: Lunch bag<br />
Markers<br />
Googly Eyes<br />
Yarn<br />
Glue<br />
Pipe Cleaners<br />
Other Craft Supplies<br />
Procedure: Using your supplies create puppets and perform<br />
a show for your friends and family!<br />
Draw a picture <strong>of</strong> your puppets here.<br />
Expressive Arts<br />
12
Sand Painting<br />
Draw a picture <strong>of</strong> your artwork here.<br />
Let’s create a picture using sand!<br />
Expressive Arts<br />
Materials: Dry Sand (in paper cups)<br />
Pencil<br />
Crayons<br />
White Glue<br />
Paper or Cardboard<br />
Newspapers<br />
Procedure:<br />
1. Use a pencil to draw a picture design lightly on paper.<br />
2. Apply a bead <strong>of</strong> glue to the pencil lines.<br />
3. Sprinkle sand gently over the wet glue.<br />
4. Tile the paper so the extra sand falls <strong>of</strong>f the paper onto<br />
the newspaper.<br />
5. Let dry.<br />
6. Use crayons to add details or color to the sand painting.<br />
13
Beanbag Socks<br />
Family, Home and Health<br />
Practice some sewing skills while making a<br />
beanbag sock!<br />
Materials: Unmatched Sock<br />
Dried Beans<br />
Large Darning Needle<br />
Colorful Yarn<br />
Scissors<br />
Markers<br />
Procedure:<br />
1. Collect the materials needed.<br />
2. Fill sock with dried beans, leaving room to sew the top <strong>of</strong><br />
the sock.<br />
3. To finish the sock – close to the beans stitch the top<br />
closed using the colorful yarn and darning needle.<br />
4. Use markers to decorate the sock.<br />
See if you can come up with a fun game to play<br />
with your new beanbag sock!<br />
14
Family, Home and Health<br />
Graham Cracker Scram<br />
Let’s Make a Delicious and Nutritious Snack!<br />
Make sure to ask an adult for help!<br />
Ingredients: Graham Crackers<br />
Peanut Butter<br />
Bananas, sliced<br />
Low-fat milk<br />
Equipment: Plastic Knife<br />
Paper Plates<br />
Plastic Glasses, for milk<br />
Napkins<br />
Procedure:<br />
1. Before making the snack, make sure to wash your hands<br />
with soap and warm water.<br />
2. Use the plastic knife to slice the bananas.<br />
3. Take a half <strong>of</strong> a graham cracker and spread peanut<br />
butter on it and then top the peanut butter with sliced<br />
bananas. Add the other half <strong>of</strong> the graham cracker to<br />
the top and enjoy with a glass <strong>of</strong> low-fat milk.<br />
This snack is made with everyday foods that are healthy for<br />
us, like peanut butter and fruit. Can you think <strong>of</strong> any other<br />
everyday foods you could use to make a similar snack? _____<br />
______________________________________________<br />
______________________________________________<br />
Recipe adapted from Kitchen Science for Kids, Cornell <strong>University</strong> Cooperative Extension,<br />
1995 and Kangaroo Jump 5: Power Up the Day, Michigan State <strong>University</strong> Extension<br />
15
Kitchen Safety<br />
Circle all <strong>of</strong> the unsafe things in this picture.<br />
Family, Home and Health<br />
Do you have any <strong>of</strong> these habits in your kitchen? _________<br />
List the things you will change about your own safety habits.<br />
______________________________________________<br />
______________________________________________<br />
16
First Aid<br />
Family, Home and Health<br />
Examine the items you find in a first aid kit, and write what<br />
they are used for.<br />
Bandages Sterile Gauze<br />
___________________ _____________________<br />
___________________ _____________________<br />
___________________ _____________________<br />
Adhesive Tape Antiseptic Wipes<br />
___________________ _____________________<br />
___________________ _____________________<br />
___________________ _____________________<br />
Antibiotic Ointment Sterile Gloves<br />
___________________ _____________________<br />
___________________ _____________________<br />
___________________ _____________________<br />
Now, let’s make a First Aid Kit!<br />
Ask an adult to help gather the materials listed above. Find an old c<strong>of</strong>fee can,<br />
plastic zip-lock bag, old lunch box, plastic container or anything that can help<br />
hold your first aid supplies. Keep your first aid kit in a safe place you can easily<br />
get to.<br />
17
Let’s Learn About Sound!<br />
Sound is a vibration moving through air, water, or some other<br />
material. Our ear collects these vibrations and turns them<br />
into a signal which is sent to our brain.<br />
Build a Kazoo<br />
Let’s Make Some Noise!<br />
Materials: Toilet Paper Tube<br />
Waxed Paper<br />
Rubber Band<br />
Crayons<br />
Scissors<br />
Procedure:<br />
1. Cut a square <strong>of</strong> waxed paper to cover the toilet paper<br />
tube.<br />
2. Secure the waxed paper to the end <strong>of</strong> the toilet paper<br />
tube using a rubber band.<br />
3. Decorate your kazoo using crayons.<br />
4. Practice humming without your kazoo.<br />
5. Now try to hum using your kazoo.<br />
Science<br />
Does your humming noise sound different when your use a<br />
kazoo? _______ What is vibrating on your kazoo? ________<br />
Do you think that changing the length <strong>of</strong> the kazoo will change<br />
the sound? _____________. Try it!<br />
18
Make a Constellation<br />
Constellations are pictures made up <strong>of</strong> stars. They were<br />
<strong>of</strong>ten named after items people were familiar with like animals<br />
or mythical people.<br />
Constructing a Constellation<br />
Materials: 8 ½ “ x 11” White Paper<br />
8 ½ “ x 11” Black Construction Paper<br />
Pencil<br />
Metal Pin<br />
Stars Cutouts<br />
Scissors<br />
Glue<br />
White Crayon<br />
Procedure:<br />
1. Draw a picture <strong>of</strong> your constellation on the white paper.<br />
You may draw a constellation from one listed on the<br />
next page or create your own.<br />
2. Line up your white and black papers. Using the metal<br />
pin, poke a hole through every corner <strong>of</strong> your design.<br />
3. Cut out stars and glue one on every pin hole.<br />
4. Connect the stars using a white crayon.<br />
Star Cutout Pattern<br />
Adapted from: Mini 4-H Space. By: Roylene Laswell. Purdue <strong>University</strong> Extension Service.<br />
19<br />
Science
Science<br />
Examples <strong>of</strong> Constellations<br />
SUMMER WINTER ALL YEAR<br />
Big Dipper Cassiopeia<br />
Boötes Taurus<br />
Hercules Leo<br />
20
Sink or Float?<br />
Science<br />
Does it float? Try different objects and record if they sink<br />
or float.<br />
Materials: Sponge<br />
Paper Clip<br />
Toothpick<br />
Marble<br />
Plastic Spoon<br />
Penny<br />
Plastic Straw<br />
Crayon<br />
Plastic Dishpan or Bucket, filled with water<br />
Towel<br />
Piece <strong>of</strong> Paper<br />
Pencil<br />
Procedure:<br />
1. Divide your piece <strong>of</strong> paper into two. On one side write<br />
FLOAT and on the other write SINK.<br />
2. Make predictions <strong>of</strong> which objects you think will sink<br />
and which will float.<br />
3. Time for testing! With the container filled with water,<br />
place each object in it one at a time and record<br />
whether the object floats or sinks.<br />
Which items did you guess correctly? _________________<br />
______________________________________________<br />
Why do you think some items sink and some float? ________<br />
______________________________________________.<br />
21
All About Leaves<br />
Let’s collect, identify and preserve leaves!<br />
Natural Resources<br />
Materials: Roll <strong>of</strong> Wax Paper<br />
Fresh Fall Leaves<br />
Plain, Scrap Paper<br />
Iron for Pressing<br />
9 x 12” Construction Paper<br />
Stapler<br />
Permanent Marker for Labeling Leaves<br />
Tree Field Guide<br />
Procedure:<br />
1. Take a nature walk and collect some fall leaves.<br />
2. Using a tree field guide identify each leaf.<br />
3. Press the leaves by layering them between plain paper. Repeat<br />
layers until all leaves are placed. Make a paper-and-leaf<br />
sandwich and place a heavy book on top. After a couple <strong>of</strong><br />
days carefully remove the pressed leaves.<br />
4. Cut a piece <strong>of</strong> waxed paper 2 feet long. Lay out the pressed<br />
leaves on the waxed paper in any pattern, but make sure to<br />
leave a 1 inch border on the long sides and a 2 inch border at<br />
each end.<br />
5. Have an adult help you lay the waxed paper design on an ironing<br />
board. Place another layer <strong>of</strong> waxed paper on top <strong>of</strong> your<br />
design. Working gently and quickly use the iron to press the<br />
wax layers together. You will only need a second or two for<br />
the wax to adhere.<br />
6. Use the construction paper to make a border around your<br />
waxed paper and adhere it using a stapler.<br />
7. Have an adult help hang your artwork in a window!<br />
22
Natural Resources<br />
Leaf Identification Guide<br />
Maple Oak Birch Ash Poplar<br />
Black<br />
Walnut Hickory Sycamore Basswood Cottonwood<br />
These are just a few types <strong>of</strong> leaves, please use a Tree<br />
Identification Guide for more information.<br />
23
Natural Resources<br />
Let’s Grow Vegetables!<br />
Let’s identify seeds using a handy seed chart.<br />
Materials: White Paper Plate<br />
Ruler<br />
Glue<br />
Markers<br />
8 Kinds <strong>of</strong> Seeds (Example: Bean, Pea, Spinach,<br />
Corn, Radish, and Cucumber)<br />
Procedure:<br />
1. Divide the paper plate into eighths, like a pie. First divide the<br />
plate in half, then in fourths, followed by eighths. Draw lines<br />
using a marker and a ruler.<br />
2. In each segment, glue a seed, label it, and draw a picture <strong>of</strong><br />
the vegetable.<br />
It’s now time to plant some seeds!<br />
Materials: Seeds (leftover from the handy seed chart)<br />
Potting Soil<br />
Paper Egg Carton<br />
Water<br />
Procedure:<br />
1. Remove the lid from the egg carton and fill each section about<br />
¾ full with potting soil.<br />
2. Place the seeds in the soil according to the package directions.<br />
3. Place the egg carton in a location <strong>of</strong> natural light and water<br />
the seeds regularly.<br />
4. Watch your garden grow! As the seedlings get larger,<br />
transplant them into your garden or larger pots by cutting the<br />
egg carton segment and planting the whole part in the ground.<br />
24
Measuring Rain<br />
Natural Resources<br />
Rain is a type <strong>of</strong> precipitation that is <strong>of</strong>ten measured using a<br />
rain gauge. Let’s make a rain gauge!<br />
Materials: Glass Jar<br />
Permanent Marker<br />
Ruler<br />
Stickers<br />
Paint<br />
Procedure:<br />
1. Place a ruler along a glass jar and mark every ½ inch<br />
using a permanent marker. Make sure to label the<br />
marks.<br />
2. Decorate your rain gauge using stickers or paints<br />
however you would like.<br />
3. Place rain gauge outside in a flat open area.<br />
Make sure to empty the jar after<br />
each rain.<br />
Observations:<br />
How much rain was in your rain gauge<br />
after a storm?_________________<br />
What other types <strong>of</strong> precipitation are<br />
there? _______________________<br />
_____________________________<br />
25
References<br />
• http://www.education.com/activity/<br />
• A great website for activity ideas.<br />
• 4-H Mini Space. 4-H-911-6. By: Roylene Laswell. Purdue<br />
<strong>University</strong> Extension Service.<br />
http://www.extension.purdue.edu/extmedia/4H/4H-911-6.pdf<br />
• <strong>Cloverbud</strong>s Activities Packet. By: Richard Moreland and<br />
Lori K. Hutchins. <strong>University</strong> <strong>of</strong> Minnesota Extension<br />
Service.<br />
• <strong>Cloverbud</strong> Program Manual. Montana 4-H.<br />
http://www.montana4h.org/#project:53.<br />
• Environmental Science/Plants & Animals <strong>Activity</strong> Guide<br />
• Science and Technology <strong>Activity</strong> Guide<br />
26
4-H Members,<br />
We have compiled new project material for 4-H <strong>Cloverbud</strong>s. The material will now<br />
be on a three year rotation, with 4-H <strong>Activity</strong> <strong>Book</strong> A, B, and C. Each year, all<br />
<strong>Cloverbud</strong>s will be doing projects out <strong>of</strong> the same activity book.<br />
The <strong>Cloverbud</strong> <strong>Activity</strong> <strong>Book</strong> is designed to introduce <strong>Cloverbud</strong>s to many different<br />
4-H areas. The new booklets provide activities in Animal Sciences/Animal Life,<br />
Expressive Arts, Family, Home, and Health, Science, and Natural Resources.<br />
Please give feedback about the new 4-H <strong>Cloverbud</strong> <strong>Activity</strong> <strong>Book</strong> and return it to<br />
the UW Extension Office.<br />
Sincerely,<br />
Michelle Grimm<br />
<strong>Taylor</strong> <strong>County</strong> 4-H Youth Development Agent<br />
UW Extension Office<br />
925 Donald Street, Room 103<br />
Medford, WI 54451<br />
(715) 748-3327<br />
(715) 748-9772 (fax)<br />
711 (Wisconsin Relay)<br />
michelle.grimm@ces.uwex.edu<br />
www.uwex.edu/ces/cty/taylor/index.html<br />
----------------------------------------------------------------------------------------------------------------<br />
Comments about the new 4-H <strong>Cloverbud</strong> <strong>Activity</strong> <strong>Book</strong>: ______________________<br />
____________________________________________________________________<br />
____________________________________________________________________<br />
____________________________________________________________________<br />
____________________________________________________________________<br />
____________________________________________________________________<br />
____________________________________________________________________<br />
____________________________________________________________________<br />
____________________________________________________________________