4-H Cloverbud Activity Book B - Taylor County - University of ...
4-H Cloverbud Activity Book B - Taylor County - University of ...
4-H Cloverbud Activity Book B - Taylor County - University of ...

Create successful ePaper yourself
Turn your PDF publications into a flip-book with our unique Google optimized e-Paper software.
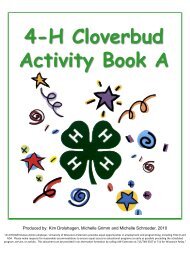
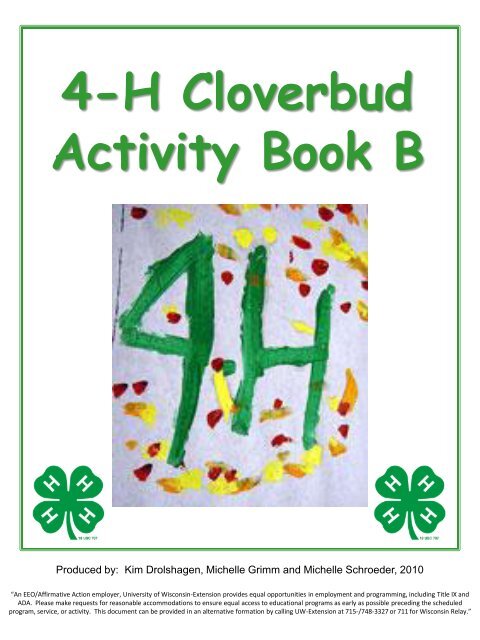
4-H <strong>Cloverbud</strong><br />
<strong>Activity</strong> <strong>Book</strong> B<br />
Produced by: Kim Drolshagen, Michelle Grimm and Michelle Schroeder, 2010<br />
“An EEO/Affirmative Action employer, <strong>University</strong> <strong>of</strong> Wisconsin-Extension provides equal opportunities in employment and programming, including Title IX and<br />
ADA. Please make requests for reasonable accommodations to ensure equal access to educational programs as early as possible preceding the scheduled<br />
program, service, or activity. This document can be provided in an alternative formation by calling UW-Extension at 715-/748-3327 or 711 for Wisconsin Relay.”
• My 4-H Club p. 3<br />
• A Little Bit About Me p. 4<br />
• About 4-H p. 5<br />
• 4-H Pledge p. 6<br />
• My Club and <strong>County</strong> Activities & Events p. 7<br />
• Animal Ears p. 8<br />
• Feathered Friends p. 9<br />
• Which Birds Have You Seen? p. 10<br />
• Time to Explore on a Nature Hike p. 11<br />
• Operation Espionage p. 12<br />
• Music Time! p. 13<br />
• Straw-Blown Painting p. 14<br />
• Quilt Squares p. 15-18<br />
• Fruity Milkshake p. 19<br />
• Five a Day p. 20-21<br />
• Take Off! p. 22-24<br />
• Sound Vibrations p. 25<br />
• Fly a Kite p. 26<br />
• Nature Rubbings P. 27<br />
• Growing with Groundwater p. 28<br />
• What Do Seeds Need? P. 29<br />
• References p. 30<br />
2
My 4-H Club<br />
My Name: ______________________________________<br />
4-H Club Name: _________________________________<br />
4-H Leader’s Name: ______________________________<br />
Phone Number:____________________________<br />
Other Club Members: _____________________________<br />
______________________________________________<br />
4-H Youth Development Agent’s Name:________________<br />
Phone Number:____________________________<br />
3
Place<br />
Your<br />
Picture<br />
Here<br />
Name:_______________________________<br />
Age:______________<br />
My Family members: ______________________________<br />
______________________________________________<br />
______________________________________________<br />
My favorite activities:_____________________________<br />
______________________________________________<br />
______________________________________________<br />
4
4-H Club Emblem<br />
The four leaf clover with the<br />
letter “H” on each leaf, which<br />
stands for head, heart, hands<br />
and health.<br />
4-H Club Colors<br />
Green and White. Green<br />
symbolizes nature’s most common<br />
color. White symbolizes purity.<br />
4-H Motto<br />
“TO MAKE THE BEST BETTER”<br />
This motto challenges everyone<br />
involved in 4-H to do the very best<br />
job they can.<br />
5
I pledge:<br />
4-H Pledge<br />
My Head to Clearer Thinking (Right hand points to forehead)<br />
My Heart to Greater Loyalty (Right hand over heart)<br />
My Hands to Larger Service (Arms slightly bent, palms up)<br />
And My Health to Better Living for My Club,<br />
My Community, My Country and My World (Arms at Side)<br />
6
My Club and <strong>County</strong><br />
Activities and Events<br />
Activities and events I was part <strong>of</strong>:<br />
Event Date<br />
7
Animal Ears<br />
Have you ever noticed that animals have larger ears than us?<br />
Animals, such as dogs, have much better hearing than we do.<br />
What do you think it would be like if you had animal<br />
ears?_____________________________________<br />
Do you think you would be able to hear better or worse?<br />
____________ Why do you think so?_________________<br />
Let’s make animal ears!<br />
Animal Sciences<br />
Animal Life<br />
Materials: Paper or Styr<strong>of</strong>oam Cups<br />
Scissors<br />
Procedure:<br />
1. Using the scissors, cut the bottoms out <strong>of</strong> 2 cups.<br />
2. Hold the smaller end <strong>of</strong> the cups up to your ears.<br />
3. Have someone whisper, make a loud noise, talk and sing<br />
while using your “animal ears.”<br />
4. Try placing your ears in different directions to see how<br />
the sound changes.<br />
Did the sound change as the direction <strong>of</strong> the ears changed?<br />
________ How did the sound change? Did it get louder or<br />
quieter? _______________________________________<br />
Could you hear better with the cups on? _______________<br />
8
Feathered Friends<br />
Birds are our feathered friends. We can see different birds<br />
outside all year round. Different birds eat different things<br />
like, seeds, insects, worms, fruits and nectar.<br />
Can you name any birds you have seen before? ___________<br />
______________________________________________<br />
______________________________________________<br />
Let’s make a bird feeder!<br />
Materials: Bagel, cut in half so there are two circles<br />
Peanut Butter<br />
Bird Seed<br />
String<br />
Plastic Knife<br />
Newspaper<br />
Paper Plate<br />
Procedure:<br />
1. Spread newspaper over your table and place some bird<br />
seed on the paper plate.<br />
2. Tie a string to your bagel so it can be hung outside.<br />
3. Using the plastic knife, cover the bagel with peanut<br />
butter.<br />
4. Dip the bagel in the bird seed making sure all <strong>of</strong> the<br />
peanut butter is covered.<br />
5. Find a good tree branch outside to hang your bird feeder<br />
on.<br />
6. Watch for birds!<br />
Animal Sciences<br />
Animal Life<br />
9
Which Birds Have<br />
You Seen?<br />
Watch your bird feeder and go for a nature hike and check<br />
any birds you see!<br />
American<br />
Goldfinch<br />
Blue Jay<br />
White Breasted<br />
Nuthatch<br />
Northern<br />
Cardinal<br />
Black-Capped<br />
Chickadee<br />
American Robin<br />
Animal Sciences<br />
Animal Life<br />
10
Animal Sciences<br />
Time to Explore on a<br />
Animal Life<br />
Nature Hike<br />
Let’s explore nature by searching for animals!<br />
With some friends and an adult, go on a nature hike and see how many<br />
animals you can find. Watch the animals and see what they are doing.<br />
Are they eating or sleeping?<br />
Make sure to bring a camera to take pictures or a pencil and paper so<br />
you can draw the animals you see!<br />
Draw a picture <strong>of</strong> some animals you saw here.<br />
On my hike I saw a _____________.<br />
Describe what it looked like. ______________________________<br />
____________________________________________________<br />
Where did you see it? ___________________________________<br />
What was it doing? _____________________________________<br />
11
Expressive Arts<br />
Operation Espionage<br />
It’s time for some detective work!<br />
The mission today is to write a secret message and then reveal it.<br />
Materials: 1 teaspoon Baking Soda<br />
1 teaspoon Water<br />
Grape Juice Concentrate<br />
Cotton Swab<br />
Cotton Ball<br />
Bowl<br />
Paper or Plastic Cups<br />
Paper<br />
Paper Towel<br />
Procedure:<br />
1. In a cup, mix 1 teaspoon baking soda with 1 teaspoon water. This<br />
is the invisible ink.<br />
2. On a sheet <strong>of</strong> white paper, draw a picture using the invisible ink<br />
and a cotton swab by dipping the cotton swab into the ink.<br />
3. Let the paper dry completely (this will take around ten minutes.)<br />
4. Time to reveal the secret message! Place some grape juice<br />
concentrate into a cup. Dip the cotton ball into the grape juice<br />
concentrate making sure to squeeze out the extra juice. Gently<br />
pat the cotton ball over the paper.<br />
What happened to the message when it dried? _________________<br />
Did your message appear? ________________________________<br />
What color is the message? _______________________________<br />
Try using other liquids such as cranberry juice, colored water and<br />
apple juice to decipher your secret message! Did any <strong>of</strong> these liquids<br />
work? _______________________<br />
12<br />
Adapted from: Operation Espionage. PBS Kids Zoom Sci http://pbskids.org/zoom/activities/sci/
Music Time!<br />
Let’s gather a band and make some music!<br />
Shaker<br />
Expressive Arts<br />
Materials: Empty Plastic Bottle with Lid<br />
Beads, Pebbles or Uncooked Rice<br />
Procedure:<br />
1. Place the beads, pebbles or uncooked rice into the plastic bottle<br />
and screw the lid on.<br />
2. Try using different sized bottles and different items inside to see<br />
if the sound changes!<br />
Finger Plinker<br />
Materials: Shoebox with Lid<br />
Scissors<br />
Different Sized Rubber Bands<br />
Procedure:<br />
1. Cut a circle out <strong>of</strong> the middle <strong>of</strong> the shoe box lid using the<br />
scissors.<br />
2. Place the lid on the shoe box and place the rubber bands around it<br />
so they cover the hole in the lid.<br />
3. Play by plucking or strumming the rubber bands. Do the different<br />
sized rubber bands make different sounds?<br />
Paper Plate Maraca<br />
Materials: Paper Plates<br />
Staples or Glue<br />
Dried Beans or Small Rocks<br />
Paints or Markers<br />
Procedure:<br />
1. Place some beans or small rocks between two paper plates.<br />
2. Secure the paper plates by gluing or stapling around the edges.<br />
3. Decorate and shake! Do dried beans sound different than rocks? 13
Expressive Arts<br />
Straw-Blown Painting<br />
Let’s create a masterpiece!<br />
Materials: A Rimmed Baking Sheet<br />
Aluminum Foil<br />
White Paper<br />
Tempera Paint or Watercolor Paint<br />
A Cup <strong>of</strong> Water<br />
Plastic Straw<br />
Procedure:<br />
1. Line the baking sheet with aluminum foil and place the<br />
white paper on the sheet.<br />
2.Pour tiny puddles <strong>of</strong> paint in a couple spots on the paper.<br />
Add a few drops <strong>of</strong> water to the paint to help it spread a<br />
little easier.<br />
3.Take the straw and blow through it on the different<br />
puddles. Try blowing hard, s<strong>of</strong>t and in different<br />
directions to see what happens.<br />
4.Lay the painting flat and allow to dry.<br />
14
Quilt Squares<br />
Quilts tell art and family stories. Most quilts are made from pieces <strong>of</strong> fabric or<br />
material that is cut into shapes. These shapes are sewn together to make quilt<br />
blocks. The blocks are then sewn together to make a quilt.<br />
Let’s make our initials in a quilt square!<br />
Materials: 2 – 6”x6” Pieces <strong>of</strong> White Poster Board<br />
Several Colors <strong>of</strong> Construction Paper or Craft Foam<br />
Square Shape Patterns<br />
Triangle Shape Patterns<br />
Glue Stick<br />
Scissors<br />
Pencil<br />
Hole Punch<br />
Yarn<br />
Procedure:<br />
1. Find the quilt square on the Quilt Squares <strong>Activity</strong> Page that matches the<br />
first letter <strong>of</strong> your first name. Choose the shapes from patterns that are<br />
in this quilt square.<br />
2. Use the scissors to cut out the shape patterns that you need to make your<br />
first quilt square.<br />
3. Trace the shape patterns onto any color <strong>of</strong> construction paper or craft<br />
foam.<br />
4. Use the scissors to cut out the shapes you traced.<br />
5. Glue the shapes onto one <strong>of</strong> the pieces <strong>of</strong> poster board. Be sure to make<br />
your quilt square look the same as the quilt square for the first letter <strong>of</strong><br />
your name. Set this quilt square aside.<br />
6. Repeat these steps for the first letter <strong>of</strong> your last name.<br />
7. Using the hole punch, punch 3 holes in the bottom <strong>of</strong> your first quilt<br />
square and 3 holes in the top <strong>of</strong> your second square (first letter <strong>of</strong> last<br />
name.)<br />
8. Use yarn to tie the two squares together by tying a loop through each set<br />
<strong>of</strong> holes.<br />
9. Punch 2 holes in the top <strong>of</strong> your first quilt square.<br />
10.Use yarn to make a hanger for your quilt square initials.<br />
Adapted from: Mini 4-H Before You Sew. By: Roylene Laswell. Purdue <strong>University</strong> Extension Service.<br />
Family, Home and Health<br />
15
Adapted from: Mini 4-H Before You Sew. By: Roylene Laswell. Purdue <strong>University</strong> Extension Service.<br />
Family, Home and Health<br />
16
Adapted from: Mini 4-H Before You Sew. By: Roylene Laswell. Purdue <strong>University</strong> Extension Service.<br />
Family, Home and Health<br />
17
Adapted from: Mini 4-H Before You Sew. By: Roylene Laswell. Purdue <strong>University</strong> Extension Service.<br />
Family, Home and Health<br />
18
Fruity Milkshake<br />
Let’s make a delicious and nutritious snack!<br />
Make sure to ask an adult for help!<br />
Family, Home and Health<br />
Ingredients: 2 Cups Skim or Low-Fat Milk<br />
1 Cup Diced Fruit such as Apples, Pears,<br />
Strawberries, Bananas, Peaches, Berries or<br />
Melon<br />
Dash <strong>of</strong> Ground Cinnamon<br />
Equipment: Blender<br />
Liquid Measuring Cups<br />
Dry Measuring Cups<br />
Measuring Spoons<br />
Cups<br />
Procedure:<br />
1. Wash your hands with warm water and soap.<br />
2.In a blender, combine milk and fruit.<br />
3.Blend until smooth.<br />
4.Pour into cups and top with a dash <strong>of</strong> ground cinnamon<br />
5.Enjoy!<br />
Can you think <strong>of</strong> any other fruits you could add to your<br />
smoothie? ______________________________________<br />
Adapted from: Fruity Milkshake. Kangaroo Jump 5: Power Up the Day Family Newsletter. Michigan State <strong>University</strong> Extension<br />
19
Five a Day<br />
Family, Home and Health<br />
It is important to get 3 servings <strong>of</strong> vegetables and 2 servings<br />
<strong>of</strong> fruit every day.<br />
Complete the My Fruit and Vegetable Diary to see if you can<br />
get five servings <strong>of</strong> fruits and vegetables a day!<br />
What types <strong>of</strong> fruits could you try? ___________________<br />
______________________________________________<br />
What types <strong>of</strong> vegetables could you try? _______________<br />
______________________________________________<br />
How many serving <strong>of</strong> fruits and vegetables do you need every<br />
day? __________________________<br />
Adapted from: Lesson 3 Vary Your Veggies and Focus on Fruits. “Make a Fruit and Vegetable Diary.” USDA Team Nutrition.<br />
MyPyramid. http://teamnutrition.usda.gov/resources/mpk1_lesson3.pdf<br />
20
Take<strong>of</strong>f!<br />
Construct 2 different paper airplanes to see which<br />
one travels farther!<br />
Materials: 8 ½” x 11” sheets <strong>of</strong> paper<br />
Paper Clips<br />
Simple Airplane Template and Dart Paper<br />
Airplane Template<br />
Measuring Tape<br />
Pencil<br />
Procedure:<br />
1. Construct one airplane using the Simple Airplane<br />
Template and one airplane using the Dart Paper Airplane<br />
Template.<br />
2.Test each airplane by gliding it. Measure the distance<br />
they traveled and record them on a sheet <strong>of</strong> paper. Test<br />
each plane three times to compare the results.<br />
3.Try adding a paper clip to each plane’s nose.<br />
4.Retest each airplane by gliding it. Measure the distance<br />
they traveled and record them on a sheet <strong>of</strong> paper.<br />
Which paper airplane design traveled farther? ___________<br />
Did adding the paper clip change the distance the plane<br />
traveled? ______________________________________<br />
Adapted from: Family Flyers – 4-H Aerospace Lesson. ACTas112. <strong>University</strong> <strong>of</strong> Wisconsin Extension.<br />
22<br />
Science
Adapted from: Family Flyers – 4-H Aerospace Lesson. ACTas112. <strong>University</strong> <strong>of</strong> Wisconsin Extension.<br />
23<br />
Science
Adapted from: Family Flyers – 4-H Aerospace Lesson. ACTas112. <strong>University</strong> <strong>of</strong> Wisconsin Extension.<br />
24<br />
Science
Sound Vibrations<br />
Construct string telephones to hear sound travel.<br />
Sound is a vibration moving through air, water, or some other<br />
material. Our ear collects these vibrations and turns them into a<br />
signal which is sent to our brain.<br />
Science<br />
Materials: 2 Plastic Cups<br />
String<br />
Paper Clips<br />
Sharpened Pencil (For Poking Holes)<br />
Procedure:<br />
1. Carefully poke a small hole in the bottom <strong>of</strong> each cup using the<br />
pencil.<br />
2. Tie the paper clip to one end <strong>of</strong> the string.<br />
3. Thread the other end <strong>of</strong> the string through the hole in the inside<br />
bottom <strong>of</strong> the cup. The paperclip will keep the string from going<br />
all the way through the hole.<br />
4. Then thread the string through the hole in the second cup, but<br />
do it from the outside <strong>of</strong> the cup.<br />
5. Tie the second paper clip to the other end <strong>of</strong> the string. The<br />
paper clip should be inside just like the first cup.<br />
6. Then, pull the cups so the string is tight and have another person<br />
hold the other cup. Talk to the person while they have the cup<br />
held to their ear.<br />
What is the farthest distance you can get the telephone to work?<br />
____________________________________________________<br />
Try using soup cans or different sized cups to see if your telephones<br />
work farther apart.<br />
Adapted from: String Telephone. PBS Kids – Zoom Sci http://pbskids.org/zoom/activities/sci/<br />
25
Fly a Kite<br />
Let’s build a kite!<br />
Science<br />
Materials: Colored 11” x 17” Paper<br />
Tape<br />
Ruler<br />
Pencil<br />
Popsicle Stick<br />
Hole Punch<br />
6 to 10 Feet <strong>of</strong> String or Yarn<br />
Plastic Bag Cut in 1” Spiral or Streamers<br />
Crayons or Markers<br />
Procedure:<br />
1. Place your paper horizontally on the table with the long ends on<br />
top and bottom.<br />
2. Fold in half taking the left side to the right side. Leave the<br />
paper folded.<br />
3. From the folded edge at the top, measure in ½” and mark this<br />
spot. From the opposite end at the bottom, measure in 3” and<br />
mark this spot. Draw a line to connect these two marks.<br />
4. Fold along this line from right to left and then left to right to<br />
make a crease for both wings. Pinching the first fold (the<br />
straight fold) open up both wings and place a tape along the fold<br />
to hold in place.<br />
5. Turn your paper slightly to where the point is at top and the<br />
angled fold is straight up and down. Take your stick and tape<br />
across the top <strong>of</strong> the wings <strong>of</strong> the kite.<br />
6. Turning the kite over, punch a hole about 1/3 <strong>of</strong> the way down<br />
from the top and about ½ “ from the fold. Secure the hole with<br />
tape or a paper reinforcement. Tie your string or yarn through<br />
the hole. You can tape the end <strong>of</strong> the string to a popsicle stick<br />
for a handle.<br />
7. Lastly, cut a tape the spiraled plastic bag to create a tail for<br />
26<br />
your kite. Decorate your kite and take it out to fly.
Nature Rubbings<br />
Living things all have texture. By making nature rubbings you can see<br />
things you may not have otherwise noticed. When you make a rubbing<br />
<strong>of</strong> a leaf, the veins, stem and shape stand out. You can also compare<br />
the texture <strong>of</strong> items by making rubbings <strong>of</strong> them.<br />
Let’s observe nature!<br />
Natural Resources<br />
Materials: Newspaper<br />
Crayons (With Paper Peeled Off)<br />
Fresh Leaves, Wild Flowers, Weeds, Grasses, Twigs or<br />
Reeds<br />
White Paper<br />
Procedure:<br />
1. Go on a nature walk and collect some leaves, wild flowers, weeds,<br />
grasses, twigs or reeds.<br />
2. Spread newspaper onto the work area.<br />
3. Place your findings onto the newspaper.<br />
4. Place the paper on top <strong>of</strong> the leaves or wildflowers you would like<br />
to make rubbings <strong>of</strong>.<br />
5. Hold the crayon sideways and rub over the objects.<br />
6. Watch the leaves and wildflowers appear as you rub the crayon<br />
over them.<br />
7. Try making different patterns by arranging the materials in rows<br />
or circles.<br />
8. Now, let’s go outside with our paper and crayon and make<br />
rubbings from surfaces such as brick walls, tree trunks or<br />
anything else with texture!<br />
27
Natural Resources<br />
Growing with Groundwater<br />
Plants need water to grow, and it comes from precipitation and<br />
groundwater. We are going to build a miniature terrarium that will<br />
allow our plants to grow using groundwater as the source <strong>of</strong> water.<br />
Time to plant!<br />
Materials: Clear Jar with Lid<br />
Gravel<br />
Potting Soil<br />
Spray Bottle Filled with Water<br />
Plant Seeds (Herbs or Vegetables Grow Quickly)<br />
Large Spoon or Trowel<br />
Procedure:<br />
1. Fill the bottom <strong>of</strong> your jar with 1 to 2 inches <strong>of</strong> gravel and add<br />
about 4 inches <strong>of</strong> potting soil on top <strong>of</strong> the gravel.<br />
2. Plant the seeds as stated on the package.<br />
3. Water generously with a spray bottle. Watch as the water<br />
trickles down through the soil and into the gravel layer. The<br />
water you see below the surface <strong>of</strong> the soil is called groundwater<br />
and will be used by the seeds.<br />
4. Secure the lid and place in a sunny window. Over the next few<br />
days watch as the sides <strong>of</strong> the jar become foggy. This is<br />
condensation or clouds. As the water on the walls <strong>of</strong> the jar<br />
becomes heavy it will fall to the ground as rain and will become<br />
groundwater again.<br />
5. If your jar becomes too foggy, open the lid slightly for a day or<br />
two. If you leave the lid <strong>of</strong>f too long, the soil may dry out. If<br />
this happens just spray some more water in the jar.<br />
6. Watch your seeds grow!<br />
Adapted from: Growing with Groundwater. The Groundwater Foundation. http://www.groundwater.org/kc/activity4.html<br />
28
Natural Resources<br />
What Do Seeds Need?<br />
Plants just like humans need certain things to survive. The four<br />
things plants need to survive are water, sunlight, food and air.<br />
Let’s Experiment!<br />
Let’s experiment with the needs <strong>of</strong> seeds. We will try planting seeds<br />
and placing one to grow in the light and the other in a dark place.<br />
Which plant do you think will sprout more quickly the plant in the light<br />
or the plant in the dark? _________________________________<br />
What are the 4 things plants need to survive? _________________<br />
____________________________________________________<br />
Materials: 2 Plastic Cups or Pots<br />
Potting Soil<br />
Seeds<br />
Water<br />
Procedure:<br />
1. Fill the plastic cups or pots 2/3 full with potting soil.<br />
2. Plant the seeds according to the directions on the package.<br />
3. Water the seeds so the soil is damp.<br />
4. Place one cup or pot in a well lit area and the other in a dark area<br />
without light.<br />
5. Water regularly and watch them grow!<br />
What happened to the seed that was placed in the light? _________<br />
____________________________________________________<br />
What happened to the seed that was placed in the dark? _________<br />
____________________________________________________<br />
29
References<br />
• http://www.education.com/activity/<br />
• A great website for activity ideas.<br />
• 4-H Mini Before You Sew. By: Roylene Laswell. Purdue <strong>University</strong> Extension<br />
Service.<br />
• <strong>Cloverbud</strong>s Activities Packet. By: Richard Moreland and Lori K. Hutchins.<br />
<strong>University</strong> <strong>of</strong> Minnesota Extension Service.<br />
• <strong>Cloverbud</strong> Program Manual. Montana 4-H.<br />
http://www.montana4h.org/#project:53.<br />
• Science and Technology <strong>Activity</strong> Guide<br />
• Family Flyers – 4-H Aerospace Lesson. ACTas112. <strong>University</strong> <strong>of</strong> Wisconsin<br />
Extension.<br />
• Fruity Milkshake. Kangaroo Jump 5: Power Up the Day Family Newsletter.<br />
Michigan State <strong>University</strong> Extension<br />
• Growing with Groundwater. The Groundwater Foundation.<br />
http://www.groundwater.org/kc/activity4.html<br />
• Lesson 3 Vary Your Veggies and Focus on Fruits. “Make a Fruit and Vegetable<br />
Diary.” USDA Team Nutrition. MyPyramid.<br />
http://teamnutrition.usda.gov/resources/mpk1_lesson3.pdf<br />
• Operation Espionage. PBS Kids – Zoom Sci<br />
http://pbskids.org/zoom/activities/sci/<br />
30