Running the R4 Software on a USB Port - Split Second
Running the R4 Software on a USB Port - Split Second
Running the R4 Software on a USB Port - Split Second

You also want an ePaper? Increase the reach of your titles
YUMPU automatically turns print PDFs into web optimized ePapers that Google loves.
<str<strong>on</strong>g>Running</str<strong>on</strong>g> <str<strong>on</strong>g>the</str<strong>on</strong>g> <str<strong>on</strong>g>R4</str<strong>on</strong>g> <str<strong>on</strong>g>Software</str<strong>on</strong>g> <strong>on</strong> a <strong>USB</strong> <strong>Port</strong><br />
Tech Note<br />
Like a lot of o<str<strong>on</strong>g>the</str<strong>on</strong>g>r engine management software programs that have been around for a while, <str<strong>on</strong>g>the</str<strong>on</strong>g><br />
<str<strong>on</strong>g>R4</str<strong>on</strong>g> program is designed to communicate through a 9-pin serial communicati<strong>on</strong> port.<br />
Unfortunately, modern laptop computers no l<strong>on</strong>ger have serial ports. The easiest way to use <str<strong>on</strong>g>the</str<strong>on</strong>g><br />
<str<strong>on</strong>g>R4</str<strong>on</strong>g> program <strong>on</strong> a modern laptop is with a <strong>USB</strong>-to-serial adapter cable.<br />
<strong>USB</strong>-to-serial adapter cables are pretty comm<strong>on</strong> and are available at Radio Shack and o<str<strong>on</strong>g>the</str<strong>on</strong>g>r<br />
computer stores. Typical prices range from $20 to $40. There are several different<br />
manufacturers of <str<strong>on</strong>g>the</str<strong>on</strong>g>se cables. When selecting <strong>on</strong>e of <str<strong>on</strong>g>the</str<strong>on</strong>g>se cables, make sure that it comes with<br />
a software driver disc. In order to use <str<strong>on</strong>g>the</str<strong>on</strong>g> adapter cable, you must successfully install <str<strong>on</strong>g>the</str<strong>on</strong>g><br />
software driver that makes it work.<br />
To install <str<strong>on</strong>g>the</str<strong>on</strong>g> cable for use, begin by powering up <str<strong>on</strong>g>the</str<strong>on</strong>g> laptop with <str<strong>on</strong>g>the</str<strong>on</strong>g> cable unplugged. Let it<br />
boot up into Windows. When <str<strong>on</strong>g>the</str<strong>on</strong>g> boot-up sequence is complete, plug <str<strong>on</strong>g>the</str<strong>on</strong>g> <strong>USB</strong> c<strong>on</strong>nector <strong>on</strong> <str<strong>on</strong>g>the</str<strong>on</strong>g><br />
<strong>USB</strong>-to-serial cable into <strong>on</strong>e of <str<strong>on</strong>g>the</str<strong>on</strong>g> <strong>USB</strong> ports <strong>on</strong> <str<strong>on</strong>g>the</str<strong>on</strong>g> laptop. At this point, <str<strong>on</strong>g>the</str<strong>on</strong>g> 9-pin c<strong>on</strong>nector<br />
end of <str<strong>on</strong>g>the</str<strong>on</strong>g> adapter cable should be unplugged.<br />
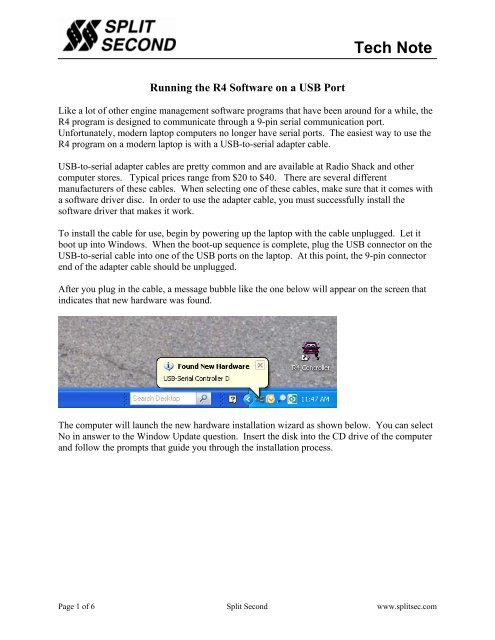
After you plug in <str<strong>on</strong>g>the</str<strong>on</strong>g> cable, a message bubble like <str<strong>on</strong>g>the</str<strong>on</strong>g> <strong>on</strong>e below will appear <strong>on</strong> <str<strong>on</strong>g>the</str<strong>on</strong>g> screen that<br />
indicates that new hardware was found.<br />
The computer will launch <str<strong>on</strong>g>the</str<strong>on</strong>g> new hardware installati<strong>on</strong> wizard as shown below. You can select<br />
No in answer to <str<strong>on</strong>g>the</str<strong>on</strong>g> Window Update questi<strong>on</strong>. Insert <str<strong>on</strong>g>the</str<strong>on</strong>g> disk into <str<strong>on</strong>g>the</str<strong>on</strong>g> CD drive of <str<strong>on</strong>g>the</str<strong>on</strong>g> computer<br />
and follow <str<strong>on</strong>g>the</str<strong>on</strong>g> prompts that guide you through <str<strong>on</strong>g>the</str<strong>on</strong>g> installati<strong>on</strong> process.<br />
Page 1 of 6 <strong>Split</strong> Sec<strong>on</strong>d www.splitsec.com
After going through <str<strong>on</strong>g>the</str<strong>on</strong>g> prompts, <str<strong>on</strong>g>the</str<strong>on</strong>g> computer will install <str<strong>on</strong>g>the</str<strong>on</strong>g> driver. When it is complete it will<br />
display <str<strong>on</strong>g>the</str<strong>on</strong>g> following message.<br />
During <str<strong>on</strong>g>the</str<strong>on</strong>g> installati<strong>on</strong> process, <str<strong>on</strong>g>the</str<strong>on</strong>g> computer will assign a com port number for <str<strong>on</strong>g>the</str<strong>on</strong>g> driver.<br />
Before you can use <str<strong>on</strong>g>the</str<strong>on</strong>g> driver you have to make sure that <str<strong>on</strong>g>the</str<strong>on</strong>g> com port setting that was assigned<br />
is between 1 and 8. The <str<strong>on</strong>g>R4</str<strong>on</strong>g> program can <strong>on</strong>ly work with com ports within that range. To<br />
determine <str<strong>on</strong>g>the</str<strong>on</strong>g> assigned com port you will have to go to <str<strong>on</strong>g>the</str<strong>on</strong>g> device manager <strong>on</strong> <str<strong>on</strong>g>the</str<strong>on</strong>g> computer.<br />
To access <str<strong>on</strong>g>the</str<strong>on</strong>g> device manager, click <str<strong>on</strong>g>the</str<strong>on</strong>g> Start butt<strong>on</strong> and C<strong>on</strong>trol Panel. Select <str<strong>on</strong>g>the</str<strong>on</strong>g> Classic View<br />
and click <strong>on</strong> System. This should bring up <str<strong>on</strong>g>the</str<strong>on</strong>g> System Properties screen as shown below.<br />
Page 2 of 6 <strong>Split</strong> Sec<strong>on</strong>d www.splitsec.com
Click <strong>on</strong> <str<strong>on</strong>g>the</str<strong>on</strong>g> Hardware tab and <str<strong>on</strong>g>the</str<strong>on</strong>g> Device Manager butt<strong>on</strong>. This will bring up a list of <str<strong>on</strong>g>the</str<strong>on</strong>g><br />
installed comp<strong>on</strong>ents <strong>on</strong> your computer. Look for <str<strong>on</strong>g>the</str<strong>on</strong>g> <strong>Port</strong>s (COM & LPT) entry. These entries<br />
are listed in alphabetical order. Double click <strong>on</strong> <str<strong>on</strong>g>the</str<strong>on</strong>g> <strong>Port</strong>s listing to expand and view <str<strong>on</strong>g>the</str<strong>on</strong>g> installed<br />
port drivers. The example below shows <str<strong>on</strong>g>the</str<strong>on</strong>g> <strong>USB</strong>-to-serial driver as ATEN <strong>USB</strong> to Serial Bridge<br />
(COM15). Your driver listing should show <str<strong>on</strong>g>the</str<strong>on</strong>g> name of your <strong>USB</strong>-to-serial adapter<br />
manufacturer.<br />
Page 3 of 6 <strong>Split</strong> Sec<strong>on</strong>d www.splitsec.com
Note that we have circled COM15 in red. We did that to draw your attenti<strong>on</strong> to <str<strong>on</strong>g>the</str<strong>on</strong>g> way that <str<strong>on</strong>g>the</str<strong>on</strong>g><br />
com port number is shown. Because <str<strong>on</strong>g>the</str<strong>on</strong>g> assigned com port is above 8, we will have to change it.<br />
Double click <strong>on</strong> <str<strong>on</strong>g>the</str<strong>on</strong>g> line showing your <strong>USB</strong>-to-serial driver. This will bring up a Properties<br />
window. Click <strong>on</strong> <str<strong>on</strong>g>the</str<strong>on</strong>g> <strong>Port</strong> Settings tab and <str<strong>on</strong>g>the</str<strong>on</strong>g> Advanced butt<strong>on</strong>.<br />
In this window you will see a com port number pull-down menu. We have clicked that in <str<strong>on</strong>g>the</str<strong>on</strong>g><br />
following screen shot to show <str<strong>on</strong>g>the</str<strong>on</strong>g> selecti<strong>on</strong> process. Select a com port between 1 and 8 that is<br />
not currently in use. For our example we are going to select com 4.<br />
Page 4 of 6 <strong>Split</strong> Sec<strong>on</strong>d www.splitsec.com
Once you have selected <str<strong>on</strong>g>the</str<strong>on</strong>g> desired com port setting, click OK twice to go back to <str<strong>on</strong>g>the</str<strong>on</strong>g> device<br />
manager screen. You can close <str<strong>on</strong>g>the</str<strong>on</strong>g> device manage and open it again to verify that <str<strong>on</strong>g>the</str<strong>on</strong>g> new com<br />
port selecti<strong>on</strong> is active.<br />
Now that <str<strong>on</strong>g>the</str<strong>on</strong>g> desired com port is set in <str<strong>on</strong>g>the</str<strong>on</strong>g> computer, we need to match that setting in <str<strong>on</strong>g>the</str<strong>on</strong>g> <str<strong>on</strong>g>R4</str<strong>on</strong>g><br />
program. Launch <str<strong>on</strong>g>the</str<strong>on</strong>g> <str<strong>on</strong>g>R4</str<strong>on</strong>g> program and open <str<strong>on</strong>g>the</str<strong>on</strong>g> file that you would like to use. Click <str<strong>on</strong>g>the</str<strong>on</strong>g> com<br />
port pull-down arrow and select <str<strong>on</strong>g>the</str<strong>on</strong>g> correct com port number. The com port in our example is<br />
com 4 as shown below.<br />
The <str<strong>on</strong>g>R4</str<strong>on</strong>g> program defaults to com 1 so that is <str<strong>on</strong>g>the</str<strong>on</strong>g> most c<strong>on</strong>venient com port number to use. If you<br />
wind up using ano<str<strong>on</strong>g>the</str<strong>on</strong>g>r com port number, you will have to select it each time you open a file and<br />
c<strong>on</strong>nect to <str<strong>on</strong>g>the</str<strong>on</strong>g> ECU in <str<strong>on</strong>g>the</str<strong>on</strong>g> <str<strong>on</strong>g>R4</str<strong>on</strong>g> program.<br />
Page 5 of 6 <strong>Split</strong> Sec<strong>on</strong>d www.splitsec.com
Once you have selected <str<strong>on</strong>g>the</str<strong>on</strong>g> correct com port, turn <strong>on</strong> <str<strong>on</strong>g>the</str<strong>on</strong>g> vehicle igniti<strong>on</strong> to power up <str<strong>on</strong>g>the</str<strong>on</strong>g><br />
programmable unit. Plug in <str<strong>on</strong>g>the</str<strong>on</strong>g> serial c<strong>on</strong>nector and click <strong>on</strong> <str<strong>on</strong>g>the</str<strong>on</strong>g> C<strong>on</strong>nect to ECU ic<strong>on</strong>. When<br />
you are successfully c<strong>on</strong>nected, <str<strong>on</strong>g>the</str<strong>on</strong>g> C<strong>on</strong>nect to ECU ic<strong>on</strong> will become inactive and <str<strong>on</strong>g>the</str<strong>on</strong>g><br />
Disc<strong>on</strong>nect from ECU ic<strong>on</strong> will become active.<br />
Always plug in <str<strong>on</strong>g>the</str<strong>on</strong>g> serial c<strong>on</strong>nector just before c<strong>on</strong>necting to <str<strong>on</strong>g>the</str<strong>on</strong>g> ECU. Also unplug <str<strong>on</strong>g>the</str<strong>on</strong>g> cable<br />
immediately after clicking <str<strong>on</strong>g>the</str<strong>on</strong>g> Disc<strong>on</strong>nect from ECU ic<strong>on</strong>. This will avoid data communicati<strong>on</strong><br />
issues while <str<strong>on</strong>g>the</str<strong>on</strong>g> <str<strong>on</strong>g>R4</str<strong>on</strong>g> program is not c<strong>on</strong>nected.<br />
Page 6 of 6 <strong>Split</strong> Sec<strong>on</strong>d www.splitsec.com