FGKT 983/984 - Zupin
FGKT 983/984 - Zupin
FGKT 983/984 - Zupin

Create successful ePaper yourself
Turn your PDF publications into a flip-book with our unique Google optimized e-Paper software.
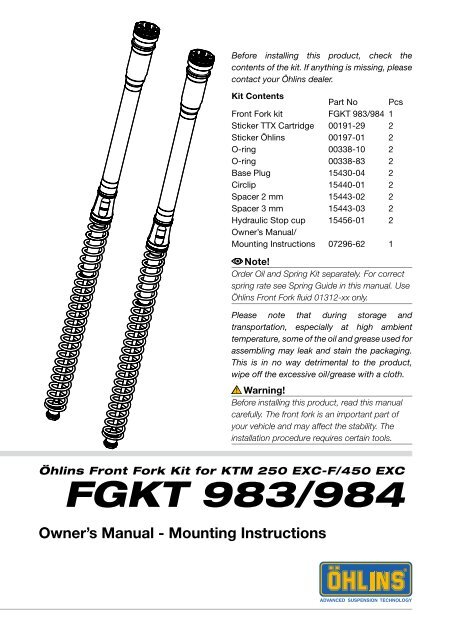
Before installing this product, check the<br />
contents of the kit. If anything is missing, please<br />
contact your Öhlins dealer.<br />
Kit Contents<br />
Part No Pcs<br />
Front Fork kit <strong>FGKT</strong> <strong>983</strong>/<strong>984</strong> 1<br />
Sticker TTX Cartridge 00191-29 2<br />
Sticker Öhlins 00197-01 2<br />
O-ring 00338-10 2<br />
O-ring 00338-83 2<br />
Base Plug 15430-04 2<br />
Circlip 15440-01 2<br />
Spacer 2 mm 15443-02 2<br />
Spacer 3 mm 15443-03 2<br />
Hydraulic Stop cup<br />
Owner’s Manual/<br />
15456-01 2<br />
Mounting Instructions 07296-62 1<br />
Note!<br />
Order Oil and Spring Kit separately. For correct<br />
spring rate see Spring Guide in this manual. Use<br />
Öhlins Front Fork fluid 01312-xx only.<br />
Please note that during storage and<br />
transportation, especially at high ambient<br />
temperature, some of the oil and grease used for<br />
assembling may leak and stain the packaging.<br />
This is in no way detrimental to the product,<br />
wipe off the excessive oil/grease with a cloth.<br />
Warning!<br />
Before installing this product, read this manual<br />
carefully. The front fork is an important part of<br />
your vehicle and may affect the stability. The<br />
installation procedure requires certain tools.<br />
Öhlins Front Fork Kit for KTM 250 EXC-F/450 EXC<br />
<strong>FGKT</strong> <strong>983</strong>/<strong>984</strong><br />
Owner’s Manual - Mounting Instructions
Safety Precautions<br />
Note!<br />
The front fork is a very important part of the<br />
vehicle and will therefore affect the stability.<br />
Read and make sure that you understand the<br />
information in this manual and the mounting<br />
instructions before you use this product. If you<br />
have any questions regarding installation or<br />
maintenance please contact your Öhlins dealer.<br />
Öhlins Racing AB can not be held<br />
responsible for any damage to the front fork,<br />
vehicle, other property or injury to persons, if the<br />
instructions for installing and maintenance are<br />
not followed exactly.<br />
Warning!<br />
This product was developed and designed<br />
exclusively for a specific vehicle model and<br />
should only be installed on the intended vehicle<br />
model in its original condition as delivered from<br />
the vehicle manufacturer.<br />
This product contains pressurized nitrogen<br />
gas (N 2 ). Do not open, service or modify this<br />
product without proper education (authorized<br />
Öhlins dealer/distributor) and proper tools.<br />
After installing this product, take a test ride at<br />
low speed to make sure that your vehicle has<br />
maintained its stability.<br />
If the suspension makes an abnormal noise,<br />
or the function is irregular, or if you notice any<br />
leakage from the product, please stop the<br />
vehicle immediately and return the product to an<br />
Öhlins Service Centre.<br />
Note!<br />
When working on this product, always consult<br />
your Vehicle Service Manual.<br />
This Manual should be considered as a part<br />
of the product and should therefore accompany<br />
the product throughout its life cycle.<br />
1<br />
Safety Symbols<br />
In this manual, mounting instructions and<br />
other technical documents, important<br />
information concerning safety is<br />
distinguished by the following symbols:<br />
The Safety Alert Symbol means: Warning!<br />
Your safety is involved.<br />
Warning!<br />
The Warning Symbol means: Failure to<br />
follow warning instructions can result in<br />
severe or fatal injury to anyone working with,<br />
inspecting or using the front fork, or<br />
to bystanders.<br />
Caution!<br />
The Caution Symbol means: Special<br />
precautions must be taken to avoid damage<br />
to the front fork.<br />
Note!<br />
The Note Symbol indicates information that<br />
is important regarding procedures.<br />
© Öhlins Racing AB. All rights reserved. Any<br />
reprinting or unauthorized use without the written<br />
permission of Öhlins Racing AB is prohibited.<br />
Printed in Sweden.
In This Manual<br />
Recommended Tools 2<br />
How to Install 3<br />
Replace Spring 6<br />
Set-up 7<br />
Set-up Data 8<br />
Spring Preload 8<br />
Adjustments 9<br />
Oil Volume - Force Diagram 9<br />
Spring Guide 10<br />
Inspection and Maintenance 10<br />
Recommended Tools<br />
Standard OEM Top Cap Tool<br />
Socket 21 mm (Bottom Plug)<br />
Socket 12 mm (Shaft end Adjuster Housing)<br />
Pliers (for the security snapring)<br />
Tool 01890-01 Plug<br />
2<br />
Contents
How to Install<br />
Remove the fork legs from the vehicle<br />
Warning!<br />
It is advisable to have an Öhlins dealer install the<br />
front fork kit.<br />
When installing, consult your Vehicle Service<br />
Manual.<br />
1<br />
Put the motorcycle on a workstand so that<br />
the front wheel barely touches the ground.<br />
Warning!<br />
Make sure the vehicle is securely supported so<br />
that it will not tip.<br />
2<br />
Remove the front wheel and the brake caliper.<br />
3<br />
Measure the distance from the top of the<br />
fork leg to the top of the upper triple clamp<br />
according to figure.<br />
Note!<br />
Note this dimension as fork height position.<br />
4<br />
Loosen the upper triple clamp by loosening<br />
the screws.<br />
5<br />
Loosen (but not remove) the top cap 1/2 turn.<br />
Use a standard tool from the motorcycle<br />
manufacturer.<br />
6<br />
Loosen the lower triple clamp by loosening<br />
the screws.<br />
7<br />
Remove the front fork legs from the<br />
motorcycle.<br />
8<br />
Clean the fork legs thoroughly. Make sure to<br />
clean underneath the fork bottoms.<br />
3<br />
Upper triple clamp<br />
Lower triple clamp<br />
Front leg cover<br />
2<br />
Front<br />
wheel<br />
3<br />
Top cap<br />
5<br />
1<br />
4<br />
6<br />
2<br />
Brake<br />
caliper
Disassemble the original front fork<br />
9<br />
Follow your vehicle service manual to remove<br />
the original front fork kit from the fork leg.<br />
Turn the fork leg upside down to pour out the<br />
oil. Make sure that the fork spring does not<br />
fall out.<br />
Install the Öhlins front fork kit<br />
10<br />
Smear some red grease or similar on the<br />
o-rings and install them onto the base plug<br />
according to figure.<br />
11<br />
Install the hydraulic stop cup from the upper<br />
end of the fork tube. Clean contact surfaces<br />
between the hydraulic stop cup and fork<br />
bottom with contact cleaner.<br />
Caution!<br />
Make sure that the hydraulic stop cup is well<br />
seated before tightening.<br />
12<br />
Install and tighten the base plug into the<br />
fork bottom, use a 21 mm socket (tightening<br />
torque 45 Nm).<br />
Caution!<br />
If the hydraulic stop cup is turning, carefully use<br />
an impact machine.<br />
13<br />
Install the preload washer(s) 15443-xx<br />
(optional - see Set-up data, Spring preload),<br />
the recommended Öhlins spring (see Spring<br />
guide) and the cartridge kit into the standard<br />
fork leg.<br />
Note!<br />
The preload washers must be below the spring,<br />
at the bottom end of the fork leg.<br />
14<br />
Tighten the cartridge shaft end into the base<br />
plug by turning counter clockwise. Use a<br />
12 mm socket (tightening torque 18 Nm).<br />
4<br />
10<br />
12<br />
Base<br />
plug<br />
13<br />
Fork bottom<br />
How to Install<br />
O-ring 00338-83 O-ring 00338-10<br />
Fork leg<br />
14<br />
Preload<br />
washer<br />
(optional)<br />
Spring<br />
Cartridge shaft end/<br />
Base valve plug<br />
11<br />
Hydraulic<br />
stop cup<br />
Cartridge kit
How to Install<br />
15<br />
Install the security snap-ring at the shaft end<br />
groove according to figure.<br />
16<br />
Pour Öhlins Front Fork Fluid in the fork leg<br />
according to the recommended settings.<br />
17<br />
Tighten the Öhlins fork top cap gently. Use<br />
the standard top cap tool from the motorcycle<br />
manufacturer. Handtighten only!<br />
18<br />
Check and set the rebound and compression<br />
valves click positions according to the<br />
recommended settings in Set-up data.<br />
19<br />
Install the front fork legs into the triple<br />
clamps. Use, to begin with, the same height<br />
position as before. Tightening torque - see<br />
your Vehicle Service Manual.<br />
Reinstall the brake caliper and front<br />
wheel - make sure that all removed parts are<br />
reinstalled as they were before the installation<br />
of the Öhlins Front Fork Kit.<br />
Note!<br />
It is very important that the triple clamps are<br />
tightened to the correct torque. See your Vehicle<br />
Service Manual.<br />
5<br />
15<br />
17<br />
Security snapring<br />
Top cap tool
Replace Spring (only)<br />
1<br />
Follow steps 1-8 in chapter Remove the fork<br />
legs from the vehicle.<br />
2<br />
Remove the security snapring in the bottom<br />
of the fork with a pair of pliers.<br />
3<br />
Loosen the bottom end of the cartridge kit by<br />
turning clockwise.<br />
4<br />
Install the tool 01890-01 (oil plug) by pushing<br />
it into the fork bottom. The plug will keep the<br />
oil in the fork while changing the spring.<br />
5<br />
Remove the cartridge kit from the fork leg and<br />
change the spring. Note the preload washer<br />
(if any).<br />
Note!<br />
The preload washers must be below the spring,<br />
at the bottom end of the fork leg.<br />
6<br />
Install the cartridge kit into the fork leg and<br />
push out the oil plug tool 01890-01.<br />
7<br />
Tighten the shaft end (counter clockwise) into<br />
the fork bottom with tightening torque 18 Nm.<br />
8<br />
Install the security snapring.<br />
9<br />
Tighten the Öhlins fork top cap gently. Use<br />
the standard top cap tool from the motorcycle<br />
manufacturer. Maximum torque: 10 Nm.<br />
10<br />
Install the front fork legs into the triple<br />
clamps. Use, to begin with, the same height<br />
position as before. Tightening torque - see<br />
your Vehicle Service Manual. Reinstall the<br />
brake caliper and front wheel - make sure that<br />
all removed parts are reinstalled as they were<br />
before the installation of the Öhlins Kit.<br />
6<br />
2<br />
3<br />
5<br />
Fork leg<br />
Preload<br />
washer<br />
(optional)<br />
Security snapring<br />
Bottom end<br />
How to Install<br />
4<br />
Oil plug<br />
Spring<br />
Cartridge kit
Set-up<br />
Warning!<br />
Before riding, always ensure that the basic<br />
settings made by Öhlins are intact. Take notes,<br />
adjust in small steps and make only one<br />
adjustment at a time.<br />
Step 1<br />
Check Sag and Ride Height<br />
Note!<br />
The following procedure should be performed on<br />
a flat surface.<br />
1.<br />
2.<br />
3.<br />
4.<br />
5.<br />
6.<br />
Put the motorcycle on a workstand so<br />
that both wheels are off the ground and<br />
the suspension is unloaded.<br />
Mark, for example with a piece of tape, a<br />
point immediately above the rear wheel<br />
axle.<br />
Measure the distance from the marked<br />
point to a fixed point, for example the<br />
wheel axle. (See figure below: R1)<br />
Measure the distance from the bottom of<br />
the upper triple clamp to a fixed point, for<br />
example the front wheel axle. (F1)<br />
Put the motorcycle on the ground so<br />
that the front and the rear suspensions<br />
are slightly compressed. Repeat the<br />
measuring procedures. (R2 and F2)<br />
Sit on the motorcycle in normal riding<br />
position, properly outfitted in your riding<br />
gear. Repeat the measuring procedures.<br />
(R3 and F3)<br />
7<br />
Recommended Measures<br />
If no other recommendations are given in the<br />
Vehicle Manual follow the measures below:<br />
Free sag (R1-R2)<br />
Rear 30±10 mm<br />
Ride height (R1-R3), (F1-F3)<br />
Rear 100±10 mm<br />
Front 45±10 mm<br />
Step 2<br />
Adjust spring preload<br />
1. If your measurements differ significantly<br />
from the recommendations from the table<br />
above, adjust the spring preload. (See<br />
section Spring Preload in this manual).<br />
2. If the ride height still differs from the<br />
recomendations, you may need to change<br />
spring. Contact your Öhlins dealer for<br />
advise.<br />
Warning!<br />
Incorrect spring rate may produce a fork angle<br />
that is too steep or too flat. This in turn will give a<br />
tendency for over- or understeering, which could<br />
seriously affect the handling characteristics of<br />
the motorcycle.
Set-up Data<br />
Rebound damping 10 click<br />
Compression damping 15 click<br />
Spring preload 2 mm<br />
Oil volume for 250F 0,340 litre<br />
Oil volume for 450F 0,370 litre<br />
Set-up Data and Spring Preload<br />
Spring preload range -2 to 8 mm<br />
(can be adjusted by<br />
adding/removing<br />
washers 15443-xx)<br />
Oil volume range 0,330-0,400 litre<br />
Öhlins Front Fork fluid 01312-xx<br />
Measure Spring Preload<br />
Measure the spring preload according to the<br />
following steps;<br />
1. Measure A. Fork outer tube should be slid<br />
down to stop and cartridge pulled out to<br />
distinct stop (requires a force of about 30 kg).<br />
2. Measure B.<br />
3. Measure C.<br />
4. Calculate preload: Preload = B – A – C<br />
5. Adjust preload according to the desired<br />
value according to set-up data, by adding/<br />
removing preload washers below the spring.<br />
A<br />
B<br />
C<br />
8<br />
Fork springs may differ in length. Therefore<br />
we recommend you to check the preload on<br />
each fork leg and, if necessary, install preload<br />
washers to get the correct value. A negative<br />
preload of up to minus 2 mm is possible,<br />
since the top-out spring still gives a small<br />
compression on the main spring.<br />
Preload less than -2 mm will make the fork<br />
spring loose when the front wheel is off the<br />
ground, which increases wear inside the fork.<br />
Caution!<br />
Preload washers must be placed below the<br />
spring, otherwise they will restrict oil flow and the<br />
fork may break.
Adjustments<br />
Compression damping adjuster<br />
The compression adjuster is located at the top<br />
of the fork leg. Adjust by turning the slotted<br />
screw with a screwdriver.<br />
Rebound damping adjuster<br />
The rebound adjuster is located at the bottom<br />
of the fork leg. Adjust by turning the slotted<br />
screw with a screwdriver.<br />
To Reset<br />
The adjusters have a normal right hand<br />
thread. Turn the damping adjusters gently<br />
clockwise to fully closed (pos. zero [0]). To<br />
open, turn counter clockwise, and count<br />
the clicks until you reach the recommended<br />
number. For recommended clicks see Set-up<br />
data. Static sag can only be changed with<br />
softer or harder spring rate.<br />
Caution!<br />
Do not use too much force, delicate sealing<br />
surfaces can be damaged.<br />
Note!<br />
The total stroke of the front fork may differ<br />
from the original stroke, so that more or less<br />
of the steel tube will be visible when the fork is<br />
fully compressed.<br />
Diagram<br />
Force<br />
Oil volume - Force<br />
Stroke<br />
9<br />
Compression damping adjuster<br />
Rebound damping adjuster<br />
390cc<br />
370cc<br />
350cc<br />
330cc
Spring Guide<br />
Brand Rider’s weight* Spring Spring rate<br />
kg/pounds N/mm<br />
KTM 250 EXC-F 70/154 08765-41 4,1<br />
75/165 08765-41 4,1<br />
80/176 08765-43 4,3<br />
85/187 08765-43 4,3<br />
90/198 08765-45 4,5<br />
95/209 08765-47 4,7<br />
KTM 450 EXC 70/154 08765-43 4,3<br />
75/165 08765-45 4,5<br />
80/176 08765-47 4,7<br />
85/187 08765-47 4,7<br />
90/198 08765-49 4,9<br />
95/209 08765-51 5,1<br />
Inspection and Maintenance<br />
Preventive maintenance and regular inspection<br />
reduces the risk of functional disturbance.<br />
Breather plug<br />
Make sure to aerate the front fork at regular<br />
intervals:<br />
1. Put the motorcycle on a workstand so that<br />
the front wheel barely touches the ground.<br />
2. Loosen the breather plug to release<br />
excessive pressure in the front fork.<br />
Recommended Service Intervals<br />
Every 25 hours. Make your service and<br />
maintenance according to Öhlins Workshop<br />
manual.<br />
Disposal<br />
Discarded Öhlins products should be handed<br />
over to an authorized Öhlins workshop or<br />
distributor for proper disposal.<br />
10<br />
Spring Guide<br />
* Rider’s weight: Rider wearing all riding equipment<br />
Breather plug
Öhlins products are subject to<br />
continuous improvement and<br />
development, therefore, although<br />
these instructions include the most<br />
up-to-date information available at<br />
the time of printing, minor updates<br />
may occur.<br />
© Öhlins Racing AB. All rights<br />
reserved. Any reprinting or<br />
unauthorized use without the written<br />
permission of Öhlins Racing AB<br />
is prohibited.<br />
To find the latest information contact<br />
your Öhlins distributor. Please<br />
consult your Öhlins dealer if you<br />
have any questions regarding the<br />
contents in this document.<br />
Part no. 07296-62_0<br />
Issued 2009-03-06<br />
Öhlins Racing AB<br />
Box 722<br />
S-194 27 Upplands Väsby, Sweden<br />
Phone +46 8 590 025 00<br />
fax +46 8 590 025 80<br />
www.ohlins.com