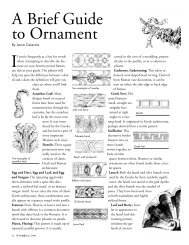
Add Flair to Mat Designs with Composition Ornaments
Add Flair to Mat Designs with Composition Ornaments
Add Flair to Mat Designs with Composition Ornaments

Create successful ePaper yourself
Turn your PDF publications into a flip-book with our unique Google optimized e-Paper software.
Pho<strong>to</strong> 5: Before being applied <strong>to</strong> the<br />
mat surface, the compo can be<br />
finished in a variety of ways. Here,<br />
it is painted.<br />
example on the opening page, the ornaments were<br />
finished <strong>with</strong> acrylic paint <strong>to</strong> match the matting elements.<br />
In the example above, the compo was finished <strong>to</strong> match<br />
the moulding.<br />
Finish the <strong>to</strong>p and sides of the ornament, but not the<br />
underside. One trick is <strong>to</strong> tape wooden skewers <strong>to</strong> cardboard,<br />
then lay the ornament on the skewers <strong>to</strong> finish it.<br />
(See Pho<strong>to</strong> 5). This way, it won’t stick <strong>to</strong> the cardboard.<br />
#3: Steam the ornament. Steaming activates the glue<br />
contained in the compo and makes it flexible. You’ll need<br />
72 PFM _ June 2004<br />
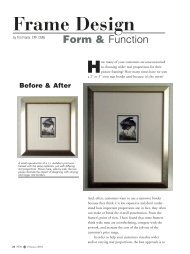
Pho<strong>to</strong> 6: Before — This print is<br />
nicely framed.<br />
Pho<strong>to</strong> 7: After — The addition of<br />
compo enhances the design.<br />
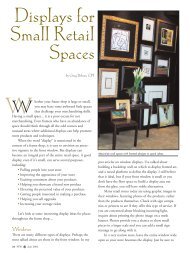
Pho<strong>to</strong> 8: Shown here is another<br />
application of compo. The frame<br />
also has been adorned.<br />
a steaming screen, which can be created by stretching a piece<br />
of cot<strong>to</strong>n over a wooden frame (see Pho<strong>to</strong> 3). You’ll also<br />
need a pan and an electric burner, or crock pot, or hot plate<br />
<strong>to</strong> create the steam.<br />
Once the water is simmering, place one finished ornament<br />
at a time on the screen. (The screen should be over the<br />
pot or pan.) When you <strong>to</strong>uch the ornament and it slides, it<br />
is ready. This may only take a few seconds. Lift the ornament<br />
carefully <strong>with</strong> a spatula or pallet knife, being careful<br />
not <strong>to</strong> stretch or bend it <strong>to</strong>o much. Once steamed, compo<br />
ornaments are pliable and can be curved—<strong>to</strong> complement<br />
an oval molding or an oval cut mat, for example.<br />
If you do not plan <strong>to</strong> bend the compo, you can use any<br />
wood or white glue, instead of steam, <strong>to</strong> adhere the ornament.<br />
#4: Place the ornament in<strong>to</strong> position. Apply light pressure<br />
<strong>to</strong> create a bond between the surfaces. Steam-applied<br />
compo will bond almost immediately. Then, allow about 30<br />
minutes of drying time before proceeding <strong>with</strong> framing.<br />
#5: Frame, using a spacer so the compo doesn’t <strong>to</strong>uch<br />
the glass.<br />
Pricing<br />
Compo can give your designs a cus<strong>to</strong>mized,<br />
high-end look that also adds <strong>to</strong> your bot<strong>to</strong>m<br />
line. How much it adds depends on the<br />
specific project, but you can typically expect <strong>to</strong><br />
add the cost of the actual ornaments, plus<br />
approximately one billable hour of labor. The<br />
hour will be spread over several small increments<br />
of time, but once you’re comfortable<br />
<strong>with</strong> the finishing and applying process, this is<br />
sufficient for most shops. ■<br />
Jennifer Semple and her husband Ed Semple<br />
own Bomar <strong>Designs</strong> in Louisburg, KS. Their<br />
company offers more than 1500 composition ornaments<br />
and has served the cus<strong>to</strong>m picture framing and<br />
gilding industries for 25 years, <strong>with</strong> Ed and Jennifer<br />
owning the business for the past eight years.