Shogun Pro-500 - Lite-Factory OHG
Shogun Pro-500 - Lite-Factory OHG
Shogun Pro-500 - Lite-Factory OHG
You also want an ePaper? Increase the reach of your titles
YUMPU automatically turns print PDFs into web optimized ePapers that Google loves.
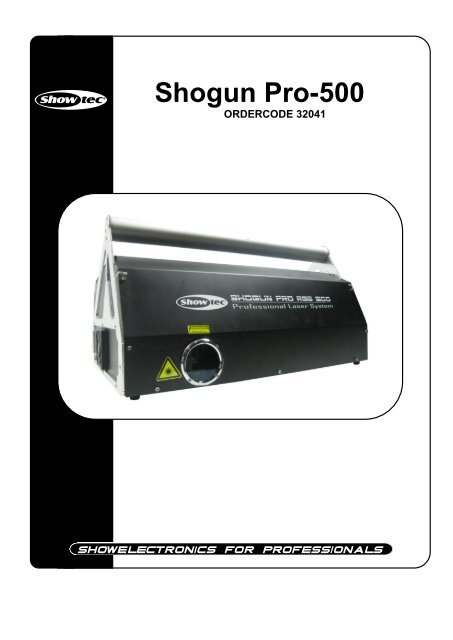
<strong>Shogun</strong> <strong>Pro</strong>-<strong>500</strong><br />
ORDERCODE 32041
Congratulations!<br />
You have bought a great, innovative product from Showtec.<br />
The Showtec <strong>Shogun</strong> <strong>Pro</strong>-<strong>500</strong> brings excitement to any venue. Whether you want simple plug-&-play<br />
action or a sophisticated DMX show, this product provides the effect you need.<br />
You can rely on Showtec, for more excellent lighting products.<br />
We design and manufacture professional light equipment for the entertainment industry.<br />
New products are being launched regularly. We work hard to keep you, our customer, satisfied.<br />
For more information: iwant@showtec.info<br />
You can get some of the best quality, best priced products on the market from Showtec.<br />
So next time, turn to Showtec for more great lighting equipment.<br />
Always get the best -- with Showtec !<br />
Thank you!
Showtec<br />
Showtec <strong>Shogun</strong> <strong>Pro</strong>-<strong>500</strong> <strong>Pro</strong>duct Guide<br />
Warning.................................................................................…...……………..…………………………….………..…..<br />
Unpacking Instructions……………………………………………………………………………………..…………….<br />
Contact Us……………………………………………………………………………………………………..……….….<br />
Safety-instructions……………………………………………………………………………………………..…………..<br />
Operating Determinations.……………………………………………………….……………………………………..<br />
Laser safety for a Class 4 Laser <strong>Pro</strong>duct……………………………………….……………………………………..<br />
Rigging.……………………………………………………………………………………………………………………..<br />
Description...............................................................................…...………………………………………….………..…. 8<br />
Features and Overview ………………………………...….……………….………….…………………..........……… 8<br />
Backside…………………………………………………...…...….……………….…………………...….….........…….. 9<br />
Set Up and Operation.....................................................................……..……………………………….….………….. 10<br />
Warm-up times and storage temperature...................................……………..…………………….……………. 10<br />
ILDA DB-25 Operation………………………………..……………………………………………………….........……. 13<br />
DMX Control……………...................................................................……..……………………………….….………….. 13<br />
Control Features...................................……………………………………………..…………………….……………. 13<br />
Setting the DMX Address …………………………..……………………………………………………….........…….. 14<br />
DMX Dip Switch Setting.................…………………….…………………………………..……………………………….. 14<br />
DMX Quick Reference Chart…………………………………………………………………………………..…………… 15<br />
DMX Channels Chart.................…………………….…………………………………..………………………………….. 16<br />
Auto Play..………………..................................................................……..……………………………….….………….. 17<br />
Cleaning the Laseroptics.......…………………….………………………………………………………………………… 18<br />
Maintenance...................................................................................………..………….…….………………………….. 18<br />
Replacing the Fuse........................................................................…………………….……………………………. 18<br />
Troubleshooting............................................................................………………….………………….………………… 19<br />
No Light.…………………………………...........................................………………….………………………………. 19<br />
No Response to DMX ....................................................................………………….………………………………. 19<br />
<strong>Pro</strong>duct Specifications.................................................................……………….…….………………………………...<br />
20<br />
1<br />
2<br />
2<br />
2<br />
3<br />
5<br />
5<br />
6
WARNING<br />
FOR YOUR OWN SAFETY, PLEASE READ THIS USER MANUAL CAREFULLY<br />
BEFORE YOUR INITIAL START-UP!<br />
Unpacking Instructions<br />
Immediately upon receiving this product, carefully unpack the carton and check the contents to ensure<br />
that all parts are present, and have been received in good condition. Notify the dealer immediately and<br />
retain packing material for inspection if any parts appear damaged from shipping or the carton itself<br />
shows signs of mishandling. Save the carton and all packing materials. In the event that a fixture must be<br />
returned to the factory, it is important that the fixture be returned in the original factory box and packing.<br />
Your shipment includes:<br />
• <strong>Shogun</strong> <strong>Pro</strong> <strong>500</strong><br />
• 1X 5m DB25 cable<br />
• 2X Keys, please record the number on the fob and retain for future reference.<br />
• 1X 3m, 3-pin IEC powercable<br />
• 1X 1m USB cable<br />
• 1X 9-pin (DB9 Male) Interlock dongle (Must be connected to the projector for the laser to operate.<br />
• 1X 128MB SmartMedia Card<br />
• 1X Installation CD- with Installation Manual included<br />
• User manual<br />
CAUTION ! EYEDAMAGES !!!<br />
NEVER LOOK DIRECTLY INTO THE LIGHTSOURCE !!!<br />
NEVER PROJECT A SINGLE LASER POINT !!!<br />
CAUTION!<br />
Keep this device away from rain and moisture!<br />
Unplug mains lead before opening the housing!<br />
FOR YOUR OWN SAFETY, PLEASE READ THIS USER MANUAL CAREFULLY<br />
BEFORE YOUR INITIAL START-UP!<br />
2
SAFETY INSTRUCTIONS<br />
Every person involved with the installation, operation and maintenance of this device has to:<br />
- be qualified<br />
- follow the instructions of this manual<br />
CAUTION! Be careful with your operations.<br />
With a dangerous voltage you can suffer<br />
a dangerous electric shock when touching the wires!<br />
Before your initial start-up, please make sure that there is no damage caused by transportation. Should<br />
there be any, consult your dealer and do not use the device.<br />
To maintain perfect condition and to ensure a safe operation, it is absolutely necessary for the user to<br />
follow the safety instructions and warning notes written in this manual.<br />
Please consider that damages caused by manual modifications to the device are not subject to<br />
warranty.<br />
This device contains no user-serviceable parts. Refer servicing to qualified technicians only.<br />
IMPORTANT:<br />
The manufacturer will not accept liability for any resulting damages caused by the nonobservance<br />
of this manual or any unauthorized modification to the device.<br />
Never unscrew the housing!<br />
Never aim the laser beam at people or animals!<br />
Never let the power-cord come into contact with other cables! Handle the power-cord and all<br />
connections with the mains with particular caution!<br />
Never remove warning or informative labels from the unit.<br />
Never use anything to cover the ground contact.<br />
Never look directly into the light source.<br />
Never leave any cables lying around.<br />
Never bypass the thermal protection mechanism or fuse.<br />
Do not insert objects into air vents.<br />
Do not connect this device to a dimmerpack or relay type system.<br />
Do not switch the device on and off in short intervals, as this would reduce the laser’s life.<br />
Do not shake the device. Avoid brute force when installing or operating the device.<br />
Do not illuminate any surface within 2 meters of the <strong>Shogun</strong> laser.<br />
Do not operate the fixture if any covers are open, missing or damaged in any way.<br />
Only use device indoor, avoid contact with water or other liquids.<br />
Only operate the device after having familiarized with its functions.<br />
Only use AC power that complies with local building and electrical codes and has both overload<br />
and ground-fault (earth fault) protection.<br />
Avoid flames and do not put close to flammable liquids or gases.<br />
Always check the regulations when using a class 4 laser product.<br />
Always check and position the laser before anybody enters the room, when the laser is facing an<br />
area with people.<br />
Always allow free air space of at least 50 cm around the unit for ventilation.<br />
Always disconnect power from the mains, when device is not used or before cleaning! Only<br />
handle the power-cord by the plug. Never pull out the plug by tugging the power-cord.<br />
Always check that all external covers and rigging hardware are securely fastened.<br />
Always keep fingers and objects out of the holes in the mounting bracket.<br />
Always protect your eyes with laser safety goggles when working on the <strong>Shogun</strong> laser.<br />
Make sure that the laser is always ground (earth) electrically.<br />
Make sure that the device is not exposed to extreme heat, moisture or dust.<br />
Make sure that the available voltage is not higher than stated on the rear panel.<br />
Make sure that the power-cord is never crimped or damaged. Check the device and the powercord<br />
from time to time.<br />
Make sure that the cable diameter of the extension cords and powercables are sufficient for the<br />
current consumption of the device.<br />
3
The powercable may not be modified, broken, mechanically strained, pressed together or<br />
heated.<br />
The cable insert or the female part in the device must never be strained. There must always be<br />
sufficient cable to the device. Otherwise, the cable may be damaged which may lead to deadly<br />
electrical shocks.<br />
If the external cable is damaged, it has to be replaced by a qualified technician.<br />
If the laser is obviously damaged, it has to be replaced. So that its functions are not impaired, due<br />
to cracks or deep scratches.<br />
Never hit the laser with a hammer or other tools, as this may lead to damages.<br />
Make sure that this product is recycled at the end of its life to protect our environment.<br />
If device is dropped or struck, disconnect mains power supply immediately. Have a qualified<br />
engineer inspect for safety before operating.<br />
If the device has been exposed to drastic temperature fluctuation (e.g. after transportation), do<br />
not switch it on immediately. The arising condensation water might damage your device. Leave<br />
the device switched off until it has reached room temperature.<br />
If your Showtec device fails to work properly, discontinue use immediately. Pack the unit securely<br />
(preferably in the original packing material), and return it to your Showtec dealer for service.<br />
For adult use only. Lighteffect must be installed out of the reach of children. Never leave the unit<br />
running unattended.<br />
For replacement use fuses of same type and rating only.<br />
The user is responsible for correct positioning and operating of the laser. The manufacturer will not<br />
accept liability for damages caused by the misuse or incorrect installation of this laser.<br />
This device falls under protection class I. Therefore it is essential to connect the yellow/green<br />
conductor to earth.<br />
The laser will only work between 15-35ºC.<br />
After 3 hours working, you must shut off the laser and let the laser diode cool off for 30 minutes,<br />
otherwise the laser could be damaged and the warranty becomes void.<br />
Repairs, servicing and electric connection must be carried out by a qualified technician.<br />
WARRANTY: Till one year after date of purchase.<br />
CAUTION: AVOID EXPOSURE TO BEAM: Avoid direct eye contact with laser<br />
light. Never intentionally expose your eyes or others to direct laser radiation.<br />
Compliance Statement<br />
Your <strong>Shogun</strong> Laser has been designed to comply with FDA and IEC Standards for it classification.<br />
The <strong>Shogun</strong> is a Class IIIB laser product.<br />
Laser Safety and Compliance Information<br />
The <strong>Shogun</strong> is manufactured to comply with the IEC 60825-1 and in accordance with U.S. Food and Drug<br />
Administrations (FDA) Standards Listed under FDA Document 21 CFR 1040 and subsequent laser notices.<br />
Further more, the <strong>Shogun</strong> manufactured to comply with Directive 2002/96/EC of the European Parliament<br />
and of the Council of the European Union on WEEE (Waste Electrical and Electronic Equipment), as<br />
amended by Directive 2003/108/EC, where applicable.<br />
Laser Safety is made and regulated by different authorities in each country:<br />
• In Europe, the European Norm-organization CENELEC<br />
• In the United States of America, the Center for Devices and Radiological Health [CDRH]<br />
• In Canada, the Radiation <strong>Pro</strong>tection Bureau (RPB)<br />
Contact these authorities for detailed information, about the safety regulations that apply to your<br />
country. Note: safety regulations can differ from those described in this manual. Always check the<br />
required regulations before operating this laser<br />
4
<strong>Pro</strong>duct Classification and Manufacturing Label Identification<br />
Laser Classification: Class 4<br />
Laser medium: wavelength 635 nm / Red (Laser Diode)<br />
wavelength 532 nm / Green (DPSS)<br />
wavelength 473 nm / Blue (DPSS)<br />
Output: <strong>500</strong>mW (300mW Red/ 200mW Green/ 100mW Blue)<br />
Cooling: TE Cooling<br />
CAUTION: The use of corrective eye wear or optics for viewing at distances such as<br />
telescopes or binoculars within a distance of 100mm may pose an eye hazard.<br />
OPERATING DETERMINATIONS<br />
• This device is not designed for permanent operation. Consistent operation breaks will ensure that the<br />
device will serve you for a long time without defects.<br />
• The minimum distance between light-output and the illuminated surface must be more than 0.8 meter.<br />
• The maximum ambient temperature ta must never be exceeded.<br />
If this device is operated in any other way, than the one described in this manual, the product may suffer<br />
damages and the warranty becomes void.<br />
Any other operation may lead to dangers like short-circuit, burns, electric shock, skin hazards, lethal or<br />
severe injury due to laser radiation, laser explosion, crash etc.<br />
You endanger your own safety and the safety of others!<br />
CAUTION! This product is for professional use only!<br />
This laser product is a Class IIIB laser and has an<br />
Interlocked housing.<br />
There are no user serviceable parts inside. Tampering or<br />
removing warranty seals will void your products limited<br />
warranty.<br />
Combo label with the <strong>Pro</strong>duct Model Number, Serial<br />
Number, Date of Manufacturing, Laser Light Warning<br />
Label, Warranty Void Label and Interlocked Housing<br />
Label<br />
Laser safety for a Class 4 Laser <strong>Pro</strong>duct<br />
This product is a Class 4 laser with more than 1000 mW visible output.<br />
This laser system presents a hazard from direct or specular reflections. It may also produce hazardous<br />
diffuse reflections and cause significant eye or skin hazards as well as fire hazards.<br />
CAUTION! Only Laser Safety Officers who are officially certified by a regulatory body or authorized<br />
training organization are allowed to use class 4 lasers in public. The Laser Safety Officer is responsible for<br />
all aspects when using this laser, including following all locally applicable safety laws and regulations. The<br />
manufacturer will not accept liability for damages caused by the misuse or incorrect installation of this<br />
laser.<br />
5
Rigging<br />
Please follow the European and national guidelines concerning rigging, trussing and all other<br />
safety issues.<br />
Do not attempt the installation yourself !<br />
Always let the installation be carried out by an authorized dealer !<br />
<strong>Pro</strong>cedure:<br />
If the laser is lowered from the ceiling or high joists, professional trussing systems have to be used.<br />
Make sure that any structure used to support the machine can support at least 10 times the total<br />
weight of all installed fixtures, clamps, cables, auxiliary equipment, etc.<br />
Use a clamp to mount the laser, with the mounting-bracket, to the trussing system. Make sure that<br />
all rigging clamps and fasteners are undamaged and can support at least 10 times the machine’s<br />
weight.<br />
The laser must never be fixed swinging freely in the room.<br />
The installation must always be secured with a safety attachment, e.g. an appropriate safety net<br />
or safety-cable. Attach a safety cable that can bear at least 10 times its weight.<br />
Place the projector on a raised platform, if working above 1.5m.<br />
When rigging, derigging or servicing the laser, always make sure, that the area below the<br />
installation place is blocked and staying in the area is forbidden.<br />
Improper installation can cause serious damage to people and property !<br />
6
<strong>Pro</strong>per Usage Safety and Compliance Information<br />
According to FDA Regulations you should operate this product as stated below.<br />
Placing the Laser on a horizontal surface<br />
The <strong>Shogun</strong> <strong>Pro</strong>-<strong>500</strong> can be placed on a level horizontal surface resting on its rubber feet.<br />
1. Make sure that the surface is level, stable and capable of supporting at least 10 times the weight of the<br />
machine.<br />
2. Secure the machine so that it cannot slide, fall, or tilt, even if vibration from audio equipment or<br />
another source is present.<br />
3. Eliminate any risk of loss of alignment or contact by members of the public.<br />
Connection with the mains<br />
Connect the device to the mains with the power-plug.<br />
Always pay attention, that the right color cable is connected to the right place.<br />
International EU Cable UK Cable US Cable Pin<br />
L BROWN RED YELLOW/COPPER FASE<br />
N BLUE BLACK SILVER NUL<br />
YELLOW/GREEN GREEN GREEN EARTH<br />
Make sure that the device is always connected properly to the earth!<br />
7
Description of the device<br />
Features<br />
The Showtec <strong>Shogun</strong> <strong>Pro</strong>-<strong>500</strong> is a laser effect with a high output and great effects.<br />
• 300 mW Red laser Diode (635nm)<br />
• 200 mW Green laser DPSS (532nm)<br />
• 100 mW Blue laser DPSS (473nm)<br />
• DMX-control via standard DMX-controller<br />
• Analog Modulation (beams dimmable from 0-100%)<br />
• Thermal Electric cooling<br />
• ILDA 24k scanning<br />
• On board memory to upload shows and/or patterns<br />
• 128MB CF card included<br />
• Including Cypher <strong>Pro</strong> USB software<br />
• Including flightcase<br />
• DMX-512 (14 channels)<br />
• Power: 230V Switching Power supply<br />
• Laser life-time: 6000-10000 hours<br />
• Full colour spectrum (56.000 colours)<br />
• USB connection for control by computer and uploading programs<br />
• ILDA 25 pole sub-D connector<br />
• Compliance to IEC 60825-1<br />
• Remote interlock<br />
• Key Switch<br />
• Emission Indicator<br />
• Class 4 laser product<br />
Overview<br />
1) <strong>500</strong>mW RGB Laser<br />
1<br />
8<br />
Fig. 1
Backside<br />
2) USB Connection<br />
3) LED Indicator<br />
4) Security Dongle<br />
5) Dipswitches<br />
6) Audio Sensitivity<br />
7) X<br />
8) Y<br />
9) ILDA connector<br />
10) SmartMedia Card 128MB<br />
11) Key System<br />
12) Power ON/OFF<br />
13) IEC Power Connector + Fuse 2A 250V<br />
14) Red<br />
15) Green<br />
16) Blue<br />
17) DMX signal connector (OUT)<br />
18) DMX signal connector (IN)<br />
9<br />
2 3<br />
4 5 6 7 8 9 10<br />
11 12 13 14 15 16 17 18<br />
Fig. 2<br />
Remote Interlock Connector: Use a DB9 connector to connect to the Remote Interlock, which stops the<br />
beam being emitted once the connection loop has been opened.<br />
Key System: When the key is locked, the unit stops emitting the laserbeam but keeps the power on,<br />
and the steppers keep working. Only when the key is turned, after 15 seconds, the<br />
projector starts emitting the laserbeam. 5 seconds before emitting, there is a rattling<br />
sound.
Set Up and Operation<br />
Follow the directions below, as they pertain to your preferred operation mode.<br />
Remove the protection cover from the front of the laser. When the laser is not in use, please replace the<br />
cover to protect the laser.<br />
Before plugging the unit in, always make sure that the power supply matches the product specification<br />
voltage. Do not attempt to operate a 120V specification product on 230V power, or vice versa.<br />
The laser will only work between 5-35ºC.<br />
Never use the laser with a high or low temperature, otherwise the laser could be damaged and the<br />
warranty becomes void.<br />
Always disconnect from electric mains power supply before cleaning or servicing.<br />
Damages caused by non-observance are not subject to warranty.<br />
Warning!<br />
The power cables must be undamaged and rated for the electrical requirements of all connected<br />
devices.<br />
Important!<br />
Powering through a dimmer system will damage the projector and computer.<br />
Never connect this device to a dimmer or switchpack.<br />
Link all DMX cables before connecting electric power.<br />
Do not supply power before the whole system is set up and connected properly.<br />
Warm-up times and storage temperature<br />
When the <strong>Shogun</strong> Laser is switched on, optimum beam alignment and colour balance are not obtained,<br />
until the laser operating temperature has stabilized:<br />
When using the Laser at the two extreme ambient temperatures, i.e. at 5°C or 35°, stabilization will take<br />
approximately 10 minutes.<br />
At room temperature of 20-25°C, stabilization takes approximately 1 to 5 minutes.<br />
Maximum diode lifetime is obtained if the laser is only used at a stabilized operating temperature.<br />
We urge you to wait at least 1 minute after switching the Laser on, before you activate the beam.<br />
Diode laser devices are subject to internal thermal stresses that have a small effect on beam precision, if<br />
the device is exposed to temperature fluctuation.<br />
The effect on precision is minimal: after 100 cycles of being warmed from 5°C up to 35°C and back<br />
again, the <strong>Shogun</strong> laser beam drift will be less than 1% of beam diameter.<br />
However, for maximum beam precision, the <strong>Shogun</strong> must be stored at room temperature and kept at a<br />
stable ambient temperature.<br />
Applying Power<br />
1. Connect the prepared cable to the mains input socket and the AC mains distribution system.<br />
2. To turn the projector on, locate the red switch at the rear of the projector and turn it into the on<br />
position. Then turn the key to the horizontal position. NOTE: when in the “ON” position, the key cannot<br />
be removed.<br />
3. Switch the computer on. You now can continue with the installation of your new laser projector.<br />
4. Please note you will need to connect and secure the DB-9 Interlock dongle to operate the laser at any<br />
time. It is advisable to wire the DB-9 to an emergency switch near the operator. This can be used to<br />
shut down the laser in case it fails to respond to control.<br />
CAUTION: Use of controls, adjustments or performance of procedures other then what is described in this<br />
manual, may result in hazardous radiation exposure, which can result in severe eye damage<br />
and or physical injury.<br />
This projector is designed to operate using ILDA standard Signal (DB25), USB or DMX-512.<br />
10
Operating with USB for the first time:<br />
1. Load the Cypher<strong>Lite</strong>USB CD-ROM into your PC.<br />
2. Create a new folder on your desktop and rename it to “Cypher” Copy the files from the CD-ROM into<br />
that folder.<br />
3. Connect the USB cable from your PC to the <strong>Pro</strong>jector.<br />
4. A screen will appear on your PC asking for the drivers.<br />
5. Select the option “Install from a specific location”<br />
6. In the next screen click the “Browse” button and find the folder titled “USB Driver”, select that folder<br />
and click “OK”<br />
11
7. The wizard will then load the necessary files and you will see the PC recognize the Flashback3 board in<br />
the projector.<br />
8. To start using Cypher USB, click on the Cypher icon .<br />
9. When the program opens, it will have an empty workspace.<br />
10. In the upper left hand corner click “File” then “Open Workspace” or press “Ctr+O” and select the<br />
workspace you wish to use. Then click “Upload” at the top of the Cypher<strong>Lite</strong>USB<br />
interface.<br />
11. You can now click on any cue and it will play instantly.<br />
12. You can change the size, speed, position, color, visible points, fade up and down, etc. all from this<br />
menu. All of these feature are also available via DMX-512.<br />
13. You can link cues together to create a sequence of effects. Simply right click on the desired first cue,<br />
select “Link” and then click on the cues you wish to follow in order. At any time you can unlink cues by<br />
clicking on the “Link” icon at the top of the page. Select “Unlink all cues” and then click “Upload” to<br />
finalize.<br />
14. Please note: when programming cues you have the option to select how the cue will play and what<br />
will happen when the cue ends. The cue can loop, stop, or freeze output depending on what you<br />
select. The default play mode is “Loop”.<br />
15. It is advisable to use the test pattern (See picture below, Cypher<strong>Lite</strong> Software Page 9, Cue 48) to<br />
check that the projection area is desirable and that the color balance is good. When projected onto<br />
a wall or screen the test pattern should look like the picture below.<br />
At this time adjust your color balance with the three knobs on the back of the unit until the frame of<br />
the test pattern is white and the letters “X” and “Y” are pink. The letters “12K/30K” and “ILDA” should<br />
be orange.<br />
16. In addition to the controls in Cypher<strong>Lite</strong>USB you can also change the image size via the “X” and “Y”<br />
knobs on the back of the unit.<br />
17. Whenever you edit cues or make changes to your workspace file, you should always save them<br />
under a new file name for later use.<br />
12
13<br />
ILDA Test Pattern<br />
ILDA DB-25 Operation<br />
For ILDA operation you must have a Pangolin LD2000 card or another ILDA standard laser show control<br />
system. The connection from the PC to the Laser projector is made with a DB-25 cable. When connecting<br />
for the first time make sure that the cable is “straight through” so that pin 1 connects to pin 1 and pin 25<br />
connects to pin 25 and so on.<br />
1. Connect the PC to the projector with the DB-25 cable.<br />
2. Start your laser show software. <strong>Pro</strong>ject a test pattern and adjust the scanning parameters<br />
appropriately.<br />
3. Please note that if you are scanning full-size at 30K the image may become distorted as the ILDA test<br />
pattern will only project correctly full size at 18K without distortion.<br />
4. The color balance controls on the back of the unit are intended only for DMX/USB/Sound active modes<br />
of operation. When using ILDA signal the color balance feature has no effect. Make any desired color<br />
adjustments through your laser show software. I.E. For Pangolin users you will need to adjust color<br />
response through the “Palettes” feature.<br />
5. If your projector is equipped with CTI 6210 scanners, you will get the most accurate imagery using 18k<br />
scan speed.<br />
DMX Control<br />
Control features<br />
Your projector’s DMX feature is capable of being controlled from a DMX-512 controller.<br />
The projector utilizes the effects on your SmartMedia Card. To learn more about Cypher<strong>Lite</strong>USB, please<br />
refer to the Cypher<strong>Lite</strong>USB Manual on the Software Disc.<br />
Connecting your projector to a DMX-512 Controller DMX-512 uses a three-pin cable similar to XLR or<br />
Microphone leads. We recommend that you use DMX designated cables only as the use of XLR or<br />
Microphone leads can affect the operation of your projector.<br />
1) Determine the length required to run between the projector and the controller.<br />
2) Using DMX Cable, connect the male end to the controller and the female to the projector.<br />
3) Address your projector accordingly so that it corresponds with projector’s profile address on your<br />
controller.<br />
4) Apply power to both the controller and projector. You are now able to control the projector via<br />
your controller.
Setting the DMX Address<br />
DMX Dip Switch Setting<br />
DMX products must have their own "address" to receive DMX signals.<br />
Addresses on the Showtec <strong>Shogun</strong> <strong>Pro</strong>-<strong>500</strong> are set by flipping the appropriate DMX dip switches.<br />
A standard DMX address for a Showtec <strong>Shogun</strong> <strong>Pro</strong>-<strong>500</strong>, which has 14 channels is as follow:<br />
<strong>Shogun</strong> <strong>Pro</strong>-<strong>500</strong> Address Value DMX Dip Switches "ON"<br />
Unit 1 1 #1<br />
Unit 2 15 #1, #2, #3 and #4<br />
Unit 3 29 #1, #3, #4 and #5<br />
Unit 4 43 #1, #2, #4, and #6<br />
Explanation: Since each unit has 14 channels, each address advances 14 values (See Address Value<br />
above).<br />
Once address values are determined, set the appropriate DMX dip switches on each unit.<br />
Example:<br />
1. If you want to give a <strong>Shogun</strong> DMX address 133, you first have to find the number 133 in the DMX Chart.<br />
2. Then look at the left side (Dip Switches #1-#5) horizontally from 133.<br />
In the Table you’ll see #1=ON, #2=OFF, #3=ON, #4=OFF, #5=OFF.<br />
3. Finally look at the upper side of the table (Dip Switches #6-#9) vertically from 133.<br />
In the Table you’ll see #6=OFF, #7=OFF, #8=ON, #9=OFF.<br />
DMX Address Quick Reference Chart<br />
DMX DIP SWITCH SET<br />
0=OFF<br />
1=ON<br />
#1 #2 #3 #4 #5<br />
#9 0 0 0 0 0 0<br />
#8 0 0 0 0 1 1<br />
#7 0 0 1 1 0 0<br />
#6 0 1 0 1 0 1<br />
0 0 0 0 0 32 64 96 128 160<br />
1 0 0 0 0 1 33 65 97 129 161<br />
0 1 0 0 0 2 34 66 98 130 162<br />
1 1 0 0 0 3 35 67 99 131 163<br />
0 0 1 0 0 4 36 68 100 132 164<br />
1 0 1 0 0 5 37 69 101 133 165<br />
0 1 1 0 0 6 38 70 102 134 166<br />
14
DMX DIP SWITCH SET<br />
0=OFF<br />
1=ON<br />
#1 #2 #3 #4 #5<br />
DMX Address Quick Reference Chart<br />
#9 0 0 0 0 0 0 0 0 1 1 1 1 1 1 1 1<br />
#8 0 0 0 0 1 1 1 1 0 0 0 0 1 1 1 1<br />
#7 0 0 1 1 0 0 1 1 0 0 1 1 0 0 1 1<br />
#6 0 1 0 1 0 1 0 1 0 1 0 1 0 1 0 1<br />
0 0 0 0 0 32 64 96 128 160 192 224 256 288 320 352 384 416 448 480<br />
1 0 0 0 0 1 33 65 97 129 161 193 225 257 289 321 353 385 417 449 481<br />
0 1 0 0 0 2 34 66 98 130 162 194 226 258 290 322 354 386 418 450 482<br />
1 1 0 0 0 3 35 67 99 131 163 195 227 259 291 323 355 387 419 451 483<br />
0 0 1 0 0 4 36 68 100 132 164 196 228 260 292 324 356 388 420 452 484<br />
1 0 1 0 0 5 37 69 101 133 165 197 229 261 293 325 357 389 421 453 485<br />
0 1 1 0 0 6 38 70 102 134 166 198 230 262 294 326 358 390 422 454 486<br />
1 1 1 0 0 7 39 71 103 135 167 199 231 263 295 327 359 391 423 455 487<br />
0 0 0 1 0 8 40 72 104 136 168 200 232 264 296 328 360 392 424 456 488<br />
1 0 0 1 0 9 41 73 105 137 169 201 233 265 297 329 361 393 425 457 489<br />
0 1 0 1 0 10 42 74 106 138 170 202 234 266 298 330 362 394 426 458 490<br />
1 1 0 1 0 11 43 75 107 139 171 203 235 267 299 331 363 395 427 459 491<br />
0 0 1 1 0 12 44 76 108 140 172 204 236 268 300 332 364 396 428 460 492<br />
1 0 1 1 0 13 45 77 109 141 173 205 237 269 301 333 365 397 429 461 493<br />
0 1 1 1 0 14 46 78 110 142 174 206 238 270 302 334 366 398 430 462 494<br />
1 1 1 1 0 15 47 79 111 143 175 207 239 271 303 335 367 399 431 463 495<br />
0 0 0 0 1 16 48 80 112 144 176 208 240 272 304 336 368 400 432 464 496<br />
1 0 0 0 1 17 49 81 113 145 177 209 241 273 305 337 369 401 433 465 497<br />
0 1 0 0 1 18 50 82 114 146 178 210 242 274 306 338 370 402 434 466 498<br />
1 1 0 0 1 19 51 83 115 147 179 211 243 275 307 339 371 403 435 467 499<br />
0 0 1 0 1 20 52 84 116 148 180 212 244 276 308 340 372 404 436 468 <strong>500</strong><br />
1 0 1 0 1 21 53 85 117 149 181 213 245 277 309 341 373 405 437 469 501<br />
0 1 1 0 1 22 54 86 118 150 182 214 246 278 310 342 374 406 438 470 502<br />
1 1 1 0 1 23 55 87 119 151 183 215 247 279 311 343 375 407 439 471 503<br />
0 0 0 1 1 24 56 88 120 152 184 216 248 280 312 344 376 408 440 472 504<br />
1 0 0 1 1 25 57 89 121 153 185 217 249 281 313 345 377 409 441 473 505<br />
0 1 0 1 1 26 58 90 122 154 186 218 250 282 314 346 378 410 442 474 506<br />
1 1 0 1 1 27 59 91 123 155 187 219 251 283 315 347 379 411 443 475 507<br />
0 0 1 1 1 28 60 92 124 156 188 220 252 284 316 348 380 412 444 476 508<br />
1 0 1 1 1 29 61 93 125 157 189 221 253 285 317 349 381 413 445 477 509<br />
0 1 1 1 1 30 62 94 126 158 190 222 254 286 318 350 382 414 446 478 510<br />
1 1 1 1 1 31 63 95 127 159 191 223 255 287 319 351 383 415 447 479 511<br />
Dip Sw itch Position DMX Address<br />
15<br />
Dip Switch Position
Auto Play<br />
Using the Cypher<strong>Lite</strong>USB software you can also set the unit up to run a cue as soon as it powers up. This<br />
may be useful in settings where the projector is used for advertisement or to project logos and does not<br />
require an operator.<br />
1) Right-click on the cue you wish to use for Auto-Play, Select “Edit” look to the bar at the top.<br />
2) To the far right, select “Cue properties”.<br />
3) Select the check box at the bottom of the properties page.<br />
4) After you upload this change to the SmartMedia card and cycle the power to the projector, you will<br />
see this cue play automatically after power up.<br />
5) If you wish to play multiple cues automatically simply link the cues in the desired order.<br />
17
Cleaning the Laser Optics<br />
Maintenance<br />
The Showtec <strong>Shogun</strong> <strong>Pro</strong>-<strong>500</strong> requires almost no maintenance. However, you should keep the unit clean.<br />
Otherwise, the fixture’s light-output will be significantly reduced. Disconnect the mains power supply, and<br />
then wipe the cover with a damp cloth. Do not immerse in liquid. Carefully wipe both mirrors clean with<br />
glass cleaner and a soft cloth. Do not use alcohol or solvents.<br />
The mirrors will require regular cleaning, as smoke-fluid tends to build up residues, reducing the lightoutput<br />
quickly.<br />
Keep connections clean. Disconnect electric power, and then wipe the DMX and audio connections<br />
with a damp cloth. Make sure connections are thoroughly dry before linking equipment or supplying<br />
electric power.<br />
The following points have to be considered during the inspection:<br />
1. All screws used for installing the device or parts of the device have to be tightly connected and must<br />
not be corroded.<br />
2. There may not be any deformations on housings, fixations and installation spots.<br />
3. The electric power supply cables must not show any damages or material fatigue.<br />
Replacing the Fuse<br />
Power surges, short-circuit or inappropriate electrical power supply may cause a fuse to burn out. If the<br />
fuse burns out, the product will not function whatsoever. If this happens, follow the directions below to do<br />
so.<br />
1. Unplug the unit from electric power source.<br />
2. Insert a screwdriver into the slot in the fuse cover. Turn the screwdriver to the left, at the same time<br />
gently push a bit (Turn and Push). The fuse will come out.<br />
3. Remove the used fuse. If brown or unclear, it is burned out.<br />
4. Insert the replacement fuse into the holder where the old fuse was. Reinsert the fuse cover. Be sure to<br />
use a fuse of the same type and specification. See the product specification label for details.<br />
18
Troubleshooting<br />
No Light<br />
This troubleshooting guide is meant to help solve simple problems. If a problem occurs, carry out the steps<br />
below in sequence until a solution is found. Once the unit operates properly, do not carry out following<br />
steps.<br />
If the light effect does not operate properly, refer servicing to a technician.<br />
Response: Suspect three potential problem areas: the power supply, the laser, the fuse.<br />
1. Power supply. Check that the unit is plugged into an appropriate power supply.<br />
2. The laser. Return the device to your Showtec dealer.<br />
3. The fuse. See page 18 for replacing the fuse.<br />
4. The cover. The cover has a safety switch, so when it is not closed properly, the laser will not work.<br />
5. The key. The key should be positioned horizontally.<br />
6. The security dongle. The security dongle should be attached to the backside, when operating the<br />
laser.<br />
No Response to DMX<br />
Response: Suspect the DMX cable or connectors, a controller malfunction, a light effect DMX card<br />
malfunction.<br />
1. Check the DMX cable: Unplug the unit; change the DMX cable; then reconnect to electrical power.<br />
Try your DMX control again.<br />
2. Determine whether the controller or laser effect is at fault. Does the controller operate properly with<br />
other DMX products ? If not, take the controller in for repair. If so, take the DMX cable and the light<br />
effect to a qualified technician.<br />
<strong>Pro</strong>blem Solution<br />
Laser does not light. Power On? Key on? DB-9 Interlock on? Volume<br />
Knob (sound active mode only) ?<br />
Smart Media Card present with the gold pins<br />
facing down?<br />
Image appears either too wide or too thin. Adjust the “X” or “Y” knobs on the back.<br />
Weak colors, I.E. No green, or faint red Adjust the Color Balance knobs on the back.<br />
Unit Does not power up after 45 second delay Check fuse in AC power input, key switch?Is main<br />
(FDA required feature in the USA).<br />
power switch in the on position?<br />
Cypher<strong>Lite</strong>USB does not connect to the laser when Cycle the power to the laser, Re-load the USB<br />
plugged into USB port.<br />
driver software, try other USB port.<br />
Image appears “jumpy” or moves erratically when Check to ensure that the DB-25 cable is secured<br />
running under ILDA (DB-25) input.<br />
completely, Also ensure scan speed does not<br />
exceed 30K.<br />
Does not respond to DMX. Check DMX address, check signal cable, ensure<br />
DMX signal is correct polarity.<br />
19
<strong>Pro</strong>duct Specification<br />
Model: Showtec <strong>Shogun</strong> <strong>Pro</strong>-<strong>500</strong><br />
Voltage: 240V-50Hz (CE)<br />
Fuse: 2A / 250V<br />
Dimensions: 615x415x340mm (LxWxH)<br />
Weight: 20,2 kg<br />
Operation and <strong>Pro</strong>gramming<br />
Signal input 3-pin XLR male<br />
Signal output 3-pin XLR female<br />
DMX-control via standard DMX-controller<br />
Laser<br />
300 mW Red laser Diode (635nm)<br />
200 mW Green laser DPSS (532nm)<br />
100 mW Blue laser DPSS (473nm)<br />
Minimum distance:<br />
Minimum distance from flammable surfaces: 0.5m<br />
Minimum distance to lighted object: 2m<br />
Design and product specifications are subject to change without prior notice.<br />
Website: www.Showtec.info<br />
Email: service@highlite.nl<br />
20


