LED Deco-Tile Pro - Lite-Factory OHG
LED Deco-Tile Pro - Lite-Factory OHG
LED Deco-Tile Pro - Lite-Factory OHG

You also want an ePaper? Increase the reach of your titles
YUMPU automatically turns print PDFs into web optimized ePapers that Google loves.
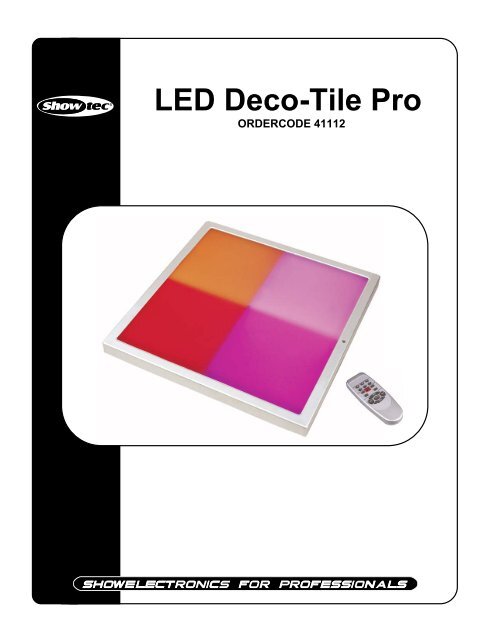
<strong>LED</strong> <strong>Deco</strong>-<strong>Tile</strong> <strong>Pro</strong><br />
ORDERCODE 41112
Congratulations!<br />
You have bought a great, innovative product from Showtec.<br />
The Showtec <strong>LED</strong> <strong>Deco</strong>-<strong>Tile</strong> <strong>Pro</strong> brings excitement to any venue.<br />
You can rely on Showtec, for more excellent lighting products.<br />
We design and manufacture professional light equipment for the entertainment industry.<br />
New products are being launched regularly. We work hard to keep you, our customer, satisfied.<br />
For more information: iwant@showtec.info<br />
You can get some of the best quality, best priced products on the market from Showtec.<br />
So next time, turn to Showtec for more great lighting equipment.<br />
Always get the best -- with Showtec !<br />
Thank you!
Showtec<br />
Showtec <strong>LED</strong> <strong>Deco</strong>-<strong>Tile</strong> <strong>Pro</strong> <strong>Pro</strong>duct Guide<br />
Warning..…...................................................................................………………………………………………………..<br />
Safety-instructions…………………………………………………………………………………………………………<br />
Operating Determinations…….………………………………………………………………………………………..<br />
Rigging…………………………….………………………………………………………………………………………..<br />
Description..…................................................................................……….……………………………………………..<br />
Features and Overview …………..……………………...….……………….………….……….……….…………….<br />
Backside……………………………….…………………...…...….……………….…………………...…………………<br />
Set Up and Operation.....................................................................……..………………………………………..….… 6<br />
Stand-alone……………………..................................................……..…………………………………………….… 6<br />
Controlled by DMX Controller..................................................……..……………………………………….……… 6<br />
DMX Setting of the <strong>Deco</strong>-<strong>Tile</strong>..................................................……..…………………………………………..…… 7<br />
Candle Power Distribution……..………………………………..…………..……………………………………...…… 8<br />
<strong>Deco</strong>-tile structure and installation......................................………..........……..…………………………….…… 8<br />
Maintenance...................................................................................………..………….…….………………………….. 9<br />
Troubleshooting............................................................................………………….………………….………………...<br />
No Light............................................………………….………………………………………………………………….<br />
<strong>Pro</strong>duct Specifications.................................................................……………….…….………………………………...<br />
10<br />
1<br />
2<br />
2<br />
3<br />
4<br />
5<br />
5<br />
5<br />
9<br />
9
WARNING<br />
CAUTION!<br />
Keep this device away from rain and moisture!<br />
FOR YOUR OWN SAFETY, PLEASE READ THIS USER MANUAL CAREFULLY<br />
BEFORE YOUR INITIAL START-UP!<br />
SAFETY INSTRUCTIONS<br />
Every person involved with the installation, operation and maintenance of this device has to:<br />
- be qualified<br />
- follow the instructions of this manual<br />
CAUTION! Be careful with your operations.<br />
With a dangerous voltage you can suffer<br />
a dangerous electric shock when touching the wires!<br />
Before your initial start-up, please make sure that there is no damage caused by transportation. Should there<br />
be any, consult your dealer and do not use the device.<br />
To maintain perfect condition and to ensure a safe operation, it is absolutely necessary for the user to follow<br />
the safety instructions and warning notes written in this manual.<br />
Please consider that damages caused by manual modifications to the device are not subject to warranty.<br />
This device contains no user-serviceable parts. Refer servicing to qualified technicians only.<br />
IMPORTANT:<br />
The manufacturer will not accept liability for any resulting damages caused by the nonobservance<br />
of this manual or any unauthorized modification to the device.<br />
Never let the power-cord come into contact with other cables! Handle the power-cord and all<br />
connections with the mains with particular caution!<br />
Never remove warning or informative labels from the unit.<br />
Do not open the device and do not modify the device.<br />
Do not connect this device to a dimmerpack.<br />
Do not shake the device. Avoid brute force when installing or operating the device..<br />
Never look directly into the light source.<br />
Never leave any cables lying around.<br />
Do not switch the device on and off in short intervals.<br />
Never use the device during thunderstorms, unplug the device immediately.<br />
Only use device indoor, avoid contact with water or other liquids.<br />
Avoid flames and do not put close to flammable liquids or gases.<br />
Only operate the device after having familiarized with its functions.<br />
Always allow free air space of at least 50 cm around the unit for ventilation.<br />
Always disconnect power from the mains, when device is not used or before cleaning! Only handle<br />
the power-cord by the plug. Never pull out the plug by tugging the power-cord.<br />
Make sure that the device is not exposed to extreme heat, moisture or dust.<br />
Only install the <strong>LED</strong> <strong>Deco</strong>-<strong>Tile</strong> <strong>Pro</strong> with the hanging-bracket.<br />
Make sure that the available voltage is not higher than stated on the rear panel.<br />
2
Make sure that the power-cord is never crimped or damaged. Check the device and the powercord<br />
from time to time.<br />
Make sure that no side forces can impact on the truss system.<br />
The cable insert or the female part in the device must never be strained. There must always be<br />
sufficient cable to the device. Otherwise, the cable may be damaged which may lead to deadly<br />
electrical shocks.<br />
If the external cable is damaged, it has to be replaced by a qualified technician.<br />
If device is dropped or struck, disconnect mains power supply immediately. Have a qualified<br />
engineer inspect for safety before operating.<br />
If the device has been exposed to drastic temperature fluctuation (e.g. after transportation), do not<br />
switch it on immediately. The arising condensation water might damage your device. Leave the<br />
device switched off until it has reached room temperature.<br />
If your Showtec device fails to work properly, discontinue use immediately. Pack the unit securely<br />
(preferably in the original packing material), and return it to your Showtec dealer for service.<br />
For adult use only. Lighteffect must be installed out of the reach of children. Never leave the unit<br />
running unattended.<br />
The user is responsible for correct positioning and operating of the <strong>LED</strong> <strong>Deco</strong>-<strong>Tile</strong> <strong>Pro</strong>. The<br />
manufacturer will not accept liability for damages caused by the misuse or incorrect installation of<br />
this device.<br />
This device falls under protection class I. Therefore it is essential to connect the yellow/green<br />
conductor to earth.<br />
Repairs, servicing and electric connection must be carried out by a qualified technician.<br />
WARRANTY: Till one year after date of purchase.<br />
OPERATING DETERMINATIONS<br />
CAUTION ! EYEDAMAGES !.<br />
Avoid looking directly into the light source.<br />
(meant especially for epileptics) !<br />
This device is not designed for permanent operation. Consistent operation breaks will ensure that the device<br />
will serve you for a long time without defects.<br />
The minimum distance between light-output and the illuminated surface must be more than 0,5 meters.<br />
The maximum ambient temperature ta = 45°C must never be exceeded.<br />
The relative humidity must not exceed 50 % with an ambient temperature of 45° C.<br />
If this device is operated in any other way, than the one described in this manual, the product may suffer<br />
damages and the warranty becomes void.<br />
Any other operation may lead to dangers like short-circuit, burns, electric shock, lamp explosion, crash etc.<br />
You endanger your own safety and the safety of others!<br />
Improper installation can cause serious damage to people and property !<br />
3
Connection with the mains<br />
Connect the device to the mains with the power-plug.<br />
Always pay attention, that the right color cable is connected to the right place.<br />
International EU Cable UK Cable US Cable Pin<br />
L BROWN RED YELLOW/COPPER FASE<br />
N BLUE BLACK SILVER NUL<br />
YELLOW/GREEN GREEN GREEN EARTH<br />
Make sure that the device is always connected properly to the earth!<br />
Improper installation can cause serious damage to people and property !<br />
4
Description of the device<br />
Features<br />
The <strong>LED</strong> <strong>Deco</strong>-<strong>Tile</strong> <strong>Pro</strong> is a fabulous <strong>LED</strong> Lighteffect from Showtec.<br />
• Never change lamps again!<br />
• Each element is divided into 4 sections.<br />
• Dimensions 50 x 50cm<br />
• Topcover of the <strong>LED</strong> <strong>Deco</strong>-<strong>Tile</strong> <strong>Pro</strong> is made of strong plastic.<br />
• Plug-&-Play<br />
Overview<br />
5<br />
Fig. 1<br />
NOTE: It is not possible to connect a <strong>LED</strong> <strong>Deco</strong> <strong>Tile</strong> <strong>Pro</strong> 240V (41112) to a <strong>LED</strong> <strong>Deco</strong> <strong>Tile</strong> Basic 24V (41111).<br />
Backside<br />
1) Master/Slave Switch<br />
2) DMX IN<br />
3) DMX OUT<br />
4) <strong>LED</strong> Display Powercable <strong>Deco</strong> <strong>Tile</strong> <strong>Pro</strong><br />
Fig. 2<br />
Set Up and Operation<br />
Before plugging the unit in, always make sure that the power supply matches the product specification<br />
voltage. Do not attempt to operate a 120V specification product on 230V power, or vice versa.<br />
Always disconnect from electric mains power supply before cleaning or servicing.<br />
Damages caused by non-observance are not subject to warranty.
CONNECTION<br />
The <strong>LED</strong> <strong>Deco</strong> uses a 2 pins extendable connector as its power cord connector, while its DMX signal wire uses<br />
a 8 pins crystal network plug (RJ-45).<br />
There are two ways to connect them: • Controlled with remote control (Fig. 3)<br />
• Controlled by DMX controller (Fig. 4)<br />
Controlled with remote control<br />
6<br />
Fig. 3<br />
Connect the first <strong>LED</strong> <strong>Deco</strong>-<strong>Tile</strong> to the second one using the signal link cable (the first <strong>Tile</strong> is the master and<br />
the others are the slaves). Connect the first <strong>Tile</strong> to the power source with the supplied cable. Connect the<br />
rest of the <strong>Deco</strong>-<strong>Tile</strong>s to eachother by linking the powercords and signal wires. After every 60 <strong>Deco</strong>-<strong>Tile</strong>s you<br />
have to use an extra powersupply. The power outlet of the last fixture must be covered with endcap for<br />
waterproof purpose. Each circuit can maximally connect 127 <strong>Deco</strong>-<strong>Tile</strong>s.<br />
(Turn off all the power when connecting, and all the unconnected power-connectors should be covered<br />
with endcaps).
Controlled by DMX Controller<br />
7<br />
Fig. 4<br />
Connect the first <strong>LED</strong> <strong>Deco</strong>-<strong>Tile</strong> with the supplied cable to the controller. Connect the first <strong>Deco</strong>-<strong>Tile</strong> to the<br />
second one using the signal link cable (the first <strong>Tile</strong> is the master and the others are the slaves). Connect the<br />
first <strong>Tile</strong> to the power source with the supplied cable. Connect the rest of the <strong>Deco</strong>-<strong>Tile</strong>s to eachother by<br />
linking the powercords and signal wires. After every 60 <strong>Deco</strong>-<strong>Tile</strong>s you have to use an extra powersupply. The<br />
power outlet of the last fixture must be covered with endcap for waterproof purpose. Each circuit can<br />
maximally connect 127 <strong>Deco</strong>-<strong>Tile</strong>s.<br />
(Turn off all the power when connecting, and all the unconnected power-connectors should be covered<br />
with endcaps).
DMX Setting of the <strong>Deco</strong>-<strong>Tile</strong><br />
1) When you only use the remote to control the panel, please turn the switch to MASTER (Fig. 5).<br />
2) If you want to control the <strong>Deco</strong>-<strong>Tile</strong> by DMX, write the DMX address to the panel first. When you<br />
set the address to the panel you need to turn the switch to MASTER, and then push the ADDRESS SET<br />
Button (Fig.6-2) on the remote to set the address. You can use the “+” or “-“ buttons (Fig.6-3) to increase<br />
or reduce the DMX address for the panel. After you have set the address, please press the ADDRESS SET<br />
Button again to confirm. During this operation please don’t connect the panel to the DMX console.<br />
The address is the start channel for the panel.<br />
3) After you have set the DMX address, please turn the switch to SLAVE and connect to the DMX console.<br />
Then it will be controlled by DMX console.<br />
4) Please note that the first channel of the DMX console is used to select the DMX mode for the <strong>Deco</strong>-<strong>Tile</strong>.<br />
You can push the first channel to set 3, 6 or 12 channels for the <strong>Deco</strong>-<strong>Tile</strong>.<br />
0~60 is 3 channels, 61~120 is 6 channels, 121~180 is 6 channels, 181~240 is 6 channels, 241~255 is 12<br />
channels. The 6 channels-mode has three different combinations of the segments.<br />
You can push channel 1 to see the combination. As you can see there are four segments on the <strong>Deco</strong>-<br />
<strong>Tile</strong>. You can control the whole tile by 3 channels, or control every 2 segments by 6 channels, or control<br />
each segment separately by 12 channels.<br />
5) If you set the address as 1, the first channel is used to select DMX mode 3 or 6 or 12 channels.<br />
Then the DMX channels will start from 2. If you set the address as 2, the first channel of the controller is still<br />
used to select DMX mode 3 or 6 or 12, but the start channel for the panel will be 3. If you set the address<br />
as 4, the start channel will be 5. It’s different from other DMX products.<br />
Fig. 5 Fig.6<br />
Connect to DMX Controller<br />
Connect to DMX IN of the <strong>Deco</strong>-<strong>Tile</strong><br />
Fig. 7<br />
Linking The First <strong>Deco</strong>-tile to the Second <strong>Deco</strong>-<strong>Tile</strong><br />
Connect to DMX OUT of the first <strong>Deco</strong>-<strong>Tile</strong><br />
Connect to DMX IN of the second <strong>Deco</strong>-<strong>Tile</strong><br />
Fig. 8<br />
8
Remote Control Functions<br />
Static Colors: Red, Green, Yellow, Blue, Purple, Cyan, White and so on.<br />
Options: Color Change<br />
Color Fade<br />
Color Chase<br />
Auto Run<br />
Buttons:<br />
Sec1: Section 1<br />
Sec2: Section 2<br />
Sec3: Section 3<br />
Sec4: Section 4<br />
Combine: Combine different sections<br />
R+, R–, G+, G–, B+, B– : Adjust the Color<br />
Adjust DMX Address<br />
Adjust Speed<br />
7x Color Change: Display every single color (Gray 0-126)<br />
Color Flash (Speed Change 1-100)<br />
7x Fade Change: Single color Fade (Speed Change 1-10)<br />
Color Fade (Speed Change 1-10)<br />
Color Chase: Single color Fade (Speed Change 1-100)<br />
Static Display (Gray 0-126)<br />
Auto Run: Auto-combine Chases and Fades (Speed Change 0-10)<br />
Address Set: 0-512<br />
Note: Set the switch to MASTER before using the remote controller.<br />
Remove the batteries, when you don’t use the remote for a long time.<br />
Change the batteries if the remote control doesn’t function fluently.<br />
Do not press the ADDRESS SET button, if the address of the <strong>Deco</strong>-<strong>Tile</strong> has been set<br />
9
<strong>Deco</strong>-tile structure and installation<br />
<strong>LED</strong> <strong>Deco</strong>-<strong>Tile</strong> is made of milky white PVC, a slim aluminum board (oxidized surface), black ABS base.<br />
Fixed with screw. You can install the <strong>Deco</strong>-<strong>Tile</strong> in 2 ways:<br />
1. Open up the support plates on the back, to create an<br />
adjustable stand. The inclination angle can be altered<br />
by adjusting the position of the stand.<br />
2. Mount the mounting-clamps (black + L-shaped)<br />
to the desired surface. After that you can click the<br />
<strong>LED</strong> <strong>Deco</strong> <strong>Tile</strong> with its U-shaped holes to the mounting<br />
brackets.<br />
10
Maintenance<br />
The operator has to make sure that safety-relating and machine-technical installations are to be inspected<br />
by an expert after every four years in the course of an acceptance test.<br />
The operator has to make sure that safety-relating and machine-technical installations are to be inspected<br />
by a skilled person once a year.<br />
The following points have to be considered during the inspection:<br />
1. All screws used for installing the device or parts of the device have to be tightly connected and must<br />
not be corroded.<br />
2. There may not be any deformations on housings, fixations and installation spots.<br />
3. Mechanically moving parts like axles, eyes and others may not show any traces of wearing.<br />
4. The electric power supply cables must not show any damages or material fatigue.<br />
The Showtec <strong>LED</strong> <strong>Deco</strong>-<strong>Tile</strong> <strong>Pro</strong> requires almost no maintenance. However, you should keep the unit clean.<br />
Otherwise, the fixture’s light-output will be significantly reduced. Disconnect the mains power supply, and<br />
then wipe the cover with a damp cloth. Do not immerse in liquid. Do not use alcohol or solvents. Keep<br />
connections clean. Disconnect electric power, and then wipe the connections with a damp cloth. Make<br />
sure connections are thoroughly dry before linking equipment or supplying electric power.<br />
Troubleshooting<br />
This troubleshooting guide is meant to help solve simple problems.<br />
If a problem occurs, carry out the steps below in sequence until a solution is found. Once the unit operates<br />
properly, do not carry out following steps.<br />
1. If the device does not operate properly, unplug the device.<br />
2. Check the power from the wall, all cables etc.<br />
3. If all of the above appears to be O.K., plug the unit in again.<br />
4. If you are unable to determine the cause of the problem, do not open the <strong>LED</strong> <strong>Deco</strong>-<strong>Tile</strong> <strong>Pro</strong>, as this may<br />
damage the unit and the warranty will become void.<br />
5. Return the device to your Showtec dealer.<br />
No Light<br />
This troubleshooting guide is meant to help solve simple problems. If a problem occurs, carry out the steps<br />
below in sequence until a solution is found. Once the unit operates properly, do not carry out following steps.<br />
If the light effect does not operate properly, refer servicing to a technician.<br />
Response: Suspect two potential problem areas: the power supply or the <strong>LED</strong>s.<br />
1. Power supply. Check that the unit is plugged into an appropriate power supply.<br />
2. The <strong>LED</strong>s. Return the <strong>LED</strong> <strong>Deco</strong>-<strong>Tile</strong> <strong>Pro</strong> to your Showtec dealer.<br />
11
<strong>Pro</strong>duct Specification<br />
Model: Showtec <strong>LED</strong> <strong>Deco</strong>-<strong>Tile</strong> <strong>Pro</strong><br />
Voltage: AC 230V-50Hz (CE)<br />
DMX input and DMX output<br />
Dimensions: 500x500x37mm (LxWxH)<br />
Weight: 4,8 kg<br />
Remote Control<br />
Signal emitting: Infrared<br />
Power source: 2 batteries AAA<br />
Operating Humidity: 0-95%<br />
Operating Temperature; -20 °C / +45 °C<br />
Dimensions: 140x52x22mm (LxWxH)<br />
Design and product specifications are subject to change without prior notice.<br />
Website: www.Highlite.nl<br />
Email: service@highlite.nl<br />
12