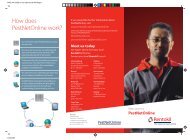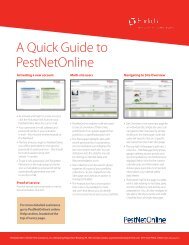
PestNetOnline Quick User Guide - Rentokil
PestNetOnline Quick User Guide - Rentokil
PestNetOnline Quick User Guide - Rentokil

You also want an ePaper? Increase the reach of your titles
YUMPU automatically turns print PDFs into web optimized ePapers that Google loves.
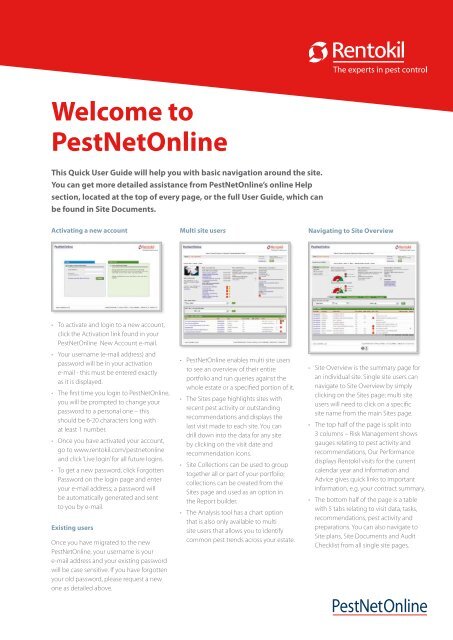
Welcome to<br />
<strong>PestNetOnline</strong><br />
This <strong>Quick</strong> <strong>User</strong> <strong>Guide</strong> will help you with basic navigation around the site.<br />
You can get more detailed assistance from <strong>PestNetOnline</strong>’s online Help<br />
section, located at the top of every page, or the full <strong>User</strong> <strong>Guide</strong>, which can<br />
be found in Site Documents.<br />
Activating a new account Multi site users<br />
Navigating to Site Overview<br />
• To activate and login to a new account,<br />
click the Activation link found in your<br />
<strong>PestNetOnline</strong> New Account e-mail.<br />
• Your username (e-mail address) and<br />
password will be in your activation<br />
e-mail - this must be entered exactly<br />
as it is displayed.<br />
• The first time you login to <strong>PestNetOnline</strong>,<br />
you will be prompted to change your<br />
password to a personal one – this<br />
should be 6-20 characters long with<br />
at least 1 number.<br />
• Once you have activated your account,<br />
go to www.rentokil.com/pestnetonline<br />
and click ‘Live login’ for all future logins.<br />
• To get a new password, click Forgotten<br />
Password on the login page and enter<br />
your e-mail address; a password will<br />
be automatically generated and sent<br />
to you by e-mail.<br />
Existing users<br />
Once you have migrated to the new<br />
<strong>PestNetOnline</strong>, your username is your<br />
e-mail address and your existing password<br />
will be case sensitive. If you have forgotten<br />
your old password, please request a new<br />
one as detailed above.<br />
• <strong>PestNetOnline</strong> enables multi site users<br />
to see an overview of their entire<br />
portfolio and run queries against the<br />
whole estate or a specified portion of it.<br />
• The Sites page highlights sites with<br />
recent pest activity or outstanding<br />
recommendations and displays the<br />
last visit made to each site. You can<br />
drill down into the data for any site<br />
by clicking on the visit date and<br />
recommendation icons.<br />
• Site Collections can be used to group<br />
together all or part of your portfolio;<br />
collections can be created from the<br />
Sites page and used as an option in<br />
the Report builder.<br />
• The Analysis tool has a chart option<br />
that is also only available to multi<br />
site users that allows you to identify<br />
common pest trends across your estate.<br />
• Site Overview is the summary page for<br />
an individual site. Single site users can<br />
navigate to Site Overview by simply<br />
clicking on the Sites page; multi site<br />
users will need to click on a specific<br />
site name from the main Sites page.<br />
• The top half of the page is split into<br />
3 columns – Risk Management shows<br />
gauges relating to pest activity and<br />
recommendations, Our Performance<br />
displays <strong>Rentokil</strong> visits for the current<br />
calendar year and Information and<br />
Advice gives quick links to important<br />
information, e.g. your contract summary.<br />
• The bottom half of the page is a table<br />
with 5 tabs relating to visit data, tasks,<br />
recommendations, pest activity and<br />
preparations. You can also navigate to<br />
Site plans, Site Documents and Audit<br />
Checklist from all single site pages.
Recommendations<br />
Recommendations are activities that<br />
our technicians have suggested that you<br />
undertake to improve your defences<br />
against pest infestations. Clicking on any<br />
recommendation icon will take you to<br />
the Recommendations tab – here you<br />
can apply filters to show a particular<br />
range of data, or export the data as a<br />
spreadsheet or PDF.<br />
‘Unactioned’<br />
New recommendation made<br />
by our technician<br />
‘Pending’<br />
Recommendation has been<br />
read by you and feedback<br />
made against the action<br />
‘Closed’<br />
Recommendation completed<br />
and closed by you<br />
This icon in the<br />
Recommendations table opens a<br />
pop up where you can progress<br />
a recommendation. Saving<br />
your changes will automatically<br />
update the data on the<br />
Recommendations tab and close<br />
the pop up.<br />
Contact Us<br />
Viewing pest activity<br />
From the Site Overview page<br />
Click on the Pest Activity tab<br />
If you need any additional help, or have a general query about <strong>PestNetOnline</strong>,<br />
please contact us using the query box on the Contact Us page.<br />
•<br />
• Pest activity will be listed by visit date in<br />
the grid, detailing individual pest species<br />
• The Location link opens a site plan for<br />
that detector<br />
• The Detector Type link opens a pop up<br />
showing the pest activity history by date<br />
at that location<br />
Analysis charts<br />
The Analysis section of <strong>PestNetOnline</strong><br />
comprises of 3 charts (4 for multi site users)<br />
that enable you to select and display data<br />
in several formats against fixed or custom<br />
time periods. The charts are intended to<br />
help identify seasonal and topical trends.<br />
From the Analysis page, click the title of a<br />
chart and follow the instructions to build<br />
it; click ‘Go’ to generate the chart. You can<br />
change the format and time scale by using<br />
the icons at the top of the page.<br />
Reports<br />
You can choose from a selection<br />
of 4 reports:<br />
• Pest activity<br />
• Recommendations<br />
• Tasks<br />
• Visits<br />
All existing reports will be stored in the<br />
table on the main reports page – from<br />
here you can edit, delete or run a report.<br />
The ‘Create new report’ button will guide<br />
you through a reports builder where you<br />
can specify the information to be included<br />
in your report - time period, delivery<br />
schedule, format and distribution list.<br />
Reports can be scheduled to run once<br />
now, run once at a future date or to run<br />
on set dates automatically. An email will<br />
be delivered to the distribution list, with<br />
a summary of the report’s criteria and<br />
the attached report (spreadsheet or<br />
PDF format). You will also receive an<br />
email to inform you if no data matches<br />
the report’s specifications.