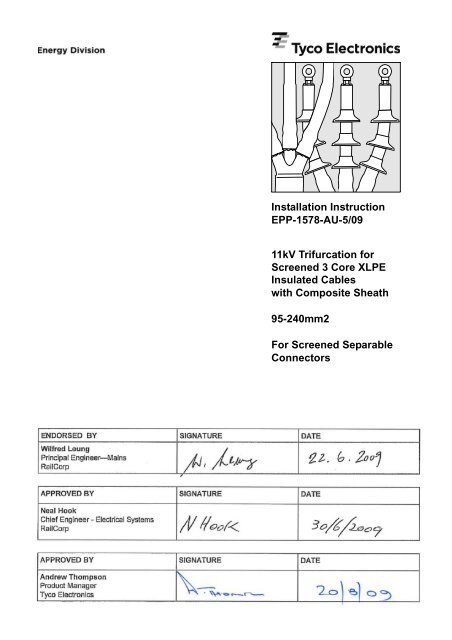
Installation Instruction EPP-1578-AU-5/09 11kV Trifurcation for ...
Installation Instruction EPP-1578-AU-5/09 11kV Trifurcation for ...
Installation Instruction EPP-1578-AU-5/09 11kV Trifurcation for ...

Create successful ePaper yourself
Turn your PDF publications into a flip-book with our unique Google optimized e-Paper software.
<strong>Installation</strong> <strong>Instruction</strong><br />
<strong>EPP</strong>-<strong>1578</strong>-<strong>AU</strong>-5/<strong>09</strong><br />
<strong>11kV</strong> <strong>Trifurcation</strong> <strong>for</strong><br />
Screened 3 Core XLPE<br />
Insulated Cables<br />
with Composite Sheath<br />
95-240mm2<br />
ENDORSED BY<br />
Wilfred Leung<br />
Principal Engineer—Mains<br />
RailCorp<br />
SIGNATURE DATE<br />
APPROVED BY SIGNATURE DATE<br />
Neal Hook<br />
Chief Engineer - Electrical Systems<br />
RailCorp<br />
APPROVED BY SIGNATURE DATE<br />
Andrew Thompson<br />
Product Manager<br />
Tyco Electronics<br />
For Screened Separable<br />
Connectors
Be<strong>for</strong>e Starting<br />
Check to ensure that the kit you are going to use fits the cable.<br />
Refer to the kit label and the title of the installation instruction.<br />
Components or working steps may have been improved since you last installed this<br />
product.<br />
Carefully read and follow the steps in the installation instruction.<br />
General <strong>Instruction</strong>s<br />
Use a propane (preferred) or butane gas torch.<br />
Ensure the torch is always used in a well-ventilated environment.<br />
Adjust the torch to obtain a soft blue flame with a yellow tip.<br />
Pencil-like blue flames should be avoided.<br />
Keep the torch aimed in the shrink direction to preheat the material.<br />
Keep the flame moving continuously to avoid scorching the material.<br />
Clean and degrease all parts that will come into contact with adhesive.<br />
If a solvent is used follow the manufacturer's handling instructions.<br />
Tubing should be cut smoothly with a sharp knife leaving no jagged edges.<br />
Start shrinking the tubing at the position recommended in the instruction.<br />
Ensure that the tubing is shrunk smoothly all around be<strong>for</strong>e continuing along the cable.<br />
Tubing should be smooth and wrinkle free with inner components clearly defined.<br />
The In<strong>for</strong>mation contained in these installation instructions is <strong>for</strong> use only by installers trained to make<br />
electrical power installations and is intended to describe the correct method of installation <strong>for</strong> this product.<br />
However, Tyco Electronics has no control over the field conditions which influence product installation.<br />
It is the user's responsibility to determine the suitability of the installation method in the user's field conditions.<br />
Tyco Electronics' only obligations are those in Tyco Electronics' standard Conditions of Sale <strong>for</strong> this product<br />
and in no case will Tyco Electronics be liable <strong>for</strong> any other incidental, indirect or consequential damages<br />
arising from the use or misuse of the products.<br />
Raychem, TE Logo und Tyco Electronics are trade marks.<br />
<strong>EPP</strong>-<strong>1578</strong>-<strong>AU</strong>-5/<strong>09</strong> Page 2/6
Check List Number: CL892-5/<strong>09</strong><br />
_____________________________________________________________________________________________________________<br />
Tyco Electronics<br />
Energy Division<br />
Dulmison Pty Ltd<br />
ABN 56 000 129 573<br />
Unit 2, No 3 Corella Close<br />
Berkeley Vale NSW 2261<br />
Energy Division<br />
SMOE-RCP03<br />
02 4389 6000 tel<br />
02 4389 6061 fax<br />
www.tycoelectronics.com<br />
Qty: 1<br />
Kit Contents<br />
________________________________________________________________________________<br />
1 x <strong>EPP</strong>A-202-2 PVC Tape 10 Metre x 15Mm Wide<br />
2 x S1085-3-400<br />
Low Temp Sealant-Red-400Lg ( For<br />
Breakout )<br />
6 x S1085-1-100 Low Temp Sealant-Red-100Lg<br />
3 x <strong>EPP</strong>A-004 Cleaning Tissue<br />
3 x MWTM-35/12-1000/U Medium Wall Tubing Uncoated 1000mm<br />
1 x 402W526/S Breakout Low Voltage<br />
1 x <strong>EPP</strong>-<strong>1578</strong>-<strong>AU</strong>-4/<strong>09</strong> <strong>Installation</strong> <strong>Instruction</strong><br />
1 x ESD-1573-<strong>AU</strong> Check List<br />
<strong>EPP</strong>-<strong>1578</strong>-<strong>AU</strong>-5/<strong>09</strong> Page 3/6<br />
Date: 26/05/20<strong>09</strong><br />
ESD-1573-<strong>AU</strong><br />
Page : 1 of 1
The setting length is determined by the overall geometry of<br />
the equipment, giving consideration to the available length of<br />
rejacketing tube in the kit and the minimum internal, set in<br />
position, bending radius of the cable. Allow 10% longitudinal<br />
shrinkage of the supplied rejacketing tube. Determine the<br />
setting length.<br />
Ensure sufficient cable is cut to allow <strong>for</strong> the setting of the<br />
cores and <strong>for</strong> the screen wires to reach the earth bar.<br />
Remove the outer layer of the composite oversheath to the<br />
setting length plus 20mm.<br />
Remove the inner layer of composite sheath to the setting<br />
length.<br />
Remove the fillers level with the oversheath.<br />
Abrade, clean and degrease the oversheath <strong>for</strong> a distance of<br />
200 mm using the cleaning tissue provided in the kit.<br />
For Cables without Water Swellable Tapes Only:<br />
i. Starting with one core at a time, unwind the screen<br />
wires from the core. Do not bend them into position at<br />
this stage.<br />
ii. Position the glove along side the cable so that the<br />
mould line of the glove is level with the end of the<br />
inner layer of the composite sheath.<br />
Apply one layer of red mastic tape (20mm wide) over<br />
the insulation screen, level with the end of the glove<br />
fingers<br />
1<br />
2<br />
<strong>EPP</strong>-<strong>1578</strong>-<strong>AU</strong>-5/<strong>09</strong> Page 4/6
iii. Wind the screen wires back over the insulation<br />
screen. Avoid crossing the individual screen wires.<br />
For cables with and without Water Swellable<br />
Tapes:<br />
iv. Apply one layer of red mastic tape (20mm wide) over<br />
the screen wires at the same location the mastic was<br />
applied in Step (ii), (i.e. over the mastic applied in<br />
Step (ii)).<br />
v. Repeat Steps (i)-(iv) <strong>for</strong> the other cores.<br />
vi. Apply 2 full turns of PVC tape over the screen wires<br />
at the end of the core to facilitate easy installation of<br />
the glove.<br />
Slide the rejacketing tube over the previously applied mastic,<br />
continuing the rejacketing tube installation as far as possible<br />
to the crotch of the cable.<br />
Starting at the cable crutch shrink the rejacketing tube over<br />
each core. Ensure that the heat is applied evenly around all<br />
of the three cores. This is necessary to ensure the tubing<br />
recovers, maintaining an even wall thickness.<br />
While shrinking the tubes be mindful that the finishing point<br />
of the shrunk rejacketing tubes will be the oversheath<br />
removal point <strong>for</strong> the termination. Avoid shrinking excess<br />
tube onto the cores.<br />
3<br />
3<br />
<strong>EPP</strong>-<strong>1578</strong>-<strong>AU</strong>-5/<strong>09</strong> Page 5/6
Apply one layer of red mastic (50mm wide) half overlapping<br />
the inner layer and outer layer of the composite oversheath.<br />
Apply one layer of red mastic (50mm wide) over the outer<br />
layer of composite oversheath 40mm from the edge of the<br />
outer sheath cutback.<br />
Slide the glove as far down the crotch as possible. Shrink<br />
the glove into place starting at the centre. Work first towards<br />
the lower end and then shrink the fingers onto the cores.<br />
<strong>Trifurcation</strong> of the 3 core cable to 3 Single core cables<br />
complete.<br />
<strong>Installation</strong> of Screened Separable Connectors<br />
Prepare the cable & install the components as per the<br />
installation instruction supplied with the screened separable<br />
connectors.<br />
Please dispose of all waste according to<br />
environmental regulations.<br />
Tyco Electronics Raychem GmbH<br />
Energy Division<br />
Finsinger Feld 1<br />
85521 Ottobrunn/Germany<br />
0049-89-6089-0 tel<br />
0049-89-6089-345 fax<br />
http://energy.tycoelectronics.com<br />
4<br />
5<br />
<strong>EPP</strong>-<strong>1578</strong>-<strong>AU</strong>-5/<strong>09</strong> Page 6/6