

GRUNDFOS INSTRUCTIONS - VBS irrigatie-technieken
GRUNDFOS INSTRUCTIONS - VBS irrigatie-technieken
GRUNDFOS INSTRUCTIONS - VBS irrigatie-technieken

You also want an ePaper? Increase the reach of your titles
YUMPU automatically turns print PDFs into web optimized ePapers that Google loves.
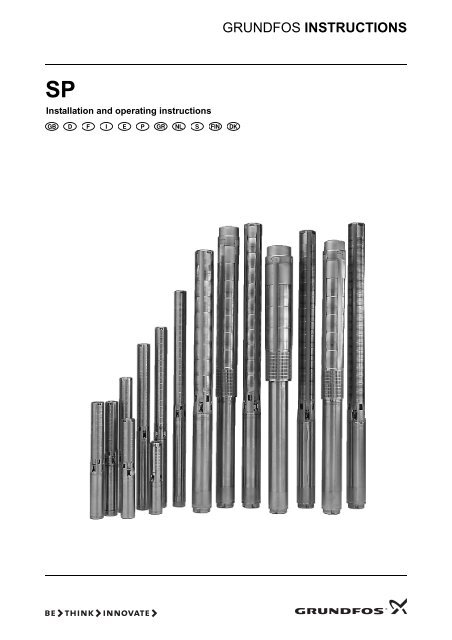
SP<br />
Installation and operating instructions<br />
<strong>GRUNDFOS</strong> <strong>INSTRUCTIONS</strong>
2<br />
Declaration of Conformity<br />
We Grundfos declare under our sole responsibility that the products SP, to<br />
which this declaration relates, are in conformity with the Council Directives<br />
on the approximation of the laws of the EC Member States relating to<br />
— Machinery (98/37/EC).<br />
— Electrical equipment designed for use within certain voltage limits<br />
(2006/95/EC).<br />
Standards used: EN 60335-1: 2002 and EN 60335-2-41: 2003,<br />
except sections 25.1 and 25.8.<br />
— Electromagnetic compatibility (2004/108/EC).<br />
Standards used: EN 61000-6-2 and EN 61000-6-3.<br />
Déclaration de Conformité<br />
Nous Grundfos déclarons sous notre seule responsabilité que les produits<br />
SP auxquels se réfère cette déclaration sont conformes aux Directives du<br />
Conseil concernant le rapprochement des législations des Etats membres<br />
CE relatives à<br />
— Machines (98/37/CE).<br />
— Matériel électrique destiné à employer dans certaines limites<br />
de tension (2006/95/CE).<br />
Standards utilisés: EN 60335-1: 2002 et EN 60335-2-41: 2003,<br />
sauf pour paragraphes 25.1 et 25.8.<br />
— Compatibilité électromagnétique (2004/108/CE).<br />
Standards utilisés: EN 61000-6-2 et EN 61000-6-3.<br />
Declaración de Conformidad<br />
Nosotros Grundfos declaramos bajo nuestra única responsabilidad que<br />
los productos SP a los cuales se refiere esta declaración son conformes<br />
con las Directivas del Consejo relativas a la aproximación de las legislaciones<br />
de los Estados Miembros de la CE sobre<br />
— Máquinas (98/37/CE).<br />
— Material eléctrico destinado a utilizarse con determinadas límites de<br />
tensión (2006/95/CE).<br />
Normas aplicadas: EN 60335-1: 2002 y EN 60335-2-41: 2003,<br />
excepto las secciones 25.1 y 25.8.<br />
— Compatibilidad electromagnética (2004/108/CE).<br />
Normas aplicadas: EN 61000-6-2 y EN 61000-6-3.<br />
Δήλωση Συμμόρφωσης<br />
Εμείς η Grundfos δηλώνουμε με αποκλειστικά δική μας ευθύνη ότι τα<br />
προιόντα SP συμμορφώνονται με την Οδηγία του Συμβουλίου επί της<br />
σύγκλισης των νόμων των Κρατών Mελών της Ευρωπαικής Ενωσης σε<br />
σχέση με τα<br />
— Μηχανήματα (98/37/EC).<br />
— Ηλεκτρικές συσκευές σχεδιασμένες γιά χρήση εντός ορισμένων ορίων<br />
ηλεκτρικής τάσης (2006/95/EC).<br />
Πρότυπα που χρησιμοποιήθηκαν: EN 60335-1: 2002 και<br />
EN 60335-2-41: 2003, εκτός των παραγράφων 25.1 και 25.8.<br />
— Ηλεκτρομαγνητική συμβατότητα (2004/108/EC).<br />
Πρότυπα που χρησιμοποιήθηκαν: EN 61000-6-2 και EN 61000-6-3.<br />
Försäkran om överensstämmelse<br />
Vi Grundfos försäkrar under ansvar, att produkterna SP, som omfattas av<br />
denna försäkran, är i överensstämmelse med Rådets Direktiv om inbördes<br />
närmande till EU-medlemsstaternas lagstiftning, avseende<br />
— Maskinell utrustning (98/37/EC).<br />
— Elektrisk utrustning avsedd för användning inom vissa spänningsgränser<br />
(2006/95/EC).<br />
Använda standarder: EN 60335-1: 2002 och EN 60335-2-41: 2003,<br />
förutom avsnitt 25.1 och 25.8.<br />
— Elektromagnetisk kompatibilitet (2004/108/EC).<br />
Använda standarder: EN 61000-6-2 och EN 61000-6-3.<br />
Overensstemmelseserklæring<br />
Vi Grundfos erklærer under ansvar, at produkterne SP, som denne<br />
erklæring omhandler, er i overensstemmelse med Rådets direktiver<br />
om indbyrdes tilnærmelse til EF medlemsstaternes lovgivning om<br />
— Maskiner (98/37/EF).<br />
— Elektrisk materiel bestemt til anvendelse inden for visse spændingsgrænser<br />
(2006/95/EF).<br />
Anvendte standarder: EN 60335-1: 2002 og EN 60335-2-41: 2003,<br />
undtagen afsnit 25.1 og 25.8.<br />
— Elektromagnetisk kompatibilitet (2004/108/EF).<br />
Anvendte standarder: EN 61000-6-2 og EN 61000-6-3.<br />
Konformitätserklärung<br />
Wir Grundfos erklären in alleiniger Verantwortung, dass die Produkte SP,<br />
auf die sich diese Erklärung bezieht, mit den folgenden Richtlinien des<br />
Rates zur Angleichung der Rechtsvorschriften der EG-Mitgliedstaaten<br />
übereinstimmen:<br />
— Maschinen (98/37/EG).<br />
— Elektrische Betriebsmittel zur Verwendung innerhalb bestimmter<br />
Spannungsgrenzen (2006/95/EG).<br />
Normen, die verwendet wurden: EN 60335-1: 2002 und<br />
EN 60335-2-41: 2003, ausgenommen Abschnitt 25.1 und 25.8.<br />
— Elektromagnetische Verträglichkeit (2004/108/EG).<br />
Normen, die verwendet wurden: EN 61000-6-2 und EN 61000-6-3.<br />
Dichiarazione di Conformità<br />
Noi Grundfos dichiariamo sotto la nostra esclusiva responsabilità che i<br />
prodotti SP ai quali questa dichiarazione se riferisce sono conformi alle<br />
Direttive del Consiglio concernente il ravvicinamento delle legislazioni degli<br />
Stati membri CE relative a<br />
— Macchine (98/37/CE).<br />
— Materiale elettrico destinato ad essere utilizzato entro certi limiti di<br />
tensione (2006/95/CE).<br />
Standard usati: EN 60335-1: 2002 e EN 60335-2-41: 2003,<br />
eccetto per i paragrafi 25.1 e 25.8.<br />
— Compatibilità elettromagnetica (2004/108/CE).<br />
Standard usati: EN 61000-6-2 e EN 61000-6-3.<br />
Declaração de Conformidade<br />
Nós Grundfos declaramos sob nossa única responsabilidade que os<br />
produtos SP aos quais se refere esta declaração estão em conformidade<br />
com as Directivas do Conselho das Comunidades Europeias relativas à<br />
aproximação das legislações dos Estados Membros respeitantes à<br />
— Máquinas (98/37/CE).<br />
— Material eléctrico destinado a ser utilizado dentro de certos limites de<br />
tensão (2006/95/CE).<br />
Normas utilizadas: EN 60335-1: 2002 e EN 60335-2-41: 2003,<br />
excepto nos pontos 25.1 e 25.8.<br />
— Compatibilidade electromagnética (2004/108/CE).<br />
Normas utilizadas: EN 61000-6-2 e EN 61000-6-3.<br />
Overeenkomstigheidsverklaring<br />
Wij Grundfos verklaren geheel onder eigen verantwoordelijkheid dat de<br />
produkten SP waarop deze verklaring betrekking heeft in overeenstemming<br />
zijn met de Richtlijnen van de Raad inzake de onderlinge aanpassing<br />
van de wetgevingen van de Lid-Staten betreffende<br />
— Machines (98/37/EG).<br />
— Elektrisch materiaal bestemd voor gebruik binnen bepaalde<br />
spanningsgrenzen (2006/95/EG).<br />
Normen: EN 60335-1: 2002 en EN 60335-2-41: 2003,<br />
behalve hoofdstukken 25.1 en 25.8.<br />
— Elektromagnetische compatibiliteit (2004/108/EG).<br />
Normen: EN 61000-6-2 en EN 61000-6-3.<br />
Vastaavuusvakuutus<br />
Me Grundfos vakuutamme yksin vastuullisesti, että tuotteet SP, jota tämä<br />
vakuutus koskee, noudattavat direktiivejä jotka käsittelevät EY:n jäsenvaltioiden<br />
koneellisia laitteita koskevien lakien yhdenmukaisuutta seur.:<br />
— Koneet (98/37/EY).<br />
— Määrättyjen jänniterajoitusten puitteissa käytettävät sähköiset laitteet<br />
(2006/95/EY).<br />
Käytetyt standardit: EN 60335-1: 2002 ja EN 60335-2-41: 2003,<br />
lukuun ottamatta kappaleita 25.1 ja 25.8.<br />
— Elektromagneettinen vastaavuus (2004/108/EY).<br />
Käytetyt standardit: EN 61000-6-2 ja EN 61000-6-3.<br />
Bjerringbro, 1st December 2007<br />
Jan Strandgaard<br />
Technical Director
SP<br />
Installation and operating instructions 4<br />
Montage- und Betriebsanleitung 17<br />
Notice d'installation et d'entretien 31<br />
Istruzioni di installazione e funzionamento 45<br />
Instrucciones de instalación y funcionamiento 58<br />
Instruções de instalação e funcionamento 72<br />
Οδηγίες εγκατάστασης και λειτουργίας 86<br />
Installatie- en bedieningsinstructies 100<br />
Monterings- och driftsinstruktion 114<br />
Asennus- ja käyttöohjeet 127<br />
Monterings- og driftsinstruktion 140<br />
3
CONTENTS<br />
2. Delivery and storage<br />
Page<br />
4<br />
2.1 Delivery 4<br />
2.2 Storage and handling 4<br />
3. General data 4<br />
3.1 Applications 4<br />
3.2 Pumped liquids 5<br />
3.3 Sound pressure level 5<br />
4. Preparation 5<br />
4.1 Checking of liquid in motor 5<br />
4.2 Positional requirements 6<br />
4.3 Diameter of pump/motor 7<br />
4.4 Liquid temperatures/cooling 7<br />
4.5 Pipework connection 7<br />
5. Electrical connection 7<br />
5.1 General 7<br />
5.2 Motor protection 8<br />
5.3 Lightning protection 9<br />
5.4 Cable sizing 9<br />
5.5 Control of single-phase MS 402 10<br />
5.6 Connection of single-phase motors 10<br />
5.7 Connection of three-phase motors 10<br />
6. Pump installation 12<br />
6.1 Fitting the motor to the pump 12<br />
6.2 Removal and fitting of cable guard 13<br />
6.3 Fitting of submersible drop cable 13<br />
6.4 Riser pipe 13<br />
6.5 Maximum installation depth below water level 13<br />
6.6 Cable fitting 13<br />
6.7 Lowering the pump 13<br />
6.8 Installation depth 13<br />
7. Start-up and operation 14<br />
7.1 Start-up 14<br />
7.2 Operation 14<br />
8. Maintenance and service 14<br />
9. Fault finding chart 15<br />
10. Checking of motor and cable 16<br />
11. Disposal 16<br />
Warning<br />
Prior to installation, read these installation and<br />
operating instructions. Installation and operation<br />
must comply with local regulations and accepted<br />
codes of good practice.<br />
These instructions apply to Grundfos submersible motors,<br />
types MS and MMS, and Grundfos submersible pumps, type SP,<br />
fitted with submersible motors, types Grundfos MS/MMS or<br />
Franklin 4"-8".<br />
If the pump is fitted with a motor of another motor make than<br />
Grundfos MS or MMS, please note that the motor data may differ<br />
from the data stated in these instructions.<br />
1. Symbols used in this document<br />
4<br />
Caution<br />
Note<br />
Warning<br />
If these safety instructions are not observed,<br />
it may result in personal injury!<br />
If these safety instructions are not observed,<br />
it may result in malfunction or damage to the<br />
equipment!<br />
Notes or instructions that make the job easier<br />
and ensure safe operation.<br />
2. Delivery and storage<br />
2.1 Delivery<br />
Grundfos submersible pumps are supplied from the factory in<br />
proper packing in which they should remain until they are to be<br />
installed.<br />
During unpacking and prior to installation, care must be taken<br />
when handling the pump to ensure that misalignment does not<br />
occur due to bending.<br />
Caution<br />
When the pump part and motor are supplied as separate units<br />
(long pumps), fit the motor to the pump as described in section<br />
6.1 Fitting the motor to the pump.<br />
Note<br />
The pump should not be exposed to unnecessary impact and<br />
shocks.<br />
2.2 Storage and handling<br />
Storage temperature<br />
Pump: –20 °C to +60 °C.<br />
Motor: –20 °C to +70 °C.<br />
The motors must be stored in a closed, dry and well ventilated<br />
room.<br />
Caution<br />
The pump should not be exposed to direct sunlight.<br />
If the pump has been unpacked, it should be stored horizontally,<br />
adequately supported, or vertically to prevent misalignment of the<br />
pump. Make sure that the pump cannot roll or fall over. During<br />
storage, the pump can be supported as shown in fig. 1.<br />
Fig. 1 Pump position during storage<br />
2.2.1 Frost protection<br />
If the pump has to be stored after use, it must be stored on a<br />
frost-free location, or it must be ensured that the motor liquid is<br />
frost-proof.<br />
3. General data<br />
The pumps should remain in the packing until<br />
they are placed in vertical position during<br />
installation.<br />
The loose data plate supplied with the pump<br />
should be fixed close to the installation site.<br />
If MMS motors are stored, the shaft must be<br />
turned by hand at least once a month. If a motor<br />
has been stored for more than one year before<br />
installation, the rotating parts of the motor must<br />
be dismantled and checked before use.<br />
3.1 Applications<br />
Grundfos SP submersible pumps are designed for a wide range<br />
of water supply and liquid transfer applications, such as the<br />
supply of fresh water to private homes or waterworks, water<br />
supply to nursery gardens or farms, drawdown of groundwater<br />
and pressure boosting, and various industrial jobs.<br />
The pump must be installed so that the suction interconnector is<br />
completely submerged in the liquid. The pump can be installed<br />
either horizontally or vertically, see also section 4.2 Positional<br />
requirements.<br />
TM00 1349 2495
3.2 Pumped liquids<br />
Clean, thin, non-explosive liquids without solid particles or<br />
fibres.<br />
The maximum sand content of the water must not exceed<br />
50 g/m3 . A larger sand content will reduce the life of the pump<br />
and increase the risk of blocking.<br />
Caution<br />
If liquids with a viscosity higher than that of water are to be<br />
pumped, please contact Grundfos.<br />
The special SP A N, SP A R, SP N, SP R and SPE types are<br />
designed to accommodate liquids with higher aggressiveness<br />
than drinking water.<br />
The maximum liquid temperature appears from section 4.4 Liquid<br />
temperatures/cooling.<br />
3.3 Sound pressure level<br />
The sound pressure level has been measured in accordance with<br />
the rules laid down in the EC machinery directive 98/37/EC.<br />
Sound pressure level of pumps<br />
Applies to pumps submerged in water, without external regulating<br />
valve.<br />
Sound pressure level of motors<br />
The sound pressure level of Grundfos MS and MMS motors is<br />
lower than 70 dB(A).<br />
Other motor makes: See installation and operating instructions<br />
for these motors.<br />
4. Preparation<br />
When pumping liquids with a density higher than<br />
that of water, motors with correspondingly higher<br />
outputs must be used.<br />
Pump type LpA [dB(A)]<br />
SP 1A < 70<br />
SP 2A < 70<br />
SP 3A < 70<br />
SP 5A < 70<br />
SP 8A < 70<br />
SP 14A < 70<br />
SP 17 < 70<br />
SP 30 < 70<br />
SP 46 < 70<br />
SP 60 < 70<br />
SP 77 < 70<br />
SP 95 < 70<br />
SP 125 79<br />
SP 160 79<br />
SP 215 82<br />
4.1 Checking of liquid in motor<br />
The submersible motors are factory-filled with a special nonpoisonous<br />
liquid, which is frost-proof down to –20 °C.<br />
Note<br />
Caution<br />
Warning<br />
Before starting work on the pump, make sure that<br />
the electricity supply has been switched off and<br />
that it cannot be accidentally switched on.<br />
The level of the liquid in the motor must be<br />
checked and the motor must be refilled, if<br />
required. Use clean water.<br />
If frost protection is required, special Grundfos<br />
liquid must be used to refill the motor. Otherwise<br />
clean water may be used for refilling (however,<br />
never use distilled water).<br />
Refilling of liquid is carried out as described below.<br />
4.1.1 Grundfos submersible motors MS 4000 and MS 402<br />
The filling hole for motor liquid is placed in the following positions:<br />
MS 4000: in the top of the motor.<br />
MS 402: in the bottom of the motor.<br />
1. Position the submersible pump as shown in fig. 2.<br />
The filling screw must be at the highest point of the motor.<br />
2. Remove the screw from the filling hole.<br />
3. Inject liquid into the motor with the filling syringe, fig. 2, until<br />
the liquid runs back out of the filling hole.<br />
4. Replace the screw in the filling hole and tighten securely<br />
before changing the position of the pump.<br />
Torques:<br />
MS 4000: 3.0 Nm.<br />
MS 402: 2.0 Nm.<br />
The submersible pump is now ready for installation.<br />
MS 4000 MS 402<br />
Fig. 2 Pump position during filling – MS 4000 and MS 402<br />
4.1.2 Grundfos submersible motors MS6 and MS 6000<br />
• If the motor is delivered from stock, the liquid level must be<br />
checked before the motor is fitted to the pump, see fig. 3.<br />
• On pumps delivered directly from Grundfos, the liquid level<br />
has already been checked.<br />
• In the case of service, the liquid level must be checked, see<br />
fig. 3.<br />
Filling procedure:<br />
The filling hole for motor liquid is placed at the top of the motor.<br />
1. Position the submersible pump as shown in fig. 3.<br />
The filling screw must be at the highest point of the motor.<br />
2. Remove the screw from the filling hole.<br />
3. Inject liquid into the motor with the filling syringe, fig. 3, until<br />
the liquid runs back out of the filling hole.<br />
4. Replace the screw in the filling hole and tighten securely<br />
before changing the position of the pump.<br />
Torque: 3.0 Nm.<br />
The submersible pump is now ready for installation.<br />
45°<br />
Fig. 3 Motor position during filling – MS6 and MS 6000<br />
TM00 6423 0606<br />
TM03 8129 0507<br />
5
4.1.3 Grundfos submersible motors MMS 6000, MMS 8000,<br />
MMS 10000 and MMS 12000<br />
Filling procedure:<br />
1. Place the motor at a 45 ° angle with the top of the motor<br />
upwards, see fig. 4.<br />
2. Unscrew the plug A and place a funnel in the hole.<br />
3. Pour tap water into the motor until the motor liquid inside the<br />
motor starts running out at A.<br />
Caution: Do not use motor liquid as it contains oil.<br />
4. Remove the funnel and refit the plug A.<br />
The submersible pump is now ready for installation.<br />
6<br />
Caution<br />
A<br />
Before fitting the motor to a pump after a long<br />
period of storage, lubricate the shaft seal by<br />
adding a few drops of water and turning the<br />
shaft.<br />
Fig. 4 Motor position during filling – MMS<br />
4.1.4 Franklin submersible motors from 3 kW and up<br />
The level of the motor liquid in Franklin 4" and 6" submersible<br />
motors is checked by measuring the distance from the bottom<br />
plate to the built-in rubber diaphragm. This distance can be<br />
measured by inserting a rule or a small rod through the hole until<br />
it touches the diaphragm, fig. 5.<br />
Caution Take care not to damage the diaphragm.<br />
Fig. 5 Measuring the distance from bottom plate to<br />
diaphragm<br />
The following table shows the correct distance from the outside of<br />
the bottom plate to the diaphragm:<br />
Motor Dimension Distance<br />
Franklin 4", 0.25 to 3 kW<br />
(see fig. 6a)<br />
A 8 mm<br />
Franklin 4", 3 to 7.5 kW<br />
(see fig. 6b)<br />
B 16 mm<br />
Franklin 6", 4 to 45 kW<br />
(see fig. 6c)<br />
C1 35 mm<br />
Franklin 6", 4 to 22 kW<br />
(see fig. 6d)<br />
C2 59 mm<br />
45°<br />
A C1<br />
B<br />
C2<br />
TM03 0265 3605<br />
TM00 1353 5092<br />
6a 6b<br />
6c 6d<br />
Fig. 6 Franklin submersible motors<br />
If the distance is not correct, carry out an adjustment as<br />
described in section 4.1.5 Franklin submersible motors.<br />
4.1.5 Franklin submersible motors<br />
The level of the motor liquid in Franklin 8" submersible motors is<br />
checked as follows:<br />
1. Prise out the filter in front of the valve at the top of the motor<br />
using a screwdriver. If the filter is slotted, unscrew. The<br />
position of the filling valve is shown in fig. 7.<br />
2. Press the filling syringe against the valve and inject the liquid,<br />
fig. 7. If the valve cone is depressed too far, it may be<br />
damaged thus causing the valve to leak.<br />
3. Remove any air in the motor by pressing the point of the filling<br />
syringe lightly against the valve.<br />
4. Repeat the process of injecting liquid and releasing air until<br />
the liquid starts running out or the diaphragm is in its correct<br />
position (Franklin 4" and 6").<br />
5. Reinstall the filter after refilling with liquid.<br />
The submersible pump is now ready for installation.<br />
Fig. 7 Position of filling valve<br />
4.2 Positional requirements<br />
Warning<br />
If the pump is to be installed in a position where<br />
it is accessible, the coupling must be suitably<br />
isolated from human touch. The pump can for<br />
instance be built into a flow sleeve.<br />
Depending on motor type, the pump can be installed either<br />
vertically or horizontally. A complete list of motor types suitable<br />
for horizontal installation is shown in section 4.2.1.<br />
TM00 6422 3695<br />
TM00 1354 5092
If the pump is installed horizontally, the discharge port should<br />
never fall below the horizontal plane, see fig. 8.<br />
Fig. 8 Positional requirements<br />
If the pump is installed horizontally, e.g. in a tank, it is<br />
recommended to fit it in a flow sleeve.<br />
4.2.1 Motors suitable for horizontal installation<br />
When Franklin 4" submersible motors up to and including 2.2 kW<br />
are started more than 10 times a day, it is recommended to<br />
incline the motor at least 15 ° above the horizontal plane in order<br />
to minimize wearing of the upthrust disc.<br />
Caution<br />
4.3 Diameter of pump/motor<br />
Power output<br />
50 Hz<br />
Power output<br />
60 Hz<br />
Motor type<br />
[kW] [kW]<br />
MS All sizes All sizes<br />
MMS 6000 3.7 to 30 3.7 to 30<br />
MMS 8000 22 to 92 22 to 92<br />
MMS 10000 75 to 170 75 to 170<br />
MMS 12000 147 to 220 –<br />
The maximum diameter of the pump/motor is as shown in the<br />
tables on pages 153 and 154.<br />
It is recommended to check the borehole with an inside calliper to<br />
ensure unobstructed passage.<br />
4.4 Liquid temperatures/cooling<br />
The maximum liquid temperature and the minimum liquid velocity<br />
past the motor appear from the following table.<br />
It is recommended to install the motor above the well screen in<br />
order to achieve proper motor cooling.<br />
Caution<br />
Allowed<br />
Not allowed<br />
During operation, the suction interconnector of<br />
the pump must always be completely submerged<br />
in the liquid.<br />
Warning<br />
If the pump is used for pumping hot liquids<br />
(40 to 60 °C), it must be ensured that persons<br />
cannot come into contact with the pump and the<br />
installation, e.g. by installing a guard.<br />
In cases where the stated liquid velocity cannot<br />
be achieved, a flow sleeve must be installed.<br />
If there is a risk of sediment build-up, such as sand, around the<br />
motor, a flow sleeve should be used in order to ensure proper<br />
cooling of the motor.<br />
4.4.1 Maximum liquid temperature<br />
Out of consideration for the rubber parts in pump and motor, the<br />
liquid temperature must not exceed 40 °C (~105 °F). See also the<br />
following table.<br />
The pump can operate at liquid temperatures between 40 °C and<br />
60 °C (~105 °F and 140 °F) provided that all rubber parts are<br />
replaced every third year.<br />
TM00 1355 5092<br />
Motor<br />
Grundfos<br />
MS 402<br />
MS 4000<br />
MS 6000<br />
Grundfos<br />
MS 4000I*<br />
MS 6000I*<br />
Grundfos<br />
MS6T30<br />
Grundfos<br />
MS6T60<br />
Grundfos<br />
MMS<br />
Franklin<br />
4"<br />
Franklin<br />
6" and 8"<br />
Flow past<br />
the motor<br />
0.15 m/s<br />
0.15 m/s<br />
0.15 m/s<br />
1.0 m/s<br />
0.15 m/s<br />
0.50 m/s<br />
0.08 m/s<br />
0.16 m/s<br />
4.5 Pipework connection<br />
If noise may be transmitted to the building through the pipework,<br />
it is advisable to use plastic pipes.<br />
When plastic pipes are used, the pump should be secured by an<br />
unloaded straining wire.<br />
Warning<br />
Make sure that the plastic pipes to be used are<br />
suitable for the actual liquid temperature and the<br />
pump pressure.<br />
When connecting plastic pipes, a compression coupling should<br />
be used between the pump and the first pipe section.<br />
5. Electrical connection<br />
Installation<br />
Vertical Horizontal<br />
40 °C<br />
(~ 105 °F)<br />
60 °C<br />
(~ 140 °F)<br />
Flow sleeve<br />
recommended<br />
30 °C<br />
(~ 86 °F)<br />
60 °C<br />
(~ 140 °F)<br />
25 °C<br />
(~ 77 °F)<br />
30 °C<br />
(~ 86 °F)<br />
30 °C<br />
(~85 °F)<br />
30 °C<br />
(~85 °F)<br />
* At an ambient pressure of minimum 1 bar (1 MPa)<br />
Note<br />
Note<br />
40 °C<br />
(~ 105 °F)<br />
60 °C<br />
(~ 140 °F)<br />
Flow sleeve<br />
recommended<br />
30 °C<br />
(~ 86 °F)<br />
60 °C<br />
(~ 140 °F)<br />
25 °C<br />
(~ 77 °F)<br />
30 °C<br />
(~ 86 °F)<br />
30 °C<br />
(~85 °F)<br />
30 °C<br />
(~85 °F)<br />
For 37 kW MMS 6000, 110 kW MMS 8000 and<br />
170 kW MMS 10000, the maximum liquid<br />
temperature is 5 °C lower than the values stated<br />
in the above table.<br />
For 190 kW MMS 10000, the temperature is 10 °C<br />
lower.<br />
Plastic pipes are recommended for 4" pumps<br />
only.<br />
Warning<br />
Before starting work on the pump, make sure that<br />
the electricity supply has been switched off and<br />
that it cannot be accidentally switched on.<br />
5.1 General<br />
The electrical connection should be carried out by an authorised<br />
electrician in accordance with local regulations.<br />
The supply voltage, rated maximum current and cos ϕ appear<br />
from the loose data plate that must be fitted close to the<br />
installation site.<br />
7
The required voltage quality for Grundfos MS and MMS<br />
submersible motors, measured at the motor terminals, is<br />
– 10 %/+ 6 % of the nominal voltage during continuous operation<br />
(including variation in the supply voltage and losses in cables).<br />
Furthermore, it must be checked that there is voltage symmetry in<br />
the electricity supply lines, i.e. same difference of voltage<br />
between the individual phases, see also section 10. Checking of<br />
motor and cable, point 2.<br />
If Grundfos MS motors with a built-in temperature transmitter<br />
(Tempcon) are not installed together with a MP 204 or similar<br />
Grundfos motor protection, they must be connected to a 0.47 μF<br />
capacitor approved for phase-phase operation (IEC 384-14) to<br />
meet the EC EMC directive (2004/108/EC). The capacitor must<br />
be connected to the two phases to which the temperature<br />
transmitter is connected, see fig. 9.<br />
8<br />
Warning<br />
The pump must be earthed.<br />
The pump must be connected to an external<br />
mains switch with a minimum contact gap of<br />
3 mm in all poles.<br />
Fig. 9 Connection of capacitor<br />
Colours of the leads<br />
Lead Flat cable Single leads<br />
1 = L1 Brown Black<br />
2 = L2 Black Yellow<br />
3 = L3 Grey Red<br />
4 = PE Yellow/green Green<br />
The motors are wound for direct-on-line starting or star-delta<br />
starting and the starting current is between 4 and 6 times the<br />
rated current of the motor.<br />
The run-up time of the pump is only about 0.1 second. Direct-online<br />
starting is therefore normally approved by the electricity<br />
supply authorities.<br />
5.1.1 Frequency converter operation<br />
Grundfos motors<br />
Three-phase Grundfos motors can be connected to a frequency<br />
converter.<br />
Caution<br />
0.47 0,47 µF μF<br />
1 2 3 4<br />
If a Grundfos MS motor with temperature<br />
transmitter is connected to a frequency<br />
converter, a fuse incorporated in the transmitter<br />
will melt and the transmitter will be inactive. The<br />
transmitter cannot be reactivated. This means<br />
that the motor will operate like a motor without<br />
a temperature transmitter.<br />
TM00 7100 0696<br />
If a temperature transmitter is required, a Pt100 sensor for fitting<br />
to the submersible motor can be ordered from Grundfos.<br />
Caution<br />
During frequency converter operation, it is not<br />
advisable to run the motor at a frequency higher<br />
than the rated frequency (50 or 60 Hz). In<br />
connection with pump operation, it is important<br />
never to reduce the frequency (and consequently<br />
the speed) to such a level that the necessary flow<br />
of cooling liquid past the motor is no longer<br />
ensured.<br />
To avoid damage to the pump part, it must be ensured that the<br />
motor stops when the pump flow falls below 0.1 x nominal flow.<br />
Depending on the frequency converter type, it may expose the<br />
motor to detrimental voltage peaks.<br />
Warning<br />
MS 402 motors for supply voltages up to and<br />
including 440 V (see motor nameplate) must be<br />
protected against voltage peaks higher than<br />
650 V (peak value) between the supply terminals.<br />
It is recommended to protect other motors against voltage peaks<br />
higher than 850 V.<br />
The above disturbance can be abated by installing an RC filter<br />
between the frequency converter and the motor.<br />
Possible increased acoustic noise from the motor can be abated<br />
by installing an LC filter which will also eliminate voltage peaks<br />
from the frequency converter.<br />
Grundfos recommends the installation of an LC filter when a<br />
frequency converter is used. See also section 5.7.6 Frequency<br />
converter.<br />
For further details, please contact your frequency converter<br />
supplier or Grundfos.<br />
Other motor makes than Grundfos<br />
Please contact Grundfos or the motor manufacturer.<br />
5.2 Motor protection<br />
5.2.1 Single-phase motors<br />
Single-phase MS 402 submersible motors, incorporate a<br />
thermal switch and require no additional motor protection.<br />
Warning<br />
When the motor has been thermally switched off,<br />
the motor terminals are still live.<br />
When the motor has cooled sufficiently, it will<br />
restart automatically.<br />
Single-phase MS 4000 submersible motors, must be<br />
protected. A protective device can either be incorporated in a<br />
control box or be separate.<br />
Franklin 4" PSC motors must be connected to a motor starter.<br />
5.2.2 Three-phase motors<br />
Grundfos MS motors are available with or without a built-in<br />
temperature transmitter.<br />
Motors with a built-in and operational temperature transmitter<br />
must be protected by:<br />
• a motor starter with thermal relay or<br />
• an MP 204 and contactor(s).<br />
Motors without or with a non-operational temperature<br />
transmitter must be protected by:<br />
• a motor starter with thermal relay or<br />
• an MP 204 and contactor(s).<br />
Grundfos MMS motors have no built-in temperature transmitter.<br />
A Pt100 sensor is available as an accessory.<br />
Motors with a Pt100 sensor must be protected by:<br />
• a motor starter with thermal relay or<br />
• an MP 204 and contactor(s).<br />
Motors without a Pt100 sensor must be protected by:<br />
• a motor starter with thermal relay or<br />
• an MP 204 and contactor(s).
5.2.3 Required motor starter settings<br />
For cold motors, the tripping time for the motor starter must be<br />
less than 10 seconds at 5 times the rated maximum current of the<br />
motor.<br />
Caution<br />
If this requirement is not met, the motor warranty<br />
will be invalidated.<br />
In order to ensure the optimum protection of the submersible<br />
motor, the starter overload unit should be set in accordance with<br />
the following guidelines:<br />
1. Set the starter overload to the rated maximum current of the<br />
motor.<br />
2. Start the pump and let it run for half an hour at normal<br />
performance.<br />
3. Slowly grade down the scale indicator until the motor trip point<br />
is reached.<br />
4. Increase the overload setting by 5 %.<br />
The highest permissible setting is the rated maximum current of<br />
the motor.<br />
For motors wound for star-delta starting, the starter overload unit<br />
should be set as above, but the maximum setting should be as<br />
follows:<br />
Starter overload setting = Rated maximum current x 0.58.<br />
The highest permissible start-up time for star-delta starting or<br />
autotransformer starting is 2 seconds.<br />
5.3 Lightning protection<br />
The installation can be fitted with a special overvoltage protective<br />
device to protect the motor from voltage surges in the electricity<br />
supply lines when lightning strikes somewhere in the area, see<br />
fig. 10.<br />
L1<br />
L2<br />
L3<br />
PE<br />
825045 825017<br />
Fig. 10 Fitting an overvoltage protective device<br />
The overvoltage protective device will not, however, protect the<br />
motor against a direct stroke of lightning.<br />
The overvoltage protective device should be connected to the<br />
installation as close as possible to the motor and always in<br />
accordance with local regulations.<br />
Ask Grundfos for lightning protective devices.<br />
Submersible motors, type MS 402, however, require no further<br />
lightning protection as they are highly insulated.<br />
Ask for a special cable termination kit with a built-in overvoltage<br />
protective device for Grundfos 4" submersible motors (part no.<br />
799911 / 799912).<br />
5.4 Cable sizing<br />
Make sure that the submersible drop cable can withstand<br />
permanent submersion in the actual liquid and at the actual<br />
temperature.<br />
Grundfos can supply submersible drop cables for a wide range of<br />
installations.<br />
The cross-section (q) of the cable should meet the following<br />
requirements:<br />
1. The submersible drop cable should be sized to the rated<br />
maximum current (I) of the motor.<br />
2. The cross-section should be sufficient to make a voltage drop<br />
over the cable acceptable.<br />
Use the largest of the cross sections found under points 1. and 2.<br />
L<br />
N<br />
PE<br />
Three-phase Single-phase<br />
TM00 1357 3605<br />
Re 1: The following table specifies the current value of Grundfos<br />
submersible drop cables (i.e. the maximum current tolerated by<br />
the drop cable) at an ambient temperature of maximum 30 °C.<br />
Please contact Grundfos if the ambient temperature lies above<br />
30 °C.<br />
When sizing the submersible drop cable, make sure that the rated<br />
maximum current does not exceed the current value (Is). For star-delta starting, however, size the cables so that 0.58 x the<br />
rated maximum current of the motor does not exceed the current<br />
value (Is) of the cables.<br />
q [mm2 ] Is [A] q [mm2 ] Is [A]<br />
1.5 18.5 50 153<br />
2.5 25 70 196<br />
4 34 95 238<br />
6 43 120 276<br />
10 60 150 319<br />
16 80 185 364<br />
25 101 240 430<br />
35 126 300 497<br />
If Grundfos submersible drop cables are not used, the crosssection<br />
should be selected on the basis of the current values of<br />
the actual cables.<br />
Re 2:<br />
Note<br />
The cross-section of the submersible drop cable<br />
must be large enough to meet the voltage quality<br />
requirements specified in 5.1 General.<br />
Determine the voltage drop for the cross-section of the<br />
submersible drop cable by means of the diagrams on pages<br />
155 and 156, where<br />
I = Rated maximum current of the motor.<br />
For star-delta starting<br />
I = rated maximum current of the motor x 0.58.<br />
Lx = Length of cable converted to a voltage drop of 1 % of<br />
the nominal voltage.<br />
Lx<br />
length of drop cable<br />
= ----------------------------------------------------------------------------permissible<br />
voltage drop in %<br />
q = Cross-section of submersible drop cable.<br />
Draw a straight line between the actual I-value and the Lx-value.<br />
Where the line intersects the q-axis, select the cross-section that<br />
lies right above the intersection.<br />
The diagrams are made on the basis of the formulas:<br />
Single-phase submersible motor<br />
U× ΔU<br />
L = -----------------------------------------------------------------------------------------------------ρ<br />
I × 2×<br />
100 × ⎛cos ϕ × -- + sin ϕ × XI⎞<br />
⎝ q<br />
⎠<br />
Three-phase submersible motor<br />
U × ΔU<br />
L =<br />
-------------------------------------------------------------------------------------------------------------ρ<br />
I× 1.73×<br />
100 × ⎛cos ϕ × -- + sin ϕ × XI⎞<br />
⎝ q<br />
⎠<br />
where<br />
L = Length of submersible drop cable [m]<br />
U = Nominal voltage [V]<br />
ΔU = Voltage drop [%]<br />
I = Rated maximum current of the motor [A]<br />
cos ϕ = 0.9<br />
ρ = Specific resistance: 0.02 [Ωmm2 /m]<br />
q = Cross-section of submersible drop cable [mm2 ]<br />
sin ϕ = 0.436<br />
Xl = Inductive resistance: 0.078 x 10⁻³ [Ω/m]<br />
9
5.5 Control of single-phase MS 402<br />
If a compressor is included in a control system together with an<br />
ochre filter, the compressor will run continuously once the motor<br />
protection has cut out the motor, unless other special precautions<br />
have been taken.<br />
5.6 Connection of single-phase motors<br />
5.6.1 2-wire motors<br />
Grundfos MS 402 2-wire motors incorporate motor protection and<br />
a starter device and can therefore be connected directly to the<br />
mains, see fig. 11.<br />
10<br />
Warning<br />
The single-phase MS 402 submersible motor<br />
incorporates motor protection which cuts out the<br />
motor in case of excessive winding temperatures<br />
while the motor is still supplied with voltage.<br />
Allow for this, when the motor forms part of a<br />
control system.<br />
Yellow/green<br />
Fig. 11 2-wire motors<br />
5.6.2 PSC motors<br />
The PSC motors are connected to the mains via an operating<br />
capacitor which should be sized for continuous operation.<br />
Select the correct capacitor size from the following table:<br />
Motor Capacitor<br />
0.25 kW 12.5 μF / 400 V / 50 Hz<br />
0.37 kW 16 μF / 400 V / 50 Hz<br />
0.55 kW 20 μF / 400 V / 50 Hz<br />
0.75 kW 30 μF / 400 V / 50 Hz<br />
1.10 kW 40 μF / 400 V / 50 Hz<br />
1.50 kW 50 μF / 400 V / 50 Hz<br />
2.20 kW 75 μF / 400 V / 50 Hz<br />
The Grundfos MS 402 PSC motor incorporates motor protection<br />
and should be connected to the mains as shown in fig. 12.<br />
Yellow/green<br />
Fig. 12 PSC motors<br />
Black<br />
Grey<br />
N L<br />
M<br />
1<br />
Black<br />
N L<br />
Brown<br />
M<br />
1<br />
Black<br />
C<br />
TM00 1358 5092<br />
TM00 1359 5092<br />
See www.franklin-electric.com and fig. 13.<br />
Fig. 13 Franklin submersible motors<br />
5.6.3 3-wire motors<br />
Grundfos MS 4000 3-wire motors should be connected to the<br />
mains via a Grundfos control box SA-SPM 2, 3 or 5 incorporating<br />
motor protection.<br />
Grundfos MS 402 3-wire motors incorporate motor protection<br />
and should be connected to the mains via a Grundfos control box<br />
SA-SPM 2, 3 or 5 without motor protection.<br />
The connection of MS 4000 and MS 402 motors appears from the<br />
table below:<br />
Motor Cable Control box Mains<br />
Up to 0.75 kW,<br />
50 Hz<br />
From 1.10 kW,<br />
50 Hz<br />
1.1 to 3.7 kW<br />
(~ 1.5 to 5.0 hp)<br />
60 Hz<br />
Grey<br />
Brown<br />
Black<br />
Yellow/green<br />
Grey<br />
Brown<br />
Black<br />
Yellow/green<br />
5.7 Connection of three-phase motors<br />
Three-phase submersible motors must be protected, see section<br />
5.2.2 Three-phase motors.<br />
For electrical connection via the MP 204, see the separate<br />
installation and operating instructions for this unit.<br />
When a conventional motor starter is being used, the electrical<br />
connection should be carried out as described below.<br />
5.7.1 Checking of direction of rotation<br />
Caution<br />
Yellow/green<br />
Black<br />
Brown<br />
M<br />
1<br />
Yellow<br />
Red<br />
Black<br />
Yellow/green<br />
L N<br />
When the pump has been connected to the electricity supply,<br />
determine the correct direction of rotation as follows:<br />
1. Start the pump and check the quantity of water and head<br />
developed.<br />
2. Stop the pump and interchange two of the phase connections.<br />
In the case of motors wound for star-delta starting, exchange<br />
U1 by V1 and U2 by V2.<br />
3. Start the pump and check the quantity of water and head<br />
developed.<br />
4. Stop the pump.<br />
5. Compare the results taken under points 1. and 3. The<br />
connection which gives the larger quantity of water and the<br />
higher head is the correct connection.<br />
C<br />
Grey<br />
3 SA-SPM 2<br />
N<br />
L<br />
PE<br />
N<br />
L<br />
PE<br />
L1<br />
L2<br />
PE<br />
The pump must not be started until the suction<br />
interconnector has been completely submerged<br />
in the liquid.<br />
1<br />
2<br />
1<br />
2<br />
N<br />
L<br />
N<br />
L<br />
3 SA-SPM 3<br />
Y<br />
R<br />
L1<br />
L2<br />
B SA-SPM 5<br />
TM00 1361 1200
5.7.2 Grundfos motors, direct-on-line starting<br />
The connection of Grundfos submersible motors wound for directon-line<br />
starting appears from the table below and fig. 14.<br />
Cable/connection<br />
Mains<br />
Grundfos 4" and 6" motors<br />
PE PE (yellow/green)<br />
L1 U (brown)<br />
L2 V (black)<br />
L3 W (grey)<br />
Check the direction of rotation as described in section<br />
5.7.1 Checking of direction of rotation.<br />
PE L1 L2 L3<br />
PE U V W<br />
Fig. 14 Grundfos motors, direct-on-line starting<br />
5.7.3 Grundfos motors, star-delta starting<br />
The connection of Grundfos submersible motors wound for stardelta<br />
starting appears from the table below and fig. 15.<br />
Connection Grundfos 6" motors<br />
PE Yellow/green<br />
U1 Brown<br />
V1 Black<br />
W1 Grey<br />
W2 Brown<br />
U2 Black<br />
V2 Grey<br />
Check the direction of rotation as described in section<br />
5.7.1 Checking of direction of rotation.<br />
M<br />
Fig. 15 Grundfos motors, star-delta starting<br />
3<br />
PE L1<br />
L2<br />
M<br />
L3<br />
W2 U2 V2<br />
PE U1 V1 W1<br />
3<br />
TM03 2099 3705<br />
TM03 2100 3705<br />
If star-delta starting is not required, but direct-on-line starting is,<br />
the submersible motors should be connected as shown in fig. 16.<br />
PE L1<br />
Fig. 16 Grundfos motors, direct-on-line starting<br />
5.7.4 Connection in the case of unidentified cable marking/<br />
connection (Franklin motors)<br />
If it is unknown where the individual leads are to be connected to<br />
the mains in order to ensure the correct direction of rotation,<br />
proceed as follows:<br />
Motors wound for direct-on-line starting<br />
Connect the pump to the mains as is expected to be right.<br />
Then check the direction of rotation as described in section<br />
5.7.1 Checking of direction of rotation.<br />
Motors wound for star-delta starting<br />
The windings of the motor are determined by means of an<br />
ohmmeter, and the lead sets for the individual windings are<br />
named accordingly: U1-U2, V1-V2 and W1-W2, see fig. 17.<br />
Fig. 17 Unidentified cable marking/connection – motors<br />
wound for star-delta starting<br />
L2<br />
M<br />
If star-delta starting is required, the leads should be connected as<br />
shown in fig. 15.<br />
If direct-on-line starting is required, the leads should be<br />
connected as shown in fig. 16.<br />
Then check the direction of rotation as described in section<br />
5.7.1 Checking of direction of rotation.<br />
5.7.5 Soft starter<br />
Grundfos only recommends the use of soft starters which control<br />
the voltage on all three phases and which are provided with<br />
a bypass switch.<br />
Ramp times: Maximum 3 seconds.<br />
For further details, please contact your soft starter supplier or<br />
Grundfos.<br />
L3<br />
W2 U2 V2<br />
PE U1 V1 W1<br />
3<br />
U1 U2<br />
V1<br />
V2<br />
W1W2<br />
TM03 2101 3705<br />
TM00 1367 5092<br />
11
5.7.6 Frequency converter<br />
Three-phase MS submersible motors can be connected to<br />
a frequency converter.<br />
Permissible frequency ranges: 30-50 Hz and 30-60 Hz.<br />
Ramp times: Maximum 3 seconds for start and stop.<br />
Depending on the type, the frequency converter may cause<br />
increased acoustic noise from the motor. Furthermore, it may<br />
expose the motor to detrimental voltage peaks. This can be<br />
abated by installing an LC filter between the frequency converter<br />
and the motor.<br />
For further details, please contact your frequency converter<br />
supplier or Grundfos.<br />
6. Pump installation<br />
6.1 Fitting the motor to the pump<br />
When the pump part and the motor are supplied as separate units<br />
(long pumps), fit the motor to the pump as follows:<br />
1. Use pipe clamps when handling the motor.<br />
2. Place the motor in vertical position at the borehole seal, see<br />
fig. 18.<br />
12<br />
Note<br />
To enable the monitoring of the motor<br />
temperature, Grundfos recommends the<br />
installation of a Pt100 sensor together with<br />
a PR 5714 relay.<br />
Warning<br />
Before starting any work on the pump/motor,<br />
make sure that the electricity supply has been<br />
switched off and that it cannot be accidentally<br />
switched on.<br />
Fig. 18 Motor in vertical position<br />
TM00 5259 2402<br />
3. Lift the pump part by means of pipe clamps fitted to the<br />
extension pipe, see fig. 19.<br />
Fig. 19 Lifting the pump into position<br />
4. Place the pump part on top of the motor.<br />
5. Fit and tighten the nuts, see the table below.<br />
Caution<br />
Make sure that the coupling between the pump<br />
and motor engages properly.<br />
The bolts and nuts securing the straps to the pump must be<br />
tightened diagonally to the torques stated in the following table:<br />
Straps<br />
bolt/nut<br />
Torque<br />
[Nm]<br />
M8 18<br />
M10 35<br />
M12 45<br />
M16 120<br />
SP 215, 50 Hz, with more than 8 stages<br />
SP 215, 60 Hz, with more than 5 stages<br />
150<br />
When fitting the motor to the pump part, the nuts must be<br />
tightened diagonally to the torques stated in the following table:<br />
Caution<br />
Pump/motor<br />
staybolt diameter<br />
Torque<br />
[Nm]<br />
3/8 UNF 18<br />
1/2 UNF 50<br />
M8 18<br />
M12 70<br />
M16 150<br />
M20 280<br />
Make sure that the pump chambers are aligned<br />
when assembly has been completed.<br />
TM02 5263 2502
6.2 Removal and fitting of cable guard<br />
For removal and fitting of cable guard(s), see pages 157 and 158.<br />
If the cable guard is screwed on to the pump, such as the SP 215<br />
and sleeved pumps, the cable guard should be removed and<br />
fitted by means of screws.<br />
Caution<br />
6.3 Fitting of submersible drop cable<br />
6.3.1 Grundfos submersible motors<br />
Before fitting the submersible drop cable to the motor, make sure<br />
that the cable socket is clean and dry.<br />
To facilitate the fitting of the cable, lubricate the rubber parts of<br />
the cable plug with non-conducting silicone paste.<br />
Tighten the screws holding the cable to the torques stated:<br />
MS 402: 2.0 Nm.<br />
MS 4000: 2.0 Nm.<br />
MS6: 5.5 Nm.<br />
MS 6000: 4.0-5.0 Nm.<br />
MMS 6000: 10 Nm.<br />
MMS 8000: 18 Nm.<br />
MMS 10000: 18 Nm.<br />
MMS 12000: 15 Nm.<br />
6.4 Riser pipe<br />
If a tool, e.g. a chain pipe wrench, is used when the riser pipe is<br />
fitted to the pump, the pump must only be gripped by the pump<br />
discharge chamber.<br />
The threaded joints on the riser pipe must all be well cut and fit<br />
together to ensure that they do not work loose when subjected to<br />
torque reaction caused by the starting and stopping of the pump.<br />
The thread on the first section of the riser pipe which is to be<br />
screwed into the pump should not be longer than the threads in<br />
the pump.<br />
If noise may be transmitted to the building through the pipework,<br />
it is advisable to use plastic pipes.<br />
Note<br />
Make sure that the pump chambers are aligned<br />
when the cable guard has been fitted.<br />
Plastic pipes are recommended for 4" pumps<br />
only.<br />
When plastic pipes are used, the pump should be secured by an<br />
unloaded straining wire to be fastened to the discharge chamber<br />
of the pump, see fig. 20.<br />
Fig. 20 Fixing the straining wire<br />
When connecting plastic pipes, a compression coupling should<br />
be used between the pump and the first pipe section.<br />
Where flanged pipes are used, the flanges should be slotted to<br />
take the submersible drop cable and a water indicator hose,<br />
if fitted.<br />
TM00 1368 2298<br />
6.5 Maximum installation depth below water level<br />
Grundfos MS 402: 150 m.<br />
Grundfos MS 4000: 600 m.<br />
Grundfos MS6: 600 m.<br />
Grundfos MS 6000: 600 m.<br />
Grundfos MMS: 250 m.<br />
Franklin motors: 350 m.<br />
6.6 Cable fitting<br />
Cable clips must be fitted every 3 metres to fix the submersible<br />
drop cable and the straining wire, if fitted, to the riser pipe of the<br />
pump.<br />
Grundfos supplies cable clip sets on request. The set consists of<br />
a 1.5 mm thick rubber band and 16 buttons.<br />
Cable fitting: Cut off the rubber band so that the piece with no<br />
slit becomes as long as possible.<br />
Insert a button in the first slit.<br />
Position the wire alongside the submersible drop cable, fig. 21.<br />
Fig. 21 Fitting the cable clips<br />
Wind the band once around the wire and the cable.<br />
Then wind it tightly at least twice around the pipe, wire and the<br />
cable.<br />
Push the slit over the button and then cut off the band.<br />
Where large cable cross-sections are used, it will be necessary to<br />
wind the band several times.<br />
Where plastic pipes are used, some slackness must be left<br />
between each cable clip as plastic pipes expand when loaded.<br />
When flanged pipes are used, the cable clips should be fitted<br />
above and below each joint.<br />
6.7 Lowering the pump<br />
It is recommended to check the borehole by means of an inside<br />
calliper before lowering the pump to ensure unobstructed<br />
passage.<br />
Lower the pump carefully into the borehole, taking care not to<br />
damage the motor cable and the submersible drop cable.<br />
Caution<br />
Do not lower or lift the pump by means of the<br />
motor cable.<br />
6.8 Installation depth<br />
The dynamic water level should always be above the suction<br />
interconnector of the pump, see section 4.2 Positional<br />
requirements and fig. 22.<br />
Minimum inlet pressure is indicated in the NPSH curve for the<br />
pump.<br />
The minimum safety margin should be 1 metre head.<br />
It is recommended to install the pump so that the motor part is<br />
above the well screen in order to ensure optimum cooling, see<br />
section 4.4 Liquid temperatures/cooling.<br />
When the pump has been installed to the required depth, the<br />
installation should be finished by means of a borehole seal.<br />
Slacken the straining wire so that it becomes unloaded and lock it<br />
to the borehole seal by means of wire locks.<br />
TM00 1369 5092<br />
13
7. Start-up and operation<br />
7.1 Start-up<br />
When the pump has been connected correctly and it is<br />
submerged in the liquid to be pumped, it should be started with<br />
the discharge valve closed off to approx. 1/3 of its maximum<br />
volume of water.<br />
Check the direction of rotation as described in section<br />
5.7.1 Checking of direction of rotation.<br />
If there are impurities in the water, the valve should be opened<br />
gradually as the water becomes clearer. The pump should not be<br />
stopped until the water is completely clean, as otherwise the<br />
pump parts and the non-return valve may choke up.<br />
As the valve is being opened, the drawdown of the water level<br />
should be checked to ensure that the pump always remains<br />
submerged.<br />
The dynamic water level should always be above the suction<br />
interconnector of the pump, see section 4.2 Positional<br />
requirements and fig. 22.<br />
14<br />
Note<br />
Fig. 22 Comparison of various water levels<br />
L1: Minimum installation depth below dynamic water level.<br />
Minimum 1 metre is recommended.<br />
L2: Depth to dynamic water level.<br />
L3: Depth to static water level.<br />
L4: Drawdown. This is the difference between the dynamic and<br />
the static water levels.<br />
L5: Installation depth.<br />
If the pump can pump more than yielded by the well, it is<br />
recommended to fit the Grundfos MP 204 motor protector, or<br />
some other type of dry-running protection.<br />
If no water level electrodes or level switches are installed, the<br />
water level may be drawn down to the suction interconnector of<br />
the pump and the pump will then draw in air.<br />
Caution<br />
For pumps fitted with plastic pipes, the<br />
expansion of the pipes when loaded should be<br />
taken into consideration, when deciding on the<br />
installation depth of the pump.<br />
L2 L3<br />
L1<br />
L5<br />
Long time operation with water containing air<br />
may damage the pump and cause insufficient<br />
cooling of the motor.<br />
L4<br />
TM00 1041 3695<br />
7.2 Operation<br />
7.2.1 Minimum flow rate<br />
To ensure the necessary cooling of the motor, the pump should<br />
never be set so low that the cooling requirements specified in<br />
section 4.4 Liquid temperatures/cooling cannot be met.<br />
7.2.2 Frequency of starts and stops<br />
Motor type Number of starts<br />
MS 402<br />
MS 4000<br />
MS6<br />
MS 6000<br />
MMS 6000<br />
MMS 8000<br />
MMS 10000<br />
MMS 12000<br />
Franklin<br />
Minimum 1 per year is recommended.<br />
Maximum 100 per hour.<br />
Maximum 300 per day.<br />
Minimum 1 per year is recommended.<br />
Maximum 100 per hour.<br />
Maximum 300 per day.<br />
Minimum 1 per year is recommended.<br />
Maximum 30 per hour.<br />
Maximum 300 per day.<br />
Minimum 1 per year is recommended.<br />
Maximum 30 per hour.<br />
Maximum 300 per day.<br />
Minimum 1 per year is recommended.<br />
Maximum 15 per hour.<br />
Maximum 360 per day.<br />
Minimum 1 per year is recommended.<br />
Maximum 10 per hour.<br />
Maximum 240 per day.<br />
Minimum 1 per year is recommended.<br />
Maximum 8 per hour.<br />
Maximum 190 per day.<br />
Minimum 1 per year is recommended.<br />
Maximum 5 per hour.<br />
Maximum 120 per day.<br />
Minimum 1 per year is recommended.<br />
Maximum 100 per day.<br />
8. Maintenance and service<br />
The pumps are maintenance-free.<br />
All pumps are easy to service.<br />
Service kits and service tools are available from Grundfos.<br />
The pumps can be serviced at a Grundfos service centre.<br />
Warning<br />
If a pump has been used for a liquid which is<br />
injurious to health or toxic, the pump will be<br />
classified as contaminated.<br />
If Grundfos is requested to service the pump, Grundfos must be<br />
contacted with details about the pumped liquid, etc. before the<br />
pump is returned for service. Otherwise Grundfos can refuse to<br />
accept the pump for service.<br />
Possible costs of returning the pump are paid by the customer.
9. Fault finding chart<br />
Fault Cause Remedy<br />
1. The pump does not run. a) The fuses are blown. Replace the blown fuses. If the new ones blow too, the<br />
electric installation and the submersible drop cable<br />
should be checked.<br />
b) The ELCB or the voltage-operated ELCB<br />
has tripped out.<br />
Cut in the circuit breaker.<br />
c) No electricity supply. Contact the electricity supply authorities.<br />
d) The motor starter overload has tripped out. Reset the motor starter overload (automatically or<br />
possibly manually). If it trips out again, check the<br />
voltage. Is the voltage OK, see items e) - h).<br />
e) Motor starter/contactor is defective. Replace the motor starter/contactor.<br />
f) Starter device is defective. Repair/replace the starter device.<br />
g) The control circuit has been interrupted or<br />
is defective.<br />
Check the electric installation.<br />
h) The dry-running protection has cut off the Check the water level. If it is OK, check the water level<br />
the electricity supply to the pump, due to low<br />
water level.<br />
electrodes/level switch.<br />
i) The pump/submersible drop cable is<br />
defective.<br />
Repair/replace the pump/cable.<br />
2. The pump runs but gives a) The discharge valve is closed. Open the valve.<br />
no water.<br />
b) No water or too low water level in borehole. See item 3 a).<br />
c) The non-return valve is stuck in its shut<br />
position.<br />
Pull out the pump and clean or replace the valve.<br />
d) The inlet strainer is choked up. Pull out the pump and clean the strainer.<br />
e) The pump is defective. Repair/replace the pump.<br />
3. The pump runs at a) The drawdown is larger than anticipated. Increase the installation depth of the pump, throttle the<br />
reduced capacity.<br />
pump or replace it by a smaller model to obtain a<br />
smaller capacity.<br />
b) Wrong direction of rotation. See section 5.7.1 Checking of direction of rotation.<br />
c) The valves in the discharge pipe are partly<br />
closed/blocked.<br />
Check and clean/replace the valves, if necessary.<br />
d) The discharge pipe is partly choked by<br />
impurities (ochre).<br />
Clean/replace the discharge pipe.<br />
e) The non-return valve of the pump is partly<br />
blocked.<br />
Pull out the pump and check/replace the valve.<br />
f) The pump and the riser pipe are partly Pull out the pump. Check and clean or replace the<br />
choked by impurities (ochre).<br />
pump, if necessary. Clean the pipes.<br />
g) The pump is defective. Repair/replace the pump.<br />
h) Leakage in the pipework. Check and repair the pipework.<br />
i) The riser pipe is defective. Replace the riser pipe.<br />
4. Frequent starts and a) The differential of the pressure switch Increase the differential. However, the stop pressure<br />
stops.<br />
between the start and stop pressures is too must not exceed the operating pressure of the<br />
small.<br />
pressure tank, and the start pressure should be high<br />
enough to ensure sufficient water supply.<br />
b) The water level electrodes or level switches Adjust the intervals of the electrodes/level switches to<br />
in the reservoir have not been installed ensure suitable time between the cutting-in and<br />
correctly.<br />
cutting-out of the pump. See installation and operating<br />
instructions for the automatic devices used. If the<br />
intervals between stop/start cannot be changed via the<br />
automatics, the pump capacity may be reduced by<br />
throttling the discharge valve.<br />
c) The non-return valve is leaking or stuck half- Pull out the pump and clean/replace the non-return<br />
open.<br />
valve.<br />
d) The volume of air in the pressure/diaphragm Adjust the volume of air in the pressure/diaphragm<br />
tank is too small.<br />
tank in accordance with its installation and operating<br />
instructions.<br />
e) The pressure/diaphragm tank is too small. Increase the capacity of the pressure/diaphragm tank<br />
by replacing or supplementing with another tank.<br />
f) The diaphragm of the diaphragm tank is<br />
defective.<br />
Check the diaphragm tank.<br />
15
10. Checking of motor and cable<br />
1. Supply voltage Measure the voltage between the<br />
phases by means of a voltmeter.<br />
On single-phase motors, measure<br />
between phase and neutral or between<br />
two phases, depending on the type of<br />
supply.<br />
Connect the voltmeter to the terminals<br />
in the motor starter.<br />
11. Disposal<br />
This product or parts of it must be disposed of in an<br />
environmentally sound way:<br />
1. Use the public or private waste collection service.<br />
2. If this is not possible, contact the nearest Grundfos company<br />
or service workshop.<br />
16<br />
TM00 1371 5092<br />
2. Current consumption Measure the amps of each phase while<br />
the pump is operating at a constant<br />
discharge head (if possible, at the<br />
capacity where the motor is most<br />
heavily loaded).<br />
For maximum operating current, see<br />
nameplate.<br />
TM00 1372 5092<br />
The voltage should, when the motor is loaded, be within the<br />
range specified in section 5.1 General.<br />
The motor may burn if there are larger variations in voltage.<br />
Large variations in voltage indicate poor electricity supply, and<br />
the pump should be stopped until the defect has been<br />
remedied.<br />
On three-phase motors, the difference between the current in<br />
the phase with the highest consumption and the current in the<br />
phase with the lowest consumption should not exceed 5 %.<br />
If so, or if the current exceeds the rated current, there are the<br />
following possible faults:<br />
• The contacts of the motor starter burnt.<br />
Replace the contacts or the control box for single-phase<br />
operation.<br />
• Poor connection in leads, possibly in the cable joint.<br />
See item 3.<br />
• Too high or too low supply voltage. See item 1.<br />
• The motor windings are short-circuited or partly disjointed.<br />
See item 3.<br />
• Damaged pump is causing the motor to be overloaded.<br />
Pull out the pump for overhaul.<br />
• The resistance value of the motor windings deviates too<br />
much (three-phase). Move the phases in phase order to a<br />
more uniform load. If this does not help, see item 3.<br />
Items 3 and 4: Measurement is not necessary when the supply voltage and the current consumption are normal.<br />
3. Winding resistance Disconnect the submersible drop cable<br />
at the motor starter.<br />
Measure the winding resistance<br />
between the leads of the drop cable.<br />
TM00 1373 5092<br />
4. Insulation resistance Disconnect the submersible drop cable<br />
at the motor starter.<br />
Measure the insulation resistance from<br />
each phase to earth (frame).<br />
Make sure that the earth connection is<br />
made carefully.<br />
TM00 1374 5092<br />
For three-phase motors, the deviation between the highest and<br />
the lowest value should not exceed 10 %.<br />
If the deviation is higher, pull out the pump.<br />
Measure motor, motor cable and drop cable separately, and<br />
repair/replace defective parts.<br />
Note: On single-phase, 3-wire motors, the operating winding<br />
will assume the lowest resistance value.<br />
If the insulation resistance is less than 0.5 MΩ, the pump<br />
should be pulled out for motor or cable repair.<br />
Local regulations may specify other values for the insulation<br />
resistance.<br />
Subject to alterations.
*) Pump in sleeve<br />
Pump Maximum diameter of pump/motor [mm]<br />
Type Thread Flange<br />
Motor<br />
Direct-on-line starting Star-delta starting<br />
4" 6" 8" 10" 12" 6" 8" 10" 12"<br />
SP 1A Rp 1¼ 101<br />
SP 2A<br />
Rp 1¼<br />
*R 1¼<br />
101<br />
108<br />
SP 3A Rp 1¼ 101<br />
SP 5A<br />
Rp 1½ 101 138<br />
*R 1½ 138<br />
SP 8A<br />
Rp 2<br />
*R 2<br />
101 138<br />
140<br />
SP 14A Rp 2 101<br />
SP 17<br />
SP 30<br />
SP 46<br />
SP 60<br />
SP 77<br />
SP 95<br />
SP 125<br />
SP 160<br />
SP 215<br />
Rp 2½ 131 140 143<br />
*R 3 169 192 175 192<br />
Rp 3 137 143 192 147 192<br />
*R 3 192 192<br />
Rp 3 141 145 192 150 192<br />
Rp 4 145 147 192 153 192<br />
*R 4 192 192<br />
Rp 3 141 145 150<br />
Rp 4 145 147 192 153 192<br />
Rp 5 178 197 186 205<br />
5" 200 200 200 205<br />
Rp 5 178 197 186 205<br />
5" 208 208 212 212<br />
Rp 6 211 218 218 232<br />
6" 222 230 226 239<br />
Rp 6 211 218 218 227<br />
6" 211 218 218 227<br />
Rp 6 241 241 248 286 247 247 259 286<br />
6" 241 241 248 286 247 247 259 286<br />
153
154<br />
Pump Maximum diameter of pump/motor [mm]<br />
Type Thread Flange<br />
Motor<br />
Pump in flow sleeve<br />
4" 6" 8" 10" 12"<br />
SP 1A Rp 1¼ 125<br />
SP 2A<br />
Rp 1¼<br />
R 1¼<br />
125<br />
125<br />
SP 3A Rp 1¼ 125 200<br />
SP 5A<br />
Rp 1½ 125 200<br />
R 1½ 200<br />
SP 8A<br />
Rp 2<br />
R 2<br />
125 200<br />
200<br />
SP 14A Rp 2 125<br />
SP 17<br />
SP 30<br />
SP 46<br />
SP 60<br />
SP 77<br />
SP 95<br />
SP 125<br />
SP 160<br />
SP 215<br />
Rp 2½ 200 200<br />
R 3 200 250<br />
Rp 3 200 200 250<br />
R 3 250<br />
Rp 3 200 200 250<br />
Rp 4 200 200 250<br />
R 4 250<br />
Rp 3 200 200<br />
Rp 4 200 200 250<br />
Rp 5 250 250<br />
5" 250 250<br />
Rp 5 250 250<br />
5" 250 250<br />
Rp 6 280 280<br />
6" 280 280<br />
Rp 6 280 280<br />
6" 280 280<br />
Rp 6 355 355 355 355<br />
6" 355 355 355
TM00 1346 5092<br />
TM00 1345 5092<br />
U = 3 x 400 V<br />
U = 3 x 380 V<br />
Example:<br />
Example:<br />
I = 40 A<br />
ΔU = 2 %<br />
L = 140 m<br />
U =3 x 400 V<br />
I =40 A<br />
L =140 m<br />
ΔU=2 %<br />
I = 10 A<br />
ΔU = 2 %<br />
L = 120 m<br />
U =3 x 380 V<br />
I =10 A<br />
L =120 m<br />
ΔU=2 %<br />
L<br />
ΔU<br />
------- = = ---------<br />
140<br />
= 70 m = q ⇒ 25 mm2<br />
2 %<br />
Lx<br />
L<br />
ΔU<br />
------- = = ---------<br />
120<br />
= 60 m = q ⇒ 6 mm2<br />
2 %<br />
Lx<br />
155
156<br />
TM00 1348 5092<br />
TM00 1347 5092<br />
U = 3 x 220 V<br />
U = 3 x 415 V<br />
Example:<br />
Example:<br />
I = 5 A<br />
ΔU = 3 %<br />
L = 105 m<br />
U =3 x 220 V<br />
I =5 A<br />
L =105 m<br />
ΔU=3 %<br />
I = 100 A<br />
ΔU = 3 %<br />
L = 150 m<br />
U =3 x 415 V<br />
I =100 A<br />
L =150 m<br />
ΔU=3 %<br />
L<br />
ΔU<br />
-------<br />
105<br />
= = --------- = 35 m = q ⇒ 2,5 mm2<br />
3 %<br />
Lx<br />
L<br />
ΔU<br />
-------<br />
150<br />
= = --------- = 50 m = q ⇒ 50 mm2<br />
3 %<br />
Lx
SP A<br />
Fig. 1 Fig. 2<br />
Fig. 3<br />
Fig. 1 Fig. 2 Fig. 3<br />
Fig. 1<br />
Fig. 1<br />
SP A<br />
Fig. 2<br />
Fig. 2<br />
TM00 1323 5092<br />
TM00 1324 5092<br />
157
158<br />
SP 17 - SP 30 - SP 46 - SP 60<br />
Fig. 1 Fig. 2<br />
Fig. 3<br />
Fig. 1 Fig. 2 Fig. 3<br />
SP 77 - SP 95 - SP 125 - SP 160 - SP 215<br />
Fig. 2<br />
Fig. 3<br />
Fig. 1 Fig. 2<br />
Fig. 3<br />
Fig. 1 Fig. 2 Fig. 3<br />
TM00 1325 5092<br />
TM00 1326 5092
Argentina<br />
Bombas <strong>GRUNDFOS</strong> de Argentina<br />
S.A.<br />
Ruta Panamericana km. 37.500 Lote<br />
34A<br />
1619 - Garin<br />
Pcia. de Buenos Aires<br />
Phone: +54-3327 414 444<br />
Telefax: +54-3327 411 111<br />
Australia<br />
<strong>GRUNDFOS</strong> Pumps Pty. Ltd.<br />
P.O. Box 2040<br />
Regency Park<br />
South Australia 5942<br />
Phone: +61-8-8461-4611<br />
Telefax: +61-8-8340 0155<br />
Austria<br />
<strong>GRUNDFOS</strong> Pumpen Vertrieb<br />
Ges.m.b.H.<br />
Grundfosstraße 2<br />
A-5082 Grödig/Salzburg<br />
Tel.: +43-6246-883-0<br />
Telefax: +43-6246-883-30<br />
Belgium<br />
N.V. <strong>GRUNDFOS</strong> Bellux S.A.<br />
Boomsesteenweg 81-83<br />
B-2630 Aartselaar<br />
Tél.: +32-3-870 7300<br />
Télécopie: +32-3-870 7301<br />
Belorussia<br />
Представительство ГРУНДФОС в<br />
Минске<br />
220090 Минск ул.Олешева 14<br />
Телефон: (8632) 62-40-49<br />
Факс: (8632) 62-40-49<br />
Bosnia/Herzegovina<br />
<strong>GRUNDFOS</strong> Sarajevo<br />
Paromlinska br. 16,<br />
BiH-71000 Sarajevo<br />
Phone: +387 33 713290<br />
Telefax: +387 33 231795<br />
Brazil<br />
Mark <strong>GRUNDFOS</strong> Ltda.<br />
Av. Humberto de Alencar Castelo<br />
Branco, 630<br />
CEP 09850 - 300<br />
São Bernardo do Campo - SP<br />
Phone: +55-11 4393 5533<br />
Telefax: +55-11 4343 5015<br />
Bulgaria<br />
<strong>GRUNDFOS</strong> Pumpen Vertrieb<br />
Representative Office - Bulgaria<br />
Bulgaria, 1421 Sofia<br />
Lozenetz District<br />
105-107 Arsenalski blvd.<br />
Phone: +359 2963 3820, 2963 5653<br />
Telefax: +359 2963 1305<br />
Canada<br />
<strong>GRUNDFOS</strong> Canada Inc.<br />
2941 Brighton Road<br />
Oakville, Ontario<br />
L6H 6C9<br />
Phone: +1-905 829 9533<br />
Telefax: +1-905 829 9512<br />
China<br />
<strong>GRUNDFOS</strong> Pumps (Shanghai) Co.<br />
Ltd.<br />
51 Floor, Raffles City<br />
No. 268 Xi Zang Road. (M)<br />
Shanghai 200001<br />
PRC<br />
Phone: +86-021-612 252 22<br />
Telefax: +86-021-612 253 33<br />
Croatia<br />
<strong>GRUNDFOS</strong> predstavništvo Zagreb<br />
Cebini 37, Buzin<br />
HR-10000 Zagreb<br />
Phone: +385 1 6595 400<br />
Telefax: +385 1 6595 499<br />
Czech Republic<br />
<strong>GRUNDFOS</strong> s.r.o.<br />
Čajkovského 21<br />
779 00 Olomouc<br />
Phone: +420-585-716 111<br />
Telefax: +420-585-716 299<br />
Denmark<br />
<strong>GRUNDFOS</strong> DK A/S<br />
Martin Bachs Vej 3<br />
DK-8850 Bjerringbro<br />
Tlf.: +45-87 50 50 50<br />
Telefax: +45-87 50 51 51<br />
E-mail: info_GDK@grundfos.com<br />
www.grundfos.com/DK<br />
Estonia<br />
<strong>GRUNDFOS</strong> Pumps Eesti OÜ<br />
Peterburi tee 92G<br />
11415 Tallinn<br />
Tel: + 372 606 1690<br />
Fax: + 372 606 1691<br />
Finland<br />
OY <strong>GRUNDFOS</strong> Pumput AB<br />
Mestarintie 11<br />
FIN-01730 Vantaa<br />
Phone: +358-3066 5650<br />
Telefax: +358-3066 56550<br />
France<br />
Pompes <strong>GRUNDFOS</strong> Distribution S.A.<br />
Parc d’Activités de Chesnes<br />
57, rue de Malacombe<br />
F-38290 St. Quentin Fallavier (Lyon)<br />
Tél.: +33-4 74 82 15 15<br />
Télécopie: +33-4 74 94 10 51<br />
Germany<br />
<strong>GRUNDFOS</strong> GMBH<br />
Schlüterstr. 33<br />
40699 Erkrath<br />
Tel.: +49-(0) 211 929 69-0<br />
Telefax: +49-(0) 211 929 69-3799<br />
e-mail: infoservice@grundfos.de<br />
Service in Deutschland:<br />
e-mail: kundendienst@grundfos.de<br />
Greece<br />
<strong>GRUNDFOS</strong> Hellas A.E.B.E.<br />
20th km. Athinon-Markopoulou Av.<br />
P.O. Box 71<br />
GR-19002 Peania<br />
Phone: +0030-210-66 83 400<br />
Telefax: +0030-210-66 46 273<br />
Hong Kong<br />
<strong>GRUNDFOS</strong> Pumps (Hong Kong) Ltd.<br />
Unit 1, Ground floor<br />
Siu Wai Industrial Centre<br />
29-33 Wing Hong Street &<br />
68 King Lam Street, Cheung Sha Wan<br />
Kowloon<br />
Phone: +852-27861706 / 27861741<br />
Telefax: +852-27858664<br />
Hungary<br />
<strong>GRUNDFOS</strong> Hungária Kft.<br />
Park u. 8<br />
H-2045 Törökbálint,<br />
Phone: +36-23 511 110<br />
Telefax: +36-23 511 111<br />
India<br />
<strong>GRUNDFOS</strong> Pumps India Private Limited<br />
118 Old Mahabalipuram Road<br />
Thoraipakkam<br />
Chennai 600 096<br />
Phone: +91-44 2496 6800<br />
Indonesia<br />
PT <strong>GRUNDFOS</strong> Pompa<br />
Jl. Rawa Sumur III, Blok III / CC-1<br />
Kawasan Industri, Pulogadung<br />
Jakarta 13930<br />
Phone: +62-21-460 6909<br />
Telefax: +62-21-460 6910 / 460 6901<br />
Ireland<br />
<strong>GRUNDFOS</strong> (Ireland) Ltd.<br />
Unit A, Merrywell Business Park<br />
Ballymount Road Lower<br />
Dublin 12<br />
Phone: +353-1-4089 800<br />
Telefax: +353-1-4089 830<br />
Italy<br />
<strong>GRUNDFOS</strong> Pompe Italia S.r.l.<br />
Via Gran Sasso 4<br />
I-20060 Truccazzano (Milano)<br />
Tel.: +39-02-95838112<br />
Telefax: +39-02-95309290 / 95838461<br />
Japan<br />
<strong>GRUNDFOS</strong> Pumps K.K.<br />
Gotanda Metalion Bldg., 5F,<br />
5-21-15, Higashi-gotanda<br />
Shiagawa-ku, Tokyo<br />
141-0022 Japan<br />
Phone: +81 35 448 1391<br />
Telefax: +81 35 448 9619<br />
Korea<br />
<strong>GRUNDFOS</strong> Pumps Korea Ltd.<br />
6th Floor, Aju Building 679-5<br />
Yeoksam-dong, Kangnam-ku, 135-916<br />
Seoul, Korea<br />
Phone: +82-2-5317 600<br />
Telefax: +82-2-5633 725<br />
Latvia<br />
SIA <strong>GRUNDFOS</strong> Pumps Latvia<br />
Deglava biznesa centrs<br />
Augusta Deglava ielā 60, LV-1035, Rīga,<br />
Tālr.: + 371 714 9640, 7 149 641<br />
Fakss: + 371 914 9646<br />
Lithuania<br />
<strong>GRUNDFOS</strong> Pumps UAB<br />
Smolensko g. 6<br />
LT-03201 Vilnius<br />
Tel: + 370 52 395 430<br />
Fax: + 370 52 395 431<br />
Malaysia<br />
<strong>GRUNDFOS</strong> Pumps Sdn. Bhd.<br />
7 Jalan Peguam U1/25<br />
Glenmarie Industrial Park<br />
40150 Shah Alam<br />
Selangor<br />
Phone: +60-3-5569 2922<br />
Telefax: +60-3-5569 2866<br />
México<br />
Bombas <strong>GRUNDFOS</strong> de México S.A.<br />
de C.V.<br />
Boulevard TLC No. 15<br />
Parque Industrial Stiva Aeropuerto<br />
Apodaca, N.L. 66600<br />
Phone: +52-81-8144 4000<br />
Telefax: +52-81-8144 4010<br />
Netherlands<br />
<strong>GRUNDFOS</strong> Netherlands<br />
Veluwezoom 35<br />
1326 AE Almere<br />
Postbus 22015<br />
1302 CA ALMERE<br />
Tel.: +31-88-478 6336<br />
Telefax: +31-88-478 6332<br />
e-mail: info_gnl@grundfos.com<br />
New Zealand<br />
<strong>GRUNDFOS</strong> Pumps NZ Ltd.<br />
17 Beatrice Tinsley Crescent<br />
North Harbour Industrial Estate<br />
Albany, Auckland<br />
Phone: +64-9-415 3240<br />
Telefax: +64-9-415 3250<br />
Norway<br />
<strong>GRUNDFOS</strong> Pumper A/S<br />
Strømsveien 344<br />
Postboks 235, Leirdal<br />
N-1011 Oslo<br />
Tlf.: +47-22 90 47 00<br />
Telefax: +47-22 32 21 50<br />
Poland<br />
<strong>GRUNDFOS</strong> Pompy Sp. z o.o.<br />
ul. Klonowa 23<br />
Baranowo k. Poznania<br />
PL-62-081 Przeźmierowo<br />
Tel: (+48-61) 650 13 00<br />
Fax: (+48-61) 650 13 50<br />
Portugal<br />
Bombas <strong>GRUNDFOS</strong> Portugal, S.A.<br />
Rua Calvet de Magalhães, 241<br />
Apartado 1079<br />
P-2770-153 Paço de Arcos<br />
Tel.: +351-21-440 76 00<br />
Telefax: +351-21-440 76 90<br />
România<br />
<strong>GRUNDFOS</strong> Pompe România SRL<br />
Bd. Biruintei, nr 103<br />
Pantelimon county Ilfov<br />
Phone: +40 21 200 4100<br />
Telefax: +40 21 200 4101<br />
E-mail: romania@grundfos.ro<br />
Russia<br />
ООО Грундфос<br />
Россия, 109544 Москва, ул.<br />
Школьная 39<br />
Тел. (+7) 495 737 30 00, 564 88 00<br />
Факс (+7) 495 737 75 36, 564 88 11<br />
E-mail<br />
grundfos.moscow@grundfos.com<br />
Serbia<br />
<strong>GRUNDFOS</strong> Predstavništvo Beograd<br />
Dr. Milutina Ivkovića 2a/29<br />
YU-11000 Beograd<br />
Phone: +381 11 26 47 877 / 11 26 47<br />
496<br />
Telefax: +381 11 26 48 340<br />
Singapore<br />
<strong>GRUNDFOS</strong> (Singapore) Pte. Ltd.<br />
24 Tuas West Road<br />
Jurong Town<br />
Singapore 638381<br />
Phone: +65-6865 1222<br />
Telefax: +65-6861 8402<br />
Slovenia<br />
<strong>GRUNDFOS</strong> PUMPEN VERTRIEB<br />
Ges.m.b.H.,<br />
Podružnica Ljubljana<br />
Blatnica 1, SI-1236 Trzin<br />
Phone: +386 1 563 5338<br />
Telefax: +386 1 563 2098<br />
E-mail: slovenia@grundfos.si<br />
Spain<br />
Bombas <strong>GRUNDFOS</strong> España S.A.<br />
Camino de la Fuentecilla, s/n<br />
E-28110 Algete (Madrid)<br />
Tel.: +34-91-848 8800<br />
Telefax: +34-91-628 0465<br />
Sweden<br />
<strong>GRUNDFOS</strong> AB<br />
Box 333 (Lunnagårdsgatan 6)<br />
431 24 Mölndal<br />
Tel.: +46(0)771-32 23 00<br />
Telefax: +46(0)31-331 94 60<br />
Switzerland<br />
<strong>GRUNDFOS</strong> Pumpen AG<br />
Bruggacherstrasse 10<br />
CH-8117 Fällanden/ZH<br />
Tel.: +41-1-806 8111<br />
Telefax: +41-1-806 8115<br />
Taiwan<br />
<strong>GRUNDFOS</strong> Pumps (Taiwan) Ltd.<br />
7 Floor, 219 Min-Chuan Road<br />
Taichung, Taiwan, R.O.C.<br />
Phone: +886-4-2305 0868<br />
Telefax: +886-4-2305 0878<br />
Thailand<br />
<strong>GRUNDFOS</strong> (Thailand) Ltd.<br />
92 Chaloem Phrakiat Rama 9 Road,<br />
Dokmai, Pravej, Bangkok 10250<br />
Phone: +66-2-725 8999<br />
Telefax: +66-2-725 8998<br />
Turkey<br />
<strong>GRUNDFOS</strong> POMPA San. ve Tic. Ltd.<br />
Sti.<br />
Gebze Organize Sanayi Bölgesi<br />
Ihsan dede Caddesi,<br />
2. yol 200. Sokak No. 204<br />
41490 Gebze/ Kocaeli<br />
Phone: +90 - 262-679 7979<br />
Telefax: +90 - 262-679 7905<br />
E-mail: satis@grundfos.com<br />
Ukraine<br />
ТОВ ГРУНДФОС УКРАЇНА<br />
01010 Київ, Вул. Московська 8б,<br />
Тел.:(+38 044) 390 40 50<br />
Фах.: (+38 044) 390 40 59<br />
E-mail: ukraine@grundfos.com<br />
United Arab Emirates<br />
<strong>GRUNDFOS</strong> Gulf Distribution<br />
P.O. Box 16768<br />
Jebel Ali Free Zone<br />
Dubai<br />
Phone: +971-4- 8815 166<br />
Telefax: +971-4-8815 136<br />
United Kingdom<br />
<strong>GRUNDFOS</strong> Pumps Ltd.<br />
Grovebury Road<br />
Leighton Buzzard/Beds. LU7 8TL<br />
Phone: +44-1525-850000<br />
Telefax: +44-1525-850011<br />
U.S.A.<br />
<strong>GRUNDFOS</strong> Pumps Corporation<br />
17100 West 118th Terrace<br />
Olathe, Kansas 66061<br />
Phone: +1-913-227-3400<br />
Telefax: +1-913-227-3500<br />
Usbekistan<br />
Представительство ГРУНДФОС в<br />
Ташкенте<br />
700000 Ташкент ул.Усмана Носира 1й<br />
тупик 5<br />
Телефон: (3712) 55-68-15<br />
Факс: (3712) 53-36-35<br />
Addresses revised 17.03.2008
080080 1207<br />
Repl. 080080 0706<br />
www.grundfos.com<br />
30<br />
Being responsible is our foundation<br />
Thinking ahead makes it possible<br />
Innovation is the essence