Kingdom One touch™ DVD Duplicator Manual
Kingdom One touch™ DVD Duplicator Manual
Kingdom One touch™ DVD Duplicator Manual

Create successful ePaper yourself
Turn your PDF publications into a flip-book with our unique Google optimized e-Paper software.
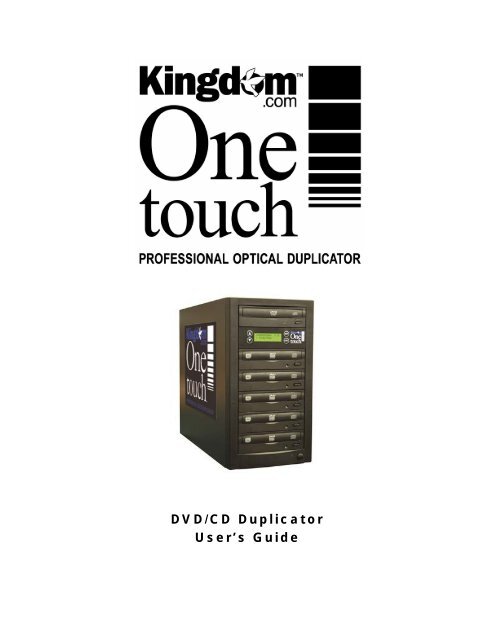
<strong>DVD</strong>/CD <strong>Duplicator</strong><br />
User’s Guide
Table of Contents<br />
2<br />
___<br />
<strong>Kingdom</strong> <strong>One</strong> Touch<br />
Chapter 1 Quick Start Guide….…………………..3<br />
Chapter 2 Product Introduction…………………..4<br />
Chapter 3 Safety Information & Set Up………....6<br />
Chapter 4 System Overview...…………………….7<br />
Chapter 5 Menu Overview…………………………8<br />
Chapter 6 Operation Guide………………...…....11<br />
Copy………………….………...…………………………11<br />
Test………………………………………………………..12<br />
Compare………………………………………………….12<br />
Copy + Compare……………………………………… 13<br />
Set Burn Speed………………………………………….13<br />
Select Source…………………………………………....13<br />
Utility……..……………………………………………….14<br />
Audio Track Edit…….…………………………………..16<br />
Set up……………………………………………………..19<br />
Chapter 7 TS Guide, Error Codes and FAQ….22
3<br />
___<br />
<strong>Kingdom</strong> <strong>One</strong> Touch<br />
Chapter 1. Quick Start Guide<br />
Duplicating (Copying) from Disc to Disc is the most frequently used function of the<br />
system. This procedure provides step-by-step instructions for making duplicates from a<br />
Master Disc.<br />
Step 1: Plug in power cord to back of the<br />
unit.<br />
Step 2: Turn on power button and wait for<br />
LCD to read “1. Copy”.<br />
Step 3: Eject reader tray (top drive) and insert source<br />
disc. Close reader tray.<br />
Step 4: Eject Recorder tray(s) and insert the blank<br />
disc(s). Close Recorder tray(s). Duplication will start<br />
automatically in 5 seconds.<br />
(Photos of 5-target duplicator are used in the manual)
Chapter 2. Product Introduction<br />
Thank you...<br />
4<br />
___<br />
<strong>Kingdom</strong> <strong>One</strong> Touch<br />
...for choosing the <strong>Kingdom</strong> <strong>One</strong> Touch Standalone duplication system. <strong>Kingdom</strong><br />
<strong>One</strong> Touch duplicators continue to be second to none in terms of speed and accuracy<br />
and we hope it will be a valuable addition to your organization, business or home for<br />
years to come.<br />
T<br />
he <strong>Kingdom</strong> <strong>One</strong> Touch is a stand-alone duplicator that requires no computer<br />
connection to operate. Low cost and high performance, the <strong>Kingdom</strong> <strong>One</strong> Touch<br />
will fulfill your duplication requirements.<br />
Specifically designed for House of Worship, School, home and office applications, the<br />
<strong>Kingdom</strong> <strong>One</strong> Touch duplicator is based upon a controller with a large LCD display<br />
and simple 4 button navigation, which make steps easy to follow during the duplication<br />
process. Should you encounter any difficulty, please refer to the "Troubleshooting"<br />
section or contact Technical Support for assistance.<br />
We strongly suggest you locate your <strong>Kingdom</strong> <strong>One</strong> Touch in a dust free environment.<br />
Dirty discs may cause duplication rejects or even total failure. Do not place unnecessary<br />
items on the unit.<br />
**<br />
For Best Performance<br />
For best results always use high quality media. <strong>Kingdom</strong> <strong>One</strong> touch duplicators have<br />
been thoroughly tested with most major optical media makers for maximum<br />
compatibility. <strong>Kingdom</strong> Platinum media is our first recommendation for excellent results.<br />
Please visit us at www.kingdom.com.<br />
This optical duplication device is to be used exclusively for the purpose of copying<br />
personal audio and data. This optical duplication device is sold and intended strictly for<br />
the purposes of legal copying. It is a violation of International Copyright Laws to use for<br />
any other purpose and subject to criminal charges. <strong>Kingdom</strong> is not responsible for any<br />
illegal use or any damages resulting from the sale, use, or performance of this device.<br />
Supported Formats: <strong>DVD</strong>-R/RW/RAM/DL, <strong>DVD</strong>+R/RW/DL, CD-R/RW<br />
Supported Burning Speed: <strong>DVD</strong> up to 24X, CD up to 48X<br />
Approximate CD/<strong>DVD</strong> Duplicating Time: 2 hour <strong>DVD</strong> - 7 min, 70 min CD - 3 min
Warranty Information<br />
5<br />
___<br />
<strong>Kingdom</strong> <strong>One</strong> Touch<br />
<strong>Kingdom</strong>, Inc. warrants to the original purchaser that this product is free from defects in<br />
material and workmanship. <strong>Kingdom</strong>, Inc. will for one year, at its option, repair or<br />
replace at no charge for parts and labor from the date you purchase the product from<br />
<strong>Kingdom</strong>, Inc.<br />
<strong>Kingdom</strong>, Inc. reserves the right to determine the validity of all warranty claims.<br />
Warranty is void if the product serial number has been altered or removed. Warranty is<br />
void if the product has been misused or damaged or if evidence is present that the<br />
product was altered, modified or serviced by unauthorized service people.<br />
THE ABOVE STATED WARRANTY IS EXCLUSIVE AND REPLACES ALL OTHER<br />
WARRANTIES EXPRESSED OR IMPLIED INCLUDING THOSE OF<br />
MERCHANTABILITY AND FITNESS FOR A PARTICULAR PURPOSE. KINGDOM<br />
INC. WILL NOT BE HELD LIABLE FOR ANY OTHER DAMAGES OR LOSS<br />
INCLUDING INCIDENTIAL OR CONSEQUENTIAL DAMAGES AND LOSS OF<br />
PROFITS OR REVENUES FROM WHATEVER CAUSE, INCLUDING BREACH OF<br />
WARRANTY OR NEGLIGENCE.<br />
KINGDOM INC. RESERVES THE RIGHT TO MODIFY OR UPDATE ITS PRODUCT<br />
OBLIGATION TO REPLACE ANY EQUIPMENT DELIVERED PRIOR TO ANY SUCH<br />
CHANGE.<br />
Technical Support<br />
For detailed technical support or questions regarding the <strong>DVD</strong> <strong>Duplicator</strong>, contact<br />
<strong>Kingdom</strong> Technical Support at 1-800-296-2312.<br />
Note: This duplicator has a serial number located on the rear panel. Please record the<br />
Model Number and Serial Number and retain them for your records. It will be necessary<br />
to provide this information to Technical Support personnel in order for them to provide<br />
you with the best technical support possible.<br />
Model Number: _____________________________________<br />
Serial Number: _____________________________________<br />
Note: Before contacting Technical Support please have your Model Number and the<br />
Serial Number of your duplicator available for reference. These numbers are located on<br />
the rear panel of your duplicator.
Chapter 3. Safety Information and Set up<br />
Please be aware of the following installation and operation precautions.<br />
1. Read these instructions - All the safety and operating<br />
instructions should be read before use of this system.<br />
2. Keep these instructions - The safety and operating<br />
instructions should be retained for future reference.<br />
3. Heed all warnings - All warnings on the system and in<br />
the operating instructions should be adhered to.<br />
4. Follow all instructions - All operating and use<br />
instructions should be followed.<br />
5. Do not use this system near water - for example, near<br />
a bathtub, washbowl, kitchen sink, laundry tub, in a wet<br />
basement or near a swimming pool, etc.<br />
6. Clean only with a damp cloth. This system should be<br />
cleaned only as recommended by the manufacturer.<br />
7. Install in accordance with the manufacturers<br />
instructions. Do not block any of the ventilation<br />
openings. For example, the system should not be situated on<br />
a bed, sofa, rug, or similar surface or placed in a built-in<br />
installation, such as a bookcase or cabinet that may impede<br />
the flow of air through the ventilation openings.<br />
8. Do not install near any heat sources such as radiators,<br />
heat registers, stoves, or other products that produce heat.<br />
Unpacking and Inspection<br />
6<br />
___<br />
<strong>Kingdom</strong> <strong>One</strong> Touch<br />
9. Do not defeat the safety purpose of the grounding-type<br />
plug. A grounding type plug has two blades and a third<br />
grounding prong. The third prong is provided for your safety.<br />
When the provided plug does not fit into your outlet, consult an<br />
electrician for replacement of the obsolete outlet.<br />
10. Protect the power cord from being walked on or pinched<br />
particularly at plugs, convenience receptacles, and the point<br />
where they exit from the system.<br />
11. Only use attachments/accessories specified by the<br />
manufacturer.<br />
12. Use only with a cart, stand,<br />
bracket, or table specified by the<br />
manufacturer, or sold with the system.<br />
When a cart is used, use caution<br />
when moving the cart/system<br />
combination to avoid injury from tipover.<br />
13. Unplug this system during lightning storms or when<br />
unused for long periods of time.<br />
14. Refer all servicing to qualified service personnel.<br />
Servicing is required when the system has been damaged in<br />
any way, such as power-supply cord or plug is damaged, liquid<br />
has been spilled on, been exposed to moisture or extreme<br />
heat, does not operate normally, or has been dropped.<br />
When unpacking your unit, inspect the carton and packaging material for damage. Damages that may<br />
have occurred during shipping could cause alignment and operation errors. Any damages found upon<br />
receipt of your unit should be immediately reported to <strong>Kingdom</strong>.<br />
Important: Keep your packaging! In the event you need to ship the unit back to the factory for repair, the<br />
product must be shipped in the manner in which it was received. Other containers are not satisfactory and<br />
will void your warranty! If the container is lost or destroyed, another may be purchased <strong>Kingdom</strong>.<br />
Choosing a Location<br />
Placing your unit in an unsuitable location can cause a number of problems. Many problems can be<br />
avoided by following these guidelines.<br />
• The unit must be placed on a flat, level surface. A tilt to the unit’s base can cause errors in<br />
calibration during use. The surface must also be relatively stable and resistant to bumps and<br />
jarring.<br />
• The surface the unit is placed on must be able to hold 50+ pounds and be resistant to bowing<br />
under such weight.<br />
• Place the unit in a location with adequate air circulation. Closets or cabinets are not suitable as<br />
heat build-up can cause the unit to malfunction. Likewise, do not place the unit on or near any<br />
heat sources such as heating vents or server racks.<br />
• The unit must not be placed in an area with direct sunlight, excessive dust, mechanical vibration<br />
or shock.
Chapter 4. System Overview<br />
Control Buttons<br />
There are 4 control buttons: , , ENT, ESC<br />
7<br />
___<br />
<strong>Kingdom</strong> <strong>One</strong> Touch<br />
: UP; Backward; Use this button to navigate backward in the menu.<br />
: Down; Forward; Use this button to navigate forward in the menu.<br />
ENT : Enter, Execute or Select the function<br />
ESC : Escape, Go back to previous function<br />
Reader (Source) Tray<br />
LCD panel & Control Buttons<br />
Writer (Target) Trays<br />
Power Button (On and Off)
Chapter 5. Menu Overview<br />
Function Table<br />
8<br />
___<br />
<strong>Kingdom</strong> <strong>One</strong> Touch<br />
Function Sub-function Description<br />
1. Copy To copy disc to disc<br />
2. Test To simulate copy process<br />
3. Compare<br />
To bit by bit compare between source disc and<br />
copied disc<br />
4. Copy & Compare To copy first and compare the copied discs later.<br />
5. Set Burn Speed To set burning speed for duplication.<br />
6. Select Source To select source from any optical drive<br />
7. Utility<br />
1. Information<br />
2. Erase Disc<br />
1. Disc Info.<br />
To check the format of disc, burning speed<br />
supported and total capacity or data size.<br />
2. Drive Info. To check the version, model No. and brand name<br />
3. System Info. To check the model No. and firmware version<br />
1. Quick Erase To quick erase data from rewriteable disc.<br />
2. Full Erase To full erase data from rewriteable disc.<br />
3. PreScan Source To check source disc’s readability.<br />
1. Copy Track<br />
To select and combine audio tracks from various<br />
CDs into a single customized audio CD.<br />
4. Track Edit 2. Close Disc<br />
To close the disc after track copying to make the CD<br />
playable on CD player.<br />
3. Disc Info. To check the audio CD’s status of usage.<br />
5. Eject All Disc To eject all trays.<br />
1. Show Count<br />
To check how many discs copy successfully and<br />
failed.<br />
6. Copy Counter<br />
2. Enable Counter To enable or disable counter setting.<br />
3. Clear Counter To delete the record.<br />
7. Update BIOS To update the system’s firmware.
8. Setup<br />
1. Auto Start Time<br />
2. Display Mode<br />
3. Button Beep<br />
4. Eject On Start<br />
9<br />
___<br />
<strong>Kingdom</strong> <strong>One</strong> Touch<br />
Allow the system to do the Copy, Test, Compare<br />
and Copy + Compare functions automatically<br />
1. Basic<br />
2. Show Speed<br />
3. Show Timer<br />
1. Eject All Discs<br />
2. Do Not Eject<br />
3. Eject Target<br />
Only<br />
4. Eject Source<br />
Only<br />
5. Eject All Trays<br />
To eject all trays with disc<br />
inside once the system is<br />
booted up.<br />
No eject any tray or disc once<br />
the system is booted up.<br />
Only eject target trays with<br />
disc inside once the system is<br />
booted up.<br />
Only eject source disc once<br />
the system is booted up.<br />
To eject all trays once the<br />
system is booted up.<br />
5. Reader Speed To adjust the reading speed of source drive.<br />
6. Compare Speed To adjust the speed of drives while comparing.<br />
7. Language<br />
8. Clear Setup<br />
9. Advanced Setup<br />
To reset all the function back to manufacturer’s<br />
default setting.<br />
To set a warm-up time from 5<br />
1. Power On Time<br />
seconds to 255 seconds<br />
To select which function you<br />
2. Startup Menu would like to show up in the<br />
beginning<br />
3. Skip Reader To set skip the read error and<br />
Error<br />
keep copying.<br />
To make the system eject<br />
4. Change Bad source disc and ask for<br />
Master<br />
another one while the source<br />
disc is unreadable for system.<br />
5. CD Overburn Set to copy overburn CD.<br />
To show HDD image name or<br />
capacity on Copy, Test, Copy<br />
6. Show HDD<br />
+ Compare and Compare<br />
Image Name<br />
function (with Optional HDD<br />
installed)<br />
To set enable or disable load<br />
7. Keep Buffer<br />
source to the buffer.<br />
8. Boot Password<br />
9. Setup<br />
Password<br />
To enable or disable the user<br />
administrative password.<br />
To set up the login password
**Only for Units with Hard Drive Installed<br />
9. HDD Manager<br />
10<br />
___<br />
<strong>Kingdom</strong> <strong>One</strong> Touch<br />
1. Select Image To select image file from HDD as your source for copy.<br />
2. Disc => Image To load your source disc to the built-in HDD.<br />
3. Set Reader Speed<br />
4. Show Image Info To check the disc format and data size of the image file.<br />
5. Rename Image To change the name of image file.<br />
6. Delete Image To delete image file from the built-in HDD.<br />
7. Show HDD Info<br />
8. Format HDD To format the built-in HDD<br />
9. Load & Copy<br />
To check the information of the built-in HDD. Displays how<br />
many discs are stored and the free space available.<br />
1. Off To disable Load & Copy Function<br />
1. Synchronism<br />
2. Load First<br />
To load the source to HDD and make<br />
copy at the same time.<br />
To load the source to HDD first and copy<br />
from HDD to disc.
Chapter 6. Operation Guide<br />
1. Copy<br />
11<br />
___<br />
<strong>Kingdom</strong> <strong>One</strong> Touch<br />
It is important to make sure that your source disc is placed in the right drive. The default<br />
source is your top drive. You can check or select your source reader by function<br />
6. Select Source. (Please refer to page 13)<br />
1. Select 1. Copy and place source disc and blank discs into the proper trays. Then the<br />
system will detect the source disc and show the information.<br />
2. Press ENT to start copy<br />
3. Once the copy task is finished, the copied discs will be ejected and the result of copy<br />
task will show on the LCD:<br />
**Note:<br />
Due to default setting of auto start time, the duplicator will start to copy automatically<br />
within a few seconds. You can set “OFF” to close the auto start function or set a longer<br />
waiting time. The default setting is 5 seconds. (For more info about this setting please<br />
refer to 8-1. Auto Start Time, page 19)<br />
If the HDD is selected to be the source, you have to load the source image to the built-in<br />
HDD and then execute the Copy process. Please refer to 9-2 Disc to Image (Page 22)<br />
for instructions on how to load from Disc to HDD.
12<br />
___<br />
<strong>Kingdom</strong> <strong>One</strong> Touch<br />
2. Test<br />
This function will simulate the copy process to ensure error free duplication. During the<br />
simulation, nothing will be burned on to the blank discs.<br />
1. Using / to select 2. Test and press ENT<br />
2. Press ENT to start test<br />
3. Once the test task is finished, the discs will be ejected and the result and the pass<br />
and fail discs of test task will show on the LCD:<br />
**Note:<br />
1. This function is unable to support <strong>DVD</strong>+R blank disc.<br />
2. If you use CD/<strong>DVD</strong> rewritable discs as your blank media in the simulation, all the<br />
content inside the discs will be erased permanently during test simulation.<br />
3. Compare<br />
This function will do bit-by-bit comparison between source disc and copied discs to<br />
ensure the copied discs are identical to source disc.<br />
1. Place source disc and blank discs into Reader and Writer separately.<br />
2. Using / to select 2. Compare and press ENT to start compare.<br />
3. The system will detect the source and the target disc automatically.<br />
4. After detecting, the system will start to compare.<br />
5. When the comparison has finished, the system will show the compare result.
13<br />
___<br />
<strong>Kingdom</strong> <strong>One</strong> Touch<br />
4. Copy + Compare<br />
This function will to do copy task first and execute comparison automatically when copy<br />
process has been finished.<br />
Note**<br />
In Copy, Test, Compare and Copy+Compare functions<br />
If there is no source and target discs inside the duplicator, there will be nothing show on LCD.<br />
The information display of these 4 functions will be different based on the display mode you<br />
selected.<br />
(Please refer to 8-2.Display mode, page 18)<br />
5. Set Burn Speed<br />
You can adjust the burning speed of CD/Audio CD/<strong>DVD</strong>/<strong>DVD</strong> DL/Blu-ray by this setting.<br />
The default setting of CD is 40X, Audio CD 24X, <strong>DVD</strong> 8X, <strong>DVD</strong> DL 2X and Blu-ray 2X.<br />
1. Using / to select 5. Set Burn Speed and press.<br />
2. Pressing / to adjust the burning speed of CD and press ENT to confirm it, or<br />
press OK to select Audio CD,<strong>DVD</strong>, <strong>DVD</strong> DL or Blu-ray to adjust the burning speed.<br />
6. Select Source<br />
You can set any drive in the duplicator to be your source reader.<br />
1. Using / to select 6. Select Source<br />
2. Press ENT to check the current source reader, or select the proper tray to be the<br />
source reader by pressing / , once the source reader is selected, press ENT<br />
to confirm the setting and back to the menu list.<br />
**Note:<br />
The default setting of source reader is the first drive.
7. Utility<br />
14<br />
___<br />
<strong>Kingdom</strong> <strong>One</strong> Touch<br />
7-1. Information<br />
You can check the information of disc, drive and system. By pressing / , each disc<br />
or drive’s information will show on the LCD.<br />
1. Using / to select 7.Utility, press ENT to enter the sub menu. Then,<br />
select 1.Information and press ENT<br />
2. Using / to select 1.Disc Info. or 2.Drive Info or 3.System Info., and press<br />
ENT to see the related information.<br />
3. The information will show on the LCD as below:<br />
Disc Info: You can check the format of disc, burning speed supported and total capacity.<br />
If the disc has data inside, you also can check the size of data.<br />
Burning Speed<br />
Disc Format Capacity/Data Size<br />
Drive Info. The version, model No. and brand name can be checked here.<br />
System Info: The model number and firmware version can be checked here.
15<br />
___<br />
<strong>Kingdom</strong> <strong>One</strong> Touch<br />
7-2. Erase Disc<br />
This function will erase the rewritable discs in WRITER tray, there are two erase modes<br />
available:<br />
Quick Erase: It will erase the INDEX of the rewritable disc.<br />
Full Erase: It will erase ALL DATA in the disc, which takes longer time than Quick<br />
Erase.<br />
1. Place a disc into a writer.<br />
2. Using / to select 7. Utility and press ENT to enter the sub menu. Then, select 2.<br />
Erase and press ENT<br />
3. Using / to select 1. Quick Erase. or 2. Full Erase.<br />
or<br />
4. Pressing ENT to execute the erasing task. When the system is detecting the discs,<br />
you will see the colon flashing.<br />
5. When the erase job is in process, you should see the O and o are blinking by turns.<br />
6. Once the erase task has finished, the O stop blinking, the disc will be ejected<br />
automatically.<br />
**Note:<br />
1. If you place a whole new <strong>DVD</strong>+RW to do whatever quick erase or full erase, the system will execute<br />
format automatically and you will see F and f are blinking by turns on LCD.<br />
2. Erase function only support rewritable discs.
16<br />
___<br />
<strong>Kingdom</strong> <strong>One</strong> Touch<br />
7-3. PreScan Source<br />
This function will scan and detect any bad sectors existing in the source disc, which<br />
helps you to ensure the readability of source disc.<br />
1. Place a source disc into reader.<br />
2. Using / to select 7. Utility and press ENT to enter the sub menu. Then, select 3.<br />
Prescan Source and press ENT to start scan task.<br />
3. When prescan task is in process, you can see the process on the display:<br />
4. When the prescan task has finished, the result of prescan will be shown on the LCD.<br />
7-4. Track Edit<br />
This function enables you to combine audio tracks from various CDs into a single<br />
customized audio CD.<br />
1. Copy Track: You can select and combine audio tracks from different CDs in this<br />
section.<br />
2. Close Disc: You have to perform this function after track copying to make the CD<br />
playable on CD player.<br />
3. Disc Info: You can check the audio CD’s status of usage.<br />
Step by Step Guide:<br />
Select function #1. Copy Track under function 7-4.<br />
Insert an Audio CD with your favorite tacks in the Reader drive and Insert<br />
Blank CD-R disc into the writer drive.<br />
As soon as both audio CD and blank CD-R are recognized, you will see the<br />
# of tracks (1,2,3,4,5………) on the duplicator LCD screen.
17<br />
___<br />
<strong>Kingdom</strong> <strong>One</strong> Touch<br />
Navigate , to the track number that you would like to select, and then<br />
press ENT to confirm your selection. The track will be played through the<br />
rear end audio jacks (Optional) after each selection is made. Continue with<br />
your selection of tracks from the disc. You will see a letter of “ a, b, c, d,….”<br />
on top of each selected track.<br />
a b c<br />
1 2 3 4 5 6 7<br />
Once you finished selecting the tracks you want to copy, you can press to<br />
move cursor to the end with the “OK” display. And press ENT to confirm and<br />
submit your selection.<br />
c d e<br />
7 8 9 10 OK_<br />
Once you have entered your selections, you will see “Copying Audio<br />
Tracks…..” on your LCD screen.<br />
Track 01 04:39<br />
Copy.... 00:04<br />
When copying was finished, the LCD will show CD-R’s usage and free space.<br />
Track Used 59:15<br />
15 Free 20:42<br />
You can repeat above step 1-6 to select Audio track from other source discs,<br />
and copy to the same blank disc.<br />
.<br />
★ Note: Once you have finished copy Audio Tracks, you NEED to execute function #2. Close<br />
Disc on this CD. This function will finalize the CD or otherwise it will not be able to<br />
play on any audio CD player.<br />
7-5. Eject All Disc<br />
You can eject all discs including source and target discs at the same time by this<br />
function.
18<br />
___<br />
<strong>Kingdom</strong> <strong>One</strong> Touch<br />
7-6. Copy Counter<br />
This function will record the result of duplication.<br />
Show Count: You can check how many discs copy successful and failed.<br />
Enable Counter: You can set the counter enable or disable to record the copy result.<br />
Clear Counter: You can delete the record by this function.<br />
1. Using / to select 7. Utility and press ENT to enter the sub menu. Then, select 6.<br />
Copy Counter and press ENT<br />
2. Using / to select 1. Show Count.<br />
3. Pressing ENT to check the calculation of successful and failed duplication for CD and<br />
<strong>DVD</strong><br />
7-7. Update BIOS<br />
You can upgrade the system’s firmware in this function.<br />
1. Place manufacturer certified update file CD into any drive<br />
2. Pressing / to select 7. Utility and sub menu 7. Update BIOS and then press ENT<br />
to start the process.<br />
3. The system will detect the update file and execute update task automatically.<br />
4. Once the update job has done, the system will require you to reboot the system.
8. Setup<br />
19<br />
___<br />
<strong>Kingdom</strong> <strong>One</strong> Touch<br />
8-1. Auto Start Time<br />
This setting will allow the system to do the Copy, Test, Compare and Copy + Compare<br />
functions automatically in a few seconds once the source and blank discs are placed in<br />
the tray and detected by the system. The default setting is 5 seconds. You can set a<br />
longer/shorter time from 1 to 99 seconds or set OFF to disable this function and execute<br />
copy task by manual.<br />
1. Pressing / to select 8. Setup and sub menu 1. Auto Start Time.<br />
2. Pressing / to set the time.<br />
8-2. Display Mode<br />
You can select the preferred display mode in Copy, Test, Compare,<br />
Copy+Compare.<br />
Basic: It will only show the copy process (%) on LCD.<br />
Show Timer: It will show the time for copy.<br />
Show Speed: It will show the speed of burning during copy process.<br />
8-3. Button Beep<br />
This setting will allow you to set up to hear a beep when a button is pressed or not.
20<br />
___<br />
<strong>Kingdom</strong> <strong>One</strong> Touch<br />
8-4. Eject On Start<br />
You can make the trays or discs eject once the system is booted up.<br />
Eject All Discs: To eject all trays with disc inside once the system is booted<br />
up.<br />
Do Not Eject: No eject any tray or disc once the system is booted up.<br />
Eject Target Only: Only eject target trays with disc inside once the system is booted<br />
up.<br />
Eject Source Only: Only eject source disc once the system is booted up.<br />
Eject All Trays: To eject all trays once the system is booted up.<br />
8-5. Reader Speed<br />
This setting allows you to adjust the reading speed of source drive. The default setting<br />
of reader speed of CD is 40X; <strong>DVD</strong> is 24X.<br />
8-6. Compare Speed<br />
The reading speed of drive and disc are the reasons can affect the quality of<br />
comparison. This setting allows you to adjust the reading speed of drives to match up<br />
the reading speed of discs. The default setting of CD’s compare speed is 40X, <strong>DVD</strong> is<br />
8X.<br />
8-7. Language<br />
You can set a proper language for interface during operation. English, Spanish,<br />
Portuguese and Japanese are available.<br />
8-8. Clear Setup<br />
This setting will reset all the function back to manufacturer’s default setting.<br />
8-9. Advanced Setup<br />
• Power On Time: You can set a warm-up time from 5 seconds to 99 seconds for<br />
warming up the duplicator when it is turned on. The default setting is 10 seconds.<br />
• Start-up Menu: You can select which function you would like to show up in the<br />
beginning.<br />
• Skip Read Error: You can set this function enable to skip disc errors in<br />
order to avoid bad quality of copy. If you are confident of your source disc has only<br />
a small and insignificant error due to physical damages and can be overlooked, you<br />
can set NO to disable this function.<br />
**Note:<br />
Skip Read Error cannot fix the error in the source disc, all it does is skipping the errors and keeps<br />
copying the rest of readable data.<br />
• Change Bad Master: This setting will make the system eject source disc and ask<br />
for another one while the source disc is unreadable for system.<br />
• CD Overburn: The majority of discs have a small margin of extra groove at the<br />
outer edge. This setting allows you to copy data over the normal size limit.<br />
• Show HDD Image Name: You can select to show HDD image name or capacity on
Copy, Test, Copy + Compare and Compare function<br />
Show HDD Image Name: Show capacity:<br />
21<br />
___<br />
<strong>Kingdom</strong> <strong>One</strong> Touch<br />
**Note: When you change the source from drive to HDD, the LCD will show the HDD<br />
information. To change your source reader please refer to 6. Select Source , page 13.<br />
• Keep Buffer: You can set Yes to load source disc to buffer in first round of<br />
Copy, Test, Compare or Copy+Compare, and do it again without the source<br />
disc. Or you can set No to keep buffer not be used.<br />
**Note:<br />
The source will be only temporary saved in buffer; there will be nothing saved when you<br />
exit the task Copy, Test, Compare and Copy+Compare or reboot the system.<br />
• Boot Password: This setting allows you to enable or disable the user administrative<br />
password. Users have to login when the system is booted on.<br />
• Setup Password: You can set up password by pressing / to select the<br />
number you like and press ENT to set next number.
22<br />
___<br />
<strong>Kingdom</strong> <strong>One</strong> Touch<br />
Chapter 7. Troubleshooting Guide and FAQ’s<br />
Troubleshooting Guide<br />
There are no end-user serviceable components that can be replaced in the CD/<strong>DVD</strong><br />
<strong>Duplicator</strong>. Please contact <strong>Kingdom</strong> for warranty repairs and service.<br />
No LCD display.<br />
- Please check if the power cord is connected properly and the utility power is<br />
supplied. Please check if the fan of power supply is rotating. If not, it might be<br />
broken.<br />
Error message shown on LCD.<br />
- Reboot the duplicator.<br />
- Change master disc and try again.<br />
Reader Drive doesn’t read disc and shows error message.<br />
- Check the format of master disc.<br />
- Use other Master disc or other duplicator to test master.<br />
Buttons do not function.<br />
- Task busy. Please wait.<br />
- Restart unit.<br />
- Faulty controller board.<br />
Copy completed but disc is not readable / executable.<br />
- Test with another CD-ROM/<strong>DVD</strong>-ROM.<br />
Failure rate is high.<br />
- Lower writing speed and try again.<br />
- Quality of blank disc is poor.<br />
- Quality of master disc is poor.<br />
- Rated speed of discs does not match writers. Ensure discs meet writers rated<br />
speed.<br />
- Update the latest BIOS version. See manufacturer for latest firmware updates.
<strong>Duplicator</strong> Error Codes<br />
23<br />
___<br />
<strong>Kingdom</strong> <strong>One</strong> Touch<br />
Error Message Possible Reasons Troubleshooting<br />
“Bad Master Disc” Master disc is empty or protected. Please check your master disc by (1) Disc Info<br />
(2) or on a PC or Player.<br />
Master disc has damaged or of bad<br />
quality<br />
“Can’t <strong>DVD</strong>↑CD” You put different format of blank<br />
disc from the master disc. Cannot<br />
Please check your master and blank disc<br />
format by "Disc info". Only can copy CD to CD,<br />
copy between different disc format <strong>DVD</strong> to <strong>DVD</strong>.<br />
“Not Blank Disc” The target disc has been written to. Please use blank disc or rewritable disc.<br />
No Disc No blank disc. Or the disc is upside Please double check your target disc.<br />
down.<br />
Using Blu-Ray blank disc, but the<br />
driver does not support Blu-Ray.<br />
No Master Disc No source disc Please check if you put the right source disc<br />
into the drive.<br />
Use Blu-Ray as a source, but the<br />
driver does not support Blu- Ray.<br />
Please check the disc format by "Disc Info".<br />
"NEED Blank CD disc" <strong>Duplicator</strong> is detecting that there<br />
are no blank CD discs in the<br />
duplicator<br />
Insert blank CD discs<br />
"NEED Blank <strong>DVD</strong> disc" <strong>Duplicator</strong> is detecting that there<br />
are no blank <strong>DVD</strong> discs in the<br />
duplicator<br />
Insert blank <strong>DVD</strong> discs<br />
"FAIL Write Disc" <strong>Duplicator</strong> Failed to write to discs Insert different blank disc and attempt to copy<br />
again. If failure happens again, contact Tech<br />
Support.<br />
"Bad Drive" <strong>One</strong> or more of the drives has<br />
failed and may need to be replaced.<br />
"Empty Source!" <strong>Duplicator</strong> cannot detect a<br />
Master/Source Disc<br />
"Can't <strong>DVD</strong>(CSS)" <strong>Duplicator</strong> will not copy CSS<br />
protected Discs<br />
"Need ALL the same Disc! <strong>Duplicator</strong> has detected both CD’s<br />
and <strong>DVD</strong>’s in drives<br />
Contact Tech Support.<br />
Insert Master Disc. If error still exists, make<br />
sure Master Disc is in “Source Drive” slot. Refer<br />
to “Select Source” Section of User’s <strong>Manual</strong>.<br />
<strong>Duplicator</strong> will only copy non-encrypted discs<br />
If copying CD’s, make sure all blank discs are<br />
CD’s, or if copying <strong>DVD</strong>’s make sure all blank<br />
discs are <strong>DVD</strong>’s.
FAQ’s<br />
What if the <strong>Duplicator</strong> will not power on?<br />
Make sure the unit is plugged into a proper power source and the unit is turned “on.”<br />
24<br />
___<br />
<strong>Kingdom</strong> <strong>One</strong> Touch<br />
What if the duplicator is having trouble making a copy, what can be done?<br />
The most common problem with discs playing but not duplicating can be attributed to overall quality.<br />
Some factors affecting disc quality include brand of blank media used, physical damage, and write quality.<br />
It is important that the disc is free of damage or blemishes and produced on a high quality brand of media<br />
.<br />
Make sure that the “master” disc has been finalized.<br />
Make sure the “master” <strong>DVD</strong> is not encrypted or is not a copy protected original.<br />
Make sure you have high quality, blank pieces of media.<br />
Make sure your master disc and blank disc are the same format. (-R to –R or +R to +R)<br />
Make sure you’re not trying to copy a CD to a <strong>DVD</strong> or <strong>DVD</strong> to CD.<br />
Try using a different brand of blank media.<br />
What if the duplicator is having trouble reading a <strong>DVD</strong>, what can be done?<br />
Make sure you have Content on the “master” disc.<br />
Make sure the “master” disc in good condition. (Disc is not scratched)<br />
Make sure the disc is placed in the drive properly. (Data side down)<br />
Make sure the “master” disc has been finalized.<br />
Can I copy Hollywood <strong>DVD</strong> movies with a <strong>Kingdom</strong> <strong>One</strong> Touch duplicator?<br />
No, commercial movies are copy protected and cannot be copied with this or any duplicator. You can<br />
copy your own video creations.<br />
Can I copy CDs in a <strong>Kingdom</strong> <strong>One</strong> Touch <strong>DVD</strong> duplicator?<br />
Yes, you can copy CDs in this duplicator. Just use blank CD-R Media that is certified at least 40X, and<br />
use the same process used to duplicate a <strong>DVD</strong>.<br />
Can I copy <strong>DVD</strong>s to CD Media in <strong>Kingdom</strong> <strong>One</strong> Touch duplicators?<br />
No, <strong>DVD</strong>s will only copy to blank <strong>DVD</strong> Media.<br />
How do I clean my <strong>Kingdom</strong> <strong>One</strong> Touch duplicator?<br />
The best maintenance for your duplicator is preventive maintenance. Using a system in an area with<br />
excessive dust, smoke, or other contaminants is not recommended since it will increase error rates and<br />
reduce hardware life expectancy. Some light cleaning can be performed; you can use a can of<br />
compressed air for dusting out drives.<br />
Need Technical Support?<br />
Email: ktsupt@kingdominc.com<br />
Address: <strong>Kingdom</strong> Inc<br />
719 Lambs Creek Road<br />
Mansfield, PA 16933<br />
Telephone: 570-662-7515<br />
Fax: 570-662-3875<br />
Website: www.kingdom.com