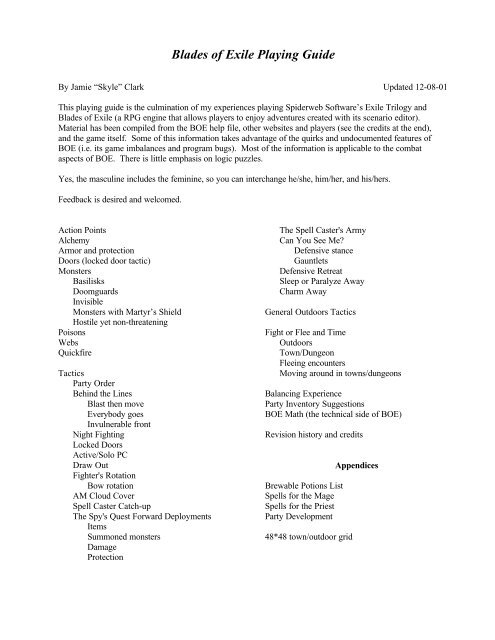
Blades of Exile Playing Guide - WebRing
Blades of Exile Playing Guide - WebRing
Blades of Exile Playing Guide - WebRing

You also want an ePaper? Increase the reach of your titles
YUMPU automatically turns print PDFs into web optimized ePapers that Google loves.
<strong>Blades</strong> <strong>of</strong> <strong>Exile</strong> <strong>Playing</strong> <strong>Guide</strong><br />
By Jamie “Skyle” Clark Updated 12-08-01<br />
This playing guide is the culmination <strong>of</strong> my experiences playing Spiderweb S<strong>of</strong>tware’s <strong>Exile</strong> Trilogy and<br />
<strong>Blades</strong> <strong>of</strong> <strong>Exile</strong> (a RPG engine that allows players to enjoy adventures created with its scenario editor).<br />
Material has been compiled from the BOE help file, other websites and players (see the credits at the end),<br />
and the game itself. Some <strong>of</strong> this information takes advantage <strong>of</strong> the quirks and undocumented features <strong>of</strong><br />
BOE (i.e. its game imbalances and program bugs). Most <strong>of</strong> the information is applicable to the combat<br />
aspects <strong>of</strong> BOE. There is little emphasis on logic puzzles.<br />
Yes, the masculine includes the feminine, so you can interchange he/she, him/her, and his/hers.<br />
Feedback is desired and welcomed.<br />
Action Points<br />
Alchemy<br />
Armor and protection<br />
Doors (locked door tactic)<br />
Monsters<br />
Basilisks<br />
Doomguards<br />
Invisible<br />
Monsters with Martyr’s Shield<br />
Hostile yet non-threatening<br />
Poisons<br />
Webs<br />
Quickfire<br />
Tactics<br />
Party Order<br />
Behind the Lines<br />
Blast then move<br />
Everybody goes<br />
Invulnerable front<br />
Night Fighting<br />
Locked Doors<br />
Active/Solo PC<br />
Draw Out<br />
Fighter's Rotation<br />
Bow rotation<br />
AM Cloud Cover<br />
Spell Caster Catch-up<br />
The Spy's Quest Forward Deployments<br />
Items<br />
Summoned monsters<br />
Damage<br />
Protection<br />
The Spell Caster's Army<br />
Can You See Me?<br />
Defensive stance<br />
Gauntlets<br />
Defensive Retreat<br />
Sleep or Paralyze Away<br />
Charm Away<br />
General Outdoors Tactics<br />
Fight or Flee and Time<br />
Outdoors<br />
Town/Dungeon<br />
Fleeing encounters<br />
Moving around in towns/dungeons<br />
Balancing Experience<br />
Party Inventory Suggestions<br />
BOE Math (the technical side <strong>of</strong> BOE)<br />
Revision history and credits<br />
Brewable Potions List<br />
Spells for the Mage<br />
Spells for the Priest<br />
Party Development<br />
48*48 town/outdoor grid<br />
Appendices
Action Points (APs). Combat is turn-based. While in combat mode, watch the AP counter below the<br />
graphic window. In general look, move, then cast a spell or attack (for example, while hasted move until 5<br />
points are left then attack twice). Encumbrance will lower your action points and to hit bonus – thus keep it<br />
low (like at 0 or 1).<br />
0 l<br />
1<br />
Some <strong>of</strong> the PC’s items – mainly rings, weapons, and armor items – can be equipped<br />
(colored italics) and unequipped (black)click the PC’s item(s))<br />
PCs cannot equip armor in combat mode<br />
1<br />
1<br />
3<br />
Give item(s) – such has a Potion <strong>of</strong> healing to a wounded PC<br />
Drop item(s)<br />
Use an item – 2 Fireballs from a Wand <strong>of</strong> Fireballs = 1 Fireball cast by a mage<br />
Get (also Hand grabbing a coin) – The active PC can get the visible item(s) – either all<br />
4 g nearby (line <strong>of</strong> sight within the 9*9 viewing window) or all adjacent (if hostile monsters<br />
can see the party). Yes, get those items behind the shut portcullis and windows.<br />
2<br />
3<br />
4<br />
s<br />
s<br />
Thrown missile attack – equipped throwing knives, razordisks, etc.<br />
Missile attack – equipped Bows and arrows, Crossbows and bolts, or slings<br />
Weapon attack – melee combat (use arrow keys to move the PC into the monster’s square)<br />
5 p<br />
6 m<br />
All d<br />
x<br />
f<br />
e<br />
a<br />
c<br />
Other Commands<br />
Look – click on the terrain screen<br />
border to see where the spell casters<br />
are<br />
0 w<br />
Wait – press w to cycle through the<br />
PCs until each PC uses their APs<br />
1 Move a space<br />
Priest spells – all priest spells take 5 AP to cast<br />
Mage spells – at higher levels (or more intelligence) some mage spells take 5 AP to cast<br />
Parry – The PC uses the rest <strong>of</strong> his turn defending. How effective this is depends heavily<br />
on the character's Defense skill, although there will always be some benefit.<br />
Active (combat mode only) – Makes the current individual PC the only active PC. None<br />
<strong>of</strong> the other PCs will do anything until the 'Act' button is clicked again or active PC dies.<br />
Combat – Splits the town mode party into the individual PCs. In combat mode, they can<br />
cover town terrain faster (4 spaces instead <strong>of</strong> 1 space per round) and get first strike at<br />
monsters.<br />
End Combat – Joins the individual PCs into the town mode party (note, some attacks will<br />
then affect all PCs). In an outdoors encounter, allows the party to resume traveling (get<br />
any dropped items first and works only if all <strong>of</strong> the hostile monsters are dead).<br />
Display the automap. Move this to the lower right corner to allow an overall view <strong>of</strong> the<br />
town/dungeon.<br />
Camp (outdoors only) – a very effective way to restore a lot <strong>of</strong> health and spell points. It<br />
will be interrupted if wondering monsters are nearby.<br />
Ctrl-s Save the current party status (town or outdoor mode only). Be sure to save the game with different<br />
names, especially after some party progress (or prior to entering a town/dungeon).<br />
Ctrl-o Opens a BOE game. Be sure the scenario’s files are in the Scenarios Folder to ensure the saved<br />
game can be opened.
Alchemy. Have one PC carry alchemy herbs and make it a priority for him to achieve Alchemy level 20.<br />
The vital herbs are Comfrey Root (Weak Healing), Glowing Nettle (Medium Healing), Asptongue Mold and<br />
Mandrake Root (Medium Energy), and Graymold and Holly (Clarity). Alchemy level 20 will make 3 use<br />
Medium Heal, 2 use Medium Energy, and 3 use Clarity Potions. As herbs are found in the dungeon, consider<br />
making potions – they may be there for a reason. A Potion <strong>of</strong> Clarity is a lot better than the priest's Restore<br />
Mind – 3 APs vs. 5 APs used and more likely to fully remove the Dumbfounding (one use versus multiple<br />
castings). Herbs are more convenient to carry than the brewed potions, are usually combinable, and allow<br />
for brewing flexibility.<br />
Prior to a long fight, or just upon entering a dungeon, check the party's distribution <strong>of</strong> Healing (Weak or<br />
Medium) Potions, Medium Energy (always have at least 1 per spell caster), and Clarity Potions (number <strong>of</strong><br />
uses equal to the number <strong>of</strong> spell casting PCs). Brew and distribute any needed potions.<br />
See the Brewable Potions for the list <strong>of</strong> brewable potions and additional information.<br />
Armor and protection. Oh what to wear? In general, keep it light and watch the armor value to<br />
encumbrance ratio. Avoid wearing bulky armor or other items that add to a PC's encumbrance. Boots,<br />
Robes, Leather gloves, and a Leather Helm equate to 4 AC for 0 encumbrance. A high encumbrance value<br />
reduces the number <strong>of</strong> APs in combat mode, reduces the bonus to hit percentage, and prevents spell casters<br />
from casting Mage spells (if above 2 encumbrance).<br />
A high Defense skill <strong>of</strong>fsets the reduction in the bonus to hit percentage (reduces the penalty), but does not<br />
affect the number <strong>of</strong> action points (APs). It seems that 3 Defense <strong>of</strong>fsets 1 encumbrance. However, there are<br />
better skills to train in than Defense.<br />
Doors. To open a door, simply move into the door to open it. If it is locked, there are three options to open<br />
the door in town mode – Bash (high strength PC), mage Unlock, or picking the lock (PC with equipped<br />
lockpicks and lockpicking skill). Bashing can result in damage to the PC, but breaking locks is the preferred<br />
manner <strong>of</strong> entry on normally locked doors. On magically locked doors, Unlock works the best (perhaps also<br />
magic lockpicks and high lockpicking skill). Some doors are impassible (thus unopenable by any means) or<br />
require the party to have certain items (or complete certain tasks) before the party can enter the room. PCs in<br />
combat mode cannot open locked doors.<br />
While in town mode, click on the Use button (or arrow-u) to shut an open door. Get into the habit <strong>of</strong> shutting<br />
doors while in town mode. Shut doors are nice for the following reasons:<br />
1. It will block the party from a monster' sight, thus delay (or may prevent) an attack.<br />
2. The monster has to open the door to attack the party, thus the sound will alert the party.<br />
3. Wandering monsters may not see the party as the PCs move through the dungeon<br />
4. Monsters don't open locked doors (on their own) to attack the party<br />
5. If a merchant goes through an open door, shut it and the party can steal the items (be sure no one else<br />
is watching, this crime makes the town hostile towards the party). Suggested by Ivan Goddard.<br />
6. An aid in sorting many items – the Get command only shows items that are in the party's or PC's line<br />
<strong>of</strong> sight (within 4 squares).
Monsters<br />
Basilisks (and other monsters with petrifaction gaze). The best defense is levels, a highly blessed status,<br />
summoned monsters, and Resist Petrifaction items. High PC levels and being highly blessed (from repeated<br />
Strength/Bless/Bless Party castings) will give a high resistance. Summoned monsters have a good chance <strong>of</strong><br />
being gazed upon (vice a PC) – consider attacking these creatures with ranged weapons and spells to<br />
minimize gazes. Although rare, some magical items are helpful. Keep a PC able to cast the priest spell<br />
Destone away from the action just in case. Basilisks do, however, make wonderful Capture Soul candidates<br />
to Simulcrum later.<br />
Doomguards. These splitting horrors are generally regarded as the BOE player's least favorite monster (not<br />
mine though). For good reasons – they split, have a lot <strong>of</strong> HP, and are immune to all magic save a few spells<br />
(like Wound). Some tactics:<br />
1. Run away. Just run away from it in town mode and lose it behind some doors you shut. When you<br />
see it later, run some more. Inspired by Alcritas’ On a Ship to Algiers and Of Good and Evil.<br />
2. Tough it out. If you can't lose it, just let it be and move around it with a hasted and heavily blessed<br />
PCs. Unequip melee weapons and ensure the PCs have equipped shields. The party may get some<br />
damage, but just endure it until the task is done. Inspired by Tormod Stanghand's Nephil's Gambit.<br />
3. Barricade. Maneuver it towards a wall or other obstacle and surround it with Force Barriers. If you<br />
want to kill it, surround it and a fighter. Be careful, the scenario designer may require a certain<br />
number to be killed as part <strong>of</strong> a puzzle (like an unreleased scenario by Stareye).<br />
4. Block its power. Cast Conflagrations, AM Clouds, and/or Quickfire to prevent it from splitting. As<br />
long as these fields have no nearby holes, the Doomguard can't split. It won't split in Quickfire, but<br />
Quickfire has its own napalming disadvantages.<br />
Invisible. Have the priest Curse All and/or mage Slow Group to know what monsters are within 10 spaces<br />
(12 with Slow Group). The only effective choice is to summon monsters (Summonings and Sticks to<br />
Snakes) that will move towards them. Note where they are directing their attacks and have the PCs engage<br />
them. Area <strong>of</strong> effect spells will indicate their current position along with whether PCs are damaged (or<br />
missed) from them. Without summoned monsters, you will need to deduce their locations(s).<br />
Monsters with Martyr’s Shield. These monsters are a fighter’s horror. Typically a fighter PC would be<br />
hasted and blessed; as such he shares the melee damage he causes (20 hp to the monster and 20 hp to the<br />
PC). The easiest manner <strong>of</strong> attacking them is with missile weapons and spells. Front line fighters should<br />
have their melee (hand held) weapons unequipped in order to block the monsters. While they are using bows<br />
and arrows (or crossbows and bolts), the rear spell casters are getting the kills. Invulnerability potions and<br />
Shielding Crystals can be used, but it is not recommended if these tactics do not work (they are better used<br />
during tougher combat). A tactic:<br />
1. Bow hunter tactic. Have a hasted and blessed PC (preferably with the archery skill) hunt monsters<br />
with this ability (martyr’s shield). He needs a good bow, lots <strong>of</strong> arrows (or a crossbow and bolts)<br />
and unequipped melee weapons. He can cause serious damage will little risk (especially if the<br />
monsters cannot cast spells). Inspired by Samuel Coates’ Ashen.<br />
Hostile yet non-threatening monsters. These monsters are no threat to the party – archers behind slits whose<br />
arrows don't hit, monsters behind Monster Block runes or locked doors, immobile monsters with no spell or<br />
missile ability, weak monsters with little chance hitting or just causing minor damage, monsters in optional<br />
rooms, etc. They use-up game time to kill and a hasted party (or one hidden by Stealth or Sanctuary) can<br />
easily get by them.<br />
Just remember, they may be a part <strong>of</strong> the town/dungeon's design – if you've done everything else you can on<br />
that level, but are unable to complete it, that monster may be important – it may be a responsive NPC, a Stuff<br />
Done Flag may be attached to it's life, the cell may have to be entered, etc.
Poisons. Many monsters don't have a resistance or immunity to poison. Casting Envenom at low levels or<br />
Major Blessing at high levels may provide the extra damage to kill the monster one round sooner. Consider<br />
keeping Strong and Killer poisons with the party for use on weapons or arrows/bolts. It is best for the PC to<br />
have 3 or 4 Poison skill points and have the priest act last in a round, he may need to cast Cure<br />
Poison/Revive on a PC or Cure All. Don't forget the mage spells <strong>of</strong> Minor Poison/Poison/Major Poison –<br />
they can be cast from a distance and the party can explore the area while a monster is dying. The priest spell<br />
Pestilence can provide the same effect for a group <strong>of</strong> monsters, but it will take longer.<br />
Webs. Webs are annoying. Click the Use button (or arrow-u) to clear webbed areas. Each web reduces the<br />
number <strong>of</strong> moves by 1 – 4 to 3 to 2 to 1 and even to 0 – and doubles for hasted PCs (8 to 6 moves for<br />
example). Thus multiple webs will prevent the PC from moving and can leave a high level party motionless<br />
and thus effectively dead. Cast the priest spell Cleanse/Major Cleansing to remove webs. Webbed PCs can<br />
parry (d, Windows number pad 5 or Macintosh space bar) to clean webs or go outdoors and re-enter.<br />
Moving in town mode will eventually remove the webs.<br />
Quickfire is a last ditch effort to get past a tough room – due to the monsters or layout – because <strong>of</strong> the long<br />
term, party damaging effects. Some major drawbacks include obscured terrain features, the inability to cast<br />
AM Cloud or Fire/Force Barrier on Quickfire squares (BOE limit – Barrier, AM Cloud, or Quickfire per<br />
square), and it is permanent (until the town resets after visiting four other towns, but the monsters may return<br />
also). Be sure to have Invulnerability potions, Shielding Crystals, resist fire items, or Protection spells to<br />
minimize damage. Move hastedly to outrun it.
Tactics<br />
Party order. Fighter 1, fighter 2, spell casters, fighter 3 (to protect the rear). Having at least two PCs with<br />
mage skills is very handy. The lightly armored spell casters can carry the unidentified items. Consider<br />
keeping a character with priest spells last in order – the party may need the healing spells or to cast Sanctuary<br />
if a member forgets to drink a healing potion.<br />
All combat tactics assume two rounds were spent casting Minor Haste/Haste upon party members (mages<br />
first) at low levels or one round casting Major Haste/Blessing at higher levels. The priest should be Blessing<br />
the fighters, Curse All, or Bless Partys (depending on the priest spell level). Of course it's good to Slow key<br />
monsters or Slow Group the monsters and (if possible) Dumbfound the spell casters. The combination <strong>of</strong><br />
Major Haste/Blessing and Slow Group usually gives the party a free round <strong>of</strong> 8 to 12 APs.<br />
Slowed monsters will not do anything every other round for a short period <strong>of</strong> time. Watch this, PCs can<br />
safely move around a barrier and attack during this round <strong>of</strong> non-action. At the end <strong>of</strong> the next party round,<br />
retreat the PCs (giving the monster a free melee attack) so they cannot see the party.<br />
Try to get and equip Rings/Boots/Helm <strong>of</strong> Speed for a move base <strong>of</strong> 5 APs. A Hasted person will have 8<br />
APs, but a Hasted PC with equipped Ring/Boots <strong>of</strong> Speed will have 10 APs. Repeated castings, or a mage<br />
with high intelligence, may allow 12 APs a round (15 with a speed item) for about 2 rounds before the haste<br />
effect lowers to 8 (10) APs per round.<br />
Behind the Lines. Eye the monster spell casters and have one or two fighters beeline it to them through<br />
the front line monsters. Sometimes these rear monsters will have weak armor or will weapon attack an<br />
adjacent PC (instead <strong>of</strong> using spells or missiles). The priests should Sanctuary and/or Bless them to<br />
minimize received damage (or mage Stealth in town mode). The mages can Dumbfound the monster spell<br />
casters or Strength the fighters. Keep a fighter near the magic users for protection. While the fighters move<br />
up, the priest can move and cast Sticks to Snakes, the mage Weak Summoning, so the creatures are adjacent<br />
to the spell casters – spells may be directed toward them. Sometimes when these leaders are dead, some or<br />
all <strong>of</strong> the other monsters will disappear.<br />
High level options:<br />
Blast then move – Advance the fighters towards the monsters while the magic users cast Major<br />
Haste/Blessing and Slow Group. Next move, the spell casters cast area <strong>of</strong> effect spells to wipe out the front<br />
line to make a path and/or cast AM Cloud to either prevent spell casting or protect the fighters. Then the<br />
fighters move to engage the monster spell casters. Staying behind, the priest casts Bless Party/Curse All to<br />
minimize received damage and protects the magic users. Now sandwich the front line.<br />
Everybody goes – Major Haste/Blessing, Slow Group, Bless Party the whole party around their front and<br />
towards the monster spell casters in the rear. Next move, cast Dumbfounds and AM Clouds (if necessary)<br />
while the priest cast Curse Alls/Bless Partys. Be sure to move the PCs until 1 AP is left, then cast spells or<br />
attack. Basically you're out flanking the monsters and attacking them from the rear. If there are friendly<br />
spell casters, you don't want to get caught in the crossfire; being caught in their area <strong>of</strong> effect spells is not<br />
healthy. Let them take care <strong>of</strong> the front lines. Inspired by Tony Wilsdon's The Wreck <strong>of</strong> the Slug.<br />
Invulnerable front – Major Haste/Blessing, Slow Group, Bless Party. Next move, mages cast Protections<br />
(select fighters). Separate the party so the spell casters are moving back and apart from each other while the<br />
fighters are moving forward. The monster spell casters may direct damage inflicting spells at the closer,<br />
invulnerable fighters only. The spell casters can cast area <strong>of</strong> effect spells from max range. Also, the monster<br />
spell casters may cast area <strong>of</strong> effect spells that can weaken or kill the monsters around the invulnerable<br />
fighters. This is a must on Death Touch monsters and Acid spitters (Slugs, Jeweled Golems, etc.). Inspired<br />
by Tony Wilsdon's The Wreck <strong>of</strong> the Slug.
Night Fighting. In dark dungeons, monsters can be fought one at a time in large rooms. Thus, by slowly<br />
exploring the room, the whole party can attack that monster with only a small risk <strong>of</strong> the other monsters<br />
joining in. If a light source is used all hostile monsters will see and react to the party. Being able to Slow<br />
Group or use area <strong>of</strong> effect spells is little comfort to multiple spells or missile attacks directed against the<br />
party. Remember, if they can't see you, they can't attack and may not move towards the combat. Don't cast<br />
Curse All, it may attract unwanted attention. Some disadvantages are that you may miss items on the ground<br />
or narrow passages (thus light-up the place after the monsters are dispatched).<br />
To effectively night fight, do not cast any <strong>of</strong> the light spells. Instead use candles and torches. Sell the<br />
lanterns.<br />
Locked doors tactic. Locked doors can be beneficial to the party – monsters will not open them on their<br />
own. This tactic needs a PC with enough strength to bash doors (break locks), lockpicks (preferably magic)<br />
and lockpicking skill (pick locks), or a mage with spell points and the Unlock spell (magically unlock the<br />
doors). Open a locked door (bash/pick/Unlock) then immediately shut it before the monster can react. Go<br />
into combat mode, prepare the party (move and cast spells as necessary), then open the door and attack. For<br />
locked doors in the general vicinity, do this for each door then fight door-to-door in combat mode. This is<br />
also an effective way for one or two PCs to gain experience (only they fight the monsters). Later, end<br />
combat and search these areas. Inspired by Ben Frank's The Fog.<br />
Active/Solo PC. While in combat mode, haste and heavily bless the PC needing experience (if necessary).<br />
Also, give him useful items (such as armor and weapons) to be equipped. Make him Active (Act button or x)<br />
and send him to kill the wounded monsters or less dangerous monsters. It can also be used in one-on-one<br />
fights if you don't want to rotate PCs around to fight the monster (see Fighter's Rotation). Alternatively, he<br />
could scout and kill hostile monsters while exploring a dungeon. He will gain a lot <strong>of</strong> experience by single<br />
handedly killing these monsters. Later the party can search containers. Inspired by Ben Frank's The Fog.<br />
A PC can be solo without being Active. Let the other PCs parry (defensive stance) or slowly move behind<br />
the hasted PC. This takes more effort as each PC must be controlled – d for parry or moved slowly behind<br />
the solo PC. The benefit, though, is that the party can cast Bless and Haste spells or perhaps long range area<br />
<strong>of</strong> effect spells.<br />
Draw Out. So there's a group <strong>of</strong> monsters in a lit room beyond the dark hallway. Instead <strong>of</strong> barging in, let<br />
them come to you. Get their attention with a Slow Group then retreat to the hallway. As the monsters come<br />
to the doorway attack them one by one with the frontal fighters and cast Curse All. As the monsters group<br />
together by the door, sneak in a spell caster to cast an area <strong>of</strong> effect spell then rotate in a fighter. Major<br />
disadvantages are that some monsters may be blocked via obstacles or monster blocking terrain and it makes<br />
the combat last a longer time. Inspired by Castle <strong>of</strong> the Winds CRPG and heavily used in Stareye's Spy's<br />
Quest.<br />
Fighter's Rotation. Inspired by Tony Wilsdon's The Wreck <strong>of</strong> the Slug, it is useful for a narrow, fighterbased<br />
front. A hasted fighter (say at 12 APs) can attack 2x (4 + 4) down to 4 AP, another fighter exchanges<br />
places with him using 1 AP (now 11 APs) and attacks 2x (4 + 4) down to 3 AP, another fighter exchanges<br />
places with him using 1 AP (now 11 APs) and attacks 3x to finish the rotation. Thus instead <strong>of</strong> 2 attacks, a<br />
monster can face 7 weapon attacks (and also a few missile attacks). If the monsters are non-spell casting and<br />
spell points are low, rotate the spell casters in also. Be sure to end the party's round with a well-armored PC<br />
adjacent to the monster.
A table can be made, but it is easier to watch the Action Point counter and fire arrows/bolts before a weapon<br />
attack, just leave 1 or 2 APs to rotate another fighter for a weapon attack. Remember, don't parry with "d"s,<br />
use Waits with "w"s until the closest fighter is selected. Equip the speed items (Boots, Ring, or Helm) on the<br />
fighters to maximize this tactic.<br />
Example table Action points<br />
Cost to exchange places 8 10 12 15 |H|<br />
Ftr 1 ( 1 ) S + W 2W S + 2W 3W ___|@|___<br />
Ftr 2 ( 2 ) W 2W S + 2W 3W @ @<br />
Ftr 3 ( 1 ) 2W 3W S + 3W 4W<br />
S – missile attack (arrow, crossbow bolt, sling), W – weapon attack, @ is party member<br />
Remember, watch the Action Point counter and use W for waits until the closest fighter is selected to begin<br />
the rotation. Retreating to a full fighter front is the best move so no rotation is necessary – have the monster<br />
come to the doorway for the three frontline PCs to attack it.<br />
Bow rotation. A PC shoots arrows (bolts) until 1 to 3 APs are left and uses 1 AP to unequip and give the<br />
bow (crossbow) to an adjacent PC. The second PC equips the bow (crossbow) and shoots his arrows (bolts).<br />
This allows the PCs to use a magical bow (Gem Bow in this case). Inspired by Samuel Coates’ Ashen.<br />
AM Cloud Cover. This is a must against monsters immune to magic (Dragons, Nagas), that absorb spells<br />
(Rakshasa), have breath weapons (Efreeti, Golems, Drakes, Salamanders), or are high-level spell casters.<br />
Cast this spell after Hastes and Bless Partys and everybody slugs it out one monster at a time. Try to<br />
surround the monster under the AM Cloud. Monsters can cast area <strong>of</strong> effect spells that can reach into the<br />
AM Cloud and damage the party (through its holes or from the edge). Watch for holes in the AM Cloud –<br />
move the spell casters to them to Bless Party or re-cast AM Cloud before the monsters cast an area <strong>of</strong> effect<br />
spell into that hole. Consider using the scroll Magic Resistance as a backup to reduce damage from area <strong>of</strong><br />
effect spells.<br />
Low-level option. The low level AM Cloud consists mainly <strong>of</strong> surrounding the hostile spell casters with<br />
Weak Summonings and Sticks to Snakes. Most likely they will melee attack or direct spells against the<br />
closer monsters and not against the party. Party members can engage with melee weapons when the<br />
summoned monsters are killed or just skip the encounter (for example, if the monsters are on islands in the<br />
water or lava and the party doesn't have the missile weapons or spell points to kill them). Separate the PCs to<br />
prevent less <strong>of</strong> a target for an area <strong>of</strong> effect spell.<br />
High-level option – Mage casts Protection (select fighter) to reduce damage from an area <strong>of</strong> effect spell, stay<br />
under the AM Cloud, but have the fighter melee on his own. The monster spell casters may cast area <strong>of</strong><br />
effect spells that can weaken or kill the monsters around the invulnerable fighter.<br />
The AM Cloud, however, does not affect the damage or effects <strong>of</strong> a monster’s special abilities, such as heat<br />
rays (Ruby Skeletons), petrification gaze (basilisks), etc.<br />
The Spell Caster's Army. The spell casters cast any <strong>of</strong> the Summoning spells, Simulcrum, Daemon,<br />
Guardian, Stick to Snakes, Deva to occupy and weaken the hostile monsters. Do not hit the summoned<br />
monsters with area <strong>of</strong> effect spells. The summoned monsters provide three bonuses – they move towards<br />
invisible monsters, are not affected by a hostile monster’s Martyr's Shield ability, and may bear the brunt <strong>of</strong><br />
the attack (reducing damage to the party). Capture Soul then Simulcrum Basilisks are very effective. Of<br />
course less experience is gained for the party.
Spell Caster Catch-up. In encounters <strong>of</strong> basically non-spell casters, slowly retreat the party while the<br />
mages Minor Haste/Haste themselves (or Major Haste/Blessing) and the priest Bless the fighters, Curse All,<br />
or Bless Party. The party should be 2 PCs wide and faces the advancing monsters. By now the monsters<br />
should be grouped together. Have the spell casters cast area <strong>of</strong> effect spells for experience (usually Fireballs<br />
and Fire Storms). The fighters just shield the spell casters and wound the monsters. Blessed/Strengthed and<br />
armored spell casters can go in and weapon attack the wounded monsters to save spell points, increase<br />
weapon pr<strong>of</strong>iciency, and give the fighters a break.<br />
The Spy's Quest Forward Deployments. Inspired by Stareye's Spy's Quest, it is mainly used at high<br />
levels and has four variations:<br />
Items – If it could be a big and long fight, brew and drop into that room Potions <strong>of</strong> Medium Healing<br />
and Medium Energy (and others like Clarity). Drop any items not needed for combat and<br />
get/distribute the potions until each PC has at least one slot left – the slot being for giving<br />
items to one another. Be careful, the items dropped will be lost if there is an unexpected<br />
level change to another dungeon.<br />
Summoned monsters – So the big room in front <strong>of</strong> you is empty – nice throne or tables or altar, but no<br />
monsters and there's a combat block at the entrance. At the open door or portcullis, enter<br />
combat mode, cast Major Haste/Blessing and Bless Party, then summon monsters into the<br />
room at max range. Enter town mode and walk in. Is it still empty? Probably not.<br />
Damage – At the open door or portcullis, enter combat mode, cast Major Haste/Blessing and Bless<br />
Party, then consider casting Wall <strong>of</strong> Force/Ice, Shockstorm, Forcefield, Wall <strong>of</strong> <strong>Blades</strong>, or<br />
any other long term, large area, damaging spell into the area. Enter town mode and be quick<br />
to enter the room as the spell's area <strong>of</strong> effect will dissipate over time.<br />
Protection – High level option for entering narrow rooms, but uses a lot <strong>of</strong> spell points. Consider casting<br />
AM Clouds or a string <strong>of</strong> Force Barriers for protection from possible attack, but cast a Fire<br />
Barrier for peeking. Enter the room, peek out through the Fire Barrier, and take the proper<br />
actions (including Quickfire if necessary and feasible). If the monsters don't see you, they<br />
cannot attack. Be wary, powerful monsters can break these barriers.<br />
Final point. You are stepping into what appears as an unconventional room – there's a strange block holding<br />
individual characters out and it's empty. Anything can happen. Don't drop items you can afford to lose and<br />
don't expend a lot <strong>of</strong> spell points prepping yourselves. Who knows, it could just be an empty room.<br />
Can You See Me? This comes in two uses – as a defensive stance and in gauntlets in lit areas. A<br />
defensive stance puts frontal walls to minimize frontal attacks, incoming spells, and missile attacks.<br />
Gauntlets are where monsters can fire upon the party from both sides behind windowed walls or come at the<br />
party through side openings. Be careful, monsters have a chance <strong>of</strong> breaking Fire and Force Barriers.<br />
Defensive stance. To give the party time, retreat the party to a 2 PC wide column and cast Slow Group and<br />
Major Haste/Blessing. During the free move, cast Fire/Force Barriers so the monsters cannot see the party<br />
(the priest can cast Curse Alls/Bless Partys). Now move around the Barriers, eye the monsters, and attack –<br />
for example, keep spell casters behind the wall until the SP drainers are killed. Move the spell casters such<br />
that one move will expose him to fully use his spells (move once, cast the 5 or 6 AP spell, then move back<br />
out <strong>of</strong> sight). This can apply to bow/crossbow users (3 AP per fired arrow/bolt). Equip speed items (Boots,<br />
Ring, and/or Helm) on the spell casters to maximize this tactic. This is mainly used in outdoor encounters or<br />
large rooms that can't be exited.
Gauntlets. When monsters are able to cast spells, fire missiles or acid spit, or use breath weapons, using<br />
Fire/Force Barriers may work better than hasting through under the priest's Sanctuary/Mass Sanctuary and<br />
casting Slow Group and AM Clouds (line <strong>of</strong> sight problems). It's slow moving and drains spell points, but<br />
move the party and magic users such that the magic users can cast these spells on both sides <strong>of</strong> the party.<br />
The party can't see the monsters and vice versa. This string <strong>of</strong> barriers can allow hassle free passage through<br />
a room with a wandering monster arrival point (if the point is outside <strong>of</strong> the barrier hallway). Inspired by<br />
<strong>Exile</strong> III's Golem Tower entrance and Stareye's Spy's Quest.<br />
Defensive retreat. The party is in a very poor tactical position, like in the middle <strong>of</strong> a large room and<br />
surrounded by monsters that just appeared. The best move is to retreat to a defensible position. Keep a PC<br />
near the monsters while retreating the others away (try to separate them to minimize them as an area <strong>of</strong> effect<br />
spell target). Use AM Clouds to protect the others PCs. Just ensure the lone PC can take the punishment.<br />
Inspired by an unreleased scenario by Stareye.<br />
Sleep or Paralyze Away. At low levels Sleep Cloud will cause monsters that don't resist sleep to be<br />
unable to attack and to lose their defense capability (1 square to 4 square area <strong>of</strong> effect). At high levels<br />
Paralysis or Mass Paralysis (8 space area <strong>of</strong> effect) can immobilize high-level monsters (like golems) longer<br />
than a Sleep Cloud, thus allowing a hack fest by all party members. It seems that the monsters don't wake up<br />
after the first attack. It this happens to a party member, use the priest's Cure Paralysis to remove it or else<br />
they are very vulnerable (if it happens to the priest, this could seriously hamper the party so give him the<br />
Ring <strong>of</strong> Free Action or Helm <strong>of</strong> Alertness). It is a good idea for the spell casters to have the Highly Alert<br />
trait.<br />
Charm away. Charming monsters does wonders. Now friendly, they attack the closest monster and thus<br />
slow their advance on the party. Of course less experience is gained for the party and the priest may need to<br />
get close to the monsters to Mass Charm (8 space range) effectively. The charmed monster may need to die<br />
due to a SDF being connected to its life – the party may need to kill it anyway.<br />
General Outdoors Tactics. Outdoor encounters with hostile monsters are inevitable. Keep the party in a<br />
1- or 2-wide narrow column, thus the monsters will move together and towards the party. Take advantage <strong>of</strong><br />
this.<br />
Low level – Round 1: Retreat the PCs until they have 1 AP left; the mages cast Minor Haste/Haste upon<br />
themselves while the priests cast Minor Bless/Bless on the fighters. Round 2: Retreat the PCs one space<br />
(watch the AP counter); the mages cast Minor Haste/Haste upon the other party members (bless the fighters<br />
as necessary) or cast Fireballs for needed experience (see Spell Caster Catch-up above). Casting Wall <strong>of</strong><br />
Force(s) slows the monsters because most don't like to get damaged while advancing. Bless and cast spells<br />
as needed according to which PC needs the experience (from death blows).<br />
High level – Move forward and cast Major Haste/Blessing and Slow Group. Firestorms, Shockstorms,<br />
and Divine Thuds thin out the monsters. Then cast AM Cloud(s) as needed (either on the party or the<br />
surviving hostile spell casters).<br />
Fight or Flee and Time – Not every hostile monster has to be killed. You'll find that visiting all <strong>of</strong> the<br />
optional dungeons, seeking wandering encounters (dungeon and outdoor), killing hostile yet non-threatening<br />
monsters, or revisiting dungeons will give the party too much experience points (thus more skill points). It<br />
may make the scenario less challenging and thus not as enjoyable as it could be. There are other<br />
consequences – losing HP, SP draining, and taking more time then necessary. Losing HP is not a big<br />
concern – magical healing will recover them, but you may not be happy about your Party Statistics for<br />
comparing Damage done to Damage taken. Draining SP is worse because the next encounter may require a
lot <strong>of</strong> spell casting and thus could be very difficult or deadly. Time is important for several reasons:<br />
1. Outdoors – Walking around without efficiently exploring or looking for encounters will make the<br />
game days accumulate. Some scenarios have time limits – Jeff Vogel's Za-khazi Run and Stareye's Spy's<br />
Quest. Buy horses ASAP. Walking/boating/horseback is better than Resting to regain spell points because<br />
you can also map the outdoors. Save the game and be wary <strong>of</strong> wandering encounters. Of course, to regain a<br />
lot <strong>of</strong> SP or HP, Resting is the better option (remember to equip Rings <strong>of</strong> Regeneration on the most wounded<br />
characters).<br />
2. Town/Dungeon – 40 round Waits allow for more wandering encounters (random monster buildup).<br />
3. Fleeing encounters – If your party is strong and doesn't need the gold or dropped items, flee the<br />
encounter. Cast Major Haste/Blessing and Slow Group and move past the edge <strong>of</strong> the map (sometimes a<br />
barrier will appear – move to hide behind it then flee). This saves game time, reduces accumulated<br />
experience (helping to maintain game balance), and saves HP and SP for future encounters. If the party fled<br />
a dungeon encounter, they will be prepared for the next fight because they are already hasted and (if Major<br />
Blessing was cast) blessed to attack better.<br />
4. Moving around in towns/dungeons – Although it is a hassle to move each PC in combat mode<br />
through towns/dungeons, the party will cover the ground at least 8 times faster while hasted. Consider<br />
prepping a PC with Hastes and Blesses and make him the Active PC (via the Act button). This has several<br />
benefits and things to be aware <strong>of</strong>:<br />
a. PC scout. The PC can scout ahead – move to look around the corner or through a window or<br />
door – then move back out <strong>of</strong> the monster's sight, thus allowing the player to prepare for the<br />
encounter. If a monster sees the scout, only he will get the damage from any spells cast or breath<br />
weapons used, not the entire party.<br />
b. The least experienced PC can fight solo against the monsters and really gain the experience to<br />
catch-up to the other party members. See Action Points – Active above.<br />
c. When the PC finds a locked door, move the PCs to it. See the Doors – Locked doors tactic<br />
above.<br />
d. Take note <strong>of</strong> where containers (bodies, chests, dressers, etc.) are to come back to when the Haste<br />
wears <strong>of</strong>f. Or move the party members to the container, End combat, search and get items, and<br />
enter Combat mode to continue moving on.<br />
e. One PC can activate certain runes or levers, thus the other PCs can look for its effect – monsters<br />
appearing, a portcullis opening, changing terrain, etc. If monsters appear, the other members<br />
will have the advantage.<br />
f. In Combat Mode the party can travel long distances over Lava with Firewalk and thus save spell<br />
points. Just look for the Small Message, "Your feet stop glowing" – meaning the Firewalk’s<br />
effect has ended.<br />
g. Certain specials will affect the whole party even if 1 PC steps on it – this is an unavoidable<br />
drawback (a feature <strong>of</strong> the <strong>Blades</strong> <strong>of</strong> <strong>Exile</strong> engine). Fortunately these specials are uncommon or<br />
the designer has put Combat Blocks on them (thus you can't enter that space in combat mode).<br />
5. In the Preferences, select Fewer Wandering monsters. This will help reduce excessive level build up<br />
and the frustration <strong>of</strong> fighting or fleeing outdoor encounters.<br />
When the haste wears <strong>of</strong>f and no monsters are nearby (either from scouts or Detect Life), go back and<br />
search the containers. It's a trade<strong>of</strong>f, but walking normally is easier than the time saving benefit but hassle <strong>of</strong><br />
moving each PC 4 spaces. Making an experience deficient PC hasted and blessed then Active is a very good<br />
alternative.<br />
Balancing Experience. A balanced party helps to overcome challenges when a member is critically low<br />
on HP or SP or incapacitated due to Dumbfounding, being webbed, out <strong>of</strong> range <strong>of</strong> combat, or even dead. If<br />
something happens to a single PC dominated party, it could create havoc. At low levels the spell casters<br />
have Wounds, Flames, and Fireballs to rake in the experience, but at higher levels the better-armed fighters<br />
use their blades against magic resistant monsters to rake in the experience. Watch the party status and have
the fighters or spell casters kill the wounded monsters for experience (use Scry Monster or estimate the<br />
number <strong>of</strong> hits or HP to kill). Let a single PC kill all <strong>of</strong> the low-threat monsters in encounters to help catchup<br />
in experience levels.<br />
Party Inventory Suggestions. At some point, the party just cannot carry everything it finds. Find or buy<br />
a storage area in the scenario. Keep unique items and valuable stuff here (like if your party has an affinity<br />
for gems). Free-up inventory slots before entering a dungeon, but be wary <strong>of</strong> the scenario’s theme; you may<br />
need some <strong>of</strong> these items on hand. Some suggestions:<br />
1. Leave unidentified or low value items in their containers and note that on paper (do not Get them).<br />
Come back to them on your way out <strong>of</strong> the dungeon or on a return trip.<br />
2. Have a place in the dungeon to drop unused or unidentified items – just save the game and do not change<br />
levels (there may be a level changing special).<br />
After exploring the dungeon, gather the unidentified items and cast the 50 sp Identify. Sort through them,<br />
take what you want, and leave the dungeon. Walk around/explore the outdoors (avoid outdoor encounters)<br />
or use 2 potions <strong>of</strong> Medium Energy to recover the 50 spell points.<br />
BOE Math. Or, the technical side <strong>of</strong> <strong>Blades</strong> <strong>of</strong> <strong>Exile</strong>.<br />
Outdoors (1 Rest is ?) Town (1 Wait is 40 rounds)<br />
Recovery rates:<br />
2 HP per 10 outdoor moves (.2 HP/square) 2 HP per 100 town moves / 50 rounds<br />
2 SP per 8 outdoor moves (.225 SP/square) 2 SP per 80 town moves / 1 40 round Wait<br />
Outdoor day = 370 moves, 740 on horseback Town day = 3700 town-mode moves<br />
1 square = 500 feet (= 24 hrs/370 moves * ~1.5 1 square = 3 feet<br />
mi/hr * 5280 feet/mi)<br />
~10 squares = 1 mile ~ 5 ft/min (= 3700 moves/24 hr * 16/24 awake<br />
time * 3 feet/move)<br />
1 Outdoors space is approximately 100 useful 4 size 48*48 towns (2*2 grid)<br />
town spaces 9 size 32*32 towns (3*3 grid)<br />
1 64*64 town + 5 32*32 towns (5 size 32*32<br />
towns along two sides <strong>of</strong> a size 64*64 town)<br />
One outside square equates to 10 town squares (recovery time) vs. 167 town squares (approximate<br />
distances) creates a discrepancy. It seems that the outdoors is easily mapped compared to towns (or<br />
dungeons).<br />
Assumptions:<br />
Town/dungeon distance <strong>of</strong> 3 ft per square (approximate physical size)<br />
Outdoor rate <strong>of</strong> 1.5 miles/hour<br />
(Walking with armor, weapons, and packs while mapping the outdoors and watching for monsters<br />
and unusual features). Also factored in is about 6 hours <strong>of</strong> sleep (many catnaps) a day.<br />
Oh, it's poor form to have the party grouped together against spell casters – a nice Fireball/Firestorm/Slow<br />
Group/Divine Thud target. Even under an AM Cloud/Protective Circle, an area <strong>of</strong> effect spell cast on the<br />
edge (or in a hole) will wound some party members.
Revision history and credits<br />
07-26-98 Originally posted.<br />
10-10-98 Added pauses for cleaning webs, tactics <strong>of</strong> Night Fighting and Draw Out, BOE math, and<br />
Balancing experience. Re-ordered the tactics based on likely usage.<br />
12-21-98 Added Doors and Party development sections, corrected BOE math, added notes to AM<br />
Cloud Cover, consolidated Sneaky spell caster into Defensive Stance. Renamed Moving<br />
to Action Points to be more consistent with BOE documentation.<br />
01-08-99 Added three appendices – Brewable potions list, Spells for the mage, and Spells for the<br />
priest.<br />
07-20-99 One year anniversary! Added Locked Door and Defensive Retreat tactics and the 48*48<br />
town/outdoor grid. Changed the Monsters section – sections for Doomguards, Invisible, and<br />
Hostile yet non-threatening monsters. Removed ineffective tactics from Monsters –<br />
Invisible. Minor editing and additions throughout.<br />
10-26-99 Added Basilisk to monsters. Yet more minor editing.<br />
05-25-01 Formatted to Times New Roman, converted to a PDF file for online viewing<br />
07-26-01 3 year anniversary <strong>of</strong> this guide. Numerous minor additions and editing.<br />
12-08-01 Added Strength and Dexterity table, added some graphics, removed ineffectual Invisible<br />
Monsters tactics, updated Brewable Potions list.<br />
Credits:<br />
Jeff Vogel <strong>of</strong> Spiderweb S<strong>of</strong>tware provided most <strong>of</strong> the party development section (from the <strong>Blades</strong> <strong>of</strong><br />
<strong>Exile</strong> help file). The information was used with no intention <strong>of</strong> copyright infringement. Unless otherwise<br />
noted, all graphics are copyrighted 1997-1998 by Spiderweb S<strong>of</strong>tware.<br />
Thanks to Tony Wilsdon (The Wreck <strong>of</strong> the Slug) and Stareye (Spy's Quest) for allowing me to beta test<br />
their scenarios. Many <strong>of</strong> the tactics were inspired or refined while play testing these excellent scenarios.<br />
Billy Harris provided practical information about the Act button under Action Points.<br />
The web paragraph has some information that was at a BOE page (I think Derin's).<br />
The Brewable potions appendix was derived from Stareye's Mage Lore <strong>Guide</strong>lines article at Spiderweb<br />
S<strong>of</strong>tware's site.<br />
Alcritas provided additional info about brewing potions – derived from his A Few New Recipes article at<br />
http://home.att.net/~alcritas/dforum/dfafnr.html.<br />
The two spells appendices were derived from pages at Akhronath's site.
Adapted from Stareye's Mage Lore <strong>Guide</strong>lines article.<br />
Brewable potion skill ingredients – some notes<br />
Brewable Potions List<br />
Weak Curing 1 Holly/Toadstools) – similar to priest's Weaken Poison<br />
Weak Healing 1 Comfrey Root) – restores 40 hp<br />
Weak Poison 1 Holly/Toadstools) – a weak weapon poison<br />
Weak Speed 3 Comfrey Root and Wormgrass/Crypt Shrooms) – similar to the mage's Minor<br />
Haste<br />
Medium Poison 4 Wormgrass/Crypt Shrooms) – a medium weapon poison<br />
Medium Healing 4 Glowing nettle) – restores about 80 hp<br />
Strong Curing 5 Glowing nettle) – cures a poisoned PC (stronger than the priest's Cure Poison)<br />
Medium Speed 5 Glowing Nettle & Wormgrass/Crypt Shrooms) – similar to the mage's Haste<br />
Strong Poison 10 Asptongue Mold) – a strong weapon poison<br />
Strong Healing 12 Graymold and Comfrey Root) – restores about 150 hp<br />
Killer Poison 12 Mandrake Root) – a deadly weapon or arrow/bolt poison<br />
Weak Energy 9 Wormgrass and Asptongue Mold) – restores about 10 sp<br />
Medium Energy 14 Mandrake Root and Asptongue Mold) – restores about 20 sp<br />
Strong Energy 20 Ember Flowers and Mandrake Root) – restores about 40 sp<br />
Graymold Salve 7 Graymold) – cures a diseased PC, similar to the priest's Cure Disease<br />
Potion <strong>of</strong> Clarity 9 Graymold and Holly/Toadstools) – cures a dumbfounded PC (vital for spell<br />
casters), stronger than the priest's Restore Mind<br />
Bliss 16 Asptongue Mold and Graymold) – very powerful, both heals and blesses the PC<br />
Knowledge Brew 19 Mandrake Root and Ember Flowers) – gives a PC some skill points<br />
To use the 4 Poison potions on melee or (archery) missile weapons, the PC should have 3 or 4 Poison skill<br />
points to ensure that the poison is applied effectively and with little risk <strong>of</strong> being poisoned himself.<br />
If the party needs gold, the best potions to brew and sell are Strong Curing and Medium Healing. That<br />
Glowing Nettle goes a long way. Pr<strong>of</strong>icient scenario designers usually make it difficult to find Mandrake<br />
Root (due to its usefulness in brewing Medium Energy Potions and Killer Poisons).<br />
The party cannot brew Strong Strength (10; Ember Flowers and Graymold) and has no need to brew<br />
Resurrection Balm ( 9; Ember Flowers) because this balm is not needed for the priest spells <strong>of</strong> Raise Dead or<br />
Resurrection. Both <strong>of</strong> these are known bugs/features <strong>of</strong> <strong>Blades</strong> <strong>of</strong> <strong>Exile</strong>. This information was provided by<br />
Alcritas.
Spells for the Mage<br />
Every PC has knowledge <strong>of</strong> the first three levels <strong>of</strong> mage and priest spells (just needs mage or priest levels to<br />
use them). The higher level spells must be found or bought. PCs can cast spells on other PCs regardless <strong>of</strong><br />
the distance between them, but <strong>of</strong>fensive spells can only affect monsters within the spell's range. Certain<br />
town-only spells, such as the Mage's Unlock and Dispel Barrier and the Priest's Ritual <strong>of</strong> Sanctification,<br />
require the party to be in town mode and in view <strong>of</strong> the target (i.e., range 3). Their range is annotated as t3<br />
(for town mode, 3 square range).<br />
Level, Spell Short Cost Range Description<br />
cut<br />
1, Flame Cloud m f 2 7 Fills the selected space with a short-lasting wall <strong>of</strong> fire.<br />
1, Goo m i 1 8 The targeted monster is covered with a sticky goo, slowing it and<br />
interfering with its attacks.<br />
1, Identify m g 50 – Makes all <strong>of</strong> your party's unidentified items identified.<br />
1, Light m a 1 – Creates a weak light.<br />
1, Minor Haste m c 1 – The selected PC has twice the number <strong>of</strong> Action Points for a short<br />
while. All haste spells take effect the next round.<br />
1, Scare m e 1 7 Decreases the morale <strong>of</strong> the targeted monster, which may make it flee.<br />
If it doesn't flee, later castings have a higher chance <strong>of</strong> success.<br />
1, Scry Monster m h 2 14 Cast to gain information about the targeted monster: current health,<br />
speed, attacks, mage and priest spell level, special attacks,<br />
resistances/immunities, etc. It will then appear in the Monster Info<br />
menu.<br />
1, Spark m b 1 6 Fires a weak bolt <strong>of</strong> electricity.<br />
1, Strength m d 1 – Makes the selected PC more skilled for a time, similar to the priest's<br />
Bless.<br />
1, True Sight m j 3 – Allows the party to see everything in a 2 square radius. This and the<br />
priest's Detect Life may show a monster on the other side <strong>of</strong> the wall.<br />
2, Conflagration m r 4 8 Makes the air in a 2 square radius burst into flames, charring anyone<br />
inside the cloud. The cloud will rapidly fade.<br />
2, Dispel Field m s 2 10 Erases a magical field in a target space. It does not work on Fire and<br />
Force Barriers.<br />
2, Dumbfound m n 2 10 Makes the targeted monster less capable <strong>of</strong> casting spells. Repeated<br />
castings can cause it to completely lose its spell casting ability.<br />
2, Envenom m o 2 – Puts poison on the selected PC's equipped weapon.<br />
2, Flame m l 3 8 Fires a bolt <strong>of</strong> flame at the targeted monster. The damage done<br />
increases with the caster's level.<br />
2, Minor Poison m k 2 6 Poisons the targeted creature, doing a fair amount <strong>of</strong> damage over time<br />
2, Sleep Cloud m t 6 6 A small sleep field is created. There is a chance anyone passing<br />
through it will fall asleep.<br />
2, Slow m m 2 7 The targeted monster gets half <strong>of</strong> its usual number <strong>of</strong> APs for a while.<br />
2, Stinking Cloud m p 2 8 A 3x3 area is filled with choking gases. Anyone entering will be<br />
cursed. The gas will slowly fade.<br />
2, Summon Beast m q 4 3 One beast-class creature is summoned to fight on the party's side. It<br />
disappears after a short time.<br />
Note: The creatures summoned are dependent on which monsters in<br />
the scenario are classified as 'Beast'.<br />
3, Fear m y 3 10 More powerful version <strong>of</strong> Scare.<br />
3, Fireball m w 5 12 Creates a powerful ball <strong>of</strong> flame, which affects a 3*3 area. The<br />
damage done increases with the caster's level.<br />
3, Flame Arrows m B 4 10 Targeted monsters are hit with a Flame spell. The number <strong>of</strong> missiles<br />
increases with the caster's level. Use all <strong>of</strong> the arrows or hit the space<br />
bar to cast the spell.
3, Haste m v 3 – More powerful version <strong>of</strong> Minor Haste, may briefly triple the number<br />
<strong>of</strong> Action Points (then double) and the effect lasts longer.<br />
3, Long Light m x 3 – More powerful version <strong>of</strong> Light.<br />
3, Resist Magic m D 4 – Makes a PC resistant to magical damage and effects.<br />
Note: It <strong>of</strong>fers some protection from fire/cold damage.<br />
3, Unlock m u 3 t3 May unlock the selected door, but won’t work on all doors.<br />
Note: Try bashing a door to break its lock first and a lock <strong>of</strong> strength<br />
10 in the scenario editor is impassable.<br />
3, Wall <strong>of</strong> Force m z 5 12 Creates a line <strong>of</strong> force walls, which are like fire walls, but more<br />
damaging and last longer. Use the space key to rotate the wall.<br />
3, Weak Summoning m A 6 4 A group <strong>of</strong> monsters appears and fights on the party's side for a period<br />
<strong>of</strong> time. The number and strength <strong>of</strong> monsters depends on the caster's<br />
level.<br />
Note: A low level form <strong>of</strong> AM Cloud if cast around the spell caster or<br />
between the spell caster and the party.<br />
3, Web m C 6 8 Covers a 2 square radius circle with icky webs, slowing everyone<br />
inside. The webs last until torn down.<br />
4, Capture Soul m I 30 10 In combat mode, the mage attempts to store a copy <strong>of</strong> a monster in one<br />
<strong>of</strong> 4 random slots in order to recreate it with the Simulacrum spell.<br />
The stronger the monster, the lower the chance <strong>of</strong> success.<br />
Note: The chance <strong>of</strong> success also depends on whether the monster is<br />
magically resistant/immune and any special abilities it may have.<br />
4, Ice Bolt m F 5 12 Slams the targeted monster with a bolt <strong>of</strong> ice. The damage done<br />
increases with the caster's level.<br />
4, Magic Map m H 8 – Reveals the entire town level on your map. The spell requires a<br />
Sapphire (or an item with the Sapphire property).<br />
Note: Very nice to cast in timed dungeons (i.e. those with Affect<br />
Party spells on a town timer) or when the party must be in and out<br />
within a period <strong>of</strong> time.<br />
4, Poison m E 4 8 More powerful version <strong>of</strong> Minor Poison. Repeated castings will have<br />
a devastating effect.<br />
4, Simulacrum m J ? 4 Summons a monster selected from one <strong>of</strong> 4 Capture Soul slots. The<br />
cost depends on the level <strong>of</strong> the monster being summoned.<br />
Note: Ur-basilisks are a Capture Soul/Simulcrum favorite.<br />
4, Slow Group m G 4 12 Hostile monsters within 12 spaces move at half speed for a time. May<br />
not affect powerful monsters (such as those immune to magic).<br />
4, Venom Arrows m K 8 8 Similar to Flame Arrows, except the selected targets become poisoned.<br />
4, Wall <strong>of</strong> Ice m L 6 8 Similar to Wall <strong>of</strong> Force, except it creates an ice wall. Ice walls do as<br />
much damage as force walls, but last longer.<br />
Other mage spells<br />
5, Dispel Barrier m d 6 t3 Can remove Fire and Force Barriers (the chance <strong>of</strong> success improves<br />
with the caster’s level). Some barriers are harder to dispel than others<br />
and some cannot be dispelled.<br />
5, Fire Barrier m e 9 2 Creates a single, permanent fire barrier. Fire barriers are damaging,<br />
but can be walked through.<br />
Note: Use Fire Barriers to block Quickfire.<br />
5, Fire Storm m c 8 14 More powerful version <strong>of</strong> Fireball – it affects all creatures within a 2<br />
square radius <strong>of</strong> the targeted space.<br />
5, Major Haste m b 8 – Similar to Haste, but gives the entire party double, or briefly triple, the<br />
number <strong>of</strong> APs for a time depending on the caster's level.<br />
5, Shockstorm m g 6 10 Creates a 2 square radius <strong>of</strong> force walls around a targeted space.<br />
5, Spray Fields m h 6 12 Creates a large number <strong>of</strong> small fields (random properties) which are<br />
targeted. The number <strong>of</strong> fields increases with the caster's level.<br />
5, Stealth m a 5 t- Makes monsters less likely to see the party for a time.
5, Summoning m f 10 4 Similar to Weak Summoning, summons a fewer number <strong>of</strong> somewhat<br />
more powerful monsters.<br />
6, Antimagic Cloud m p 10 8 Creates a 2 square radius field, from which no spells may be cast and<br />
in which no spells may be targeted, which slowly fades.<br />
Note: This is an effective spell against spell casters and monsters with<br />
breath weapons. It also slows Quickfire.<br />
6, Daemon m o 12 5 Summons a Demon to fight on the party's side.<br />
6, Flight m r 20 – Allows the party to fly outdoors for a short time (usually 3 spaces).<br />
Watch the small messages for flying status.<br />
6, Group Fear m l 6 12 Hostile monsters within 12 spaces lose a lot <strong>of</strong> morale. This spell<br />
gains effectiveness rapidly with the caster's level.<br />
6, Kill m m 8 6 Deals a devastating blow to a selected target.<br />
Note: This spell can do up to 130 hp <strong>of</strong> damage against monsters not<br />
resistant to magic.<br />
6, Major Poison m k 7 8 More powerful version <strong>of</strong> Poison. Does a lot <strong>of</strong> damage over time.<br />
6, MindDuel m q 12 4 When cast on a monster spell caster, the two get in a mental battle<br />
absorbing spell points from each other. The loser may end up<br />
dumbfounded or killed. The spell requires a Smoky Crystal (or an<br />
item with the Smoky Crystal property) to cast.<br />
Note: MindDuelling is enhanced by a Ring <strong>of</strong> Will. Practice on weak<br />
spell casters to gain spell points.<br />
6, Paralysis m n 7 8 Has a chance <strong>of</strong> paralyzing the target(s), which lasts for a long time.<br />
Note: All <strong>of</strong> your attacks will do a lot <strong>of</strong> damage.<br />
7, Death Arrows m B 10 6 Similar to the Arrow spells, but strikes each target with a 1/2 effect<br />
Kill spell. The number <strong>of</strong> arrows increases with the caster's level.<br />
7, Force Barrier m z 10 2 Creates an impenetrable, permanent barrier. Powerful monsters can<br />
break the barrier.<br />
7, Major Blessing m v 8 – The party is blessed, hasted, and has their weapons mildly poisoned.<br />
7, Major Summoning m y 14 4 Similar to Summoning, but brings forth more powerful creatures.<br />
7, Mass Paralysis m w 20 8 Similar to Paralysis, but affects all hostile monsters within 8 spaces.<br />
7, Protection m x 10 – Makes the party temporarily magic resistant, and makes a selected PC<br />
invulnerable for a short time <strong>of</strong> time.<br />
7, Quickfire m A 50 4 Creates a single space <strong>of</strong> quickfire, which will sweep over the area<br />
killing everything. It is hindered by Antimagic Cloud, and can be<br />
blocked by Fire and Force Barriers.<br />
7, Shockwave m u 12 t- Sends a wave <strong>of</strong> force out from the caster, damaging everyone within<br />
10 squares. The farther someone is from the caster, the more damage<br />
is taken (to the 10 square range). Don't cast in towns where friendly<br />
creatures may be wounded.<br />
Adapted from Akhronath's Spells <strong>of</strong> Magery, http://hometown.aol.com/zzhou22876/mspells.html.
Spells for the Priest<br />
Every character has knowledge <strong>of</strong> the first three levels <strong>of</strong> mage and priest spells (just needs mage or priest<br />
levels to use them). The higher level spells must be found or bought. PCs can cast spells on other PCs<br />
regardless <strong>of</strong> the distance between them, but <strong>of</strong>fensive spells can only affect monsters within the spell's<br />
range. Certain town-only spells, such as the Mage's Unlock and Dispel Barrier and the Priest's Ritual <strong>of</strong><br />
Sanctification, require the party to be in town mode and in view <strong>of</strong> the target (i.e., range 3). Their range is<br />
annotated as t3 (for town mode, 3 square range).<br />
Level, Spell Short Cost Range Description<br />
cut<br />
1, Location p e 1 t- Gives the party's (X,Y) location in the town or outdoors.<br />
1, Minor Bless p a 1 – The selected PC is harder to hit (takes less damage), increases his to<br />
hit bonus, and increases damage done from melee weapons. Its effects<br />
decay with time.<br />
1, Minor Heal p b 1 – Restores a small amount <strong>of</strong> a selected PC’s health.<br />
1, Minor Manna p h 5 – Gives the party a little food.<br />
1, Ritual <strong>of</strong> p I 50 t3 The location receives a blessing. This might repel any evil magic.<br />
Sanctification Then again, it might not.<br />
Note: This spell is generally used on evil altars. Exactly what this<br />
spell does (if anything) depends upon the scenario.<br />
1, Sanctuary p f 1 – The selected PC becomes magically shielded. For a time, monsters<br />
will miss him (except for high level ones). The effect is void when the<br />
PC attacks.<br />
Note: This spell effectively hides the PC from most monsters. He will<br />
still take damage from magical attacks, but physical and missile<br />
attacks have a much less chance <strong>of</strong> succeeding.<br />
1, Stumble p j 1 10 The targeted monster moves slower and has worse attacks for a short<br />
time.<br />
1, Symbiosis p g 3 – The priest absorbs the damage taken by another character. The higher<br />
the level, the less damage the priest takes per health point healed.<br />
1, Turn Undead p d 2 8 Does a reasonable amount <strong>of</strong> damage to an undead monster.<br />
1, Weaken Poison p c 1 – Reduces the selected PC’s level <strong>of</strong> poison and may cure the PC.<br />
2, Awaken p t 2 – Wakes a selected PC immediately.<br />
2, Bless p k 2 – More powerful version <strong>of</strong> Minor Bless, its effect increases with the<br />
caster's level.<br />
2, Charm Foe p r 6 6 The targeted monster may become friendly and fight on the party's<br />
side. The chance <strong>of</strong> it working drops sharply with the monster's level.<br />
Note: The hostile monster may be a responsive NPC – so charm first.<br />
2, Cure Poison p l 2 – More powerful version <strong>of</strong> Weaken Poison, its effect increases with the<br />
caster's level.<br />
2, Curse p m 2 10 The opposite <strong>of</strong> Bless, the targeted monster will hit less <strong>of</strong>ten (doing<br />
less damage) and is easier to hit in combat.<br />
2, Disease p s 4 6 The targeted monster is afflicted by a disease which slowly weakens it.<br />
The disease lasts a long time.<br />
2, Light p n 2 – Creates a short, reasonable quality light.<br />
2, Move Mountains p q 8 t3 Blasts a crumbling wall into rubble. It doesn't work on all walls.<br />
2, Summon Spirit p p 5 4 Summons a shade to fight on the party's side. It will disappear after a<br />
short time.<br />
2, Wound p o 3 6 Deals a painful blow to the targeted monster. The damage increases<br />
with the caster's level.<br />
Note: This spell is extremely useful as almost nothing can resist it. It<br />
can damage monsters immune to magic.
3, Cure Disease p B 3 – Reduces the selected PC’s level <strong>of</strong> disease and may cure the PC.<br />
3, Cure Paralysis p y 3 – Revives a selected PC that is paralyzed.<br />
3, Detect Life p x 3 – All living things appear on the explored portion <strong>of</strong> your map for a<br />
short time.<br />
Note: Cast after the mage's Magic Map to get a feel for monster<br />
locations.<br />
3, Forcefield p A 5 8 Fills an area with walls <strong>of</strong> force, which are fairly damaging and<br />
reasonably long lasting.<br />
3, Heal p u 3 – More powerful version <strong>of</strong> Minor Heal.<br />
3, Holy Scourge p w 8 8 More powerful version <strong>of</strong> Curse.<br />
3, Light Heal All p v 4 – Has the effect <strong>of</strong> one Minor Heal on each character.<br />
3, Manna p z 10 – More powerful version <strong>of</strong> Minor Manna.<br />
Note: While outdoors, cast this spell while traveling<br />
3, Restore Mind p C 4 – Reduces the selected PC’s level <strong>of</strong> dumbfounding and may cure the<br />
PC.<br />
Note: Carry Potions <strong>of</strong> Clarity (more effective than the spell).<br />
3, Smite p D 6 8 Fires a number <strong>of</strong> cold bolts, the number <strong>of</strong> which increases with the<br />
caster's level. Use all <strong>of</strong> the bolts or hit the space bar to cast the spell.<br />
4, Cleanse p K 5 – The selected PC is completely unwebbed and cured <strong>of</strong> all disease.<br />
4, Cure Party p E 5 – Reduces the level <strong>of</strong> poison in all PCs. Useful for swamps.<br />
4, Curse All p F 5 10 Similar to Curse, but curses all hostile monsters within 10 spaces.<br />
Note: Helpful for aiding friendly monsters in attacking hostile<br />
monsters with weapons. Also affects monsters behind walls (i.e. out<br />
<strong>of</strong> the party's line <strong>of</strong> sight) = a monster radar.<br />
4, Dispel Undead p G 5 8 Deals a deadly blow to the targeted undead monster. The damage<br />
done increases with the caster's level.<br />
4, Firewalk p L 8 – Party members can walk across lava with no damage for a short time.<br />
The duration increases slowly with the caster's level.<br />
Note: Cast while in combat mode to walk further.<br />
4, Martyr's Shield p J 5 – The monster striking the selected character in melee combat receives<br />
as much damage as the character. The duration increases with the<br />
caster's level.<br />
Note: Some monsters have an inherent Martyr's Shield ability.<br />
4, Remove Curse p H 15 – Has a chance <strong>of</strong> removing the curse from an equipped, cursed item.<br />
Note: The party should identify something to make sure it isn't cursed<br />
before equipping it (cursed items cannot be unequipped).<br />
4, Sticks to Snakes p I 6 6 Summons giant snakes to fight on the party's side. Based on the<br />
caster's level, asps may be summoned.<br />
Note: See note under the mage's Weak Summoning spell<br />
Other priest spells<br />
5, Bless Party p a 6 – Similar to Bless, but affects all characters in the party.<br />
5, Dispel Fields p h 6 8 All magical fields in a 2 square radius will be dispelled. It has a small<br />
chance <strong>of</strong> affecting Quickfire.<br />
5, Flamestrike p d 8 9 Similar to the mage's Fireball. The damage done increases with level.<br />
5, Major Heal p b 7 – More powerful version <strong>of</strong> Heal.<br />
5, Mass Sanctuary p e 10 – Similar to Sanctuary, but hides the party. The effect for a PC is voided<br />
when that PC attacks.<br />
5, Raise Dead p c 25 t- Returns a dead character to life, but there is a small chance (decreasing<br />
with the caster's level) that it turns the corpse to dust. Resurrection<br />
Balm may be required.<br />
Note: It is better to pay attention to vital stats and save <strong>of</strong>ten. Dying<br />
is not fun (the party dying sound is not pleasant).<br />
5, Shatter p g 12 t- Similar to Move Mountains, but strikes every space adjacent to the<br />
party with a Move Mountains spell.
5, Summon Host p f 12 4 Summons 4 shades and a being to lead them to fight on the party's side<br />
for a little while.<br />
6, Destone p n 8 – Restores a selected PC that was turned to stone.<br />
6, Guardian p o 14 4 Summons a powerful, invisible being to fight on the party's side. Do<br />
not damage it by mistake.<br />
6, Heal All p k 8 – More powerful version <strong>of</strong> Light Heal All.<br />
6, Hyperactivity p m 8 – Awakens all PCs, provides some magical protection from sleeping,<br />
and removes any slowing effects.<br />
6, Mass Charm p p 17 8 Similar to Charm Foe, hostile monsters within 8 spaces may be<br />
charmed.<br />
6, Pestilence p r 7 – Similar to Disease, hostile monsters within 8 are afflicted with an<br />
effective, but slow-acting disease.<br />
6, Protective Circle p q 8 – An effective spell for a party on the defensive. The priest is<br />
surrounded by several layers <strong>of</strong> damaging magical fields and a 3*3<br />
Antimagic Cloud.<br />
6, Revive p l 7 – Restores a selected PC’s health and cures all poison.<br />
7, Avatar p y 12 – Temporarily makes the caster an invulnerable, powerful avatar <strong>of</strong> the<br />
gods.<br />
Note: This spell also heals damage. When a monster casts this spell,<br />
it only becomes harder to hit, the other effects are the same.<br />
7, Divine Thud p x 10 12 It delivers a stunning blow <strong>of</strong> force to all beings within a 2 square<br />
radius <strong>of</strong> the targeted space.<br />
7, Major Cleansing p B 10 – Similar to Cleanse, but removes all webs and disease from the party.<br />
7, Ravage Spirit p v 10 4 This spell gives Demons a blow which usually does a lot <strong>of</strong> damage.<br />
The damage done increases with the caster's level.<br />
7, Resurrect p w 35 – More powerful version <strong>of</strong> Raise Dead and works on even a dusted<br />
character. Resurrection Balm is not required (per Alcritas).<br />
7, Revive All p u 10 – Similar to Revive, the party receives a powerful healing and has<br />
poison cured (amount healed increases with the caster's level).<br />
7, Wall <strong>of</strong> <strong>Blades</strong> p z 12 10 Creates a wall <strong>of</strong> the most damaging (and long lasting) <strong>of</strong> the magic<br />
fields. Rotate the wall by hitting the space key.<br />
7, Word <strong>of</strong> Recall p A 30 – Outdoors only – it returns the party to the town where they began the<br />
scenario.<br />
Adapted from Akhronath's Holy Prayers, http://hometown.aol.com/zzhou22876/pspells.html.
Party Development<br />
When creating a level 1 party, start with the pre-supplied party and change those PCs as desired. This party<br />
has more skill points than a newly created party – 71, 76, 85, 80, 80, 78 (in order) vs. 60. During PC<br />
creation, use 5 or 6 skill points to give your spell casters the Mage or Priest Spell levels – each Mage or<br />
Priest Spell level gives a bonus <strong>of</strong> 3 Spell Points and saves 250 gold later. Most <strong>of</strong> the following information<br />
was adapted from the <strong>Blades</strong> <strong>of</strong> <strong>Exile</strong> Help file. The percentages are adjustments to the basic 100 experience<br />
points needed per PC level to gain skill points. Thus 20% means 20 additional experience points.<br />
Races:<br />
Human 0% No notable advantages.<br />
Nephilim 12% Nimble, feline humanoids that get a bonus when using missile weapons. A<br />
PC gains 2 bonus points <strong>of</strong> dexterity after a Nephilim PC is created.<br />
Slithzerikai 20% Reptilian humanoids that get a “sizable bonus” when attacking with pole<br />
weapons. A PC gains 2 bonus points <strong>of</strong> strength and 1 bonus point <strong>of</strong><br />
intelligence after a Slith PC is created. The PC is resistant to poison.<br />
Advantageous Traits:<br />
Toughness 10% Gives some protection from damage – most assaults do less damage.<br />
Magically Apt 20% Makes most spells cast by the PC more effective.<br />
Ambidextrous 8% The PC is able to use two one-handed weapons without any to hit penalties.<br />
Nimble Fingers 12% The PC is better at disarming traps and picking locks.<br />
Cave Lore 4% The PC is familiar with cave flora and fauna. Also, this trait has other, subtle<br />
effects depending on the BOE scenario.<br />
Good Constitution 10% The PC is more resistant to poison and disease.<br />
Woodsman 6% Like Cave Lore in all respects, but applies to the forests <strong>of</strong> the surface.<br />
Highly Alert 7% The PC is more likely to resist sleeping clouds or breaths. It may also help<br />
keep the party from being surprised.<br />
Exceptional Strength 12% The PC is able to carry more stuff (increased stone capacity) and will inflict<br />
some extra damage in combat.<br />
Recuperation 15% The PC will heal at a faster rate (about 2x normal).<br />
Skills. Each skill can attain a maximum level <strong>of</strong> 20 unless otherwise specified. The cost in skill points/gold<br />
pieces is after the skill.<br />
Health 1/10 PCs are limited to 250 health points.<br />
Spell Points 1/15 PCs are limited to 100 spell points.<br />
Skill<br />
Level<br />
Dexterity<br />
(to hit<br />
bonus)<br />
Strength<br />
(damage<br />
bonus)<br />
1 - 10 % - 2<br />
2 - 5 % - 1<br />
3 0 % 0<br />
4, 5 + 5 % + 1<br />
6 – 8 + 10 % + 2<br />
9 – 11 + 15 % + 3<br />
12 – 15 + 20 % + 4<br />
16 – 18 + 25 % + 5<br />
19 – 20 + 30 % + 6<br />
(at 0 enc)<br />
Strength 3/50 The PC’s physical strength. High strength increases<br />
damage done in combat, improves odds <strong>of</strong> bashing<br />
doors to break locks, and has other, more subtle effects<br />
(such as more health points per level gained). PCs can<br />
carry 100 + 15 stones per strength point. Each PC<br />
should start with at least 3 points <strong>of</strong> strength.<br />
Dexterity 3/50 The PC’s nimbleness. High dexterity gives a better<br />
chance <strong>of</strong> hitting in combat and makes the character<br />
harder to hit. High dexterity also makes disarming<br />
traps and picking locks easier. A fighter PC should<br />
start with at least 4 points <strong>of</strong> dexterity.<br />
Intelligence 3/50 The PC’s mental strength. High intelligence makes<br />
spells more effective. A spell casting PC should start<br />
with at least 4 points <strong>of</strong> intelligence.
Warrior skills – The higher the skill, the better the chance to hit with that weapon type:<br />
Edged 2/40 Swords, knives, axes – edged melee weapons are the most common<br />
Bashing 2/40 Maces, hammers, clubs – bashing melee weapons are common and cheap<br />
Pole 2/40 Bardiches, halberds, spears, slith spears – in general the most expensive,<br />
most rare, and most powerful melee weapons (all are two-handed)<br />
Thrown missile 1/30 Javelins, throwing daggers, darts – thrown weapons are common but cannot<br />
be poisoned (generally regarded as a useless skill, but may be useful in a<br />
scenario)<br />
Archery 2/50 Bows and arrows, crossbows and bolts, slings – long range and able to<br />
poison, very effective<br />
Defense 2/40 Determines how well a character does at parrying, decreases the to hit<br />
penalty in combat due to bulky armor (encumbrance penalty), and<br />
occasionally decreases the damage taken from weapons.<br />
Mage Spells 6/250 Enables the PC to cast mage/priest spells up to the skill level owned<br />
(maximum<br />
Priest Spells 5/250 level for both is 7). All PCs know spells up to level 3. It usually takes gold<br />
and/or Mage Lore to find mage and priest spells <strong>of</strong> level 4 and above.<br />
Mage Lore 1/25 Determines how good the party can decipher and understand magical<br />
readings. If the skill is high enough, the party may gain a spell or a valuable<br />
piece <strong>of</strong> information. Each PC’s Mage Lore skill is added together (party’s<br />
Mage Lore ability) to determine if the party can interpret the magical<br />
information. Generally, the party should have at most 25 Mage Lore points.<br />
Obviously a 1 PC party is limited to 20 Mage Lore.<br />
Alchemy 2/100 A PC's Alchemy skill must be above a certain level to make a given potion.<br />
The higher it is above this level, the better the chance <strong>of</strong> succeeding and the<br />
brewed potion may have 2 or 3 uses. It may take Mage Lore to find<br />
alchemy recipes. Have only 1 PC develop this skill.<br />
Item Lore 4/200 Gives a chance the party will know what item a monsters drop. Otherwise,<br />
the items would have to be identified in town (gold) or identified by a party<br />
mage (50 spell point Identify). In general, several PCs with low Item Lore<br />
are better than one PC with high Item Lore. It is not a good idea to equip or<br />
use unidentified items (they may be cursed).<br />
Disarm Traps 2/30 Many chests and some corridors will have traps on them, which can be<br />
devastating. The PC's chance <strong>of</strong> disarming the trap (success) depends on<br />
this skill. Have the PC with the Nimble Fingers trait develop this skill.<br />
Lockpicking 1/20 A PC with this skill and equipped lock picks can try to pick locks on locked<br />
doors. Some locks are magical and cannot be picked (thus opened only by<br />
the mage spell Unlock). A PC with high strength can effectively bash doors<br />
and break non-magical locks. Generally regarded as a useless skill.<br />
Assassination 4/100 Sometimes when a PC attacks a much weaker monster the blow will do<br />
extra damage (like double damage). The more <strong>of</strong> this skill a PC has, the<br />
better the chance <strong>of</strong> this happening and the stronger the monsters it can<br />
happen to.<br />
Poison 2/80 Having a few levels (3 or 4 should be sufficient) will make it more likely<br />
you will put the poison on your weapons at full strength and the less likely<br />
you will nick yourself with the poison.<br />
Luck 5/0 Luck affects the quality <strong>of</strong> items left by killed monsters and occasionally<br />
allows a PC to survive a death blow (i.e., a PC lucks out and lives when<br />
damaged with 0 health). At higher levels, consider buying 1 or 2 levels <strong>of</strong><br />
Luck (after the other skills are at a satisfactory level).
The following is information about my 5 human PC party that I have played in all <strong>of</strong> the <strong>Exile</strong> games. I<br />
always play a party whose average level is lower than the author's recommended level. If necessary, the<br />
party can fight more wandering monsters, go through side or optional dungeons, revisit dungeons after the 4<br />
town reset, or (as a last resort) I can use the PC editor if the party is constantly outclassed by monsters or<br />
other scenario challenges.<br />
During the scenario, I build the skills based on what is available - Alchemy for alchemy recipes and herbs,<br />
Mage/Priest level for Mage and Priest spells above 3rd level, etc. The PCs gain Mage Lore (up to 5 points<br />
each for 25 points total) early in case spell books are found – revisiting a dungeon is not a pleasant<br />
experience (and some books may be a one-shot read). I try to always have 5 or 6 unused skill points for spell<br />
users in case the party just gains access to the higher level spells.<br />
A party may want to have a higher casting level than needed as some spells may be found just before they are<br />
needed in dungeons (i.e. Ravage Spirit and Protection in Of Good and Evil). The party may not have a<br />
chance to go back to town and train to get that additional spell level.<br />
I have not played PCs using the Nephil or Slithzerikai races. Once, I played a Nephil Jared (Nared), but<br />
wasn't too impressed by the additional dexterity benefits (i.e. +1 dexterity and better with missiles, disarming<br />
traps, and lockpicking). I noticed he was taking more damage from poison than the other PCs. I have yet to<br />
play a Slithzerikai PC (it would be a more combat effective party, but I don't like the additional 20 xp<br />
penalty).<br />
Skyle is my main Fighter and volunteer for Split Party tasks. He is based on my favorite AD&D character, a<br />
Ranger. At higher levels, he gains more intelligence, spell points, and additional Priest Levels to effectively<br />
cast low-level Priest spells. His main task is to engage the hostile spell casters in the rear.<br />
Attributes: Toughness, Ambidextrous, Woodsman, Good Constitution, Exceptional Strength, Recuperation<br />
161 xp/level<br />
Jared is the Fighter/thief, again based on an AD&D character. He is the secondary fighter, carries the bow<br />
or crossbow, and is skilled at disarming traps. At higher levels, he is the alchemist and carries the herbs to<br />
brew potions (a dumb alchemist with 1 Intelligence). He is the most important member <strong>of</strong> the party –<br />
alchemy is vital for my playing style. He also advances to engage the rear spell casters.<br />
Attributes: Toughness, Ambidextrous, Nimble Fingers, Cave Lore, Good Constitution, Exceptional<br />
Strength, Recuperation (mod 3)<br />
157 xp/level<br />
Jennifer is nearly identical to Shawna in mage skills. She carries the Sapphires to cast Magic Map and any<br />
alchemy ingredients that Jared can't carry. She is usually better armored than Shawna, which allows her to<br />
be closer to the action to cast Slow Group. In her support role, she tends to carry much <strong>of</strong> the unidentified<br />
items out <strong>of</strong> a dungeon. At higher levels, both Jennifer and Shawna develop their dexterity skills to kill the<br />
wounded monsters. With repeated Major Blessings/Bless Partys/Curse Alls, they become effective fighters.<br />
Attributes: Magically Adept, Good Constitution, Highly Alert<br />
137 xp/level<br />
Shawna is nearly identical to Jennifer in mage skills. She carries the Piercing Crystals and Smoky Crystals<br />
(with a Ring <strong>of</strong> Will, she is the first choice for MindDuelling). To balance spell points, she is the first to<br />
learn Capture Soul (Jennifer learns it later as gold permits). In her support role, she tends to carry much <strong>of</strong><br />
the unidentified items out <strong>of</strong> a dungeon. At higher levels, both Jennifer and Shawna develop their dexterity<br />
skills to kill the wounded monsters. With repeated Major Blessings/Bless Partys/Curse Alls, they become<br />
effective fighters.<br />
Attributes: Magically Adept, Good Constitution, Highly Alert<br />
137 xp/level
Patrick is the main Priest and is mainly the party's rear guard and support (via Bless Party and Curse Alls).<br />
In general, he is the lowest level PC in the party, but I usually send him out alone to finish the wounded<br />
monsters (after Hastes and Blesses) to catch-up. He also frequently casts Cure Disease.<br />
Attributes: Magically Adept, Good Constitution<br />
130 xp/level<br />
To balance levels, I shift weapons among the PCs and usually let the lower level PCs kill the wounded<br />
monsters or fight them all (with a few Blesses, Curse Alls, and attacks to wound them first). The PC that<br />
strikes the death blow gets most <strong>of</strong> that monster's experience points. Doing this, most <strong>of</strong> the PCs in my<br />
parties differ only by 4 levels (Skyle is the highest, Patrick the lowest).<br />
I sometimes split the party to explore the dungeon faster or for a two sided attack - Skyle and Shawna in a<br />
group and Jared, Jennifer, and Patrick in the other. For a three way split, it's Skyle solo, Jared and Jennifer,<br />
and Patrick and Shawna.<br />
The latest level 1 party:<br />
Level 1 party, mod 3<br />
Level Health SP Str Dex Int Edged Bashing Pole Thrown Archery Def<br />
Skyle 1 24 10 5 5 3 4 0 0 0 0 1<br />
Jared 1 24 0 5 7 1 2 0 0 0 2 1<br />
Jennifer 1 14 32 4 1 6 0 0 0 0 0 0<br />
Shawna 1 14 32 4 1 6 0 0 0 0 0 0<br />
Patrick 1 20 32 5 3 6 0 0 0 0 0 0<br />
Mage Priest Mage Item Disarm Lock- Assass-<br />
Spells Spells Lore Alchemy Lore Traps Picking ination Poison Luck<br />
Skyle 0 2 1 0 1 0 0 1 0 0<br />
Jared 0 0 1 3 1 6 0 1 0 0<br />
Jennifer 4 2 1 0 1 0 0 0 0 0<br />
Shawna 4 2 1 0 1 0 0 0 0 0<br />
Patrick 0 4 1 0 1 0 0 0 0 0<br />
Additional information (such as how the beginning parties have changed) and the saved game files<br />
(Windows version <strong>of</strong> <strong>Blades</strong> <strong>of</strong> <strong>Exile</strong>) for these parties can be downloaded from:<br />
http://us.geocities.com/skyle_jc/skyle5pc.htm.
48*48 town/outdoor grid<br />
It is <strong>of</strong>ten useful to map mazes or logic puzzles that move the party. This allows an efficient way to map a<br />
safe path through the room. You can also mark unsearched containers.<br />
1 1 1 1 1 1 1 1 1 1 2 2 2 2 2 2 2 2 2 2 3 3 3 3 3 3 3 3 3 3 4 4 4 4 4 4 4 4<br />
0 1 2 3 4 5 6 7 8 9 0 1 2 3 4 5 6 7 8 9 0 1 2 3 4 5 6 7 8 9 0 1 2 3 4 5 6 7 8 9 0 1 2 3 4 5 6 7<br />
_ _ _ _ _ _ _ _ _ _ _ _ _ _ _ _ _ _ _ _ _ _ _ _ _ _ _ _ _ _ _ _ _ _ _ _ _ _ _ _ _ _ _ _ _ _ _ _<br />
0|_|_|_|_|_|_|_|_|_|_|_|_|_|_|_|_|_|_|_|_|_|_|_|_|_|_|_|_|_|_|_|_|_|_|_|_|_|_|_|_|_|_|_|_|_|_|_|_|<br />
1|_|_|_|_|_|_|_|_|_|_|_|_|_|_|_|_|_|_|_|_|_|_|_|_|_|_|_|_|_|_|_|_|_|_|_|_|_|_|_|_|_|_|_|_|_|_|_|_|<br />
2|_|_|_|_|_|_|_|_|_|_|_|_|_|_|_|_|_|_|_|_|_|_|_|_|_|_|_|_|_|_|_|_|_|_|_|_|_|_|_|_|_|_|_|_|_|_|_|_|<br />
3|_|_|_|_|_|_|_|_|_|_|_|_|_|_|_|_|_|_|_|_|_|_|_|_|_|_|_|_|_|_|_|_|_|_|_|_|_|_|_|_|_|_|_|_|_|_|_|_|<br />
4|_|_|_|_|_|_|_|_|_|_|_|_|_|_|_|_|_|_|_|_|_|_|_|_|_|_|_|_|_|_|_|_|_|_|_|_|_|_|_|_|_|_|_|_|_|_|_|_|<br />
5|_|_|_|_|_|_|_|_|_|_|_|_|_|_|_|_|_|_|_|_|_|_|_|_|_|_|_|_|_|_|_|_|_|_|_|_|_|_|_|_|_|_|_|_|_|_|_|_|<br />
6|_|_|_|_|_|_|_|_|_|_|_|_|_|_|_|_|_|_|_|_|_|_|_|_|_|_|_|_|_|_|_|_|_|_|_|_|_|_|_|_|_|_|_|_|_|_|_|_|<br />
7|_|_|_|_|_|_|_|_|_|_|_|_|_|_|_|_|_|_|_|_|_|_|_|_|_|_|_|_|_|_|_|_|_|_|_|_|_|_|_|_|_|_|_|_|_|_|_|_|<br />
8|_|_|_|_|_|_|_|_|_|_|_|_|_|_|_|_|_|_|_|_|_|_|_|_|_|_|_|_|_|_|_|_|_|_|_|_|_|_|_|_|_|_|_|_|_|_|_|_|<br />
9|_|_|_|_|_|_|_|_|_|_|_|_|_|_|_|_|_|_|_|_|_|_|_|_|_|_|_|_|_|_|_|_|_|_|_|_|_|_|_|_|_|_|_|_|_|_|_|_|<br />
10|_|_|_|_|_|_|_|_|_|_|_|_|_|_|_|_|_|_|_|_|_|_|_|_|_|_|_|_|_|_|_|_|_|_|_|_|_|_|_|_|_|_|_|_|_|_|_|_|<br />
11|_|_|_|_|_|_|_|_|_|_|_|_|_|_|_|_|_|_|_|_|_|_|_|_|_|_|_|_|_|_|_|_|_|_|_|_|_|_|_|_|_|_|_|_|_|_|_|_|<br />
12|_|_|_|_|_|_|_|_|_|_|_|_|_|_|_|_|_|_|_|_|_|_|_|_|_|_|_|_|_|_|_|_|_|_|_|_|_|_|_|_|_|_|_|_|_|_|_|_|<br />
13|_|_|_|_|_|_|_|_|_|_|_|_|_|_|_|_|_|_|_|_|_|_|_|_|_|_|_|_|_|_|_|_|_|_|_|_|_|_|_|_|_|_|_|_|_|_|_|_|<br />
14|_|_|_|_|_|_|_|_|_|_|_|_|_|_|_|_|_|_|_|_|_|_|_|_|_|_|_|_|_|_|_|_|_|_|_|_|_|_|_|_|_|_|_|_|_|_|_|_|<br />
15|_|_|_|_|_|_|_|_|_|_|_|_|_|_|_|_|_|_|_|_|_|_|_|_|_|_|_|_|_|_|_|_|_|_|_|_|_|_|_|_|_|_|_|_|_|_|_|_|<br />
16|_|_|_|_|_|_|_|_|_|_|_|_|_|_|_|_|_|_|_|_|_|_|_|_|_|_|_|_|_|_|_|_|_|_|_|_|_|_|_|_|_|_|_|_|_|_|_|_|<br />
17|_|_|_|_|_|_|_|_|_|_|_|_|_|_|_|_|_|_|_|_|_|_|_|_|_|_|_|_|_|_|_|_|_|_|_|_|_|_|_|_|_|_|_|_|_|_|_|_|<br />
18|_|_|_|_|_|_|_|_|_|_|_|_|_|_|_|_|_|_|_|_|_|_|_|_|_|_|_|_|_|_|_|_|_|_|_|_|_|_|_|_|_|_|_|_|_|_|_|_|<br />
19|_|_|_|_|_|_|_|_|_|_|_|_|_|_|_|_|_|_|_|_|_|_|_|_|_|_|_|_|_|_|_|_|_|_|_|_|_|_|_|_|_|_|_|_|_|_|_|_|<br />
20|_|_|_|_|_|_|_|_|_|_|_|_|_|_|_|_|_|_|_|_|_|_|_|_|_|_|_|_|_|_|_|_|_|_|_|_|_|_|_|_|_|_|_|_|_|_|_|_|<br />
21|_|_|_|_|_|_|_|_|_|_|_|_|_|_|_|_|_|_|_|_|_|_|_|_|_|_|_|_|_|_|_|_|_|_|_|_|_|_|_|_|_|_|_|_|_|_|_|_|<br />
22|_|_|_|_|_|_|_|_|_|_|_|_|_|_|_|_|_|_|_|_|_|_|_|_|_|_|_|_|_|_|_|_|_|_|_|_|_|_|_|_|_|_|_|_|_|_|_|_|<br />
23|_|_|_|_|_|_|_|_|_|_|_|_|_|_|_|_|_|_|_|_|_|_|_|_|_|_|_|_|_|_|_|_|_|_|_|_|_|_|_|_|_|_|_|_|_|_|_|_|<br />
24|_|_|_|_|_|_|_|_|_|_|_|_|_|_|_|_|_|_|_|_|_|_|_|_|_|_|_|_|_|_|_|_|_|_|_|_|_|_|_|_|_|_|_|_|_|_|_|_|<br />
25|_|_|_|_|_|_|_|_|_|_|_|_|_|_|_|_|_|_|_|_|_|_|_|_|_|_|_|_|_|_|_|_|_|_|_|_|_|_|_|_|_|_|_|_|_|_|_|_|<br />
26|_|_|_|_|_|_|_|_|_|_|_|_|_|_|_|_|_|_|_|_|_|_|_|_|_|_|_|_|_|_|_|_|_|_|_|_|_|_|_|_|_|_|_|_|_|_|_|_|<br />
27|_|_|_|_|_|_|_|_|_|_|_|_|_|_|_|_|_|_|_|_|_|_|_|_|_|_|_|_|_|_|_|_|_|_|_|_|_|_|_|_|_|_|_|_|_|_|_|_|<br />
28|_|_|_|_|_|_|_|_|_|_|_|_|_|_|_|_|_|_|_|_|_|_|_|_|_|_|_|_|_|_|_|_|_|_|_|_|_|_|_|_|_|_|_|_|_|_|_|_|<br />
29|_|_|_|_|_|_|_|_|_|_|_|_|_|_|_|_|_|_|_|_|_|_|_|_|_|_|_|_|_|_|_|_|_|_|_|_|_|_|_|_|_|_|_|_|_|_|_|_|<br />
30|_|_|_|_|_|_|_|_|_|_|_|_|_|_|_|_|_|_|_|_|_|_|_|_|_|_|_|_|_|_|_|_|_|_|_|_|_|_|_|_|_|_|_|_|_|_|_|_|<br />
31|_|_|_|_|_|_|_|_|_|_|_|_|_|_|_|_|_|_|_|_|_|_|_|_|_|_|_|_|_|_|_|_|_|_|_|_|_|_|_|_|_|_|_|_|_|_|_|_|<br />
32|_|_|_|_|_|_|_|_|_|_|_|_|_|_|_|_|_|_|_|_|_|_|_|_|_|_|_|_|_|_|_|_|_|_|_|_|_|_|_|_|_|_|_|_|_|_|_|_|<br />
33|_|_|_|_|_|_|_|_|_|_|_|_|_|_|_|_|_|_|_|_|_|_|_|_|_|_|_|_|_|_|_|_|_|_|_|_|_|_|_|_|_|_|_|_|_|_|_|_|<br />
34|_|_|_|_|_|_|_|_|_|_|_|_|_|_|_|_|_|_|_|_|_|_|_|_|_|_|_|_|_|_|_|_|_|_|_|_|_|_|_|_|_|_|_|_|_|_|_|_|<br />
35|_|_|_|_|_|_|_|_|_|_|_|_|_|_|_|_|_|_|_|_|_|_|_|_|_|_|_|_|_|_|_|_|_|_|_|_|_|_|_|_|_|_|_|_|_|_|_|_|<br />
36|_|_|_|_|_|_|_|_|_|_|_|_|_|_|_|_|_|_|_|_|_|_|_|_|_|_|_|_|_|_|_|_|_|_|_|_|_|_|_|_|_|_|_|_|_|_|_|_|<br />
37|_|_|_|_|_|_|_|_|_|_|_|_|_|_|_|_|_|_|_|_|_|_|_|_|_|_|_|_|_|_|_|_|_|_|_|_|_|_|_|_|_|_|_|_|_|_|_|_|<br />
38|_|_|_|_|_|_|_|_|_|_|_|_|_|_|_|_|_|_|_|_|_|_|_|_|_|_|_|_|_|_|_|_|_|_|_|_|_|_|_|_|_|_|_|_|_|_|_|_|<br />
39|_|_|_|_|_|_|_|_|_|_|_|_|_|_|_|_|_|_|_|_|_|_|_|_|_|_|_|_|_|_|_|_|_|_|_|_|_|_|_|_|_|_|_|_|_|_|_|_|<br />
40|_|_|_|_|_|_|_|_|_|_|_|_|_|_|_|_|_|_|_|_|_|_|_|_|_|_|_|_|_|_|_|_|_|_|_|_|_|_|_|_|_|_|_|_|_|_|_|_|<br />
41|_|_|_|_|_|_|_|_|_|_|_|_|_|_|_|_|_|_|_|_|_|_|_|_|_|_|_|_|_|_|_|_|_|_|_|_|_|_|_|_|_|_|_|_|_|_|_|_|<br />
42|_|_|_|_|_|_|_|_|_|_|_|_|_|_|_|_|_|_|_|_|_|_|_|_|_|_|_|_|_|_|_|_|_|_|_|_|_|_|_|_|_|_|_|_|_|_|_|_|<br />
43|_|_|_|_|_|_|_|_|_|_|_|_|_|_|_|_|_|_|_|_|_|_|_|_|_|_|_|_|_|_|_|_|_|_|_|_|_|_|_|_|_|_|_|_|_|_|_|_|<br />
44|_|_|_|_|_|_|_|_|_|_|_|_|_|_|_|_|_|_|_|_|_|_|_|_|_|_|_|_|_|_|_|_|_|_|_|_|_|_|_|_|_|_|_|_|_|_|_|_|<br />
45|_|_|_|_|_|_|_|_|_|_|_|_|_|_|_|_|_|_|_|_|_|_|_|_|_|_|_|_|_|_|_|_|_|_|_|_|_|_|_|_|_|_|_|_|_|_|_|_|<br />
46|_|_|_|_|_|_|_|_|_|_|_|_|_|_|_|_|_|_|_|_|_|_|_|_|_|_|_|_|_|_|_|_|_|_|_|_|_|_|_|_|_|_|_|_|_|_|_|_|<br />
47|_|_|_|_|_|_|_|_|_|_|_|_|_|_|_|_|_|_|_|_|_|_|_|_|_|_|_|_|_|_|_|_|_|_|_|_|_|_|_|_|_|_|_|_|_|_|_|_|<br />
Medium town / Outdoors / Small town (0 – 31 square)