XE-A303 Operation-Manual GB - Sharp
XE-A303 Operation-Manual GB - Sharp
XE-A303 Operation-Manual GB - Sharp

Create successful ePaper yourself
Turn your PDF publications into a flip-book with our unique Google optimized e-Paper software.
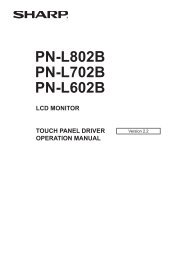
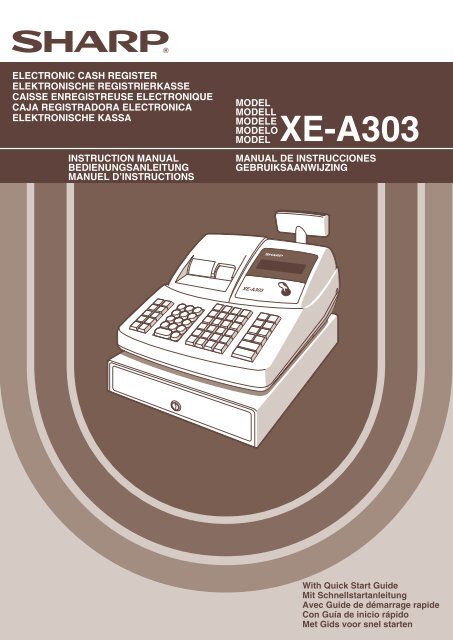
ELECTRONIC CASH REGISTER<br />
ELEKTRONISCHE REGISTRIERKASSE<br />
CAISSE ENREGISTREUSE ELECTRONIQUE<br />
CAJA REGISTRADORA ELECTRONICA<br />
ELEKTRONISCHE KASSA<br />
INSTRUCTION MANUAL<br />
BEDIENUNGSANLEITUNG<br />
MANUEL D’INSTRUCTIONS<br />
MODEL<br />
MODELL<br />
MODELE<br />
MODELO<br />
MODEL<br />
<strong>XE</strong>-<strong>A303</strong><br />
MANUAL DE INSTRUCCIONES<br />
GEBRUIKSAANWIJZING<br />
<strong>XE</strong>-<strong>A303</strong><br />
With Quick Start Guide<br />
Mit Schnellstartanleitung<br />
Avec Guide de démarrage rapide<br />
Con Guía de inicio rápido<br />
Met Gids voor snel starten
CAUTION:<br />
The cash register should be securely fitted to the supporting platforms to avoid instability when the drawer<br />
is open.<br />
CAUTION:<br />
The socket-outlet shall be installed near the equipment and shall be easily accessible.<br />
VORSICHT:<br />
Die Netzsteckdose muß nahe dem Gerät angebracht und leicht zugänglich sein.<br />
ATTENTION:<br />
La prise de courant murale devra être installée à proximité de l’équipement et devra être facilement<br />
accessible.<br />
AVISO:<br />
El tomacorriente debe estar instalado cerca del equipo y debe quedar bien accesible.<br />
VARNING:<br />
Det matande vägguttaget skall placeras nära apparaten och vara lätt åtkomligt.<br />
LET OP:<br />
Het stopcontact dient in de buurt van de kassa en gemakkelijk toegangbaar te zijn.<br />
CAUTION:<br />
For a complete electrical disconnection pull out the mains plug.<br />
VORSICHT:<br />
Zur vollständigen elektrischen Trennung vom Netz den Netzstecker ziehen.<br />
ATTENTION:<br />
Pour obtenir une mise hors-circuit totale, débrancher la prise de courant secteur.<br />
AVISO:<br />
Para una desconexión eléctrica completa, desenchufar el enchufe de tomacorriente.<br />
VARNING:<br />
För att helt koppla från strömmen, dra ut stickproppen.<br />
LET OP:<br />
Trek de stekker uit het stopcontact indien u de stroom geheel wilt uitschakelen.<br />
Warning<br />
This is a Class A product. In a domestic environment this product may cause radio interference in which<br />
case the user may be required to take adequate measures.<br />
Warnung<br />
Dies ist eine Einrichtung der Klasse A. Diese Einrichtung kann im Wohnbereich Funkstörungen<br />
verursachen; in diesem Fall kann vom Betreiber verlangt werden, angemessene Maßnahmen<br />
durchzuführen und dafür aufzukommen.<br />
Avertissement<br />
Ceci est un produit de Classe A. Dans un environnement domestique ce produit risque de provoquer une<br />
interférence radio, auquel cas l’utilisateur sera obligé d’observer les mesures adéquates.<br />
Advertencia<br />
Este es un producto de la clase A. En un ambiente doméstico es posible que este producto cause<br />
radiointerferencia. En este caso se solicita al usuario que tome medidas adecuadas.<br />
Contact the following for the CE mark.
INTRODUCTION<br />
Thank you very much for your purchase of the SHARP Electronic Cash Register, Model <strong>XE</strong>-<strong>A303</strong>.<br />
Please read this manual carefully before operating your machine in order to gain full understanding of<br />
functions and features.<br />
Please keep this manual for future reference. It will help you if you encounter any operational problems.<br />
CAUTION!<br />
Be sure to initialize the cash register before you start operating the cash register. Otherwise, distorted<br />
memory contents and malfunction of the cash register will occur. For this procedure, please refer to page 9.<br />
IMPORTANT<br />
• Be very careful when removing and replacing the printer cover, as the cutter mounted on it is very<br />
sharp.<br />
• Install the cash register in a location not subject to direct sunlight, unusual temperature changes,<br />
high humidity or splashing water.<br />
Installation in such locations could cause damage to the cabinet and the electronic components.<br />
• Never operate the register with wet hands.<br />
The water could seep into the interior of the register and cause component failure.<br />
• When cleaning your register, use a dry, soft cloth. Never use solvents, such as benzine and/or<br />
thinner.<br />
The use of such chemicals will lead to discolouration or deterioration of the cabinet.<br />
• The register plugs into any standard wall outlet (official (nominal) voltage).<br />
Other electrical devices on the same electrical circuit could cause the register to malfunction.<br />
• For complete electrical disconnection, disconect the main plug.<br />
PRECAUTION<br />
This Electronic Cash Register has a built-in memory protection circuit which is operated by rechargeable<br />
batteries.<br />
As you know, all batteries will, in time, dissipate their charge even if not used. Therefore to insure an<br />
adequate initial charge in the protection circuit, and to prevent any possible loss of memory upon installation, it<br />
is recommended that each unit be allowed to recharge for a period of 24 to 48 hours prior to use. Also note<br />
that if the rechargeable batteries have been discharged completely, your cash register will be automatically<br />
initialized when you turn on the power.<br />
In order to charge the batteries, the machine must be plugged in and the mode switch must be in a position<br />
other than “ ”. This recharging precaution can prevent unnecessary initial service calls.<br />
English<br />
English<br />
1
2<br />
CONTENTS<br />
INTRODUCTION ............................................................................................................................................1<br />
IMPORTANT ..................................................................................................................................................1<br />
PRECAUTION................................................................................................................................................1<br />
CONTENTS....................................................................................................................................................2<br />
Part1 QUICK START GUIDE<br />
STEP1 PARTS AND THEIR FUNCTIONS.................................................................................................5<br />
1 External View ........................................................................................................................................5<br />
2 Printer....................................................................................................................................................5<br />
3 Mode Switch and Mode Keys................................................................................................................6<br />
4 Keyboard ...............................................................................................................................................6<br />
5 Displays.................................................................................................................................................7<br />
6 Drawer Lock Key ...................................................................................................................................7<br />
STEP2 PREPARING THE CASH REGISTER ...........................................................................................8<br />
1 Installing the Cash Register ..................................................................................................................8<br />
2 Initializing the Cash Register.................................................................................................................9<br />
3 Installing Paper Rolls...........................................................................................................................10<br />
STEP3 BASIC FUNCTION PROGRAMMING..........................................................................................12<br />
1 Abbreviations and Terminology...........................................................................................................12<br />
2 Prior to Programming ..........................................................................................................................12<br />
Procedure for programming..........................................................................................................12<br />
Description of special keys ...........................................................................................................12<br />
Guidance for text programming ....................................................................................................13<br />
3 Language Selection.............................................................................................................................14<br />
4 Date and Time Programming ..............................................................................................................14<br />
5 Tax Programming................................................................................................................................15<br />
6 Department Programming ...................................................................................................................16<br />
7 PLU (Price Look-Up) and Subdepartment Programming ....................................................................22<br />
8 Text Programming...............................................................................................................................25<br />
Clerk names .................................................................................................................................25<br />
Logo messages ............................................................................................................................25<br />
9 Programming Other Necessary Items .................................................................................................27<br />
STEP4 BASIC SALES ENTRY ................................................................................................................28<br />
1 Basic Sales Entry Example .................................................................................................................28<br />
2 PLU Entry ............................................................................................................................................29<br />
STEP5 CORRECTION .............................................................................................................................30<br />
1 Cancellation of the Numeric Entry.......................................................................................................30<br />
2 Correction of the Last Entry (direct void).............................................................................................30<br />
3 Correction of the Next-to-last or Earlier Entry (indirect void)...............................................................31<br />
4 Subtotal Void .......................................................................................................................................32<br />
5 Correction of Incorrect Entries not Handled by the Direct or Indirect Void Function ...........................32<br />
STEP6 FULL SALES REPORT (Z REPORT)..........................................................................................33
Part2 FOR THE OPERATOR<br />
OTHER BASIC SALES ENTRIES ...............................................................................................................36<br />
1 Additional Information for BASIC SALES ENTRY...............................................................................36<br />
2 Error Warning ......................................................................................................................................36<br />
3 Item Entries .........................................................................................................................................37<br />
Single item entries ........................................................................................................................37<br />
Repeat entries ..............................................................................................................................38<br />
Multiplication entries .....................................................................................................................39<br />
Split pricing entries .......................................................................................................................39<br />
Single item cash sale (SICS) entry...............................................................................................40<br />
4 Displaying Subtotals............................................................................................................................40<br />
5 Finalization of Transaction ..................................................................................................................41<br />
Cash or cheque tendering ............................................................................................................41<br />
Cash or cheque sale that does not require tender entry ..............................................................41<br />
Credit sale ....................................................................................................................................42<br />
Mixed-tender sale .........................................................................................................................42<br />
6 Computation of VAT (Value Added Tax)/tax .......................................................................................42<br />
VAT/tax system ............................................................................................................................42<br />
OPTIONAL FEATURES...............................................................................................................................44<br />
1 Auxiliary Entries...................................................................................................................................44<br />
Percent calculations (premium or discount) .................................................................................44<br />
Deduction entries..........................................................................................................................44<br />
Refund entries ..............................................................................................................................45<br />
Non-add code number entries and printing ..................................................................................45<br />
2 Auxiliary Payment Treatment ..............................................................................................................46<br />
Currency exchange ......................................................................................................................46<br />
Received-on-account entries........................................................................................................47<br />
Paid-out entries ............................................................................................................................47<br />
No sale (exchange) ......................................................................................................................47<br />
Cashing a cheque.........................................................................................................................47<br />
3 Automatic Sequence Key ([]key) Entries.................................................................................48<br />
4 Overlapped Clerk Entries ....................................................................................................................48<br />
Part3 FOR THE MANAGER<br />
PRIOR TO PROGRAMMING ......................................................................................................................49<br />
Procedure for programming..........................................................................................................49<br />
Guidance messages.....................................................................................................................49<br />
Entering character codes with numeric keys on the keyboard .....................................................50<br />
Alphanumeric character code table ..............................................................................................51<br />
AUXILIARY FUNCTION PROGRAMMING .................................................................................................52<br />
1 Miscellaneous Key Programming........................................................................................................52<br />
Programming for -.....................................................................................................................52<br />
Programming for % and & .......................................................................................................55<br />
Programming for V.....................................................................................................................58<br />
Programming for r, R, X, Y, c and b........................................................................60<br />
Function parameters for A....................................................................................................63<br />
2 Other Text Programming.....................................................................................................................64<br />
Foreign currency symbol ..............................................................................................................64<br />
Domestic currency symbol ...........................................................................................................64<br />
Training mode text........................................................................................................................65<br />
Function text .................................................................................................................................65<br />
3
4<br />
ADVANCED FUNCTION PROGRAMMING ................................................................................................67<br />
1 Register Number and Consecutive Number Programming .................................................................67<br />
2 Various Function Selection Programming 1 ........................................................................................68<br />
Function selection for miscellaneous keys ...................................................................................68<br />
Print format ...................................................................................................................................69<br />
Receipt print format ......................................................................................................................69<br />
Other programming ......................................................................................................................70<br />
3 Various Function Selection Programming 2 ........................................................................................75<br />
Power save mode.........................................................................................................................75<br />
Logo message print format...........................................................................................................76<br />
Clerk code assignment .................................................................................................................76<br />
Entry digit limit for cash in drawer (CID)(sentinel) ........................................................................76<br />
Entry digit limit for cheque cashing...............................................................................................77<br />
Entry digit limit for cheque change ...............................................................................................77<br />
Thermal printer density.................................................................................................................77<br />
Training clerk specification for training mode ...............................................................................77<br />
AUTO key programming - Automatic sequence key ....................................................................78<br />
4 EURO Programming ...........................................................................................................................79<br />
5 Reading Stored Programs...................................................................................................................80<br />
TRAINING MODE ........................................................................................................................................83<br />
READING (X) AND RESETTING (Z) OF SALES TOTALS.........................................................................84<br />
CCD -Compulsory Cash/cheque Declaration- .........................................................................................89<br />
OVERRIDE ENTRIES ..................................................................................................................................90<br />
CORRECTION AFTER FINALIZING A TRANSACTION (Void mode).......................................................90<br />
EURO MIGRATION FUNCTION ..................................................................................................................91<br />
OPERATOR MAINTENANCE......................................................................................................................94<br />
1 In Case of Power Failure.....................................................................................................................94<br />
2 In Case of Printer Error .......................................................................................................................94<br />
3 Cautions in Handling the Printer and Recording Paper.......................................................................94<br />
4 Replacing the Paper Roll.....................................................................................................................95<br />
5 Removing a Paper Jam.......................................................................................................................96<br />
6 Cleaning the Printer (Print Head / Sensor / Roller) .............................................................................96<br />
7 Removing the Till and the Drawer .......................................................................................................97<br />
8 Opening the Drawer by Hand..............................................................................................................97<br />
9 Before Calling for Service....................................................................................................................98<br />
Error message table .....................................................................................................................98<br />
SPECIFICATIONS .......................................................................................................................................99
Part1 QUICK START GUIDE<br />
STEP1<br />
1 External View<br />
PARTS AND THEIR FUNCTIONS<br />
Front view Rear view<br />
Operator display<br />
Printer cover<br />
Receipt paper<br />
Journal paper<br />
Drawer lock<br />
Drawer<br />
2 Printer<br />
Paper roll cradle<br />
(Receipt side)<br />
Print roller release<br />
lever (Receipt side)<br />
Print roller arm<br />
(Receipt side)<br />
Paper positioning<br />
guides<br />
Inner cover<br />
<strong>XE</strong>-<strong>A303</strong><br />
The printer is a receipt/journal dual station type thermal printer, therefore it does<br />
not require any type of ink ribbon or cartridge.<br />
Lift the rear of the printer cover to remove. To re-install, hook the pawls on the<br />
cabinet and close.<br />
Caution: The paper cutter is mounted on the printer cover. Be careful not<br />
to cut yourself.<br />
Take-up spool<br />
Customer display<br />
(Pop-up type)<br />
AC power cord<br />
Mode switch<br />
Keyboard<br />
Paper roll cradle (Journal side)<br />
Print roller release lever<br />
(Journal side)<br />
Print roller arm (Journal side)<br />
Do not attempt to remove the paper roll<br />
with the print roller arm locked. This may<br />
result in damage to the printer and print<br />
head.<br />
5
6<br />
3 Mode Switch and Mode Keys<br />
The mode switch can be operated by inserting one of the two supplied mode keys - manager (MA) and operator<br />
(OP) keys. These keys can be inserted or removed only in the “REG” or “ ” position.<br />
Manager key (MA)<br />
Operator key (OP)<br />
4 Keyboard<br />
Keyboard layout<br />
Key names<br />
RECEIPT<br />
JOURNAL<br />
RA<br />
RCPT<br />
/PO<br />
ESC<br />
Received-on account key<br />
Receipt print/Paid-out key<br />
Void key<br />
Escape key<br />
%1 %2 Percent 1 and 2 keys<br />
RF Refund key<br />
Discount key<br />
MA OP<br />
Receipt paper feed key<br />
Journal paper feed key<br />
The mode switch has these settings:<br />
: This mode locks all register operations. (AC power turns off.)<br />
No change occurs to register data.<br />
OP X/Z: To take individual clerk X or Z reports, and to take flash reports.<br />
It can be used to toggle receipt state “ON” and “OFF” by pressing<br />
the R key.<br />
REG: For entering sales.<br />
PGM: To program various items.<br />
: Enters into the void mode. This mode allows correction after<br />
finalizing a transaction. In this mode, the back light of the operator<br />
display turns red.<br />
MGR: For manager’s entries. The manager can use this mode for an<br />
override entry.<br />
X1/Z1: To take the X/Z report for various daily totals.<br />
X2/Z2: To take the X/Z report for periodic (weekly or monthly)<br />
consolidation.<br />
•<br />
CL<br />
00 0<br />
PLU<br />
/SUB<br />
DEPT<br />
#<br />
DEPT<br />
SHIFT<br />
CLK#<br />
21<br />
1<br />
~<br />
Multiplication key<br />
Decimal point key<br />
Clear key<br />
~ 9 Numeric keys<br />
PLU/Subdepartment key<br />
Department code entry key<br />
Department shift key<br />
Clerk code entry key<br />
40<br />
20<br />
5<br />
4<br />
3<br />
2<br />
1<br />
21<br />
6<br />
Department keys<br />
25 30 35 40<br />
10 15 20<br />
24 29 34 39<br />
23<br />
22<br />
9<br />
8<br />
7<br />
28<br />
27<br />
26<br />
14<br />
13<br />
12<br />
11<br />
33<br />
32<br />
31<br />
AUTO<br />
1<br />
EX<br />
VAT<br />
19<br />
18<br />
17<br />
16<br />
CH1 CH2<br />
#/TM/ST<br />
TL / NS<br />
Automatic sequence keys<br />
Foreign currency<br />
exchange key<br />
Value added tax key<br />
AUTO<br />
2<br />
38<br />
37<br />
36<br />
CR1 CR2 Credit 1 and 2 keys<br />
Cheque 1 and 2 keys<br />
Non-add code/Time display<br />
/Subtotal key<br />
Total/No sale key
5 Displays<br />
Operator display<br />
Receipt OFF indicator<br />
Repeat / Sentinel mark / Power save mark<br />
Part1 QUICK START GUIDE Part2 Part3<br />
• Clerk code or Mode name<br />
The mode you are in is displayed. When a clerk is assigned, the clerk code is displayed in the REG or<br />
OP X/Z mode. For example, “?01?” is displayed when clerk 01 is assigned.<br />
• Repeat mark<br />
The number of repeats is displayed, starting at “2” and incremental with each repeat. When you have<br />
registered ten times, the display will show “0”. (2 ➞ 3 ......9 ➞ 0 ➞ 1 ➞ 2...)<br />
• Sentinel mark<br />
When amount in the drawer reaches the amount you preprogrammed, the sentinel mark “X” is displayed<br />
to advice you to remove the money to a safe place.<br />
• Power save mark<br />
When the cash register goes into the power save mode, the power save mark (decimal point) lights up.<br />
• Function message display area<br />
Item labels of departments and PLU/subdepartments and function texts you use, such as %1, (-) and<br />
CASH are displayed. For the details of function texts, please refer to page 66.<br />
When an amount is to be entered or entered, “AMOUNT” is displayed: When an amount is to be<br />
entered, ------- is displayed at the numeric entry display area with “AMOUNT”. When a preset price has<br />
been set with "Open & Preset" selected in department programming, the preset price is displayed at the<br />
numeric entry display area with "AMOUNT".<br />
• Numeric entry display area<br />
Numbers entered using numeric keys are displayed here.<br />
Date and time display<br />
Date and time appear on the display in the OP X/Z, REG, or MGR mode. In the REG or MGR mode, press<br />
the s key to display the date and time.<br />
Error message<br />
When an error occurs, the corresponding error message is displayed in the function message display area.<br />
For details of error messages, please refer “Error message table” on page 98.<br />
Customer display<br />
(Pop-up type)<br />
6 Drawer Lock Key<br />
This key locks and unlocks the drawer. To lock it, turn 90<br />
degrees counterclockwise. To unlock it, turn 90 degrees<br />
clockwise.<br />
Clerk code or mode name<br />
SK1-1<br />
Function message display area<br />
Numeric entry display area<br />
7
8<br />
STEP2<br />
PREPARING THE CASH REGISTER<br />
Unpack the cash register and make sure all accessories are included. For details of accessories, please refer to<br />
“SPECIFICATIONS” section on page 99.<br />
For installing the cash register, find a stable surface near an AC outlet where the cash register will not subject to<br />
water sources or direct sunlight.<br />
For preparing the cash register, please follow the three steps shown below; "1 Installing the Cash Register" on<br />
page 8, "2 Initializing the Cash Register" on page 9, and "3 Installing Paper Rolls" on page 10.<br />
1 Installing the Cash Register<br />
Install the cash register using the fixing angle bracket provided with the register according to the following<br />
instruction. The fixing angle bracket prevents the register from moving when the drawer opens. By hooking the<br />
register on the bracket, you can secure the register to the position.<br />
How to install the fixing angle bracket<br />
1. Thoroughly clean the location where the fixing angle bracket<br />
(B) is to be placed.<br />
2. Peel off the adhesive tape on the fixing angle bracket.<br />
3. Hook the angle bracket onto the hook (A) that is located at the<br />
bottom rear of the register.<br />
4. Firmly stick the fixing angle bracket to the table surface that<br />
your cleaned above.<br />
How to remove the register from the fixing angle bracket<br />
1. Lift up the front of the register and pull the register towards<br />
you.<br />
B<br />
A
2 Initializing the Cash Register<br />
Part1 QUICK START GUIDE Part2 Part3<br />
In order to operate the cash register properly, you must initialize it before operating for the first time. Follow this<br />
procedure.<br />
1. Make sure the power cord plug is not inserted into the AC outlet.<br />
2. Insert the manager (MA) key into the mode switch and turn it to the PGM<br />
position.<br />
3. While holding down both the } key and the l key, insert the plug into<br />
the AC outlet. The buzzer will sound three times and “??? MRS. ???”<br />
will be displayed.<br />
4. The cash register has now been initialized. The register display will now<br />
show “0.00” with “PGM”.<br />
REG<br />
OPX/Z MGR<br />
If the buzzer does not sound when the plug is inserted, the initialization has not been done<br />
successfully. (This will occur when the voltage is high because you operated the cash register<br />
before starting initialization.) Wait at least ten seconds after pulling out the plug and initialize the<br />
cash register again.<br />
The cash register has a built-in memory protection circuit which is operated by rechargeable<br />
batteries. Since the rechargeable batteries have been discharged, please charge the batteries for<br />
one or two days before using the cash register for the first time. To charge the batteries, set the<br />
mode switch to a position other than “ ” with the power cord plugged into the AC outlet.<br />
Unless the batteries have been charged, all of the programmed data and sales data is not saved.<br />
If you press a key by mistake, an error message such as “HEAD UP” or “PAPER EMPTY” may be<br />
displayed. Press the l key to clear message after installing paper rolls.<br />
PGM<br />
X1/Z1<br />
X2/Z2<br />
*** MRS. *** _<br />
PGM<br />
0.00<br />
9
10<br />
3 Installing Paper Rolls<br />
Precaution: The paper cutter is mounted on the printer cover. Take caution when removing and installing<br />
the cover.<br />
The register can print receipts and journals. For the printer, you must install the paper rolls (receipt and journal<br />
paper rolls) provided with the register.<br />
Install the paper rolls according to the procedure shown below with the power cord connected and the mode<br />
switch set to the REG position:<br />
1. Cut off approximately one revolution of each paper roll.<br />
Make sure each paper end is cut as per the diagram.<br />
2. Lift up the print roller release lever<br />
(indicated as "PULL" on it) of the<br />
receipt side to unlock and open the<br />
print roller arm.<br />
3. Set a paper roll in the paper roll cradle of the receipt side as<br />
per the diagram.<br />
4. Feed the end of the paper along with<br />
the paper positioning guides as per<br />
the diagram.<br />
Print roller release lever<br />
(Receipt side)<br />
Paper positioning guides<br />
5. While holding down the paper, slowly close the print roller arm<br />
of the receipt side, and push down the "PUSH"-indicated part<br />
of the arm until you hear a click locking the arm. Make sure<br />
securely you push down the center of the wing part of the arm<br />
as per the diagram. The paper will be fed automatically.<br />
If the print roller arm is not securely locked, printing<br />
is not done right. If this problem occurs, open the<br />
arm, and close the arm as instructed above.<br />
Print roller arm<br />
(Receipt side)<br />
Correct<br />
Correct Incorrect<br />
To the printer<br />
Incorrect<br />
To the printer
6. Cut off the excess paper using the edge of the inner cover.<br />
7. Lift up the print roller release lever<br />
(indicated as "PULL" on it) of the journal<br />
side to unlock and open the print roller<br />
arm. Then, set a paper roll in the paper<br />
roll cradle of the journal side as per the<br />
diagram in the Step 3.<br />
8. While holding down the paper, slowly close the print roller arm of the<br />
journal side, and push down the arm until you hear a click locking<br />
the arm. Make sure securely you push down the center of the wing<br />
part of the arm as per the diagram. The paper will be automatically<br />
fed.<br />
9. Insert the end of the paper into the slit in<br />
the spool. (Press the } key to feed<br />
more paper if required.)<br />
10.Wind the paper two or three turns around<br />
the spool shaft.<br />
Part1 QUICK START GUIDE Part2 Part3<br />
Print roller release lever<br />
(Journal side)<br />
11.Set the spool on the bearing, and press the } key to take up<br />
excess slack in the paper.<br />
12.Replace the printer cover.<br />
13.Press the { key to make sure the paper end comes out of the<br />
printer cover and clean paper appears.<br />
Print roller arm<br />
(Journal side)<br />
11
12<br />
STEP3<br />
BASIC FUNCTION PROGRAMMING<br />
Before starting sales entries, you must first program necessary items so the cash register suits your sales<br />
needs. In this manual, there are three sections, BASIC FUNCTION PROGRAMMING (pages 12-27) where<br />
required items must be programmed, AUXILIARY FUNCTION PROGRAMMING (pages 52-66) where you<br />
can program for more convenient use of keys on the keyboard, and ADVANCED FUNCTION PROGRAMMING<br />
(pages 67-82) where various optional programming features are provided. Find the appropriate features for your<br />
needs, and make the necessary programming.<br />
1 Abbreviations and Terminology<br />
Dept.: Department; a category for merchandise classifications. Every sales item should belong to a<br />
department.<br />
PLU: Price Look Up; a category for merchandise classifications. PLUs are used to call up preset prices by a<br />
code entry.<br />
VAT: Value Added Tax<br />
X report: Report to read sales data<br />
Z report: Report to read and reset sales data<br />
2 Prior to Programming<br />
Procedure for programming<br />
1. Check to see whether both journal and receipt rolls are present in the machine. If there is not enough paper on<br />
a roll, replace it with a new one (refer to "Replacing the Paper Roll" on page 95 for the replacement).<br />
2. Put the manager key in the mode switch and turn it to the PGM position.<br />
3. Program necessary items into the cash register.<br />
Every time you program an item, the cash register will print the setting. Please<br />
refer to print samples in each section.<br />
4. If necessary, issue programming reports for your reference.<br />
REG<br />
OPX/Z MGR<br />
• On the key operation example shown in the programming details, numbers such as “22082007”<br />
indicates the parameter which must be entered using the corresponding numeric keys.<br />
• Asterisks in the tables shown in the programming details indicate default settings.<br />
Description of special keys<br />
0,1 to 9 Numerical key Used for numerical number entry.<br />
: Double-zero key Used for parameter entry and character code entry.<br />
l Clear key Used for cancel entry.<br />
P Point key Used for decimal point entry and right moving entry (as right cursor key).<br />
@ Multiplication key Used for left moving entry (as left cursor key).<br />
s Subtotal key Used for data decision entry.<br />
A Finalization key Used for programming termination entry.<br />
PGM<br />
X1/Z1<br />
X2/Z2
Guidance for text programming<br />
Part1 QUICK START GUIDE Part2 Part3<br />
The register allow you to program texts for department item names (page 16), PLU/subdepartment item names<br />
(page 22), function texts (page 65), clerk names (page 25), logo messages (page 25), foreign and domestic<br />
currency symbols (page 64), and training mode texts (page 65).<br />
There are two ways for programming text; using character keys on the keyboard or entering character codes<br />
with numeric keys on the keyboard. For the latter way, refer to "Entering character codes with numeric keys on<br />
the keyboard" on page 50.<br />
Using character keys on the keyboard<br />
You can enter characters according to the small figures printed in the lower right position of the tops. For the<br />
layout, please refer to “Keyboard” section on page 6.<br />
The following are used as control keys for character entry:<br />
H Toggles between upper-case and lower-case letters. By default, the upper-case letter is selected. Once<br />
the H key is pressed, you are locked in for entering lower-case letters. “a” is displayed when lowercase<br />
letters entry is selected as shown in the operator display example below.<br />
N Press the N key to enter numeric characters. For example to enter “1”, press the N and 1 key.<br />
If you press the 1 key without pressing the N key, the cash register goes to character codes entry<br />
mode.<br />
Once the N key is pressed, you are locked in for entering numeric characters. "1" is displayed when<br />
numeric characters entry is selected.<br />
W Toggles between single-size and double-size characters. By default, the single-size character is<br />
selected. Once the W key is pressed, you are locked in for entering double size characters. “W” is<br />
displayed when double-size characters entry is selected as shown in the operator display example below.<br />
B Backs up the cursor, erasing the character to the left.<br />
Operator display (Example)<br />
To program the word “Clerk01” with the letter “C” being double size.<br />
To make the letter “C” double size character<br />
To make character size return to normal size<br />
To toggle the characters to lower-case letters<br />
To enter numbers<br />
Cursor<br />
ABCD_<br />
01 Wa1 032<br />
Character code<br />
Department code, PLU code, function number,<br />
clerk code or logo message line number is displayed here.<br />
Characters entered using character keys is displayed here.<br />
Wg<br />
W<br />
H<br />
hijk<br />
N01<br />
=C_<br />
01 W 032<br />
=C_<br />
01 032<br />
=C_<br />
01 a 032<br />
=Clerk_<br />
01 a 032<br />
=Clerk01_<br />
01 a1 032<br />
13
14<br />
3 Language Selection<br />
*Language: 0: English 1: German 2: French 3: Spanish<br />
By default, English is set.<br />
Date<br />
When you change the language, the texts such as clerk names (page 25), logo messages (page<br />
25) and function texts (page 65), which you programmed, will be reset to the default settings. The<br />
language selection must be made before programming clerk names, logo messages and function<br />
texts.<br />
For setting the date, enter the date in 8 digits using the day-month-year (DD/MM/YYYY) format, then press the<br />
s key.<br />
Time<br />
s 88 @<br />
Key operation example<br />
s 88 @<br />
0 A<br />
4 Date and Time Programming<br />
Date(DD/MM/YYYY) s<br />
Key operation example<br />
22082007<br />
(22 August, 2007)<br />
s<br />
For setting the time, enter the time in 4 digits using the 24-hour format. For example, when the time is set to<br />
2:30 AM, enter 230; and when it is set to 2:30 PM, enter 1430.<br />
Time(max. 4 digits in 24-hour format) s<br />
Key operation example<br />
1430<br />
s<br />
Operator display<br />
LANGUAGE CHANGE<br />
88<br />
THANK YOU<br />
0<br />
Operator display<br />
PGM<br />
22082007<br />
PGM<br />
0.00<br />
Operator display<br />
To set 0<br />
*Language<br />
(0-3) A<br />
PGM<br />
1430<br />
PGM<br />
0.00<br />
Print<br />
Print<br />
Print<br />
Date<br />
Time
5 Tax Programming<br />
Part1 QUICK START GUIDE Part2 Part3<br />
If you program the VAT/tax, the cash register can calculate the sales tax. In the VAT system, the tax is included<br />
in the price you enter in the register, and the tax amount is calculated when tendered according to the VAT rate<br />
programmed. In the tax system, the tax is calculated when tendered according to the tax rate programmed, and<br />
added to the price. The cash register can provide totally 6 kinds of VAT/tax systems (automatic VAT1-4,<br />
automatic tax 1-4, manual VAT 1-4, manual VAT 1, manual tax 1-4, and automatic VAT1 and automatic tax 2-4<br />
systems) and 4 kinds of rates. By default, the cash register is pre-programmed as automatic VAT1-4 system.<br />
When you program tax rate(s) and taxable status for each department (by default, VAT1/tax1 is set to taxable.),<br />
tax will be automatically added to sales of items assigned to the department according to the programmed tax<br />
status for the department and the corresponding tax rate(s).<br />
For details of the tax systems, refer to “Computation of VAT (Value Added Tax)/tax” section on page 42. To<br />
change the tax system, please refer to “Other programming” of “Various Function Selection Programming 1”<br />
section (Job code 69) on page 74.<br />
Tax rate programming<br />
The percent rate specified here is used for tax calculation on taxable subtotals.<br />
Tax number (1 to 4)<br />
s 9 @<br />
@<br />
To program 0.0000<br />
* Sign and tax rate<br />
*Sign and tax rate: X YYY.YYYY<br />
Tax rate=0.0000 to 100.0000<br />
Sign -/+ = 1/0<br />
For entering tax number, sign and tax rate and lowest taxable amount, the register displays guidance<br />
messages, "ENTER TAX NO.", "ENTER TAX RATE", and "ENTER LOWER TAX" respectively.<br />
Key operation example<br />
s 9 @<br />
2 @<br />
7 @<br />
s<br />
A<br />
When the lowest taxable amount is zero<br />
Lowest taxable amount<br />
@ (0.01 to 999.99) s A<br />
Operator display<br />
TAX RATE PROG.<br />
9<br />
ENTER TAX NO.<br />
0.00<br />
ENTER TAX RATE<br />
2 0.00<br />
ENTER LOWER TAX<br />
2 0.00<br />
ENTER TAX NO.<br />
0.00<br />
PGM<br />
0.00<br />
To program other kind of tax<br />
Print<br />
15
16<br />
• The lowest taxable amount is valid only when you select add on tax system. If you select VAT<br />
(Value added system), it is ignored.<br />
• If you make an incorrect entry before pressing the third @ key in programming a tax rate, cancel<br />
it with the l key.<br />
• You do not need to enter the trailing zeros of the tax rate (after the decimal point), but you do<br />
need to enter the decimal for fractions.<br />
• If you select VAT system, the sign which you program is ignored.<br />
To delete a tax rate, use the following sequence:<br />
Tax number (1 to 4)<br />
s 9 @<br />
@ v A<br />
6 Department Programming<br />
Merchandise can be classified into a maximum of 99 departments. Items sold using the department keys can<br />
later be printed on a report shown as the quantities sold and sales amounts classified by department. The data<br />
is useful for making purchasing decisions and other store operations.<br />
Each department also needs to belong to one of the following groups. Plus or minus attribute of a department is<br />
determined by which group it belongs to.<br />
Group no.<br />
Groups 1 to 9 : Positive (+) normal dept.<br />
Group 10 : Negative (-) normal dept.<br />
Group 11 : Positive (+) hash dept.*<br />
Group 12 : Negative (-) hash dept.*<br />
*Hash department<br />
Hash departments allow you to separate special sales from ordinary merchandise sales. The sales of hash<br />
departments do not affect the sales grand totals.<br />
Default setting for the VAT/tax statuses and Group no. are listed below.<br />
Dept. code: VAT/tax status: Group no.<br />
Dept. 1-10 VAT 1 1<br />
Dept. 11-20 VAT 2 1<br />
Dept. 21 VAT 1 10<br />
Dept. 22-99 VAT 1 1<br />
• To keep current setting on each programming, press the s key when the corresponding<br />
guidance message is firstly displayed.<br />
• When pressing the A key in the middle of procedure, the programming will terminate and the<br />
data you entered before the press of A is saved.<br />
• When pressing the l key twice in the middle of procedure, the programming will terminate and<br />
the data you entered before pressing the l key twice is NOT saved.<br />
• When pressing the PLU, - , % , & , V , r , R , X , Y , c or b key in the middle of<br />
procedure except while entering texts or prices, the programming will move to the pressed key<br />
programming.
1. Specify the department code.<br />
(1) For dept.1 through 20, press the department key.<br />
For dept.21 through 40, press the D key, and then<br />
press the department key.<br />
Or enter dept. code using numeric key, and then<br />
press the d key.<br />
On the upper line of the display, immediately after<br />
displaying the current text data, guidance message<br />
for the next step will be displayed.<br />
On the lower line of the display, the corresponding<br />
dept. key code you entered will be displayed.<br />
2. Text programming (Press s to skip. / Press A to terminate.)<br />
(1) Press : key to enter text programming.<br />
On the upper line of the display, immediately after<br />
displaying guidance message, the current text data<br />
will be displayed.<br />
On the lower line of the display, the character code<br />
corresponding to the first character of the text data<br />
will be displayed.<br />
(2) Enter an item name.<br />
A maximum of 16 characters can be entered.<br />
Please refer to "Guidance for text programming" on<br />
page 13 for entering the item name.<br />
When you start entering a character, the current<br />
text data will be overwritten by new data.<br />
Use the S and B keys to delete unnecessary<br />
text data.<br />
Pressing the P and @ key moves the cursor to<br />
the right and left respectively.<br />
(3) Press the s key to register the item name.<br />
On the upper line of the display, guidance message<br />
for the next step will be displayed.<br />
On the lower line of the display, the current setting<br />
will be displayed.<br />
Part1 QUICK START GUIDE Part2 Part3<br />
Key operation<br />
§<br />
:<br />
BOOK SSS<br />
s<br />
Operator display<br />
DEPT.06<br />
06 0.00<br />
ENTER[00]KEY<br />
06 0.00<br />
ENTER TEXT<br />
06 0.00<br />
DEPT.06<br />
06 068<br />
BOOK _<br />
06 032<br />
PRICE<br />
06 0.00<br />
17
18<br />
3. Unit price programming (Press s to skip. / Press A to terminate.)<br />
(1) Enter a unit price using numeric keys.<br />
300<br />
A maximum of 6 digits can be set.<br />
Default setting is 0.<br />
(2) Press the s key to register the unit price.<br />
On the upper line of the display, guidance message<br />
for the next step will be displayed.<br />
On the lower line of the display, the current setting<br />
will be displayed.<br />
4. Entry type programming (Press s to skip. / Press A to terminate.)<br />
(1) Press : key 3 times to display "PRESET".<br />
Each time : key is pressed, the display shows<br />
"INHIBITED", "OPEN", "PRESET" and "OPEN &<br />
PRESET" in this order.<br />
Default setting is "OPEN".<br />
When the unit price is changed from the default<br />
setting ("0") in step 3, "OPEN & PRESET" will be<br />
displayed first.<br />
However, when the default setting is not changed,<br />
"OPEN" will be displayed first.<br />
(2) Press the s key to register the entry type.<br />
On the upper line of the display, guidance message<br />
for the next step will be displayed.<br />
On the lower line of the display, the current setting<br />
will be displayed.<br />
5. VAT/tax 1 status programming (Press s to skip. / Press A to terminate.)<br />
(1) Go to (2) when the VAT/tax 1 status does not need<br />
to be changed from "TAX1 YES". Otherwise, press<br />
: key to display "TAX1 NO".<br />
Each time : key is pressed, the display shows<br />
"TAX1 NO" and "TAX1 YES" alternately.<br />
Choose "YES" for taxable and "NO" for non-taxable.<br />
Default setting is "YES" for dept. code 1 to 10 and<br />
21 to 99, and "NO" for dept. code 11 to 20.<br />
When any entry of a taxable department is made in<br />
a transaction, tax is automatically computed<br />
according to the associated tax rate as soon as the<br />
transaction is completed.<br />
s<br />
:::<br />
s<br />
PRICE<br />
06 300<br />
DEPT ENTRY TYPE<br />
06 OPEN & PRESET<br />
DEPT ENTRY TYPE<br />
06 PRESET<br />
SELECT OF TAX1<br />
TAX1 YES
(2) Press the s key to register the setting.<br />
On the upper line of the display, guidance message<br />
for the next step will be displayed.<br />
On the lower line of the display, the current setting<br />
will be displayed.<br />
Part1 QUICK START GUIDE Part2 Part3<br />
6. VAT/tax2 status programming (Press s to skip. / Press A to terminate.)<br />
(1) Go to (2) when the VAT/tax 2 status does not need<br />
to be changed from "TAX2 NO". Otherwise, press<br />
: key to display "TAX2 YES".<br />
Each time : key is pressed, the display shows<br />
"TAX2 YES" and "TAX2 NO" alternately.<br />
Default setting is "NO" for dept. code 1 to 10 and 21<br />
to 99, and "YES" for dept. code 11 to 20.<br />
(2) Press the s key to register the setting.<br />
On the upper line of the display, guidance message<br />
for the next step will be displayed.<br />
On the lower line of the display, the current setting<br />
will be displayed.<br />
7. VAT/tax3 status programming (Press s to skip. / Press A to terminate.)<br />
(1) Go to (2) when the VAT/tax 3 status does not need<br />
to be changed from "TAX3 NO". Otherwise, press<br />
: key to display "TAX3 YES".<br />
Each time : key is pressed, the display shows<br />
"TAX3 YES" and "TAX3 NO" alternately.<br />
Default setting is "NO".<br />
(2) Press the s key to register the setting.<br />
On the upper line of the display, guidance message<br />
for the next step will be displayed.<br />
On the lower line of the display, the current setting<br />
will be displayed.<br />
8. VAT/tax4 status programming (Press s to skip. / Press A to terminate.)<br />
(1) Go to (2) when the VAT/tax 4 status does not need<br />
to be changed from "TAX4 NO". Otherwise, press<br />
: key to display "TAX4 YES".<br />
Each time : key is pressed, the display shows<br />
"TAX4 YES" and "TAX4 NO" alternately.<br />
Default setting is "NO".<br />
(2) Press the s key to register the setting.<br />
On the upper line of the display, guidance message<br />
for the next step will be displayed.<br />
On the lower line of the display, the current setting<br />
will be displayed.<br />
s<br />
s<br />
s<br />
s<br />
SELECT OF TAX2<br />
TAX2 NO<br />
SELECT OF TAX3<br />
TAX3 NO<br />
SELECT OF TAX4<br />
TAX4 NO<br />
REGIST. TYPE<br />
06 NORMAL<br />
19
20<br />
9. Registration type programming (Press s to skip. / Press A to terminate.)<br />
(1) Go to (2) when the registration type does not need<br />
to be changed from "NORMAL". Otherwise, press<br />
: key to display "SICS".<br />
Each time : key is pressed, the display shows<br />
"SICS" and "NORMAL" alternately.<br />
Choose "SICS" for single item cash sale and<br />
"NORMAL" for normal sale.<br />
Default setting is "NORMAL".<br />
If an entry of a department programmed for SICS is<br />
made first, the sale will be finalized as a cash sale<br />
as soon as the department key is pressed. If the<br />
entry is made after entering a department not<br />
programmed for SICS, the sale will not be finalized<br />
until the A key is pressed.<br />
(2) Press the s key to register the setting.<br />
On the upper line of the display, guidance message<br />
for the next step will be displayed.<br />
On the lower line of the display, the current setting<br />
will be displayed.<br />
10. Group No. programming (Press s to skip. / Press A to terminate.)<br />
(1) Enter a group no. for the department using numeric<br />
keys.<br />
Choose a group from groups 1 to 9 for normal<br />
positive department, group 10 for negative normal<br />
department, group 11 for positive hash department,<br />
and group 12 for negative hash department.<br />
Default setting is group 1 for dept. code 1 to 20 and<br />
22 to 99, and group 10 for dept. code 21.<br />
(2) Press the s key to register the setting.<br />
On the upper line of the display, guidance message<br />
for the next step will be displayed.<br />
On the lower line of the display, the current setting<br />
will be displayed.<br />
11. Entry digit limit programming (Press s to skip. / Press A to terminate.)<br />
(1) Enter entry digit limit using numeric key.<br />
The entry digit limit can be set up to 8.<br />
Default setting is 8.<br />
s<br />
1<br />
s<br />
7<br />
GROUP NO.<br />
06 01<br />
GROUP NO.<br />
06 1<br />
LIMIT DIGITS<br />
06 8<br />
LIMIT DIGITS<br />
06 7
(2) Press the s key to register the setting.<br />
On the upper line of the display, immediately after<br />
displaying the current text data for the next<br />
department, guidance message will be displayed.<br />
On the lower line of the display, the corresponding<br />
department code will be displayed.<br />
The dept. code is automatically incremented for a<br />
new department key programming, and ready for<br />
text programming for the incremented dept. code.<br />
Part1 QUICK START GUIDE Part2 Part3<br />
To program for the incremented dept. code, return to the step 2.<br />
When you want to program for other than incremented dept. code, return to the step 1.<br />
12. Terminate programming<br />
(1) Press the A key to terminate department code<br />
programming.<br />
Group no.<br />
Item name<br />
s<br />
A<br />
Print<br />
Tax status Unit price<br />
Item: Selection: Print:<br />
A SICS/Normal Normal* 0<br />
SICS 1<br />
B Entry digit limit 0-8(default:8)<br />
C Type of unit price entry Open and preset 3<br />
Preset only 2<br />
Open only* 1<br />
Inhibit department key 0<br />
DEPT.07<br />
07 0.00<br />
ENTER[00]KEY<br />
07 0.00<br />
PGM<br />
0.00<br />
From left, ABC<br />
21
22<br />
7 PLU (Price Look-Up) and Subdepartment Programming<br />
The PLU function allows speedy key entries whereby a price is automatically called up when a code is entered.<br />
The subdepartment is a kind of “open PLU”, which requires you to enter a price after the PLU code is entered. A<br />
maximum of 1800 PLU/subdepartment settings are possible. Each one belongs to a department and acquires<br />
the department’s parameters (tax status, SICS and entry digit limit).<br />
The cash register is preprogrammed so all 1800 codes are assigned as positive PLUs associated with<br />
department 1 and preset unit price “0”.<br />
• To keep current setting on each programming, press the s key when the corresponding<br />
guidance message is firstly displayed.<br />
• When pressing the A key in the middle of procedure, the programming will terminate and the<br />
data you entered before the press of A is saved.<br />
• When pressing the l key twice in the middle of procedure, the programming will terminate and<br />
the data you entered before pressing the l key twice is NOT saved.<br />
• When pressing the department, - , % , & , V , r , R , X , Y , c or b key in the middle<br />
of procedure except while entering texts or prices, the programming will move to the pressed key<br />
programming.<br />
1. Specify the PLU code.<br />
(1) Enter PLU code using numeric key, and then press<br />
the p key.<br />
On the upper line of the display, immediately after<br />
displaying the current text data, guidance message<br />
for the next step will be displayed.<br />
On the lower line of the display, the corresponding<br />
PLU code you entered will be displayed.<br />
2. Text programming (Press s to skip. / Press A to terminate.)<br />
(1) Press : key to enter text programming.<br />
On the upper line of the display, immediately after<br />
displaying guidance message, the current text data<br />
will be displayed.<br />
On the lower line of the display, the character code<br />
corresponding to the first character of the text data<br />
will be displayed.<br />
(2) Enter an item name.<br />
A maximum of 16 characters can be entered.<br />
Please refer to “Guidance for text programming” on<br />
page 13 for entering the item name.<br />
When you start entering a character, the current<br />
text data will be overwritten by new data.<br />
Use the S and B keys to delete unnecessary<br />
text data.<br />
Pressing the P and @ key moves the cursor to<br />
the right and left respectively.<br />
Key operation<br />
71 p<br />
:<br />
MELON SSS<br />
Operator display<br />
PLU.0071<br />
0071 0.00<br />
ENTER[00]KEY<br />
0071 0.00<br />
ENTER TEXT<br />
0071 0.00<br />
PLU.0071<br />
0071 080<br />
MELON _<br />
0071 032
(3) Press the s key to register the item name.<br />
On the upper line of the display, guidance message<br />
for the next step will be displayed.<br />
On the lower line of the display, the current setting<br />
will be displayed.<br />
Part1 QUICK START GUIDE Part2 Part3<br />
3. Unit price programming (Press s to skip. / Press A to terminate.)<br />
(1) Enter a unit price using numeric keys.<br />
A maximum of 6 digits can be set.<br />
For a subdepartment, set the limit amount of unit<br />
price entry.<br />
Default setting is 0.<br />
(2) Press the s key to register the unit price.<br />
On the upper line of the display, guidance message<br />
for the next step will be displayed.<br />
On the lower line of the display, the current setting will<br />
be displayed.<br />
4. Associated dept. programming (Press s to skip. / Press A to terminate.)<br />
(1) Enter an associated dept. code using numeric key.<br />
Default setting is dept. 1.<br />
For deleting PLU, enter 0 instead of an associated<br />
dept. code.<br />
(2) Press the s key to register the associated<br />
dept. code.<br />
On the upper line of the display, guidance message<br />
for the next step will be displayed.<br />
On the lower line of the display, the current setting<br />
will be displayed.<br />
5. Sign programming (Press s to skip. / Press A to terminate.)<br />
(1) Go to (2) when the sign does not need to be<br />
changed from "(+)". Otherwise, press : key to<br />
display "(-)".<br />
Each time : key is pressed, the display shows "(-<br />
)" and "(+)" alternately.<br />
Choose "(+)" for positive entry and "(-)" for negative<br />
entry.<br />
Default setting is "(+)" for all 1800 PLU codes.<br />
(2) Press the skey to register setting.<br />
On the upper line of the display, guidance message<br />
for the next setting will be displayed.<br />
On the lower line of the display, the current setting<br />
will be displayed.<br />
s<br />
500<br />
s<br />
1<br />
s<br />
s<br />
PRICE<br />
0071 0.00<br />
PRICE<br />
0071 500<br />
ENTER DEPT#<br />
0071 01<br />
ENTER DEPT#<br />
0071 1<br />
SIGN<br />
0071 (+)<br />
ENTER PLU TYPE<br />
0071 PLU<br />
23
24<br />
6. Function programming (Press s to skip. / Press A to terminate.)<br />
(1) Go to (2) when the function does not need to be<br />
changed from "PLU". Otherwise, press : key to<br />
display "SUBDEPT".<br />
Each time : key is pressed, the display shows<br />
"SUBDEPT" and "PLU" alternately.<br />
Choose "PLU" for using the PLU code as PLU and<br />
"SUBDEPT" for using the PLU code as<br />
subdepartment.<br />
Default setting is "PLU".<br />
(2) Press the s key to register the setting.<br />
On the upper line of the display, immediately after<br />
displaying the current text data for the next PLU,<br />
guidance message will be displayed.<br />
On the lower line of the display, the corresponding<br />
PLU code will be displayed.<br />
The PLU code is automatically incremented for a<br />
new PLU programming, and ready for text<br />
programming for the incremented PLU code.<br />
To program for the incremented PLU code, return to the step 2.<br />
When you want to program for other than incremented PLU code, return to the step 1.<br />
7. Terminate programming<br />
(1) Press the A key to terminate PLU programming.<br />
PLU code<br />
Item name<br />
s<br />
A<br />
PLU/subdept. 1/0<br />
Unit price<br />
Associated dept.<br />
Sign<br />
• In case negative is programmed for a PLU/subdepartment whose associated department is positive<br />
department, the PLU/subdepartment serves as a coupon PLU/subdepartment, and split price entry is<br />
disallowed for the PLU/subdepartment. It is invalid to program positive for a PLU/subdepartment whose<br />
associated department is negative.<br />
Print<br />
PLU.0072<br />
0072 0.00<br />
ENTER[00]KEY<br />
0072 0.00<br />
PGM<br />
0.00
8 Text Programming<br />
Part1 QUICK START GUIDE Part2 Part3<br />
Please refer to "Guidance for text programming" on page 13 as for how to entering characters.<br />
When you press an appropriate number key (job code number) and press the P key for text entry just after you<br />
start programming with the s key, the cash register will automatically be ready for text entry.<br />
Then a little after displaying guidance message indicating what programming you are in, the register may ask you to<br />
enter the first parameter. Referring to the corresponding “Procedure”, enter a parameter and start character entries.<br />
Clerk names (12 digits)<br />
s 5 P<br />
Key operation example<br />
s 5 P CLERK NAME PROG.<br />
5<br />
ENTER CLERK NO.<br />
0.00<br />
1 @ CLERK 01<br />
01 067<br />
DAVID SSS* DAVID _<br />
01 032<br />
CLERK NAME PROG.<br />
0.00<br />
ENTER CLERK NO.<br />
0.00<br />
PGM<br />
0.00<br />
*1 For clerk no. 1 to 4, the names "CLERK 01" to "CLERK 04", are automatically assigned respectively by<br />
default. You also need to assign clerk codes for each clerk. By default, clerk codes 1 to 4 are programmed for<br />
clerk no. 1 to 4. For clerk no. 5 through 25, refer to "Clerk code assignment" on page 76.<br />
*2 Use the S and B keys to delete unnecessary text data as necessary.<br />
Logo messages (6 lines and 30 digits for each line)<br />
2<br />
s<br />
A<br />
The register can print programmed messages on every receipt. On the standard model, a 6-line logo message is<br />
printed on the receipt. If you want to print in other logo message format, please change the format. For the<br />
programming details, refer to page 76. The options are listed below:<br />
s 4 P<br />
*1<br />
Clerk no.<br />
(1-25)<br />
*Line number<br />
(1-6)<br />
@<br />
To program another clerk<br />
Operator display<br />
@<br />
To keep current setting<br />
Character keys<br />
(max. 12 digits)<br />
To keep the current setting<br />
s<br />
Character keys<br />
(max. 30 digits) s A<br />
To program another line<br />
* “Header 3-line message” type: 1 to 3<br />
“Footer 3-line message” type : 4 to 6<br />
“Header 6-line message” type: 1 to 6<br />
“Header 3-line and footer 3-line message” type: 1 to 6 (1 to 3 as header, 4 to 6 as footer)<br />
Print<br />
A<br />
25
26<br />
Logo message print format (6 types)<br />
Graphic logo<br />
Header 1st line<br />
Header 2nd line Graphic logo Graphic logo<br />
Header 3rd line<br />
To print the logo message “THANK YOU” using double sized characters and centering on the third line.<br />
Key operation example<br />
s 4 P<br />
3 @<br />
SSSSSS<br />
W<br />
THANK S YOU<br />
W<br />
SSSSSS<br />
Header 3-line message Footer 3-line<br />
message<br />
s<br />
A<br />
Header 1st line<br />
Header 2nd line<br />
Header 3rd line<br />
Operator display<br />
Footer 4th line<br />
Footer 5th line<br />
Footer 6th line<br />
LOGO TEXT PROG.<br />
4<br />
ENTER LINE NO.<br />
0.00<br />
_ =X=E=-=A<br />
3 032<br />
_ =X=E=-=A<br />
3 032<br />
_ =X=E=-=A<br />
3 W 032<br />
H=A=N=K= =Y=O=U_<br />
3 W 032<br />
H=A=N=K= =Y=O=U_<br />
3 032<br />
K= =Y=O=U _<br />
3<br />
LOGO TEXT PROG.<br />
0.00<br />
ENTER LINE NO.<br />
0.00<br />
PGM<br />
0.00<br />
Header 1st line<br />
Header 2nd line<br />
Header 3rd line<br />
Header 4th line<br />
Header 5th line<br />
Header 6th line<br />
Header 6-line<br />
message<br />
Print<br />
Header 1st line<br />
Header 2nd line<br />
Header 3rd line<br />
Footer 4th line<br />
Footer 5th line<br />
Footer 6th line<br />
Header 3-line<br />
message and<br />
footer 3-line<br />
messages<br />
(Default setting)<br />
• A 6-line logo message is preprogrammed when shipped. Please start entering from the first line<br />
when you first program a logo message.<br />
• The preprogrammed messages are displayed for each line in the logo message programming. In<br />
the example above, "<strong>XE</strong>-<strong>A303</strong>" is displayed. Please overwrite the preprogrammed message<br />
entering your desired one when programming.
9 Programming Other Necessary Items<br />
Part1 QUICK START GUIDE Part2 Part3<br />
Decimal point position (tab) setting for domestic currency<br />
By default, “2” is selected. When your country has a different tab setting, you must change the setting. Please<br />
refer to "Other programming" of “Various Function Selection Programming 1” (Job code 61) on page 70.<br />
Rounding system<br />
When your country has a special rounding system, such as Australia, Switzerland, Norway, Sweden, Denmark<br />
and South Africa, you must change the setting to suit your country. For the setting for Australia, Switzerland,<br />
Norway and South Africa, please refer to “Other programming” of “Various Function Selection Programming 1”<br />
(Job code 67) on page 72. For the setting for Sweden and Denmark, please refer to “Other programming” of<br />
“Various Function Selection Programming 1” (Job code 69) on page 74.<br />
27
28<br />
STEP4<br />
BASIC SALES ENTRY<br />
1 Basic Sales Entry Example<br />
Listed below is a basic sales entry example when selling items by cash. For operation details, please refer to<br />
"Additional Information for BASIC SALES ENTRY" on page 36.<br />
Mode switch setting<br />
1. Turn the mode switch to the REG position.<br />
Clerk assignment<br />
2. Enter your clerk code. (For example, clerk code is 1. Press the 1 and L key<br />
in this order.) The clerk codes 1 to 4 can be assigned by default.<br />
Item entries<br />
3. Enter the price for the first department item. (For example, for 15.00, enter 15: , and press the<br />
appropriate department key.)<br />
For department 21 to department 40, press the D key first before pressing the department key.<br />
For department 41 and above, enter the department code using numeric keys and press the d key,<br />
then enter the price and press the d key again.<br />
4. Repeat step 3 for all department items.<br />
Displaying subtotals<br />
5. Press the s key to display the amount due.<br />
Finalizing the transaction<br />
6. Enter the amount received from the customer. (You can omit this step if the amount tendered is the same as the subtotal.)<br />
7. Press the A key, and the change due is displayed and the drawer is opened.<br />
8. Tear off the receipt and give it to the customer with his or her change.<br />
9. Close the drawer.<br />
Key operation example<br />
Clerk<br />
assignment<br />
Item<br />
entries<br />
Displaying<br />
subtotal<br />
Amount<br />
tendered<br />
Finalizing<br />
the transaction<br />
1 L<br />
1500 ¡<br />
2300 <br />
s<br />
4000<br />
A<br />
Operator display<br />
DAVID *01*<br />
-01-<br />
DEPT.01 *01*<br />
15.00<br />
DEPT.02 *01*<br />
23.00<br />
SUBTOTAL *01*<br />
38.00<br />
(In this example, tax system is set to automatic<br />
VAT 1 and the tax rate is set to 16.00%.)<br />
*01*<br />
4000<br />
CHANGE *01*<br />
2.00<br />
Receipt print<br />
REG<br />
OPX/Z MGR<br />
PGM<br />
Logo message (Header)<br />
Date/Time/Clerk code<br />
Register number/Consecutive<br />
number/Clerk name<br />
Items<br />
Price<br />
Not printed when<br />
non-taxable items<br />
only are sold.<br />
Total quantity<br />
Total amount<br />
Cash tendering/amount<br />
received<br />
Change<br />
Logo message (Footer)<br />
X1/Z1<br />
X2/Z2
2 PLU Entry<br />
Enter a PLU code using numeric keys and press the p key.<br />
Key operation example<br />
Item<br />
entries<br />
1 p<br />
71 p<br />
141 p<br />
A<br />
Operator display<br />
PLU.0001 *01*<br />
1.50<br />
PLU.0071 *01*<br />
15.00<br />
PLU.0141 *01*<br />
36.20<br />
CASH *01*<br />
52.70<br />
Part1 QUICK START GUIDE Part2 Part3<br />
Receipt print<br />
29
30<br />
STEP5<br />
CORRECTION<br />
You can correct entries you mistakenly made in several ways, such as using the void v key, or making entires<br />
in the void mode. This section explains how to make such entries.<br />
The back light of the operator display turns red when you make the following entries:<br />
• Void entries<br />
• Subtotal void entries<br />
• Refund entries<br />
• Entries in the void mode<br />
• The second press of E for error escape<br />
1 Cancellation of the Numeric Entry<br />
If you make an incorrect numeric entry, you can clear the entry by pressing the l key only before pressing a<br />
department key, PLU/subdepartment key, the d key, the % key, the & key, the - key or the f key.<br />
In this operation, the back light of the operator display does not turn red.<br />
2 Correction of the Last Entry (direct void)<br />
If you make an incorrect entry relating to a department, PLU/subdepartment, percentage (% and &), discount<br />
(-) or refund, you can void this entry by pressing the v key immediately after the incorrect entry.<br />
Key operation example<br />
1250 §<br />
v<br />
2 p<br />
v<br />
600 •<br />
%<br />
v<br />
1 p<br />
28 -<br />
v<br />
250 f§<br />
v<br />
A<br />
Operator display<br />
DEPT.06 *01*<br />
12.50<br />
DEPT.06 *01*<br />
-12.50<br />
PLU.0002 *01*<br />
1.50<br />
PLU.0002 *01*<br />
-1.50<br />
DEPT.08 *01*<br />
6.00<br />
%1 *01*<br />
-0.90<br />
%1 *01*<br />
0.90<br />
PLU.0001 *01*<br />
3.28<br />
(-) *01*<br />
-0.28<br />
(-) *01*<br />
0.28<br />
DEPT.06 *01*<br />
-2.50<br />
DEPT.06 *01*<br />
2.50<br />
CASH *01*<br />
9.28<br />
Receipt print
Part1 QUICK START GUIDE Part2 Part3<br />
3 Correction of the Next-to-last or Earlier Entry (indirect void)<br />
You can void any incorrect department entry, PLU/subdepartment entry or item refund entry made during a<br />
transaction if you find it before finalizing the transaction (e.g. pressing the A key). This function is<br />
applicable to department, PLU/subdepartment and refund entries only.<br />
Press the v key just before you press a department key, d key or p key. For the refund indirect void,<br />
press the v key after you press the f key.<br />
Key operation example<br />
Correction<br />
of a<br />
department<br />
entry<br />
Correction<br />
of a PLU entry<br />
Correction of<br />
a refund entry<br />
1310 §<br />
1755 <br />
10 p<br />
12 p<br />
250 f §<br />
825 <br />
1310 v §<br />
12 v p<br />
250 f v §<br />
A<br />
Operator display<br />
DEPT.06 *01*<br />
13.10<br />
DEPT.07 *01*<br />
17.55<br />
PLU.0010 *01*<br />
7.15<br />
PLU.0012 *01*<br />
3.60<br />
DEPT.06 *01*<br />
-2.50<br />
DEPT.07 *01*<br />
8.25<br />
DEPT.06 *01*<br />
-13.10<br />
PLU.0012 *01*<br />
-3.60<br />
DEPT.06 *01*<br />
2.50<br />
CASH *01*<br />
32.95<br />
Receipt print<br />
31
32<br />
4 Subtotal Void<br />
You can void an entire transaction. Once subtotal void is executed, the transaction is aborted and the register<br />
issues a receipt. This function does not work when more than 30 items have been entered.<br />
Key operation example<br />
Subtotal void<br />
1310 <br />
<br />
1755 §<br />
10 p<br />
35 p<br />
s<br />
v<br />
s<br />
Operator display<br />
DEPT.02 *01*<br />
13.10<br />
DEPT.02 *01*<br />
2 13.10<br />
DEPT.06 *01*<br />
17.55<br />
PLU.0010 *01*<br />
7.15<br />
PLU.0035 *01*<br />
10.00<br />
SUBTOTAL *01*<br />
60.90<br />
*01*<br />
0.00<br />
***TOTAL *01*<br />
0.00<br />
Any errors found after the entry of a transaction has been completed or during an amount tendered entry cannot<br />
be voided. These errors must be corrected by the manager.<br />
The following steps should be taken:<br />
1. If making the amount tendered entry, finalize the transaction.<br />
2. Make correct entries from the beginning.<br />
3. Hand the incorrect receipt to the manager for its cancellation.<br />
Receipt print<br />
5 Correction of Incorrect Entries not Handled by the Direct or Indirect Void Function
STEP6<br />
Part1 QUICK START GUIDE Part2 Part3<br />
FULL SALES REPORT (Z REPORT)<br />
For reading and resetting the sales data, use the resetting function (Z). Resetting prints all sales information and<br />
clears the entire memory except for the GT1 through GT3, Training GT, reset count, and consecutive number.<br />
For more information about resetting (Z) of sales totals, refer to "READING (X) AND RESETTING (Z) OF SALES<br />
TOTALS" on page 84.<br />
Full sales report<br />
Put the manager key in the mode switch and turn it to the X1/Z1 position.<br />
*2<br />
Key operation<br />
Sample report<br />
PA<br />
Mode title*1<br />
Reset counter<br />
Net grand total (GT2-GT3)<br />
Grand total of plus<br />
registration<br />
Grand total of<br />
minus registration<br />
Grand total of training<br />
mode registration<br />
Dept. code<br />
Sales q’ty<br />
Sales amount<br />
Percentage of sales amount<br />
of group total<br />
Group1 total<br />
“+” dept. counter<br />
and total<br />
“–” dept. counter<br />
and total<br />
Hash “+” dept. counter<br />
and total<br />
Hash “–” dept. counter<br />
and total<br />
Operator display<br />
X1Z1<br />
0.00<br />
(Continued to the next page)<br />
REG<br />
OPX/Z MGR<br />
PGM<br />
Subtotal counter<br />
and total<br />
Subtotal percent<br />
counter and total<br />
Net sales total<br />
Taxable 1 total<br />
VAT 1 total<br />
Tax total<br />
Net total without tax<br />
Item counter and total<br />
Item percent<br />
counter and total<br />
*3<br />
*4<br />
Coupon PLU counter and total<br />
Refund counter and total<br />
X1/Z1<br />
X2/Z2<br />
REG mode void counter<br />
and total<br />
Void mode transaction<br />
counter and total<br />
Manager item void counter<br />
and total<br />
Subtotal void counter<br />
and total<br />
Hash void counter and total<br />
Hash refund counter and total<br />
33
34<br />
No-sales counter<br />
Received on account<br />
counter and total<br />
Paid out counter and total<br />
Cash cheque counter and total<br />
Customer counter<br />
Paid total<br />
Paid total average per<br />
customer<br />
Cash counter and total<br />
Cheque1 sales counter<br />
and total<br />
Credit1 sale and tendering<br />
counter and total<br />
Exchange counter and<br />
total (in preset rate entry)<br />
Domestic currency<br />
Exchange manual rate entry<br />
counter and total<br />
Exchange check (in preset<br />
rate entry)<br />
Exchange credit (in preset<br />
rate entry)<br />
Cash in drawer<br />
Cheque in drawer<br />
Cash + cheque in drawer<br />
Change total for cheque<br />
tendering<br />
*1: When you take X1 report, “X1” is printed.<br />
*2: Printed in the Z1 report only.<br />
*3: When “Memory of difference due to rounding” is set<br />
to “yes” the following is displayed here. For<br />
changing the setting, refer to "Other programming"<br />
(job code 67).<br />
*4: When manual tax 1-4 system or auto tax 1-4<br />
system is selected, the following is displayed here.<br />
For changing the setting, refer to "Other<br />
programming" (job code 69).<br />
Sales total including tax
Periodic consolidation<br />
Put the manager key in the mode switch and turn it to the X2/Z2 position.<br />
• Full sales report<br />
• Daily net report<br />
Key operation<br />
Sample report<br />
Key operation<br />
Sample report<br />
PA<br />
Ps<br />
Mode title*1<br />
Reset counter of daily total<br />
Reset counter of periodic<br />
consolidation<br />
Grand total<br />
Mode title*<br />
Date<br />
Customer counter<br />
Sales total<br />
Customer total<br />
Net amount total<br />
Operator display<br />
Operator display<br />
*: When you take X report, “X2” is printed instead of “Z2”.<br />
*2<br />
Part1 QUICK START GUIDE Part2 Part3<br />
X2Z2<br />
0.00<br />
The subsequent printouts are the same in format<br />
as in the X1/Z1 full sales report.<br />
*1: When you take X2 report, “X2” is printed.<br />
*2: Printed in the Z2 report only<br />
X2Z2<br />
0.00<br />
REG<br />
OPX/Z MGR<br />
PGM<br />
X1/Z1<br />
X2/Z2<br />
35
36<br />
Part2 FOR THE OPERATOR<br />
OTHER BASIC SALES ENTRIES<br />
1<br />
Clerk assignment<br />
Prior to any item entries, clerks must enter their clerk codes into the register. However, the code entry may not<br />
be necessary when the same clerk handles the consecutive transactions. The clerk codes 1 to 4 can be<br />
assigned by default.<br />
Receipt ON/OFF function<br />
When you use the printer to issue receipts, you can disable receipt printing in the REG mode to save paper<br />
using the receipt ON/OFF function. To disable receipt printing, press the R key in the OP X/Z position. This<br />
key toggles the receipt printing status ON and OFF.<br />
The register will print reports regardless of the receipt state, so the paper roll must be installed.<br />
To issue a receipt when receipt ON/OFF function is set to OFF:<br />
If your customer wants a receipt after you finalized a transaction with the receipt ON/OFF function being OFF<br />
status, press the R key. This will produce a receipt. However, if more than 30 items were entered, the<br />
receipt will be issued in a summary receipt.<br />
Copy receipt<br />
You can print a copy receipt by pressing the R key when the receipt ON/OFF function is in the “ON” status.<br />
To realize this function, you must enable the function. Please refer to page 71 (Job code 63).<br />
Power Save Mode<br />
The register will enter into power save mode when no entries are performed based on the pre-programmed time<br />
limit (by default, 30 minutes).<br />
When the register goes to the power save mode, all display lights will turn off except the decimal point at the<br />
leftmost position. The register will return to the normal operation mode when any key is pressed or a mode is<br />
changed with the mode key. Please note when the register is recovered by a key entry, its key entry is invalid.<br />
After the recovery, start the key entry from the beginning.<br />
2<br />
Additional Information for BASIC SALES ENTRY<br />
■ Sign-on (in REG, MGR, mode)<br />
To display the signed-on clerk code<br />
Clerk code<br />
Error Warning<br />
In the following examples, your register will go into an error state accompanied with a warning beep and a<br />
corresponding error message. Clear the error state by pressing the l key and take the proper action.<br />
Please refer to the error message table on page 98.<br />
• Enter over a 32-digit number (entry limit overflow): Cancel the entry and re-enter the correct number.<br />
• An error in key operation: Clear the error and continue operation.<br />
• An entry beyond a programmed amount entry limit: Check to see if the entered amount is correct. If it is<br />
correct, it can be rung up in the MGR mode. Contact your manager.<br />
• An including-tax subtotal exceeds eight digits: Delete the subtotal by pressing the l key and press the<br />
key to finalize the transaction.<br />
A , X , Y , c or b<br />
L<br />
■ Sign-off (in REG, MGR, mode)<br />
L<br />
L
Part1<br />
Part2 FOR THE OPERATOR Part3<br />
Error escape function<br />
To quit a transaction due to an error or an unforeseen event, use the error escape function as shown below:<br />
After the second E key press, the back light of the operator display turns red. The transaction is voided<br />
(treated as a subtotal void) and the receipt is issued by this function. If you have already entered a tendered<br />
amount, the operation is finalized as a cash sale.<br />
3<br />
Single item entries<br />
1. Department entries<br />
The cash register provides a maximum of 99 departments for a merchandise classification. Group attributes,<br />
such as taxable status, are applied to items when they are entered to the departments.<br />
• When using the department keys (for department 1 to 40)<br />
For department 1 to 20, enter a unit price and press a department key. If you use a programmed unit price,<br />
press a department key only.<br />
For department 21 to 40, enter a unit price, press the D key and press a department key. If you use a<br />
programmed unit price, press the D key and press a department key.<br />
* 1 Less than the programmed upper limit amounts<br />
When zero is entered, only the sales quantity is<br />
added.<br />
* 2 For the departments 21 through 40, press the<br />
D key.<br />
Please note if you press the same key after using the D key, it acts as a repeat entry. For<br />
example, when you register an item of dept. 21 using the D key and then an item of dept. 1<br />
using the preset unit price, you should use the department code entry key described below for the<br />
dept. 1 item. If you just press the ¡ key to register dept. 1 item, it will act as a repeat entry of<br />
dept. 21 item.<br />
• When using the department code entry key<br />
Enter a department (dept.) code and press the d key, then enter a unit price and press the d<br />
you use a programmed unit price, enter a dept. code and press the d key.<br />
Dept. code<br />
(1 to 99)<br />
Transaction<br />
Item Entries<br />
Unit price * 1<br />
(max. 8 digits)<br />
To clear the error state<br />
l<br />
When using a programmed unit price<br />
*<br />
D<br />
2<br />
When using a programmed unit price<br />
d d<br />
Unit price * 1<br />
(max. 8 digits)<br />
E E<br />
Department key<br />
(In case only preset price entry is allowed.)<br />
key again. If<br />
* 1 Less than the programmed upper limit<br />
amounts<br />
When zero is entered, only the sales<br />
quantity is added.<br />
2. PLU/subdepartment entries<br />
For another merchandise classification, the cash register provides a maximum of 1800 PLUs/subdepartments.<br />
PLUs are used to call up preset prices by a code entry. Subdepartments are used to classify merchandise into<br />
smaller groups under the departments. Every PLU and subdepartment has a code from 1 to 1800, and should<br />
belong to a department to obtain attributes of that department.<br />
37
38<br />
By default, the cash register is preprogrammed to PLU mode, and all of the 1800 codes are set to PLU mode<br />
and zero for unit price.<br />
For more information on PLU/subdepartment programming, refer to “PLU (Price Look-Up) and Subdepartment<br />
Programming” on page 22.<br />
• PLU entries<br />
PLU code<br />
(1 to 1800)<br />
• Subdepartment (open PLU) entries<br />
Department entry<br />
PLU entry<br />
Subdepartment<br />
entry<br />
Repeat entries<br />
* Less than the programmed upper limit<br />
amounts<br />
When zero is entered, only the sales<br />
quantity is added.<br />
You can use this function for entering a sale of two or more of the same items. Consecutive pressing of a<br />
department key, d key or p key is as shown on key operation example below.<br />
Department entry<br />
PLU entry<br />
Subdepartment<br />
entry<br />
p<br />
PLU code p (1 to 1800)<br />
Unit price *<br />
(max. 8 digits)<br />
Key operation example<br />
Key operation example<br />
1200 ∑<br />
500 D ¡ ®<br />
D <br />
50 d 1500 d<br />
41 d<br />
2 p<br />
11 p 1200 p A<br />
1200 ∑ ∑<br />
500 D ¡ ¡<br />
® ®<br />
D <br />
50 d 1500 d d<br />
41 d d<br />
2 p p<br />
11 p 1200 p p A<br />
p<br />
Receipt print<br />
Receipt print
Multiplication entries<br />
Part1<br />
Part2 FOR THE OPERATOR Part3<br />
When selling a large quantity of items, it is convenient to use the multiplication entry method. Enter quantity<br />
using numeric keys and press the @ key before starting item entry as shown in the example below.<br />
When programmed to allow fractional quantity entries, you can enter up to four integers and three<br />
digit decimal, though the quantity is counted as one for sales reports. To enter a fractional quantity,<br />
use the decimal point key between integer and decimal, as 7P5 for entering 7.5.<br />
Department entry<br />
PLU entry<br />
Subdepartment<br />
entry<br />
Split pricing entries<br />
You will use this function when your customer wants to purchase more or less than the base quantity of a loose<br />
item. To make split pricing entries, follow the procedure below:<br />
Selling q'ty<br />
(Up to 4 digits)<br />
Key operation example<br />
3 @ 1200 ∑<br />
5 @ 500 D ¡<br />
3 @ ®<br />
5 @ D <br />
3 @ 50 d 1500 d<br />
5 @ 41 d<br />
3 @ 2 p<br />
5 @ 11 p 1200 p A<br />
When using a programmed unit price<br />
Base q'ty<br />
Unit price<br />
Department key<br />
@ @ (Up to 2 digits)<br />
per base q'ty<br />
Dept. code<br />
(1 to 99)<br />
PLU code<br />
(1 to 1800)<br />
PLU code<br />
(1 to 1800)<br />
Receipt print<br />
D<br />
d<br />
p<br />
p<br />
d<br />
Unit price<br />
per base q'ty<br />
(In case only preset price<br />
entry is allowed.)<br />
Unit price<br />
per base q'ty<br />
p<br />
• If you live in Australia, please change the printing format for this function. Please refer to "Other<br />
programming" (Job code 68) of "Various Function Selection Programming 1" on page 73.<br />
• When programmed to allow fractional quantity entries, you can enter up to four integers and three<br />
digit decimal. To enter a fractional quantity, use the decimal point key between integer and<br />
decimal, as 7P5 for entering 7.5.<br />
39
40<br />
Single item cash sale (SICS) entry<br />
• This function is useful when a sale is for only one item and is for cash. This function is applicable only to those<br />
departments that have been set for SICS or to their associated PLUs or subdepartments.<br />
• The transaction is complete and the drawer opens as soon as you press the department key, d key or<br />
p key.<br />
4<br />
Key operation example<br />
Department entry 7 @ 10 @<br />
600 <br />
8 @ 12 @<br />
PLU entry<br />
35 p<br />
A<br />
Key operation example<br />
For finishing<br />
the transaction<br />
If an entry to a department or PLU/subdepartment set for SICS follows the ones to departments or<br />
PLUs/subdepartments not set for SICS, it does not finalize and results in a normal sale.<br />
Displaying Subtotals<br />
250<br />
¡<br />
Receipt print<br />
When Australian printing format<br />
is selected<br />
Receipt print<br />
The subtotal is displayed by pressing the s key. When you press it, the subtotal of all entries which have<br />
been made is displayed with the function message “SUBTOTAL”.<br />
Subtotal will not be printed on a receipt on the current factory setting. If you want to print it, change<br />
the setting by programming. Refer to “Receipt print format” (Job code 7) on page 69.
5<br />
Finalization of Transaction<br />
Cash or cheque tendering<br />
Part1<br />
Part2 FOR THE OPERATOR Part3<br />
Press the s key to get a subtotal, enter the amount tendered by your customer, then press the A key<br />
if it is a cash tender or press a cheque key (X or Y ) if it is a cheque tender. When the amount tendered is<br />
greater than the amount of the sale, the register will show the change due amount with the function message<br />
“CHANGE”. Otherwise the register will show a deficit with the function message “DUE”. You now must make a<br />
correct tender entry.<br />
Cash tendering<br />
Key operation example<br />
s<br />
1000 A<br />
Cheque tendering<br />
Key operation example<br />
s<br />
1000 X<br />
Cash or cheque sale that does not require tender entry<br />
Enter items and press the A key if it is a cash sale or press a cheque key if it is a cheque sale. The<br />
register will display the total sale amount.<br />
Key operation example<br />
300 §<br />
10 p A<br />
Receipt print<br />
Receipt print<br />
Receipt print<br />
In the case of cheque 1 sale<br />
When programmed not to allow “direct non-tender finalization after tendering” (Job code 63, refer to<br />
page 71), you must always enter a tender amount.<br />
41
42<br />
Credit sale<br />
Enter items and press a credit key (c or b).<br />
Mixed-tender sale<br />
You can perform mixed-tendering of cheque and cash, cash and credit, and cheque and credit.<br />
6<br />
VAT/ tax system<br />
Key operation example<br />
The cash register may be programmed for the following six VAT/tax systems. The cash register is preprogrammed<br />
as automatic VAT 1-4 system.<br />
Automatic VAT 1-4 system (Automatic operation method using programmed percentages)<br />
This system, at settlement, calculates VAT for taxable 1 through 4 subtotals by using the corresponding<br />
programmed percentages.<br />
Automatic tax 1-4 system (Automatic operation method using programmed percentages)<br />
This system, at settlement, calculates taxes for taxable 1 through 4 subtotals by using the corresponding<br />
programmed percentages, and also adds the the calculated taxes to those subtotals, respectively.<br />
<strong>Manual</strong> VAT 1-4 system (<strong>Manual</strong> entry method using programmed percentages)<br />
s t<br />
2500 §<br />
3250 c<br />
Key operation example<br />
s<br />
950 A b<br />
Computation of VAT (Value Added Tax)/tax<br />
This system provides the VAT calculation for taxable 1 through 4 subtotals. This calculation is performed using<br />
the corresponding programmed percentages when the t key is pressed just after the s key.<br />
<strong>Manual</strong> VAT 1 system (<strong>Manual</strong> entry method for subtotals that uses VAT 1 preset percentages)<br />
To use a programmed rate<br />
s VAT rate t<br />
Receipt print<br />
Receipt print<br />
This system enables the VAT calculation for the then subtotal. This calculation is performed using the VAT 1<br />
preset percentages when the t key is pressed just after the s key. For this system, the keyed-in tax rate<br />
can be used.
Part1<br />
<strong>Manual</strong> tax 1-4 system (<strong>Manual</strong> entry method using preset percentages)<br />
s t<br />
Part2 FOR THE OPERATOR Part3<br />
This system provides the tax calculation for taxable 1 through 4 subtotals. This calculation is performed using<br />
the corresponding programmed percentages when the t key is pressed just after the s key.<br />
After this calculation, you must finalize the transaction.<br />
Automatic VAT 1 and automatic tax 2-4 system<br />
This system enables the calculation in the combination with automatic VAT 1 and automatic tax 2 through 4. The<br />
combination can be any of VAT1 corresponding to taxable 1 and any of tax 2 through 4 corresponding to taxable<br />
2 through taxable 4 for each item. The tax amount is calculated automatically with the percentages previously<br />
programmed for these taxes.<br />
• The tax status of PLU/subdepartment depends on the tax status of the department which the<br />
PLU/subdepartment belongs to.<br />
• VAT/tax assignment symbol can be printed at the fixed right position near the amount on the<br />
receipt as follows:<br />
VAT1/tax1 A<br />
VAT2/tax2 B<br />
VAT3/tax3 C<br />
VAT4/tax4 D<br />
When the multiple VAT/tax is assigned to a department or a PLU, a symbol of the lowest number<br />
assigned to VAT/tax rate will be printed. For programming, please refer to “Various Function<br />
Selection Programming 1” (Job code 66) on page 72.<br />
Key operation example<br />
(When the manual<br />
VAT 1-4 system<br />
is selected)<br />
1000 ¡<br />
st<br />
A<br />
Receipt print<br />
43
44<br />
OPTIONAL FEATURES<br />
1<br />
Auxiliary Entries<br />
Percent calculations (premium or discount)<br />
Your register provides the percent calculation for the subtotal and/or each item entry depending on the<br />
programming. Refer to "Programming for % and &" for the programming.<br />
• Percentage: 0.01 to 100.00% (Depending on the programming)<br />
Application of preset rate (if programmed) and manual rate entry are available.<br />
Percent calculation for subtotal<br />
Percent calculation for item entries<br />
Deduction entries<br />
Your register allows you to deduct a preset amount or a certain amount manually entered, which are less than a<br />
programmed upper limit. These calculations can be after the entry of an item and/or the computation of subtotal<br />
depending on the programming. Refer to "Programming for -" for the programming.<br />
Deduction for subtotal<br />
Key operation example<br />
4 @<br />
140 ∞<br />
570 <br />
s<br />
10 %<br />
A<br />
Key operation example<br />
800 §<br />
7 P 5 %<br />
15 p &<br />
A<br />
(When premium and 15% are<br />
programmed for the & key)<br />
Key operation example<br />
575 §<br />
10 p s<br />
100 -<br />
A<br />
Receipt print<br />
Receipt print<br />
Receipt print
Deduction for item entries<br />
Refund entries<br />
Key operation example<br />
675 -<br />
A<br />
(When a deduction amount of<br />
0.75 is programmed.)<br />
Part1<br />
Part2 FOR THE OPERATOR Part3<br />
For departments 1 to 20, enter the refund amount and press the f key, and then press the corresponding<br />
department key and for departments 21 to 40, enter the refund amount and press the f key, then press the<br />
D key and press the corresponding department key (when using the preset price, omit entering the amount).<br />
In case of department 41 to 99, enter the department code and press f key and the d key, then enter the<br />
refund amount and press the d key if necessary.<br />
For a refund of a PLU item, enter the PLU code and press the f key, then press the p key.<br />
For a refund of a subdepartment item, enter the PLU code and press the f key and p key, then enter the<br />
refund amount and press the p key.<br />
Key operation example<br />
250 f§<br />
41 fd100 d<br />
7 @<br />
13 fp<br />
85 fp150 p A<br />
Non-add code number entries and printing<br />
You can enter a non-add code number such as a customer’s code number and credit card number, a maximum<br />
of 16 digits, at any point during the entry of a sale. The cash register will print it at once.<br />
To enter a non-add code number, enter the number and press the s key.<br />
Key operation example<br />
1230 s<br />
1500 § c<br />
Receipt print<br />
Receipt print<br />
Receipt print<br />
45
46<br />
2<br />
Auxiliary Payment Treatment<br />
Currency exchange<br />
After an entry<br />
is completed<br />
or<br />
After the amount<br />
tendered is found<br />
smaller than the<br />
sales amount in<br />
a sales entry<br />
*Exchange rate: 0.000000 to 999.999999<br />
• Press the l key after pressing the V key to cancel payment in a foreign currency.<br />
• If “Yes” is selected for cheque and credit operation when tendering in foreign currency in EURO<br />
programming, you can finalize a sale in foreign currency using the X, Y, c or b key with<br />
preset exchange rate operation.<br />
• If programmed, a foreign currency symbol is printed when you use a preset rate. Refer to<br />
"Foreign currency symbol" for the programming.<br />
• Refer to "Programming for V" for programming the currency exchange rate.<br />
Applying preset exchange rate<br />
Currency<br />
exchange<br />
Amount<br />
tendered in<br />
foreign currency<br />
Applying manual exchange rate<br />
Key operation example<br />
Exchange rate<br />
Preset exchange rate<br />
*Exchange rate<br />
Key operation example<br />
2300 §<br />
4650 <br />
V<br />
10000 A<br />
(When a currency exchange<br />
rate of 0.939938 is programmed for<br />
the V key.)<br />
For an additional payment in foreign currency<br />
Reentry<br />
2300 §<br />
4650 <br />
1 P 275 V<br />
10000 A<br />
V<br />
For direct finalization<br />
Amount<br />
tendered<br />
(max. 8 digits)<br />
l<br />
Receipt print<br />
Foreign currency symbol<br />
(Printed if programmed)<br />
Receipt print<br />
A<br />
c or X<br />
b<br />
or Y<br />
Next registration<br />
or<br />
payment in<br />
domestic currency<br />
Domestic currency<br />
Exchange rate<br />
Foreign currency<br />
Domestic currency
Received-on-account entries<br />
Part1<br />
Part2 FOR THE OPERATOR Part3<br />
When you receive on account from a customer, use the r key. For the received-on-account (RA) entry, enter<br />
the amount, and press the r key.<br />
Cash tendering only available for RA operation.<br />
Key operation example<br />
Paid-out entries<br />
When you pay an amount to a vendor, use the R key. For the paid-out (PO) entry, enter the amount and<br />
press the R key.<br />
Cash tendering only available for PO operation.<br />
No sale (exchange)<br />
When you need to open the drawer with no sale, press the A key. The drawer will open and printer will<br />
print “NO SALE” on the receipt or journal. If you let the machine print a non-add code number before pressing<br />
the A key, a no sale entry is achieved and a non-add code number is printed. Refer to "Other<br />
programming" (job code 63) for the programming.<br />
Cashing a cheque<br />
12345 s<br />
4800 r<br />
Key operation example<br />
54321 s<br />
2300 R<br />
When you need to cash a cheque, enter the cheque amount and press a cheque key (X or Y).<br />
Key operation example<br />
3000 X<br />
Receipt print<br />
Receipt print<br />
Receipt print<br />
47
48<br />
3<br />
You can achieve a programmed transaction simply by pressing the [ or ] key. Refer to "AUTO key<br />
programming - Automatic sequence key" for the programming.<br />
4<br />
Automatic Sequence Key ([]key) Entries<br />
Key operation example<br />
([ = 500 §A )<br />
This function allows you to switch from one clerk to another and to interrupt the first clerk’s entry. So the second<br />
clerk can do his or her entry in this mode. To use this function, please change the clerk system to “overlapped<br />
clerk” on the programming of job code 65. Please refer to “Other programming” of “Various Function Selection<br />
Programming 1” on page 72.<br />
• The overlapped clerk entry is not effective while the tendering sale is going on.<br />
• If any clerk is still making an entry (or has not finalized the transaction yet), the machine does not<br />
run in any mode other than REG and MGR and can print no X/Z reports. The error message<br />
“CLERK ERR.” and the corresponding clerk code(s) are displayed at this time.<br />
1. Clerk code 1 is assigned.<br />
[<br />
Overlappped Clerk Entries<br />
Key operation example<br />
(1 L )<br />
100 ¡<br />
360 £<br />
£<br />
2. Clerk code 2 is assigned.<br />
(Clerk change: 1 to 2) 2 L<br />
3 @<br />
150 <br />
A<br />
3. Clerk code 1 is assigned.<br />
(Clerk change: 2 to 1) 1 L<br />
50 ¡<br />
300 £<br />
A<br />
Receipt print<br />
Comments<br />
The entry by clerk code 1 is started.<br />
The entry by clerk code 2 is started.<br />
(The entry by clerk code 1 is interrupted.)<br />
The transaction by clerk code 2 is finalized.<br />
The entry by clerk code 1 is restarted.<br />
The transaction by clerk code 1 is finalized.
Part3 FOR THE MANAGER<br />
PRIOR TO PROGRAMMING<br />
Procedure for programming<br />
1. Check to see whether both journal and receipt rolls are present in the machine. If<br />
there is not enough paper on a roll, replace it with a new one (refer to "Replacing<br />
the Paper Roll" on page 95 for the replacement).<br />
2. Put the manager key in the mode switch and turn it to the PGM position.<br />
3. Program necessary items into the cash register.<br />
Every time you program an item, the cash register will print the setting. Please refer to print samples in each<br />
section.<br />
4. If necessary, issue programming reports for your reference.<br />
• On the key operation example shown in the programming details, numbers such as “22082007”<br />
indicates the parameter which must be entered using the corresponding numeric keys.<br />
• Asterisks in the tables shown in the programming details indicate default settings.<br />
Guidance messages<br />
Depending on programming items, the register shows guidance messages on the operator display to indicate a<br />
programming item you are in, or guidance to enter data, as shown in the examples below.<br />
Your register allows you to program all necessary data in one procedure with the guidance messages for<br />
department programming (page 16), PLU (Price Look-Up) and subdepartment programming (page 22),<br />
programming for the -, %, &, V, r, R, X, Y, c and b keys (pages 52-62). For their guidance<br />
messages, please refer to each section.<br />
Example 1: For key entry type programming<br />
Key operation example<br />
Parameter/price entry<br />
Press of the subjected key<br />
• Guidance message is displayed.<br />
To terminate<br />
008 @<br />
(In case of parameter entry)<br />
s<br />
A<br />
PGM<br />
008<br />
PAYMENT KEY PROG<br />
0.00<br />
Operator display<br />
PGM<br />
0.00<br />
REG<br />
OPX/Z MGR<br />
PGM<br />
X1/Z1<br />
X2/Z2<br />
To repeat<br />
(depending on programming)<br />
Guidance message is kept<br />
displaying until you press<br />
the A key.<br />
49
50<br />
Example 2: Job code type programming (programming starting from the press of s.)<br />
Key operation example<br />
Job code entry<br />
• Guidance message is displayed.<br />
Parameter entry<br />
Registration of parameter<br />
To terminate<br />
Entering character codes with numeric keys on the keyboard<br />
For entering numerals, letters or symbols, enter a character code using numeric keys and press the numeric key :.<br />
For the character codes, please refer to the alphanumeric character code table on the next page. By doing this,<br />
you can program characters other than those on the key tops. For entering numerals and letters using character<br />
keys, refer to "Using character keys on the keyboard" on page 13.<br />
• Double-size characters can be made by entering the character code 253 or pressing the W key. “W” is<br />
displayed when double-size characters entry is selected as shown in the operator display example below.<br />
• All three digits of the character code MUST be entered (even if it starts with zero).<br />
Key operation example<br />
s 1 @<br />
50<br />
s<br />
A<br />
253 :<br />
065<br />
:<br />
MACHINE NO.<br />
MACHINE NO.<br />
Cursor<br />
_<br />
01 W 032<br />
_<br />
01 W 065<br />
=A_<br />
01 W 032<br />
To program the word “SHARP” in double-size characters<br />
253 : 083 : 072 : 065 : 082 : 080 :<br />
S H A R P<br />
0.00<br />
50<br />
ENTER[TL/NS]KEY<br />
0.00<br />
Operator display<br />
PGM<br />
0.00<br />
Operator display<br />
Department code, PLU code, function number,<br />
clerk code or logo message line number is displayed here.<br />
Character code<br />
Characters entered are displayed here.<br />
To repeat<br />
(depending on programming)<br />
Guidance message is changed<br />
after a new job code entry.<br />
Characters: Indicating double size character of "A"
51<br />
Part3 FOR THE MANAGER<br />
Part2<br />
Part1<br />
Alphanumeric character code table<br />
*(DC): Double-size character code<br />
: The shaded characters cannot be correctly displayed; a similar character or a space is displayed<br />
instead.<br />
The character “!!” (code 128) cannot be displayed (displayed as “!”).<br />
Code<br />
001<br />
002<br />
003<br />
004<br />
005<br />
006<br />
007<br />
008<br />
009<br />
010<br />
011<br />
012<br />
013<br />
014<br />
015<br />
016<br />
017<br />
018<br />
019<br />
020<br />
021<br />
022<br />
023<br />
024<br />
025<br />
026<br />
027<br />
028<br />
029<br />
030<br />
031<br />
032<br />
033<br />
034<br />
035<br />
036<br />
037<br />
038<br />
039<br />
040<br />
041<br />
042<br />
043<br />
044<br />
045<br />
Character<br />
á<br />
â<br />
ê<br />
î<br />
ì<br />
í<br />
ô<br />
ó<br />
û<br />
ú<br />
œ<br />
u<br />
ú<br />
o<br />
ó<br />
<br />
<br />
<br />
¨<br />
<br />
<br />
<br />
<br />
<br />
<br />
<br />
<br />
U<br />
Ú<br />
O<br />
Ó<br />
(space)<br />
!<br />
”<br />
#<br />
$<br />
%<br />
&<br />
’<br />
(<br />
)<br />
+<br />
,<br />
-<br />
Code<br />
046<br />
047<br />
048<br />
049<br />
050<br />
051<br />
052<br />
053<br />
054<br />
055<br />
056<br />
057<br />
058<br />
059<br />
060<br />
061<br />
062<br />
063<br />
064<br />
065<br />
066<br />
067<br />
068<br />
069<br />
070<br />
071<br />
072<br />
073<br />
074<br />
075<br />
076<br />
077<br />
078<br />
079<br />
080<br />
081<br />
082<br />
083<br />
084<br />
085<br />
086<br />
087<br />
088<br />
089<br />
090<br />
Character<br />
.<br />
/<br />
0<br />
1<br />
2<br />
3<br />
4<br />
5<br />
6<br />
7<br />
8<br />
9<br />
:<br />
;<br />
<<br />
=<br />
><br />
?<br />
@<br />
A<br />
B<br />
C<br />
D<br />
E<br />
F<br />
G<br />
H<br />
I<br />
J<br />
K<br />
L<br />
M<br />
N<br />
O<br />
P<br />
Q<br />
R<br />
S<br />
T<br />
U<br />
V<br />
W<br />
X<br />
Y<br />
Z<br />
Code<br />
091<br />
092<br />
093<br />
094<br />
095<br />
096<br />
097<br />
098<br />
099<br />
100<br />
101<br />
102<br />
103<br />
104<br />
105<br />
106<br />
107<br />
108<br />
109<br />
110<br />
111<br />
112<br />
113<br />
114<br />
115<br />
116<br />
117<br />
118<br />
119<br />
120<br />
121<br />
122<br />
123<br />
124<br />
125<br />
126<br />
127<br />
128<br />
129<br />
130<br />
131<br />
132<br />
133<br />
134<br />
135<br />
Character<br />
Ä<br />
Ö<br />
Ü<br />
^<br />
_<br />
a<br />
b<br />
c<br />
d<br />
e<br />
f<br />
g<br />
h<br />
i<br />
j<br />
k<br />
l<br />
m<br />
n<br />
o<br />
p<br />
q<br />
r<br />
s<br />
t<br />
u<br />
v<br />
w<br />
x<br />
y<br />
z<br />
{<br />
|<br />
}<br />
ß<br />
¢<br />
!!<br />
1<br />
2<br />
3<br />
4<br />
1/2<br />
F T<br />
←<br />
Code<br />
136<br />
137<br />
138<br />
139<br />
140<br />
141<br />
142<br />
143<br />
144<br />
145<br />
146<br />
147<br />
148<br />
149<br />
150<br />
151<br />
152<br />
153<br />
154<br />
155<br />
156<br />
157<br />
158<br />
159<br />
160<br />
161<br />
162<br />
163<br />
164<br />
165<br />
177<br />
178<br />
180<br />
181<br />
182<br />
183<br />
184<br />
185<br />
186<br />
187<br />
188<br />
189<br />
190<br />
191<br />
192<br />
Character<br />
→<br />
F<br />
T<br />
↓<br />
ç<br />
°<br />
¿<br />
ù<br />
à<br />
Æ<br />
ø<br />
Å<br />
é<br />
è<br />
Pt<br />
i<br />
Ñ<br />
ò<br />
£<br />
¥<br />
°<br />
Á<br />
Í<br />
A<br />
a<br />
E<br />
e<br />
I<br />
i<br />
U<br />
u<br />
N<br />
n<br />
C<br />
S<br />
C<br />
▲<br />
▲<br />
´´<br />
´´<br />
´´<br />
´´<br />
193<br />
194<br />
195<br />
196<br />
197<br />
198<br />
199<br />
200<br />
201<br />
202<br />
203<br />
204<br />
205<br />
206<br />
207<br />
208<br />
209<br />
210<br />
211<br />
212<br />
213<br />
214<br />
215<br />
216<br />
217<br />
218<br />
219<br />
224<br />
225<br />
226<br />
227<br />
228<br />
229<br />
230<br />
231<br />
232<br />
233<br />
234<br />
235<br />
236<br />
237<br />
238<br />
253<br />
I<br />
G<br />
S<br />
G<br />
g<br />
K<br />
k<br />
L<br />
l<br />
Z<br />
D<br />
d<br />
C<br />
c<br />
P<br />
e<br />
s<br />
c<br />
z<br />
y<br />
u<br />
n<br />
r<br />
§<br />
Ø<br />
↑<br />
]<br />
[<br />
ä<br />
ö<br />
ü<br />
æ<br />
å<br />
É<br />
ñ<br />
*(DC)<br />
’<br />
.<br />
.<br />
.<br />
.<br />
.<br />
.<br />
.<br />
.<br />
.<br />
.<br />
.<br />
.<br />
”<br />
Code Character
52<br />
AUXILIARY FUNCTION PROGRAMMING<br />
1<br />
Miscellaneous Key Programming<br />
The cash register provides miscellaneous keys such as - , % , & , V , r , R , X , Y , c , b and A .<br />
Miscellaneous keys are programmed in one procedure with guidance messages except for the A key.<br />
• To keep current setting on each programming, press the s key when the corresponding<br />
guidance message is firstly displayed.<br />
• When pressing the A key in the middle of procedure, the programming will terminate and the<br />
data you entered before the press of A is saved.<br />
• When pressing the l key twice in the middle of procedure, the programming will terminate and<br />
the data you entered before pressing the l key twice is NOT saved.<br />
• When pressing the department, PLU, - , % , & , V , r , R , X , Y , c or b key in the<br />
middle of procedure except while entering texts or prices, the programming will move to the<br />
pressed key programming.<br />
Programming for -<br />
1. Specify the key to program.<br />
(1) Press the - to enter - programming.<br />
On the upper line of the display, immediately after<br />
displaying "(-) PROGRAMMING", guidance message<br />
for the next step will be displayed.<br />
On the lower line of the display, the corresponding<br />
function no. will be displayed.<br />
2. Text programming (Press s to skip. / Press A to terminate.)<br />
(1) Press : key to enter text programming.<br />
On the upper line of the display, immediately after<br />
displaying guidance message, the current text data<br />
will be displayed.<br />
On the lower line of the display, the character code<br />
corresponding to the first character of the text data<br />
will be displayed.<br />
(2) Enter the text.<br />
A maximum of 12 characters can be entered.<br />
Please refer to "Guidance for text programming" on<br />
page 13 for entering the text.<br />
When you start entering a character, the current<br />
text data will be overwritten by new data.<br />
Use the S and B keys to delete unnecessary<br />
text data.<br />
Pressing the P and @ key moves the cursor to<br />
the right and left respectively.<br />
Key operation<br />
-<br />
:<br />
(-) SS<br />
Operator display<br />
(-) PROGRAMMING<br />
01 0.00<br />
ENTER[00]KEY<br />
01 0.00<br />
ENTER TEXT<br />
01 0.00<br />
=(=-=)<br />
01 040<br />
(-) _<br />
01 032
(3) Press the s key to register the text.<br />
On the upper line of the display, guidance message<br />
for the next step will be displayed.<br />
On the lower line of the display, the current setting<br />
will be displayed.<br />
Part1<br />
Part2<br />
3. Amount programming (Press s to skip. / Press A to terminate.)<br />
(1) Enter the amount using numeric keys.<br />
A maximum of 6 digits can be set.<br />
Default setting is 0.<br />
(2) Press the s key to register the amount.<br />
On the upper line of the display, guidance message<br />
for the next step will be displayed.<br />
On the lower line of the display, the current setting<br />
will be displayed.<br />
4. Sign programming (Press s to skip. / Press A to terminate.)<br />
(1) Go to (2) when the sign does not need to be<br />
changed from "(-)". Otherwise, press : key to<br />
display "(+)".<br />
Each time : key is pressed, the display shows<br />
"(+)" and "(-)" alternately.<br />
Choose "(-)" for discount and "(+)" for premium.<br />
Default setting is "(-)".<br />
(2) Press the s key to register the setting.<br />
On the upper line of the display, guidance message<br />
for the next step will be displayed.<br />
On the lower line of the display, the current setting<br />
will be displayed.<br />
Part3 FOR THE MANAGER<br />
5. Discount calculation (for the items) programming (Press s to skip. / Press A to terminate.)<br />
(1) Go to (2) when the discount calculation for the items<br />
does not need to be changed from "ITEM<br />
ENABLE". Otherwise, press : key to display<br />
"ITEM DISABLE".<br />
Each time : key is pressed, the display shows<br />
"ITEM DISABLE" and "ITEM ENABLE" alternately.<br />
Default setting is "ENABLE".<br />
(2) Press the s key to register the setting.<br />
On the upper line of the display, guidance message<br />
for the next step will be displayed.<br />
On the lower line of the display, the current setting<br />
will be displayed.<br />
s<br />
300<br />
s<br />
s<br />
s<br />
ENTER AMOUNT<br />
01 -0.00<br />
ENTER AMOUNT<br />
01 300<br />
SIGN<br />
01 (-)<br />
ENTRY FOR ITEM<br />
01 ITEM ENABLE<br />
ENTRY FOR SBTL<br />
01 SBTL ENABLE<br />
53
54<br />
6. Discount calculation (for the subtotals) programming (Press sto skip. / Press Ato terminate.)<br />
(1) Go to (2) when the discount calculation for the<br />
subtotals does not need to be changed from "SBTL<br />
ENABLE". Otherwise, press : key to display<br />
"SBTL DISABLE".<br />
Each time : key is pressed, the display shows<br />
"SBTL DISABLE" and "SBTL ENABLE" alternately.<br />
Default setting is "ENABLE".<br />
(2) Press the s key to register the setting.<br />
On the upper line of the display, guidance message<br />
for the next step will be displayed.<br />
On the lower line of the display, the current setting<br />
will be displayed.<br />
7. Entry digit limit programming (Press s to skip. / Press A to terminate.)<br />
(1) Enter entry digit limit using numeric key.<br />
The entry digit limit can be set up to 8.<br />
Default setting is 8.<br />
The entry digit limit is in effect for the REG mode<br />
operations but can be overridden in the MGR mode.<br />
The entry digit limit is represented by the number of<br />
allowable digit for the maximum entry amount for<br />
discount key. When "0" is set, open price entry is<br />
prohibited.<br />
(2) Press the s key to register the setting.<br />
8. Terminate programming<br />
(1) Press the A key to terminate the - key<br />
programming.<br />
s<br />
s<br />
A<br />
Print<br />
Text Amount<br />
Sign<br />
Item: Selection: Print:<br />
A Discount calculation Enable* 0<br />
(for the items) Disable 1<br />
B Discount calculation Enable* 0<br />
(for the subtotals) Disable 1<br />
C Entry digit limit 0-8(default:8)<br />
7<br />
LIMIT DIGITS<br />
01 8<br />
LIMIT DIGITS<br />
01 7<br />
ENTER[TL/NS]KEY<br />
0.00<br />
PGM<br />
0.00<br />
From left, ABC
The %<br />
Programming for % and &<br />
key is used as an example below.<br />
1. Specify the key to program.<br />
(1) Press the % key to enter % programming.<br />
On the upper line of the display, immediately after<br />
displaying "%1 PROGRAMMING", guidance<br />
message for the next step will be displayed.<br />
On the lower line of the display, the corresponding<br />
function no. will be displayed.<br />
Part1<br />
Part2<br />
2. Text programming (Press s to skip. / Press A to terminate.)<br />
(1) Press : key to enter text programming.<br />
On the upper line of the display, immediately after<br />
displaying guidance message, the current text data<br />
will be displayed.<br />
On the lower line of the display, the character code<br />
corresponding to the first character of the text data<br />
will be displayed.<br />
(2) Enter the text.<br />
A maximum of 12 characters can be entered.<br />
Please refer to "Guidance for text programming" on<br />
page 13 for entering the text.<br />
When you start entering a character, the current<br />
text data will be overwritten by new data.<br />
Use the S and B keys to delete unnecessary<br />
text data.<br />
Pressing the P and @ key moves the cursor to<br />
the right and left respectively.<br />
(3) Press the s key to register the text.<br />
On the upper line of the display, guidance message<br />
for the next step will be displayed.<br />
On the lower line of the display, the current setting<br />
will be displayed.<br />
3. Rate programming (Press s to skip. / Press A to terminate.)<br />
(1) Enter the rate using numeric keys, using a decimal<br />
point when setting fractional rates.<br />
The rate can be set from 0.00 to 100.00.<br />
Default setting is 0.<br />
(2) Press the s key to register the rate.<br />
On the upper line of the display, guidance message<br />
for the next step will be displayed.<br />
On the lower line of the display, the current setting<br />
will be displayed.<br />
Key operation<br />
Part3 FOR THE MANAGER<br />
%<br />
:<br />
% SS<br />
s<br />
15.00<br />
s<br />
Operator display<br />
%1 PROGRAMMING<br />
02 0.00<br />
ENTER[00]KEY<br />
02 0.00<br />
ENTER TEXT<br />
02 0.00<br />
=%=1<br />
02 037<br />
% _<br />
02 032<br />
ENTER RATE<br />
02 -0.00<br />
ENTER RATE<br />
02 15.00<br />
SIGN<br />
02 (-)<br />
55
56<br />
4. Sign programming (Press s to skip. / Press A to terminate.)<br />
(1) Go to (2) when the sign does not need to be<br />
changed from "(-)". Otherwise, press : key to<br />
display "(+)".<br />
Each time : key is pressed, the display shows<br />
"(+)" and "(-)" alternately.<br />
Choose "(-)" for discount and "(+)" for premium.<br />
Default setting is "(-)".<br />
(2) Press the s key to register the setting.<br />
On the upper line of the display, guidance message<br />
for the next step will be displayed.<br />
On the lower line of the display, the current setting<br />
will be displayed.<br />
5. Discount calculation (for the items) programming (Press s to skip. / Press A to terminate.)<br />
(1) Go to (2) when the discount calculation for the items<br />
does not need to be changed from "ITEM<br />
ENABLE". Otherwise, press : key to display<br />
"ITEM DISABLE".<br />
Each time : key is pressed, the display shows<br />
"ITEM DISABLE" and "ITEM ENABLE" alternately.<br />
Default setting is "ENABLE".<br />
(2) Press the s key to register the setting.<br />
On the upper line of the display, guidance message<br />
for the next step will be displayed.<br />
On the lower line of the display, the current setting<br />
will be displayed.<br />
6. Discount calculation (for the subtotals) programming (Press sto skip. / Press Ato terminate.)<br />
(1) Go to (2) when the discount calculation for the<br />
subtotals does not need to be changed from "SBTL<br />
ENABLE". Otherwise, press : key to display<br />
"SBTL DISABLE".<br />
Each time : key is pressed, the display shows<br />
"SBTL DISABLE" and "SBTL ENABLE" alternately.<br />
Default setting is "ENABLE".<br />
(2) Press the s key to register the setting.<br />
On the upper line of the display, guidance message<br />
for the next step will be displayed.<br />
On the lower line of the display, the current setting<br />
will be displayed.<br />
7. Percent rate limit programming (Press s to skip. / Press A to terminate.)<br />
(1) Enter percent rate limit using numeric key.<br />
The rate limit can be set from 0.00 to 100.00.<br />
Default setting is 100.00.<br />
s<br />
s<br />
s<br />
90.00<br />
ENTRY FOR ITEM<br />
02 ITEM ENABLE<br />
ENTRY FOR SBTL<br />
02 SBTL ENABLE<br />
% HALO PROG.<br />
02 100.00<br />
% HALO PROG.<br />
02 90.00
(2) Press the s key to register the setting.<br />
In the case of programming for the % key, "%2<br />
PROGRAMMING" will be displayed on the upper<br />
line, and the corresponding function no. on the<br />
lower line. Go to step 2 to program the & key.<br />
In the case of programming for the & key, the<br />
display shows "ENTER[TL/NS]KEY". Go to step 8.<br />
8. Terminate programming<br />
(1) Press the A key to terminate the % key<br />
programming.<br />
Part1<br />
Part2<br />
Part3 FOR THE MANAGER<br />
s<br />
A<br />
Print<br />
Text Percent rate<br />
Sign<br />
Percentage rate limit<br />
Item: Selection: Print:<br />
A Discount calculation Enable* 0<br />
(for the items) Disable 1<br />
B Discount calculation Enable* 0<br />
(for the subtotals) Disable 1<br />
C Always 0 is printed. 0<br />
%2 PROGRAMMING<br />
03 0.00<br />
ENTER[00]KEY<br />
03 0.00<br />
PGM<br />
0.00<br />
From left, ABC<br />
57
58<br />
Programming for V<br />
1. Specify the key to program.<br />
(1) Press the V key to enter V programming.<br />
On the upper line of the display, immediately after<br />
displaying "EXCHANGE PROG.", guidance message<br />
for the next step will be displayed.<br />
On the lower line of the display, the corresponding<br />
function no. will be displayed.<br />
2. Text programming (Press s to skip. / Press A to terminate.)<br />
(1) Press : key to enter text programming.<br />
On the upper line of the display, immediately after<br />
displaying guidance message, the current text data<br />
will be displayed.<br />
On the lower line of the display, the character code<br />
corresponding to the first character of the text data<br />
will be displayed.<br />
(2) Enter the text.<br />
A maximum of 12 characters can be entered.<br />
Please refer to "Guidance for text programming" on<br />
page 13 for entering the text.<br />
When you start entering a character, the current<br />
text data will be overwritten by new data.<br />
Use the S and B keys to delete unnecessary<br />
text data.<br />
Pressing the P and @ key moves the cursor to<br />
the right and left respectively.<br />
(3) Press the s key to register the text.<br />
On the upper line of the display, guidance message<br />
for the next step will be displayed.<br />
On the lower line of the display, the current setting<br />
will be displayed.<br />
3. Rate programming (Press s to skip. / Press A to terminate.)<br />
(1) Enter the rate using numeric keys, using a decimal<br />
point when setting fractional rates.<br />
The rate can be set from 0.000000 to 999.999999.<br />
Default setting is 0.000000.<br />
(2) Press the s key to register the rate.<br />
On the upper line of the display, guidance message<br />
for the next step will be displayed.<br />
On the lower line of the display, the current setting<br />
will be displayed.<br />
Key operation<br />
V<br />
:<br />
EX SSS<br />
s<br />
0.939938<br />
s<br />
Operator display<br />
EXCHANGE PROG.<br />
37 0.00<br />
ENTER[00]KEY<br />
37 0.00<br />
ENTER TEXT<br />
37 0.00<br />
EXCH1<br />
37 069<br />
EX _<br />
37 032<br />
ENTER EX RATE<br />
37 0.000000<br />
ENTER EX RATE<br />
37 0.939938<br />
OPEN RATE ENTRY<br />
37 OPEN ENABLE
Part1<br />
Part2<br />
Part3 FOR THE MANAGER<br />
4. Open rate entry programming (Press s to skip. / Press A to terminate.)<br />
(1) Go to (2) when the open rate entry does not need to<br />
be changed from "OPEN ENABLE". Otherwise,<br />
press : key to display "OPEN DISABLE".<br />
Each time : key is pressed, the display shows<br />
"OPEN DISABLE" and "OPEN ENABLE" alternately.<br />
Default setting is "ENABLE".<br />
(2) Press the s key to register the setting.<br />
On the upper line of the display, guidance message<br />
for the next step will be displayed.<br />
On the lower line of the display, the current setting<br />
will be displayed.<br />
5. Preset rate entry programming (Press s to skip. / Press A to terminate.)<br />
(1) Go to (2) when the preset rate entry does not need<br />
to be changed from "PRESET ENABLE".<br />
Otherwise, press :key to display "PRESEST<br />
DISABLE".<br />
Each time :key is pressed, the display shows "PRESET<br />
DISABLE" and "PRESET ENABLE" alternately.<br />
Default setting is "ENABLE".<br />
(2) Press the s key to register the setting.<br />
On the upper line of the display, guidance message<br />
for the next step will be displayed.<br />
On the lower line of the display, the current setting<br />
will be displayed.<br />
6. Position of decimal point programming (Press s to skip. / Press A to terminate.)<br />
(1) Enter the position of decimal point from right using<br />
numeric key.<br />
The position of decimal point from right can be set<br />
from 0 to 3.<br />
Default setting is 2.<br />
(2) Press the s key to register the setting.<br />
7. Terminate programming<br />
(1) Press the A key to terminate the V key<br />
programming.<br />
mms<br />
s<br />
2<br />
s<br />
A<br />
PRESET RATE<br />
37 PRESET ENABLE<br />
TAB<br />
37 2<br />
TAB<br />
37 2<br />
ENTER[TL/NS]KEY<br />
0.00<br />
PGM<br />
0.00<br />
59
60<br />
Item: Selection: Print:<br />
A Open rate entry Enable* 0<br />
Disable 1<br />
B Preset rate entry Enable* 0<br />
Disable 1<br />
C TAB (position of decimal point from right) 0-3 (default:2)<br />
Programming for r, R, X, Y, c and b<br />
The X key is used as an example below.<br />
Programming for r and R, the step 3 and 4 are skipped.<br />
1. Specify the key to program.<br />
(1) Press the X key to enter X programming.<br />
On the upper line of the display, immediately after<br />
displaying "CH1 PROGRAMMING", guidance<br />
message for the next step will be displayed.<br />
On the lower line of the display, the corresponding<br />
function no. will be displayed.<br />
2. Text programming (Press s to skip. / Press A to terminate.)<br />
(1) Press : key to enter text programming.<br />
On the upper line of the display, immediately after<br />
displaying guidance message, the current text data<br />
will be displayed.<br />
On the lower line of the display, the character code<br />
corresponding to the first character of the text data<br />
will be displayed.<br />
(2) Enter the text.<br />
A maximum of 12 characters can be entered.<br />
Please refer to "Guidance for text programming" on<br />
page 13 for entering the text.<br />
When you start entering a character, the current<br />
text data will be overwritten by new data.<br />
Use the S and B keys to delete unnecessary<br />
text data.<br />
Pressing the P and @ key moves the cursor to<br />
the right and left respectively.<br />
Text<br />
Key operation<br />
Print<br />
X<br />
:<br />
CHEQUE<br />
Rate<br />
From left, ABC<br />
Operator display<br />
CH1 PROGRAMMING<br />
33 0.00<br />
ENTER[00]KEY<br />
33 0.00<br />
ENTER TEXT<br />
33 0.00<br />
CHECK1<br />
33 067<br />
CHEQUE_<br />
33 032
(3) Press the s key to register the text.<br />
On the upper line of the display, guidance message<br />
for the next step will be displayed.<br />
On the lower line of the display, the current setting<br />
will be displayed.<br />
Part1<br />
Part2<br />
Part3 FOR THE MANAGER<br />
3. Footer print on receipt programming (Press s to skip. / Press A to terminate.)<br />
(1) Go to (2) when the footer print on receipt does not<br />
need to be changed from "NO". Otherwise, press<br />
: key to display "YES".<br />
Each time : key is pressed, the display shows<br />
"YES" and "NO" alternately.<br />
Default setting is "NO".<br />
This programming decides whether or not the<br />
machine should print a message at the foot of a<br />
receipt when a specified key is used. With regard<br />
to programming method of footer logo message,<br />
refer to "Logo messages" section on page 25.<br />
(2) Press the s key to register the setting.<br />
On the upper line of the display, guidance message<br />
for the next step will be displayed.<br />
On the lower line of the display, the current setting<br />
will be displayed.<br />
4. Entry of amount tendered programming (Press s to skip. / Press A to terminate.)<br />
(1) Go to (2) when the entry of amount tendered does<br />
not need to be changed from "NON<br />
COMPULSORY". Otherwise, press : key to<br />
display "COMPULSORY".<br />
Each time : key is pressed, the display shows<br />
"COMPULSORY" and "NON COMPULSORY"<br />
alternately. In case of c and b programming,<br />
"INHIBIT" is displayed instead of "NON<br />
COMPULSORY".<br />
Default setting is "NON COMPULSORY" or "INHIBIT".<br />
(2) Press the s key to register the setting.<br />
On the upper line of the display, guidance message<br />
for the next step will be displayed.<br />
On the lower line of the display, the current setting<br />
will be displayed.<br />
s<br />
s<br />
s<br />
FOOTER PRINT<br />
33 NO<br />
AMOUNT TENDERED<br />
NON COMPULSORY<br />
LIMIT DIGITS<br />
33 8<br />
61
62<br />
5. Entry digit limit programming (Press s to skip. / Press A to terminate.)<br />
(1) Enter entry digit limit using numeric key.<br />
The entry digit limit can be set up to 8.<br />
Default setting is 8.<br />
The entry digit limit is in effect for REG mode<br />
operation but can be overridden in the MGR mode.<br />
The entry digit limit is represented by the number of<br />
allowable digits for the maximum entry or total<br />
amount. When "0" is set, the operation of the<br />
corresponding key is prohibited.<br />
(2) Press the s key to register the setting.<br />
In the case of programming for the X and c<br />
keys, "CH2 PROGRAMMING" and "CR2<br />
PROGRAMMING" respecitively will be displayed on<br />
the upper line, and the corresponding function no.<br />
on the lower line. Go to step 2 to program the Y<br />
and b keys.<br />
In the case of programming for the r, R, Y<br />
and b keys, the display shows<br />
"ENTER[TL/NS]KEY". Go to step 6.<br />
6. Terminate programming<br />
(1) Press the A key to terminate the X key<br />
programming.<br />
Item: Selection: Print:<br />
A Footer print No* 0<br />
Yes 1<br />
B Amount tendered entry Non compulsory (for X and Y)* 0<br />
Inhibit (for c and b)* 0<br />
Compulsory 1<br />
C Entry digit limit 0-8 (default:8)<br />
Text<br />
7<br />
s<br />
A<br />
Print<br />
LIMIT DIGITS<br />
33 7<br />
CH2 PRORAMMING<br />
34 0.00<br />
ENTER[00]KEY<br />
34 0.00<br />
PGM<br />
0.00<br />
From left, ABC
Function parameters for A<br />
Part1<br />
Part2<br />
* 1 To program 0 for all items<br />
ABC @ s<br />
A<br />
To program for another key<br />
Part3 FOR THE MANAGER<br />
*1:Item: Selection: Entry:<br />
A Footer printing* Allow 1<br />
Disallow* 0<br />
B Amount tendered entry* Compulsory 1<br />
Non-compulsory* 0<br />
C Entry digit limit 0-8 (default:8)<br />
Footer printing<br />
• This programming decides whether or not the machine should print a message at the foot of a receipt when<br />
the A key is used. With regard to programming method of footer logo message, refer to “Logo<br />
messages” section on page 25.<br />
Amount tendered entry<br />
• You may select amount tendered, compulsory or optional.<br />
Entry digit limit<br />
• Program upper limit entry for total cash amount which can be handled on the register. The entry digit limit is<br />
in effect for REG mode operation but can be overridden in the MGR mode. The entry digit limit is represented<br />
by the number of allowable digits for the maximum entry or total amount. When “0” is set, the operation of the<br />
corresponding key is prohibited.<br />
Key operation example<br />
018 @<br />
sA<br />
Print<br />
From left, ABC<br />
63
64<br />
2<br />
Please refer to “Guidance for text programming” on page 13 as for how to entering characters.<br />
Foreign currency symbol (4 digits)<br />
Foreign currency symbol for the V key is printed with a foreign currency exchange amount obtained using a<br />
preset rate.<br />
Domestic currency symbol (4 digits)<br />
“ ” is set as a default setting. When you want to change the domestic currency symbol, change the setting.<br />
✱<br />
Other Text Programming<br />
s 6 P<br />
Key operation example<br />
Entry using<br />
character code<br />
s 85 P<br />
Key operation example<br />
Entry using<br />
character code<br />
s 6 P<br />
US S<br />
036 :<br />
s A<br />
s 85 P<br />
S S S<br />
207 :<br />
s A<br />
To keep the current setting<br />
Character keys<br />
(max. 4 digits) s A<br />
Print<br />
Foreign currency symbol<br />
To keep the current setting<br />
Character keys<br />
(max. 4 digits) s A<br />
Print<br />
Domestic<br />
currency symbol
Part1<br />
Part2<br />
Part3 FOR THE MANAGER<br />
Training mode text (12 digits)<br />
For every receipts issued in the training mode, **TRAINING** is printed by default. When you want to change<br />
the text, follow the procedure below.<br />
s 87 P<br />
Key operation example<br />
s 87 P<br />
SSTRAINING SS<br />
sA<br />
The programmed text is printed in double-size characters on the receipts issued in the training<br />
mode.<br />
Function text (12 digits)<br />
s P<br />
*Function no.<br />
3 (max. 2 digits) @<br />
* Function no.: See “List of function texts” shown on the following page.<br />
Key operation example<br />
s 3 P<br />
35 @<br />
CARD N 1 s A<br />
(Programming CARD1 for<br />
credit 1)<br />
To program another function text<br />
To keep the current setting<br />
Character keys<br />
(max. 12 digits) s A<br />
Print<br />
To keep the current setting<br />
Character keys<br />
(max. 12 digits) s A<br />
Print<br />
65
66<br />
List of function texts<br />
Function<br />
no.<br />
Key or function<br />
Default<br />
setting<br />
1 _ (–)<br />
2 %1 %1<br />
3 %2 %2<br />
4 Net 1 NET1<br />
5 Differ DIFFER<br />
6 Taxable 1 subtotal TAX1 ST<br />
7 Taxable 2 subtotal TAX2 ST<br />
8 Taxable 3 subtotal TAX3 ST<br />
9 Taxable 4 subtotal TAX4 ST<br />
10 VAT/tax 1 VAT 1<br />
11 VAT/tax 2 VAT 2<br />
12 VAT/tax 3 VAT 3<br />
13 VAT/tax 4 VAT 4<br />
14 Total tax TTL TAX<br />
15 Net without tax NET<br />
16 Net 2 NET2<br />
17 Coupon PLU CP PLU<br />
18 Refund REFUND<br />
19 Void<br />
20 Void mode total MODE<br />
21 Manager void MGR<br />
22 Subtotal void SBTL<br />
23 Hash void HASH<br />
24 Hash refund HASH RF<br />
25 No sale NO SALE<br />
26 RA RA<br />
27 PO PO<br />
28 Cheque cashing CA/CHK<br />
29 Customer GUEST<br />
30 Paid total PAID TL<br />
31 Average AVE.<br />
32 Cash CASH<br />
33 Cheque 1 CHECK1<br />
34 Cheque 2 CHECK2<br />
35 Credit 1 CREDIT1<br />
36 Credit 2 CREDIT2<br />
37 Exchange (Preset rate) EXCH1<br />
38 Exchange (Open rate) EXCH2<br />
39 Exchange is EXCH1 IS<br />
40 Exchange cheque EX1 CHK<br />
41 Exchange credit EX1 CR<br />
42 Cash in drawer CID<br />
43 Cash/cheque is CA/CH IS<br />
44 Cash/cheque in drawer CA/CH ID<br />
Function<br />
no.<br />
Key or function<br />
Default<br />
setting<br />
45 Change for cheque CHK/CG<br />
46 Domestic currency 1 DOM.CUR1<br />
47 Domestic currency 2 DOM.CUR2<br />
48 Dom. currency for EX cheque DOM.CUR1<br />
49 Dom. currency for EX credit DOM.CUR1<br />
50 Cheque in drawer CH ID<br />
51 Group 1 GROUP1<br />
52 Group 2 GROUP2<br />
53 Group 3 GROUP3<br />
54 Group 4 GROUP4<br />
55 Group 5 GROUP5<br />
56 Group 6 GROUP6<br />
57 Group 7 GROUP7<br />
58 Group 8 GROUP8<br />
59 Group 9 GROUP9<br />
60 (+) Dept total DEPT TL<br />
61 (-) Dept total DEPT (-)<br />
62 Hash (+) dept. total HASH TL<br />
63 Hash (-) dept. total HASH(-)<br />
64 Net 1 (Taxable 1 - VAT/tax 1) NET 1<br />
65 Net 2 (Taxable 2 - VAT/tax 2) NET 2<br />
66 Net 3 (Taxable 3 - VAT/tax 3) NET 3<br />
67 Net 4 (Taxable 4 - VAT/tax 4) NET 4<br />
68 Subtotal SUBTOTAL<br />
69 Merchandise subtotal MDSE ST<br />
70 Total TOTAL<br />
71 Change CHANGE<br />
72 Sales q'ty ITEMS<br />
73 Due DUE<br />
74 CCD CCD<br />
75 CCD differ CCD DIF.<br />
76 CCD differ total DIF. TL<br />
77 Department report title DEPT<br />
78 Dept. group report title GROUP<br />
79 PLU report title PLU<br />
80 Transaction report title TRANS.<br />
81 Cash in drawer CID report title TL–ID<br />
82 Clerk report title CLERK<br />
83 Hourly report title HOURLY<br />
84 Daily net report title DAILY<br />
85 Non add symbol (8 chara.) #<br />
86 Copy receipt title COPY<br />
87 Exchange (Preset rate) change EX1 CHG<br />
88 Amount AMOUNT
Part3 FOR THE MANAGER<br />
ADVANCED FUNCTION PROGRAMMING<br />
1<br />
The register number and consecutive numbers are printed on every receipt or journal.<br />
When your store has two or more registers, it is practical to set separate register numbers for identification. The<br />
consecutive number is increased by one each time a receipt is issued or when a journal print occurs.<br />
For consecutive number programming, enter a number (max. 6 digits) that is one less than the desired starting<br />
number.<br />
Register number<br />
Consecutive number<br />
Part1<br />
Part2<br />
Register Number and Consecutive Number Programming<br />
s 1<br />
s 2<br />
@<br />
Key operation example<br />
s 1 @<br />
123456 sA<br />
Key operation example<br />
A number (one to six digits) that is one<br />
@ less than the desired starting number s A<br />
s 2 @<br />
1000 sA<br />
To set the register number 0<br />
Register number (one to six digits)<br />
To begin the count from 000001<br />
Print<br />
Print<br />
s A<br />
Register number<br />
Consecutive<br />
number<br />
67
68<br />
2<br />
Various Function Selection Programming 1<br />
The cash register provides various detailed functions listed below.<br />
• Function selection for miscellaneous keys<br />
• Print format<br />
• Receipt print format<br />
• Others<br />
For this programming, the job code entry style is applied. You can continue programming until you press the<br />
A key for the programming described in this section. To continue programming, repeat from a job code<br />
entry.<br />
s @ *2<br />
*1 Enter job code using numeric keys specified in each section below.<br />
*2 Data entry details are listed on each table in each section below. An asterisk is entered for factory setting.<br />
Example: When programming for job code 5 as ABCDEFGH: 00000100.<br />
Key operation example<br />
s 5 @<br />
00000100 sA<br />
Function selection for miscellaneous keys<br />
* ABCDEFGH<br />
1Job code<br />
To set 00000000<br />
s A<br />
Print<br />
Job code: 5<br />
* Item: Selection: Entry:<br />
A Paid-out in the REG mode Enable* 0<br />
Disable 1<br />
B Received on account in the REG mode Enable* 0<br />
Disable 1<br />
C Subtotal void in the REG mode Enable* 0<br />
Disable 1<br />
D Indirect void in the REG mode Enable* 0<br />
Disable 1<br />
E Direct void in the REG mode Enable* 0<br />
Disable 1<br />
F Refund entry in the REG mode Enable* 0<br />
Disable 1<br />
G No sale in the REG mode Enable* 0<br />
Disable 1<br />
H Fractional quantity entry Enable (3 digits decimal place) 0<br />
Disable* 1
Print format<br />
Job code: 6<br />
Part1<br />
Part2<br />
Part3 FOR THE MANAGER<br />
* Item: Selection: Entry:<br />
A Always enter 0. 0<br />
B Journal print item selection All items* 0<br />
Selected items 1<br />
C Time print on receipts/journals Yes* 0<br />
No 1<br />
D Date print on receipts/journals Yes* 0<br />
No 1<br />
E Consecutive no. print Yes* 0<br />
No 1<br />
F Separator line in reports One line space 0<br />
Separator line* 1<br />
G Zero skip in PLU report No 0<br />
Yes* 1<br />
H Zero skip in full sales/clerk/hourly/daily No 0<br />
net sales reports Yes* 1<br />
Journal print item selection<br />
• When you select “Selected items”, positive normal department and positive PLU entries are not printed on the<br />
journal printer in the REG mode.<br />
Receipt print format<br />
Job code: 7<br />
* Item: Selection: Entry:<br />
A Always enter 0. 0<br />
B Always enter 0. 0<br />
C Subtotal print with a press of subtotal key No* 0<br />
Yes 1<br />
D Always enter 0. 0<br />
E VAT/tax amount print Yes* 0<br />
No 1<br />
F Taxable amount print Yes* 0<br />
No 1<br />
G Net amount print Yes* 0<br />
No 1<br />
H Purchase no. print Yes* 0<br />
No 1<br />
69
70<br />
Other programming<br />
As the guidance messages for other programming, “OTHERS + the lower digit number of job code”<br />
is displayed. For example, for job code 61, “OTHERS 1” is displayed as the guidance message.<br />
Job code: 61<br />
* Item: Selection: Entry:<br />
A Always enter 0. 0<br />
B Always enter 0. 0<br />
C Negative dept. and PLU/subdept. Disable 0<br />
Enable* 1<br />
D Fractional treatment Round off (4 down, 5 up)* 0<br />
Raising to unit 1<br />
Disregarding fractional treatment 2<br />
E Use of : key As 00 key* 0<br />
As 000 key 1<br />
F Time format 12-hour format 0<br />
24-hour format* 1<br />
G Date format Use month-day-year format 0<br />
Use day-month-year format* 1<br />
Use year-month-day format 2<br />
H Position of decimal point (from right) (TAB) 0 to 3 (default: 2)<br />
Job code: 62<br />
* Item: Selection: Entry:<br />
A Always enter 0. 0<br />
B Error beep for misoperation Lock error 0<br />
Misoperation* 1<br />
C Key catch sound Yes* 0<br />
No 1<br />
D Buffered keyboard Yes* 0<br />
No 1<br />
E Void mode Enable* 0<br />
Disable 1<br />
F Printing of void mode in X2/Z2 report Yes* 0<br />
No 1<br />
G Printing of void mode in X1/Z1 report Yes* 0<br />
No 1<br />
H Addition to the hourly total in VOID mode No* 0<br />
Yes 1
Job code: 63<br />
Part1<br />
Part2<br />
Part3 FOR THE MANAGER<br />
* Item: Selection: Entry:<br />
A Receipting at the time of “no sale” entry Yes* 0<br />
No 1<br />
B No sale after non-add code entry Disable 0<br />
Enable* 1<br />
C Non-add code entry Enable* 0<br />
Disable 1<br />
D Copy receipt No* 0<br />
Yes 1<br />
E Entry that causes the merchandise Enable* 0<br />
subtotal to be smaller than zero Disable 1<br />
F Subtotal entry before tendering Noncompulsory* 0<br />
Compulsory 1<br />
G Subtotal entry before direct non-tender Noncompulsory* 0<br />
finalization Compulsory 1<br />
H Direct non-tender finalization after Disable 0<br />
tendering Enable* 1<br />
Job code: 64<br />
* Item: Selection: Entry:<br />
A Printing of GT1 on Z report Yes* 0<br />
No 1<br />
B Printing of GT2 on Z report Yes* 0<br />
No 1<br />
C Printing of GT3 on Z report Yes* 0<br />
No 1<br />
D Printing of Training GT on Z report Yes* 0<br />
No 1<br />
E Printing of Z counter on Z report Yes* 0<br />
No 1<br />
F Printing of DATA on PLU resetting report Yes* 0<br />
No 1<br />
G Resetting of GT1, 2, 3 at the general Z1 No* 0<br />
report Yes 1<br />
H OP X/Z report Enable* 0<br />
Disable 1<br />
71
Job code: 65<br />
* Item: Selection: Entry:<br />
A Printing of GT1 on X report No* 0<br />
Yes 1<br />
B Printing of GT2 on X report No* 0<br />
Yes 1<br />
C Printing of GT3 on X report No* 0<br />
Yes 1<br />
D Printing of Training GT on X report No* 0<br />
Yes 1<br />
E Clerk system Normal* 0<br />
Overlapped clerk 1<br />
F Issue of X report before CCD entry in Disable* 0<br />
case of CCD compulsory Enable 1<br />
G Locking REG mode entry after individual Disable* 0<br />
clerk resetting Enable 1<br />
H CCD compulsory Noncompulsory* 0<br />
Compulsory for individual clerk 1<br />
Compulsory for all clerks 2<br />
Job code: 66<br />
* Item: Selection: Entry:<br />
A After transaction receipt Total only 0<br />
Details* 1<br />
B Amount printing when PLU unit price No* 0<br />
is zero Yes 1<br />
C Conversion SBTL printing of native SBTL Yes* 0<br />
No 1<br />
D VAT/tax assignment print Yes 0<br />
No* 1<br />
E Always enter 0. 0<br />
F Always enter 0. 0<br />
G Logo text print on journal No* 0<br />
Yes 1<br />
H Footer print control All receipts* 0<br />
Only on selected function key at the time of finalization 1<br />
Job code: 67<br />
* Item: Selection: Entry:<br />
A Rounding amount printing No* 0<br />
Yes (for Australian system) 1<br />
B Total amount rounding when a transaction Rounding* 0<br />
is finalized directly by X, Y, c or b key Not rounding (for Australian system) 1<br />
C Rounding up of the unit digit of amount 0 - 9 (default: 0)<br />
D Rounding down of the unit digit of amount 0 - 9 (default: 0)<br />
E Application of rounding Item and payment* 0<br />
Payment 1<br />
F Limit of the least significant digit in Arbitrary* 0<br />
entering amount of item 0 only 1<br />
0 and 5 only 2<br />
G Memory of difference due to rounding No* 0<br />
Yes 1<br />
H Limit of the least significant digit in Arbitrary* 0<br />
entering amount of payment 0 only 1<br />
0 and 5 only 2<br />
72
Part3 FOR THE MANAGER<br />
Rounding amount printing (A)<br />
Total amount rounding when a transaction is finalized directly by X, Y, c or b key(B)<br />
• When you live in Australia, set as shown on the tale below for the parameters A and B.<br />
Rounding up of the unit digit of amount (C)<br />
Rounding down of the unit digit of amount (D)<br />
• Handle C and D as a pair. When you live in Australia, Switzerland, Norway or South Africa, set as shown on<br />
the table below for the parameters C and D.<br />
The rounding is performed as follows:<br />
In case C = 0: Unit digit of amount < or = Value of D — rounding down<br />
Value of D < or = Unit digit of amount — rounding to 5<br />
In other cases: Unit digit of amount < or = Value of D — rounding down<br />
Value of D < Unit digit of amount < Value of C — rounding to 5<br />
Value of C < or = Unit digit of amount — rounding up<br />
Application of rounding (E)<br />
Limit of the least significant digit in entering amount of item (F)<br />
Memory of difference due to rounding (G)<br />
Limit of the least significant digit in entering amount of payment (H)<br />
• When you live in Australia, Switzerland, Norway or South Africa, set as shown on the table below for the<br />
parameters E through H.<br />
CD E F G H<br />
Switzerland 82 Item & payment 0 and 5 only No 0 and 5 only<br />
Norway 54 Payment Arbitrary Yes 0 only<br />
South Africa 05 Payment Arbitrary Yes 0 and 5 only<br />
A B CD E F G H<br />
Australia Yes Not rounding 82 Payment* Arbitrary Yes 0 and 5 only<br />
* Applied to payment by cash and change amount.<br />
Job code: 68<br />
* Item: Selection: Entry:<br />
A Printing format for split pricing entry Normal* 0<br />
Australian format 1<br />
B to H Always enter 0. 0<br />
Part1<br />
Part2<br />
73
74<br />
Job code: 69<br />
* Item: Selection: Entry:<br />
A Always enter 0. 0<br />
B Always enter 0. 0<br />
C Always enter 0. 0<br />
D Rounding of foreign currency for V Rising to unit* 0<br />
Round off (4 down/5 up) 1<br />
E Tax system Auto tax 1-4 0<br />
Auto VAT 1-4* 1<br />
<strong>Manual</strong> VAT 1-4 2<br />
<strong>Manual</strong> VAT 1 3<br />
<strong>Manual</strong> tax 1-4 4<br />
Auto VAT 1 & Auto tax 2-4 5<br />
F Tax print when taxable subtotal is zero No* 0<br />
Yes 1<br />
G Tax print when tax is zero Yes* 0<br />
No 1<br />
H Rounding system Normal* 0<br />
Sweden 1<br />
Denmark 2<br />
Rounding system<br />
• When you live in Sweden or Denmark, change the default setting (H=0) to the corresponding setting.<br />
Job code: 70<br />
* Item: Selection: Entry:<br />
A Split pricing counting Quantity* 0<br />
Package 1<br />
B to H Always enter 0. 0<br />
Split pricing counting<br />
• When “Quantity” is selected, selling quantity is added to the quantity counter (printed on sales reports), and<br />
when “Package” is selected, quantity “1” is always added to the counter regardless a selling quantity.
3<br />
Part1<br />
Various Function Selection Programming 2<br />
Part2<br />
Part3 FOR THE MANAGER<br />
The cash register provides various options so you can use the register to suit your sales needs.<br />
In this section, you can program the following features (parameters within parentheses indicates default setting):<br />
• Power save mode (entering the power save mode after 30 minutes)<br />
• Logo message print format (Header 6-line message)<br />
• Clerk code assignment (Clerk codes 1 to 4 are assigned for clerk numbers 1 to 4 respectively.)<br />
• Entry digit limit for cash in drawer (999999999)<br />
• Entry digit limit for cheque cashing (99999999)<br />
• Entry digit limit for cheque change (99999999)<br />
• Thermal printer density (standard density)<br />
• Training clerk specification (none) - If you specify a clerk number who is trained for use on this cash register,<br />
the cash register will go into training mode when the clerk is signed on for sales entries. The sales operations<br />
done by the trained clerk do not affect sales totals. For details, refer to TRAINING MODE section.<br />
Power save mode<br />
s 10 @ *ABCD s A<br />
* Item: Selection: Entry:<br />
A Entering power save mode Yes* 0<br />
when time is displayed No 1<br />
B-D Time(min.) to entering power save mode 001-254 or 999<br />
since no operation is made (Default 030)<br />
When 999 is set for B to D, entering into power save mode is inhibited.<br />
Key operation example<br />
s 10 @<br />
0060 sA<br />
Print<br />
75
76<br />
Logo message print format<br />
You can select the number of lines for your logo message, and the position to print it on receipt.<br />
For details of the logo message type, please refer to “Logo messages” on page 25.<br />
*A: Logo message type<br />
0: Header 3-line message without graphic logo<br />
1: Graphic logo only<br />
2: Footer 3-line message with graphic logo<br />
3: Header 6-line message<br />
4: Header 3-line message with graphic logo<br />
5: Header 3-line message and footer 3-line message<br />
Clerk code assignment<br />
s<br />
* 00 : Disallows to use the clerk.<br />
By default, clerk codes 1 to 4 are programmed for clerk no. 1 to 4.<br />
Entry digit limit for cash in drawer (CID) (sentinel)<br />
s<br />
Key operation example<br />
s 11 @<br />
0 sA<br />
Clerk no.<br />
16 @ (1 to 25) @<br />
Key operation example<br />
s 16 @<br />
20 @ 99 sA<br />
20 @<br />
Key operation example<br />
s 20 @<br />
9999 sA<br />
To set 0<br />
*A s 11<br />
@ s A<br />
Print<br />
Clerk code<br />
(00 to 99)*<br />
Print<br />
Entry digit limit for CID<br />
(max. 9 digits)<br />
Print<br />
s<br />
s<br />
A<br />
A
Entry digit limit for cheque cashing<br />
s<br />
Entry digit limit for cheque change<br />
s<br />
21 @<br />
Key operation example<br />
s 21 @<br />
99999 sA<br />
22 @<br />
Key operation example<br />
s 22 @<br />
9999 sA<br />
Thermal printer density<br />
s 50 @<br />
Part1<br />
Part2<br />
Part3 FOR THE MANAGER<br />
* 50 (100%) is the default setting. To make the print darker, set a larger number, and to make the print lighter,<br />
set a smaller number.<br />
Key operation example<br />
s 50 @<br />
70 sA<br />
Training clerk specification for training mode<br />
For the details of clerk training, please refer to “TRAINING MODE” on page 83.<br />
s 86 @<br />
To cancel<br />
Clerk number<br />
(1 to 25) s A<br />
Key operation example<br />
s 86 @<br />
20 sA<br />
Entry digit limit for cheque<br />
cashing (max. 8 digits)<br />
Entry digit limit for cheque<br />
change (max. 8 digits)<br />
To set 0<br />
Print<br />
Print<br />
*Printer density<br />
(00-99) s A<br />
Print<br />
Print<br />
s<br />
s<br />
A<br />
A<br />
77
78<br />
AUTO key programming — Automatic sequencing key<br />
If you program frequently performed transactions or report sequences for the [ and ] key, you can call<br />
those transactions and/or reports simply by pressing the [ or ] key in key operations.<br />
Programming for [ ; entering a PLU 2 item and a dept. 6 item (unit price: 1.00)<br />
AUTO<br />
setting<br />
[ or ] [ Transaction<br />
or<br />
(key entry) ]<br />
A<br />
Key operation example<br />
[<br />
2 p 100 § [A<br />
Delete<br />
max. 25 times<br />
Print<br />
When the AUTO key has been programmed to execute a report job function, the mode switch must<br />
be in the appropriate position (OPX/Z for individual clerk reports, X1/Z1 for daily reports or X2/Z2<br />
for weekly or monthly reports).
4<br />
EURO Programming<br />
Part1<br />
Part2<br />
Part3 FOR THE MANAGER<br />
For details of EURO migration operation, please refer to “EURO MIGRATION FUNCTION”.<br />
EURO system settings<br />
To set 0 for all items<br />
s 8 @ s<br />
*ABCD<br />
* Item: Selection: Entry:<br />
A Printing exchange total amount and No* 0<br />
change amount on receipt or journal Yes 1<br />
B Always enter 0. 0<br />
C Cheque and credit operation when No* 0<br />
tendering in foreign currency Yes 1<br />
D Exchange calculation method Multiplication* 0<br />
Division 1<br />
Printing exchange total amount and change amount on receipt/journal<br />
• Total and change amounts in exchange currency are printed respectively below each of the total and<br />
exchange amounts in domestic currency.<br />
Exchange calculation method<br />
• “Division” or “Multiplication” can be selected for the conversion method from domestic currency to exchange<br />
currency, and the calculation is performed as follows:<br />
In case that “Division” is selected:<br />
Domestic currency amount Exchange rate = Exchange amount<br />
In case that “Multiplication” is selected<br />
Domestic currency amount Exchange rate = Exchange amount<br />
Key operation example<br />
s 8 @<br />
1000 s A<br />
Automatic EURO modification operation settings<br />
s 12<br />
* Item: Selection: Entry:<br />
A Converting the preset unit price of Dept./PLU in the automatic Yes* 0<br />
modification operation for EURO (job #800 in the X2/Z2 mode) No 1<br />
B Automatic modification operation for EURO Compulsory* 0<br />
(job #800 in the X2/Z2 mode) at the preset date Non-compulsory 1<br />
Key operation example<br />
s 12 @<br />
01 s A<br />
Print<br />
@<br />
To set 00<br />
*AB s A<br />
Print<br />
A<br />
If you have already made the Job #800 operation with the substitution of 3 for “A” in the X2/Z2<br />
mode, this programming is disabled.<br />
79
80<br />
5<br />
Date setting for EURO modification operation<br />
s 13<br />
• In case you changed the date format using job code 61, follow the format you selected for setting<br />
the date.<br />
• If all zeros are set, this programming is disabled.<br />
• If you have already made the Job #800 operation with the substitution of 3 for “A” in the X2/Z2<br />
mode, this programming is disabled.<br />
Time setting for EURO modification operation<br />
s 14<br />
@<br />
Key operation example<br />
s 13 @<br />
01072009 s A<br />
Key operation example<br />
@<br />
s 14 @<br />
10 s A<br />
• If you have already made the Job #800 operation with the substitution of 3 for “A” in the X2/Z2<br />
mode, this programming is disabled.<br />
Reading Stored Programs<br />
To set all zeros<br />
Date (Day-Month-Year)<br />
(seven or eight digits)<br />
Time (Hour) (00-23)<br />
The machine allows you to read every program stored in the PGM mode.<br />
Key sequence for reading stored program<br />
Print<br />
Print<br />
s A<br />
Report name Key sequence<br />
Programming report 1 A<br />
Programming report 2 2 A<br />
Auto key programming report 1 A<br />
Printer density programming report 3 A<br />
Department programming report 4 A<br />
PLU programming report Start PLU code @ End PLU code p<br />
To stop reading programming report, turn the mode switch to the MGR position.<br />
s A
Sample printouts<br />
1 Programming report 1<br />
Mode<br />
Function no.& its text<br />
Function parametrs<br />
Discount amt. w/sign<br />
Function parametrs<br />
Percent rate with sign<br />
Percent limit<br />
Entry digit limit<br />
Function parameters (A-C)<br />
Foreign currency<br />
symbol/Rate<br />
Part1<br />
Part2<br />
Part3 FOR THE MANAGER<br />
Logo Message<br />
Function selection for<br />
miscellaneous keys (A-H)<br />
Print format (A-H)<br />
Receipt print format(A-H)<br />
EURO system settings (A-D)<br />
Power save mode(A-D)<br />
Logo message print format<br />
Automatic EURO modification<br />
operation settings (AB)<br />
Date setting for EURO<br />
modification operation<br />
Time setting for EURO<br />
modification operation<br />
Entry digit limit for CID<br />
Entry digit limit for cheque cashing<br />
Entry digit limit for cheque changing<br />
Tax rate<br />
Min. taxable amount<br />
Clerk name/code<br />
81
82<br />
2 Programming report 2<br />
3 Auto key programming report<br />
4 Printer density programming report<br />
Job code<br />
Dept. code<br />
Dept. text<br />
A to H from the left<br />
Group no.<br />
* Job code #71, 72, 76 and<br />
77 are fixed settings, for<br />
which you cannot change<br />
the settings.<br />
Domestic currency symbol<br />
Training clerk specification<br />
Training mode text<br />
Language selection<br />
Entered value<br />
Printer density<br />
Printing density<br />
example<br />
5 Department programming report<br />
6 PLU programming report<br />
PLU code<br />
PLU text<br />
Dept. function<br />
Dept. unit price<br />
w/sign<br />
Minus department<br />
Tax status<br />
Range<br />
Mode parameter<br />
Unit price<br />
Associated<br />
dept. code
Part3 FOR THE MANAGER<br />
TRAINING MODE<br />
The training mode is used when the operator or the manager practices register operations.<br />
When a clerk in training is selected, the machine automatically enters the training mode. To specify a clerk to be<br />
trained, refer to “Training clerk specification for training mode” in “ADVANCED FUNCTION PROGRAMMING” in<br />
page 77.<br />
The training operation is valid only in REG, MGR and mode.<br />
The corresponding clerk memory is only updated in the training mode.<br />
Key operation example<br />
A clerk set in training 20 L<br />
1000 ∞<br />
3 @<br />
£<br />
A<br />
Part1<br />
Part2<br />
Print<br />
83
84<br />
READING (X) AND RESETTING (Z)<br />
OF SALES TOTALS<br />
• Use the reading function (X) when you need to take a reading of sales information entered since the last reset.<br />
You can take this reading any number of times. It does not affect the register’s memory.<br />
• Use the resetting function (Z) when you need to clear the register’s memory. Resetting prints all sales information and<br />
clears the entire memory except for the GT1 through GT3, Training GT, reset count, and consecutive number.<br />
1<br />
Summary of Reading (X) and Resetting (Z) Reports<br />
X1 and Z1 reports: Daily sales reports<br />
X2 and Z2 reports: Periodic (monthly) consolidation reports<br />
When you take an X or Z report, turn the mode switch to the appropriate position referring to the column of<br />
“Mode switch position” shown on the table below, and use the following corresponding key sequence.<br />
Item<br />
Flash report:<br />
(Only display)<br />
To clear the<br />
display, press the<br />
l key or turn the<br />
mode switch to<br />
another position.<br />
Full sales report<br />
Department report<br />
Individual group<br />
total report on<br />
department<br />
Full group total<br />
report on<br />
department<br />
PLU report by<br />
designated range<br />
PLU report by<br />
associated<br />
department<br />
Transaction report<br />
Mode switch position<br />
OPX/Z X1/Z1 X2/Z2<br />
X<br />
--<br />
--<br />
--<br />
--<br />
--<br />
--<br />
--<br />
--<br />
X1, Z1<br />
X1, Z1<br />
--<br />
X2, Z2<br />
X1 X2<br />
X1 X2<br />
X1 X2<br />
X2, Z2<br />
X1 X2<br />
X1 X2<br />
A key: Sales total<br />
Key operation<br />
Dept. code d : Department sales total<br />
For dept. 1 to 20; Dept. key ( ¡ to π )<br />
D<br />
For dept. 21 to 40; Dept. key ( ¡ to π )<br />
@ key: Amount of cash in drawer<br />
Reading: Resetting:<br />
A P A<br />
Reading:<br />
d<br />
Reading: Group number<br />
Reading: 0 @<br />
Reading:<br />
Reading: 1 A<br />
@ d<br />
d<br />
Start<br />
PLU code<br />
All PLUs<br />
@<br />
End<br />
PLU code p<br />
Resetting:<br />
All PLUs<br />
Start<br />
PLU code @<br />
End<br />
PLU code P p<br />
Reading: Associated dept. code D p
Item<br />
Total in drawer<br />
report<br />
Mode switch position<br />
OPX/Z X1/Z1 X2/Z2<br />
--<br />
--<br />
--<br />
X2, Z2<br />
Part1<br />
Part2<br />
X1 X2 Reading: 2 A<br />
Part3 FOR THE MANAGER<br />
Key operation<br />
Individual clerk<br />
report X, Z -- --<br />
Reading: Resetting: P<br />
(The report of the current clerk)<br />
Full clerk report<br />
Hourly report<br />
(full)<br />
X1, Z1<br />
X1, Z1<br />
--<br />
L L<br />
Reading: Resetting:<br />
L P L<br />
Reading: Resetting:<br />
s P s<br />
Hourly report<br />
(by range)<br />
-- X1 -- Reading: Start time End time @ s<br />
(hour) (hour)<br />
s s<br />
Daily net sales<br />
report<br />
-- -- X2, Z2 Reading: Resetting: P<br />
• When both sales quantities and sales amounts are zero, printing is skipped. If you do not want to skip,<br />
change the programming. (Refer to “Print format” of “Various Function Selection Programming 1”.)<br />
• “X” represents read symbol and “Z” represents reset symbol in the reports.<br />
• To stop reading and resetting the PLU sales report, turn the mode switch to the MGR position.<br />
The data will not be erased when you reset.<br />
• The drawer does not open when you take X/Z reports.<br />
The drawer can be opened by pressing the A key to remove the till after closing your business.<br />
• When printing is performed continuously, the printing may be intermitted several seconds. After<br />
the intermission, the printing will be restarted.<br />
85
86<br />
2<br />
Daily Sales Totals<br />
For the sample reports of the full sales and periodic consolidation report, refer to "FULL SALES REPORT (Z<br />
REPORT)" on page 33.<br />
Individual group total report on<br />
department<br />
• Sample report<br />
Mode title<br />
Report title<br />
Group 1 total<br />
Department report<br />
• Sample report<br />
Mode title<br />
Report title
Full group total report on<br />
department<br />
• Sample report<br />
PLU report by designated range<br />
• Sample report<br />
PLU code<br />
Item label<br />
Mode title<br />
Report title<br />
Group 1 total<br />
*: When you take Z1 report, “Z1” is printed.<br />
Mode title*<br />
Report title<br />
Range<br />
Sales q'ty and total<br />
Range sum<br />
Part1<br />
Part2<br />
Part3 FOR THE MANAGER<br />
PLU report by associated<br />
department<br />
• Sample report<br />
PLU code<br />
Transaction report<br />
• Sample report<br />
From here this report shows the same transaction<br />
data as when a full sales report is run.<br />
Total in drawer report<br />
• Sample report<br />
Mode title<br />
Report title<br />
Mode title<br />
Report title<br />
Associate<br />
dept. code<br />
Sales q'ty and total<br />
Mode title<br />
Report title<br />
Cash in drawer<br />
Cheque in drawer<br />
Cash plus cheque in drawer<br />
Change total for cheque<br />
tendering<br />
87
88<br />
Individual clerk report<br />
• Sample report<br />
Full clerk report<br />
Mode title<br />
Report title<br />
Clerk no. /code<br />
Clerk name<br />
Customer counter<br />
Sales total<br />
Average<br />
The printout occurs in the same format as in the<br />
sample report of individual clerk, but all clerk’s sales<br />
data and total of all clerks are printed in the order of<br />
clerk number (from #1 to #25).<br />
Hourly report<br />
• Sample report<br />
Mode title*<br />
Report title<br />
Customer counter<br />
Sales total<br />
*: When you take Z1 report, “Z1” is printed.<br />
When you take an hourly report by range, a report<br />
of the specified range of time (hour) is printed.
Part1<br />
Part2<br />
Part3 FOR THE MANAGER<br />
CCD -Compulsory Cash/cheque Declaration-<br />
You can make mandatory the declaration of the cash/cheque amount in the drawer before outputting<br />
clerk Z report.<br />
If your register is programmed for compulsory cash/cheque declaration (CCD), a clerk must first count and<br />
declare the cash and cheque amounts (of domestic and foreign currency) in the drawer before the clerk can<br />
output a clerk report. The procedure for outputting a CCD report is shown below.<br />
Type of compulsory cash/cheque declaration<br />
• Compulsory declaration prior to individual clerk resetting<br />
• Compulsory declaration prior to full clerk resetting<br />
When cash/cheque declaration is compulsory, flash report are not available.<br />
• Individual clerk report (Currently assigned clerk's declaration and report)<br />
OP X/Z mode<br />
The drawer opens and the clerk is prompted to enter<br />
the cash and cheque amounts. (“CCD ” is displayed.)<br />
• Full clerk report<br />
X1/Z1 mode<br />
P L<br />
P L<br />
Q’ty<br />
To display cash/cheque subtotal(Available only after the first entry is made)<br />
X : When inputting the cash and/or cheque amount in the drawer<br />
V : When inputting the amount of a foreign currency obtained in the sales by preset rate calculation in the<br />
drawer<br />
CCD entry amount<br />
Amount<br />
@ X or X V v A<br />
X V or<br />
Input the total amount of<br />
cash or cheques<br />
Input the cheque or<br />
currency denomination<br />
s<br />
Cancel<br />
previous<br />
entry<br />
Currency exchange 1<br />
in drawer to be obtained<br />
Exchange 1 (preset rate) total declared<br />
Difference<br />
Cash in drawer to be obtained<br />
Cheque in drawer<br />
Cash/cheque in drawer<br />
Cash+cheque total declared<br />
Difference<br />
Total of difference<br />
89
90<br />
OVERRIDE ENTRIES<br />
Programmed limit for functions (such as for maximum amounts) can be overridden by making an entry in the<br />
MGR mode.<br />
1. Turn the mode switch to the MGR position.<br />
2. Make an override entry.<br />
In this example, the register has been programmed not to allow<br />
discounts entries over 1.00.<br />
Key operation example<br />
REG mode 1500 £<br />
entries 250 - ...Error<br />
l<br />
Turn the mode switch<br />
to the MGR position.<br />
250 -<br />
Return the mode switch<br />
to the REG position.<br />
A<br />
Print<br />
CORRECTION AFTER FINALIZING A<br />
TRANSACTION (Void mode)<br />
REG<br />
OPX/Z<br />
When you need to void incorrect entries that clerks cannot correct (incorrect entries found after finalizing a<br />
transaction or cannot be corrected by direct or indirect void), follow this procedure:<br />
1. Turn the mode switch to the position using the manager key (MA), to enter<br />
into the void mode. In the void mode, the back light of the operator display turns red.<br />
2. Repeat the entries that are recorded on an incorrect receipt. (All data on the<br />
incorrect receipt is removed from register memory; the voided amounts are<br />
added to the void mode transaction totalizer.)<br />
Incorrect receipt<br />
PGM<br />
Cancellation receipt<br />
REG<br />
OPX/Z MGR<br />
PGM<br />
MGR<br />
X1/Z1<br />
X2/Z2<br />
X1/Z1<br />
X2/Z2
Part1<br />
Part2<br />
Part3 FOR THE MANAGER<br />
EURO MIGRATION FUNCTION<br />
• EURO programming described in this section are for users in the countries which will join to the<br />
members of the European Currency Union, not for the users in the countries already have joined<br />
the Union.<br />
Your register can be modified to correspond with each period set for the introduction of EURO, and in your<br />
register each currency is treated as shown on the table below depending on which period you are in.<br />
Basically your register can be automatically modified to correspond to the introduction of EURO by executing<br />
automatic EURO modification operation shown below in the X2/Z2 mode. However, there are several options<br />
you must set depending on your needs. So, please carefully conduct necessary settings.<br />
How currencies are treated in your register<br />
Currency<br />
EURO<br />
National currency<br />
Foreign currency<br />
Automatic EURO modification operation<br />
Make sure the mode switch is in the X2/Z2 mode first, then perform the following procedure. Please note that<br />
you can perform each operation only once with the substitution of “A=1”, “A=2” and “A=3”. For example if you<br />
performed the operation with the substitution of “A=2” first, you cannot perform the operation with the<br />
substitution of “A=1”.<br />
8:<br />
Period 1<br />
*A=1: Applicable for period 1<br />
*A=2: Applicable for period 2<br />
*A=3: Applicable for period 3<br />
After the introduction of<br />
EURO, and before EURO<br />
banknotes and coins begin to<br />
circulate<br />
Exchange key<br />
(Preset rate entry)<br />
Domestic currency<br />
Exchange key<br />
(<strong>Manual</strong> rate entry)<br />
P @ A<br />
*A<br />
Period 2<br />
After EURO banknotes and<br />
coins begin to circulate, and<br />
before national currency is<br />
withdrawn from circulation.<br />
(Co-existence of EURO and<br />
national currency)<br />
Domestic currency<br />
Exchange key<br />
(Preset rate entry)<br />
Exchange key<br />
(<strong>Manual</strong> rate entry)<br />
Period 3<br />
After the national currency is<br />
withdrawn from circulation<br />
Domestic currency<br />
Exchange key<br />
91
92<br />
The details of the register system modification are as shown below:<br />
A=1 A=2 A=3<br />
Items (EURO status 1) (EURO status 2) (EURO status 3)<br />
General Z1 report Issue Issue Issue<br />
General Z2 report Issue Issue Issue<br />
GT memories (GT1, GT2, GT3 and Training GT) - Clear Clear*1<br />
Conversion of preset prices of Dept./PLU - Yes Yes*1<br />
Conversion of entry digit/amount limit - Yes Yes*1<br />
Exchange amount printing for total and change Yes Yes No<br />
Exchange calculation method Division Multiplication Multiplication<br />
Domestic currency symbol - [EURO] [EURO]<br />
Domestic currency decimal point position - 2 2<br />
Exchange currency symbol [EURO] Previous domestic currency<br />
symbol<br />
-*2<br />
Exchange currency decimal point position 2 Previous domestic currency<br />
decimal point position<br />
-<br />
Rounding system (Denmark/Sweden/Normal) - Normal Normal*1<br />
Rounding up/down of the unit digits of amount - No No*1<br />
Lowest digit entering limitation of item - Arbitrary Arbitrary*1<br />
Lowest digit entering limitation of payment - Arbitrary Arbitrary*1<br />
Memory of difference due to rounding - No No*1<br />
Rounding of exchange currency Round off<br />
(4 down/5 up)<br />
Round off Round off<br />
• The item marked with “-” remains the same as the previous data.<br />
*1: When you perform from EURO status 2, previous data remains unchanged.<br />
*2: When you perform from EURO status 1 or 2, “space” is set.<br />
IMPORTANT<br />
• Conversion of the preset unit prices of departments and PLUs<br />
Note that the conversion rate of the preset rate of the V key is applied for the conversion, and the method is<br />
set to “division”. When the conversion is performed, the message “PRICE CONVERTED” will be printed on the<br />
#800 report.<br />
• After the execution of the procedure with “A=1”, treat EURO as foreign currency using the exchange key (V)<br />
with the preset rate entry. Set the EURO conversion rate as the currency exchange rate for the exchange key.<br />
• After the execution of the procedure with “A=2”, treat EURO as domestic currency, and national currency as<br />
foreign currency using the exchange key (V) with the preset rate entry. Set the EURO conversion rate as the<br />
currency exchange rate for the exchange key.<br />
• As for the percent rate for %, & and -, the automatic conversion is not made. So, when your domestic<br />
currency becomes EURO, you must change these settings so that they are base on EURO currency.<br />
You can manually make these settings. For programming details, please refer to “EURO<br />
Programming” section.
Part3 FOR THE MANAGER<br />
Checking the current EURO status<br />
You can check the EURO status currently set on the cash register. Set the manager key (MA) to the X2/Z2<br />
position, and perform the following sequence. The current EURO status will be printed on the receipt/journal.<br />
8:<br />
@<br />
A<br />
Part1<br />
Part2<br />
Optional Programming for the Introduction of EURO<br />
Some programming relating with the function of exchange key (V) cannot be changed automatically with the<br />
execution of modification operation described in the previous section. After the execution on each period,<br />
conduct the following programming depending on your needs.<br />
Programming for Exchange Key (V)<br />
Currency exchange rate<br />
For period 1 and period 2, set the EURO conversion rate.<br />
For programming details, refer to “Programming for V” on page 58.<br />
Exchange rate entry selection<br />
When you treat EURO currency in the exchange key, you must apply preset rate entry. So, make enable for<br />
preset rate entry for period 1 and period 2. For programming details, refer to “Programming for V” on page 58.<br />
Cheque/credit operation<br />
For period 1 and period 2, enable cheque/credit operation when tendering in foreign currency so that you can<br />
treat cheque and credit for EURO currency and national currency. For programming details, refer to “EURO<br />
system settings” on page 79.<br />
Setting the date and time when the automatic modification operation for EURO should be executed<br />
Selection of compulsory/non-compulsory of execution of the automatic modification operation for EURO<br />
You can program the scheduled date and time to execute the automatic EURO modification operation .<br />
From ten days before the preset date, the remaining days are printed at the bottom of the daily full resetting (Z1)<br />
report as follows.<br />
Preset data and time<br />
Remaining days<br />
EURO status<br />
When the above-mentioned preset date and time has come, and also when you start an entry in the REG/MGR<br />
mode, the error message “EURO CHANGE” is displayed. You cannot make any operation in the REG/MGR<br />
mode until you execute the automatic modification operation for EURO (job #800) in the X2/Z2 mode.<br />
You can program so that you can make entries in the REG/MGR mode even when the error message is<br />
displayed.<br />
Date and time setting will be reset after the execution of the automatic modification operation and you can<br />
program again the date and time for the next automatic modification operation.<br />
93
94<br />
OPERATOR MAINTENANCE<br />
1<br />
When power is lost, the machine retains its memory contents and all information on sales entries.<br />
• When power failure is encountered in register idle state or during an entry, the<br />
machine returns to normal operation after power recovery.<br />
• When power failure is encountered during a printing cycle, the register prints<br />
“============” and then carries out the correct printing procedure after<br />
power recovery. (See the sample print.)<br />
2<br />
If the printer runs out of paper, the printer will stall, and “PAPER EMPTY” will appear on the display. Key entries<br />
will not be accepted. Refer to section 4 in this chapter, install a new roll, then press the l key. The printer will<br />
print the power failure symbol and resume printing.<br />
If the print roller arm comes up, the printer stalls, “HEAD UP” will appear on the display. Key entries will not be<br />
accepted. Push down the arm until it is securely locked, then press the l key. The printer will print the power<br />
failure symbol and resume printing.<br />
3<br />
In Case of Power Failure<br />
In Case of Printer Error<br />
Cautions in Handling the Printer and Recording Paper<br />
Cautions in handling the printer<br />
• Avoid dusty and humid environments, direct sunlight and iron powder. (A permanent magnet and<br />
electromagnet are used in this machine.)<br />
• Never pull the paper when the print roller arm is locked. First lift up the arm, and then remove the paper.<br />
• Never touch the surface of the print head and print roller.<br />
Cautions in handling the recording paper (thermal paper)<br />
• Use only the paper specified by SHARP.<br />
• Do not unpack the thermal paper until you are ready to use it.<br />
• Avoid heat. The paper will color at around 70°C.<br />
• Avoid dusty and humid storage places. Avoid direct sunlight.<br />
• The printed text on the paper can discolor under conditions of high humidity and temperature, exposure to the<br />
direct sunlight, contact with glue, thinner or a freshly copied blueprint, and heat caused by friction from<br />
scratching or other such means.<br />
• Be very careful when handling the thermal paper. If you want to keep a permanent record, copy the printed text<br />
with a photocopier.
4<br />
Replacing the Paper Roll<br />
Part1<br />
Part2<br />
Part3 FOR THE MANAGER<br />
Be sure to use paper rolls specified by SHARP.<br />
The use of any other paper rolls other than those specified could cause paper jamming, resulting in register<br />
malfunction.<br />
Paper specification<br />
Paper width: 57.5 ± 0.5 mm<br />
Max. outside diameter: 80 mm<br />
Quality: Thermal paper<br />
• Be sure to set the paper roll prior to using your machine, otherwise it may cause a malfunction.<br />
Install the paper roll in the printer. Be careful to set the roll correctly.<br />
(How to set the paper roll)<br />
To the printer<br />
To the printer<br />
Removing the paper roll<br />
When a red dye appears on the paper roll, it is time to replace it. Replace the paper roll with a new one. If you<br />
plan on not using the register for an extended period of time, remove the paper roll, and store it in an appropriate<br />
place.<br />
Caution: The paper cutter is mounted on the printer cover. Be careful not to cut yourself.<br />
Removing the receipt paper roll:<br />
Print roller arm<br />
(Receipt side)<br />
Removing the journal paper roll:<br />
Area to cut<br />
Correct<br />
Incorrect<br />
1. Remove the printer cover.<br />
2. Lift up the print roller release lever (indicated as "PULL" on it) of<br />
the receipt side to unlock and open the print roller arm.<br />
3. Remove the paper roll from the paper roll cradle of the receipt<br />
side.<br />
Do not pull the paper through the printer.<br />
1. Turn the mode switch to a position other than “ ” with the<br />
power cord connected.<br />
2. Remove the printer cover.<br />
3. Press the } key to advance the journal paper until its printed<br />
part is out of the way.<br />
4. Cut the paper and remove the take-up spool.<br />
5. Lift up the print roller release lever (indicated as "PULL" on it) of<br />
the journal side to unlock and open the print roller arm.<br />
6. Remove the paper roll from the paper roll cradle of the journal side.<br />
95
96<br />
Installing the paper roll<br />
7. Remove the printed journal roll from the take-up spool.<br />
Do not pull the paper through the printer.<br />
For information on how to install paper rolls, refer to "Installing Paper Rolls" on page 10.<br />
Caution: The paper cutter is mounted on the printer cover. Be careful not to cut yourself.<br />
5<br />
Caution: The paper cutter is mounted on the printer cover. Be careful not to cut yourself. Never touch<br />
the print head immediately after printing, as the head may still be hot.<br />
1. Remove the printer cover.<br />
2. Lift up the print roller release lever to unlock and open the print roller arm.<br />
3. Remove the paper jam. Check for and remove any shreds of paper that may remain in the printer.<br />
4. Reset the paper roll correctly by following the steps in “Installing Paper Rolls” on page 10.<br />
6<br />
Removing a Paper Jam<br />
Cleaning the Printer (Print Head / Sensor / Roller)<br />
When the printed text is getting dark or faint, paper dust may be stuck to the print head, sensor and/or roller.<br />
Clean them as follows:<br />
Caution:<br />
• Never touch the print head with a tool or anything hard as it may damage the head.<br />
• The paper cutter is mounted on the printer cover. Be careful not to cut yourself.<br />
Roller<br />
Print head<br />
Sensor<br />
1. Turn the mode switch to the “ ” position.<br />
2. Remove the printer cover.<br />
3. Lift up the print roller release lever to unlock and open<br />
the print roller arm.<br />
4. Remove the paper roll referring to the “Removing the<br />
paper roll” section.<br />
5. Clean the print head with a cotton swab or soft rag<br />
moistened with ethyl alcohol or isopropyl alcohol. Clean<br />
the roller and the sensor in the same manner.<br />
6. Reset the paper roll correctly by following the steps in<br />
“Installing Paper Rolls” on page 10.
7<br />
Part1<br />
Part2<br />
Part3 FOR THE MANAGER<br />
The till in the register is detachable. After closing your business for the day, remove the till from the drawer and<br />
keep the drawer open. The 8-denomination coin case is also detachable from the till. To detach the drawer, pull<br />
it forward fully with the till removed, and remove it by lifting it up.<br />
8<br />
Removing the Till and the Drawer<br />
Opening the Drawer by Hand<br />
Lever<br />
Till Coin case<br />
Drawer<br />
Bill case<br />
8-denomination coin case<br />
(detatchable)<br />
The drawer automatically opens. However, when a power failure occurs or the<br />
machine becomes out of order, slide the lever located on the bottom of the<br />
machine in the direction of the arrow. (See the diagram at the left.)<br />
The drawer will not open if it is locked with the key.<br />
1<br />
2<br />
97
9<br />
The malfunctions shown in the left-hand column below, labelled “Fault,” do not necessarily indicate functional<br />
faults of the machine. It is therefore advisable to refer to “Checking” shown in the right-hand column before<br />
calling for service.<br />
(1)<br />
(2)<br />
(3)<br />
(4)<br />
(5)<br />
(6)<br />
(7)<br />
Before Calling for Service<br />
Error message table<br />
Fault Checking<br />
The display shows symbols that do not make sense. • Has the machine been initialized properly as shown in<br />
"PREPARING THE CASH REGISTER" on page 8?<br />
(Note that initialization clears all the data and programmed<br />
settings stored in memory.)<br />
The display won’t illuminate even when the mode switch<br />
is turned to any other position than “ ”.<br />
The display is illuminated, but the whole machine<br />
refuses registrations.<br />
• Is power supplied to the electrical outlet?<br />
• Is the power cord plug out or loosely connected to the<br />
AC outlet?<br />
• Is a clerk code assigned to the register?<br />
• Is the mode switch set properly at the “REG” position?<br />
No receipt is issued. • Is the paper roll properly installed?<br />
• Is there a paper jam?<br />
• Is the receipt function in the “OFF” status?<br />
• Is the print roller arm securely locked?<br />
No journal paper is taken up. • Is the take-up spool installed on the bearing properly?<br />
• Is there a paper jam?<br />
Printing is unusual. • Is the print roller arm securely locked?<br />
Open the print roller arm, and lock the arm by following<br />
the instruction of installation.<br />
• Is the paper roll properly installed?<br />
• Are the print head/sensor/roller clean?<br />
Continuous printing stops. • Display shows “→ → → → →”.<br />
Printing will automatically restart after several seconds.<br />
When the following error messages are displayed, press the l key and take a proper action according to the<br />
table below.<br />
Error message Error status Action<br />
ENTRY ERROR Registration error Make a correct key entry.<br />
MISOPERATION Misoperation error Make a correct key entry.<br />
NO RECORD Undefined code is entered. Enter a correct code.<br />
MEMORY FULL Memory is full (in the AUTO key programming). Program the AUTO key within 25 steps.<br />
SBTL COMPUL. Compulsory depression of the s key for<br />
direct finalization<br />
Press the s key and continue the operation.<br />
TEND COMPUL. Compulsory tendering Make a tendering operation.<br />
NOT ASSIGNED No entry of a clerk code Make a clerk code entry.<br />
OVER LIMIT. Overflow limitation error Make a registration within a limit of entry.<br />
INH. OPEN PR The open price entry is inhibited. Make a preset price entry.<br />
INH. UNIT PR The preset price entry is inhibited. Make an open price entry.<br />
NOT NON-TEND The direct finalization is inhibited. Make a tendering operation.<br />
BUFFER FULL Subtotal void is not allowed. Finalize the transaction, and correct the wrong<br />
entries in the mode.<br />
HEAD UP Print roller arm is lifted up. Make sure the print roller arm is surely rocked.<br />
PAPER EMPTY Receipt or journal paper roll is not<br />
installed or empty.<br />
Install a receipt or journal paper.<br />
EURO CHANGE EURO modification operation must be Execute EURO modification operation (Job code<br />
executed 800).<br />
98<br />
CLERK ERR. Overlapped clerk error Complete the overlapped transaction under way.
SPECIFICATIONS<br />
Model: <strong>XE</strong>-<strong>A303</strong><br />
Dimensions: 355 (W) x 430 (D) x 312 (H) mm<br />
Weight: 11.5 kg<br />
Part1<br />
Part2<br />
Power source: Official (nominal) voltage and frequency<br />
Power consumption: Stand-by: 10W (When the official voltage is 220 to 230 V)<br />
Stand-by: 11W (When the official voltage is 230 to 240 V)<br />
Operating: 46W (When the official voltage is 220 to 230 V)<br />
Operating: 46W (When the official voltage is 230 to 240 V)<br />
Working temperature: 0 °C to 40 °C<br />
Electronics:<br />
Display:<br />
LSI (CPU) etc.<br />
Operator display: Dot matrix display (16 positions and 2 lines)<br />
Customer display:<br />
Printer:<br />
7-segment display (7 positions)<br />
Type: 2-station thermal printer<br />
Printing speed: Approx. 17 lines/second<br />
Printing capacity: 30 digits each for receipt/journal paper<br />
Other functions: • Graphic logo printing function<br />
• Logo message function<br />
• Receipt (ON-OFF) function<br />
Paper roll:<br />
• Receipt and journal independent paper feed function<br />
Width: 57.5 ± 0.5 mm<br />
Max. diam.: 80 mm<br />
Quality: High quality (0.06 to 0.08 mm thickness)<br />
Cash drawer: 5 slots for bill and 8 for coin denominations<br />
Accessories: Manager key 2<br />
Operator key 2<br />
Drawer lock key 2<br />
Paper roll 2<br />
Take-up spool 1<br />
Fixing angle bracket 1 set<br />
Instruction manual 1 copy<br />
"Where to Find" sheet 1 copy<br />
* Specifications and appearance subject to change without notice for improvement.<br />
Part3 FOR THE MANAGER<br />
Use these labels with the department keys. Write department names on the labels and attach them to the<br />
department keys by first removing the transparent key covers. (Please make a copy of this page.)<br />
Example:<br />
2<br />
1<br />
22<br />
D<br />
21<br />
E<br />
21<br />
Candy<br />
Danish<br />
1 E<br />
7<br />
6<br />
27<br />
I<br />
26<br />
J<br />
12<br />
11<br />
32<br />
N<br />
31<br />
O<br />
17<br />
16<br />
37<br />
S<br />
36<br />
T<br />
4<br />
3<br />
25<br />
24<br />
B<br />
23<br />
C<br />
9<br />
8<br />
30<br />
5 A 10 F 15 K 20<br />
P<br />
29<br />
G<br />
28<br />
H<br />
14<br />
13<br />
35<br />
34<br />
L<br />
33<br />
M<br />
19<br />
18<br />
40<br />
39<br />
Q<br />
38<br />
R<br />
99
100<br />
Attention: Your product<br />
is marked with this<br />
symbol. It means that<br />
used electrical and<br />
electronic products<br />
should not be mixed with<br />
general household<br />
waste. There is a<br />
separate collection<br />
system for these<br />
products.<br />
A. Information on Disposal for Users (private households)<br />
1. In the European Union<br />
Attention: If you want to dispose of this equipment, please do not use the<br />
ordinary dust bin!<br />
Used electrical and electronic equipment must be treated separately and<br />
in accordance with legislation that requires proper treatment, recovery<br />
and recycling of used electrical and electronic equipment.<br />
Following the implementation by member states, private households<br />
within the EU states may return their used electrical and electronic<br />
equipment to designated collection facilities free of charge*. In some<br />
countries* your local retailer may also take back your old product free of<br />
charge if you purchase a similar new one.<br />
*) Please contact your local authority for further details.<br />
If your used electrical or electronic equipment has batteries or<br />
accumulators, please dispose of these separately beforehand according<br />
to local requirements.<br />
By disposing of this product correctly you will help ensure that the waste<br />
undergoes the necessary treatment, recovery and recycling and thus<br />
prevent potential negative effects on the environment and human health<br />
which could otherwise arise due to inappropriate waste handling.<br />
2. In other Countries outside the EU<br />
If you wish to discard this product, please contact your local authorities<br />
and ask for the correct method of disposal.<br />
For Switzerland: Used electrical or electronic equipment can be returned<br />
free of charge to the dealer, even if you don’t purchase a new product.<br />
Further collection facilities are listed on the homepage of www.swico.ch<br />
or www.sens.ch.<br />
B. Information on Disposal for Business Users.<br />
1. In the European Union<br />
If the product is used for business purposes and you want to discard it:<br />
Please contact your SHARP dealer who will inform you about the takeback<br />
of the product. You might be charged for the costs arising from<br />
take-back and recycling. Small products (and small amounts) might be<br />
taken back by your local collection facilities.<br />
For Spain: Please contact the established collection system or your local<br />
authority for take-back of your used products.<br />
2. In other Countries outside the EU<br />
If you wish to discard of this product, please contact your local<br />
authorities and ask for the correct method of disposal.
FOR CUSTOMERS IN U.K.<br />
BLUE:<br />
BROWN:<br />
IMPORTANT<br />
The wires in this mains lead are coloured in accordance with the following code:<br />
Neutral<br />
Live<br />
As the colours of the wires in the mains lead of this apparatus may not correspond with the coloured<br />
markings identifying the terminals in your plug proceed as follows.<br />
The wire which is coloured BLUE must be connected to the terminal which is marked with the letter<br />
N or coloured black.<br />
The wire which is coloured BROWN must be connected to the terminal which is marked with the<br />
letter L or coloured red.<br />
The apparatus must be protected by a 3A fuse in the mains plug or distribution board.<br />
CAUTION: DO NOT CONNECT THE LIVE (BROWN) WIRE OR THE NEUTRAL (BLUE) WIRE<br />
TO THE EARTH TERMINAL OF YOUR 3-PIN MAINS PLUG.<br />
Environment Protection<br />
The device is supported by a battery. To dispose the battery safely to protect the environment,<br />
please note the following points:<br />
• Take the used battery to your local waste depot, dealer or customer service centre for recycling.<br />
• Do not throw the used battery into fire, into water or into the household waste!<br />
Umweltschutz<br />
Das Gerät wird durch eine Batterie gestützt. Um die Batterie sicher und umweltschonend zu<br />
entsorgen, beachten Sie bitte folgende Punkte:<br />
• Bringen Sie die leere Batterie zu Ihrer örtlichen Mülldeponie, zum Händler oder zum<br />
Kundenservice-Zentrum zur Entsorgung.<br />
• Werfen Sie die leere Batterie niemals ins Feuer, ins Wasser oder in den Hausmüll.<br />
Protection de l’environnement<br />
L’appareil est supporté sur pile. Afin de protéger l’environnement, nous vous recommendons de<br />
traiter la pile usagée la façon suivante:<br />
• Apporter la pile usagée à votre centre de traitement des ordures ménagères le plus proche ou,<br />
à votre revendeur ou, au service après-vente, pour recyclement.<br />
• Ne jamais jeter la pile usagée dans une source de chaleur, dans l’eau ou dans les vide-ordures.<br />
Miijöskydd<br />
Denna produkt nöddrivs av batteri.<br />
Vid batteribyte skall följande iakttagas:<br />
• Det förbrukade batteriet skall inlämnas till er lokala handlare eller till kommunal miljöstation för<br />
återinssamling.<br />
• Kasta ej batteriet i vattnet eller i hushållssoporna. Batteriet får ej heller utsätttas för öppen eld.<br />
Bescherming van het milieu<br />
Deze kassa gebruikt een batterij. Bescherm het milieu en gooi een gebruikte batterij op de juiste<br />
manier weg. Let op de volgende punten:<br />
• Breng een lege batterij naar de lokale verzamelplaats voor klein chemisch afval, terug naar de<br />
winkel of gooi in een batterijbak.<br />
• Gooi een gebruikte batterij niet in een vuur of water en gooi niet met het gewone huisafval weg.<br />
Geräuschpegel LpA: 62,3 dB<br />
Gemessen nach EN ISO 7779:2001
Printed in China / Imprimé en Chine / Gedruckt in China / Impreso en China / Gedrukt in China<br />
TINSM2559RCZZ 1