MX-B382/SC Operation-Manual Start-Guide GB - Sharp
MX-B382/SC Operation-Manual Start-Guide GB - Sharp
MX-B382/SC Operation-Manual Start-Guide GB - Sharp

Create successful ePaper yourself
Turn your PDF publications into a flip-book with our unique Google optimized e-Paper software.
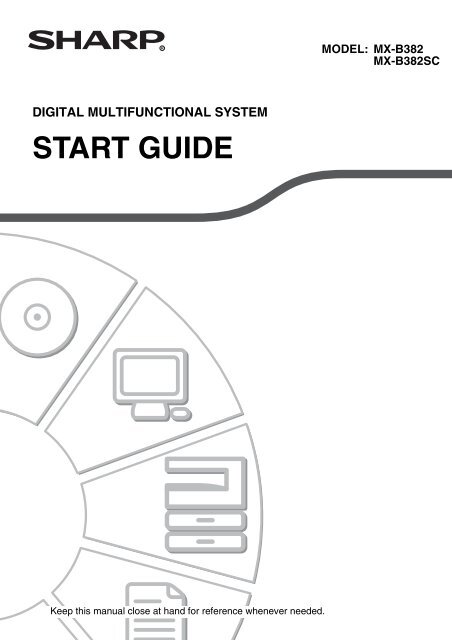
DIGITAL MULTIFUNCTIONAL SYSTEM<br />
START GUIDE<br />
Keep this manual close at hand for reference whenever needed.<br />
MODEL: <strong>MX</strong>-<strong>B382</strong><br />
<strong>MX</strong>-<strong>B382</strong><strong>SC</strong>
Caution!<br />
For complete electrical disconnection, pull out the main plug.<br />
The socket-outlet shall be installed near the equipment and shall be easily accessible.<br />
Shielded interface cables must be used with this equipment to maintain compliance<br />
with EMC regulations.<br />
EMC (this machine and peripheral devices)<br />
Warning:<br />
This is a Class A product. In a domestic environment this product may cause radio<br />
interference in which case the user may be required to take adequate measures.<br />
This machine contains the software having modules developed by Independent JPEG<br />
Group.<br />
This product includes Adobe® Flash® technology of Adobe Systems Incorporated.<br />
Copyright© 1995-2007 Adobe Macromedia Software LLC. All rights reserved.
For the users of the fax function<br />
FAX interface cable and Line cable:<br />
These special accessories must be used with the device.<br />
The Declaration of Conformity can be viewed at the following URL address.<br />
http://www.sharp.de/doc/<strong>MX</strong>-FXX3.pdf<br />
SOFTWARE LICENSE<br />
The SOFTWARE LICENSE will appear when you install the software from the CD-ROM.<br />
By using all or any portion of the software on the CD-ROM or in the machine, you are<br />
agreeing to be bound by the terms of the SOFTWARE LICENSE.<br />
1
Contents<br />
CAUTIONS . . . . . . . . . . . . . . . . . 4<br />
Symbols in this manual . . . . . . . 4<br />
Power notes . . . . . . . . . . . . . . . . 4<br />
Installation notes . . . . . . . . . . . . 5<br />
About consumables . . . . . . . . . . 6<br />
Handling precautions . . . . . . . . . 7<br />
Laser information . . . . . . . . . . . . 8<br />
OPERATION MANUALS AND HOW<br />
TO USE THEM . . . . . . . . . . . . . . . 9<br />
DIGITAL MULTIFUNCTIONAL<br />
SYSTEM FUNCTIONS . . . . . . . . 10<br />
ACCESSING THE WEB SERVER IN<br />
THE MACHINE. . . . . . . . . . . . . . 11<br />
Opening the Web pages. . . . . . 11<br />
CHECKING THE IP ADDRESS. . . . 12<br />
PART NAMES AND FUNCTIONS . . . .13<br />
SUPPLIES. . . . . . . . . . . . . . . . . 14<br />
OPERATION PANEL . . . . . . . . 15<br />
TURNING THE POWER ON AND<br />
OFF . . . . . . . . . . . . . . . . . . . . . . 17<br />
PLACING ORIGINALS . . . . . . . 18<br />
Using the automatic document<br />
feeder . . . . . . . . . . . . . . . . . . . . 18<br />
Using the document glass . . . . 19<br />
LOADING PAPER IN A TRAY . . . . 20<br />
Names of the trays . . . . . . . . . . 20<br />
Loading paper in a tray. . . . . . . 21<br />
Loading paper in bypass tray . . . 22<br />
BEFORE INSTALLING THE<br />
SOFTWARE . . . . . . . . . . . . . . . 23<br />
CD-ROMS AND SOFTWARE . . . 23<br />
VERIFYING SYSTEM<br />
REQUIREMENTS . . . . . . . . . . 26<br />
CONNECTING THE MACHINE . . . 28<br />
2<br />
SETUP IN A WINDOWS<br />
ENVIRONMENT . . . . . . . . . . . . 29<br />
OPENING THE SOFTWARE<br />
SELECTION <strong>SC</strong>REEN (FOR ALL<br />
SOFTWARE) . . . . . . . . . . . . . . 29<br />
INSTALLING THE PRINTER<br />
DRIVER / PC-FAX DRIVER . . . 31<br />
REGULAR MAINTENANCE . . . 37<br />
SUPPLIES. . . . . . . . . . . . . . . . . 38<br />
SPECIFICATIONS . . . . . . . . . . 39<br />
Machine specifications / copier<br />
specifications . . . . . . . . . . . . . . 39<br />
Continuous copying speeds* . . . . 42<br />
Ambient environment . . . . . . . . 43<br />
Chemical emission (measured<br />
according to RAL-UZ122: Edition<br />
Jun. 2006). . . . . . . . . . . . . . . . . 44<br />
Acoustic noise emission<br />
(measurement according to<br />
ISO7779) . . . . . . . . . . . . . . . . . 44<br />
Automatic document feeder<br />
specifications . . . . . . . . . . . . . . 45<br />
INFORMATION ON DISPOSAL 46<br />
A. Information on Disposal for<br />
Users (private households). . 46<br />
B. Information on Disposal for Business<br />
Users.. . . . . . . . . . . . . . . . . . . . . . 46<br />
TO THE ADMINISTRATOR OF<br />
THE MACHINE . . . . . . . . . . . . . 48<br />
Factory default passwords . . . . 48<br />
Forwarding all transmitted and received<br />
data to the administrator (document<br />
administration function) . . . . . . . . . . 48<br />
For the users of the fax function . . . 49<br />
Trademark acknowledgments . . . 50
Note:<br />
The explanations in this manual assume that 500 sheet paper feed units (total of<br />
four trays) are installed on the <strong>MX</strong>-<strong>B382</strong>.<br />
The explanations in this manual assume that you have a working knowledge of your<br />
Windows or Macintosh computer.<br />
For information on your operating system, please refer to your operating system<br />
manual or the online Help function.<br />
The explanations of screens and procedures in this manual are primarily for<br />
Windows Vista® in Windows® environments. The screens may vary depending on<br />
the version of the operating system.<br />
This manual contains references to the fax function. However, please note that the<br />
fax function is not available in some countries and regions.<br />
This manual contains explanations of the PC-Fax driver and PPD driver. However,<br />
please note that the PC-Fax driver and PPD driver are not available and do not<br />
appear on the software for installation in some countries and regions. In this case,<br />
please install the English version if you want to use these drivers.<br />
Considerable care has been taken in preparing this manual. If you have any<br />
comments or concerns about the manual, please contact your dealer or nearest<br />
authorised service representative.<br />
This product has undergone strict quality control and inspection procedures. In the<br />
unlikely event that a defect or other problem is discovered, please contact your<br />
dealer or nearest authorised service representative.<br />
Aside from instances provided for by law, SHARP is not responsible for failures<br />
occurring during the use of the product or its options, or failures due to incorrect<br />
operation of the product and its options, or other failures, or for any damage that<br />
occurs due to use of the product.<br />
Products that have earned the ENERGY STAR ® are designed to protect<br />
the environment through superior energy efficiency.<br />
The products that meet the ENERGY STAR ® guidelines carry the logo shown above.<br />
The products without the logo may not meet the ENERGY STAR ® guidelines.<br />
Warranty<br />
While every effort has been made to make this document as accurate and helpful as<br />
possible, SHARP Corporation makes no warranty of any kind with regard to its content.<br />
All information included herein is subject to change without notice. SHARP is not<br />
responsible for any loss or damages, direct or indirect, arising from or related to the use<br />
of this operation manual.<br />
©Copyright SHARP Corporation 2010. All rights reserved. Reproduction, adaptation or<br />
translation without prior written permission is prohibited, except as allowed under<br />
copyright laws.<br />
3
CAUTIONS<br />
Symbols in this manual<br />
To ensure safe use of the machine, this manual uses various safety symbols. The safety symbols are classified<br />
as explained below. Be sure you understand the meaning of the symbols when reading the manual.<br />
Symbol Meaning<br />
Power notes<br />
4<br />
WARNING<br />
CAUTION<br />
CAUTION!<br />
HOT<br />
PINCH POINT<br />
KEEP CLEAR<br />
Indicates a risk of death or serious injury.<br />
Indicates a risk of human injury or property damage.<br />
Meaning of the symbols<br />
Symbol Meaning Symbol Meaning Symbol Meaning<br />
Be sure to connect the power cord only to a<br />
power outlet that meets the specified voltage<br />
and current requirements. Also make certain<br />
the outlet is properly grounded. Do not use an<br />
extension cord or adapter to connect other<br />
devices to the power outlet used by the<br />
machine. Using an improper power supply<br />
may cause fire or electrical shock.<br />
*For the power supply requirements, see the<br />
name plate in the lower left corner of the left side<br />
of the machine.<br />
When removing the power plug from the<br />
outlet, do not pull on the cord.<br />
Pulling on the cord may cause damage such as<br />
wire exposure and breakage, and may result in<br />
fire or electrical shock.<br />
If you will not use the machine for a long time,<br />
be sure to remove the power plug from the<br />
outlet for safety.<br />
PROHIBITED ACTIONS<br />
DO NOT<br />
DISASSEMBLE<br />
WARNING<br />
CAUTION<br />
MANDATORY ACTIONS<br />
Do not damage or modify the power cord.<br />
Placing heavy objects on the<br />
power cord, pulling it, or<br />
forcibly bending it will damage<br />
the cord, resulting in fire or<br />
electrical shock.<br />
Do not insert or remove the power plug with<br />
wet hands.<br />
This may cause electrical shock.<br />
When moving the machine, switch off the<br />
main power and remove the power plug from<br />
the outlet before moving.<br />
The cord may be damaged, creating a risk of fire<br />
or electrical shock.
Installation notes<br />
Do not install the machine on an unstable or<br />
slanted surface. Install the machine on a<br />
surface that can withstand the weight of the<br />
machine.<br />
Risk of injury due to the machine falling or<br />
toppling. If peripheral devices are to be installed,<br />
do not install on an uneven floor, slanted surface,<br />
or otherwise unstable surface. Danger of slippage,<br />
falling, and toppling. Install the product on a flat,<br />
stable surface that can withstand the weight of the<br />
product. (Weight when various peripheral devices<br />
are installed: approx. 57 kg (125.7 lbs.))<br />
Do not install in a location with moisture or<br />
dust.<br />
Risk of fire and electrical shock.<br />
If dust enters the machine, dirty<br />
output and machine failure may<br />
result.<br />
Locations that are excessively hot, cold,<br />
humid, or dry (near heaters, humidifiers, air<br />
conditioners, etc.)<br />
The paper will become damp and condensation<br />
may form inside the machine, causing misfeeds<br />
and dirty output.<br />
☞ Ambient environment (page 43)<br />
If the location has an ultrasonic humidifier, use<br />
pure water for humidifiers in the humidifier. If tap<br />
water is used, minerals and other impurities will be<br />
emitted, causing impurities to collect on the inside<br />
of the machine and create dirty output.<br />
CAUTION<br />
Locations exposed to<br />
direct sunlight<br />
Plastic parts may<br />
become deformed<br />
and dirty output<br />
may result.<br />
CAUTIONS<br />
Locations with ammonia gas<br />
Installing the machine next to<br />
a diazo copy machine may<br />
cause dirty output.<br />
Do not install the machine in a location with<br />
poor ventilation. Install so that exhaust from<br />
the machine does not directly contact people.<br />
A small amount of ozone is created inside the<br />
machine during printing. The amount of ozone<br />
created is not sufficient to be harmful; however,<br />
an unpleasant odor may be noticed during large<br />
copy runs, and thus the machine should be<br />
installed in a room with a ventilation fan or<br />
windows that provide sufficient air circulation.<br />
(The odor may occasionally cause headaches.)<br />
* Install the machine so that people are not<br />
directly exposed to exhaust from the machine.<br />
If installed near a window, ensure that the<br />
machine is not exposed to direct sunlight.<br />
5
CAUTIONS<br />
Installation notes (continued)<br />
About consumables<br />
6<br />
Near a wall<br />
Be sure to allow the required space around the<br />
machine for servicing and proper ventilation.<br />
(The machine should be no closer than the<br />
distances indicated below from walls. The<br />
indicated distances are for the case when a<br />
saddle finisher and large capacity paper tray are<br />
not installed.)<br />
<strong>MX</strong>-<strong>B382</strong>:<br />
30 cm<br />
(11-13/16")<br />
<strong>MX</strong>-<strong>B382</strong><strong>SC</strong>:<br />
30 cm<br />
(11-13/16")<br />
30 cm<br />
(11-13/16")<br />
45 cm<br />
(17-23/32")<br />
30 cm<br />
(11-13/16")<br />
45 cm<br />
(17-23/32")<br />
CAUTION<br />
Locations subject to vibration.<br />
Vibration may cause failure.<br />
The machine includes a built-in hard drive. Do not subject the machine to<br />
shock or vibration. In particular, never move the machine while the power<br />
is on.<br />
The machine should be installed near an accessible power outlet for easy<br />
connection.<br />
Connect the machine to a power outlet which is not used for other electric<br />
appliances. If a lighting fixture is connected to the same outlet, the light may flicker.<br />
Do not throw a toner cartridge into a fire.<br />
Toner may fly and cause burns.<br />
CAUTION<br />
Store a toner cartridge out of the reach of<br />
children.
Handling precautions<br />
Do not place a container of water or other<br />
liquid, or a metal object that might fall inside,<br />
on the machine.<br />
If the liquid spills or the object<br />
falls into the machine, fire or<br />
electrical shock may result.<br />
Do not remove the machine casing.<br />
High-voltage parts inside the machine may cause<br />
electrical shock.<br />
Do not make any modifications to this machine.<br />
Doing so may result in personal injury or damage<br />
to the machine.<br />
Do not use a flammable spray to clean the<br />
machine.<br />
If gas from the spray comes in contact with hot<br />
electrical components or the fusing unit inside the<br />
machine, fire or electrical shock may result.<br />
Do not look directly at the light source.<br />
Doing so may damage your<br />
eyes.<br />
Do not block the ventilation ports on the<br />
machine. Do not install the machine in a<br />
location that will block the ventilation ports.<br />
Blocking the ventilation ports will cause heat to<br />
build up in the machine, creating a risk of fire.<br />
WARNING<br />
CAUTION<br />
CAUTIONS<br />
If you notice smoke, a strange odor, or<br />
other abnormality, do not use the machine.<br />
If used in this condition, fire<br />
or electrical shock may result.<br />
Immediately switch off the<br />
main power and remove the<br />
power plug from the power<br />
outlet. Contact your dealer or<br />
nearest authorised service<br />
representative.<br />
If a thunder storm begins, switch off the<br />
main power and remove the power plug from<br />
the outlet to prevent electrical shock and fire<br />
due to lightning.<br />
If a piece of metal or water enters the<br />
machine, switch off the main power and<br />
remove the power plug from the power<br />
outlet.<br />
Contact your dealer or nearest authorised<br />
service representative. Using the machine in<br />
this condition may result in electrical shock or<br />
fire.<br />
The fusing unit and paper<br />
exit area are hot. When<br />
removing a misfeed, do<br />
not touch the fusing unit<br />
and paper exit area. Take<br />
care not to burn yourself.<br />
Fusing<br />
unit<br />
Paper<br />
exit area<br />
When loading paper, removing a misfeed,<br />
performing maintenance, closing the front<br />
and side covers, and inserting and removing<br />
trays, take care that your fingers are not<br />
pinched.<br />
The machine includes the document filing function, which stores document image data<br />
on the machine's hard drive. Stored documents can be called up and printed or<br />
transmitted as needed. If a hard drive failure occurs, it will no longer be possible to call up<br />
the stored document data. To prevent the loss of important documents in the unlikely<br />
event of a hard drive failure, keep the originals of important documents or store the<br />
original data elsewhere.<br />
With the exception of instances provided for by law, <strong>Sharp</strong> Corporation bears no<br />
responsibility for any damages or loss due to the loss of stored document data.<br />
7
CAUTIONS<br />
Laser information<br />
Wave length 790 nm ±10 nm<br />
Pulse times<br />
(North America and Europe)<br />
8<br />
4.1 µs ±4.1 ns /7 mm<br />
Output power Max 0.6 mW (LD1+ LD2)<br />
Caution<br />
Use of controls or adjustments or performance of procedures other than those specified<br />
herein may result in hazardous radiation exposure.<br />
This Digital Equipment is CLASS 1 LASER PRODUCT (IEC 60825-1 Edition 1.2-2001)<br />
SAFETY PRECAUTIONS<br />
This Digital Equipment is rated Class 1 and complies with 21 CFR 1040.10 and<br />
1040.11 of the CDRH standards. This means that the equipment does not produce<br />
hazardous laser radiation. For your safety, observe the precautions below.<br />
Do not remove the cabinet, operation panel or any other covers.<br />
The equipment's exterior covers contain several safety interlock switches. Do not<br />
bypass any safety interlock by inserting wedges or other items into switch slots.<br />
"BATTERY DISPOSAL"<br />
THIS PRODUCT CONTAINS A LITHIUM PRIMARY MEMORY BACK-UP BATTERY<br />
THAT MUST BE DISPOSED OF PROPERLY. PLEASE CONTACT YOUR LOCAL<br />
SHARP DEALER OR AUTHORISED SERVICE REPRESENTATIVE FOR<br />
ASSISTANCE IN DISPOSING OF THIS BATTERY.<br />
Each instruction also covers the optional units used with these products.
OPERATION MANUALS AND HOW TO USE THEM<br />
Printed manuals and a manual in PDF format are provided with the machine.<br />
Printed manuals<br />
This section explains precautions to ensure safe usage, part names and functions and<br />
basic software. Refer to the PDF instruction manual for instructions on how to use the<br />
machine.<br />
<strong>Start</strong> <strong>Guide</strong><br />
(this manual)<br />
<strong>Manual</strong>s in PDF format<br />
The explanation of the functions that can be used on the machine are provided in the<br />
<strong>Operation</strong> <strong>Guide</strong> in PDF format. The <strong>Operation</strong> <strong>Guide</strong> can be downloaded from the Web<br />
pages in the machine.<br />
<strong>Operation</strong> <strong>Guide</strong><br />
Download the <strong>Operation</strong> <strong>Guide</strong> from the<br />
Web pages in the machine.<br />
Convenient methods for using the <strong>Operation</strong> <strong>Guide</strong><br />
The first page contains a regular table of contents as well as an "I want to..." table of contents.<br />
"I want to..." lets you jump to an explanation based on what you want to do. For example, "I use the<br />
copier function often, so I'd like to save paper".<br />
Use either table of contents as appropriate based on what you want to know.<br />
The contents of the <strong>Operation</strong> <strong>Guide</strong> are as follows:<br />
BEFORE USING THE MACHINE<br />
COPIER<br />
PRINTER<br />
FACSIMILE<br />
<strong>SC</strong>ANNER / INTERNET FAX<br />
DOCUMENT FILING<br />
SYSTEM SETTINGS<br />
TROUBLESHOOTING<br />
* To view the <strong>Operation</strong> <strong>Guide</strong> in PDF format, Adobe ® Reader ® or Acrobat ® Reader ® of Adobe Systems<br />
Incorporated is required. Adobe ® Reader ® can be downloaded from the following URL:<br />
http://www.adobe.com/<br />
9
DIGITAL MULTIFUNCTIONAL<br />
SYSTEM FUNCTIONS<br />
This machine provides four major areas of functionality.<br />
Refer to the <strong>Operation</strong> <strong>Guide</strong> for details on using the various functions within each area.<br />
10<br />
Copy<br />
Printer<br />
Document filing<br />
Facsimile<br />
Scanner
ACCESSING THE WEB SERVER IN<br />
THE MACHINE<br />
When the machine is connected to a network, the machine's built-in Web server can be<br />
accessed from a Web browser on your computer.<br />
Opening the Web pages<br />
Recommended Web browsers<br />
Internet Explorer: 6.0 or higher (Windows ® )<br />
Netscape Navigator: 9 (Windows ® )<br />
Firefox: 2.0 or higher (Windows ® Access the Web server in the<br />
machine to open the Web<br />
pages.<br />
<strong>Start</strong> a Web browser on a<br />
computer that is connected to<br />
the same network as the<br />
machine and enter the IP<br />
address of the machine.<br />
)<br />
Safari: 1.5 or higher (Macintosh)<br />
The Web page will appear.<br />
The machine settings may require that user authentication be performed in order to open<br />
the Web page. Please ask the administrator of the machine for the password that is<br />
required for user authentication.<br />
11
CHECKING THE IP ADDRESS<br />
To check the IP address of the machine, print out the all custom setting list in the system<br />
settings.<br />
12<br />
PRINT<br />
IMAGE SEND<br />
JOB STATUS<br />
SYSTEM<br />
SETTINGS<br />
READY<br />
DATA<br />
LINE<br />
DATA<br />
HOME<br />
LOGOUT<br />
System Settings Admin Password Exit<br />
Total Count<br />
Paper Tray<br />
Settings<br />
Printer Condition<br />
Settings<br />
System Settings<br />
List Print (User)<br />
All Custom Setting List:<br />
Printer Test Page:<br />
PCL Symbol Set List<br />
Sending Address List:<br />
Individual List<br />
Document Filling Folder List:<br />
Default Settings<br />
Address Control<br />
Document Filing<br />
Control<br />
List Print<br />
(User) (1)<br />
Fax Data<br />
Receive/Forward<br />
USB-Device Check<br />
Print<br />
Print<br />
Print<br />
Print<br />
Back<br />
(2)<br />
1 Press the [SYSTEM<br />
SETTINGS] key.<br />
2 Select the all custom<br />
setting list in the touch<br />
panel.<br />
(1) Touch the [List Print<br />
(User)] key.<br />
(2) Touch the [Print] key to the<br />
right of "All Custom Setting<br />
List".<br />
The IP address is shown in the list<br />
that is printed.
PART NAMES AND FUNCTIONS<br />
(14) (1) (13) (2) (3) (1) (2) (3) (4)<br />
(5)<br />
(12)<br />
(1) Automatic document feeder<br />
This automatically feeds and scans<br />
multiple originals. Both sides of<br />
2-sided originals can be scanned at<br />
once.<br />
(2) Document feeder tray<br />
Place the originals in this tray when<br />
using the automatic document<br />
feeder.<br />
(3) <strong>Operation</strong> panel<br />
(4) Original exit tray<br />
Originals are delivered to this tray<br />
after scanning.<br />
(5) Document glass<br />
This is used to scan books and<br />
other originals that cannot be<br />
scanned using the automatic<br />
document feeder.<br />
(6) USB connector (type A)<br />
Supports USB 2.0 (Hi-Speed).<br />
This is used to connect a USB memory<br />
or other USB device to the machine.<br />
(7) Finisher*<br />
This can be used to staple output.<br />
(8) Tray 2/Tray 3/Tray 4 (500 sheet<br />
paper feed unit is installed)*<br />
This holds paper. Up to 500 sheets<br />
(80 g/m 2 (21 lbs.)) of paper can be<br />
loaded.<br />
(6)<br />
(11) (10) (9) (8)<br />
(7)<br />
(9) Tray 1<br />
Up to 500 sheets of paper (80 g/m 2<br />
(21 lbs.)) can be loaded in each<br />
tray.<br />
(10) Output tray (centre tray)<br />
Copy jobs and print jobs are<br />
delivered to this tray.<br />
(When a finisher is installed, the<br />
output tray (centre tray) cannot be<br />
used.)<br />
(11) Main power switch<br />
This is used to power on the<br />
machine.<br />
When using the fax or Internet fax<br />
functions, keep this switch in the<br />
"on" position.<br />
(12) Keyboard (<strong>MX</strong>-<strong>B382</strong><strong>SC</strong> only)<br />
This is a keyboard that is<br />
incorporated into the machine.<br />
When not used, it can be stored<br />
under the operation.<br />
(13) Original exit tray 1<br />
(<strong>MX</strong>-<strong>B382</strong><strong>SC</strong> only)<br />
Originals are delivered to this tray<br />
after scanning.<br />
(14) Original exit tray 2<br />
(<strong>MX</strong>-<strong>B382</strong><strong>SC</strong> only)<br />
If originals are not delivered to<br />
original exit tray 1 after scanning,<br />
they are delivered to this tray.<br />
13
SUPPLIES<br />
14<br />
* Peripheral device. For more information, see "PERIPHERAL DEVICES" in<br />
"Chapter 1 - BEFORE USING THE MACHINE" in the <strong>Operation</strong> <strong>Guide</strong>.<br />
(15) (16) (17)<br />
(15) Front cover<br />
Open to replace a toner cartridge.<br />
(16) Bypass tray<br />
Special types of paper and<br />
envelopes can be fed from the<br />
bypass tray.<br />
(17) USB connector (B type)<br />
Supports USB 2.0 (Hi-Speed).<br />
A computer can be connected to<br />
this connector to use the machine<br />
as a printer.<br />
SUPPLIES<br />
(1) Toner collection container<br />
This collects excess toner that<br />
remains after printing.<br />
(1) (2)<br />
(19)<br />
(18)<br />
(18) LAN connector<br />
Connect the LAN cable to this<br />
connector when the machine is<br />
used on a network.<br />
(19) USB connector (type A)<br />
This connector is the same as (6).<br />
On the <strong>MX</strong>-<strong>B382</strong>, this connector<br />
is set so that it cannot be used<br />
when shipped from the factory.<br />
To use this connector, please<br />
contact your service<br />
representative.<br />
(2) Toner cartridge<br />
This contains toner for printing.<br />
When the toner runs out in a<br />
cartridge, the cartridge must be<br />
replaced.
OPERATION PANEL<br />
Image send indicators<br />
LINE indicator<br />
This lights up during transmission or reception in fax mode. The indicator also lights up during<br />
transmission in scan mode.<br />
DATA indicator<br />
When a received fax cannot be printed because of a problem such as out of paper, the indicator<br />
blinks. The indicator lights steadily when there is data that is waiting to be transmitted.<br />
Touch panel<br />
Messages and keys<br />
appear in the LCD<br />
display.<br />
<strong>Operation</strong>s are<br />
performed by<br />
touching the keys<br />
with your finger.<br />
COPY<br />
Ready to scan for copy.<br />
Exposure<br />
Auto<br />
Copy Ratio<br />
100%<br />
Tray1<br />
IMAGE SEND<br />
1. A4<br />
2. A4R<br />
3. B4<br />
4. A3<br />
Plain<br />
A4<br />
Original Paper Select<br />
[SYSTEM SETTINGS] key<br />
[JOB STATUS] key<br />
Press this key to view the job<br />
status screen. You can check<br />
the status of jobs and cancel<br />
jobs in the job status screen.<br />
DOCUMENT<br />
FILING<br />
Auto<br />
A4<br />
Plain<br />
Special Modes<br />
2-Sided Copy<br />
Output<br />
File<br />
Quick File<br />
Press this key to display the system settings screen. The<br />
system settings can be adjusted to make the machine<br />
easier to use, such as configuring paper tray settings and<br />
storing addresses.<br />
0<br />
Job Status<br />
MFP Status<br />
020/015<br />
Copying<br />
005/000<br />
Waiting<br />
010/000<br />
Waiting<br />
010/000<br />
Waiting<br />
Print mode indicators<br />
READY indicator<br />
Print data can be received when<br />
this indicator is lit.<br />
DATA indicator<br />
This blinks while print data is<br />
being received and lights steadily<br />
while printing is taking place.<br />
[HOME] key<br />
PRINT<br />
IMAGE SEND<br />
JOB STATUS<br />
SYSTEM<br />
SETTINGS<br />
READY<br />
DATA<br />
LINE<br />
DATA<br />
HOME<br />
Touch this key to display the home<br />
screen.<br />
The base screen of each mode is<br />
opened from the home screen.<br />
15
OPERATION PANEL<br />
16<br />
Numeric keys<br />
These are used to enter the number of<br />
copies, fax numbers, and other<br />
numbers.<br />
[LOGOUT] key ( )<br />
When user authentication is enabled,<br />
press this key to log out after using the<br />
machine. When using the fax function,<br />
this key can be pressed to send tone<br />
signals on a pulse dial line.<br />
[#/P] key ( )<br />
Press this key to use a job program<br />
when using the copier function. When<br />
using the fax function, this key can be<br />
used when dialing.<br />
LOGOUT<br />
[CLEAR ALL] key<br />
Press this key to redo an operation<br />
from the beginning.<br />
All settings will be cleared and<br />
operation will return to the initial state.<br />
[STOP] key<br />
Press this key to stop a copy job or scanning<br />
of an original.<br />
[CLEAR] key<br />
Press this key to return<br />
settings such as the<br />
number of copies to "0".<br />
[POWER SAVE] key<br />
Main power indicator<br />
This indicator lights when the<br />
main power is switched on.<br />
The main power switch is on<br />
the left side of the machine.<br />
[POWER] key<br />
Use this key to turn<br />
the machine power<br />
on and off.<br />
Use this key to activate power save mode.<br />
The [POWER SAVE] key blinks when the<br />
machine is in power save mode. This key is<br />
also used to deactivate power save mode.<br />
[START] key<br />
Use this key to copy or scan an original.<br />
This key is also used to send a fax in fax<br />
mode.
TURNING THE POWER ON AND OFF<br />
The machine has two power switches. One is the main power switch on the left side of<br />
the machine, and the other is the [POWER] key ( ) on the upper right side of the<br />
operation panel.<br />
Main power switch<br />
When the main power switch is switched<br />
on, the main power indicator on the<br />
operation panel lights up.<br />
"On" position<br />
"Off" position<br />
Turning on the power<br />
(1) Switch the main power<br />
switch to the "on" position.<br />
(2) Press the [POWER] key ( )<br />
to turn on the power.<br />
[POWER] key<br />
T<br />
Main power indicator<br />
[POWER] key<br />
Turning off the power<br />
(1) Press the [POWER] key ( )<br />
to turn off the power.<br />
(2) Switch the main power<br />
switch to the "off" position.<br />
17
PLACING ORIGINALS<br />
The automatic document feeder can be used to automatically scan many originals at<br />
once. This saves you the trouble of manually feeding each original.<br />
For originals that cannot be scanned using the automatic document feeder, such as a<br />
book or a document with notes attached, use the document glass.<br />
Using the automatic document feeder<br />
When using the automatic document feeder, place the originals in the document feeder<br />
tray.<br />
Make sure an original has not been placed on the document glass.<br />
When using the <strong>MX</strong>-<strong>B382</strong><br />
18<br />
Set the original in the upper<br />
tray.<br />
Adjust the original guides<br />
to the width of the originals.<br />
When using the <strong>MX</strong>-<strong>B382</strong><strong>SC</strong><br />
Set the original in the lower<br />
tray.<br />
Adjust the original guides<br />
to the width of the originals.<br />
Place the originals face up with the edges<br />
aligned evenly.<br />
The indicator line indicates approximately<br />
how many originals can be placed. The placed<br />
originals must not be higher than this line.<br />
Place the originals face up with the edges<br />
aligned evenly.<br />
The indicator line indicates approximately<br />
how many originals can be placed. The placed<br />
originals must not be higher than this line.
PLACING ORIGINALS<br />
Using the document glass<br />
Take care that your fingers are not pinched when closing the automatic document feeder.<br />
After placing the original, be sure to close the automatic document feeder. If left open,<br />
parts outside of the original will be copied black, causing excessive use of toner.<br />
Place the original face down.<br />
Align the middle of the original<br />
with the tip of the mark in the<br />
centre of the glass.<br />
Place the original<br />
face down.<br />
To place a thick original such as a book,<br />
push up the far edge of the automatic<br />
document feeder and then close the<br />
automatic document feeder slowly.<br />
Do not press hard on the automatic<br />
document feeder. This may cause failure.<br />
19
LOADING PAPER IN A TRAY<br />
Names of the trays<br />
The names of the trays are shown below.<br />
For the number of sheets of paper that can be loaded in each tray, see the following<br />
manuals:<br />
<strong>Operation</strong> <strong>Guide</strong>, "Paper Tray Settings" in "Chapter 7 - SYSTEM SETTINGS"<br />
<strong>Start</strong> <strong>Guide</strong> (this manual), "SPECIFICATIONS"<br />
20<br />
(1)<br />
(2)<br />
(3)<br />
(4)<br />
(5)<br />
(1) Tray 1<br />
(2) Tray 2<br />
(3) Tray 3<br />
(4) Tray 4<br />
(5) Bypass tray
LOADING PAPER IN A TRAY<br />
Loading paper in a tray<br />
A maximum of 500 sheets of paper from size A5 (5-1/2" x 8-1/2") to A4 (8-1/2" x 14") can<br />
be loaded in trays 1 and 2.<br />
A maximum of 500 sheets of paper from size B5 (7-1/4" x 10-1/2") to A4 (8-1/2" x 14")<br />
can be loaded in trays 3 and 4.<br />
Gently pull out the paper tray. If<br />
paper remains in the tray, remove it.<br />
Move the two guides on the tray.<br />
Load the paper so that it is not as<br />
shown below when viewed from the<br />
front and side of the machine.<br />
The loaded paper should not go<br />
higher than these protrusions.<br />
Insert the paper with the print side<br />
face up.<br />
Fan the paper well before inserting<br />
it.<br />
Indicator line<br />
The indicator line indicates the<br />
maximum height of the paper<br />
that can be loaded in the tray.<br />
When loading paper, make sure<br />
that the stack is not higher than<br />
the indicator line.<br />
For detailed information, see “TRAY SETTINGS FOR TRAY 1 TO 4” in “Chapter 1 -<br />
BEFORE USING THE MACHINE” in the <strong>Operation</strong> <strong>Guide</strong>.<br />
21
LOADING PAPER IN A TRAY<br />
Loading paper in bypass tray<br />
22<br />
Example: Loading an envelope<br />
The side to be<br />
copied or printed on<br />
must be face down!<br />
Load the paper in the horizontal orientation.<br />
When loading paper larger than A4 or 8-1/2" x<br />
11", pull out the tray extension.<br />
Only the address side of envelopes<br />
can be printed on. Place envelopes<br />
with the address side face down.<br />
Do not place heavy objects on the bypass tray or press down on the tray. The<br />
bypass tray may be damaged, the machine may topple, and injury may result.<br />
Special types of paper that cannot be loaded in other trays can be loaded<br />
in the bypass tray.<br />
For detailed information, see "LOADING PAPER IN THE BYPASS TRAY" in<br />
"Chapter 1 - BEFORE USING THE MACHINE" in the <strong>Operation</strong> <strong>Guide</strong>.
BEFORE INSTALLING THE<br />
SOFTWARE<br />
This chapter describes the software programs that allow you to use the printer and<br />
scanner functions of the machine, the CD-ROMs that contain the software, and the<br />
pages where the basic installation procedures can be found.<br />
For details on installation procedures, refer to Chapter 1 of the <strong>Operation</strong> <strong>Guide</strong>.<br />
CD-ROMS AND SOFTWARE<br />
The software that can be used with the machine is on the CD-ROMs that accompany the<br />
machine and the expansion kits.<br />
Before installing the software, make sure that your computer and the machine meet the<br />
system requirements described in "VERIFYING SYSTEM REQUIREMENTS" (page 26).<br />
SOFTWARE CD-ROM<br />
The "Software CD-ROM" that accompanies the machine contains the printer driver and<br />
other software. The "Software CD-ROM" consists of 2 discs.<br />
The CD-ROM does not include software for Mac OS 9.0 to<br />
9.2.2/X10.2.8/X10.3.9.<br />
Contact your dealer or nearest authorized service representative if you want<br />
software for Mac OS 9.0 to 9.2.2/X10.2.8/X10.3.9.<br />
The CD-ROM does not include printer driver for PCL5e. Contact your dealer<br />
or nearest authorized service representative if you want printer driver for<br />
PCL5e.<br />
23
BEFORE INSTALLING THE SOFTWARE<br />
24<br />
Disc 1<br />
Software for Windows<br />
Printer driver<br />
These allow the machine to be used as a printer.<br />
- PCL6 printer driver<br />
The machine supports the Hewlett-Packard PCL6 printer control languages.<br />
- PS printer driver<br />
The PS printer driver supports the PostScript 3 page description language<br />
developed by Adobe Systems Incorporated.<br />
- PPD driver<br />
The PPD driver enables the machine to use the standard Windows PS<br />
printer driver.<br />
☞ WHEN THE MACHINE IS CONNECTED TO A NETWORK (page 31)<br />
☞ WHEN THE MACHINE WILL BE CONNECTED WITH A USB CABLE<br />
(<strong>Operation</strong> <strong>Guide</strong>)<br />
Printer Status Monitor (can only be used when the machine<br />
is connected to a network)<br />
This allows you to monitor the status of the machine on your computer screen.<br />
☞ INSTALLING THE PRINTER STATUS MONITOR (<strong>Operation</strong> <strong>Guide</strong>)<br />
Software for Macintosh<br />
PPD file<br />
This is the printer description file which enables the machine to be used as a<br />
PostScript 3 compatible printer.<br />
☞ MAC OS X (<strong>Operation</strong> <strong>Guide</strong>)<br />
☞ MAC OS 9.0 - 9.2.2 (<strong>Operation</strong> <strong>Guide</strong>)<br />
To use the machine as a printer in a Macintosh environment, the machine must be<br />
connected to a network. A USB connection cannot be used.<br />
The scanner driver and PC-Fax driver cannot be used in a Macintosh<br />
environment.
BEFORE INSTALLING THE SOFTWARE<br />
Disc 2<br />
Software for Windows<br />
PC-Fax driver<br />
This enables you to send a file from your computer as a fax using the same<br />
procedure as when printing the file. (When the fax option is installed.)<br />
Even if the fax function is not installed, the PC-Fax driver can be updated using<br />
the CD-ROM in the Internet fax expansion kit to enable you to send a file from<br />
your computer as an Internet fax in the same way as you print a file.<br />
☞ INSTALLING THE PRINTER DRIVER / PC-FAX DRIVER (page 31)<br />
Scanner driver (TWAIN driver)<br />
(Can only be used when the machine is connected to a<br />
network.)<br />
This allows you to use the scanner function of the machine from a<br />
TWAIN-compliant software application.<br />
☞ INSTALLING THE <strong>SC</strong>ANNER DRIVER (<strong>Operation</strong> <strong>Guide</strong>)<br />
OTHER CD-ROMS<br />
� "PRINTER UTILITIES" CD-ROM that accompanies<br />
the Internet fax expansion kit (for Windows)<br />
This CD-ROM is used to update the PC-Fax driver on the "Software CD-ROM" so<br />
that it can be used to send Internet faxes (PC-I-Fax function).<br />
If you wish to use the PC-I-Fax function, first install the PC-Fax driver from the<br />
"Software CD-ROM" and then run the installer on this CD-ROM. If the PC-Fax driver<br />
is already installed, run only the installer. (There is no need to reinstall the PC-Fax<br />
driver.)<br />
☞ INSTALLING THE PRINTER DRIVER / PC-FAX DRIVER (page 31)<br />
� "<strong>Sharp</strong>desk/Network Scanner Utilities" CD-ROM<br />
(for Windows)<br />
This contains software that helps you get the most out of the images that you scan<br />
on the machine. The software includes "<strong>Sharp</strong>desk", a desktop document<br />
management application that enables integrated management of scanned images<br />
and files created using a variety of applications. To use the "Scan to Desktop"<br />
scanner function, the "Network Scanner Tool" must be installed from the CD-ROM.<br />
For the system requirements of the software, see the manual (PDF format) in the<br />
"<strong>Manual</strong>" folder or the Readme file on the CD-ROM. For the procedures for installing<br />
the software, see the "Information <strong>Guide</strong>".<br />
25
BEFORE INSTALLING THE SOFTWARE<br />
VERIFYING SYSTEM REQUIREMENTS<br />
SYSTEM REQUIREMENTS<br />
Before installing the software described in this manual, make sure that your computer<br />
satisfies the following requirements.<br />
Operating<br />
system<br />
Computer<br />
type<br />
*1 The PCL5e printer driver will not run on any of the 64-bit editions of the Windows<br />
operating systems, Windows Server 2008 and Windows 7.<br />
*2 Includes the 64-bit edition.<br />
*3 Compatible with models preinstalled with Windows 2000 Professional, Windows XP<br />
Professional, Windows XP Home Edition, Windows 2000 Server, Windows Server<br />
2003, Windows Vista, Windows Server 2008 or Windows 7, and which are equipped<br />
standard with a USB interface.<br />
*4 Cannot be used when the machine is connected with a USB cable. The PC-Fax<br />
driver and scanner driver cannot be used.<br />
26<br />
Windows* 1 Macintosh* 4<br />
Windows 2000 Professional,<br />
Windows XP Professional *2 ,<br />
Windows XP Home Edition,<br />
Windows 2000 Server,<br />
Windows Server 2003 *2 , Windows<br />
Vista *2 , Windows Server 2008 *2 ,<br />
WIndows 7 *2<br />
IBM PC/AT compatible computer<br />
Equipped with a<br />
10Base-T/100Base-TX/1000Base-T<br />
LAN board or equipped standard<br />
with a USB 2.0/1.1* 3 port.<br />
Display 1024 x 768 dots resolution and<br />
16-bit colour or higher is<br />
recommended.<br />
Other<br />
hardware<br />
requirements<br />
An environment that allows any of<br />
the above operating systems to fully<br />
operate.<br />
Mac OS 9.0 to 9.2.2,<br />
Mac OS X v10.2.8,<br />
Mac OS X v10.3.9,<br />
Mac OS X v10.4.11,<br />
Mac OS X v10.5 to 10.5.8,<br />
Mac OS X v10.6 to 10.6.2<br />
An environment in which<br />
any of the operating<br />
systems listed above can<br />
fully operate (including<br />
Macintosh computers with<br />
an Intel processor).
BEFORE INSTALLING THE SOFTWARE<br />
For users of Mac OS 9.0 to 9.2.2/X10.2.8/X10.3.9<br />
The CD-ROM does not include software for Mac OS 9.0 to<br />
9.2.2/X10.2.8/X10.3.9.<br />
Contact your dealer or nearest authorized service representative if you want<br />
software.<br />
For users of Windows 2000/XP/Server 2003/Vista/Server 2008/7<br />
To perform the procedures described in this manual such as installing the<br />
software and configuring settings after installation, administrator authority is<br />
required.<br />
SOFTWARE REQUIREMENTS<br />
The following requirements must be met to use the software described in this manual.<br />
Operating<br />
system<br />
environment* 1<br />
Software<br />
Windows PCL6 printer driver,<br />
PCL5e printer driver<br />
PS printer driver,<br />
PPD driver<br />
PC-Fax driver<br />
Scanner driver<br />
Printer Status<br />
Monitor<br />
Macintosh Macintosh PPD file<br />
Required<br />
expansion kits<br />
Can be used in<br />
the standard<br />
configuration.<br />
Facsimile<br />
expansion kit* 2<br />
Can be used in<br />
the standard<br />
configuration.<br />
Type of<br />
connection* 1<br />
Network/ USB<br />
Network only* 3<br />
(cannot be used<br />
with a USB<br />
connection)<br />
*1 For the types of computers and operating systems that can run the software, see<br />
"SYSTEM REQUIREMENTS" (page 26).<br />
*2 When the Internet fax expansion kit is installed, the PC-Fax driver can be updated<br />
using the "PRINTER UTILITIES" CD-ROM to enable the driver to be used as a<br />
PC-I-Fax driver. In this case, the driver can be used without the facsimile expansion<br />
kit.<br />
*3 The scanner driver and Printer Status Monitor cannot be used on an IPv6-only<br />
network.<br />
27
BEFORE INSTALLING THE SOFTWARE<br />
CONNECTING THE MACHINE<br />
CONNECTING TO A NETWORK<br />
To connect the machine to a network, connect the LAN cable to the machine's network<br />
connector. Use a shielded LAN cable.<br />
After connecting the machine to a network, be sure to configure the IP address and other<br />
network settings before installing the software. (The factory default setting for the IP<br />
address is to receive the IP address automatically when the machine is used in a DHCP<br />
environment.)<br />
Network settings can be configured using "Network Settings" in the system settings<br />
(administrator) on the machine.<br />
� Checking the IP address of the machine<br />
You can check the IP address of the machine by printing out the "All Custom Setting List"<br />
in the system settings. Follow these steps to print out the "All Custom Setting List".<br />
Press the [SYSTEM SETTINGS] key, touch the [List Print (User)] key, and then touch the<br />
[Print] key of "All Custom Setting List".<br />
CONNECTING THE MACHINE WITH A USB CABLE (Windows)<br />
The machine can be connected to a computer using a USB cable if the computer is a<br />
Windows computer. (The USB interface on the machine cannot be used in a Macintosh<br />
environment.)<br />
The machine and computer should be connected while the printer driver is being<br />
installed. If a USB cable is connected before the printer driver is installed, the printer<br />
driver will not be installed correctly. For the procedure for connecting a USB cable, see<br />
"WHEN THE MACHINE WILL BE CONNECTED WITH A USB CABLE" (<strong>Operation</strong><br />
<strong>Guide</strong>).<br />
28<br />
If the machine is used in a DHCP environment, the IP address of the<br />
machine may change. If this happens, printing will not be possible. This<br />
problem can be avoided by using a WINS server or by assigning a<br />
permanent IP address to the machine.<br />
This manual explains how to set up the software in a Windows network<br />
environment.<br />
To use the machine on an IPv6 network, the IPv6 setting must be<br />
enabled in "Network Settings" in the system settings (administrator).
SETUP IN A WINDOWS<br />
ENVIRONMENT<br />
This section explains how to install the software on a Windows computer. For more<br />
details regarding installation procedures and instructions for installation in Macintosh<br />
environments, see Chapter 1 of the <strong>Operation</strong> <strong>Guide</strong>.<br />
OPENING THE SOFTWARE SELECTION <strong>SC</strong>REEN<br />
(FOR ALL SOFTWARE)<br />
1 Insert the "Software CD-ROM" into your computer's<br />
CD-ROM drive.<br />
If you are installing the printer driver or printer status monitor, insert the<br />
"Software CD-ROM" that shows "Disc 1" on the front of the CD-ROM.<br />
If you are installing the PC-Fax driver or scanner driver, insert the "Software<br />
CD-ROM" that shows "Disc 2" on the front of the CD-ROM.<br />
2 Click the [<strong>Start</strong>] button ( ), click [Computer], and then<br />
double-click the [CD-ROM] icon ( ).<br />
In Windows XP/Server 2003, click the [start] button, click [My Computer], and<br />
then double-click the [CD-ROM] icon.<br />
In Windows 2000, double-click [My Computer] and then double-click the<br />
[CD-ROM] icon.<br />
3 Double-click the [Setup] icon ( ).<br />
In Windows 7, if a message screen appears asking you for confirmation, click<br />
[Yes].<br />
In Windows Vista/Server 2008, if a message screen appears asking you for<br />
confirmation, click [Allow].<br />
4 The "SOFTWARE LICENSE" window will appear. Make<br />
sure that you understand the contents of the license<br />
agreement and then click the [Yes] button.<br />
You can show the "SOFTWARE LICENSE" in a different language by selecting<br />
the desired language from the language menu. To install the software in the<br />
selected language, continue the installation with that language selected.<br />
29
SETUP IN A WINDOWS ENVIRONMENT<br />
5 Read the message in the "Welcome" window and then<br />
click the [Next] button.<br />
6 The software selection screen appears.<br />
Before installing the software, be sure to click the [Display Readme] button and<br />
view the detailed information on the software.<br />
30<br />
* The above screen appears when using the "Disc 1" CD-ROM.<br />
For the steps that follow, see the appropriate page below for the software that<br />
you are installing.<br />
INSTALLING THE PRINTER DRIVER / PC-FAX DRIVER<br />
WHEN THE MACHINE IS CONNECTED TO A NETWORK *<br />
- Standard installation: page 32<br />
- Installation by specifying the machine's address: <strong>Operation</strong> <strong>Guide</strong><br />
- Printing using the IPP function and the SSL function: <strong>Operation</strong> <strong>Guide</strong><br />
WHEN THE MACHINE WILL BE CONNECTED WITH A USB CABLE: <strong>Operation</strong><br />
<strong>Guide</strong><br />
USING THE MACHINE AS A SHARED PRINTER: <strong>Operation</strong> <strong>Guide</strong><br />
INSTALLING THE PRINTER STATUS MONITOR: <strong>Operation</strong> <strong>Guide</strong><br />
INSTALLING THE <strong>SC</strong>ANNER DRIVER: <strong>Operation</strong> <strong>Guide</strong><br />
* If the machine is being used on an IPv6 network, see "Installation by specifying the<br />
machine's address" (in the <strong>Operation</strong> <strong>Guide</strong>).
SETUP IN A WINDOWS ENVIRONMENT<br />
INSTALLING THE PRINTER DRIVER / PC-FAX<br />
DRIVER<br />
To install the printer driver or the PC-Fax driver, follow the appropriate procedure in this<br />
section depending on whether the machine is connected to a network or connected by<br />
USB cable.<br />
☞ WHEN THE MACHINE WILL BE CONNECTED WITH A USB CABLE (<strong>Operation</strong><br />
<strong>Guide</strong>)<br />
WHEN THE MACHINE IS CONNECTED TO A NETWORK<br />
This section explains how to install the printer driver and the PC-Fax driver when the<br />
machine is connected to a Windows network (TCP/IP network).<br />
To print to the machine over the Internet using the IPP function when the<br />
machine is installed in a remote location, or to print using the SSL (encrypted<br />
communication) function, see "Printing using the IPP function and the SSL<br />
function" in the <strong>Operation</strong> <strong>Guide</strong> and install the printer driver or the PC-Fax<br />
driver.<br />
If the machine is connected to an IPv6-only network<br />
The software cannot be installed by detecting the machine's address from the<br />
installer. After installing the software as explained in "Installation by specifying<br />
the machine's address" in the <strong>Operation</strong> <strong>Guide</strong>, change the port as explained<br />
in "Changing to a Standard TCP/IP Port" in the <strong>Operation</strong> <strong>Guide</strong>.<br />
The installation procedure in this section is for both the printer driver and the<br />
PC-Fax driver, although the explanations are centred on the printer driver.<br />
31
SETUP IN A WINDOWS ENVIRONMENT<br />
� Standard installation<br />
When the software selection screen appears in step 6 of "OPENING THE SOFTWARE<br />
SELECTION <strong>SC</strong>REEN (FOR ALL SOFTWARE)" (page 29), perform the steps below.<br />
1 Click the [Printer Driver] button.<br />
To install the PC-Fax driver, click the [PC-Fax Driver] button on the "Disc 2"<br />
CD-ROM.<br />
32<br />
* The above screen appears when using the "Disc 1" CD-ROM.<br />
2 Click the [Standard installation] button.
SETUP IN A WINDOWS ENVIRONMENT<br />
When [Custom installation] is selected, you can change any of the items below.<br />
When [Standard installation] is selected, the installation will take place as<br />
indicated below.<br />
Machine connection method: LPR Direct Print (Auto Search)<br />
Set as default printer:Yes (excluding the PC-Fax driver)<br />
Printer driver name: Cannot be changed<br />
PCL printer display fonts: Installed<br />
If you selected [Custom installation], select [LPR Direct Print (Auto Search)]<br />
and click the [Next] button.<br />
If you selected other than [LPR Direct Print (Auto Search)], see the following<br />
pages in the <strong>Operation</strong> <strong>Guide</strong>:<br />
LPR Direct Print (Specify Address)<br />
IPP Shared printer<br />
Connected to this computer<br />
3 Printers connected to the network are detected. Select<br />
the machine and click the [Next] button.<br />
If the machine is not found, make sure that the machine is powered on and<br />
that the machine is connected to the network, and then click the [Re-search]<br />
button.<br />
You can also click the [Specify condition] button and search for the machine<br />
by entering the machine's name (host name) or IP address.<br />
☞ Checking the IP address of the machine (page 28)<br />
33
SETUP IN A WINDOWS ENVIRONMENT<br />
4 A confirmation window appears. Check the contents and<br />
then click the [Next] button.<br />
5 When the printer driver selection window appears, select<br />
the printer driver to be installed and click the [Next]<br />
button.<br />
Click the checkbox of the printer driver to be installed so that a checkmark ( )<br />
appears.<br />
34<br />
When the PC-Fax driver is being installed, this screen does not appear. Go to<br />
the next step.<br />
6 When you are asked whether or not you want the printer<br />
to be your default printer, make a selection and click the<br />
[Next] button.<br />
If you are installing multiple drivers, select the printer driver to be used as the<br />
default printer.<br />
If you do not wish to set one of the printer drivers as the default printer, select<br />
[No].
SETUP IN A WINDOWS ENVIRONMENT<br />
If you clicked the [Custom installation] button in step 2, the following windows<br />
will appear.<br />
Printer name window<br />
If you wish to change the printer name, enter the desired name and click the<br />
[Next] button.<br />
Window confirming installation of the display fonts<br />
To install the display fonts select [Yes] and click the [Next] button.<br />
When the PC-Fax driver is being installed, this screen does not appear.<br />
Go to the next step.<br />
If you are not installing the PCL printer driver (you are installing the PS<br />
printer driver or the PPD driver), select [No] and click the [Next] button.<br />
7 Follow the on-screen instructions.<br />
Read the message in the window that appears and click the [Next] button.<br />
Installation begins.<br />
If you are using Windows Vista/Server 2008/7<br />
If a security warning window appears, be sure to click [Install this driver<br />
software anyway].<br />
If you are using Windows 2000/XP/Server 2003<br />
If a warning message regarding the Windows logo test or digital signature<br />
appears, be sure to click the [Continue Anyway] or [Yes] button.<br />
8 When the installation completed screen appears, click<br />
the [OK] button.<br />
9 Click the [Close] button in the window of step 1.<br />
After the installation, a message prompting you to restart your computer may<br />
appear. If this message appears, click the [Yes] button to restart your<br />
computer.<br />
35
SETUP IN A WINDOWS ENVIRONMENT<br />
This completes the installation.<br />
After installation, see "CONFIGURING THE PRINTER DRIVER FOR THE OPTIONS<br />
INSTALLED ON THE MACHINE" in the <strong>Operation</strong> <strong>Guide</strong> to configure the printer driver<br />
settings.<br />
If you are using the machine as a shared printer, see "USING THE MACHINE AS A<br />
SHARED PRINTER" in the <strong>Operation</strong> <strong>Guide</strong> to install the printer driver on each of the<br />
client computers.<br />
36
REGULAR MAINTENANCE<br />
To ensure that the machine continues to provide top quality performance, periodically<br />
clean the machine.<br />
Warning<br />
Do not use a flammable spray to clean the machine. If gas from the spray comes<br />
in contact with hot electrical components or the fusing unit inside the machine,<br />
fire or electrical shock may result.<br />
Do not use thinner, benzene, or similar volatile cleaning agents to clean the<br />
machine. These may degrade or discolour the housing.<br />
Use a soft cloth to gently wipe off dirt<br />
from the area on the operation panel<br />
with a mirror-like finish (shown at<br />
right). If you use a stiff cloth or rub<br />
hard, the surface may be damaged.<br />
The area with a mirror-like finish is<br />
the area that is .<br />
Cleaning the document glass and automatic document feeder<br />
If the document glass or document backplate sheet becomes dirty, the dirt will appear as<br />
dirty spots, or black or white lines in the scanned image. Always keep these parts clean.<br />
Wipe the parts with a clean, soft cloth.<br />
If necessary, moisten the cloth with water or a small amount of neutral detergent. After<br />
wiping with the moistened cloth, wipe the parts dry with a clean dry cloth.<br />
Document glass Document backplate sheet<br />
When wiping dirt off the machine, do not press down hard on the machine. This<br />
may damage or deform the machine.<br />
37
SUPPLIES<br />
Standard supplies for this product that can be replaced by the user include paper, toner<br />
cartridges, and staple cartridges for the finisher.<br />
Be sure to use only SHARP-specified products for the toner cartridges, finisher staple<br />
cartridge, and transparency film.<br />
GENUINE SUPPLIES<br />
Storage of supplies<br />
Proper storage<br />
1. Store the supplies in a location that is:<br />
clean and dry<br />
at normal temperature with minimal temperature fluctuations<br />
not exposed to direct sunlight<br />
2. Store paper in the wrapper and lying flat.<br />
3. Paper stored in packages standing up or out of the wrapper may curl or become<br />
damp, resulting in paper misfeeds.<br />
Storing toner cartridges<br />
Store the box that contains the toner cartridge horizontally; do not store it standing up. If<br />
the toner cartridge is stored standing up, the toner may solidify inside the cartridge.<br />
Store the toner in a location that is cooler than 104°F (40°C). Storage in a hot location<br />
may cause the toner in the cartridge to solidify.<br />
Staple cartridge<br />
The finisher requires the following staple cartridge:<br />
<strong>MX</strong>-<strong>SC</strong>X1 (for finisher)<br />
Approx. 5000 per cartridge x 3 cartridges<br />
Supply of spare parts and consumables<br />
The supply of spare parts for repair of the machine is guaranteed for at least 7 years<br />
following the termination of production. Spare parts are those parts of the machine which<br />
may break down within the scope of the ordinary use of the product, whereas those parts<br />
which normally exceed the life of the product are not to be considered as spare parts.<br />
Consumables too, are available for 7 years following the termination of production.<br />
38<br />
For best copying results, be sure to use only <strong>Sharp</strong> Genuine Supplies<br />
which are designed, engineered, and tested to maximize the life and<br />
performance of <strong>Sharp</strong> products. Look for the Genuine Supplies label<br />
on the toner package.
SPECIFICATIONS<br />
Machine specifications / copier specifications<br />
Name Digital Multifunctional System <strong>MX</strong>-<strong>B382</strong>/<strong>MX</strong>-<strong>B382</strong><strong>SC</strong><br />
Type Desktop<br />
Display 7 inch colour touch panel LCD<br />
Photoconductive type OPC drum<br />
Printing method Electrophotographic system (laser)<br />
Developer system Dry-type two-component magnetic brush development<br />
Fusing system Heat rollers<br />
Scanning resolution<br />
Document glass<br />
Automatic document<br />
feeder<br />
Copying resolution 600 x 600 dpi<br />
Scanning gradation 10 bits<br />
Printing gradation Equivalent to 256 levels<br />
Original sizes / types<br />
(Document Glass)<br />
Copy sizes<br />
Print margins<br />
Black and white scanning:<br />
600 x 300 dpi<br />
600 x 600 dpi<br />
(factory default values)<br />
Colour scanning:<br />
600 x 300 dpi<br />
600 x 600 dpi<br />
(factory default values)<br />
Black and white scanning:<br />
600 x 300 dpi<br />
(factory default values)<br />
600 x 600 dpi<br />
Colour scanning:<br />
600 x 300 dpi<br />
(factory default values)<br />
600 x 600 dpi<br />
Max. A4 (8-1/2" x 11") / sheets, bound documents<br />
Maximum: A4 (8-1/2" x 11")<br />
Minimum: A5 (5-1/4" x 5-3/4")<br />
Leading edge / trailing edge: total 8 mm (21/64") or less,<br />
near edge / far edge: total 8 mm (21/64") or less<br />
39
SPECIFICATIONS<br />
Machine specifications / copier specifications<br />
(Continued)<br />
Warm-up time<br />
First-copy time<br />
Copy ratios<br />
Continuous copy 999 copies<br />
Automatic document<br />
feeder<br />
Tray 1<br />
40<br />
<strong>MX</strong>-<strong>B382</strong>: 50 seconds or less<br />
<strong>MX</strong>-<strong>B382</strong><strong>SC</strong>: 45 seconds or less<br />
(This may vary depending on the ambient conditions.)<br />
<strong>MX</strong>-<strong>B382</strong>: 8.0 seconds or less<br />
<strong>MX</strong>-<strong>B382</strong><strong>SC</strong>: 6.5 seconds or less<br />
(This may vary depending on the state of the machine.)<br />
Variable: 50% to 200% in increments of 1%, total 151<br />
increments<br />
Fixed presets: 50%, 64%, 77%, 100%, 129% and 200%<br />
for inch sizes;<br />
50%, 70%, 81%, 86%, 100%, 115%,<br />
122%, 141% and 200% for AB sizes.<br />
Two reduction ratios and two enlargement ratios can be<br />
stored.<br />
See "Automatic document feeder specifications".<br />
Paper sizes: A4, B5, A5, 16K, 8-1/2" x 14",<br />
8-1/2" x 13-1/2", 8-1/2" x 13-2/5",<br />
8-1/2" x 13", 8-1/2" x 11",<br />
7-1/4" x 10-1/2", 5-1/2" x 8-1/2"<br />
Paper weight: Plain paper 60 g/m 2 (16 lbs.) to<br />
105 g/m 2 (28 lbs.)<br />
Paper capacity: Plain paper (80 g/m 2 (21 lbs.)) 500<br />
sheets<br />
Paper types: SHARP-recommended plain paper,<br />
recycled paper and coloured paper
Machine specifications / copier specifications<br />
(Continued)<br />
Bypass tray<br />
Duplex module<br />
Output tray (Centre tray)<br />
Interface port<br />
SPECIFICATIONS<br />
Paper sizes: A4, B5, A5, 16K, 8-1/2" x 14",<br />
8-1/2" x 13-1/2", 8-1/2" x 13-2/5",<br />
8-1/2" x 13", 8-1/2" x 11", 7-1/4" x 10-1/2",<br />
5-1/2" x 8-1/2", envelopes<br />
Paper weights:<br />
Thin paper (55 g/m2 (15 lbs.) to 59 g/m2 (16 lbs.)), plain<br />
paper (60 g/m2 (16 lbs.) to 105 g/m2 (28 lbs.)), heavy<br />
paper (106 g/m2 to 209 g/m2 (28 lbs. bond to 110 lbs.<br />
index))<br />
Paper capacity: Standard paper 100 sheets<br />
Paper types:<br />
SHARP-recommended plain paper, recycled paper,<br />
coloured paper, heavy paper, thin paper, transparency<br />
film, and envelopes (Monarch, Com-10, DL, C5)<br />
Paper sizes: A4, B5, A5, 16K, 8-1/2" x 14",<br />
8-1/2" x 13-1/2", 8-1/2" x 13-2/5",<br />
8-1/2" x 13", 8-1/2" x 11", 5-1/2" x 8-1/2"<br />
Paper weight: Plain paper (60 g/m 2 (16 lbs.) to 105 g/m 2<br />
(28 lbs.))<br />
Paper types:SHARP-recommended plain paper,<br />
recycled paper, and coloured paper<br />
Output method: Face-down output<br />
Output capacity: 250 sheets (using SHARP-recommended<br />
A4 or 8-1/2" x 11" paper)<br />
(The maximum number of sheets that can be held varies<br />
depending on ambient conditions in the installation<br />
location, the type of paper, and the storage conditions of<br />
the paper.)<br />
Tray full sensor: Yes<br />
LAN connectivity: 10Base-T / 100Base-TX /<br />
1000Base-T<br />
USB connectivity: Type A connector supports USB 2.0<br />
(Hi speed)*<br />
Compatibility requirements of USB 2.0<br />
Disk Format: FAT<br />
Type B connector supports USB 2.0<br />
(Hi speed)<br />
41
SPECIFICATIONS<br />
Machine specifications / copier specifications<br />
(Continued)<br />
Local voltage ±10% (For the power supply<br />
Required power supply requirements, see the name plate in the lower corner of<br />
the left side of the machine.)<br />
Power consumption 1.84 kW<br />
<strong>MX</strong>-<strong>B382</strong>:<br />
560 mm (W) x 493 mm (D) x 714 mm (H)<br />
(22-3/64" (W) x 19-13/32" (D) x 28-7/64" (H))<br />
Dimensions<br />
<strong>MX</strong>-<strong>B382</strong><strong>SC</strong>:<br />
560 mm (W) x 494 mm (D) x 789 mm (H)<br />
(22-3/64" (W) x 19-29/64" (D) x 31-1/16" (H))<br />
<strong>MX</strong>-<strong>B382</strong>:<br />
Approx. 42 kg (92.6 lbs.)<br />
Weight<br />
<strong>MX</strong>-<strong>B382</strong><strong>SC</strong>:<br />
Approx. 47 kg (103.6 lbs.)<br />
<strong>MX</strong>-<strong>B382</strong>:<br />
868 mm (W) x 493 mm (D) (34-11/64" (W) x 19-13/32" (D))<br />
(when bypass tray is extended)<br />
Overall dimensions<br />
<strong>MX</strong>-<strong>B382</strong><strong>SC</strong>:<br />
1101 mm (W) x 494 mm (D) (43-11/32" (W) x 19-29/64" (D))<br />
(when bypass tray is extended)<br />
* Type A connectors are located on the front and back right of the machine (two<br />
connectors); however, the connectors cannot be used simultaneously on the<br />
<strong>MX</strong>-<strong>B382</strong>. The connector on the back of the machine is not initially available for use. If<br />
you wish to use the connector, contact your service assistance.<br />
Continuous copying speeds*<br />
Copy ratio 100% / Reduced / Enlarged<br />
A4 38 copies/min.<br />
8-1/2" x 14", 8-1/2" x 13-1/2",<br />
8-1/2" x 13-2/5", 8-1/2" x 13"<br />
32 copies/min.<br />
8-1/2" x 11", 7-1/4" x 10-1/2",<br />
5-1/2" x 8-1/2", B5, A5, 16K<br />
40 copies/min.<br />
* Copy speed during output of the second copy and following copies when performing<br />
continuous one-sided copying of the same page (excluding offset output) using plain<br />
one-sided paper from a tray other than the bypass tray.<br />
42
Ambient environment<br />
(Humidity)<br />
85%<br />
60%<br />
20%<br />
10˚C<br />
(54˚F)<br />
30˚C 35˚C (Temperature)<br />
(86˚F) (91˚F)<br />
SPECIFICATIONS<br />
43
SPECIFICATIONS<br />
Chemical emission (measured according to<br />
RAL-UZ122: Edition Jun. 2006)<br />
Ozone 1.5 mg/h or less<br />
Dust 4.0 mg/h or less<br />
Styrene 1.0 mg/h or less<br />
Benzene less than 0.05 mg/h<br />
TVOC 10 mg/h or less<br />
Acoustic noise emission (measurement according to<br />
ISO7779)<br />
Sound power level LwA<br />
Printing mode (continuous<br />
printing)<br />
Standby mode 4.9 B<br />
44<br />
<strong>MX</strong>-<strong>B382</strong>:<br />
6.8 B<br />
<strong>MX</strong>-<strong>B382</strong><strong>SC</strong>:<br />
6.7 B<br />
Sound pressure level LpA (actual measurement)<br />
Printing<br />
mode<br />
Standby<br />
mode<br />
Bystander<br />
positions<br />
Operator<br />
positions<br />
Bystander<br />
positions<br />
Operator<br />
positions<br />
54 dB (A)<br />
<strong>MX</strong>-<strong>B382</strong>:<br />
56 dB (A)<br />
<strong>MX</strong>-<strong>B382</strong><strong>SC</strong>:<br />
54 dB (A)<br />
<strong>MX</strong>-<strong>B382</strong>:<br />
36 dB (A)<br />
<strong>MX</strong>-<strong>B382</strong><strong>SC</strong>:<br />
35 dB (A)<br />
<strong>MX</strong>-<strong>B382</strong>:<br />
36 dB (A)<br />
<strong>MX</strong>-<strong>B382</strong><strong>SC</strong>:<br />
34 dB (A)
Automatic document feeder specifications<br />
Original sizes<br />
Original weight* 2<br />
Capacity<br />
SPECIFICATIONS<br />
<strong>MX</strong>-<strong>B382</strong>:<br />
A4 (8-1/2" x 14") to A5 (5-1/2" x 8-1/2"), long paper<br />
(max. width 216 mm (8-1/2") x max. length 500 mm* 1 (19-5/8"))<br />
<strong>MX</strong>-<strong>B382</strong><strong>SC</strong>:<br />
A4 (8-1/2" x 14") to A5 (5-1/2" x 8-1/2"), long paper<br />
(max. width 216 mm (8-1/2") x max. length 500 mm* 1 (19-5/8")),<br />
Card size (54 mm x 86 mm), Check size (76 mm x 155 mm)<br />
<strong>MX</strong>-<strong>B382</strong>:<br />
One-sided 35 g/m 2 (9 lbs. ) to 128 g/m 2 (32 lbs.) (Paper weights from<br />
35 g/m 2 (9 lbs.) to 49 g/m 2 (13 lbs.) require the use of slow scan mode.)<br />
Two-sided 50 g/m 2 (13 lbs.) to 105 g/m 2 (28 lbs.)<br />
<strong>MX</strong>-<strong>B382</strong><strong>SC</strong>:<br />
One-sided 35 g/m 2 (9 lbs.) to 280 g/m 2 (73 lbs.) (Paper weights from<br />
35 g/m 2 (9 lbs. ) to 49 g/m 2 (13 lbs.) require the use of slow scan mode.)<br />
Two-sided 50 g/m 2 (13 lbs.) to 280 g/m 2 (73 lbs.)<br />
<strong>MX</strong>-<strong>B382</strong>:<br />
50 sheets (80 g/m 2 (21 lbs.)) Maximum stack height of 6.5 mm<br />
(1/4")<br />
<strong>MX</strong>-<strong>B382</strong><strong>SC</strong>:<br />
100 sheets (80 g/m 2 (21 lbs.)) Maximum stack height of 13 mm<br />
(1/2")<br />
* 1 Scanning in mono 2 mode of one side only is possible in fax and scan send modes.<br />
* 2 Heavy paper (129 g/m 2 (34 lbs.) to 280 g/m 2 (75 lbs.)) is only discharged at the heavy<br />
exit.<br />
45
INFORMATION ON DISPOSAL<br />
A. Information on Disposal for Users (private households)<br />
1. In the European Union<br />
Attention: If you want to dispose of this equipment,<br />
please do not use the ordinary dust bin!<br />
Used electrical and electronic equipment must be<br />
treated separately and in accordance with legislation<br />
that requires proper treatment, recovery and<br />
recycling of used electrical and electronic<br />
equipment.<br />
Following the implementation by member states,<br />
private households within the EU states may return<br />
their used electrical and electronic equipment to<br />
designated collection facilities free of charge*. In<br />
some countries* your local retailer may also take<br />
back your old product free of charge if you purchase<br />
a similar new one.<br />
*) Please contact your local authority for further details.<br />
If your used electrical or electronic equipment has batteries or accumulators, please dispose<br />
of these separately beforehand according to local requirements.<br />
By disposing of this product correctly you will help ensure that the waste undergoes the<br />
necessary treatment, recovery and recycling and thus prevent potential negative effects on<br />
the environment and human health which could otherwise arise due to inappropriate waste<br />
handling.<br />
2. In other Countries outside the EU<br />
If you wish to discard this product, please contact your local authorities and ask for the correct<br />
method of disposal.<br />
For Switzerland: Used electrical or electronic equipment can be returned free of charge to the<br />
dealer, even if you don't purchase a new product. Further collection facilities are listed on the<br />
homepage of www.swico.ch or www.sens.ch.<br />
B. Information on Disposal for Business Users.<br />
1. In the European Union<br />
If the product is used for business purposes and you want to discard it:<br />
Please contact your SHARP dealer who will inform you about the take-back of the product.<br />
You might be charged for the costs arising from take-back and recycling. Small products (and<br />
small amounts) might be taken back by your local collection facilities.<br />
For Spain: Please contact the established collection system or your local authority for<br />
take-back of your used products.<br />
2. In other Countries outside the EU<br />
If you wish to discard of this product, please contact your local authorities and ask for the<br />
correct method of disposal.<br />
46<br />
Attention: Your product is marked<br />
with this symbol. It means that<br />
used electrical and electronic<br />
products should not be mixed with<br />
general household waste. There<br />
is a separate collection system for<br />
these products.
Administrator Name: Contact at:<br />
✂<br />
Information that the administrator of<br />
the machine requires is printed on<br />
the back of this page.<br />
(Separate this page from the<br />
manual and keep it in a safe place.<br />
In addition, fill in the name of the<br />
administrator and the<br />
administrator's contact information<br />
in the left hand margin.)<br />
47
TO THE ADMINISTRATOR OF<br />
THE MACHINE<br />
(Separate this page from the manual and keep it in a safe place.)<br />
Factory default passwords<br />
When accessing the system settings, the administrator password is required to log<br />
in with administrator rights. The system settings can be configured in the Web<br />
pages as well as on the operation panel. To access the system settings using the<br />
Web pages, a password is also required.<br />
Factory default administrator password<br />
Factory default setting: admin<br />
Store a new administrator password as soon as the machine is installed.<br />
Once the administrator password has been changed, the new password is required to<br />
restore the factory default password. Take care to remember the new password.<br />
Factory default passwords (Web pages)<br />
There are two factory default accounts: "Administrator" and "User". A person who logs<br />
in as an "Administrator" can configure all settings in the Web pages. In addition, an<br />
administrator can restrict access to other settings by enabling "User" accounts.<br />
The factory default passwords are shown below.<br />
Forwarding all transmitted and received data to the<br />
administrator (document administration function)<br />
This function is used to forward all data transmitted and received by the machine<br />
to a specified destination (Scan to E-mail address, Scan to FTP destination, Scan<br />
to Network Folder destination, or Scan to Desktop destination).<br />
This function can be used by the administrator of the machine to archive all<br />
transmitted and received data.<br />
To configure the document administration settings, click [Application Settings]<br />
and then [Document Administration Function] in the Web page menu.<br />
(Administrator rights are required.)<br />
48<br />
Factory default account Factory default password<br />
User users users<br />
Administrator admin admin<br />
Note:<br />
The format, exposure, and resolution settings of transmitted and received<br />
data remain in effect when the data is forwarded.<br />
When forwarding is enabled for data sent in fax mode,<br />
The [Direct TX] key does not appear in the touch panel.<br />
Quick online transmission and dialing using the speaker cannot be used.<br />
✂
TO THE ADMINISTRATOR OF THE MACHINE<br />
For the users of the fax function<br />
Important safety instructions<br />
If any of your telephone equipment is not operating properly, you should immediately<br />
remove it from your telephone line, as it may cause harm to the telephone network.<br />
The AC power outlet shall be installed near the equipment and shall be easily<br />
accessible.<br />
Never install telephone wiring during a lightning storm.<br />
Never install telephone jacks in wet locations unless the socket is specifically designed<br />
for wet locations.<br />
Never touch uninsulated telephone wires or terminals unless the telephone line has<br />
been disconnected at the network interface.<br />
Use caution when installing or modifying telephone lines.<br />
Avoid using a telephone (other than a cordless type) during an electrical storm. There<br />
may be a remote risk of electric shock from lightning.<br />
Do not use a telephone to report a gas leak in the vicinity of the leak.<br />
Do not install or use the machine near water, or when you are wet. Take care not to<br />
spill any liquids on the machine.<br />
Save these instructions.<br />
49
TO THE ADMINISTRATOR OF THE MACHINE<br />
Trademark acknowledgments<br />
50<br />
The following trademarks and registered trademarks are used in conjunction with the<br />
machine and its peripheral devices and accessories.<br />
Microsoft ® , Windows ® , Windows ® 98, Windows ® Me, Windows NT ® 4.0, Windows ® 2000, Windows ® XP,<br />
Windows Server ® 2003, Windows Vista ® , Windows Server ® 2008, Windows ® 7 and Internet Explorer ® are<br />
registered trademarks or trademarks of Microsoft Corporation in the U.S.A. and other countries.<br />
PostScript is a registered trademark of Adobe Systems Incorporated.<br />
Adobe and Flash are registered trademarks or trademarks of Adobe Systems Incorporated in<br />
the United States and other countries.<br />
Adobe, the Adobe logo, Acrobat, the Adobe PDF logo, and Reader are registered trademarks<br />
or trademarks of Adobe Systems Incorporated in the United States and other countries.<br />
Macintosh, Mac OS, AppleTalk, EtherTalk and LaserWriter are trademarks of Apple Inc.,<br />
registered in the U.S. and other countries.<br />
Netscape Navigator is a trademark of Netscape Communications Corporation.<br />
Mozilla ® and Firefox ® are registered trademarks or trademarks of the Mozilla Foundation in<br />
the U.S.A. and other countries.<br />
PCL is a registered trademark of the Hewlett-Packard Company.<br />
IBM, PC/AT, and PowerPC are trademarks of International Business Machines Corporation.<br />
<strong>Sharp</strong>desk is a trademark of <strong>Sharp</strong> Corporation.<br />
<strong>Sharp</strong> OSA is a trademark of <strong>Sharp</strong> Corporation.<br />
RealVNC is a trademark of RealVNC Limited.<br />
All other trademarks and copyrights are the property of their respective owners.<br />
Candid and Taffy are trademarks of Monotype Imaging, Inc. registered in the United States<br />
Patent and Trademark Office and may be registered in certain jurisdictions. CG Omega, CG<br />
Times, Garamond Antiqua, Garamond Halbfett, Garamond Kursiv, Garamond and Halbfett<br />
Kursiv are trademarks of Monotype Imaging, Inc. and may be registered in certain jurisdictions.<br />
Albertus, Arial, Coronet, Gill Sans, Joanna and Times New Roman are trademarks of The<br />
Monotype Corporation registered in the United States Patent and Trademark Office and may be<br />
registered in certain jurisdictions. Avant Garde, ITC Bookman, Lubalin Graph, Mona Lisa, Zapf<br />
Chancery and Zapf Dingbats are trademarks of International Typeface Corporation registered in<br />
the United States Patent and Trademark Office and may be registered in certain jurisdictions.<br />
Clarendon, Eurostile, Helvetica, Optima, Palatino, Stempel Garamond, Times and Univers are<br />
trademarks of Heidelberger Druckmaschinen AG, which may be registered in certain<br />
jurisdictions, exclusively licensed through Linotype Library GmbH, a wholly owned subsidiary of<br />
Heidelberger Druckmaschinen AG. Apple Chancery, Chicago, Geneva, Monaco and New York<br />
are trademarks of Apple Computer Inc. and may be registered in certain jurisdictions.<br />
HGGothicB, HGMinchoL, HGPGothicB and HGPMinchoL are trademarks of Ricoh Company,<br />
Ltd. and may be registered in some jurisdictions. Wingdings is a registered trademark of<br />
Microsoft Corporation in the United States and other countries. Marigold and Oxford are<br />
trademarks of Arthur Baker and may be registered in some jurisdictions. Antique Olive is a<br />
trademark of Marcel Olive and may be registered in certain jurisdictions. Hoefler Text is a<br />
trademark of Johnathan Hoefler and may be registered in some jurisdictions. ITC is a<br />
trademark of International Typeface Corporation registered in the United States Patent and<br />
Trademark Office and may be registered in certain jurisdictions. Agfa is a trademark of the<br />
Agfa-Gevaert Group and may be registered in certain jurisdictions. Intellifont, MicroType and<br />
UFST are trademarks of Monotype Imaging, Inc. registered in the United States Patent and<br />
Trademark Office and may be registered in certain jurisdictions. Macintosh and TrueType are<br />
trademarks of Apple Computer Inc. registered in the United States Patent and Trademark Office<br />
and other countries. PostScript is a trademark of Adobe Systems Incorporated and may be<br />
registered in some jurisdictions. HP, PCL, FontSmart and LaserJet are trademarks of<br />
Hewlett-Packard Company and may be registered in some jurisdictions. The Type 1 processor<br />
resident in Monotype Imaging's UFST product is under license from Electronics For Imaging,<br />
Inc. All other trademarks are the property of their respective owners.
SHARP ELECTRONICS (Europe) GmbH<br />
Sonninstraße 3, D-20097 Hamburg
PRINTED IN FRANCE<br />
TINSE4755GHZZ<br />
*TINSE4755GHZZ*<br />
<strong>MX</strong>-<strong>B382</strong>/<strong>MX</strong>-<strong>B382</strong><strong>SC</strong> <strong>Start</strong> <strong>Guide</strong>