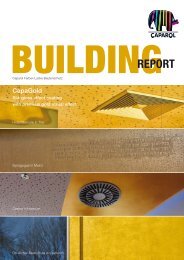
Capadur Repair AS - Caparol
Capadur Repair AS - Caparol
Capadur Repair AS - Caparol

Create successful ePaper yourself
Turn your PDF publications into a flip-book with our unique Google optimized e-Paper software.
Method of Application<br />
Workability<br />
Application Conditions<br />
Drying/Drying Time<br />
Tool Cleaning<br />
Special Risks (Hazard Note) / Safety<br />
Advice (Status as at Date of<br />
Publication)<br />
Disposal<br />
Giscode<br />
Technical Information No. 182<br />
Mixing: Cut cartridges above thread of screw and insert both cartridges (component A + B) in a<br />
suitable dual cartridge caulking gun. Alternatively two normal caulking guns can be used. Press two<br />
threads of component A + B in same length and required quantity onto a board, side by side, and<br />
close the cartridges using delivered threaded caps.<br />
Mix both components thoroughly with a scraper, until a homogeneously coloured and streak-free wood<br />
repair compound is achieved.<br />
Note: Always use a board for mixing in order to prevent blistering by pressing out all air cells/bubbles<br />
with the scraper. Do not amass the filling compound on the (mixing) board but spead out.<br />
Accumulation of mixed product will cause a diminished pot life due to heat of reaction.<br />
Application: Impregnate defective areas with <strong>Capadur</strong> <strong>Repair</strong> P. Allow the primer to flash off for min.<br />
20 minutes (but no longer than max. 2 hours), then apply wood repair compound <strong>Capadur</strong> <strong>Repair</strong> <strong>AS</strong><br />
onto the primer. Note: The primer must not be moist. Remove all excess product with a cloth.<br />
In a first working step apply a fine layer of <strong>Capadur</strong> <strong>Repair</strong> <strong>AS</strong> onto the wood surface by scraper, in<br />
order to achieve a proper wetting (grip/adhesion). Then fill the defect with <strong>Capadur</strong> <strong>Repair</strong> <strong>AS</strong>. Fill<br />
deeper defects wet on wet in layers of max. 5 mm. Thus a proper densification is obtained and<br />
blistering is avoided. Fill all defects with a little overspill. Excess product can be sanded the next<br />
day flush to the surface, at the earliest after 16 hrs. (at 20 °C and 60 % relative humidity).<br />
Fill the repair compound with fitted bits of wood, when repairing large defects. Take care to provide for<br />
a min. 5 mm wide joint of repair compound on all sides between the filling bits of wood and the wood<br />
component part. Prime all contact surfaces with <strong>Capadur</strong> <strong>Repair</strong> P and, after a flash off time of 20<br />
minutes (2 hrs. at the latest), apply <strong>Capadur</strong> <strong>Repair</strong> <strong>AS</strong> onto the full surface. Lay in all bits of wood<br />
avoiding blistering and remove all excess product with a scraper.<br />
<strong>Capadur</strong> <strong>Repair</strong> <strong>AS</strong> is no spackling compound (putty/body filler/surfacer)!<br />
<strong>Repair</strong> patches must be min. 5 mm deep and wide (minimum layer thickness).<br />
Thoroughly sanded surfaces can be coated with <strong>Caparol</strong> enamels and wood stains/glazes.<br />
Always check for compatibility, when products of other manufacturers are used.<br />
Pot (working) life: Approx. 30 minutes at 20 °C air temperature. Pot life is shortened at higher<br />
temperatures. Avoid application under a glaring sun (on sun-heated surfaces).<br />
Processing temperature during application & curing: Min. 10 °C up to max. 30 °C (substrate, product<br />
and ambient air). Maximum permissible relative humidity: 85 %.<br />
Drying/curing times at 20 °C and 60 % RH:<br />
Dust-dry after approx. 4 hours.<br />
Sanding/grinding is possible after approx. 16 hours.<br />
Recoatable after approx. 16 hours.<br />
Chemical and mechanical loadability (fully cured) after approx. 7 days.<br />
With special cleaning wipes or with Disboxid 419 Verdünner (thinner).<br />
Advice<br />
Component A (Base material):<br />
For professional use only.<br />
Causes skin irritation. May cause an allergic skin reaction. Causes serious eye irritation. Toxic to<br />
aquatic life with long lasting effects. Do not breathe vapours/ spray. Do not get in eyes, on skin, or on<br />
clothing. Avoid release to the environment. Use personal protective equipment as required. Rinse<br />
cautiously with water for several minutes. Remove contact lenses, if present and easy to do. Continue<br />
rinsing. Wash with plenty of soap and water. Store in a well-ventilated place. Keep container tightly<br />
closed. Dispose of contents/ container to an approved waste disposal plant. Contains epoxy<br />
constituents. May produce an allergic reaction.<br />
Component B (Hardener/Catalyst):<br />
For professional use only.<br />
Harmful if swallowed. Causes severe skin burns and eye damage. May cause an allergic skin reaction.<br />
Do not breathe dust/ fume/ gas/ mist/ vapours/ spray. Do not get in eyes, on skin, or on clothing. Avoid<br />
release to the environment. Use personal protective equipment as required. IF IN EYES: Rinse<br />
cautiously with water for several minutes. Remove contact lenses, if present and easy to do. Continue<br />
rinsing. IF ON SKIN: Wash with plenty of soap and water. Take off contaminated clothing and wash<br />
before reuse. Store in a well-ventilated place. Keep container tightly closed. Dispose of contents/<br />
container to an approved waste disposal plant.<br />
Materials and all related packaging must be disposed of in a safe way in accordance with the full<br />
requirements of the local authority. Particular attention should be made to removing wastage from site<br />
in compliance with standard construction site procedures.<br />
In Germany: Only completely emptied cartridges must be given for recycling. Product residues: Allow<br />
curing of base material with hardener (components A + B) and dispose of as paints waste.<br />
RE1