AnyConnect VPN - The Cisco Learning Network
AnyConnect VPN - The Cisco Learning Network
AnyConnect VPN - The Cisco Learning Network
Create successful ePaper yourself
Turn your PDF publications into a flip-book with our unique Google optimized e-Paper software.
<strong>AnyConnect</strong> <strong>VPN</strong> (SSL) Client on IOS Router with<br />
CCP Configuration Example<br />
Document ID: 110608<br />
Contents<br />
Introduction<br />
Prerequisites<br />
Requirements<br />
Components Used<br />
Conventions<br />
<strong>Network</strong> Diagram<br />
Preconfiguration Tasks<br />
Configure Anyconnect <strong>VPN</strong> on IOS<br />
Step 1. Install and Enable the Anyconnect <strong>VPN</strong> Software on the IOS Router<br />
Step 2. Configure a SSL<strong>VPN</strong> Context and SSL<strong>VPN</strong> Gateway with the CCP Wizard<br />
Step 3. Configure the User Database for Anyconnect <strong>VPN</strong> Users<br />
Step 4. Configure the Anyconnect Full Tunnel<br />
CLI Configuration<br />
Establish the <strong>AnyConnect</strong> <strong>VPN</strong> Client Connection<br />
Verify<br />
Commands<br />
Troubleshoot<br />
SSL Connectivity Issue<br />
Error: SSL<strong>VPN</strong> Package SSL−<strong>VPN</strong>−Client : installed Error: Disk<br />
Troubleshooting Commands<br />
Related Information<br />
Introduction<br />
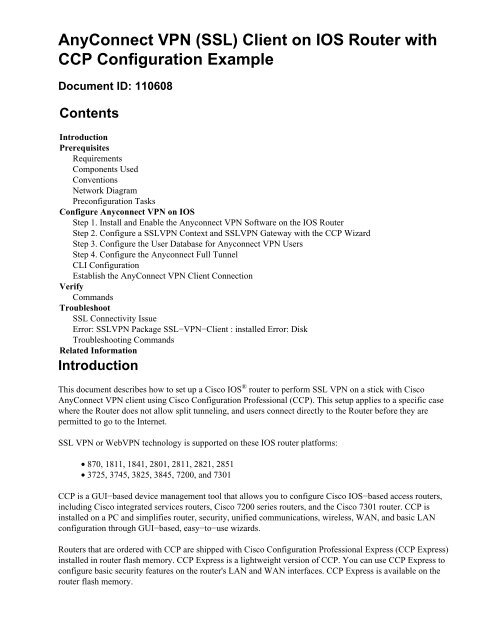
This document describes how to set up a <strong>Cisco</strong> IOS ® router to perform SSL <strong>VPN</strong> on a stick with <strong>Cisco</strong><br />
<strong>AnyConnect</strong> <strong>VPN</strong> client using <strong>Cisco</strong> Configuration Professional (CCP). This setup applies to a specific case<br />
where the Router does not allow split tunneling, and users connect directly to the Router before they are<br />
permitted to go to the Internet.<br />
SSL <strong>VPN</strong> or Web<strong>VPN</strong> technology is supported on these IOS router platforms:<br />
• 870, 1811, 1841, 2801, 2811, 2821, 2851<br />
• 3725, 3745, 3825, 3845, 7200, and 7301<br />
CCP is a GUI−based device management tool that allows you to configure <strong>Cisco</strong> IOS−based access routers,<br />
including <strong>Cisco</strong> integrated services routers, <strong>Cisco</strong> 7200 series routers, and the <strong>Cisco</strong> 7301 router. CCP is<br />
installed on a PC and simplifies router, security, unified communications, wireless, WAN, and basic LAN<br />
configuration through GUI−based, easy−to−use wizards.<br />
Routers that are ordered with CCP are shipped with <strong>Cisco</strong> Configuration Professional Express (CCP Express)<br />
installed in router flash memory. CCP Express is a lightweight version of CCP. You can use CCP Express to<br />
configure basic security features on the router's LAN and WAN interfaces. CCP Express is available on the<br />
router flash memory.
Prerequisites<br />
Requirements<br />
Ensure that you meet these requirements before you attempt this configuration:<br />
• Microsoft Windows 2000 or XP<br />
• Web Browser with SUN JRE 1.4 or later or an ActiveX controlled browser<br />
• Local administrative privileges on the client<br />
• <strong>Cisco</strong> IOS Router with Advanced Security image −12.4(20)T or later<br />
• <strong>Cisco</strong> Configuration Professional 1.3<br />
If the <strong>Cisco</strong> Configuration Professional is not already loaded on your computer, you can obtain a free<br />
copy of the software and install the .exe (cisco−config−pro−k9−pkg−1_3−en.zip) file from Software<br />
Download. For detailed information on the installation and configuration of CCP, refer to <strong>Cisco</strong><br />
Configuration Professional Quick Start Guide.<br />
Components Used<br />
<strong>The</strong> information in this document is based on these software and hardware versions:<br />
• <strong>Cisco</strong> IOS Series 1841 Router with software version 12.4(24)T<br />
• <strong>Cisco</strong> Configuration Professional (CCP) 1.3<br />
• <strong>Cisco</strong> <strong>AnyConnect</strong> SSL <strong>VPN</strong> Client version for Windows 2.3.2016<br />
Note: <strong>The</strong> information in this document was created from devices in a specific lab environment. All of the<br />
devices used in this document started with a cleared (default) configuration. If your network is live, make sure<br />
that you understand the potential impact of any command.<br />
Conventions<br />
Refer to the <strong>Cisco</strong> Technical Tips Conventions for more information on document conventions.<br />
<strong>Network</strong> Diagram<br />
This document uses this network setup:<br />
Preconfiguration Tasks<br />
1.<br />
You must configure the router for CCP.
Routers with the appropriate security bundle license already have the CCP application loaded in flash.<br />
Refer to <strong>Cisco</strong> Configuration Professional Quick Start Guide to obtain and configure the software.<br />
2. Download a copy of the Anyconnect <strong>VPN</strong> .pkg file to your management PC.<br />
Configure Anyconnect <strong>VPN</strong> on IOS<br />
In this section, you are presented with the steps necessary to configure the features described in this<br />
document. This example configuration uses the CCP Wizard to enable the operation of the Anyconnect <strong>VPN</strong><br />
on the IOS router.<br />
Complete these steps in order to configure Anyconnect <strong>VPN</strong> on the <strong>Cisco</strong> IOS router:<br />
1. Install and Enable the Anyconnect <strong>VPN</strong> Software on the <strong>Cisco</strong> IOS Router<br />
2. Configure a SSL <strong>VPN</strong> Context and SSL <strong>VPN</strong> Gateway with the CCP Wizard<br />
3. Configure the User Database for Anyconnect <strong>VPN</strong> Users<br />
4. Configure the Resources to Expose to Users<br />
Step 1. Install and Enable the Anyconnect <strong>VPN</strong> Software on the IOS<br />
Router<br />
To install and enable the Anyconnect <strong>VPN</strong> software on the IOS router, complete these steps:<br />
1. Open the CCP application, go to Configure > Security, and then click <strong>VPN</strong>.<br />
2. Expand SSL<strong>VPN</strong>, and choose Packages.<br />
3.<br />
In the <strong>Cisco</strong> SSL<strong>VPN</strong> client software, click Browse.<br />
<strong>The</strong> Install SSL <strong>VPN</strong> Client Package dialog box appears.
4. Specify the location of the <strong>Cisco</strong> Anyconnect <strong>VPN</strong> client image.<br />
♦ If the <strong>Cisco</strong> Anyconnect <strong>VPN</strong> client image is in the router's flash, click the Router File<br />
System radio button dialog box, and click Browse.<br />
♦ If the <strong>Cisco</strong> Anyconnect <strong>VPN</strong> client image is not in the router's flash, click the My<br />
Computer radio dialog box, and click Browse.<br />
<strong>The</strong> File Selection dialog box appears.<br />
5.<br />
Select the client image that you want to install, and click OK.
6. Once you specify the location of the client image, click Install.<br />
7. Click Yes, and then click OK.<br />
8. Once the client image is successfully installed, you receive this message:<br />
9. Click OK to continue.<br />
Step 2. Configure a SSL<strong>VPN</strong> Context and SSL<strong>VPN</strong> Gateway with the CCP<br />
Wizard<br />
Complete these steps in order to configure a SSL <strong>VPN</strong> context and SSL <strong>VPN</strong> gateway:<br />
1. Go to Configure > Security > <strong>VPN</strong>, and then click SSL <strong>VPN</strong>.<br />
2. Click SSL <strong>VPN</strong> Manager, and click the Create SSL <strong>VPN</strong> tab.<br />
3.<br />
Check the Create a New SSL <strong>VPN</strong> radio button, and then click Launch the selected task.<br />
<strong>The</strong> SSL <strong>VPN</strong> Wizard dialog box appears.
4. Click Next.<br />
5.<br />
Enter the IP Address of the new SSL <strong>VPN</strong> gateway, and enter a unique name for this SSL <strong>VPN</strong><br />
context.
You can create different SSL <strong>VPN</strong> contexts for the same IP address (SSL <strong>VPN</strong> gateway), but each<br />
name must be unique. This example uses this IP address: https://172.16.1.1/<br />
6. Click Next, and continue to Step 3.<br />
Step 3. Configure the User Database for Anyconnect <strong>VPN</strong> Users<br />
For authentication, you can use an AAA Server, local users, or both. This configuration example uses locally<br />
created users for authentication.<br />
Complete these steps in order to configure the user database for Anyconnect <strong>VPN</strong> users:<br />
1.<br />
After you complete Step 2, click the Locally on this router radio button located in the SSL <strong>VPN</strong><br />
Wizard User Authentication dialog box.<br />
This dialog box allows you to add users to the local database.<br />
2.<br />
Click Add, and enter user information.
3. Click OK, and add additional users as necessary.<br />
4. After you add the necessary users, click Next, and continue to Step 4.<br />
Step 4. Configure the Anyconnect Full Tunnel<br />
Complete these steps in order to configure the Anyconnect full tunnel and pool of ip addresses for the users:<br />
1.<br />
As Anyconnect gives the direct access to corporate intranet resources, the URL list is not needed to<br />
configure. Click the Next button located in the Configure Intranet Websites dialog box.
2. Verify that the Enable Full Tunnel check box is checked.<br />
3. Create a pool of IP addresses that clients of this SSL <strong>VPN</strong> context can use.<br />
<strong>The</strong> pool of addresses must correspond to addresses available and routable on your Intranet.<br />
4.<br />
Click the ellipses (...) next to the IP Address Pool field, and choose Create a new IP Pool.
5. In the Add IP Local Pool dialog box, enter a namefor the pool (for example, new), and click Add.<br />
6.<br />
In the Add IP address range dialog box, enter the address pool range for the Anyconnect <strong>VPN</strong> clients,<br />
and click OK.<br />
Note: Before 12.4(20)T, the IP address pool should be in a range of an interface directly connected to<br />
the router. If you want to use a different pool range, you can create a loopback address associated with<br />
your new pool to satisfy this requirement. .<br />
7. Click OK.<br />
8.<br />
Make sure to check the Install Full Tunnel Client check box.
9.<br />
Configure advanced tunnel options, such as split tunneling, split DNS, browser proxy settings, and<br />
DNS and WNS servers.<br />
Note: <strong>Cisco</strong> recommends you configure at least DNS and WINS servers.<br />
To configure advanced tunnel options, complete these steps:<br />
a. Click the Advanced Tunnel Options button.<br />
b. Click the DNS and WINS Servers tab, and enter the primary IP addresses for the DNS and<br />
WINS servers.
c. To configure split tunneling, click the Split Tunneling tab.<br />
<strong>The</strong> ability to transmit both secured and unsecured traffic on the same interface is known as<br />
split tunneling. Split tunneling requires that you specify exactly which traffic is secured and<br />
what the destination of that traffic is, so that only the specified traffic enters the tunnel while<br />
the rest is transmitted unencrypted across the public network (Internet).<br />
For example, refer to ASA 8.x : Allow Split Tunneling for <strong>AnyConnect</strong> <strong>VPN</strong> Client on the<br />
ASA Configuration Example which provides step−by−step instructions on how to allow<br />
<strong>Cisco</strong> <strong>AnyConnect</strong> <strong>VPN</strong> client access to the Internet while they are tunneled into a <strong>Cisco</strong><br />
Adaptive Security Appliance (ASA) 8.0.2.<br />
10. After you configure the necessary options, click Next.<br />
11.<br />
Customize the SSL <strong>VPN</strong> Portal Page or select the default values.<br />
<strong>The</strong> Customize SSL <strong>VPN</strong> Portal Page allows you to customize how the SSL <strong>VPN</strong> Portal Page appears<br />
to your customers.
12. After you customize the SSL <strong>VPN</strong> portal page, click Next.<br />
13. Click Finish.<br />
14.<br />
Click Deliver in order to save your configuration, and then click OK.<br />
<strong>The</strong> SSL <strong>VPN</strong> Wizard submits tour commands to the router.
Note: If you receive an error message, the SSL <strong>VPN</strong> license may be incorrect.<br />
To correct a license issue, complete these steps:<br />
a. Go to Configure > Security > <strong>VPN</strong>, and then click SSL <strong>VPN</strong>.<br />
b. Click SSL <strong>VPN</strong> Manager, and then click the Edit SSL <strong>VPN</strong> tab in the right hand side.<br />
c.<br />
Highlight your newly created context, and click the Edit button.
d. In the Maximum Number of users field, enter the correct number of users for your license.<br />
e. Click OK, and then click Deliver.<br />
CLI Configuration<br />
Your commands are written to the configuration file.<br />
CCP creates these command−line configurations:<br />
Router#show run<br />
Building configuration...<br />
Current configuration : 4110 bytes<br />
!<br />
version 12.4<br />
service timestamps debug datetime msec<br />
service timestamps log datetime msec<br />
no service password−encryption<br />
!<br />
hostname Router<br />
!<br />
boot−start−marker<br />
boot−end−marker<br />
!<br />
logging message−counter syslog<br />
no logging buffered<br />
enable password cisco<br />
!<br />
aaa new−model<br />
!<br />
Router
!<br />
aaa authentication login default local<br />
aaa authentication login ciscocp_vpn_xauth_ml_1 local<br />
aaa authorization exec default local<br />
!<br />
!<br />
aaa session−id common<br />
!<br />
crypto pki trustpoint TP−self−signed−1951692551<br />
enrollment selfsigned<br />
subject−name cn=IOS−Self−Signed−Certificate−1951692551<br />
revocation−check none<br />
rsakeypair TP−self−signed−1951692551<br />
!<br />
!<br />
crypto pki certificate chain TP−self−signed−1951692551<br />
certificate self−signed 02<br />
3082023E 308201A7 A0030201 02020102 300D0609 2A864886 F70D0101 04050030<br />
31312F30 2D060355 04031326 494F532D 53656C66 2D536967 6E65642D 43657274<br />
69666963 6174652D 31393531 36393235 3531301E 170D3039 30383037 31303538<br />
33345A17 0D323030 31303130 30303030 305A3031 312F302D 06035504 03132649<br />
4F532D53 656C662D 5369676E 65642D43 65727469 66696361 74652D31 39353136<br />
39323535 3130819F 300D0609 2A864886 F70D0101 01050003 818D0030 81890281<br />
8100CD40 156E21C4 4F84401A F5674319 CC05B708 72A79C69 90997D30 6F556A37<br />
75FC53DA AB0B43AF 70E7DBC2 C9416C4B 009C3695 67C20847 4F0BC7B0 715F0518<br />
5E558DFC 13A20167 5D169C47 3BC083C9 A2B66790 79B83814 5008EBF6 169FA897<br />
6D955F46 2BDADBB0 5275F07E C124CCF3 64DD9CE1 1B6F5744 282E4EA5 A0840385<br />
5FD90203 010001A3 66306430 0F060355 1D130101 FF040530 030101FF 30110603<br />
551D1104 0A300882 06526F75 74657230 1F060355 1D230418 30168014 05F279A9<br />
C556AF46 C5F7A1F0 2ADD2D22 F75BF7B7 301D0603 551D0E04 16041405 F279A9C5<br />
56AF46C5 F7A1F02A DD2D22F7 5BF7B730 0D06092A 864886F7 0D010104 05000381<br />
81004886 D666121E 42862509 CA7FDACC 9C57C8BE EB6745FC 533A8C08 FEF2C007<br />
274374EE 803823FB 79CFD135 2B116544 88B5CFB1 B7BB03E2 F3D65A62 B0EE050A<br />
924D3168 98357A5B E1F15449 5C9C22D0 577FB036 A3D8BB08 5507C574 18F2F48F<br />
0694F21C 0983F254 6620FCD7 8E460D29 B09B87E8 ADC3D589 F4D74659 A5CEA30F 1A9C<br />
quit<br />
dot11 syslog<br />
ip source−route<br />
!<br />
!<br />
!<br />
!<br />
ip cef<br />
!<br />
multilink bundle−name authenticated<br />
!<br />
!<br />
!<br />
username test privilege 15 password 0 test<br />
username tsweb privilege 15 password 0 tsweb<br />
!<br />
!<br />
!<br />
archive<br />
log config<br />
hidekeys<br />
!<br />
!<br />
!<br />
!<br />
!<br />
!<br />
interface FastEthernet0/0<br />
ip address 10.77.241.111 255.255.255.192<br />
duplex auto<br />
speed auto
!<br />
interface FastEthernet0/1<br />
description $ES_LAN$<br />
ip address 172.16.1.1 255.255.255.0<br />
ip virtual−reassembly<br />
duplex auto<br />
speed auto<br />
!<br />
interface FastEthernet0/1/0<br />
!<br />
interface FastEthernet0/1/1<br />
!<br />
interface FastEthernet0/1/2<br />
!<br />
interface FastEthernet0/1/3<br />
!<br />
interface ATM0/0/0<br />
no ip address<br />
shutdown<br />
no atm ilmi−keepalive<br />
!<br />
interface Vlan1<br />
no ip address<br />
!<br />
ip local pool new 192.168.10.1 192.168.10.10<br />
ip forward−protocol nd<br />
ip route 10.20.10.0 255.255.255.0 172.16.1.2<br />
ip route 10.77.233.0 255.255.255.0 10.77.241.65<br />
ip http server<br />
ip http authentication local<br />
ip http secure−server<br />
!<br />
!<br />
!<br />
!<br />
!<br />
!<br />
!<br />
!<br />
control−plane<br />
!<br />
!<br />
line con 0<br />
line aux 0<br />
line vty 0 4<br />
password cisco<br />
transport input telnet ssh<br />
transport output telnet<br />
!<br />
scheduler allocate 20000 1000<br />
!<br />
webvpn gateway gateway_1<br />
ip address 172.16.1.1 port 443<br />
http−redirect port 80<br />
ssl trustpoint TP−self−signed−1951692551<br />
inservice<br />
!<br />
webvpn install svc flash:/webvpn/svc_1.pkg sequence 1<br />
!<br />
webvpn context sales<br />
secondary−color white<br />
title−color #CCCC66<br />
text−color black<br />
ssl authenticate verify all<br />
!
!<br />
policy group policy_1<br />
functions svc−enabled<br />
svc address−pool "new"<br />
svc dns−server primary 10.1.1.1<br />
svc wins−server primary 10.1.1.2<br />
default−group−policy policy_1<br />
aaa authentication list ciscocp_vpn_xauth_ml_1<br />
gateway gateway_1<br />
max−users 10<br />
inservice<br />
!<br />
end<br />
Establish the <strong>AnyConnect</strong> <strong>VPN</strong> Client Connection<br />
Complete these steps in order to establish an <strong>AnyConnect</strong> <strong>VPN</strong> connection with Router.<br />
Note: Add a router to the list of trusted sites in the Internet Explorer. For more information, refer to Adding a<br />
Security Appliance/Router to the List of Trusted Sites (IE).<br />
1.<br />
Enter the URL or IP address of the router's Web<strong>VPN</strong> interface in your web browser in the format as<br />
shown.<br />
OR<br />
https://<br />
https://
2. Enter your user name and password.<br />
3.<br />
Click the start button to initiate the Anyconnect <strong>VPN</strong> Tunnel Connection.
4.<br />
This window appears before the SSL <strong>VPN</strong> connection is established.<br />
Note: ActiveX software must be installed in your computer before you download the Anyconnect<br />
<strong>VPN</strong>.<br />
<strong>The</strong> Connection Established message appears once the client successfully connects.
5. Once the connection is successfully established, click the Statistics tab.<br />
<strong>The</strong> Statistics tab displays information about the SSL connection.<br />
6.<br />
Click Details.
<strong>The</strong> <strong>Cisco</strong> <strong>AnyConnect</strong> <strong>VPN</strong> Client: Statistics Detail dialog box appears.<br />
<strong>The</strong> Statistics Details dialog box displays detailed connection statistical information, including the<br />
tunnel state and mode, the duration of the connection, the number of bytes and frames sent and<br />
received, address information, transport information, and <strong>Cisco</strong> Secure Desktop posture assessment<br />
status. <strong>The</strong> Reset button on this tab resets the transmission statistics. <strong>The</strong> Export button allows you to<br />
export the current statistics, interface, and routing table to a text file. <strong>The</strong> <strong>AnyConnect</strong> client prompts<br />
you for a name and location for the text file. <strong>The</strong> default name is <strong>AnyConnect</strong>−ExportedStats.txt, and<br />
the default location is on the desktop.<br />
7.<br />
In the <strong>Cisco</strong> <strong>AnyConnect</strong> <strong>VPN</strong> Client dialog box, click the About tab.<br />
This tab displays the <strong>Cisco</strong> <strong>AnyConnect</strong> <strong>VPN</strong> Client Version information.
Verify<br />
Use this section to confirm that your configuration works properly.<br />
Commands<br />
Several show commands are associated with Web<strong>VPN</strong>. You can execute these commands at the<br />
command−line interface (CLI) to show statistics and other information. For detailed information about show<br />
commands, refer to Verifying Web<strong>VPN</strong> Configuration.<br />
Note: <strong>The</strong> Output Interpreter Tool (registered customers only) (OIT) supports certain show commands. Use<br />
the OIT to view an analysis of show command output.<br />
•<br />
•<br />
Router#show webvpn session context all<br />
Web<strong>VPN</strong> context name: sales<br />
Client_Login_Name Client_IP_Address No_of_Connections Created Last_Used<br />
test 10.20.10.2 3 00:03:10 00:02:56<br />
Router#show webvpn session user test context sales<br />
Web<strong>VPN</strong> user name = test ; IP address = 10.20.10.2 ; context = sales<br />
No of connections: 0<br />
Created 00:26:05, Last−used 00:25:24<br />
User Policy Parameters<br />
Group name = policy_1<br />
Group Policy Parameters<br />
url list name = "webserver"<br />
idle timeout = 2100 sec<br />
session timeout = Disabled<br />
functions =<br />
mask−urls<br />
svc−enabled
•<br />
citrix disabled<br />
address pool name = "new"<br />
dpd client timeout = 300 sec<br />
dpd gateway timeout = 300 sec<br />
keepalive interval = 30 sec<br />
SSL<strong>VPN</strong> Full Tunnel mtu size = 1406 bytes<br />
keep sslvpn client installed = enabled<br />
rekey interval = 3600 sec<br />
rekey method =<br />
lease duration = 43200 sec<br />
Router#show webvpn stats<br />
User session statistics:<br />
Active user sessions : 1 AAA pending reqs : 0<br />
Peak user sessions : 2 Peak time : 00:00:52<br />
Active user TCP conns : 0 Terminated user sessions : 2<br />
Session alloc failures : 0 Authentication failures : 1<br />
<strong>VPN</strong> session timeout : 0 <strong>VPN</strong> idle timeout : 0<br />
User cleared <strong>VPN</strong> sessions: 0 Exceeded ctx user limit : 0<br />
Exceeded total user limit: 0<br />
Client process rcvd pkts : 108 Server process rcvd pkts : 0<br />
Client process sent pkts : 589 Server process sent pkts : 0<br />
Client CEF received pkts : 76 Server CEF received pkts : 0<br />
Client CEF rcv punt pkts : 0 Server CEF rcv punt pkts : 0<br />
Client CEF sent pkts : 0 Server CEF sent pkts : 0<br />
Client CEF sent punt pkts: 0 Server CEF sent punt pkts: 0<br />
SSL<strong>VPN</strong> appl bufs inuse : 0 SSL<strong>VPN</strong> eng bufs inuse : 0<br />
Active server TCP conns : 0<br />
Mangling statistics:<br />
Relative urls : 0 Absolute urls : 0<br />
Non−http(s) absolute urls: 0 Non−standard path urls : 0<br />
Interesting tags : 0 Uninteresting tags : 0<br />
Interesting attributes : 0 Uninteresting attributes : 0<br />
Embedded script statement: 0 Embedded style statement : 0<br />
Inline scripts : 0 Inline styles : 0<br />
HTML comments : 0 HTTP/1.0 requests : 0<br />
HTTP/1.1 requests : 9 Unknown HTTP version : 0<br />
GET requests : 9 POST requests : 0<br />
CONNECT requests : 0 Other request methods : 0<br />
Through requests : 0 Gateway requests : 9<br />
Pipelined requests : 0 Req with header size >1K : 0<br />
Processed req hdr bytes : 2475 Processed req body bytes : 0<br />
HTTP/1.0 responses : 0 HTTP/1.1 responses : 0<br />
HTML responses : 0 CSS responses : 0<br />
XML responses : 0 JS responses : 0<br />
Other content type resp : 0 Chunked encoding resp : 0<br />
Resp with encoded content: 0 Resp with content length : 0<br />
Close after response : 0 Resp with header size >1K: 0<br />
Processed resp hdr size : 0 Processed resp body bytes: 0<br />
Backend https response : 0 Chunked encoding requests: 0<br />
HTTP Authentication stats :<br />
Successful NTLM Auth : 0 Failed NTLM Auth : 0<br />
Successful Basic Auth : 0 Failed Basic Auth : 0<br />
Unsupported Auth : 0 Unsup Basic HTTP Method : 0<br />
NTLM srv kp alive disabld: 0 NTLM Negotiation Error : 0<br />
Oversize NTLM Type3 cred : 0 Internal Error : 0<br />
Num 401 responses : 0 Num non−401 responses : 0<br />
Num Basic forms served : 0 Num NTLM forms served : 0<br />
Num Basic Auth sent : 0 Num NTLM Auth sent : 0<br />
CIFS statistics:<br />
SMB related Per Context:<br />
TCP VC's : 0 UDP VC's : 0<br />
Active VC's : 0 Active Contexts : 0
Aborted Conns : 0<br />
NetBIOS related Per Context:<br />
Name Queries : 0 Name Replies : 0<br />
NB DGM Requests : 0 NB DGM Replies : 0<br />
NB TCP Connect Fails : 0 NB Name Resolution Fails : 0<br />
SMB related Global:<br />
Sessions in use : 0 Mbufs in use : 0<br />
Mbuf Chains in use : 0 Active VC's : 0<br />
Active Contexts : 0 Browse Errors : 0<br />
Empty Browser List : 0 NetServEnum Errors : 0<br />
Empty Server List : 0 NBNS Config Errors : 0<br />
NetShareEnum Errors : 0<br />
HTTP related Per Context:<br />
Requests : 0 Request Bytes RX : 0<br />
Request Packets RX : 0 Response Bytes TX : 26286<br />
Response Packets TX : 33 Active Connections : 0<br />
Active CIFS context : 0 Requests Dropped : 0<br />
HTTP related Global:<br />
Server User data : 0 CIFS User data : 0<br />
Net Handles : 0 Active CIFS context : 0<br />
Authentication Fails : 0 Operations Aborted : 0<br />
Timers Expired : 0 Pending Close : 0<br />
Net Handles Pending SMB : 0 File Open Fails : 0<br />
Browse <strong>Network</strong> Ops : 0 Browse <strong>Network</strong> Fails : 0<br />
Browse Domain Ops : 0 Browse Domain Fails : 0<br />
Browse Server Ops : 0 Browse Server Fails : 0<br />
Browse Share Ops : 0 Browse Share Fails : 0<br />
Browse Dir Ops : 0 Browse <strong>Network</strong> Fails : 0<br />
File Read Ops : 0 File Read Fails : 0<br />
File Write Ops : 0 File Write Fails : 0<br />
Folder Create Ops : 0 Folder Create Fails : 0<br />
File Delete Ops : 0 File Delete Fails : 0<br />
File Rename Ops : 0 File Rename Fails : 0<br />
URL List Access OK : 0 URL List Access Fails : 0<br />
Socket statistics:<br />
Sockets in use : 1 Sock Usr Blocks in use : 1<br />
Sock Data Buffers in use : 0 Sock Buf desc in use : 0<br />
Select timers in use : 1 Sock Select Timeouts : 0<br />
Sock Tx Blocked : 0 Sock Tx Unblocked : 0<br />
Sock Rx Blocked : 0 Sock Rx Unblocked : 0<br />
Sock UDP Connects : 0 Sock UDP Disconnects : 0<br />
Sock Premature Close : 0 Sock Pipe Errors : 12<br />
Sock Select Timeout Errs : 0<br />
Port Forward statistics:<br />
Client Server<br />
proc pkts : 0 proc pkts : 0<br />
proc bytes : 0 proc bytes : 0<br />
cef pkts : 0 cef pkts : 0<br />
cef bytes : 0 cef bytes : 0<br />
WEB<strong>VPN</strong> Citrix statistics:<br />
Server Client<br />
Packets in : 0 0<br />
Packets out : 0 0<br />
Bytes in : 0 0<br />
Bytes out : 0 0<br />
ACL statistics:<br />
Permit web request : 0 Deny web request : 0<br />
Permit cifs request : 0 Deny cifs request : 0<br />
Permit without ACL : 0 Deny without match ACL : 0<br />
Permit with match ACL : 0 Deny with match ACL : 0
Single Sign On statistics:<br />
Auth Requests : 0 Pending Auth Requests : 0<br />
Successful Requests : 0 Failed Requests : 0<br />
Retranmissions : 0 DNS Errors : 0<br />
Connection Errors : 0 Request Timeouts : 0<br />
Unknown Responses : 0<br />
URL−rewrite splitter statistics:<br />
Direct access request : 0 Redirect request : 0<br />
Internal request : 0<br />
Tunnel Statistics:<br />
Active connections : 0<br />
Peak connections : 1 Peak time : 00:34:51<br />
Connect succeed : 3 Connect failed : 0<br />
Reconnect succeed : 0 Reconnect failed : 0<br />
DPD timeout : 0<br />
Client Server<br />
in CSTP frames : 32 out IP pkts : 5<br />
in CSTP data : 5<br />
in CSTP control : 27<br />
in CSTP bytes : 1176 out IP bytes : 805<br />
out CSTP frames : 4 in IP pkts : 0<br />
out CSTP data : 0<br />
out CSTP control : 4<br />
out CSTP bytes : 32 in IP bytes : 0<br />
cef in CSTP data frames : 0 cef out forwarded pkts : 0<br />
cef in CSTP data bytes : 0 cef out forwarded bytes : 0<br />
cef out CSTP data frames : 0 cef in forwarded pkts : 0<br />
cef out CSTP data bytes : 0 cef in forwarded bytes : 0<br />
• In CCP, choose Monitoring > Security > <strong>VPN</strong> Status > SSL <strong>VPN</strong> > Users in order to view the<br />
current SSL <strong>VPN</strong> user lists in the router.<br />
•<br />
Choose Monitoring > Security > <strong>VPN</strong> Status > SSL <strong>VPN</strong> > Sales in order to view the current SSL<br />
<strong>VPN</strong> session information in the router.
Troubleshoot<br />
Use this section to troubleshoot your configuration.<br />
SSL Connectivity Issue<br />
Problem: SSL <strong>VPN</strong> clients are unable to connect the router.<br />
Solution: Insufficient IP addresses in the IP address pool might cause this issue. Increase the number of IP<br />
addresses in the pool of IP addresses on the router in order to resolve this issue.<br />
For more information on Troubleshooting <strong>AnyConnect</strong> <strong>VPN</strong> Client, refer to <strong>AnyConnect</strong> <strong>VPN</strong> Client FAQ.<br />
Error: SSL<strong>VPN</strong> Package SSL−<strong>VPN</strong>−Client : installed Error: Disk<br />
Problem: You receive this error when you install the SVC package on a router: SSL<strong>VPN</strong> Package<br />
SSL−<strong>VPN</strong>−Client : installed Error: Disk.<br />
Solution: This error can be resolved by reformatting the flash.<br />
Troubleshooting Commands<br />
Several clear commands are associated with Web<strong>VPN</strong>. For detailed information about these commands, refer<br />
to Using Web<strong>VPN</strong> Clear Commands.<br />
Several debug commands are associated with Web<strong>VPN</strong>. For detailed information about these commands,<br />
refer to Using Web<strong>VPN</strong> Debug Commands.<br />
Note: <strong>The</strong> use of debug commands can adversely impact your <strong>Cisco</strong> device. Before you use debug<br />
commands, refer to Important Information on Debug Commands.
Related Information<br />
• <strong>Cisco</strong> IOS SSL<strong>VPN</strong><br />
• <strong>AnyConnect</strong> <strong>VPN</strong> Client FAQ<br />
• <strong>Cisco</strong> <strong>AnyConnect</strong> <strong>VPN</strong> Client Administrator Guide, Release 2.3<br />
• SSL <strong>VPN</strong> − Web<strong>VPN</strong><br />
• Clientless SSL <strong>VPN</strong> (Web<strong>VPN</strong>) on <strong>Cisco</strong> IOS with SDM Configuration Example<br />
• Thin−Client SSL <strong>VPN</strong> (Web<strong>VPN</strong>) IOS Configuration Example with SDM<br />
• Web<strong>VPN</strong> and DM<strong>VPN</strong> Convergence Deployment Guide<br />
• Technical Support & Documentation − <strong>Cisco</strong> Systems<br />
Contacts & Feedback | Help | Site Map<br />
© 2010 − 2011 <strong>Cisco</strong> Systems, Inc. All rights reserved. Terms & Conditions | Privacy Statement | Cookie Policy | Trademarks of<br />
<strong>Cisco</strong> Systems, Inc.<br />
Updated: Aug 28, 2009 Document ID: 110608


