Manual
Manual
Manual

You also want an ePaper? Increase the reach of your titles
YUMPU automatically turns print PDFs into web optimized ePapers that Google loves.
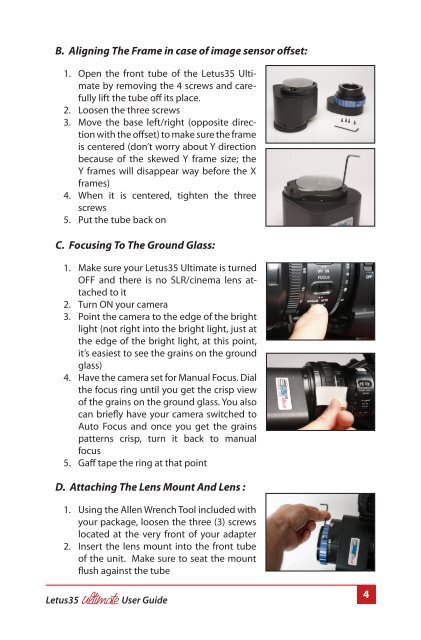
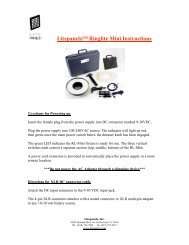
B. Aligning The Frame in case of image sensor offset:<br />
1. Open the front tube of the Letus35 Ultimate<br />
by removing the 4 screws and carefully<br />
lift the tube off its place.<br />
2. Loosen the three screws<br />
3. Move the base left/right (opposite direction<br />
with the offset) to make sure the frame<br />
is centered (don’t worry about Y direction<br />
because of the skewed Y frame size; the<br />
Y frames will disappear way before the X<br />
frames)<br />
4. When it is centered, tighten the three<br />
screws<br />
5. Put the tube back on<br />
C. Focusing To The Ground Glass:<br />
1. Make sure your Letus35 Ultimate is turned<br />
OFF and there is no SLR/cinema lens attached<br />
to it<br />
2. Turn ON your camera<br />
3. Point the camera to the edge of the bright<br />
light (not right into the bright light, just at<br />
the edge of the bright light, at this point,<br />
it’s easiest to see the grains on the ground<br />
glass)<br />
4. Have the camera set for <strong>Manual</strong> Focus. Dial<br />
the focus ring until you get the crisp view<br />
of the grains on the ground glass. You also<br />
can briefly have your camera switched to<br />
Auto Focus and once you get the grains<br />
patterns crisp, turn it back to manual<br />
focus<br />
5. Gaff tape the ring at that point<br />
D. Attaching The Lens Mount And Lens :<br />
1. Using the Allen Wrench Tool included with<br />
your package, loosen the three (3) screws<br />
located at the very front of your adapter<br />
2. Insert the lens mount into the front tube<br />
of the unit. Make sure to seat the mount<br />
flush against the tube<br />
Letus35 User Guide<br />
4


![V-R261-IMD-HDSDI Operating Instructions v1[1] - Marshall Electronics](https://img.yumpu.com/17966564/1/190x245/v-r261-imd-hdsdi-operating-instructions-v11-marshall-electronics.jpg?quality=85)