USER MANUAL - Evobike
USER MANUAL - Evobike
USER MANUAL - Evobike
Create successful ePaper yourself
Turn your PDF publications into a flip-book with our unique Google optimized e-Paper software.
U SER M ANUAL<br />
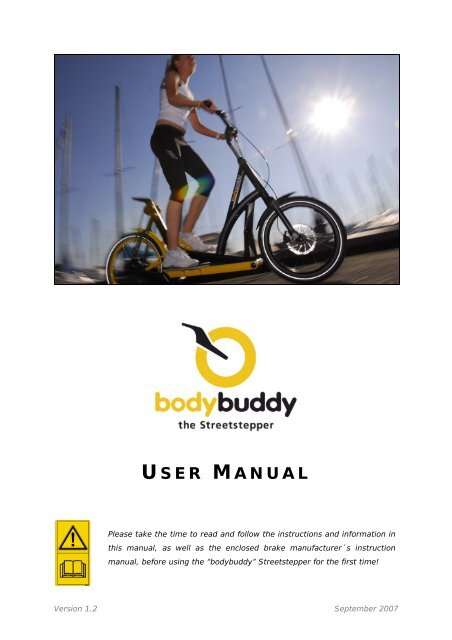
Please take the time to read and follow the instructions and information in<br />
this manual, as well as the enclosed brake manufacturer´s instruction<br />
manual, before using the “bodybuddy” Streetstepper for the first time!<br />
Version 1.2 September 2007
U SER M ANUAL<br />
For the „bodybuddy ® “ Streetstepper ®<br />
Version 1.2.<br />
© September 2007<br />
According to EN 14764:2005<br />
GRADITECH Entwicklungs GmbH<br />
Grillhofweg 20b<br />
A-6080 Innsbruck-Vill<br />
AUSTRIA<br />
Tel.: +43 (0)664 / 5115 878<br />
Fax: +43 (0)512 / 56 44 42<br />
Mail: info@streetstepper.com<br />
www.streetstepper.com<br />
Hot Chili & D.A.R.T GmbH<br />
Carl-Zeiss-Straße 43-45<br />
D-73614 Schorndorf-Weiler<br />
GERMANY<br />
Tel.: +49 (0)7181 / 97 8 42 - 44<br />
Fax: +49 (0)7181 / 97 8 42 - 20<br />
Mail: markus.hermann@hot-chili.com<br />
www.hot-chili.com<br />
Bodybuddy®, Streetstepper ® as well as the logo (tire symbol &<br />
drive element) are registered trade marks of GRADITECH<br />
Development GmbH (Innsbruck/Austria)<br />
This innovative product is protected and patented by<br />
GRADITECH Entwicklungs GmbH.<br />
The product design is made by KISKA (Salzburg/Austria) and is<br />
registered and protected through GRADITECH.
Dear Customer<br />
Thank you for buying the “bodybuddy” Sreetstepper!<br />
The “bodybuddy” is a world novelty, that’s been available in selected stores since autumn 2007. You<br />
are now the proud owner of this innovative product, shortly after it has been released onto the market.<br />
Marketing researchers respectfully call these people “innovators” and “early adopters”. We are glad to<br />
welcome you in the circle of “bodybuddy” owners!<br />
Your “bodybuddy” Streetstepper is a high-tech-vehicle driven by muscular power, which cleverly<br />
combines fitness and transport. It is equipped with the latest technical devices, and whilst developing<br />
it, we emphasized on quality, ease of use, low maintenance and safety.<br />
The “bodybuddy” Streetstepper is easy to use, and most people will be able to ride it immediately.<br />
Given that this vehicle is a brand new form of transport, a few special features need to be noted and<br />
possible risks, which you may not be familiar with. This vehicle is different than any other product you<br />
might know.<br />
Please read and follow the instructions and information in this, as well as the enclosed brake<br />
manufacturer´s instruction manual, before using the “bodybuddy” Streetstepper for the first<br />
time!<br />
We wrote this user manual with your safety and fun in mind. We can not predict every aspect of the<br />
versatile use of this vehicle, but the owner manual includes important suggestions regarding your<br />
safety when used properly, as well as some tips for the optimal riding experience and product<br />
longevity.<br />
The detailed list of safety instructions and recommendations should not make you think that your<br />
“bodybuddy” Streetstepper is a particularly dangerous or complicated invention! If you follow the<br />
suggestions, the “bodybuddy” Streetstepper is no more difficult or risky than riding a bike.<br />
If any questions arise, or you are still uncertain about something after reading the user manual, please<br />
contact the distributor - or us!<br />
Have fun and safe travels with the “bodybuddy” Streetstepper!<br />
FREE THE GYM! – TRAIN AND MOVE!<br />
Your „bodybuddy“-Team www.streetstepper.com
CONTENTS<br />
1. Important Suggestions 5<br />
2. Technical Specifications 7<br />
3. Guidelines for riding in traffic 8<br />
4. Definitions 9<br />
5. Before your first ride 10<br />
6. Before every ride: technical check 11<br />
6.1 Technical check – overview 11<br />
6.2 Detailed description of the technical check 12<br />
7. Particular warnings 16<br />
8. Riding techniques – how to “streetstep” perfectly! 18<br />
9. The “bodybuddy” as a work out machine 21<br />
10. Adjustment and Assembly 22<br />
11. Cleaning and Care 25<br />
12. Repair and Maintenance 26<br />
13. Tightening torque for bolts 27<br />
14. Warranty 27<br />
Enclosures<br />
• Brake manufacturers instruction manual<br />
• Registration<br />
• Warranty<br />
4
1. Important Suggestions<br />
1. Important Suggestions<br />
The user manual is filled with suggestions and information for your own safety and fun as well as the<br />
longevity of the product. Please follow the suggestions and information, otherwise you may harm<br />
yourself and/or other people and cause liability claims!<br />
Your “bodybuddy” Streetstepper is equipped with hydraulic brakes from the renowned, German<br />
manufacturer MAGURA. The user manual for your “bodybuddy’s” brakes is enclosed and is an integral<br />
part of this user manual. Read the brake user manual carefully and follow the instructions, suggestions<br />
and information! In case the manual is missing, please contact the distributor or us! (You can find<br />
more details and information about the brakes online at www.magura.com)<br />
In the instruction manual we talk about a tightening torque for bolts [Nm]. Do not trust your feelings<br />
when tightening the bolts. “Tight” does not mean “tight enough”! ONLY a bolt tightening torque will tell<br />
you exactly when it is tight enough. Use a tightening torque for bolts, whenever the user manual<br />
mentions the amount of torque. Incorrect tightening of the bolts may result in damage and<br />
malfunctions, which can be harmful to your own and other people’s lives and health!<br />
When we manufactured the “bodybuddy” Streetsteppers we focused on safety, ease of use and low<br />
maintenance. It needs to be mentioned though, that this product is built with ground-breaking technical<br />
equipment. In this respect, please leave any maintenance and repair work to the experts! If any<br />
maintenance, assembly or repair work is not explained in this user manual, please contact an<br />
authorized distributor!!<br />
If the maintenance, assemble or repair work in the user manual is not clear and you are having<br />
trouble, leave it to the distributor as well! Unfinished or improper work performed on the equipment<br />
may leave the product permanently damaged, and could therefore harm your life and health!<br />
!! ATTENTION!!<br />
Important notice regarding lending your “bodybuddy” Streetstepper to someone else!<br />
No liability claims will be acceptable when used by a non-owner!<br />
Immediately you will draw attention, when riding your “bodybuddy”. Your friends, family and even<br />
strangers will want to try your “bodybuddy. Especially kids and youngsters will be fascinated and<br />
asking to take the “bodybuddy” for a spin. After reading the user manual and a test ride, you should<br />
know how to use the vehicle correctly and avoid dangers. Please keep in mind that someone who<br />
does not have that knowledge is not safe to ride it. We would like to inform you that neither the<br />
manufacturer nor the distributors can be held responsible for any bodily injuries or material damages,<br />
caused by third persons using the “bodybuddy”.<br />
5
1. Important Suggestions<br />
We know how tempting it is to loan a friend your “bodybuddy”, because it is fun to share an exciting<br />
new toy, but sometimes it is better to just enjoy your friend’s admiration! Be aware of the risk of<br />
loaning your “bodybuddy” to someone else even if it is just for a short test run. If you would like to<br />
introduce someone to your “bodybuddy”, please consider the following:<br />
• Make the person aware of all the dangers and risks mentioned in the user manual, as well as<br />
the liability claims.<br />
• Please explain the person the correct use of the “bodybuddy” and the particular dangers and<br />
risks if it is used incorrectly!<br />
• Insist that they follow your instructions! Immediately stop the test drive if they behave in a<br />
hazardous, careless or unsafe manner.<br />
• Insist that they listen to your instructions, especially the ones for the brakes, before they start<br />
the test run!<br />
• Make sure the person is wearing appropriate clothes and a helmet!<br />
• Do the test drive away from traffic!<br />
• Do the technical check mentioned in this manual and make sure the brakes are working and<br />
the handlebars are adjusted to the correct height and mounted properly.<br />
• Consider the body weight and height restrictions! (chapter 2 “technical specifications”)<br />
• Note that kids under 12 years, without a bike driver’s license are not allowed to ride in traffic!<br />
(Not even when the legal guardian would permit it!)<br />
We would like to point out that a verbal explanation of what is written in the user manual, does not<br />
replace reading it and therefore we do not cover any claims, caused by a third party, even if they were<br />
instructed by you.<br />
We recommend you send the person interested in trying the “bodybuddy” to the nearest distributor!<br />
Distributors are authorized to advice and supervise someone in their first test ride, which alleviates<br />
you of any responsibilities!<br />
Our product is an ever developing machine and some of the illustrations might not be up<br />
to date with your new model of the “bodybuddy” Streetstepper, but this does not affect<br />
the subject matter of this user manual.<br />
6
2. Technical Specifications<br />
1. Product name bodybuddy ®<br />
2. Technical Specifications<br />
2. Type of vehicle Streetstepper ® – single track vehicle for standing use,<br />
and driven by muscle power<br />
3. Specified use 1)<br />
4. Series September 2007<br />
designated for driving on streets and fixed trails 1)<br />
5. Power System Step-system (pedals) with automatic gradient<br />
transmission<br />
6. Length 183 cm<br />
7. Handlebar adjustable from 104 cm to 119 cm<br />
8. Weight 15,8 kg<br />
9. Max. capacity weight 2)<br />
10. Permitted user height 145 cm – 195 cm<br />
95 kg (Including additional baggage)<br />
11. Luggage Rack optional (any certified handlebar carriers are suitable)<br />
12. Max. capacity for luggage 2)<br />
10 kg<br />
13. Max. total weight (incl. operator<br />
and luggage)<br />
120 kg<br />
14. Front brake Magura „Julie“ (hydraulic disk brake)<br />
15. Rear brake Magura „HS 11“ (hydraulic rim brake)<br />
16. Positioning of brake handles right = front brake<br />
left = rear brake<br />
17. Wheels 20 inch, hollow section rims<br />
18. Tires Vredestein „Perfect Moirée“, 20 x 1,75 inches<br />
Manufacturer’s recommended tire pressure: 2,8 – 4,5<br />
bars (40 - 65 psi).<br />
We recommend 4 bar (60 psi)<br />
19. Axis Front: quick release axis, rear: nuts<br />
20. Gears none; automatic transmission<br />
21. Bearings all bearings (except some friction bearings in the<br />
brakes) are ball bearings, lubricated for life<br />
1) Use your ‘bodybuddy” Streetstepper on streets and smooth trails only! The<br />
“bodybuddy” is not to be used off-road. Do not jump with it! Do not drive over<br />
curbs, edges, stairs or other obstacles! The vehicle could get damaged and you<br />
could get hurt. Any incorrect use, racing, jumping or other similar activities will<br />
result in the loss of any right to liability claims towards the manufacturer.<br />
2) Even top-quality equipment and components get damaged when overstrained.<br />
Note the maximum allowed weight! (see top of page 9., 12. And 13)<br />
7
3. Guidelines for riding in traffic<br />
3 Guidelines for riding in traffic<br />
The Streetstepper is a muscle powered, single track vehicle, equipped with top quality brakes. Its<br />
performance (speed and climbing ability) is comparable to a modern City or Fitness bike and in some<br />
cases even better (agility and mobility). Just like a bike, the Streetstepper is technically suitable for<br />
riding in traffic.<br />
The tires of the “bodybuddy” are equipped with reflectors, which are required by law in Austria,<br />
Germany and Switzerland.<br />
To ride your “bodybuddy” in traffic legally, further equipment is necessary, which is not mounted to the<br />
standard Streetstepper, because of the differing standards throughout Europe regarding:<br />
• More reflectors<br />
• Lights<br />
• Bell<br />
• Switzerland: Insurance sticker<br />
Before riding in traffic, please find out (for instance at the distributing store)<br />
about the local restrictions and laws in your country!<br />
The “bodybuddy” does not have a seat. It is ridden while standing and the experience might be a little<br />
different than riding a regular bike. Giving hand signals might require a bit more balance and practice,<br />
than on your bike.<br />
Therefore you should get used to it on a less busy road without heavy traffic.<br />
Practice giving hand signals to the right as well as to the left. Do not apply brakes<br />
while giving the hand signal. If you need to, slow down, put your hand back on<br />
the bar and then apply brake. Do not brake hard, while giving the signal! Riding<br />
one handed while braking may cause a bad accident!<br />
Do not ride the “bodybuddy” without holding on to the handlebar! Since the<br />
Streetstepper does not have a seat, hands-free riding may result in a serious<br />
accident!<br />
8
4. Definitions<br />
4 Definitions<br />
Your “bodybuddy” Streetstepper is a technical novelty. Mechanical components are used, that you<br />
might have never seen on any other product. Illustration 1 shows the different parts and new names<br />
for them, which are important for understanding the user manual. Please make yourself familiar with<br />
these terms before you read on!<br />
Fig. 1:<br />
carrying handle 1)<br />
upper stop for step pedal<br />
(Elastomer)<br />
pulley<br />
chain<br />
bracket of the step pedal<br />
rear brake<br />
cam of the gear system<br />
tread<br />
step pedal<br />
bearing of the step pedal<br />
lower stop for step pedal<br />
(Elastomer)<br />
brake lever<br />
stem<br />
steering rod<br />
headset<br />
head tube<br />
reflecting strip<br />
retaining spring<br />
here you find the<br />
chassis number for<br />
registration!<br />
1) The carrying handle is not to be used as a seat! Do not sit on the carrying<br />
handle! It could break and cause serious injuries! Besides, riding while sitting will<br />
affect the weight distribution and you could lose control and fall!<br />
9
5. Before your first ride<br />
5. Before your first ride<br />
The distributor has assembled your “bodybuddy” so it is ready for use. A test run was made and the<br />
mandatory checks were done to ensure flawless and optimum operation. Most likely the distributor has<br />
run you through the initial instructions and you have had a test drive, but before you take it for a spin<br />
on your own, please follow these instructions:<br />
Is the handlebar adjusted to the right heights?<br />
Take the Steetstepper with both hands and stand right next to the vehicle. Your upper<br />
arms should be along the side of your body and the forearm should be at a 90 degree<br />
angle to your upper arms. (Further information on adjusting the handlebar can be found<br />
in chapter 10.)<br />
Are you familiar with the brake system?<br />
Check if your brakes are used the same way on the Streetstepper as on your bike.<br />
If they are positioned differently it might take some getting used to. Practice on<br />
low traffic roads, because wrong use of the front brake might result in an<br />
accident.<br />
The hydraulic brake system is a lot more powerful, than you might be used to!<br />
Practice carefully and get used to the power of the brakes away from traffic.<br />
New brakes need to be broken in, in order to run smoothly and at optimal<br />
performance! This takes about 30 full brake applications at a speed of 30 km/h,<br />
away from traffic. The same needs to be done when you get your brake pads<br />
replaced!<br />
The brake performance depends on the kind of pavement you ride on. Rain or wet<br />
roads can dramatically influence the brake capability. So be extra careful when<br />
riding on gravel and when roads are wet!<br />
Further information on the brake system can be found in the enclosed user manual from<br />
the manufacturer.<br />
10
6. Before every ride: technical check<br />
6.1. Techncal check - overview<br />
The following checks should be performed before each ride:<br />
1. Is the quick release axis of the front wheel mounted correctly?<br />
2. Brake performance?<br />
3. Are the nuts tight on the axis of the rear wheel?<br />
4. Is there enough pressure in the tires?<br />
5. Condition of the tires?<br />
6. Is the steering mechanism/headset smooth and easy-going?<br />
7. Is the steering mechanism working properly?<br />
8. Is the handle bar installed securely to the stem?<br />
9. Is the handle bar installed securely to the front wheel?<br />
10. Is the kick stand up?<br />
6. Before every ride: technical check<br />
If any of these points are faulty, please refrain from use of your “boddybuddy”,<br />
and when in doubt call your distributor!<br />
Ride with a suitable helmet!<br />
With a bit of practice, you can get up to great speed as on your bike, thanks to the<br />
patented power system used for the “bodybuddy”. More than 30 km/h on flat roads (and<br />
significantly more when going downhill). Be aware that this kind of velocity involves<br />
greater risk and danger! Always ride with a suitable helmet!<br />
11
6.2. Detailed description of the technical check<br />
6. Before every ride: technical check<br />
1) Is the quick release axis of the front wheel mounted correctly?<br />
1. Check if the lever of the quick release axis is mounted correctly, as you can see in the<br />
illustration: The lever of the quick release axis needs to be parallel to the front tire. It should<br />
not be sticking out to the side.<br />
2. Push on the lever where it says CLOSE. There must be a significant resistance when pushing<br />
this lever.<br />
3. If the lever is still movable, it is too loose! You have to adjust the pre-tension of the<br />
quick release axis by turning the nut on the opposite side of the lever!<br />
The lever is closed correctly when<br />
parallel to the front tire.<br />
If the quick release axis of the front wheel is not mounted correctly this can result<br />
in loss of your front wheel whilst riding, which can result in an accident and<br />
injuries!<br />
Remember that the lever of the quick release axis can be loosened quickly and easily<br />
without tools (beware of malicious pedestrians or mischievous youngsters…), so please<br />
check it before every ride. Check your vehicle before each ride, even if you just stopped<br />
for a minute (for instance while stopping to get groceries) and have left it unattended!<br />
12
2) Are the brakes functioning?<br />
6. Before every ride: technical check<br />
Perform a brake check while you are standing still, by pulling the brake lever to the handle bar. Both<br />
brakes should build some resistance (pressure point). Neither one of the levers should reach the<br />
handle bar without resistance.<br />
You can find further information in the enclosed user manual from the brake manufacturer.<br />
3) Are the axel nuts on the rear tire tight?<br />
Incorrect tightening of the axle nuts might result in a loss of your vehicle’s parts and<br />
accidents can occur!<br />
4) Is there enough pressure in the tires?<br />
• Check the tire pressures at least manually with the “thumb test”, by applying the thumb on one<br />
side of the tire and 2 – 3 fingers on the opposite side. Apply pressure. The tire should feel tight<br />
and firm.<br />
• To get optimum pressure (see below) in your tire use a manometer (pressure measuring<br />
device) from time to time.<br />
Recommendation: The manufacturer of the standard tires recommends a<br />
pressure of 2,8 – 4,5 bar (40 - 65 psi). We recommend a pressure of about 4 bar<br />
(60 psi) for optimal driving performance and safety.<br />
This recommendation applies to the standard tires! In case you use different tires,<br />
follow the directions of the particular manufacturer.<br />
5) Condition of the tires?<br />
Visually inspect the tire. Any bulging or unusual wear and tear indicate damage.<br />
A damaged tire might lose air and turn into a flat tire, which may cause severe<br />
accidents! Damaged tires need to be replaced, ideally by the distributor.<br />
13
6) Is the steering mechanism (headset) smooth and easy-going?<br />
6. Before every ride: technical check<br />
1. Lift the bike up at the frame where it says “bodybuddy”, so that the front tire is off the floor.<br />
2. Turn the handle bar as far as possible to the right and left. This should be an easy movement,<br />
silent and without any friction.<br />
3. Turn the handle bar about 5 degrees to the right and then let it go. It should keep turning to<br />
the right without any further input from you.<br />
4. Repeat the same test on the left.<br />
7) Is the steering mechanism (headset) free moving?<br />
1. Stand next to your bike and apply the front brakes (standard brake lever on the left).<br />
2. Shake the handle bar, with the brake lever applied, towards the driving direction and into the<br />
opposite direction.<br />
3. Make sure nothing is loose while you do this. If there is a clearance in the headset you will feel<br />
it clearly.<br />
If you ride with an incorrectly adjusted, loose or defect steering mechanism<br />
(headset), several components of the vehicle (bearings, parts of the frame) are<br />
exposed to excessive strain and pressure, resulting in the malfunctions and<br />
damage of your vehicle.<br />
Adjusting the headset requires expert knowledge. Leave it to the distributor!<br />
8) Is the handle bar installed tightly to the stem?<br />
Take the handle bar with both hands and try to twist it at the stem. The three screws attaching it to the<br />
stem should be tightened enough to keep it from twisting!<br />
If the screws are not tight enough, the handle bar may move whilst riding which<br />
can result in an accident!<br />
14
9) Is the handle bar installed tightly to the front wheel?<br />
6. Before every ride: technical check<br />
Stand in front of your vehicle and hold the tire tightly between your legs, and try to twist the handle<br />
bar. The handlebar should not move unless a lot of force is needed. It should take some effort to twist<br />
it or should even be impossible.<br />
A sudden twist of the handle bar while riding might be the result of loose bolts<br />
and can cause severe accidents!<br />
10) Is the kick-stand up?<br />
The “bodybuddy is equipped with a standard kick-stand. Riding with the kickstand<br />
down may result in severe accidents!<br />
15
7. Specific Warnings<br />
7. Specific Warnings<br />
“bodybuddy” the Streetstepper is a fundamentally new innovation and it is important to know about<br />
these particular warnings:<br />
1) Watch out for obstacles at head height!<br />
OBSTACLE<br />
Because you are in an upright position while riding the “bodybuddy”, you are<br />
significantly taller than on a bike.<br />
Pay attention to head high obstacles like street signs, awnings, underpasses,<br />
parking garages and similar objects! A collision with obstacles can cause severe<br />
injuries!<br />
Immediately avoid any head high obstacles like street<br />
signs and awnings. If it is not possible to avoid obstacle<br />
like underpasses, reduce the speed and bend down to<br />
avoid a collision.<br />
OBSTACLE<br />
Always ride with a suitable helmet! A bike helmet can prevent you from getting<br />
injured when colliding with obstacles!<br />
16
7. Specific Warnings<br />
2) Always ride with both hands on the handle bar. Do not ride hands-free!<br />
Even though the “bodybuddy has an excellent straight-running stability, it lacks the stabilizing seat<br />
found on a standard bike, and requires a different kind of stabilization! The “bodybuddy” is stabilized<br />
by means of your handle bar, similar to a scooter. Riding single-handed can be particularly dangerous<br />
when you gain a certain speed. The vehicle could rear up resulting in loss of control, which can result<br />
in an accident. The same applies when operating the brakes while driving single-handed.<br />
Never try to ride your “bodybuddy” hands-free. This could result in severe<br />
accidents!<br />
Ride with both hands on the handle bar - particularly when riding fast! Practice<br />
giving hand signals at a safe and obstacle free area before riding in traffic! Use<br />
your brakes only when both hands are on the handle bar!<br />
3) Always wear shoes with anti-slip soles<br />
The treads on the “bodybuddy” are covered with an excellent anti-slip surface. This anti-slip surface is<br />
suitable most for sneakers or shoes with soft rubbery soles.<br />
The anti-slip quality of the surface is significantly diminished with hard leather soles.<br />
The anti-slip surface is also significantly diminished when the shoes are very dirty and if rain or slushy<br />
snow is accumulated on shoes or treads.<br />
Always wear anti-slip shoes. Make sure the treads are safe to step on. Adjust your<br />
speed to the condition (reduced friction) of the treads and your shoes. Severe<br />
accidents can occur when you slip off the tread while riding!<br />
17
8.Riding techniques<br />
8. Riding techniques – how to “streetstep” perfectly!<br />
(A video at www.streetstepper.com shows practised drivers in all driving<br />
situations)<br />
Different to the crank drive of a bike, the uncoupled step pedals of the “bodybuddy” do not predefine<br />
the work movement. You can step slow or fast, with the right leg, the left leg or alternately, and you<br />
can quit stepping. The gear system automatically provides the right transmission ratio.<br />
To tap the full potential of the Streetstepper, please follow the suggestions below:<br />
1) Get on and go!<br />
2) Comfortable riding on flat terrain<br />
Different to a bike, the “bodybuddy’s” frame does not<br />
get in the way when getting on and off the vehicle. If<br />
you are standing to the left of the Streetstepper, put<br />
your right foot on the right tread first and vice versa.<br />
That might seem awkward at first, but makes getting on<br />
and riding away much easier. Use the leg that is still on<br />
the floor to push yourself and there you go! Do not<br />
apply brakes when you start riding.<br />
To get from point A to point B comfortably, or for a low<br />
impact work out make small steps. The treads should<br />
stay in the lower region of the vehicle. If you like, you<br />
can step with just one leg or coast and enjoy the ride.<br />
The treads will sink to the bottom for a comfortable<br />
posture.<br />
The “bodybuddy” is powered by your weight. Do not try<br />
to apply power to the handle bar to get more power to<br />
the treads. That is tiring and does not work, so ride with<br />
a relaxed upright posture!<br />
18
3) Speeding up<br />
4) Riding up-hill and accelerating<br />
8.Riding techniques<br />
To reach a higher speed, lift your legs up higher to use<br />
the full range of the step pedals and increase your step<br />
frequency. This motion is similar to jogging. When the<br />
tread is close to the lower position your balls of the feet<br />
should carry most of the weight. Work with your weight<br />
only and do not yank on the handle bar. Ideally it<br />
should feel like jogging while standing, with a<br />
continuous up and down movement of the whole body.<br />
If you would like to exceed 30 km/h, lower your upper<br />
body to improve aerodynamics.<br />
Riding up-hill takes a bit of experience. Do not attempt<br />
to ride any roads with more than a 10% gradient,<br />
unless you are comfortable riding on flat roads using<br />
the full range of the step pedals.<br />
To ride up-hill you need to start out with the step pedals<br />
at their highest position, because that is where the<br />
transmission ratio is optimal.<br />
ADVICE: over-exaggerate when you first start out, so<br />
you can hear the step pedals hit the upper stop.<br />
Then you need to continue doing this at a high step<br />
frequency in order to keep going.<br />
The key for going up-hill is to perform lots of small<br />
steps in the tread’s upper range.<br />
19
5) Reversing<br />
8.Riding techniques<br />
Don’t try to force the treads to move by applying more<br />
pressure. Your weight is the only thing necessary!<br />
To succeed in ascending a road with 15% gradient,<br />
move your feet to the very back of the treads. You can<br />
apply more force to the rear wheel in this manner.<br />
With a bit of practice you can accomplish riding roads<br />
steeper than 15%.<br />
For long up-hill rides – to improve your stamina for<br />
instance – we recommend 10 – 13% gradient<br />
For technical reasons the “bodybuddy” cannot be used in reverse mode. To move it backwards you<br />
must lift the rear wheel by the plastic carrying handle.<br />
Do not sit on the plastic handle. It could break and cause severe injuries!<br />
Ergonomically speaking, sitting while riding is not favorable for an ideal weight<br />
distribution. When sitting you could lose control over your vehicle, which results<br />
in severe accidents!<br />
6) Do not ride over stairs or high kerbs!<br />
The frame of the “bodybuddy” is low to the ground. The hydraulic line for the rear brake runs through<br />
the beam of the lower stop for the step pedals. The connecting line for the rear brake is located below<br />
the frame and is not totally protected.<br />
Do not ride over thigh kerbs or stairs, because the hydraulic brake could be<br />
damaged. Even if you push it, you must lift it over high kerbs.<br />
In case the hydraulic brake gets damaged, your distributor will fix it professionally and<br />
reasonably.<br />
20
9. The „bodybuddy“ as a work out machine<br />
9. The “bodybuddy” as a work out machine<br />
The “bodybuddy is not just an ideal form of transport for the city and the countryside, it is also an<br />
excellent work out machine!<br />
It is particularly suitable for endurance training as well as high impact training.<br />
The main health benefits of the streetstepper:<br />
• Homogenous, concentric muscle exertion<br />
• Ideal hip, knee and ankle joints<br />
• Upright body position and no spinal damaging forced posture caused otherwise by cycling<br />
• Gentle, low impact step movement<br />
• Works out all muscle groups which were created during evolution enabling us to walk upright<br />
• As there is no saddle, tummy, upper body and arms are also in motion (no movement<br />
blockage from the hips upwards)<br />
• Due to the upright riding position and the uncoupled step pedals, coordination and balance<br />
are improved automatically<br />
Like with any other work out machine, your exercise program and heart frequency should match your<br />
physical condition!<br />
Training at a heart frequency that is too high for your personal health levels can<br />
be health damaging!<br />
Talk to a trainer about a suitable work out and intensity (heart frequency) for you,<br />
before using the Streetstepper for work out purposes!<br />
Just like with the use of any other work out machine, a heart frequency<br />
measuring device is recommended!<br />
21
10. Adjustment and assembly<br />
10. Adjustment and assembly<br />
The Streetstepper will be fully assembled and tested by the distributor. We recommend you have it<br />
adjusted to your body height and personal requirements in relation to the height of your handle bar<br />
and the location of the brake levers.<br />
You can perform the following adjustments and assembly work yourself:<br />
1) Installing and removing the front wheel<br />
The front wheel is equipped with a quick-release axis, which permits you to quickly and easily remove<br />
the front tire – for instance when transporting the vehicle in a car.<br />
Make sure the quick release axis is locked down securely!<br />
A faulty and incorrect tightening of the quick release axis may result in loss of the<br />
tire while riding. Severe accidents and danger to your life and health may occur.<br />
(see chapter 6.2.)<br />
Read the brake user manual enclosed by the manufacturer, before you install or<br />
remove the front wheel! If you are not used to hydraulic disc brakes, have the<br />
distributor show you how to install and remove the front wheel.<br />
Transporting the vehicle in a passenger vehicle does not require removing the front tire.<br />
We recommend inserting the handle bar/steering rod and turning the handle bar 90<br />
degrees. It fits easily in most cars where you can put the seats down, not necessitating<br />
removal of the front tire.<br />
22
2) Adjusting the handle bar height<br />
10. Adjustment and assembly<br />
Loosen the socket head screw at the frame (see<br />
arrow), pull the handle bar to the desired height<br />
and tighten the socket head screw again.<br />
The right torque for the bolt is described in<br />
chapter 13!<br />
Loosen the screw until you can easily adjust the<br />
handle bar. If you loosen it too much the lower<br />
part of the handlebar could fall inside of the<br />
frame. It takes a lot of effort to get the part back<br />
into its original position. If it is difficult to move<br />
the handle bar twist it back and forth while pulling<br />
or pushing.<br />
Pay attention to the marking on the steering rod,<br />
which marks the maximum extension length.<br />
Do not pull it out past this marker!<br />
Do not pull the handle bar past the mark, which points out the max. extension<br />
length! The stability of the handle bar will be diminished, parts could get<br />
damaged and accidents may occur!<br />
23
10. Adjustment and assembly<br />
Rule of thumb for adjusting the handle bars to the correct height:<br />
Stand next to your bike, with both hands on the handle bar. Your upper arms should be<br />
along the side of your body and the forearm should be at a 90 degree angle to your<br />
upper arms.<br />
3) Adjusting the handle bar position<br />
To adjust the handle bar position loosen the<br />
three bolts on the stem (see arrow) until you can<br />
easily twist and adjust it to the desired position.<br />
Then tighten the three bolts again.<br />
Make sure all three bolts are tightened equally<br />
and that they are not crooked. The three bolts<br />
need to be tightened to where the handle bar<br />
does not move anymore!<br />
The correct torque for these bolts can be found<br />
on page 13!<br />
If the bolts are not tight enough the handle bar could suddenly move and twist<br />
while riding, which may result in severe accidents!<br />
24
11. Cleaning and care<br />
11. Cleaning and care<br />
Dried dirt or salt (from winter use and/or sweat) may damage your Streetstepper. Cleaning with a<br />
steam pressure cleaner is not recommended: the pressurized water coming out of the jets can<br />
penetrate into the sealed area of the bike and dilute the lubricant, which decreases the lifespan of the<br />
bearings.<br />
Clean your Streetstepper by either gently hosing down or using a bucket of water and a sponge or<br />
cloth. For heavy soiling use window cleaner.<br />
While cleaning, check for chipped paint, loose bolts or spokes and check the pressure in the tires and<br />
the brake pads.<br />
Pay attention to tears, bent parts or discoloration. When in doubt contact your distributor. Damaged<br />
parts need to be replaced immediately and paint chips need to be touched up!<br />
Do not clean your Streetstepper with a pressurized water jet cleaner or steam<br />
blaster at close proximity!<br />
When your vehicle is clean, we recommend you wax all painted areas, spores, hub joints, bolts, nuts,<br />
etc. and polish it with a soft cloth<br />
After you have cleaned and polished the bike you should lubricate the chain. Use<br />
any standard chain wax.<br />
Make sure none of the cleaning products or lubricants touch the brake pads,<br />
brake discs or rims.<br />
It could diminish the brake performance drastically and result in severe<br />
accidents!<br />
25
12. Repair and Maintenance<br />
12. Repair and Maintenance<br />
Your “bodybuddy” Streetstepper is a technical innovation and is built with parts that you might not<br />
recognise from any other vehicle.<br />
Leave repair and maintenance work to your distributor!<br />
If you would like to carry out repairs and maintenance yourself, make sure you<br />
just do so on parts that you are familiar with from your bike, and only if you have<br />
experience in fixing these parts!<br />
The rear wheel construction including the axis, the hub, the two gear boxes with cams and the chain is<br />
a patented invention that is not used on any other vehicle. Inserting and removing the rear tire takes<br />
expertise and should be done by trained professionals only!<br />
Do not attempt to remove the rear wheel (to replace the tube for instance)! Always<br />
leave it to the qualified distributor.<br />
INSERTING AND REMOVING OF THE REAR WHEEL BY A NON QUALIFIED<br />
PERSON, CAN LEAD TO INJURIES, FOR WHICH THE COMPANY DOES NOT<br />
ASSUME LIABILITY!<br />
THE WARRANTY DOES NOT COVER DAMAGE CAUSED BY INCORRECT<br />
MOUNTING OF THE REAR WHEEL BY NON-QUALIFIED PEOPLE!<br />
26
13. Tightening torque for bolts<br />
For information purposes only to be carried out by trained personnel (Service)<br />
13. Tightening torque for bolts<br />
14. Warranty<br />
COMPONENT SCREW CONNECTION TORQUE BOLT<br />
RETAINING<br />
DEVICE<br />
(Loctite 243)*<br />
Stem 3 bolts to secure the handle bar M6 / 10 Nm<br />
Stem 1 bolt to adjust the height of the handle bar M8 / 25 Nm -<br />
Retaining springs 1 bolt above and 1 bolt below -<br />
Step pedal, bearing 1 bolt in the lid 25 Nm<br />
Footsteps 6 attachment bolts per foot step M5 / 6 Nm<br />
Step pedal, bracket 3 attachment bolts per pedal M5 / 6 Nm<br />
Step pedal, bracket 3 attachment bolts to secure the chain M4 / 3 Nm<br />
Pulley 1 attachment bolt M10 / 49 Nm<br />
Rear axle 2 axel nuts M8 / 25 Nm<br />
Front brake 2 attachment bolts M6 / 10 Nm<br />
Rear brake 2 x 2 attachment bolts M5 / 6 Nm<br />
* Disassembly of Loctite-secured bolts:<br />
1) Disassemble with regular tools<br />
2) If it is difficult to loosen the bolt, warm it up to about 150 °C. Loosen while the bolts are warm!<br />
3) After disassembling Loctite-secured bolts, Loctite needs to be reapplied before remounting.<br />
14. Warranty<br />
• There is a 24 month warranty on the frame of your Streetstepper and all Streetstepper-specific<br />
parts, starting on the day you bought it, with proof of purchase. Keep the invoice!<br />
• Parts made by other manufacturers are covered up to 24 months, starting on the day you<br />
bought it, with proof of purchase.<br />
• The warranty covers faulty materials arising during fabrication at the manufacturers.<br />
The warranty does not cover:<br />
• Anything related to improper use, inadequate care or lack of maintenance<br />
• Regular wear and tear (brakes, tires, tubes, surface of the tread pedals)<br />
• Damages caused by accidents or transportation<br />
• Force majeure, and acts of nature beyond control<br />
• Inappropriate use<br />
27


