SHEETROCK® Lightweight Setting-Type Joint Compounds - Easy
SHEETROCK® Lightweight Setting-Type Joint Compounds - Easy
SHEETROCK® Lightweight Setting-Type Joint Compounds - Easy

You also want an ePaper? Increase the reach of your titles
YUMPU automatically turns print PDFs into web optimized ePapers that Google loves.
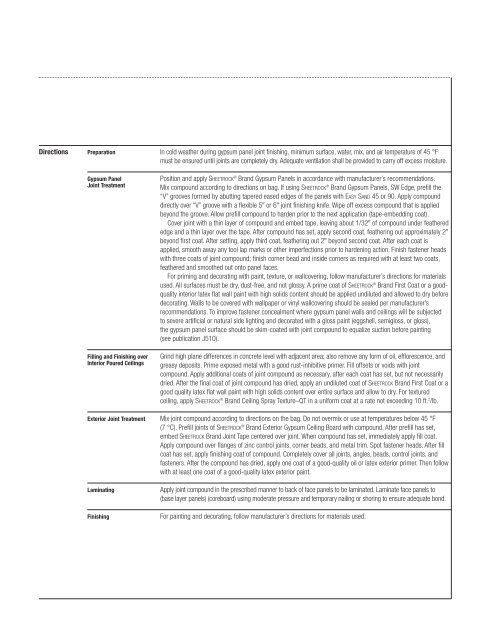
Directions Preparation In cold weather during gypsum panel joint finishing, minimum surface, water, mix, and air temperature of 45 °F<br />
must be ensured until joints are completely dry. Adequate ventilation shall be provided to carry off excess moisture.<br />
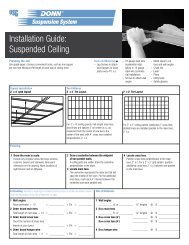
Gypsum Panel Position and apply SHEETROCK ® Brand Gypsum Panels in accordance with manufacturer’s recommendations.<br />
<strong>Joint</strong> Treatment Mix compound according to directions on bag. If using SHEETROCK ® Brand Gypsum Panels, SW Edge, prefill the<br />
“V” grooves formed by abutting tapered eased edges of the panels with EASY SAND 45 or 90. Apply compound<br />
directly over “V” groove with a flexible 5 or 6 joint finishing knife. Wipe off excess compound that is applied<br />
beyond the groove. Allow prefill compound to harden prior to the next application (tape-embedding coat).<br />
Cover joint with a thin layer of compound and embed tape, leaving about 1/32 of compound under feathered<br />
edge and a thin layer over the tape. After compound has set, apply second coat, feathering out approximately 2<br />
beyond first coat. After setting, apply third coat, feathering out 2 beyond second coat. After each coat is<br />
applied, smooth away any tool lap marks or other imperfections prior to hardening action. Finish fastener heads<br />
with three coats of joint compound; finish corner bead and inside corners as required with at least two coats,<br />
feathered and smoothed out onto panel faces.<br />
For priming and decorating with paint, texture, or wallcovering, follow manufacturer’s directions for materials<br />
used. All surfaces must be dry, dust-free, and not glossy. A prime coat of SHEETROCK ® Brand First Coat or a goodquality<br />
interior latex flat wall paint with high solids content should be applied undiluted and allowed to dry before<br />
decorating. Walls to be covered with wallpaper or vinyl wallcovering should be sealed per manufacturer’s<br />
recommendations. To improve fastener concealment where gypsum panel walls and ceilings will be subjected<br />
to severe artificial or natural side lighting and decorated with a gloss paint (eggshell, semigloss, or gloss),<br />
the gypsum panel surface should be skim-coated with joint compound to equalize suction before painting<br />
(see publication J510).<br />
Filling and Finishing over Grind high plane differences in concrete level with adjacent area; also remove any form of oil, efflorescence, and<br />
Interior Poured Ceilings greasy deposits. Prime exposed metal with a good rust-inhibitive primer. Fill offsets or voids with joint<br />
compound. Apply additional coats of joint compound as necessary, after each coat has set, but not necessarily<br />
dried. After the final coat of joint compound has dried, apply an undiluted coat of SHEETROCK Brand First Coat or a<br />
good quality latex flat wall paint with high solids content over entire surface and allow to dry. For textured<br />
ceiling, apply SHEETROCK ® Brand Ceiling Spray Texture–QT in a uniform coat at a rate not exceeding 10 ft. 2 /lb.<br />
Exterior <strong>Joint</strong> Treatment Mix joint compound according to directions on the bag. Do not overmix or use at temperatures below 45 °F<br />
(7 °C). Prefill joints of SHEETROCK ® Brand Exterior Gypsum Ceiling Board with compound. After prefill has set,<br />
embed SHEETROCK Brand <strong>Joint</strong> Tape centered over joint. When compound has set, immediately apply fill coat.<br />
Apply compound over flanges of zinc control joints, corner beads, and metal trim. Spot fastener heads. After fill<br />
coat has set, apply finishing coat of compound. Completely cover all joints, angles, beads, control joints, and<br />
fasteners. After the compound has dried, apply one coat of a good-quality oil or latex exterior primer. Then follow<br />
with at least one coat of a good-quality latex exterior paint.<br />
Laminating Apply joint compound in the prescribed manner to back of face panels to be laminated. Laminate face panels to<br />
(base layer panels) (coreboard) using moderate pressure and temporary nailing or shoring to ensure adequate bond.<br />
Finishing For painting and decorating, follow manufacturer’s directions for materials used.