TKF 8451 A 30 TKF 8451 AG 30 Dryer Kuivaaja - Blomberg
TKF 8451 A 30 TKF 8451 AG 30 Dryer Kuivaaja - Blomberg
TKF 8451 A 30 TKF 8451 AG 30 Dryer Kuivaaja - Blomberg

Create successful ePaper yourself
Turn your PDF publications into a flip-book with our unique Google optimized e-Paper software.
2 Installation<br />
Refer to the nearest Authorized Service<br />
Agent for installation of the product.<br />
To make the product ready for use,<br />
make sure that the electricity and water<br />
drainage system are appropriate before<br />
calling the Authorized Service Agent. If<br />
they are not, call a qualified technician<br />
and plumber to have any necessary<br />
arrangements carried out.<br />
C<br />
B<br />
A<br />
A<br />
Preparation of the product's<br />
location as well as the electrical and<br />
waste water installations is under<br />
customer's responsibility.<br />
Installation and electrical connections<br />
of the product must be carried out<br />
by the Authorized Service Agent.<br />
Manufacturer shall not be held<br />
liable for damages that may arise<br />
from procedures carried out by<br />
unauthorized persons.<br />
Prior to installation, visually check if<br />
the product has any defects on it. If<br />
so, do not have it installed. Damaged<br />
products cause risks for your safety.<br />
Let your dryer wait for 12 hours<br />
before starting to use it.<br />
Appropriate installation<br />
location<br />
• Install the product on a stable and<br />
level surface.<br />
• <strong>Dryer</strong> is heavy. Do not move it by<br />
yourself.<br />
• Operate your product in a well<br />
ventilated, dust-free environment.<br />
• Do not block the air ducts in front of<br />
and under the product with materials<br />
such as long pile rugs, wooden<br />
blocks and bands.<br />
• Do not install the product behind a<br />
door with a lock, sliding door or a<br />
hinged door which can strike the<br />
product.<br />
• Once the product is installed, it<br />
should stay at the same place where<br />
its connections have been made.<br />
When installing the product, make<br />
sure that the rear wall of it does<br />
not touch anywhere (tap, socket,<br />
etc.). Also pay attention to select an<br />
installation location which you will not<br />
be required to change afterwards.<br />
• Place the product at least 1.5<br />
cm away from the edges of other<br />
furniture.<br />
B<br />
6 EN<br />
Do not place the product on the<br />
power cable.<br />
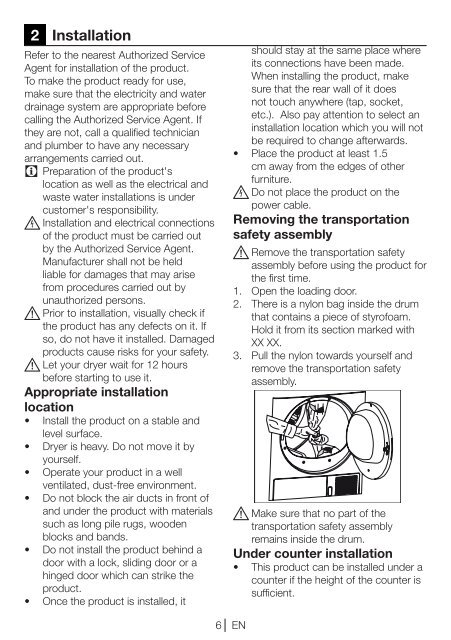
Removing the transportation<br />
safety assembly<br />
A Remove the transportation safety<br />
assembly before using the product for<br />
the first time.<br />
1. Open the loading door.<br />
2. There is a nylon bag inside the drum<br />
that contains a piece of styrofoam.<br />
Hold it from its section marked with<br />
XX XX.<br />
3. Pull the nylon towards yourself and<br />
remove the transportation safety<br />
assembly.<br />
A Make sure that no part of the<br />
transportation safety assembly<br />
remains inside the drum.<br />
Under counter installation<br />
• This product can be installed under a<br />
counter if the height of the counter is<br />
sufficient.