SAFE AND ECONOMICAL STEPS TO PRODUCING A 'PCB'
SAFE AND ECONOMICAL STEPS TO PRODUCING A 'PCB'
SAFE AND ECONOMICAL STEPS TO PRODUCING A 'PCB'

Create successful ePaper yourself
Turn your PDF publications into a flip-book with our unique Google optimized e-Paper software.
5. ETCHING<br />
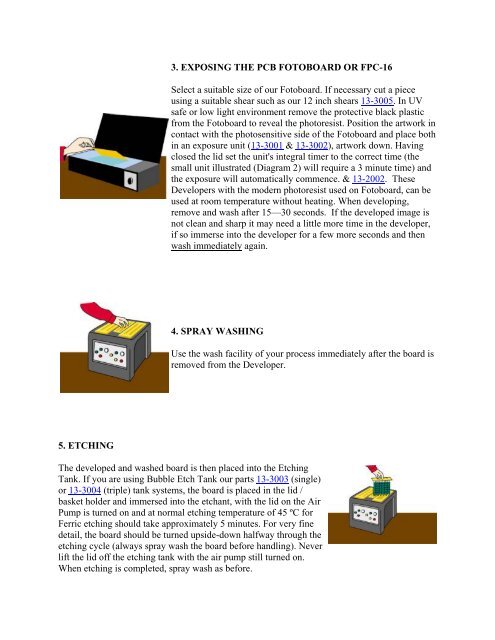
3. EXPOSING THE PCB FO<strong>TO</strong>BOARD OR FPC-16<br />
Select a suitable size of our Fotoboard. If necessary cut a piece<br />
using a suitable shear such as our 12 inch shears 13-3005. In UV<br />
safe or low light environment remove the protective black plastic<br />
from the Fotoboard to reveal the photoresist. Position the artwork in<br />
contact with the photosensitive side of the Fotoboard and place both<br />
in an exposure unit (13-3001 & 13-3002), artwork down. Having<br />
closed the lid set the unit's integral timer to the correct time (the<br />
small unit illustrated (Diagram 2) will require a 3 minute time) and<br />
the exposure will automatically commence. & 13-2002. These<br />
Developers with the modern photoresist used on Fotoboard, can be<br />
used at room temperature without heating. When developing,<br />
remove and wash after 15—30 seconds. If the developed image is<br />
not clean and sharp it may need a little more time in the developer,<br />
if so immerse into the developer for a few more seconds and then<br />
wash immediately again.<br />
4. SPRAY WASHING<br />
Use the wash facility of your process immediately after the board is<br />
removed from the Developer.<br />
The developed and washed board is then placed into the Etching<br />
Tank. If you are using Bubble Etch Tank our parts 13-3003 (single)<br />
or 13-3004 (triple) tank systems, the board is placed in the lid /<br />
basket holder and immersed into the etchant, with the lid on the Air<br />
Pump is turned on and at normal etching temperature of 45 ºC for<br />
Ferric etching should take approximately 5 minutes. For very fine<br />
detail, the board should be turned upside-down halfway through the<br />
etching cycle (always spray wash the board before handling). Never<br />
lift the lid off the etching tank with the air pump still turned on.<br />
When etching is completed, spray wash as before.