23632 ccl_Novellini Install guide:CCL Installation Guide
23632 ccl_Novellini Install guide:CCL Installation Guide
23632 ccl_Novellini Install guide:CCL Installation Guide

Create successful ePaper yourself
Turn your PDF publications into a flip-book with our unique Google optimized e-Paper software.
<strong>23632</strong> <strong>ccl</strong>_<strong>Novellini</strong> <strong>Install</strong> <strong>guide</strong>:<strong>CCL</strong> <strong>Install</strong>ation <strong>Guide</strong> 21/5/08 11:43 Page 3<br />
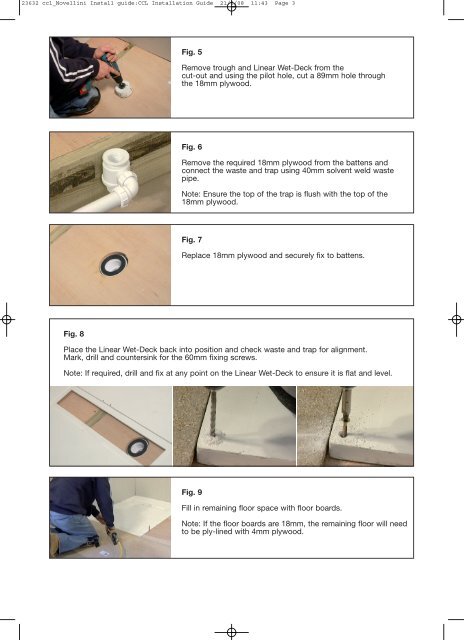
Fig. 8<br />
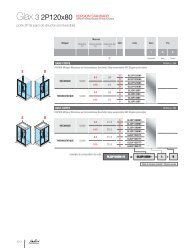
Fig. 5<br />
Remove trough and Linear Wet-Deck from the<br />
cut-out and using the pilot hole, cut a 89mm hole through<br />
the 18mm plywood.<br />
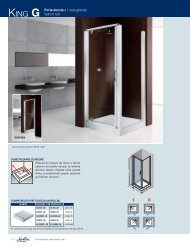
Fig. 6<br />
Remove the required 18mm plywood from the battens and<br />
connect the waste and trap using 40mm solvent weld waste<br />
pipe.<br />
Note: Ensure the top of the trap is flush with the top of the<br />
18mm plywood.<br />
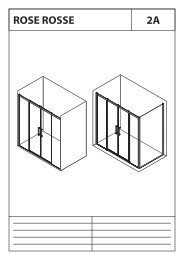
Fig. 7<br />
Replace 18mm plywood and securely fix to battens.<br />
Place the Linear Wet-Deck back into position and check waste and trap for alignment.<br />
Mark, drill and countersink for the 60mm fixing screws.<br />
Note: If required, drill and fix at any point on the Linear Wet-Deck to ensure it is flat and level.<br />
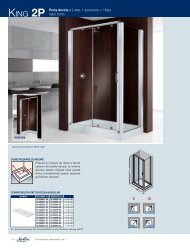
Fig. 9<br />
Fill in remaining floor space with floor boards.<br />
Note: If the floor boards are 18mm, the remaining floor will need<br />
to be ply-lined with 4mm plywood.