

medgluqsg - Freescale Semiconductor
medgluqsg - Freescale Semiconductor
medgluqsg - Freescale Semiconductor

Create successful ePaper yourself
Turn your PDF publications into a flip-book with our unique Google optimized e-Paper software.
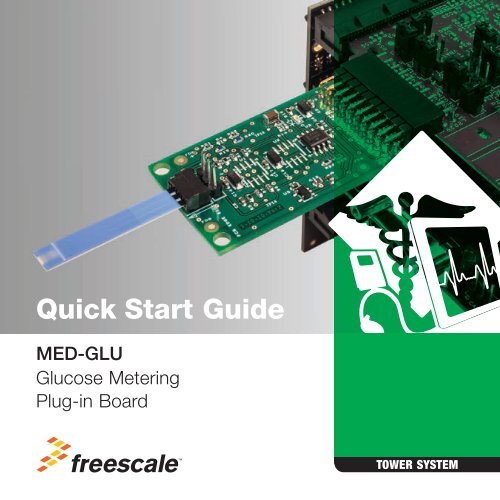
Quick Start Guide<br />
MED-GLU<br />
Glucose Metering<br />
Plug-in Board<br />
TOWER SYSTEM
Quick Start Guide<br />
Get to Know the MED-GLU Board<br />
2<br />
Glucose Strip<br />
Connector<br />
Linear ® Optional<br />
External Opamps<br />
Power on LED<br />
MED-GLU<br />
<strong>Freescale</strong> Tower System<br />
Medical<br />
Connector<br />
The MED-GLU plug-in board is compatible with the <strong>Freescale</strong><br />
Tower System, a modular development platform that enables rapid<br />
prototyping and tool re-use through reconfigurable hardware. Elevate<br />
your design to the next level with this industrial powerhouse by<br />
building your Tower System today.
MED-GLU Features<br />
MED-GLU is a single-board glucometer solution. It is<br />
reduced in size and eases the design of applications<br />
based on glucose metering. This board can be used<br />
together with the Tower System, offering a complete<br />
suite of tools including serial communication interfaces<br />
and graphic LCD screens.<br />
Features<br />
• Ready-to-develop glucometer solution<br />
• Required components for glucometry embedded on board<br />
(excluding test strip)<br />
• Tower System compatible<br />
3
4<br />
1<br />
Verify the Jumper<br />
Configuration<br />
Verify the jumper configuration on<br />
each board according to the Jumper<br />
Configurations table found later in this<br />
guide.<br />
2<br />
Assemble the<br />
Tower System<br />
Quick Start Guide<br />
Step-by-Step Installation Instructions<br />
In this quick start guide, you will learn how to set up the MED-GLU and Tower System<br />
and run the included demonstrated software. For more detailed infomation, review the<br />
user manual at freescale.com/healthcare.<br />
Assemble the Tower System by matching<br />
primary and secondary sides on the<br />
serial and MCU boards to corresponding<br />
elevators.<br />
3<br />
Connect the<br />
MED-GLU AFE<br />
Connect the MED-GLU AFE to the<br />
medical connector on TWR-K53N512<br />
board as shown below.<br />
4<br />
Download and<br />
Install Software<br />
Download and install IAR Embedded<br />
Workbench 6 for ARM ® . A 30-day<br />
trial version can be downloaded from<br />
iar.com.
5<br />
Install the<br />
Drivers<br />
Install P&E Micro drivers. The installer<br />
is located in IAR installation folder\arm\<br />
drivers\pemicro.<br />
6<br />
Connect a<br />
USB Cable<br />
Connect a USB cable from the computer<br />
to the USB port on the TWR-K53N512<br />
board. Wait for drivers to install.<br />
7<br />
TOWER SYSTEM<br />
Download the<br />
Application Note<br />
Go to freescale.com and conduct a<br />
parametric search for AN4364. Download<br />
AN4364SW.zip.<br />
8<br />
Open the<br />
File<br />
Open the file MED-GLU K53.eww<br />
using IAR from \Software\MED-GLU<br />
MK53N512\app\cdc\iar_ew\kinetis.<br />
9<br />
Load the<br />
Firmware<br />
Click the Debug button to load the<br />
firmware to the MCU.<br />
5
6<br />
Quick Start Guide<br />
Step-by-Step Installation Instructions<br />
Continued<br />
10<br />
Install the<br />
Software<br />
Install the Medical GUI software. It can<br />
be downloaded from freescale.com.<br />
Note: Make sure you have already installed Java ®<br />
JDK on your computer. Look for JDK folder in:<br />
C:\Program Files\Java<br />
11<br />
Change the<br />
Connection<br />
Disconnect the USB cable from the<br />
TWR-K53N512 and connect it to the<br />
TWR-SER board.
12<br />
Install Drivers for<br />
JM CDC Demo<br />
If the driver is not installed automatically,<br />
open Device Manager and install drivers<br />
for JM CDC Demo. Drivers can be<br />
found here:<br />
• 32-bit version:<br />
C:\<strong>Freescale</strong>\Medical GUI\Drivers\x32<br />
• 64-bit version:<br />
C:\<strong>Freescale</strong>\Medical GUI\Drivers\x64<br />
Note: Open the Device Manager by opening<br />
the start menu, right-clicking on Computer and<br />
selecting Manage. Device manager is on the<br />
left options tree.<br />
13<br />
Look for the<br />
COM Number<br />
In the device manager, look for the COM<br />
number assigned to “Virtual Com Port.”<br />
14<br />
TOWER SYSTEM<br />
Open the<br />
Medical GUI<br />
Open the Medical GUI and select the<br />
Virtual Com Port from previous step.<br />
7
8<br />
Quick Start Guide<br />
Step-by-Step Installation Instructions<br />
Continued<br />
15 Prepare<br />
Solution<br />
Prepare a solution mixing 55 ml of<br />
distilled water and 1 ml of glucose<br />
solution with 5% concentration (0.05g/<br />
ml). Draw the solution into a syringe.<br />
16 Place<br />
Test Strip<br />
Place the test strip on the MED-GLU<br />
board’s strip connector as shown below.
17 Start<br />
Measurements<br />
In the main screen, click the GLU section<br />
(blue) to start measurements.<br />
18<br />
TOWER SYSTEM<br />
Place Solution<br />
on Test Strip<br />
Place a drop of glucose solution on the<br />
test strip. Wait five seconds for results to<br />
appear on screen.<br />
9
10<br />
Quick Start Guide<br />
MED-GLU Jumper Options<br />
The following is a list of jumper options. The default installed jumper settings are<br />
shown in white text within the green boxes.<br />
TWR-K53N512 Jumper Configurations<br />
Jumper Position Function<br />
J1 Open R71 to ADC1_DM1<br />
J3 Open FlexBus Latch OE<br />
J4 2-3 Medical Connector Pin 4 Function<br />
J11 1-2 External Oscillator Selection<br />
J15 Connected Core VDD<br />
J17 Connected Oscillator Power Enable<br />
J18 Connected USB0_VBUS Voltage In<br />
J24 1-2 SYS_PWR Select<br />
J28 Open Disable JM60 Bootloader<br />
J34 Open Oscillator OE Control
TWR-SER Jumper Configurations<br />
Jumper Position Function<br />
TOWER SYSTEM<br />
J10 1-2 VBDEV Source<br />
J16 3-4 USB Mode Select<br />
J2 1-2 CLK_SEL Source<br />
11
Quick Start Guide<br />
Visit freescale.com/healthcareAFE for the latest<br />
information, including:<br />
• AN4364 application note<br />
Support<br />
Visit freescale.com/support for a list of phone<br />
numbers within your region.<br />
Warranty<br />
Visit freescale.com/warranty for complete<br />
warranty information.<br />
For more information, visit freescale.com/Tower<br />
Join the online Tower community at towergeeks.org<br />
<strong>Freescale</strong> and the <strong>Freescale</strong> logo are trademarks of <strong>Freescale</strong> <strong>Semiconductor</strong>,<br />
Inc., Reg. U.S. Pat. & Tm. Off. Tower is a trademark of <strong>Freescale</strong><br />
<strong>Semiconductor</strong>, Inc. All other product or service names are the property<br />
of their respective owners. ARM is a registered trademark of ARM Limited.<br />
© 2013 <strong>Freescale</strong> <strong>Semiconductor</strong>, Inc.<br />
Document Number: MEDGLUQSG REV 0


