QorIQ Configuration Suite Device Tree Editor - Freescale ...
QorIQ Configuration Suite Device Tree Editor - Freescale ...
QorIQ Configuration Suite Device Tree Editor - Freescale ...
You also want an ePaper? Increase the reach of your titles
YUMPU automatically turns print PDFs into web optimized ePapers that Google loves.
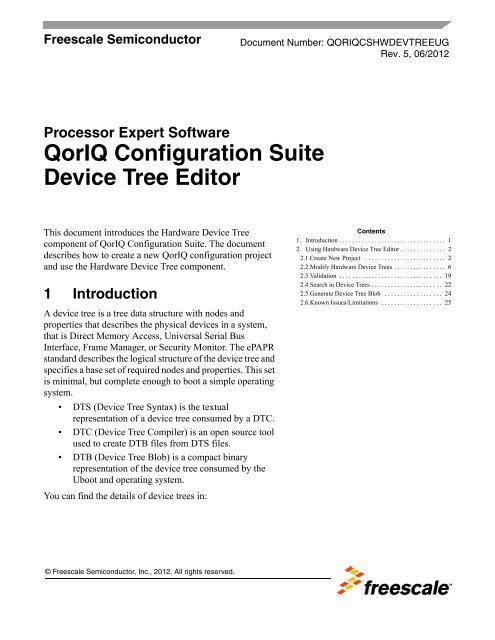
<strong>Freescale</strong> Semiconductor<br />
Processor Expert Software<br />
<strong>QorIQ</strong> <strong>Configuration</strong> <strong>Suite</strong><br />
<strong>Device</strong> <strong>Tree</strong> <strong>Editor</strong><br />
This document introduces the Hardware <strong>Device</strong> <strong>Tree</strong><br />
component of <strong>QorIQ</strong> <strong>Configuration</strong> <strong>Suite</strong>. The document<br />
describes how to create a new <strong>QorIQ</strong> configuration project<br />
and use the Hardware <strong>Device</strong> <strong>Tree</strong> component.<br />
1 Introduction<br />
A device tree is a tree data structure with nodes and<br />
properties that describes the physical devices in a system,<br />
that is Direct Memory Access, Universal Serial Bus<br />
Interface, Frame Manager, or Security Monitor. The ePAPR<br />
standard describes the logical structure of the device tree and<br />
specifies a base set of required nodes and properties. This set<br />
is minimal, but complete enough to boot a simple operating<br />
system.<br />
• DTS (<strong>Device</strong> <strong>Tree</strong> Syntax) is the textual<br />
representation of a device tree consumed by a DTC.<br />
• DTC (<strong>Device</strong> <strong>Tree</strong> Compiler) is an open source tool<br />
used to create DTB files from DTS files.<br />
• DTB (<strong>Device</strong> <strong>Tree</strong> Blob) is a compact binary<br />
representation of the device tree consumed by the<br />
Uboot and operating system.<br />
You can find the details of device trees in:<br />
© <strong>Freescale</strong> Semiconductor, Inc., 2012. All rights reserved.<br />
Document Number: QORIQCSHWDEVTREEUG<br />
Rev. 5, 06/2012<br />
Contents<br />
1. Introduction . . . . . . . . . . . . . . . . . . . . . . . . . . . . . . . . . 1<br />
2. Using Hardware <strong>Device</strong> <strong>Tree</strong> <strong>Editor</strong> . . . . . . . . . . . . . . 2<br />
2.1.Create New Project . . . . . . . . . . . . . . . . . . . . . . . . . 2<br />
2.2.Modify Hardware <strong>Device</strong> <strong>Tree</strong>s . . . . . . . . . . . . . . . . 6<br />
2.3.Validation . . . . . . . . . . . . . . . . . . . . . . . . . . . . . . . . 19<br />
2.4.Search in <strong>Device</strong> <strong>Tree</strong>s . . . . . . . . . . . . . . . . . . . . . . 22<br />
2.5.Generate <strong>Device</strong> <strong>Tree</strong> Blob . . . . . . . . . . . . . . . . . . 24<br />
2.6.Known Issues/Limitations . . . . . . . . . . . . . . . . . . . 25
Using Hardware <strong>Device</strong> <strong>Tree</strong> <strong>Editor</strong><br />
• Power.org Standard for Embedded Power Architecture Platform Requirements (ePAPR),<br />
version 1.0<br />
• Booting the Linux/ppc kernel without Open Firmware<br />
— 2005 Benjamin Herrenschmidt , IBM Corp.<br />
— 2005 Becky Bruce , <strong>Freescale</strong> Semiconductor, FSL SOC and<br />
32-bit additions.<br />
— 2006 MontaVista Software, Inc., Flash chip node definition.<br />
<strong>Device</strong> trees represent one of the most difficult configuration elements on <strong>QorIQ</strong> family because of the<br />
complexity of the processors and its format. Presently, the modification of device trees is done through any<br />
text editors. From here emerges the need to have a device tree dedicated tool in the form of a GUI editor<br />
that represents its tree like structure graphically and facilitates its handling.<br />
2 Using Hardware <strong>Device</strong> <strong>Tree</strong> <strong>Editor</strong><br />
The Hardware <strong>Device</strong> <strong>Tree</strong> <strong>Editor</strong> is a graphical tool designed to edit the standard ePAPR device trees and<br />
to offer assistance. The dts format is complex enough encompassing all the SoC resources, as such, noninitiated<br />
users find difficult to read or modify it. The Hardware <strong>Device</strong> <strong>Tree</strong> <strong>Editor</strong> offers support for both<br />
interpreting and writing hardware device trees.<br />
This section describes:<br />
• Section 2.1, “Create New Project’’<br />
• Section 2.2, “Modify Hardware <strong>Device</strong> <strong>Tree</strong>s’’<br />
• Section 2.3, “Validation’’<br />
• Section 2.4, “Search in <strong>Device</strong> <strong>Tree</strong>s’’<br />
• Section 2.5, “Generate <strong>Device</strong> <strong>Tree</strong> Blob’’<br />
• Section 2.6, “Known Issues/Limitations’’<br />
2.1 Create New Project<br />
The device tree project is created using the New <strong>QorIQ</strong> <strong>Configuration</strong> Project wizard. You can import<br />
an existing device tree file or generate a default one.<br />
To create a new <strong>QorIQ</strong> project for device tree configuration, follow these steps:<br />
1. Select File > New > <strong>QorIQ</strong> <strong>Configuration</strong> Project. Follow the steps in the New <strong>QorIQ</strong><br />
<strong>Configuration</strong> Project Wizard.<br />
2. Enter project name.<br />
3. Select the required target SoC.<br />
4. In the Toolset Selection screen (Figure 1), select <strong>Device</strong> <strong>Tree</strong> <strong>Editor</strong>.<br />
<strong>QorIQ</strong> <strong>Configuration</strong> <strong>Suite</strong> <strong>Device</strong> <strong>Tree</strong> <strong>Editor</strong>, Rev. 5<br />
2 <strong>Freescale</strong> Semiconductor
Figure 1. Select <strong>Device</strong> <strong>Tree</strong> <strong>Editor</strong><br />
<strong>QorIQ</strong> <strong>Configuration</strong> <strong>Suite</strong> <strong>Device</strong> <strong>Tree</strong> <strong>Editor</strong>, Rev. 5<br />
Using Hardware <strong>Device</strong> <strong>Tree</strong> <strong>Editor</strong><br />
5. Click Next. The <strong>Device</strong> <strong>Tree</strong> <strong>Configuration</strong> screen appears where you can select from three<br />
actions:<br />
— Import configuration from an existing device tree file<br />
A minimal validation is performed for the imported file. The agreeable files have ".dts"<br />
extension and are compatible with the selected SoC. A compatible file is a dts file which<br />
specifies the "model" property containing the selected SoC. Figure 3 shows an example where<br />
imported device tree file and chosen SoC do not meet.<br />
— Use default device tree configuration which is the default option<br />
— Empty configuration<br />
<strong>Freescale</strong> Semiconductor 3
Using Hardware <strong>Device</strong> <strong>Tree</strong> <strong>Editor</strong><br />
Figure 2. <strong>Device</strong> <strong>Tree</strong> <strong>Configuration</strong> Screen<br />
Figure 3. Import <strong>Configuration</strong> from <strong>Device</strong> <strong>Tree</strong> File<br />
— The default device trees are dts files from existing BSPs as follows:<br />
<strong>QorIQ</strong> <strong>Configuration</strong> <strong>Suite</strong> <strong>Device</strong> <strong>Tree</strong> <strong>Editor</strong>, Rev. 5<br />
4 <strong>Freescale</strong> Semiconductor
Table 2-1. List of SoC Supported for <strong>Device</strong> <strong>Tree</strong><br />
P1<br />
P2<br />
P3<br />
P4<br />
P5<br />
Supported SOC BSP<br />
P1010 <strong>QorIQ</strong>-SDK-v1.2-20120614<br />
P1011 SDK_20110506<br />
P1020 <strong>QorIQ</strong>-SDK-v1.2-20120614<br />
P1021 <strong>QorIQ</strong>-SDK-v1.2-20120614<br />
P1022 <strong>QorIQ</strong>-SDK-v1.2-20120614<br />
P1023 <strong>QorIQ</strong>-SDK-v1.2-20120614<br />
P1024 <strong>QorIQ</strong>-SDK-v1.2-20120614<br />
P1025 <strong>QorIQ</strong>-SDK-v1.2-20120614<br />
P2010 SDK_20110506<br />
P2020 <strong>QorIQ</strong>-SDK-v1.2-20120614<br />
P2041 <strong>QorIQ</strong>-SDK-v1.2-20120614<br />
P3041 <strong>QorIQ</strong>-SDK-v1.2-20120614<br />
P3060 <strong>QorIQ</strong>-SDK-v1.2-20120614<br />
P4080_v1_0 <strong>QorIQ</strong>-SDK-v1.2-20120614<br />
P4080_v2_0 <strong>QorIQ</strong>-SDK-v1.2-20120614<br />
P5020 <strong>QorIQ</strong>-SDK-v1.2-20120614<br />
P5040 <strong>QorIQ</strong>-SDK-v1.2-20120614<br />
<strong>QorIQ</strong> <strong>Configuration</strong> <strong>Suite</strong> <strong>Device</strong> <strong>Tree</strong> <strong>Editor</strong>, Rev. 5<br />
Using Hardware <strong>Device</strong> <strong>Tree</strong> <strong>Editor</strong><br />
6. If no default device tree exists for the selected SoC, the associated option becomes disabled.<br />
7. Click Finish.<br />
The project is created, and the HW<strong>Device</strong><strong>Tree</strong> component is added to the project under Embedded<br />
Components folder (Figure 4), and the data from the device tree file is loaded into the component.<br />
<strong>Freescale</strong> Semiconductor 5
Using Hardware <strong>Device</strong> <strong>Tree</strong> <strong>Editor</strong><br />
Figure 4. <strong>Device</strong> <strong>Tree</strong> Project<br />
This operation may take time depending on the size of the file. A dialog box appears (Figure 5) on the<br />
screen indicating the progress of the procedure.<br />
Figure 5. <strong>Device</strong> <strong>Tree</strong> Progress Monitor<br />
The original file used to create the HW<strong>Device</strong><strong>Tree</strong> component is added to the Imported_Files folder. A<br />
new device tree file is generated under the Sources folder based on the imported file. At this moment, the<br />
two files are identical. You will work with the generated one and the former will remain untouched. There<br />
can be more than one HW<strong>Device</strong><strong>Tree</strong> component per project.<br />
Follow the tips while working on the device tree:<br />
• Enable Project > Build Automatically setting to always have everything in sync.<br />
• Save your session before leaving the application in case you still need it. When you close the<br />
Processor Expert, a pop-up dialog appears allowing you to save the changes.<br />
• When HW<strong>Device</strong><strong>Tree</strong> component is removed from the project, the generated device tree file is<br />
also removed.<br />
2.2 Modify Hardware <strong>Device</strong> <strong>Tree</strong>s<br />
You can perform modifications in the Hardware <strong>Device</strong> <strong>Tree</strong> component through the GUI editor or text<br />
editor or both.<br />
<strong>QorIQ</strong> <strong>Configuration</strong> <strong>Suite</strong> <strong>Device</strong> <strong>Tree</strong> <strong>Editor</strong>, Rev. 5<br />
6 <strong>Freescale</strong> Semiconductor
2.2.1 GUI <strong>Editor</strong><br />
<strong>QorIQ</strong> <strong>Configuration</strong> <strong>Suite</strong> <strong>Device</strong> <strong>Tree</strong> <strong>Editor</strong>, Rev. 5<br />
Using Hardware <strong>Device</strong> <strong>Tree</strong> <strong>Editor</strong><br />
When the HW<strong>Device</strong><strong>Tree</strong> component is selected in the Project Panel, the Component Inspector opens<br />
displaying the GUI editor and the device tree properties. This view is split in two parts, a tree structure that<br />
handles the nodes and the <strong>Device</strong> <strong>Tree</strong> Properties view that handles the properties.<br />
Figure 6. <strong>Device</strong> <strong>Tree</strong> GUI <strong>Editor</strong> — <strong>Device</strong><strong>Tree</strong> and <strong>Device</strong> <strong>Tree</strong> Properties Views<br />
The device tree nodes are represented in a tree structure. Each node selection makes the corresponding<br />
properties display in the <strong>Device</strong> <strong>Tree</strong> Properties view. The <strong>Device</strong> <strong>Tree</strong> Properties view displays a list<br />
of properties along with the short details of the node. You can activate the dynamic context help by<br />
pressing F1 key after selecting the required node for which you want to view the dynamic context help.<br />
<strong>Freescale</strong> Semiconductor 7
Using Hardware <strong>Device</strong> <strong>Tree</strong> <strong>Editor</strong><br />
Figure 7. <strong>Device</strong> <strong>Tree</strong> Properties Custom View<br />
The Properties table contains three columns: Name, Value, and Type. All values in the Value column are<br />
discarded of any type-specific symbols. For example, cell list appears as 0x1 0x2, that is<br />
without the angular brackets. A string list appears without the quotation marks. This is applicable in the<br />
graphical editor only, the text editor displays all values in the complete form. The supported types are<br />
shown in Table 2-2.<br />
Table 2-2. Supported Properties Types<br />
Type Example<br />
BYTELIST [AB CD 01]<br />
CELLLIST <br />
EMPTY empty value<br />
PHANDLE &mpic<br />
STRINGLIST "fsl,p5020", "fsl,p4080"<br />
U32 <br />
STRING memory<br />
EMPTY no value<br />
You can perform the following actions in the GUI editor using the View toolbar (Figure 8).<br />
Figure 8. View Toolbar<br />
<strong>QorIQ</strong> <strong>Configuration</strong> <strong>Suite</strong> <strong>Device</strong> <strong>Tree</strong> <strong>Editor</strong>, Rev. 5<br />
8 <strong>Freescale</strong> Semiconductor
<strong>QorIQ</strong> <strong>Configuration</strong> <strong>Suite</strong> <strong>Device</strong> <strong>Tree</strong> <strong>Editor</strong>, Rev. 5<br />
Using Hardware <strong>Device</strong> <strong>Tree</strong> <strong>Editor</strong><br />
• Import a new device tree file.<br />
• Include a device tree file.<br />
• Perform manual validation against device tree.<br />
• <strong>Tree</strong> navigation using Go back and Go forward icons from the View toolbar.<br />
• Expand/collapse nodes from the toolbar or using the context menu.<br />
• Sort the nodes in ascending/descending order.<br />
You can perform the following actions from the context menu. Right-click in the tree structure to open the<br />
context menu.<br />
Figure 9. Context Menu<br />
• Create a new node using the Insert node option. The Insert node dialog box appears. Enter a name<br />
for the node and click OK.<br />
Figure 10. Insert Node Dialog Box<br />
• Delete a node using the Delete node option. The Confirmation dialog box appears, which not only<br />
deletes the node but also allows you to delete all the node's references that exist in the device tree.<br />
Figure 11. Confirmation Dialog Box<br />
• Rename a node using the Rename node option.<br />
• Open the <strong>Device</strong> <strong>Tree</strong> Settings page.<br />
<strong>Freescale</strong> Semiconductor 9
Using Hardware <strong>Device</strong> <strong>Tree</strong> <strong>Editor</strong><br />
You can insert a property by pressing New… button in the <strong>Device</strong> <strong>Tree</strong> Properties view. The Insert<br />
Property dialog box appears. Select a name, type and the required value in the respective fields.<br />
Figure 12. Insert Property Dialog Box<br />
You can remove a property by selecting it in the <strong>Device</strong> <strong>Tree</strong> Properties view and then clicking Remove.<br />
A confirmation dialog box will appear.<br />
Some keyboard shortcuts that you can use in the device tree GUI editor are listed in Table 2-3.<br />
Table 2-3. Keyboard Shortcuts Used in <strong>Device</strong> <strong>Tree</strong> GUI <strong>Editor</strong><br />
Action/View <strong>Tree</strong> Structure View <strong>Device</strong> <strong>Tree</strong> Properties View<br />
Insert node F3<br />
Delete node DELETE<br />
Rename node F2<br />
Insert property<br />
Remove property DELETE<br />
Edit property<br />
Search node/property CTRL+ALT+H CTRL+ALT+H<br />
• Context help support for device tree nodes:<br />
Select the required node in the tree structure and open the Eclipse context help by pressing F1 on<br />
Windows and Ctrl+F1 on Linux host. The nodes that have no documentation available are marked<br />
in the <strong>Device</strong> <strong>Tree</strong> Properties view.<br />
Figure 13. Node with No Documentation Available<br />
<strong>QorIQ</strong> <strong>Configuration</strong> <strong>Suite</strong> <strong>Device</strong> <strong>Tree</strong> <strong>Editor</strong>, Rev. 5<br />
10 <strong>Freescale</strong> Semiconductor
<strong>QorIQ</strong> <strong>Configuration</strong> <strong>Suite</strong> <strong>Device</strong> <strong>Tree</strong> <strong>Editor</strong>, Rev. 5<br />
Using Hardware <strong>Device</strong> <strong>Tree</strong> <strong>Editor</strong><br />
You can edit existing documentation or add missing documentation by performing the following steps:<br />
1. Edit existing file or create a new html file at the location eclipse/plugins/<br />
com.freescale.processorexpert.doc.qoriq.dt/html keeping the same format; the name of the file<br />
must be identical with the name of the node, that is .html.<br />
2. If you are creating a new html file, add a new entry in eclipse/plugins/<br />
com.freescale.processorexpert.doc.qoriq.dt/contexts.xml for the new file.<br />
3. Close the Eclipse IDE.<br />
4. Open Command Prompt and launch Eclipse using the following command:<br />
>eclipse.exe --clean<br />
2.2.1.1 Editing <strong>Device</strong> <strong>Tree</strong> Properties<br />
The Properties table in the GUI editor stores a node’s properties.The Name column in the Properties<br />
table provides a cell editor which lets you change the name of a property directly in the table cell.<br />
Figure 14. Content Assistance for <strong>Device</strong> <strong>Tree</strong> Properties<br />
When a cell becomes empty, a content proposals list appears. This list contains all existing properties<br />
encountered during the process of importing a device tree file. Filtering in the cell editor is also enabled.<br />
In addition, you can enter the name of a new property. After pressing the Enter key, the name is added to<br />
the proposals list in the current session.<br />
The cell editor associated with the Value column allows you to set the value of the property. Click the "…"<br />
button (Figure 15) to open the Property dialog box (Figure 16), which contains information about each<br />
cell item.<br />
Figure 15. Setting Value in Properties Table<br />
<strong>Freescale</strong> Semiconductor 11
Using Hardware <strong>Device</strong> <strong>Tree</strong> <strong>Editor</strong><br />
The items are characterized by their name and type. Again, the type symbols are discarded in the Value<br />
column. The value can be converted to a new radix by selecting a new type from the available combo box<br />
(in the Type column) within a cell, as shown in Figure 16.<br />
Figure 16. Property Dialog Box<br />
You can insert a new item on an empty row. The following types are supported.<br />
Each action modifies the content of the HW<strong>Device</strong><strong>Tree</strong> component. Because of that each action is<br />
followed by a build operation that updates the dts file under the Sources folder.<br />
2.2.1.2 Include <strong>Tree</strong><br />
Table 2-4. Supported Property Types<br />
Name Example<br />
BYTESTRING [AA BB CC]<br />
CELLLIST* <br />
DECIMAL 175<br />
HEX AF<br />
LABEL label:<br />
REFERENCE &cpu0<br />
STRING fsl,p4080<br />
The Include <strong>Tree</strong> tab in the Component Inspector represents the hierarchy of the included device tree<br />
files. The Include <strong>Tree</strong> tab allows easy navigation among all device tree fragments: dts or dtsi.<br />
<strong>QorIQ</strong> <strong>Configuration</strong> <strong>Suite</strong> <strong>Device</strong> <strong>Tree</strong> <strong>Editor</strong>, Rev. 5<br />
12 <strong>Freescale</strong> Semiconductor
Figure 17. Include <strong>Tree</strong> Tab in Component Inspector<br />
<strong>QorIQ</strong> <strong>Configuration</strong> <strong>Suite</strong> <strong>Device</strong> <strong>Tree</strong> <strong>Editor</strong>, Rev. 5<br />
Using Hardware <strong>Device</strong> <strong>Tree</strong> <strong>Editor</strong><br />
The Include <strong>Tree</strong> tab displays three types of files:<br />
• merged device tree file, which represents the all-in-one file merging all nodes and properties from<br />
multiple device trees in a single file.<br />
• top-level device tree file, which is the first dts including other device tree(s).<br />
• included files representing fragments with /include/ statement, usually dtsi files.<br />
2.2.1.3 Interrupts View<br />
In the Interrupts view of the device tree, a logical interrupt tree exists that represents the hierarchy and<br />
routing of interrupts in the platform hardware. You can view this interrupt tree in the Component<br />
Inspector when selecting an existing hardware device tree component.<br />
Figure 18. Interrupts View in Component Inspector<br />
<strong>Freescale</strong> Semiconductor 13
Using Hardware <strong>Device</strong> <strong>Tree</strong> <strong>Editor</strong><br />
The left side of the Interrupts view displays the actual representation of the Interrupt tree, starting from<br />
the root interrupt controller. When you select an element in the Interrupt tree, a table appears on the right<br />
side listing the interrupt sources for the selected device tree node. Each row in the table provides a userfriendly<br />
view of a decoded interrupt specifier, and each column in the table represents a specific cell of the<br />
interrupt specifier.<br />
You can edit the Interrupts table for each device tree node selected from the device tree. An interrupt tree<br />
may contain special nodes called interrupt nexuses that map from one interrupt domain to another interrupt<br />
domain. When you select an interrupt nexus node in the Interrupt tree, the Domain map table appears<br />
below the Interrupts table on the right side. The Domain Map table allows you to perform interrupt<br />
domain mapping for the selected interrupt nexus.<br />
2.2.1.4 Memory Map View<br />
Figure 19. Interrupts <strong>Tree</strong> — Nexus Nodes and Domain Map<br />
You can view a device tree as a representation of different Local Access Windows (LAWs) within a device.<br />
For example, according to the P4080 Reference Manual, you can define the p4080 address map using a set<br />
of maximum 32 LAWs. An example of such window is the <strong>Configuration</strong> Control and Status Register area<br />
defined by soc node in the device tree. All LAWs can be relocated within the entire address space of the<br />
platform. Each of these LAWs maps a programmable 4-Kbite to 64-Gbyte region of the local 36-bit<br />
address space to a specified target interface, such as DDR Controller, Localbus, and PCI Express<br />
Controller.<br />
<strong>QorIQ</strong> <strong>Configuration</strong> <strong>Suite</strong> <strong>Device</strong> <strong>Tree</strong> <strong>Editor</strong>, Rev. 5<br />
14 <strong>Freescale</strong> Semiconductor
Figure 20. LAW Defined Inside <strong>Device</strong> <strong>Tree</strong><br />
<strong>QorIQ</strong> <strong>Configuration</strong> <strong>Suite</strong> <strong>Device</strong> <strong>Tree</strong> <strong>Editor</strong>, Rev. 5<br />
Using Hardware <strong>Device</strong> <strong>Tree</strong> <strong>Editor</strong><br />
Each device tree node having reg and ranges properties defines memory ranges inside or outside CCSR<br />
window. Figure 21 and Figure 22 shows an example of such device tree node.<br />
Figure 21. reg Property Definition Inside <strong>Device</strong> <strong>Tree</strong><br />
Figure 22. ranges Property Definition Inside <strong>Device</strong> <strong>Tree</strong><br />
In Figure 20, pci2 has one block of memory mapped register starting at F_FE20_2000 with size 4-Kbyte<br />
in the SoC. There are two pci2 ranges (Figure 22) within the entire address space which can be accessed<br />
by a load or store operation. The first pci2 memory block starts at 0xC_4000_0000 with size of 512-<br />
MByte; the second pci2 block starts at address 0xF_F802_0000 with size of 64-Kbyte.<br />
Once all memory blocks are decoded and gathered, they can be visually represented in the Memory Map<br />
view. The Memory Map view pops-up automatically with the created memory block areas when a device<br />
<strong>Freescale</strong> Semiconductor 15
Using Hardware <strong>Device</strong> <strong>Tree</strong> <strong>Editor</strong><br />
tree component is selected in the Component Inspector. The Memory Map view displays its content<br />
created on the basis of DTS file that comes with the component. Block highlighting is available in the<br />
Memory Map view. Moreover, selecting a block in the Memory Map view triggers a node selection in<br />
the graphical device tree.<br />
2.2.2 Text <strong>Editor</strong><br />
Figure 23. <strong>Device</strong> <strong>Tree</strong> Memory Map View<br />
The text editor of HW<strong>Device</strong><strong>Tree</strong> component involves syntax highlighting and folding support. The<br />
device tree GUI editor and the text editor are synchronized. Therefore, when you select a node in the GUI<br />
editor, the node is selected automatically in the text editor also. The vice versa is also true. Figure 24 shows<br />
that after selecting the SoC node in the GUI editor, the corresponding entry in the text editor is<br />
automatically selected.<br />
<strong>QorIQ</strong> <strong>Configuration</strong> <strong>Suite</strong> <strong>Device</strong> <strong>Tree</strong> <strong>Editor</strong>, Rev. 5<br />
16 <strong>Freescale</strong> Semiconductor
Figure 24. <strong>Device</strong> <strong>Tree</strong> Text <strong>Editor</strong><br />
<strong>QorIQ</strong> <strong>Configuration</strong> <strong>Suite</strong> <strong>Device</strong> <strong>Tree</strong> <strong>Editor</strong>, Rev. 5<br />
Using Hardware <strong>Device</strong> <strong>Tree</strong> <strong>Editor</strong><br />
If inclusions exist, the merged file will have hovering support in the text editor. When mouse cursor hovers<br />
over properties and nodes, a tooltip appears displaying initial locations of the files in the Include <strong>Tree</strong>.<br />
The merged file is read-only; it gets updated based on other files. Therefore, you can edit only the top-level<br />
and included files to automatically propagate changes in the final merged file.<br />
<strong>Freescale</strong> Semiconductor 17
Using Hardware <strong>Device</strong> <strong>Tree</strong> <strong>Editor</strong><br />
Figure 25. Origin of Included Files<br />
Hyperlink detection is also supported for /include/ declarations and device tree references. Use CTRL+left<br />
click combination on these statements to change the context in the referred file or node.<br />
Figure 26. Hyperlink Detection<br />
Tips:<br />
• To see the line numbers in the text editor, enable:<br />
<strong>QorIQ</strong> <strong>Configuration</strong> <strong>Suite</strong> <strong>Device</strong> <strong>Tree</strong> <strong>Editor</strong>, Rev. 5<br />
18 <strong>Freescale</strong> Semiconductor
<strong>QorIQ</strong> <strong>Configuration</strong> <strong>Suite</strong> <strong>Device</strong> <strong>Tree</strong> <strong>Editor</strong>, Rev. 5<br />
Using Hardware <strong>Device</strong> <strong>Tree</strong> <strong>Editor</strong><br />
Window > Preferences > General > <strong>Editor</strong>s > Text <strong>Editor</strong>s > show line numbers option.<br />
• Play with the views in the workbench to accommodate your needs and have a better perspective.<br />
2.3 Validation<br />
The <strong>Device</strong> <strong>Tree</strong> <strong>Editor</strong> allows you to verify the syntax of a device tree and to check if it conforms to the<br />
set of defined constraints.There are two approaches to display errors, using markers in Eclipse Problems<br />
view or using decorators in the Properties custom view table.<br />
2.3.1 Syntax Validation<br />
Using markers, the error checking is performed for the following:<br />
• Syntax errors (inappropriate format)<br />
• More than one root node<br />
• Duplicate node labels<br />
• Undefined node reference<br />
• Properties do not precede sub-nodes<br />
• In case of inaccuracies, the text editor is decorated with markers on the faulty lines. The markers<br />
can also be examined in the Eclipse Problems view.<br />
Figure 27. Errors Detection Using Markers<br />
If errors are detected, do not rely on the GUI tree, the hierarchy is broken and cannot display the tree. You<br />
can turn on/off the validation against the device tree bindings in the <strong>Device</strong> <strong>Tree</strong> Settings page<br />
<strong>Freescale</strong> Semiconductor 19
Using Hardware <strong>Device</strong> <strong>Tree</strong> <strong>Editor</strong><br />
(Figure 34). If it is enabled, the validation starts automatically whenever changes occur in the device tree.<br />
You can also perform validation manually using the second option in the View toolbar (Figure 8).<br />
2.3.2 Property Constraints<br />
Each device tree node is completed and distinguished by an XML "binding". The binding describes which<br />
properties are required, which are optional, what each property means and what constraints are to be met.<br />
The repository of device tree bindings is stored at PEx_Data\Beans\HW<strong>Device</strong><strong>Tree</strong>\dts_bindings.<br />
The xml binding keeps information about the list of devices supported by the node, node instances, subnodes,<br />
properties, constraints, and example. Figure 28 shows the structure of a node and a property.<br />
Figure 28. Xml Node and Property Schema<br />
Following are the types of constraints that can be assigned to a property:<br />
• — specifies the type of a property value<br />
• — specifies whether or not the property can be modified<br />
• , — specifies the minimum and maximum number of items allowed<br />
in a property cell<br />
• — specifies a set of allowed values for a property<br />
• — bounds a numeric value between minimum and maximum values; it can also force a<br />
property value to match a regular expression.<br />
Take an example where you have the dma-channel@0 node as follows:<br />
dma-channel@0 {<br />
};<br />
dma-channel@100 {<br />
compatible = "fsl,p5020-dma-channel", "fsl,eloplus-dma-channel";<br />
reg = ;<br />
cell-index = ;<br />
interrupts = ;<br />
compatible = "fsl,p5020-dma-channel", "fsl,eloplus-dma-channel";<br />
reg = ;<br />
<strong>QorIQ</strong> <strong>Configuration</strong> <strong>Suite</strong> <strong>Device</strong> <strong>Tree</strong> <strong>Editor</strong>, Rev. 5<br />
20 <strong>Freescale</strong> Semiconductor
};<br />
cell-index = ;<br />
interrupts = ;<br />
Assume you want to define the following constraints:<br />
• restrict the type of interrupts property to EMPTY for all dma-channel instances<br />
• for dma-channel@0, define reg property<br />
— to have at least 3 items in its value<br />
— first item to be in [0xA, 0xC] range<br />
— second item to be in [0x0, 0x400] range<br />
• for dma-channel@100<br />
— compatible property to be non-editable<br />
— to have exactly 3 items in its value<br />
Then the dma-channel.xml file will be modified as shown in Figure 29.<br />
Figure 29. Example of Defining a Constraint<br />
<strong>QorIQ</strong> <strong>Configuration</strong> <strong>Suite</strong> <strong>Device</strong> <strong>Tree</strong> <strong>Editor</strong>, Rev. 5<br />
Using Hardware <strong>Device</strong> <strong>Tree</strong> <strong>Editor</strong><br />
Non-editable properties are disabled in the graphical editor, as shown in Figure 30. They can be changed<br />
only through the text editor.<br />
<strong>Freescale</strong> Semiconductor 21
Using Hardware <strong>Device</strong> <strong>Tree</strong> <strong>Editor</strong><br />
Figure 30. <strong>Device</strong> <strong>Tree</strong> Property Constraints for Non-editable Properties<br />
Setting these constraints produce the following warnings in the Problems view:<br />
• "interrupts" does not meet constraint for all dma-channel instances from all dma nodes<br />
(4 instances x 2 nodes)<br />
• "reg" does not meet constraint at dma-channel@0 and dma-channel@100<br />
instances (there are 2 items and the constraint requires minimum 3)<br />
• "reg" does not meet constraint at index 0 at dma-channel@0 instances: item at<br />
index 0 is 0x0 and the constraint requires a value between 0xA, 0xC<br />
2.4 Search in <strong>Device</strong> <strong>Tree</strong>s<br />
Figure 31. <strong>Device</strong> <strong>Tree</strong> Property Constraint Warnings<br />
Use the Search view to search a particular information in the project’s device tree files. The Search view<br />
can be opened in three ways:<br />
• Select Search > Search > <strong>Device</strong> <strong>Tree</strong> Search in the main menu bar.<br />
• Search option from the context menu of the <strong>Device</strong> <strong>Tree</strong> graphical editor.<br />
• Use the shortcut CTRL+ALT+H.<br />
<strong>QorIQ</strong> <strong>Configuration</strong> <strong>Suite</strong> <strong>Device</strong> <strong>Tree</strong> <strong>Editor</strong>, Rev. 5<br />
22 <strong>Freescale</strong> Semiconductor
There are three options that specify the criteria based on which you can search the text:<br />
• Case sensitive<br />
• Whole word<br />
• Regular expression<br />
Figure 32. <strong>Device</strong> <strong>Tree</strong> Search View<br />
<strong>QorIQ</strong> <strong>Configuration</strong> <strong>Suite</strong> <strong>Device</strong> <strong>Tree</strong> <strong>Editor</strong>, Rev. 5<br />
Using Hardware <strong>Device</strong> <strong>Tree</strong> <strong>Editor</strong><br />
By default, searching is performed in the whole workspace and all encountered dts file. To restrict<br />
searching to a particular project or working set, use the Scope feature in the Search dialog box, which<br />
provides the following options.<br />
• Workspace — is the default option; when selected, searches in all open projects<br />
• Selected resources — searches in the selected resource if applicable; it is a device tree file or<br />
contains device tree files<br />
• Enclosing projects — searches in the selected project only<br />
• Working set — allows you to create a custom working set with the desired resources<br />
The results appear in the Search view.<br />
<strong>Freescale</strong> Semiconductor 23
Using Hardware <strong>Device</strong> <strong>Tree</strong> <strong>Editor</strong><br />
2.5 Generate <strong>Device</strong> <strong>Tree</strong> Blob<br />
Figure 33. <strong>Device</strong> <strong>Tree</strong> Search View Results<br />
The <strong>Device</strong> <strong>Tree</strong> <strong>Editor</strong> enables you to generate device tree binaries if a device tree compiler is available.<br />
You can find the DTC settings in the <strong>Device</strong> <strong>Tree</strong> Compiler page of the Preferences dialog box<br />
(Figure 34), which appears on selecting Window > Preferences > Processor Expert > <strong>Device</strong> <strong>Tree</strong><br />
Compiler.<br />
You can change the default settings. If this functionality is not required, it can be switched off by clearing<br />
the Use DTC checkbox.<br />
<strong>QorIQ</strong> <strong>Configuration</strong> <strong>Suite</strong> <strong>Device</strong> <strong>Tree</strong> <strong>Editor</strong>, Rev. 5<br />
24 <strong>Freescale</strong> Semiconductor
Figure 34. <strong>Device</strong> <strong>Tree</strong> Settings Page<br />
<strong>QorIQ</strong> <strong>Configuration</strong> <strong>Suite</strong> <strong>Device</strong> <strong>Tree</strong> <strong>Editor</strong>, Rev. 5<br />
Using Hardware <strong>Device</strong> <strong>Tree</strong> <strong>Editor</strong><br />
To generate DTB files, select Project > Generate Processor Expert Code from the IDE menu bar. The<br />
code is generated per project, therefore, the device tree blobs are created for all encountered device tree<br />
sources in the opened projects. The resultant device tree blob files are added to the Generated_Code<br />
folder, as shown in Figure 35.<br />
2.6 Known Issues/Limitations<br />
Figure 35. DTB File Generation<br />
To see a list of known issues and limitations, refer the ReadMe.html file.<br />
<strong>Freescale</strong> Semiconductor 25
How to Reach Us:<br />
Home Page:<br />
www.freescale.com<br />
Web Support:<br />
http://www.freescale.com/support<br />
USA/Europe or Locations Not Listed:<br />
<strong>Freescale</strong> Semiconductor, Inc.<br />
Technical Information Center, EL516<br />
2100 East Elliot Road<br />
Tempe, Arizona 85284<br />
1-800-521-6274 or<br />
+1-480-768-2130<br />
www.freescale.com/support<br />
Europe, Middle East, and Africa:<br />
<strong>Freescale</strong> Halbleiter Deutschland GmbH<br />
Technical Information Center<br />
Schatzbogen 7<br />
81829 Muenchen, Germany<br />
+44 1296 380 456 (English)<br />
+46 8 52200080 (English)<br />
+49 89 92103 559 (German)<br />
+33 1 69 35 48 48 (French)<br />
www.freescale.com/support<br />
Japan:<br />
<strong>Freescale</strong> Semiconductor Japan Ltd.<br />
Headquarters<br />
ARCO Tower 15F<br />
1-8-1, Shimo-Meguro, Meguro-ku<br />
Tokyo 153-0064<br />
Japan<br />
0120 191014 or<br />
+81 3 5437 9125<br />
support.japan@freescale.com<br />
Asia/Pacific:<br />
<strong>Freescale</strong> Semiconductor China Ltd.<br />
Exchange Building 23F<br />
No. 118 Jianguo Road<br />
Chaoyang District<br />
Beijing 100022<br />
China<br />
+86 10 5879 8000<br />
support.asia@freescale.com<br />
For Literature Requests Only:<br />
<strong>Freescale</strong> Semiconductor<br />
Literature Distribution Center<br />
1-800 441-2447 or<br />
+1-303-675-2140<br />
Fax: +1-303-675-2150<br />
LDCFor<strong>Freescale</strong>Semiconductor<br />
@hibbertgroup.com<br />
Document Number:QORIQCSHWDEVTREEUG<br />
Rev. 5<br />
06/2012<br />
Information in this document is provided solely to enable system and software<br />
implementers to use <strong>Freescale</strong> Semiconductor products. There are no express or<br />
implied copyright licenses granted hereunder to design or fabricate any integrated<br />
circuits or integrated circuits based on the information in this document.<br />
<strong>Freescale</strong> Semiconductor reserves the right to make changes without further notice to<br />
any products herein. <strong>Freescale</strong> Semiconductor makes no warranty, representation or<br />
guarantee regarding the suitability of its products for any particular purpose, nor does<br />
<strong>Freescale</strong> Semiconductor assume any liability arising out of the application or use of<br />
any product or circuit, and specifically disclaims any and all liability, including without<br />
limitation consequential or incidental damages. “Typical” parameters which may be<br />
provided in <strong>Freescale</strong> Semiconductor data sheets and/or specifications can and do<br />
vary in different applications and actual performance may vary over time. All operating<br />
parameters, including “Typicals” must be validated for each customer application by<br />
customer’s technical experts. <strong>Freescale</strong> Semiconductor does not convey any license<br />
under its patent rights nor the rights of others. <strong>Freescale</strong> Semiconductor products are<br />
not designed, intended, or authorized for use as components in systems intended for<br />
surgical implant into the body, or other applications intended to support or sustain life,<br />
or for any other application in which the failure of the <strong>Freescale</strong> Semiconductor product<br />
could create a situation where personal injury or death may occur. Should Buyer<br />
purchase or use <strong>Freescale</strong> Semiconductor products for any such unintended or<br />
unauthorized application, Buyer shall indemnify and hold <strong>Freescale</strong> Semiconductor<br />
and its officers, employees, subsidiaries, affiliates, and distributors harmless against all<br />
claims, costs, damages, and expenses, and reasonable attorney fees arising out of,<br />
directly or indirectly, any claim of personal injury or death associated with such<br />
unintended or unauthorized use, even if such claim alleges that <strong>Freescale</strong><br />
Semiconductor was negligent regarding the design or manufacture of the part.<br />
<strong>Freescale</strong>, the <strong>Freescale</strong> logo, CodeWarrior, <strong>QorIQ</strong>, Processor Expert are<br />
registered trademarks of <strong>Freescale</strong> Semiconductor, Inc., Reg. U.S. Pat. &<br />
Tm. Off.<br />
All other product or service names are the property of their respective<br />
owners.<br />
© 2011 <strong>Freescale</strong> Semiconductor, Inc.


