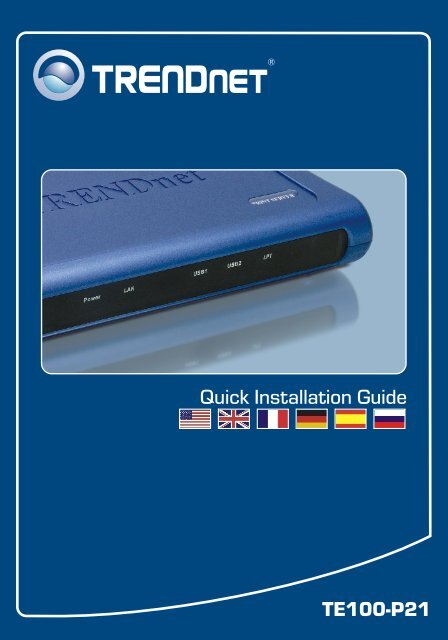
TE100-P21 Quick Installation Guide - TRENDnet
TE100-P21 Quick Installation Guide - TRENDnet
TE100-P21 Quick Installation Guide - TRENDnet

You also want an ePaper? Increase the reach of your titles
YUMPU automatically turns print PDFs into web optimized ePapers that Google loves.
<strong>Quick</strong> <strong>Installation</strong> <strong>Guide</strong><br />
<strong>TE100</strong>-<strong>P21</strong>
Table of of Contents Contents<br />
Deutsch .....................................................................................................<br />
1. Bevor Sie anfangen ...........................................................................<br />
2. Herstellung der Verbindung ...............................................................<br />
3. Nutzung des Druckservers .................................................................<br />
Troubleshooting ........................................................................................<br />
1<br />
1<br />
2<br />
3<br />
7<br />
Version 11.07.05
1. Bevor Sie anfangen<br />
Systemanforderungen<br />
1<br />
Deutsch<br />
Packungsinhalt<br />
<strong>TE100</strong>-<strong>P21</strong><br />
Kurzanleitung zur <strong>Installation</strong><br />
Programm-CD<br />
Netzteil (5 V, 2,5 A)<br />
1. Pentium 100 MHz oder schneller<br />
2. 8 MB RAM oder mehr<br />
3. Windows, Linux, Mac OS X oder andere Betriebssysteme<br />
10/100Mbps Multi-Port Print Server<br />
(<strong>TE100</strong>-<strong>P21</strong>)<br />
Parallel<br />
Printer<br />
USB 2.0 Printer<br />
Cable/DSL 4-Port Broadband Router<br />
(TW100-S4W1CA)<br />
Workstations with Fast Ethernet adapter<br />
(<strong>TE100</strong>-PCIWN)<br />
Internet<br />
Cable/DSL Modem
2. Herstellung der Verbindung<br />
Hinweis: Schalten Sie bitte alle Drucker aus, bevor Sie sie mit dem<br />
Druckserver verbinden. Sobald die Hardware korrekt angeschlossen ist,<br />
können Sie die Drucker wieder einschalten.<br />
1. Verbinden Sie die Parallel- oder USB-Drucker<br />
mit den Druckeranschlüssen.<br />
2. Verbinden Sie den LAN-Port über das RJ-<br />
45-Kabel mit dem Hub oder Switch Ihres<br />
Netzwerks.<br />
3. Verbinden Sie das Netzteil mit dem<br />
Druckserver.<br />
2<br />
Deutsch
3. Nutzung des Druckservers<br />
Hinweis: Benutzer von MACs ändern bitte die IP-Adresse des Computers auf<br />
192.168.0.X (X ist eine beliebige Nummer von 1 bis 253) und geben in den<br />
Webbrowser 192.168.0.1 ein, um auf das Internetprogramm des Druckservers<br />
zugreifen zu können.<br />
Für Benutzer von Windows<br />
1. Legen Sie die <strong>Installation</strong>s-CD ein<br />
und klicken Sie auf Install Utility<br />
(Programm installieren).<br />
2. Folgen Sie den<br />
<strong>Installation</strong>sschritten und klicken<br />
Sie abschließend auf Finish<br />
(Fertigstellen).<br />
3. Doppelklicken Sie auf das Symbol<br />
für das Druckserverprogramm.<br />
3<br />
Deutsch<br />
PS-Utility<br />
V3.00
4. Klicken Sie dann auf Change IP<br />
Address (IP-Adresse ändern).<br />
5. Markieren Sie Manually Assign<br />
(Manuell zuweisen) und geben Sie<br />
eine IP-Adresse ein, die Ihrem<br />
gegenwärtigen Netzwerksegment<br />
entspricht. Klicken Sie auf OK. Die<br />
Änderung wird in einem neuen<br />
Popup-Fenster angezeigt. Klicken<br />
Sie auf OK.<br />
6. Klicken Sie im<br />
Druckserverprogramm auf Show<br />
Web Setup (Web-Setup anzeigen).<br />
Notieren Sie sich die Server- und<br />
Druckernamen.<br />
4<br />
Deutsch
Hinweis: Wenn Sie Windows 95/98(SE)/ME verwenden, muss NETBEUI<br />
installiert sein, bevor Sie die untenstehenden Anweisungen ausführen können.<br />
Bei Windows 2000/XP können Sie Ihren Drucker einfach entsprechend den<br />
folgenden Schritten hinzufügen. Detaillierte Hinweise zum TCP/IP-Druck<br />
entnehmen Sie bitte der Bedienungsanleitung auf der CD.<br />
7. Gehen Sie zu Control Panel<br />
(Systemsteuerung) und<br />
doppelklicken Sie dort auf<br />
Printers and Faxes (Drucker und<br />
Faxgeräte). Klicken Sie auf Add<br />
Printer (Drucker hinzufügen).<br />
8. Wählen Sie im Add Printer<br />
Wizard (Druckerinstallations-<br />
Assistent) die Option Network<br />
Printer (Netzwerkdrucker) aus und<br />
klicken Sie auf Next (Weiter).<br />
5<br />
Deutsch
9. Markieren Sie Connect to this<br />
printer (Verbindung mit folgendem<br />
Drucker herstellen) und geben Sie<br />
die Namen von Server und Drucker<br />
im folgenden Format ein:<br />
\\Servername\Druckername<br />
klicken Sie auf Next (Weiter).<br />
10. Klicken Sie auf OK.<br />
11. Wählen Sie den geeigneten<br />
Treiber für Ihren Drucker aus und<br />
klicken Sie auf Next (Weiter).<br />
12. Markieren Sie Yes (Ja) und<br />
klicken Sie auf Next (Weiter).<br />
Klicken Sie auf Finish<br />
(Fertigstellen), um die <strong>Installation</strong><br />
abzuschließen.<br />
Ihre <strong>Installation</strong> ist beendet!<br />
Hinweis: Zusätzliche Informationen zu den erweiterten Funktionen finden Sie in<br />
der Bedienungsanleitung.<br />
6<br />
Deutsch
Troubleshooting<br />
Q1. I cannot add a network printer after I typed the server name and<br />
printer name.<br />
A1. Please double check your hardware connections. Make sure that<br />
your printer is connected properly to the print server and your power<br />
adapter is connected properly to a power outlet.<br />
Q2. I have double checked my hardware connections and have verified<br />
that everything is connected properly, but I still cannot connect to my<br />
printer after I typed in the server name and printer name.<br />
A2. Make sure that you are typing the correct printer name. If your USB<br />
printer is connected to the USB2 slot, then use the Printer Name that<br />
is by the USB2 heading in the web configuration utility. The following<br />
examples will give you a better idea of how the print server maps<br />
each physical port with a logical name:<br />
LPT port = \\PS-567787\PS-567787-LP1<br />
USB1 port = \\PS-567787\PS-567787-U1<br />
USB2 port = \\PS-567787\PS-567787-U2<br />
Q3. I verified that the hardware installation is correct and typed the<br />
correct printer name, but I still cannot find the network printer.<br />
A3. Make sure that the server name and printer name is entered correctly.<br />
There should be no spaces, and the back slashes that separate the<br />
server name and printer name should be this “\\”, instead of this ”//”.<br />
Q4. I typed in the server name and printer name correctly and<br />
successfully installed the network printer. But I can't print a test page.<br />
A4. Make sure that the printer is online by turning the printer on. Make<br />
sure the power adapter of your printer is properly connected to a<br />
power outlet.<br />
Q5. I successfully added a network printer to my computer, and my<br />
printer is receiving power. I can also print a test page, but I cannot print<br />
anything from Microsoft Word or other applications.<br />
A5. Make sure to set the newly installed network printer to your default<br />
printer.<br />
7
Q6. I configured my print server to automatically receive an IP Address<br />
from a DHCP server, and now I cannot go into the print server's web<br />
utility.<br />
A6. Press the Reset button at the back of the <strong>TE100</strong>-<strong>P21</strong>, hold the button<br />
for 15 seconds, release the button, and enter http://192.168.0.1 in a<br />
web browser to access the web utility feature.<br />
Q7. I pressed the reset button and held it for 15 seconds. I also typed in<br />
http://192.168.0.1 in a web browser, but I still cannot access my print<br />
server.<br />
A7. Make sure to change your local IP address to 192.168.0.xxx where<br />
xxx is an available number between 2 to 254. You can also use the<br />
PS-Utility to locate the print server's IP address, or enable UPnP.<br />
If you have any questions regarding the print server, please contact <strong>TRENDnet</strong><br />
Technical Support Department.<br />
8
Certifications<br />
This equipment has been tested and found to comply with FCC and CE Rules.<br />
Operation is subject to the following two conditions:<br />
(1) This device may not cause harmful interference.<br />
(2) This device must accept any interference received. Including interference that may<br />
cause undesired operation.<br />
Waste electrical and electronic products must not<br />
be disposed of with household waste. Please<br />
recycle where facilities exist. Check with you Local<br />
Authority or Retailer for recycling advice.<br />
NOTE: THE MANUFACTURER IS NOT RESPONSIBLE FOR ANY RADIO OR TV<br />
INTERFERENCE CAUSED BY UNAUTHORIZED MODIFICATIONS TO THIS<br />
EQUIPMENT. SUCH MODIFICATIONS COULD VOID THE USER’S AUTHORITY TO<br />
OPERATE THE EQUIPMENT.<br />
ADVERTENCIA<br />
En todos nuestros equipos se mencionan claramente las caracteristicas del adaptador de<br />
alimentacón necesario para su funcionamiento. El uso de un adaptador distinto al<br />
mencionado puede producir daños fisicos y/o daños al equipo conectado. El adaptador<br />
de alimentación debe operar con voltaje y frecuencia de la energia electrica domiciliaria<br />
existente en el pais o zona de instalación.
<strong>TRENDnet</strong> Technical Support<br />
US . Canada<br />
Toll Free Telephone: 1(866) 845-3673<br />
24/7 Tech Support<br />
Europe (Germany France Italy Spain Switzerland UK)<br />
Toll Free Telephone: +00800 60 76 76 67<br />
English/Espanol - 24/7<br />
Francais/Deutsch - 11am-8pm, Monday - Friday MET<br />
Worldwide<br />
Telephone: +(31) (0) 20 504 05 35<br />
English/Espanol - 24/7<br />
Francais/Deutsch - 11am-8pm, Monday - Friday MET<br />
Product Warranty Registration<br />
Please take a moment to register your product online.<br />
Go to <strong>TRENDnet</strong>’s website at http://www.trendnet.com<br />
20675 Manhattan Place<br />
Torrance, CA 90501<br />
USA<br />
. . . . .<br />
Copyright ©2006. All Rights Reserved. <strong>TRENDnet</strong>.