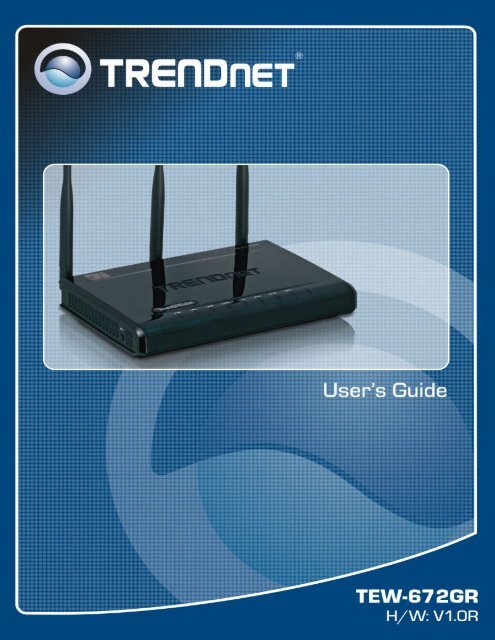
TEW-672GR - TRENDnet
TEW-672GR - TRENDnet
TEW-672GR - TRENDnet

Create successful ePaper yourself
Turn your PDF publications into a flip-book with our unique Google optimized e-Paper software.
Federal Communication Commission Interference Statement<br />
This equipment has been tested and found to comply with the limits for a Class B digital device,<br />
pursuant to Part 15 of the FCC Rules. These limits are designed to provide reasonable protection<br />
against harmful interference in a residential installation. This equipment generates, uses and can<br />
radiate radio frequency energy and, if not installed and used in accordance with the instructions,<br />
may cause harmful interference to radio communications. However, there is no guarantee that<br />
interference will not occur in a particular installation. If this equipment does cause harmful<br />
interference to radio or television reception, which can be determined by turning the equipment off<br />
and on, the user is encouraged to try to correct the interference by one of the following measures:<br />
- Reorient or relocate the receiving antenna.<br />
- Increase the separation between the equipment and receiver.<br />
- Connect the equipment into an outlet on a circuit different from that to which the receiver is<br />
connected.<br />
- Consult the dealer or an experienced radio/TV technician for help.<br />
This device complies with Part 15 of the FCC Rules. Operation is subject to the following two<br />
conditions: (1) This device may not cause harmful interference, and (2) this device must accept any<br />
interference received, including interference that may cause undesired operation.<br />
FCC Caution: Any changes or modifications not expressly approved by the party responsible for<br />
compliance could void the user's authority to operate this equipment.<br />
IMPORTANT NOTE:<br />
FCC Radiation Exposure Statement:<br />
This equipment complies with FCC radiation exposure limits set forth for an uncontrolled<br />
environment. This equipment should be installed and operated with minimum distance 20cm<br />
between the radiator & your body.<br />
This transmitter must not be co-located or operating in conjunction with any other antenna or<br />
transmitter.<br />
For product available in the USA/Canada market, only channel 1~11 can be operated. Selection of<br />
other channels is not possible.<br />
This device is going to be operated in 5.15~5.25GHz frequency range, it is restricted in indoor<br />
environment only.<br />
The availability of some specific channels and/or operational frequency bands are country<br />
dependent and are firmware programmed at the factory to match the intended destination. The<br />
firmware setting is not accessible by the end user.<br />
1
Copyright<br />
This publication, including all photographs, illustrations and software, is protected under international<br />
copyright laws, with all rights reserved. Neither this manual, nor any of the material contained herein, may<br />
be reproduced without written consent of the author.<br />
Copyright 2008<br />
Trademark recognition<br />
All product names used in this manual are the properties of their respective owners and are acknowledged.<br />
2
Table of Contents<br />
Getting Started with the <strong>TEW</strong>-<strong>672GR</strong> ------------------------------------- 3<br />
Package Contents ------------------------------------------------------- 4<br />
Minimum System Requirements ------------------------------------ 4<br />
Wireless LAN Networking -------------------------------------------------- 5<br />
Introduction -------------------------------------------------------------- 9<br />
Features ------------------------------------------------------------------- 9<br />
Hardware Overview ---------------------------------------------------------- 10<br />
LED Indications --------------------------------------------------------- 10<br />
Rear Panel ---------------------------------------------------------------- 10<br />
Installation Considerations -------------------------------------------- 11<br />
Getting Started ----------------------------------------------------------- 11<br />
Using the Configuration Menu ---------------------------------------------- 12<br />
Network -------------------------------------------------------------------- 13<br />
Wireless -------------------------------------------------------------------- 20<br />
Advanced ------------------------------------------------------------------ 28<br />
Administrator ------------------------------------------------------------ 42<br />
3
Getting Started with the <strong>TEW</strong>-<strong>672GR</strong><br />
Congratulations on purchasing the <strong>TEW</strong>-<strong>672GR</strong>! This manual provides information for setting up and<br />
configuring the <strong>TEW</strong>-<strong>672GR</strong>. This manual is intended for both home users and professionals.<br />
The following conventions are used in this manual:<br />
THE NOTE SYMBOL INDICATES ADDITIONAL INFORMATION ON THE<br />
TOPIC AT HAND.<br />
THE TIP SYMBOL INDICATES HELPFULL INFORMATION AND TIPS TO<br />
IMPROVE YOUR NETWORK EXPERIENCE.<br />
THE CAUTION SYMBOL ALERTS YOU TO SITUATIONS THAT MAY<br />
DEGRADE YOUR NETWORKING EXPERIENCE OR COMPROMISE<br />
LIKE NOTES AND TIPS, THE IMPORTANT SYMBOL INDICATES<br />
INFORMATION THAT CAN IMPROVE NETWORKING. THIS INFORMATION<br />
SHOULD NOT BE OVERLOOKED.<br />
4
Package Contents<br />
<strong>TEW</strong>-<strong>672GR</strong> 2.4/5GHz Dual-Band Wireless 802.11n(DRAFT) Giga Router<br />
CAT-5 Ethernet Cable<br />
Power Adapter (12V, 1A)<br />
CD-ROM with Manual<br />
Quick Installation Guide<br />
Using a power supply with a different voltage than the one included with your product will<br />
cause damage and void the warranty for this product.<br />
Minimum System Requirements<br />
<br />
<br />
<br />
Ethernet-Based Cable or DSL Modem<br />
Computers with Windows, Macintosh, or Linux-based operating systems with an installed Ethernet<br />
adapter and CD-ROM Drive<br />
Internet Explorer Version 6.0 or Netscape Navigator Version 7.0 and Above<br />
5
Wireless LAN Networking<br />
This section provides background information on wireless LAN networking technology. Consult the<br />
Glossary for definitions of the terminology used in this section.<br />
THE INFORMATION IN THIS SECTION IS FOR YOUR REFERENCE. CHANGING<br />
NETWORK SETTINGS AND PARTICULARLY SECURITY SETTTINGS SHOULD ONLY BE<br />
DONE BY AN AUTHORIZED ADMINISTRATOR.<br />
Transmission Rate (Transfer Rate)<br />
The <strong>TEW</strong>-<strong>672GR</strong> provides various transmission (data) rate options for you to select. In most networking<br />
scenarios, the factory default Best (automatic) setting proves the most efficient. This setting allows your<br />
<strong>TEW</strong>-<strong>672GR</strong> to operate at the maximum transmission (data) rate. When the communication quality drops<br />
below a certain level, the <strong>TEW</strong>-<strong>672GR</strong> automatically switches to a lower transmission (data) rate.<br />
Transmission at lower data speeds is usually more reliable. However, when the communication quality<br />
improves again, the <strong>TEW</strong>-<strong>672GR</strong> gradually increases the transmission (data) rate again until it reaches the<br />
highest available transmission rate.<br />
Types of Wireless Networks<br />
Wireless LAN networking works in either of the two modes: ad-hoc and infrastructure. In infrastructure<br />
mode, wireless devices communicate to a wired LAN via access points. Each access point and its wireless<br />
devices are known as a Basic Service Set (BSS). An Extended Service Set (ESS) is two or more BSSs in the<br />
same subnet. In ad hoc mode (also known as peer-to-peer mode), wireless devices communicate with each<br />
other directly and do not use an access point. This is an Independent BSS (IBSS).<br />
To connect to a wired network within a coverage area using access points, set the operation mode to<br />
Infrastructure (BSS). To set up an independent wireless workgroup without an access point, use Ad-hoc (IBSS)<br />
mode.<br />
AD-HOC (IBSS) NETWORK<br />
Ad-hoc mode does not require an access point or a wired network. Two or more wireless stations<br />
communicate directly to each other. An ad-hoc network may sometimes be referred to as an Independent<br />
Basic Service Set (IBSS).<br />
6
To set up an ad-hoc network, configure all the stations in ad-hoc mode. Use the same SSID and channel for<br />
each station.<br />
7
When a number of wireless stations are connected using a single access point, you have a Basic Service Set<br />
(BSS).<br />
In the ESS diagram below, communication is done through the access points, which relay data packets to<br />
other wireless stations or devices connected to the wired network. Wireless stations can then access<br />
resources, such as a printer, on the wired network.<br />
8
In an ESS environment, users are able to move from one access point to another without losing the<br />
connection. In the diagram below, when the user moves from BSS (1) to BSS (2) the WLAN client devices<br />
automatically switches to the channel used in BSS (2).<br />
Roaming in an ESS network diagram<br />
9
Introduction<br />
The 300Mbps Dual Band Wireless N Gigabit Router offers unsurpassed wireless speed, coverage and<br />
reliability. Enjoy up to 14x the speed and 6x the coverage of a wireless g connection*.<br />
Dual Band wireless n technology uses 11 additional wireless channels, reduces wireless interference and<br />
optimizes performance in the most challenging environments.<br />
Advanced Multiple Input Multiple Output (MIMO) antenna technology eliminates wireless dead spots.<br />
Advanced wireless encryption and a manual on/off wireless switch keeps your data safe. Wireless Protected<br />
Setup (WPS) integrates other WPS supported wireless adapters at the touch of a button. Seamlessly<br />
stream HD media, download files, surf and play games all at the same time.<br />
**Maximum wireless signal rates are referenced from IEEE 802.11 theoretical specifications. Actual data<br />
throughput and coverage will vary depending on interference, network traffic, building materials and other<br />
conditions.<br />
Features<br />
IEEE 802.11n draft 2.0 and IEEE 802.11a/b/g compliant<br />
Dual band 2.4Ghz and 5Ghz Wireless Local Area Networking (WLAN) in one device<br />
4 x 10/100/1000Mbps Auto-MDIX LAN ports and 1 x 10/100/1000Mbps WAN port (Internet)<br />
Gigabit LAN ports for high speed network connectivity<br />
Compatible with most popular cable/DSL Internet service providers using Dynamic/Static IP, PPPoE, PPTP and L2TP<br />
High-speed data rates up to 300Mbps using an IEEE 802.11n draft 2.0 connection<br />
3 external antennas provide high-speed performance and expansive wireless coverage<br />
Advanced Firewall protection with Network Address Translation (NAT) and Stateful Packet Inspection (SPI)<br />
Access restriction with Internet Access Control; time scheduling, URL and MAC filtering<br />
Built in pre-configured virtual servers and Application Level Gateway services for special Internet applications<br />
Universal Plug and Play (UPnP) for auto discovery and support for device configuration of Internet applications<br />
Enable/disable wireless functionality with the WLAN on/off toggle switch<br />
Multiple pass-through sessions for popular VPN applications (IPSec, L2TP and PPTP)<br />
Easy setup via Web browser using the latest versions of Internet Explorer, FireFox, and Safari<br />
One touch wireless security setup using the Wi-Fi Protected Setup (WPS) button<br />
10
Complete wireless security with WPA/WPA2, WPA-PSK/WPA2-PSK, and WEP<br />
Windows 95/98/NT/2000/XP/2003 Server/Vista, Linux and Mac OS supported<br />
3-year limited warranty<br />
Product usage<br />
Note: The <strong>TEW</strong>-<strong>672GR</strong> only supports one wireless mode at a time. The dual band wireless n<br />
Router use 2.4GHz 802.11b/g/n or 5GHz 802.11a/n, only one frequency can be select for use.<br />
11
Hardware Overview<br />
LED Indications:<br />
LEDs Indication LED 1 Power Green ON:<br />
Power ON<br />
Green OFF:<br />
Power OFF<br />
LED 2 WAN Green/Orange OFF: No link<br />
Green ON: 10/100Mbps connection established<br />
Green Blinking: 10/100Mbps connected with data traffic<br />
Orange ON: 1000Mbps connection established<br />
Orange Blinking: 1000Mbps connected with data traffic<br />
LED 3 LAN 1 Green/Orange OFF: No link<br />
Green ON: 10/100Mbps connection established<br />
Green Blinking: 10/100Mbps connected with data traffic<br />
Orange ON: 1000Mbps connection established<br />
Orange Blinking: 1000Mbps connected with data traffic<br />
LED 4 LAN 2 Green/Orange OFF: No link<br />
Green ON: 10/100Mbps connection established<br />
Green Blinking: 10/100Mbps connected with data traffic<br />
Orange ON: 1000Mbps connection established<br />
Orange Blinking: 1000Mbps connected with data traffic<br />
12
LED 5 LAN 3 Green/Orange OFF: No link<br />
Green ON: 10/100Mbps connection established<br />
Green Blinking: 10/100Mbps connected with data traffic<br />
Orange ON: 1000Mbps connection established<br />
Orange Blinking: 1000Mbps connected with data traffic<br />
LED 6 LAN 4 Green/Orange OFF: No link<br />
Green ON: 10/100Mbps connection established<br />
Green Blinking: 10/100Mbps connected with data traffic<br />
Orange ON: 1000Mbps connection established<br />
Orange Blinking: 1000Mbps connected with data traffic<br />
LED 7 Wireless Green/Orange OFF: Wireless disable<br />
Green ON: 11b/g mode enabled<br />
Green Blinking: 11b/g mode enables with data traffic<br />
Orange ON: 11n mode enabled<br />
Orange Blinking: 11n mode enabled with data traffic<br />
LED 8 WPS Green OFF: No WPS/PBC activity<br />
LED 9 Reserve Green<br />
Green Blinking : PBC in progress<br />
Orange Blinking (faster): WPS error<br />
Orange Blinking (normal): WPS success<br />
Please note: WPS button on<br />
the side of the <strong>TEW</strong>-<strong>672GR</strong><br />
13
Rear panel: (from bottom to top)<br />
Standard Wired: IEEE 802.3 (10Base-T), 802.3u (100Base-TX), 802.3ab (1000Base-T)<br />
I/O Ports<br />
Wireless: IEEE 802.11a, 802.11b, 802.11g, 802.11n (draft)<br />
One WAN Port 10/100/1000Mbps Auto-MDIX<br />
Four LAN Ports 10/100/1000Mbps Auto-MDIX<br />
Slide Switch Turn ON/OFF wireless LAN<br />
Power Jack DC Input, φ 2.0 (Diameter)<br />
Reset Button Reset to factory default setting<br />
WPS Button (side) Trigger WPS/PBC function<br />
14
Installation Considerations<br />
The <strong>TEW</strong>-<strong>672GR</strong> 2.4/5GHz Dual-Band Wireless 802.11n(DRAFT) Giga Router lets you access your network, using a<br />
wireless connection, from virtually anywhere within its operating range. Keep in mind, however, that the number,<br />
thickness and location of walls, ceilings, or other objects that the wireless signals must pass through, may limit the<br />
range. Typical ranges vary depending on the types of materials and background RF (radio frequency) noise in your<br />
home or business. The key to maximizing wireless range is to follow these basic guidelines:<br />
1 Keep the number of walls and ceilings between the <strong>TEW</strong>-<strong>672GR</strong> and other network devices to a minimum -<br />
each wall or ceiling can reduce your wireless product’s range from 3-90 feet (1-30 meters.) Position your<br />
devices so that the number of walls or ceilings is minimized.<br />
2 Be aware of the direct line between network devices. A wall that is 1.5 feet thick (.5 meters), at a 45-degree<br />
angle appears to be almost 3 feet (1 meter) thick. At a 2-degree angle it looks over 42 feet (14 meters) thick!<br />
Position devices so that the signal will travel straight through a wall or ceiling (instead of at an angle) for better<br />
reception.<br />
3 Building Materials can impede the wireless signal - a solid metal door or aluminum studs may have a negative<br />
effect on range. Try to position wireless devices and computers with wireless adapters so that the signal passes<br />
through drywall or open doorways and not other materials.<br />
4 Keep your product away (at least 3-6 feet or 1-2 meters) from electrical devices or appliances that generate<br />
extreme RF noise.<br />
Getting Started<br />
For a typical wireless setup at home, please do the following:<br />
1. You will need broadband Internet access (a Cable or DSL-subscriber line into your home or office)<br />
2. Consult with your Cable or DSL provider for proper installation of the modem.<br />
3. Connect the Cable or DSL modem to the <strong>TEW</strong>-<strong>672GR</strong> Wireless Broadband Router (WAN port).<br />
4. Ethernet LAN ports of the <strong>TEW</strong>-<strong>672GR</strong> are Auto MDI/MDIX and will work with both<br />
Straight-Through and Cross-Over cable.<br />
15
Using the Configuration Menu<br />
Whenever you want to configure your <strong>TEW</strong>-<strong>672GR</strong>, you can access the Configuration Menu through your PC<br />
by opening the Web-browser and typing in the IP Address of the <strong>TEW</strong>-<strong>672GR</strong>. The <strong>TEW</strong>-<strong>672GR</strong>’s default IP<br />
Address is http://192.168.10.1<br />
Open the Web browser.<br />
Type in the IP Address of the Router (http://192.168.10.1).<br />
If you have changed the default IP Address assigned to the <strong>TEW</strong>-<strong>672GR</strong>, make sure to enter the<br />
correct IP Address.<br />
Select admin in the User Name field.<br />
Leave the Password blank.<br />
Click Login In.<br />
16
Network<br />
Network: WAN Setting<br />
WAN Connection Type<br />
Static<br />
DHCP<br />
PPPoE<br />
There are several connection types to choose from: Static IP, DHCP, PPPoE, PPTP, L2TP, and Russia<br />
PPTP. If you are unsure of your connection method, please contact your Internet Service Provider.<br />
Used when your ISP provides you a set IP address that does not change. The IP information is manually<br />
entered in your IP configuration settings. You must enter the IP address, Subnet Mask, Gateway, Primary<br />
DNS Server, and Secondary DNS Server. Your ISP provides you with all of this information.<br />
A method of connection where the ISP assigns your IP address when your router requests one from the<br />
ISP's server.<br />
Host Name: Some ISP's may check your computer's Host Name. The Host Name identifies your system<br />
to the ISP's server.<br />
Select this option if your ISP requires you to use a PPPoE (Point to Point Protocol over Ethernet)<br />
connection. DSL providers typically use this option. This method of connection requires you to enter a<br />
Username and Password (provided by your Internet Service Provider) to gain access to the Internet.<br />
Reconnect Mode: Typically PPPoE connections are not always on. The router allows you to set the<br />
reconnection mode. The settings are:<br />
Always on: A connection to the Internet is always maintained.<br />
17
L2TP<br />
PPTP<br />
On demand: A connection to the Internet is made as needed.<br />
Manual: You have to open up the Web-based management interface and click the Connect button<br />
manually any time that you wish to connect to the Internet.<br />
Maximum Idle Time: Time interval the machine can be idle before the PPPoE connection is<br />
disconnected. The Maximum Idle Time value is only used for the "On demand" and "Manual" reconnect<br />
modes.<br />
L2TP (Layer Two Tunneling Protocol) uses a virtual private network to connect to your ISP. This<br />
method of connection requires you to enter a Username and Password (provided by your Internet<br />
Service Provider) to gain access to the Internet.<br />
L2TP Server IP Address: The ISP provides this parameter, if necessary. The value may be the same as<br />
the Gateway IP Address.<br />
Reconnect Mode: Typically PPPoE connections are not always on. The router allows you to set the<br />
reconnection mode. The settings are:<br />
Always on: A connection to the Internet is always maintained.<br />
On demand: A connection to the Internet is made as needed.<br />
Manual: You have to open up the Web-based management interface and click the Connect button<br />
manually any time that you wish to connect to the Internet.<br />
Maximum Idle Time: Time interval the machine can be idle before the PPPoE connection is<br />
disconnected. The Maximum Idle Time value is only used for the "On demand" and "Manual" reconnect<br />
modes.<br />
WAN Interface IP Type<br />
Static: If your ISP has assigned a fixed IP address, select this option. The ISP provides the values for the<br />
following fields for WAN Interface IP Setting:<br />
IP Address, Subnet Mask , Default Gateway.<br />
Dynamic: If the ISP's servers assign the router's IP addressing upon establishing a connection, select this<br />
option.<br />
PPTP (Point to Point Tunneling Protocol) uses a virtual private network to connect to your ISP. This<br />
method of connection is primarily used in Europe. This method of connection requires you to enter a<br />
Username and Password (provided by your Internet Service Provider) to gain access to the Internet.<br />
PPTP Server IP Address: The ISP provides this parameter, if necessary. The value may be the same as<br />
the Gateway IP Address.<br />
Reconnect Mode: Typically PPPoE connections are not always on. The router allows you to set the<br />
reconnection mode. The settings are:<br />
Always on: A connection to the Internet is always maintained.<br />
On demand: A connection to the Internet is made as needed.<br />
Manual: You have to open up the Web-based management interface and click the Connect button<br />
manually any time that you wish to connect to the Internet.<br />
Maximum Idle Time: Time interval the machine can be idle before the PPPoE connection is<br />
18
disconnected. The Maximum Idle Time value is only used for the "On demand" and "Manual" reconnect<br />
modes.<br />
WAN Interface IP Type<br />
Static: If your ISP has assigned a fixed IP address, select this option. The ISP provides the values for the<br />
following fields for WAN Interface IP Setting:<br />
IP Address, Subnet Mask , Default Gateway, and optional for DNS Server<br />
Dynamic: If the ISP's servers assign the router's IP addressing upon establishing a connection, select this<br />
option.<br />
Russia PPTP<br />
The Russia PPTP can configure IP address on the WAN interface and establish PPTP to get IP<br />
address, subnet mask, default gateway and DNS for ANOTHER logical IP interface on WAN port.<br />
So the physical WAN port will have 2 logical IP interfaces and can communicate with internal<br />
ISP’s network resources and also communicate with Internet through PPTP tunnel. It is specified<br />
by Russia Cobrina ISP, user can configure it the same as the normal PPTP and PPTP<br />
server IP Address can use the domain name string.<br />
WAN MTU Setting<br />
The Maximum Transmission Unit (MTU) is a parameter that determines the largest packet size (in<br />
bytes) that the router will send to the WAN. If LAN devices send larger packets, the router will<br />
break them into smaller packets. Ideally, you should set this to match the MTU of the connection to<br />
your ISP. Typical values are 1500 bytes for an Ethernet connection and 1492 bytes for a PPPoE<br />
connection. If the router's MTU is set too high, packets will be fragmented downstream. If the<br />
router's MTU is set too low, the router will fragment packets unnecessarily and in extreme cases<br />
may be unable to establish some connections. In either case, network performance can suffer. t<br />
modes.<br />
MAC Address Clone<br />
Each networking device has it's own unique MAC address defined by the hardware manufacturer.<br />
Some ISP's may check your computer's MAC address. Some ISP's record the MAC address of the<br />
network adapter in the computer or router used to initially connect to their service. The ISP will<br />
then only grant Internet access to requests from a computer or router with this particular MAC<br />
address. This router has a different MAC address than the computer or router that initially<br />
connected to the ISP. If you need to change the MAC address of the rounter's WAN-side Ethernet<br />
interface, either type in an alternate MAC address (for example, the MAC address of the router<br />
initially connected to the ISP) or copy the MAC address of a PC. To copy the MAC address of the<br />
computer that initially connected to the ISP, connect to the router using that computer and click the<br />
Clone Your PC's MAC Address button. The WAN interface will then use the MAC address of the<br />
network adapter in your computer.<br />
19
Network: LAN Setting<br />
LAN Interface Setting<br />
IP Address<br />
The IP address of the this device on the local area network. Assign any unused IP address in the range of<br />
IP addresses available for the LAN. For example, 192.168.10.101.<br />
Subnet Mask<br />
The subnet mask of the local area network.<br />
20
DHCP Server Settings<br />
DHCP stands for Dynamic Host Configuration Protocol. The DHCP section is where you configure the<br />
built-in DHCP Server to assign IP addresses to the computers and other devices on your local area<br />
network (LAN).<br />
Enable DHCP Server<br />
Once your router is properly configured and this option is enabled, the DHCP Server will manage the IP<br />
addresses and other network configuration information for computers and other devices connected to<br />
your Local Area Network. There is no need for you to do this yourself.<br />
The computers (and other devices) connected to your LAN also need to have their TCP/IP configuration<br />
set to "DHCP" or "Obtain an IP address automatically". When you set Enable DHCP Server, the<br />
following options are displayed.<br />
DHCP IP Address Range<br />
These two IP values (Start and End) define a range of IP addresses that the DHCP Server uses when<br />
assigning addresses to computers and devices on your Local Area Network. Any addresses that are<br />
outside of this range are not managed by the DHCP Server; these could, therefore, be used for manually<br />
configured devices or devices that cannot use DHCP to obtain network address details automatically.<br />
It is possible for a computer or device that is manually configured to have an address that does reside<br />
within this range. In this case the address should be reserved, so that the DHCP Server knows that this<br />
specific address can only be used by a specific computer or device.<br />
Your router, by default, has a static IP address of 192.168.10.1. This means that addresses 192.168.10.2<br />
to 192.168.10.254 can be made available for allocation by the DHCP Server.<br />
Subnet Mask<br />
The subnet mask of the local area network.<br />
Gateway<br />
The IP address of the router on the local area network. For example, 192.168.10.1.<br />
DHCP Lease Time<br />
The amount of time that a computer may have an IP address before it is required to renew the lease. The<br />
lease functions just as a lease on an apartment would. The initial lease designates the amount of time<br />
before the lease expires. If the tenant wishes to retain the address when the lease is expired then a new<br />
lease is established. If the lease expires and the address is no longer needed than another tenant may use<br />
the address.<br />
Add/Edit DHCP Reservation<br />
This option lets you reserve IP addresses, and assign the same IP address to the network device with the<br />
specified MAC address any time it requests an IP address. This is almost the same as when a device has<br />
a static IP address except that the device must still request an IP address from the router. The router will<br />
provide the device the same IP address every time. DHCP Reservations are helpful for server computers<br />
on the local network that are hosting applications such as Web and FTP. Servers on your network should<br />
either use a static IP address or use this option.<br />
Computer Name<br />
You can assign a name for each computer that is given a reserved IP address. This may help you keep<br />
track of which computers are assigned this way. Example: Game Server.<br />
21
Clear<br />
IP Address:<br />
The LAN address that you want to reserve.<br />
MAC Address<br />
To input the MAC address of your system, enter it in manually or connect to the router's<br />
Web-Management interface from the system and click the Copy Your PC's MAC Address button.<br />
A MAC address is usually located on a sticker on the bottom of a network device. The MAC address is<br />
comprised of twelve digits. Each pair of hexadecimal digits are usually separated by dashes or colons<br />
such as 00-0D-88-11-22-33 or 00:0D:88:11:22:33. If your network device is a computer and the network<br />
card is already located inside the computer, you can connect to the router from the computer and click<br />
the Copy Your PC's MAC Address button to enter the MAC address.<br />
Re-initialize this area of the screen, discarding any changes you have made.<br />
DHCP Reservations List<br />
This shows clients that you have specified to reserve DHCP addresses. Click the Enable checkbox at the<br />
left to directly activate or de-activate the entry. An entry can be changed by clicking the Edit icon or can<br />
be deleted by clicking the Delete icon. When you click the Edit icon, the item is highlighted, and the<br />
"Edit DHCP Reservation" section is activated for editing.<br />
22
Network: DHCP Client List<br />
DHCP Client List<br />
In this section you can see what LAN devices are currently leasing IP addresses.<br />
23
Wireless<br />
Wireless: Basic<br />
Radio On/Off<br />
This indicates the wireless operating status. The wireless can be turned on or off by the slide switch.<br />
When the radio is on, the following parameters are in effect.<br />
Wireless Mode<br />
If all of the wireless devices you want to connect with this router can connect in the same transmission<br />
mode, you can improve performance slightly by choosing the appropriate wireless mode. If you have<br />
some devices that use a different transmission mode, choose the appropriate wireless mode. The<br />
<strong>TEW</strong>-<strong>672GR</strong> supports both 2.4GHz and 5GHz wireless networks. There are many different<br />
configuration options available to choose from. Use the drop down list to select the wireless mode.<br />
Note: One wireless mode can be selected can select at any one time. This means that you can only select<br />
one of the operating frequency at a time<br />
24
Wireless Mode options<br />
2.4GHz 802.11b/g mixed mode - This wireless mode works in the 2.4GHz frequency range<br />
and will allow both wireless b and wireless g client to connect and access the <strong>TEW</strong>-<strong>672GR</strong> at<br />
11Mbps for wireless b, at 54Mbps for wireless g and share access at the same time. Although<br />
the wireless b/g operates in the 2.4GHz frequency, it will allow the use of other 2.4GHz client<br />
devices (Wireless n/g @ 54Mbps) to connect and access at the same time.<br />
2.4GHz 802.11 wireless b/g mixed mode<br />
25
2.4GHz 802.11 n only – This wireless mode works in the 2.4GHz frequency range and will<br />
only allow the use of wireless n client devices to connect and access the <strong>TEW</strong>-<strong>672GR</strong> up to<br />
300Mbps*. Although the wireless n operates in the 2.4GHz frequency, this mode will only<br />
permit wireless n client devices to work and will exclude any other wireless mode and devices<br />
that are not wireless n only.<br />
2.4GHZ 802.11 wireless n only<br />
5GHz 802.11a/n mixed mode - This wireless mode works in the 5GHz frequency range and<br />
will only allow the use of wireless a/n dual band client devices to connect and access the<br />
<strong>TEW</strong>-<strong>672GR</strong> up to 300Mbps*. Dual band wireless client devices that support both wireless a/n<br />
can connect and access the <strong>TEW</strong>-<strong>672GR</strong> up to 300Mbps. Wireless a client devices can connect<br />
and access the <strong>TEW</strong>-<strong>672GR</strong> but, will only connect up to 54Mbps, (this due to the legacy<br />
limitation of wireless a technology for that standard). Although the wireless a/n operate in the<br />
same 5GHz frequency, this mode will only permit wireless a/n client devices to work and will<br />
exclude any other wireless mode and devices that are not wireless a/n. (note: wireless b/g/n will<br />
not be able to connect at the same time to the <strong>TEW</strong>-<strong>672GR</strong> with 5GHz wireless a/n mode<br />
enable).<br />
5GHz 802.11 wireless a/n mixed mode<br />
26
2.4 GHz 802.11b/g/n mixed mode - This wireless mode works in the 2.4GHz frequency range<br />
and will only allow the use of wireless g client devices to connect and access the <strong>TEW</strong>-<strong>672GR</strong><br />
at 11Mbps for wireless b, 54Mbps for wireless g and up to 300Mbps* for wireless n and share<br />
access at the same time. Although the wireless b/g/n operates in the same 2.4GHz frequency, it<br />
will allow the use of other 2.4GHz client devices (Wireless b/g/n) to connect and access at the<br />
same time.<br />
2.4GHz 802.11 wireless b/g/n mixed mode<br />
*Maximum wireless signal rates are referenced from IEEE 802.11 theoretical specifications. Actual data throughput and<br />
coverage will vary depending on interference, network traffic, building materials and other conditions.<br />
27
Wireless Network Name (SSID)<br />
When you are browsing for available wireless networks, this is the name that will appear in the list<br />
(unless Visibility Status is set to Invisible, see below). This name is also referred to as the SSID. For<br />
security purposes, it is highly recommended to change from the pre-configured network name. Add up<br />
to three additional SSIDs to create virtual wireless networks from one wireless Router Access Point<br />
device.<br />
Add Additional Wireless Network Name (SSID)<br />
To add additional wireless Network Names simply add the name to the Multiple SSID field and<br />
click on apply at the bottom of the page. When finished, go to the Security section in this Users<br />
Guide for wireless security configuration.<br />
28
Multiple SSID with the <strong>TEW</strong>-<strong>672GR</strong><br />
Frequency (Channel)<br />
A wireless network uses specific channels in the wireless spectrum to handle communication between<br />
clients. Some channels in your area may have interference from other electronic devices. Choose the<br />
clearest channel to help optimize the performance and coverage of your wireless network.<br />
29
Wireless Distribution System (WDS)<br />
When WDS is enabled, this access point functions as a wireless repeater and is able to wirelessly<br />
communicate with other APs via WDS links. Note that WDS is incompatible with WPA -- both features<br />
cannot be used at the same time. A WDS link is bidirectional; so this AP must know the MAC Address<br />
(creates the WDS link) of the other AP, and the other AP must have a WDS link back to this AP. Make<br />
sure the APs are configured with same channel number.<br />
WDS setup with <strong>TEW</strong>-<strong>672GR</strong> and multiple Access Points on the LAN<br />
30
Configuring WDS with <strong>TEW</strong>-<strong>672GR</strong><br />
Enable the option for WDS and select the Encryp Type for wireless security (Note: WDS supports<br />
wireless g/n modes. The use multiple Access Point will reduces the overall network throughput to ½ the<br />
<strong>TEW</strong>-<strong>672GR</strong>. For wireless security, WDS will only support WEP; however, you have the ability to use<br />
WPA as a non-standard configuration for securing WDS feature). Now, add the MAC Address of the<br />
wireless device that also supports WDS in to the blank fields. You can add up to three additional devices<br />
in the spaces provided. Click on apply at the bottom of the page, to apply your setting changes.<br />
31
HT Physical Mode<br />
In HT (High Throughput) Physical mode setting allow for control of the 802.11n wireless environment.<br />
Operating Mode<br />
Mixed Mode<br />
Green Field<br />
Mixed Mode:<br />
In this mode packets are transmitted with a preamble compatible with the legacy 802.11a/g, the rest of<br />
the packet has a new format. In this mode the receiver shall be able to decode both the Mixed Mode<br />
packets and legacy packets.<br />
Green Field:<br />
In this mode high throughput packets are transmitted without a legacy compatible part.<br />
Channel BandWidth:<br />
Set channel width of wireless radio.<br />
20<br />
20/40<br />
20 Channel Width = 20 MHz<br />
20/40 Channel Width = 20/40 MHz<br />
Guard Interval:<br />
Support Short/Long GI, the purpose of the guard interval is to introduce immunity to propagation delays,<br />
echoes and reflections, to which digital data is normally very sensitive.<br />
Long<br />
Auto<br />
Long Guard Interval, 800 nsec<br />
Short Guard Interval, 400 nsec<br />
MCS:<br />
Fix MCS rate for HT rate.<br />
0-15<br />
The Modulation and Coding Scheme (MCS) is a value that determines the modulation, coding and<br />
number of spatial channels.<br />
32
Wireless: Advanced<br />
Beacon Interval<br />
DTIM<br />
Beacons are packets sent by a wireless router to synchronize wireless devices. Specify a Beacon Period<br />
value between 20 and 1000. The default value is set to 100 milliseconds.<br />
A DTIM is a countdown informing clients of the next window for listening to broadcast and multicast<br />
messages. When the wireless router has buffered broadcast or multicast messages for associated clients,<br />
it sends the next DTIM with a DTIM Interval value. Wireless clients detect the beacons and awaken to<br />
receive the broadcast and multicast messages. The default value is 1. Valid settings are between 1 and<br />
255.<br />
Fragmentation Threshold<br />
Wireless frames can be divided into smaller units (fragments) to improve performance in the presence of<br />
RF interference and at the limits of RF coverage. Fragmentation will occur when frame size in bytes is<br />
greater than the Fragmentation Threshold. This setting should remain at its default value of 2346 bytes.<br />
Setting the Fragmentation value too low may result in poor performance.<br />
RTS Threshold<br />
When an excessive number of wireless packet collisions are occurring, wireless performance can be<br />
improved by using the RTS/CTS (Request to Send/Clear to Send) handshake protocol. The wireless<br />
transmitter will begin to send RTS frames (and wait for CTS) when data frame size in bytes is greater<br />
than the RTS Threshold. This setting should remain at its default value of 2346 bytes.<br />
Short Preamble and Slot<br />
Using a short (400ns) guard interval can increase throughput. However, it can also increase error rate in<br />
some installations, due to increased sensitivity to radio-frequency reflections. Select the option that<br />
works best for your installation.<br />
33
TX Burst<br />
Allows the wireless Router to deliver better throughput in the same period and environment in<br />
order to increase speed.<br />
Pkt_Aggregate<br />
Increase efficiency by aggregating multiple packets of application data into a single<br />
transmission frame. In this way, 802.11n networks can send multiple data packets with the fixed<br />
overhead cost of just a single frame.<br />
34
Wireless: Security<br />
Security Mode<br />
Unless one of these encryption modes is selected, wireless transmissions to and from your wireless<br />
network can be easily intercepted and interpreted by unauthorized users.<br />
WEP<br />
A method of encrypting data for wireless communication intended to provide the same level of privacy<br />
as a wired network. WEP is not as secure as WPA encryption. To gain access to a WEP network, you<br />
must know the key. The key is a string of characters that you create. When using WEP, you must<br />
determine the level of encryption. The type of encryption determines the key length. 128-bit encryption<br />
requires a longer key than 64-bit encryption. Keys are defined by entering in a string in HEX<br />
(hexadecimal - using characters 0-9, A-F) or ASCII (American Standard Code for Information<br />
Interchange - alphanumeric characters) format. ASCII format is provided so you can enter a string that is<br />
easier to remember. The ASCII string is converted to HEX for use over the network. Four keys can be<br />
defined so that you can change keys easily. A default key is selected for use on the network.<br />
WPA-Personal and WPA-Enterprise<br />
Both of these options select some variant of Wi-Fi Protected Access (WPA) -- security standards<br />
published by the Wi-Fi Alliance. The WPA Mode further refines the variant that the router should<br />
employ.<br />
WPA Mode: WPA is the older standard; select this option if the clients that will be used with the router<br />
only support the older standard. WPA2 is the newer implementation of the stronger IEEE 802.11i<br />
security standard. With the "WPA2" option, the router tries WPA2 first, but falls back to WPA if the<br />
client only supports WPA. With the "WPA2 Only" option, the router associates only with clients that<br />
also support WPA2 security.<br />
Cipher Type: The encryption algorithm used to secure the data communication. TKIP (Temporal Key<br />
Integrity Protocol) provides per-packet key generation and is based on WEP. AES (Advanced<br />
Encryption Standard) is a very secure block based encryption. With the "TKIP and AES" option, the<br />
router negotiates the cipher type with the client, and uses AES when available.<br />
Group Key Update Interval: The amount of time before the group key used for broadcast and multicast<br />
data is changed.<br />
35
Group Key Update Interval: The amount of time before the group key used for broadcast and<br />
multicast data is changed.<br />
WPA-Personal<br />
This option uses Wi-Fi Protected Access with a Pre-Shared Key (PSK).<br />
Pre-Shared Key: The key is entered as a pass-phrase of up to 63 alphanumeric characters in ASCII<br />
(American Standard Code for Information Interchange) format at both ends of the wireless connection. It<br />
cannot be shorter than eight characters, although for proper security it needs to be of ample length and<br />
should not be a commonly known phrase. This phrase is used to generate session keys that are unique<br />
for each wireless client.<br />
WPA-Enterprise<br />
This option works with a RADIUS Server to authenticate wireless clients. Wireless clients should have<br />
established the necessary credentials before attempting to authenticate to the Server through this<br />
Gateway. Furthermore, it may be necessary to configure the RADIUS Server to allow this Gateway to<br />
authenticate users.<br />
Authentication Timeout: Amount of time before a client will be required to re-authenticate.<br />
RADIUS Server IP Address: The IP address of the authentication server.<br />
RADIUS Server Port: The port number used to connect to the authentication server.<br />
RADIUS Server Shared Secret: A pass-phrase that must match with the authentication server.<br />
Wireless MAC Filtering<br />
Choose the type of MAC filtering needed.<br />
Turn MAC Filtering Disable: When "Disable" is selected, MAC addresses are not used to control<br />
network access.<br />
Add MAC Filtering Rule<br />
MAC Address<br />
Use this section to add MAC addresses to the list below.<br />
Enter the MAC address of a computer that you want to control with MAC filtering. Computers that have<br />
obtained an IP address from the router's DHCP server will be in the DHCP Client List. Select a device<br />
from the drop down menu.<br />
36
Wireless: WPS<br />
WPS<br />
Enable<br />
Enable the WPS feature.<br />
Lock Wireless Security Settings<br />
PIN Settings<br />
Locking the wireless security settings prevents the settings from being changed by any new external<br />
registrar using its PIN. Devices can still be added to the wireless network using WPS.<br />
A PIN is a unique number that can be used to add the router to an existing network or to create a new<br />
network. The default PIN may be printed on the bottom of the router. For extra security, a new PIN can<br />
be generated. You can restore the default PIN at any time. Only the Administrator ("admin" account) can<br />
change or reset the PIN.<br />
Current PIN<br />
Shows the current value of the router's PIN.<br />
Reset To WPS Default<br />
37
Restore the default PIN of the router.<br />
Generate New PIN<br />
Create a random number that is a valid PIN. This becomes the router's PIN. You can then copy this PIN<br />
to the user interface of the registrar.<br />
38
Wireless: Station List<br />
39
Advanced<br />
Advanced: DMZ<br />
DMZ Setting<br />
DMZ means "Demilitarized Zone." If an application has trouble working from behind the router, you<br />
can expose one computer to the Internet and run the application on that computer.<br />
When a LAN host is configured as a DMZ host, it becomes the destination for all incoming packets that<br />
do not match some other incoming session or rule. If any other ingress rule is in place, that will be used<br />
instead of sending packets to the DMZ host; so, an active session, virtual server, active port trigger, or<br />
port forwarding rule will take priority over sending a packet to the DMZ host. (The DMZ policy<br />
resembles a default port forwarding rule that forwards every port that is not specifically sent anywhere<br />
else.)<br />
The router provides only limited firewall protection for the DMZ host. The router does not forward a<br />
TCP packet that does not match an active DMZ session, unless it is a connection establishment packet<br />
(SYN). Except for this limited protection, the DMZ host is effectively "outside the firewall". Anyone<br />
considering using a DMZ host should also consider running a firewall on that DMZ host system to<br />
provide additional protection.<br />
Packets received by the DMZ host have their IP addresses translated from the WAN-side IP address of<br />
the router to the LAN-side IP address of the DMZ host. However, port numbers are not translated; so<br />
applications on the DMZ host can depend on specific port numbers.<br />
The DMZ capability is just one of several means for allowing incoming requests that might appear<br />
unsolicited to the NAT. In general, the DMZ host should be used only if there are no other alternatives,<br />
because it is much more exposed to cyberattacks than any other system on the LAN. Thought should be<br />
given to using other configurations instead: a virtual server, a port forwarding rule, or a port trigger.<br />
Virtual servers open one port for incoming sessions bound for a specific application (and also allow port<br />
redirection and the use of ALGs). Port forwarding is rather like a selective DMZ, where incoming traffic<br />
targeted at one or more ports is forwarded to a specific LAN host (thereby not exposing as many ports as<br />
a DMZ host). Port triggering is a special form of port forwarding, which is activated by outgoing traffic,<br />
and for which ports are only forwarded while the trigger is active.<br />
Few applications truly require the use of the DMZ host. Following are examples of when a DMZ host<br />
might be required:<br />
• A host needs to support several applications that might use overlapping ingress ports such that<br />
two port forwarding rules cannot be used because they would potentially be in conflict.<br />
40
Enable DMZ<br />
• To handle incoming connections that use a protocol other than ICMP, TCP, UDP, and IGMP<br />
(also GRE and ESP, when these protocols are enabled by the PPTP and IPSec ALGs ).<br />
DMZ IP Address<br />
Putting a computer in the DMZ may expose that computer to a variety of security risks. Use of this<br />
option is only recommended as a last resort.<br />
Specify the LAN IP address of the LAN computer that you want to have unrestricted Internet<br />
communication.<br />
41
Advanced: Virtual Server<br />
Add/Edit Virtual Server<br />
Enable<br />
Name<br />
Specifies whether the entry will be active or inactive.<br />
Assign a meaningful name to the virtual server, for example Web Server. Several well-known types of<br />
virtual server are available from the "Application Name" drop-down list. Selecting one of these entries<br />
fills some of the remaining parameters with standard values for that type of server.<br />
IP Address<br />
The IP address of the system on your internal network that will provide the virtual service, for example<br />
192.168.10.50. You can select a computer from the list of DHCP clients in the "Computer Name"<br />
drop-down menu, or you can manually enter the IP address of the server computer.<br />
Protocol<br />
Select the protocol used by the service. The common choices -- UDP, TCP, and both UDP and TCP --<br />
can be selected from the drop-down menu. To specify any other protocol, select "Other" from the list,<br />
then enter the corresponding protocol number (as assigned by the IANA) in the Protocol box.<br />
Private Port<br />
The port that will be used on your internal network.<br />
Public Port<br />
42
The port that will be accessed from the Internet.<br />
Schedule<br />
Clear<br />
Select a schedule for when the service will be enabled. If you do not see the schedule you need in the list<br />
of schedules.<br />
Re-initialize this area of the screen, discarding any changes you have made.<br />
43
Advanced: Routing<br />
Add/Edit Route<br />
Destination IP<br />
Adds a new route to the IP routing table or edits an existing route.<br />
The IP address of packets that will take this route.<br />
Gateway<br />
Metric<br />
Specifies the next hop to be taken if this route is used. A gateway of 0.0.0.0 implies there is no next hop,<br />
and the IP address matched is directly connected to the router on the interface specified: LAN or WAN.<br />
The route metric is a value from 1 to 16 that indicates the cost of using this route. A value of 1 is the<br />
lowest cost, and 15 is the highest cost. A value of 16 indicates that the route is not reachable from this<br />
router. When trying to reach a particular destination, computers on your network will select the best<br />
route, ignoring unreachable routes.<br />
Interface<br />
Clear<br />
Specifies the interface -- LAN or WAN -- that the IP packet must use to transit out of the router, when<br />
this route is used.<br />
Re-initialize this area of the screen, discarding any changes you have made.<br />
44
Routes List<br />
The section shows the current routing table entries. Certain required routes are predefined and cannot be<br />
changed. Routes that you add can be changed by clicking the Edit icon or can be deleted by clicking the<br />
Delete icon. When you click the Edit icon, the item is highlighted, and the "Edit Route" section is<br />
activated for editing. Click the Enable checkbox at the left to directly activate or de-activate the entry.<br />
45
Advanced: Access Control<br />
Enable<br />
By default, the Access Control feature is disabled. If you need Access Control, check this option.<br />
Note: When Access Control is disabled, every device on the LAN has unrestricted access to the Internet.<br />
However, if you enable Access Control, Internet access is restricted for those devices that have an<br />
Access Control Policy configured for them. All other devices have unrestricted access to the Internet.<br />
46
Advanced: Special Applications<br />
Add/Edit Port Trigger Rule<br />
Enable<br />
Name<br />
Specifies whether the entry will be active or inactive.<br />
Enter a name for the Special Application Rule, for example Game App, which will help you identify the<br />
rule in the future. Alternatively, you can select from the Application list of common applications.<br />
Protocol<br />
Select the protocol used by the service. The common choices -- UDP, TCP, and both UDP and TCP --<br />
can be selected from the drop-down menu.<br />
Trigger Port<br />
Enter the outgoing port range used by your application (for example 6500-6700).<br />
Schedule<br />
Clear<br />
Select a schedule for when this rule is in effect.<br />
47
Re-initialize this area of the screen, discarding any changes you have made.<br />
Port Trigger Rule List<br />
This is a list of the defined application rules. Click the Enable checkbox at the left to directly activate or<br />
de-activate the entry. An entry can be changed by clicking the Edit icon or can be deleted by clicking the<br />
Delete icon.<br />
48
Advanced: Gaming<br />
Add/Edit Port Range Rule<br />
Rule Enable<br />
Use this section to add a Port Range Rule to the following list or to edit a rule already in the list.<br />
Specifies whether the entry will be active or inactive.<br />
Rule Name<br />
Give the rule a name that is meaningful to you, for example Game Server. You can also select from a<br />
list of popular games, and many of the remaining configuration values will be filled in accordingly.<br />
However, you should check whether the port values have changed since this list was created, and you<br />
must fill in the IP address field.<br />
IP Address<br />
Enter the local network IP address of the system hosting the server, for example 192.168.10.50. You can<br />
select a computer from the list of DHCP clients in the "Computer Name" drop-down menu, or you can<br />
manually enter the IP address of the server computer.<br />
TCP Ports to Open<br />
Enter the TCP ports to open (for example 6159-6180, 99).<br />
UDP Ports to Open<br />
Enter the UDP ports to open (for example 6159-6180, 99).<br />
Inbound Filter<br />
Select a filter that controls access as needed for this rule.<br />
49
Schedule<br />
Clear<br />
Select a schedule for the times when this rule is in effect.<br />
Re-initialize this area of the screen, discarding any changes you have made.<br />
Port Range Rule List<br />
This is a list of the defined Port Range Rules. Click the Enable checkbox at the left to directly activate or<br />
de-activate the entry. An entry can be changed by clicking the Edit icon or can be deleted by clicking the<br />
Delete icon. When you click the Edit icon, the item is highlighted, and the "Edit Port Forwarding Rule"<br />
section is activated for editing.<br />
50
Advanced: Inbound Filter<br />
Add/Edit Inbound Filter Rule<br />
Name<br />
Action<br />
Here you can add entries to the Inbound Filter Rules List below, or edit existing entries.<br />
Enter a name for the rule that is meaningful to you.<br />
The rule can either Allow or Deny messages.<br />
Remote IP Range<br />
Clear<br />
Define the ranges of Internet addresses this rule applies to. For a single IP address, enter the same<br />
address in both the Start and End boxes. Up to eight ranges can be entered. The Enable checkbox<br />
allows you to turn on or off specific entries in the list of ranges.<br />
Re-initialize this area of the screen, discarding any changes you have made.<br />
Inbound Filter Rules List<br />
The section lists the current Inbound Filter Rules. An entry can be changed by clicking the Edit icon or<br />
can be deleted by clicking the Delete icon. When you click the Edit icon, the item is highlighted, and the<br />
"Edit Inbound Filter Rule" section is activated for editing.<br />
In addition to the filters listed here, two predefined filters are available wherever inbound filters can be<br />
applied:<br />
Allow All<br />
Permit any WAN user to access the related capability.<br />
Deny All<br />
Prevent all WAN users from accessing the related capability. (LAN users are not affected by Inbound<br />
Filter Rules.)<br />
51
Advanced: Schedule<br />
Add/Edit Schedule Rule<br />
Name<br />
Day(s)<br />
In this section you can add entries to the Schedule Rules List below or edit existing entries.<br />
Give the schedule a name that is meaningful to you, such as "Weekday rule".<br />
Place a checkmark in the boxes for the desired days or select the All Week radio button to select all<br />
seven days of the week.<br />
All Day - 24 hrs<br />
Select this option if you want this schedule in effect all day for the selected day(s).<br />
Start Time<br />
If you don't use the All Day option, then you enter the time here. The start time is entered in two fields.<br />
The first box is for the hour and the second box is for the minute. Email events are normally triggered<br />
only by the start time.<br />
End Time<br />
Clear<br />
The end time is entered in the same format as the start time. The hour in the first box and the minutes in<br />
the second box. The end time is used for most other rules, but is not normally used for email events.<br />
Re-initialize this area of the screen, discarding any changes you have made.<br />
Schedule Rules List<br />
This section shows the currently defined Schedule Rules. An entry can be changed by clicking the Edit<br />
icon or can be deleted by clicking the Delete icon. When you click the Edit icon, the item is highlighted,<br />
and the "Edit Schedule Rule" section is activated for editing.<br />
52
Administrator<br />
Administrator: Management<br />
Admin Password<br />
Device Name<br />
Enter a password for the user "admin", who will have full access to the Web-based management<br />
interface.<br />
The name of the router can be changed here.<br />
Enable Dynamic DNS<br />
Enable this option only if you have purchased your own domain name and registered with a dynamic<br />
DNS service provider. The following parameters are displayed when the option is enabled.<br />
Dynamic DNS Provider<br />
53
Host Name<br />
Account<br />
Password<br />
Select a dynamic DNS service provider from the pull-down list.<br />
Enter your host name, fully qualified; for example: myhost.mydomain.net.<br />
Enter the account provided by your service provider. If the Dynamic DNS provider supplies only a key,<br />
enter that key in all three fields.<br />
Enter the password provided by your service provider. If the Dynamic DNS provider supplies only a key,<br />
enter that key in all three fields.<br />
54
Administrator: Upload Firmware<br />
Upload Firmware<br />
Upload Firmware<br />
Once you have a firmware update on your computer, use this option to browse for the file and then<br />
upload the information into the router.<br />
55
Administrator: Setting Management<br />
Export Settings<br />
This option allows you to export and then save the router's configuration to a file on your computer. Be sure<br />
to save the configuration before performing a firmware upgrade.<br />
Import Settings<br />
Use this option to restore previously saved router configuration settings.<br />
Load Factory Defaults<br />
This option restores all configuration settings back to the settings that were in effect at the time the router<br />
was shipped from the factory. Any settings that have not been saved will be lost. If you want to save your<br />
router configuration settings, use the Export Settings option above.<br />
System Reboot<br />
This restarts the router. It is useful for restarting when you are not near the device.<br />
56
Administrator: Time<br />
Time Configuration<br />
Current Router Time<br />
Displays the time currently maintained by the router. If this is not correct, use the following options to<br />
configure the time correctly.<br />
Time Zone<br />
Select your local time zone from pull down menu.<br />
Automatic Time Configuration<br />
Enable NTP Server<br />
Select this option if you want to synchronize the router's clock to a Network Time Server over the<br />
Internet. If you are using schedules or logs, this is the best way to ensure that the schedules and logs are<br />
kept accurate.<br />
Note that, even when NTP Server is enabled, you must still choose a time zone and set the daylight<br />
saving parameters.<br />
NTP Server Used<br />
Select a Network Time Server for synchronization. You can type in the address of a time server or select<br />
one from the list. If you have trouble using one server, select another.<br />
Set the Date and Time Manually<br />
If you do not have the NTP Server option in effect, you can either manually set the time for your router<br />
here.<br />
57
Administrator: Status<br />
58
Network Glossary<br />
Access Point - A device that allows wireless-equipped computers and other devices to communicate with a wired network.<br />
also used to expand the range of a wireless network.<br />
Ad-hoc - A group of wireless devices communicating directly with each other (peer-to-peer) without the use of<br />
an access point.<br />
AES (Advanced Encryption Standard) - A security method that uses symmetric 128-bit block data encryption.<br />
Bandwidth - The transmission capacity of a given device or network.<br />
Bit - A binary digit.<br />
Boot - To start a device and cause it to start executing instructions.<br />
Broadband - An always-on, fast Internet connection.<br />
Browser - An application program that provides a way to look at and interact with all the information on the World Wide<br />
Web.<br />
Cable Modem - A device that connects a computer to the cable television network, which in turn connects to the Internet.<br />
Daisy Chain - A method used to connect devices in a series, one after the other.<br />
DDNS (Dynamic Domain Name System) - Allows the hosting of a website, FTP server, or e-mail server with a fixed<br />
domain name (e.g., www.xyz.com) and a dynamic IP address.<br />
Default Gateway - A device that forwards Internet traffic from your local area network.<br />
DHCP (Dynamic Host Configuration Protocol) - A networking protocol that allows administrators to assign temporary IP<br />
addresses to network computers by “leasing” an IP address to a user for a limited amount of time, instead of assigning<br />
permanent IP addresses.<br />
DMZ (Demilitarized Zone) - Removes the Router's firewall protection from one PC, allowing it to be “seen” from the<br />
Internet.<br />
DNS (Domain Name Server) - The IP address of your ISP's server, which translates the names of websites into IP addresses.<br />
Domain - A specific name for a network of computers.<br />
Download - To receive a file transmitted over a network.<br />
DSL (Digital Subscriber Line) - An always-on broadband connection over traditional phone lines.<br />
Dynamic IP Address - A temporary IP address assigned by a DHCP server.<br />
EAP (Extensible Authentication Protocol) - A general authentication protocol used to control network access.<br />
Many specific authentication methods work within this framework.<br />
Encryption - Encoding data transmitted in a network.<br />
Ethernet - IEEE standard network protocol that specifies how data is placed on and retrieved from a common transmission<br />
medium.<br />
Firewall - A set of related programs located at a network gateway server that protects the resources of a network from users<br />
from other networks.<br />
Firmware - The programming code that runs a networking device.<br />
59
FTP (File Transfer Protocol) - A protocol used to transfer files over a TCP/IP network.<br />
Full Duplex - The ability of a networking device to receive and transmit data simultaneously.<br />
Gateway - A device that interconnects networks with different, incompatible communications protocols.<br />
Half Duplex - Data transmission that can occur in two directions over a single line, but only one direction at a time.<br />
HTTP (HyperText Transport Protocol) - The communications protocol used to connect to servers on the World Wide Web.<br />
Infrastructure - A wireless network that is bridged to a wired network via an access point.<br />
IP (Internet Protocol) - A protocol used to send data over a network<br />
IP Address - The address used to identify a computer or device on a network.<br />
IPCONFIG - A Windows 2000 and XP utility that displays the IP address for a particular networking device.<br />
IPSec (Internet Protocol Security) - A VPN protocol used to implement secure exchange of packets at the IP layer.<br />
ISP (Internet Service Provider) - A company that provides access to the Internet.<br />
LAN - The computers and networking products that make up your local network.<br />
MAC (Media Access Control) Address - The unique address that a manufacturer assigns to each networking device.<br />
Mbps (MegaBits Per Second) - One million bits per second; a unit of measurement for data transmission.<br />
NAT (Network Address Translation) - NAT technology translates IP addresses of a local area network to a different IP<br />
address for the Internet.<br />
Packet - A unit of data sent over a network.<br />
Passphrase - Used much like a password, a passphrase simplifies the WEP encryption process by automatically generating<br />
the WEP encryption keys for Linksys products.<br />
Ping (Packet Internet Groper) - An Internet utility used to determine whether a particular IP address is online.<br />
POP3 (Post Office Protocol 3) - A standard mail server commonly used on the Internet.<br />
Port - The connection point on a computer or networking device used for plugging in cables or adapters.<br />
Power over Ethernet (PoE) - A technology enabling an Ethernet network cable to deliver both data and power.<br />
PPPoE (Point to Point Protocol over Ethernet) - A type of broadband connection that provides authentication<br />
(username and password) in addition to data transport.<br />
PPTP (Point-to-Point Tunneling Protocol) - A VPN protocol that allows the Point to Point Protocol (PPP) to be tunneled<br />
through an IP network. This protocol is also used as a type of broadband connection in Europe.<br />
RADIUS (Remote Authentication Dial-In User Service) - A protocol that uses an authentication server to control network<br />
access.<br />
RJ-45 (Registered Jack-45) - An Ethernet connector that holds up to eight wires.<br />
Roaming - The ability to take a wireless device from one access point's range to another without losing the connection.<br />
Router - A networking device that connects multiple networks together.<br />
60
Server - Any computer whose function in a network is to provide user access to files, printing, communications, and other<br />
services.<br />
SMTP (Simple Mail Transfer Protocol) - The standard e-mail protocol on the Internet.<br />
SNMP (Simple Network Management Protocol) - A widely used network monitoring and control protocol.<br />
SPI (Stateful Packet Inspection) Firewall - A technology that inspects incoming packets of information before allowing<br />
them to enter the network.<br />
SSID (Service Set IDentifier) - Wireless network's name.<br />
Static IP Address - A fixed assigned address to a computer or device that is connected to a network.<br />
Static Routing - Forwarding data in a network via a fixed path.<br />
Subnet Mask - An address code that determines the size of the network.<br />
Switch - 1. A data switch that connects computing devices to host computers, allowing a large number of devices to share a<br />
limited number of ports. 2. A device for making, breaking, or changing the connections in an electrical circuit.<br />
TCP (Transmission Control Protocol) - A network protocol for transmitting data that requires acknowledgement from the<br />
recipient of data sent.<br />
TCP/IP (Transmission Control Protocol/Internet Protocol) - A set of instructions PCs use to communicate over a network.<br />
Telnet - A user command and TCP/IP protocol used for accessing remote PCs.<br />
TFTP (Trivial File Transfer Protocol) - A version of the TCP/IP FTP protocol that has no directory or password capability.<br />
Throughput - The amount of data moved successfully from one node to another in a given time period.<br />
TKIP (Temporal Key Integrity Protocol) - a wireless encryption protocol that provides dynamic encryption keys for each<br />
packet transmitted.<br />
Topology - The physical layout of a network.<br />
TX Rate - Transmission Rate.<br />
Upgrade - To replace existing software or firmware with a newer version.<br />
Upload - To transmit a file over a network.<br />
URL (Uniform Resource Locator) - The address of a file located on the Internet.<br />
VPN (Virtual Private Network) - A security measure to protect data as it leaves one network and goes to another over the<br />
Internet.<br />
WAN (Wide Area Network)- The Internet.<br />
WEP (Wired Equivalent Privacy) - A method of encrypting network data transmitted on a wireless network for<br />
greater security.<br />
WLAN (Wireless Local Area Network) - A group of computers and associated devices that communicate with each other<br />
wirelessly.<br />
WPA (Wi-Fi Protected Access) - a wireless security protocol using TKIP (Temporal Key Integrity Protocol) encryption,<br />
which can be used in conjunction with a RADIUS server.<br />
61