Getting Started with On-Farm Mortality Composting - gpvec
Getting Started with On-Farm Mortality Composting - gpvec
Getting Started with On-Farm Mortality Composting - gpvec

Create successful ePaper yourself
Turn your PDF publications into a flip-book with our unique Google optimized e-Paper software.
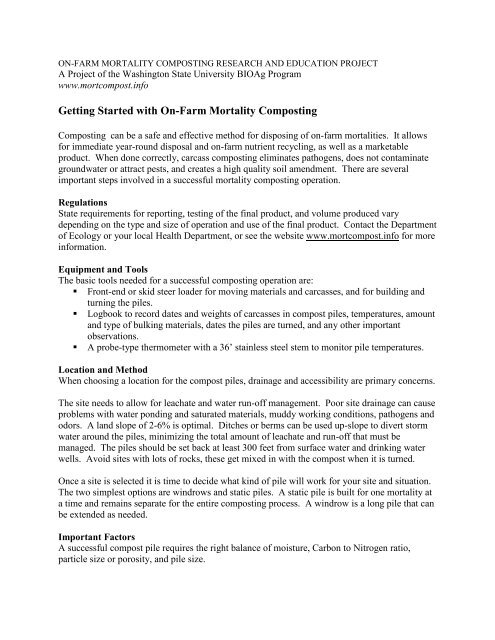
ON-FARM MORTALITY COMPOSTING RESEARCH AND EDUCATION PROJECT<br />
A Project of the Washington State University BIOAg Program<br />
www.mortcompost.info<br />
<strong>Getting</strong> <strong>Started</strong> <strong>with</strong> <strong>On</strong>-<strong>Farm</strong> <strong>Mortality</strong> <strong>Composting</strong><br />
<strong>Composting</strong> can be a safe and effective method for disposing of on-farm mortalities. It allows<br />
for immediate year-round disposal and on-farm nutrient recycling, as well as a marketable<br />
product. When done correctly, carcass composting eliminates pathogens, does not contaminate<br />
groundwater or attract pests, and creates a high quality soil amendment. There are several<br />
important steps involved in a successful mortality composting operation.<br />
Regulations<br />
State requirements for reporting, testing of the final product, and volume produced vary<br />
depending on the type and size of operation and use of the final product. Contact the Department<br />
of Ecology or your local Health Department, or see the website www.mortcompost.info for more<br />
information.<br />
Equipment and Tools<br />
The basic tools needed for a successful composting operation are:<br />
Front-end or skid steer loader for moving materials and carcasses, and for building and<br />
turning the piles.<br />
Logbook to record dates and weights of carcasses in compost piles, temperatures, amount<br />
and type of bulking materials, dates the piles are turned, and any other important<br />
observations.<br />
A probe-type thermometer <strong>with</strong> a 36’ stainless steel stem to monitor pile temperatures.<br />
Location and Method<br />
When choosing a location for the compost piles, drainage and accessibility are primary concerns.<br />
The site needs to allow for leachate and water run-off management. Poor site drainage can cause<br />
problems <strong>with</strong> water ponding and saturated materials, muddy working conditions, pathogens and<br />
odors. A land slope of 2-6% is optimal. Ditches or berms can be used up-slope to divert storm<br />
water around the piles, minimizing the total amount of leachate and run-off that must be<br />
managed. The piles should be set back at least 300 feet from surface water and drinking water<br />
wells. Avoid sites <strong>with</strong> lots of rocks, these get mixed in <strong>with</strong> the compost when it is turned.<br />
<strong>On</strong>ce a site is selected it is time to decide what kind of pile will work for your site and situation.<br />
The two simplest options are windrows and static piles. A static pile is built for one mortality at<br />
a time and remains separate for the entire composting process. A windrow is a long pile that can<br />
be extended as needed.<br />
Important Factors<br />
A successful compost pile requires the right balance of moisture, Carbon to Nitrogen ratio,<br />
particle size or porosity, and pile size.
The ideal moisture content is between 50% and 60%. The material should feel moist to the touch<br />
but not wet. As a rule of thumb, if a handful of material does not feel moist to the touch and<br />
crumbles after squeezing, it is too dry. If several drops of water can be squeezed from the<br />
material by hand, it is too wet. If the material sticks together when it is squeezed and leaves a<br />
drop or two of moisture on your hand, it is just right.<br />
The ideal C:N ratio for a compost pile is 25:1 to 40:1. Materials that are too high in Nitrogen<br />
and low in Carbon will lose gaseous ammonia or water soluble nitrates that can cause odor and<br />
environmental issues. A mix that is too low in Nitrogen and high in Carbon will slow down the<br />
composting process by limiting microbial growth. This is less of an issue <strong>with</strong> mortality<br />
composting because the carcass is so high in Nitrogen, but it is still an important factor to<br />
consider when mixing materials.<br />
A particle size of 0.25 to 1 inch is optimum. It must be large enough to allow adequate air flow,<br />
but small enough to prevent rapid drying or cooling of the pile. Larger particles do not absorb or<br />
insulate as well and can cause problems <strong>with</strong> leaching, odors and pests. Woodchips and straw<br />
can be useful to mix <strong>with</strong> denser materials to increase the porosity and oxygen availability, but<br />
generally do not make very good composting materials by themselves.<br />
The size of the pile will depend on the size and number of carcasses to be composted. A typical<br />
pile will be 6 to 8 feet tall <strong>with</strong> a base width of approximately 1.5-2X the height. The piles<br />
should be mounded to shed moisture in wetter climates. If low moisture is a concern, the piles<br />
can be built <strong>with</strong> a depression on top to collect water. There must be enough space between<br />
windrows or piles to maneuver equipment. When using windrows, carcasses can be added to the<br />
end as needed but the location and date of each addition should be recorded.<br />
Building the Piles<br />
Before building the compost piles or windrows, the types and proportions of co-composting or<br />
bulking materials must be selected. This will depend on the material available in the area and the<br />
C:N and moisture content of these materials. Finished compost can be used for up to 50% of the<br />
bulking material in a new pile. Using more than this will limit the nutrients available to the<br />
microbes and slow down the composting process. Finished compost is especially helpful as a<br />
‘blanket’ over the pile to reduce odors and insulate the pile in cold weather. See the website<br />
www.mortcompost.info for a list of typical co-composting materials and their values.<br />
<strong>On</strong>ce the site has been selected and the materials gathered, it is time to build the pile.<br />
Start <strong>with</strong> at a base of bulking material 2-3 ft deep. If high moisture or poor drainage is a<br />
concern, a base of large wood chips or something similar under the bulking material will<br />
help <strong>with</strong> aeration and drainage.<br />
Place the carcass on top of the base of bulking material so that no part of the carcass is<br />
less than 2 ft from any edge. Lance the rumen a few times to prevent bloating and speed<br />
up decomposition. Then bury the carcass completely <strong>with</strong> at least another 2 ft of bulking<br />
material. Again, make sure that all parts of the carcass are 2 ft or more from any edges.<br />
This is very important! It is easy to underestimate the amount of material over the<br />
carcass so it is a good idea to use a stick or some other method of measurement to double
check. The pile is likely to settle so watch it carefully for several days to make sure that<br />
the carcass is adequately covered. Add more material if needed.<br />
Record the date, number and size of carcasses, and bulking material used in the log book.<br />
Monitoring the Piles<br />
It is very important to monitor the piles closely, especially in the beginning, for odors, pests,<br />
settling of materials, moisture and temperature.<br />
Record temperatures and observations weekly in the log book.<br />
As the microbes become active, the internal temperature of the pile will rise. In order to<br />
kill any harmful bacteria or other pathogens, the internal temperature of the pile must<br />
reach at least 131 o F for three consecutive days. As long as the pile stays hot the microbes<br />
are still working. It is important to note that outside temperatures can also have an affect<br />
on the internal temperature of the pile.<br />
After several months of active composting, the pile can be turned to mix and aerate the<br />
materials. Some large bones and hair may still be left at this point but the majority of the<br />
soft tissues and small bones should be gone.<br />
After turning, rebuild the pile and let it continue to compost. It is important to make sure<br />
that the bones are adequately covered again after the pile is mixed so they do not attract<br />
pests. Continue to monitor the pile and record weekly temperatures. The internal<br />
temperatures should spike again as the microbes get back to work, and again internal<br />
temperatures need to reach at least 131 o F for 3 days in a row to kill any pathogens.<br />
Continue to monitor and mix the pile until the compost is finished.<br />
The Finished Product<br />
The final product should have no trace of tissues or unpleasant odor. Some of the bones may<br />
still be left but should be brittle and easily broken. Large bones can be taken out and put into the<br />
next compost pile if necessary. The finished compost should be brown or dark brown in color<br />
and have a pleasant earthy odor. The texture should be crumbly, allowing air to penetrate but<br />
holding moisture <strong>with</strong> out being saturated. Depending on materials and management, the entire<br />
process can take anywhere from four months to over a year.<br />
The compost can be stored in large piles on site until it is land applied, or transported off the<br />
farm. If testing is required before distribution, the finished compost must be tested for:<br />
Nutrients, Pathogen Levels, pH, and Stability. The tests must be done by a lab accredited by the<br />
Washington State Department of Ecology.<br />
More Information…<br />
This is a very basic outline of what it takes to begin a successful on-farm carcass composting<br />
operation. Keep in mind there is much, much more information available on anything from<br />
bulking materials and pile construction, to troubleshooting and testing. There are many web<br />
resources available from other states and universities, as well as books and videos. Starting a<br />
successful on-farm mortality composting operation will take some research and planning but it<br />
will be well worth the effort. Good luck!<br />
ON-FARM MORTALITY COMPOSTING RESEARCH AND EDUCATION PROJECT<br />
A Project of the Washington State University BIOAg Program<br />
www.mortcompost.info