CLEANCut Manual English.indb - Sears
CLEANCut Manual English.indb - Sears
CLEANCut Manual English.indb - Sears

You also want an ePaper? Increase the reach of your titles
YUMPU automatically turns print PDFs into web optimized ePapers that Google loves.
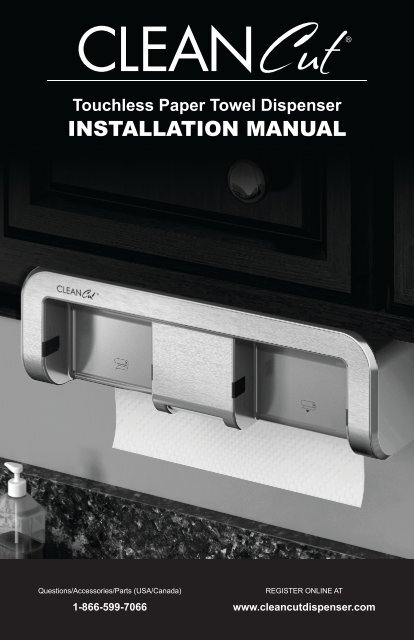
Touchless Paper Towel Dispenser<br />
INSTALLATION MANUAL<br />
Questions/Accessories/Parts (USA/Canada)<br />
1-866-599-7066<br />
REGISTER ONLINE AT<br />
www.cleancutdispenser.com<br />
1
2<br />
IMPORTANT SAFEGUARDS<br />
When using electrical appliances, basic safety precautions should always be followed, including<br />
the following:<br />
• Read all instructions before using.<br />
DANGER: To reduce the risk of electric shock:<br />
• Always unplug this appliance from the electrical outlet before cleaning.<br />
WARNING: To reduce the risk of burns, fi re, electric shock, or injury to persons:<br />
• Make sure the appliance is unplugged before installing or uninstalling.<br />
• Use this appliance only for its intended use as described in these instructions.<br />
Do not use attachments not recommended by the manufacturer.<br />
• Never operate this appliance if it has a damaged cord or plug, if it is not<br />
working properly, if it has been dropped or damaged, or dropped into<br />
water. Return the appliance to an authorized service facility for examination,<br />
repair or adjustment. Or, call the appropriate toll-free number on the<br />
cover of this manual.<br />
• Do not place on or near a hot gas or electric burner.<br />
• Keep cord away from heated surfaces.<br />
• To reduce the risk of fi re, do not place any heating or cooking appliance<br />
beneath the appliance.<br />
• To reduce the risk of fi re, do not mount unit over or near any portion of a<br />
heating or cooking appliance.<br />
• Do not use outdoors.<br />
• To disconnect, remove plug from outlet.<br />
SAVE THESE INSTRUCTIONS<br />
ELECTRICAL CORD<br />
A short power-supply cord (or detachable power-supply cord)<br />
is to be provided to reduce the risk resulting from becoming<br />
entangled in or tripping over a longer cord.<br />
NOTE: If the power supply cord is damaged, it should be replaced by qualifi ed personnel.<br />
CAUTION: Make sure power cord does not fall into the roll. Use cord management hooks<br />
behind the appliance to hang extra cord.<br />
TAMPER-RESISTANT STICKERS<br />
WARNING: This appliance is equipped with tamper-resistant stickers to prevent removal<br />
of the outer cover. To reduce the risk of fi re or electric shock, do not attempt to<br />
remove the outer cover. There are no user-serviceable parts inside. Repair should be<br />
done only by authorized service personnel.<br />
3
A<br />
2<br />
3<br />
13<br />
14<br />
9<br />
1<br />
C<br />
B<br />
4<br />
10<br />
TOP DOWN<br />
Mounting Bracket Opened<br />
and Hidden from Illustration<br />
15<br />
D<br />
6<br />
5<br />
16<br />
BACK<br />
17<br />
11<br />
1<br />
8<br />
7<br />
12<br />
UNIT PARTS:<br />
1. Mounting Holes<br />
2. Mounting Bracket<br />
3. LED Sensor Windows<br />
4. Cut Zone<br />
5. Dispense Zone<br />
6. Opening Latch<br />
7. Viewing Window<br />
8. Main Body<br />
9. Dowel Rod<br />
10. Dowel Rod Guide<br />
11. Power Cord Connector<br />
12. Power Adapter (exact model<br />
varies by country)<br />
13. Paper Roller<br />
14. Insertion Slot (space between<br />
paper roller and pinch rollers)<br />
15. Pinch Rollers (Inside)<br />
16. Power Jack<br />
17. Cord Management Hooks<br />
YOU WILL ALSO NEED:<br />
• Tape<br />
• Ruler (or you may cut out the<br />
ruler provided on the template)<br />
• Electric drill with a ⅜” or 1/16”<br />
drill bit<br />
• Phillips-head screwdriver<br />
MOUNTING PARTS:<br />
A. 4 Wood Screws (Sharp Point)<br />
2 ½”<br />
2 1 ¼”<br />
B. 12 Standard Screws<br />
4 1”<br />
4 1 ½”<br />
4 2 ¼”<br />
C. 4 Washers<br />
D. 18 Spacers<br />
4 ½”<br />
4 ¼”<br />
4 3/16”<br />
4 1/16”<br />
2 13/16”<br />
E. Mounting Template (in box)<br />
4 5
GETTING STARTED<br />
WATCH ONLINE: www.cleancutdispenser.com/installation-and-use<br />
1. Remove all packing material.<br />
2. Remove and save literature.<br />
3. Unpack mounting washers, screws and spacers for mounting and set them aside in a safe<br />
place where they will not roll away or get lost.<br />
IMPORTANT: Do not attempt to operate appliance until it is properly installed. This appliance<br />
will be damaged if operated while sitting on a surface or on its side.<br />
CHOOSE A LOCATION<br />
When choosing your location, consider the following:<br />
• DO make sure to mount within reach of an electrical outlet.<br />
• DO consider your normal work patterns in the kitchen when choosing location. As<br />
this will become your most used kitchen appliance, it is recommended to mount the<br />
<strong>CLEANCut</strong> close to your sink or food prep area.<br />
• DO NOT mount over any heating or cooking appliance such as your range or oven.<br />
• DO NOT mount under, in front of or behind any under-cabinet light fi xtures.<br />
CAUTION: When selecting a location for your <strong>CLEANCut</strong>, make sure you have adequate room to<br />
reach the power jack. Be sure to unlatch the main body to ensure that nothing hits the power jack.<br />
CAUTION: There needs to be a minimum of 13¼” of space between the surface that the<br />
<strong>CLEANCut</strong> is mounted to and the counter top.<br />
DETERMINE INSTALLATION TYPE<br />
WATCH ONLINE: www.cleancutdispenser.com/installation-and-use/determine-installation-type<br />
1. Prior to taping the mounting template and beginning to drill your holes, determine if your cabinet<br />
has a fl at bottom [B] or an overhanging lip [C].<br />
• If your cabinet is fl at, you may follow the RECOMMENDED INSTALLATION<br />
or THROUGH CABINET INSTALLATION method.<br />
[B] [C]<br />
2. Use your ruler or the paper ruler provided<br />
to measure the overhang height, placing<br />
your ruler vertically against the underside<br />
of the cabinet behind the overhang [D].<br />
[D]<br />
• If this measurement is less than 1¾”, you may follow the RECOMMENDED<br />
INSTALLATION or THROUGH CABINET INSTALLATION method.<br />
• If this measurement is greater than 1¾”, you must follow the THROUGH<br />
CABINET INSTALLATION method.<br />
RECOMMENDED INSTALLATION<br />
WATCH ONLINE: www.cleancutdispenser.com/installation-and-use/under-cabinet-installation<br />
IMPORTANT: This method can only be used if the bottom of your cabinet is ⅜” thick or more. If<br />
the cabinet bottom is too thin the sharp ends of the screws will protrude through.<br />
IMPORTANT: Always wear protective glasses or goggles to prevent injury.<br />
1. Clear counter top under insta mounting easier.<br />
2. Fully open the main body and position the <strong>CLEANCut</strong> under the cabinet where you<br />
want it installed.<br />
IMPORTANT: Do not align screw holes with the break between cabinets, as this will prevent<br />
you from installing the appliance properly. Pay close attention to where the drill holes will be set<br />
so as not to damage your cabinets during mounting. Drilling through the breaks between your<br />
cabinet may cause damage to cabinets and prevent proper installation.<br />
3. Using a thin pencil, mark the 4 mounting holes [SEE ILLUSTRATION G & H1].<br />
4. Pre drill a small 1/16” pilot starter hole ¼”<br />
deep in the center of your 4 marks. Be careful<br />
not to drill through the cabinet.<br />
[E]<br />
NOTE: Put some tape on the drill as a guide to prevent drilling through the bottom [E].<br />
IMPORTANT: Always ensure you are drilling straight up through the marks you made on<br />
the bottom of the cabinet. Drilling at an angle may prevent proper installation and may damage<br />
cabinets if the drill bit goes into the break or partition of the cabinet.<br />
5. Once holes are drilled, wipe dust and debris off under side of cabinet.<br />
6. Hold the unit in place secure the back with the two small screws [SEE ILLUSTRATION G].<br />
NOTE: Always tighten screws to ensure the appliance does not move or shake during operation.<br />
Be careful not to over-tighten the screws to avoid damaging the mounting bracket.<br />
6 7<br />
1/4”
7. Insert the plastic spacers then screw the large<br />
wood screws into the two front holes [H].<br />
8. Plug power cord connector into the<br />
power jack in the back of the appliance.<br />
Plug the power adapter into a standard<br />
electrical outlet. Extra cord should be<br />
hung over cord management hooks behind<br />
unit [F].<br />
[G]<br />
[F]<br />
CAUTION: Make sure power cord does not fall into the roll.<br />
NOTE: If you wish to conceal the power cord, drill a ⅜” hole through the bottom of the cabinet<br />
fl oor at the rear and to the side of the cabinet. Now the power cord connector can be<br />
run down through the ⅜” hole and connected to the power jack. The power adapter can be<br />
plugged into a standard electrical outlet available inside the cabinet. If this outlet is not available<br />
then one can be installed by a qualifi ed electrician.<br />
9. Your <strong>CLEANCut</strong> appliance is now ready for use! For operating instructions, see the<br />
HOW TO USE section of this manual.<br />
[H1]<br />
[H2]<br />
THROUGH CABINET INSTALLATION<br />
WATCH ONLINE: www.cleancutdispenser.com/installation-and-use/through-cabinet-installation<br />
IMPORTANT: Always wear protective glasses or goggles to prevent injury when drilling.<br />
1. Clear counter top under installation area to avoid getting dust or debris on other appliances or<br />
items. Open cabinets and remove contents to make mounting easier.<br />
2. Fold mounting template along Overhang<br />
Lip Fold Line. Place template under cabinet<br />
with fold line fl ush against inside overhang,<br />
and tape securely in place [J].<br />
NOTE: Use center line to align unit with center of cabinet if desired.<br />
8 9<br />
[J]<br />
IMPORTANT: Do not align screw holes on template with the partition between cabinets, as<br />
this will prevent you from installing the appliance properly. Pay close attention to where the<br />
drill holes will be set so as not to damage your cabinets during mounting. Drilling through your<br />
cabinet’s partition may cause damage to cabinets and prevent proper installation.<br />
3. Drill from under the cabinet up. Drill holes through the 4 places marked on the template<br />
using a ⅜” drill bit.<br />
IMPORTANT: Always ensure you are drilling straight up through the marked mounting<br />
hole on the template. Drilling at an angle may prevent proper installation and may damage<br />
cabinets if the drill bit pierces the partition.<br />
4. Once holes are drilled, remove tape and mounting template and save template with your<br />
instructions in case you move or wish to remount at a later time.<br />
5. Wipe dust and debris off inside cabinet surface. Also, make sure under side of cabinet is clean.<br />
6. Place a washer inside the cabinet over each of the 4 holes you drilled.<br />
7. Now, use your ruler or the paper ruler pro- [K]<br />
vided to measure the overhang height, placing<br />
your ruler vertically against the underside<br />
of the cabinet behind the overhang [K]. If this<br />
measurement is less than 1¾”, you may skip<br />
step 9. If it is greater than 1¾”, this number<br />
determines the number of spacers you need,<br />
using the SPACER MOUNTING GUIDE<br />
found below.<br />
WATCH ONLINE: www.cleancutdispenser.com/installation-and-use/spacer-mounting-installation<br />
SPACER MOUNTING GUIDE<br />
MEASUREMENT SPACER<br />
1 ¾” or less None<br />
1 13/16” 1/16”<br />
1 15/16” 13/16”<br />
MEASUREMENT SPACER<br />
2” ¼”<br />
2 1/16” ¼” + 3/16”<br />
1 3/16” ¼” + 3/16”
8. Drop one of your 1” screws through<br />
each of the washers covering the<br />
holes in the cabinet, from inside the<br />
cabinet down.<br />
[L]<br />
NOTE: For spacer installation, you’ll need to use longer screws.<br />
9. Place the appropriate number of spacers determined in step 7 on each screw so the appliance<br />
will be even with the front overhang [L].<br />
NOTE: For spacer installation, you may require assistance (in mounting) in order to hold<br />
spacers in place while securing the appliance at the same time. If assistance is not available,<br />
use pieces of tape to hold the spacers in place while you position the appliance.<br />
10. Once spacers are set (if necessary), hold <strong>CLEANCut</strong> and mounting bracket up and tighten<br />
screws into mounting holes to secure.<br />
NOTE: Always tighten screws to ensure the appliance does not move or shake during operation.<br />
Be careful not to over-tighten the screws to avoid damaging the mounting bracket.<br />
NOTE: If you wish to conceal the power cord, drill a ⅜” hole through the bottom of the cabinet<br />
fl oor at the rear and to the side of the cabinet. Now the power cord connector can be<br />
run down through the ⅜” hole and connected to the power jack. The power adapter can be<br />
plugged into a standard electrical outlet available inside the cabinet. If this outlet is not available<br />
then one can be installed by a qualifi ed electrician.<br />
11. Plug power cord connector into the power jack in the back of the appliance. Plug into<br />
standard electrical outlet. Extra cord should be hung over cord management hooks behind<br />
unit [SEE ILLUSTRATION H].<br />
CAUTION: Make sure power cord does not fall into the roll.<br />
12. Your <strong>CLEANCut</strong> appliance is now ready for use! For operating instructions, see the<br />
HOW TO USE section of this manual.<br />
HOW TO USE<br />
WATCH ONLINE: www.cleancutdispenser.com/installation-and-use/loading-and-operation<br />
LOADING INSTRUCTIONS<br />
1. Pull opening latch to release the main body.<br />
2. Push the main body down completely until it stops to ensure it is FULLY opened.<br />
NOTE: Make sure pinch rollers are recessed to completely open the insertion slot<br />
[SEE ILLUSTRATION M].<br />
NOTE: The <strong>CLEANCut</strong> appliance is equipped with a security feature to prevent operation<br />
while the unit is opened.<br />
3. Lift dowel rod to remove from device<br />
and dispose of empty cardboard tube<br />
from previous use (if any).<br />
4. Insert the dowel rod through the center<br />
of a new paper towel roll.<br />
5. Once paper towel roll is loaded onto the dowel rod, place into the dowel cradle.<br />
10 11<br />
[M]<br />
NOTE: It is recommended that you place the roll into the cradle so that the paper comes up<br />
from the bottom front of the roll [N].<br />
6. Load end of paper sheet through<br />
paper path [N].<br />
7. Push unit up until the opening latch<br />
clicks to securely close.<br />
OPERATING INSTRUCTIONS<br />
1. Place hand between LED sensors in the dispense zone.<br />
NOTE: The <strong>CLEANCut</strong> is designed to dispense the amount of paper towel you desire. For<br />
short sheets, briefl y hold your hand in the dispense zone. For longer sheets, hold your hand<br />
in the dispense zone for a longer period of time.<br />
2. Once the desired amount of paper has been dispensed, remove hand.<br />
CAUTION: To prevent paper jams, do not try to remove the paper towel without cutting. The<br />
<strong>CLEANCut</strong> is designed to give you the perfect size sheet regardless of the roll’s perforation.<br />
3. To cut, place hand between LED sensors in the cutting zone.<br />
4. Remove cut paper towel sheet from the bottom of the <strong>CLEANCut</strong> appliance.<br />
CLEANING INSTRUCTIONS<br />
Th is product contains no user-serviceable parts. Repair should be done only by authorized<br />
service personnel.<br />
1. Make sure the main body is opened or the power cord is removed before cleaning.<br />
2. Small pieces of paper may remain in the paper path after numerous rolls are cut.<br />
3. Clean with a mild, non-abrasive cleaner being careful not to soak the LED sensor windows.<br />
[N]
PROBLEM POSSIBLE CAUSE SOLUTION<br />
<strong>CLEANCut</strong> does not dispense<br />
paper<br />
Paper does not load<br />
TROUBLESHOOTING<br />
WATCH ONLINE: www.cleancutdispenser.com/installation-and-use/tips-and-tricks<br />
Power adapter is not<br />
plugged into the wall<br />
Power cord connector is not<br />
plugged into the power jack<br />
Main body is open<br />
Power cord is hitting roll<br />
Paper is jammed<br />
Main body is not fully open<br />
First sheet is either curled<br />
or damaged<br />
Paper path is clogged<br />
Cutter is blocking the path<br />
Make sure the power adapter<br />
is plugged into a live outlet<br />
Fully press power cord connector<br />
into the power jack<br />
Close the main body and<br />
make sure the opening<br />
latch is fully locked<br />
Use cord management<br />
hooks to keep power cord<br />
from hitting the paper roll<br />
Unplug the power cord<br />
connector then remove<br />
any jammed paper. Replug<br />
power cord connector<br />
Push the main body completely<br />
down to fully open<br />
Tear off the fi rst sheet to<br />
make sure its fl at<br />
Make sure the main body<br />
is fully open and clear any<br />
loose paper<br />
Unplug and replug the power<br />
cord connector to reset cutter<br />
PROBLEM POSSIBLE CAUSE SOLUTION<br />
Paper does not cut<br />
Paper roll does not fi t in<br />
main body<br />
A new brand of paper towel<br />
is not dispensing<br />
Th ere is no paper in the<br />
paper path<br />
Paper is jammed<br />
Dowel rod is not seated<br />
in slots<br />
Main body is not fully open<br />
Some rolls are cut unevenly<br />
and may jam<br />
Roll may be smashed in<br />
shipping or storing<br />
Moisture may cause the roll<br />
to be sticky<br />
Make sure paper is dispensed<br />
so it is hanging out of the<br />
bottom of the main body<br />
Unplug the power cord<br />
connector then remove<br />
any jammed paper. Replug<br />
power cord connector<br />
Make sure dowel rod is fully<br />
seated in slots<br />
Push the main body completely<br />
down until the paper<br />
roll fi ts inside<br />
Try another roll<br />
Squeeze the roll back into a<br />
round shape<br />
Allow the roll to dry or<br />
use another<br />
HELPFUL HINTS<br />
• After the main body is plugged in and closed, placing your hand into the<br />
dispense beam side will activate the dispense roller. Th is can be done with or<br />
without paper in the unit. Th e cut operation however can not be activated<br />
unless the unit is loaded and can sense paper in the paper path.<br />
• Once cut, you can remove the paper by easily pulling the paper out or by<br />
dispensing another sheet. Paper can be loaded so it enters the paper path<br />
from the top of the roll, but this usually causes the paper to curl to the back<br />
of the unit and makes it more diffi cult to judge the length.<br />
12 13
NEED HELP?<br />
For service, repair or any questions regarding your appliance, call the appropriate toll free<br />
number on the cover of this book. DO NOT return the product to the place of purchase. Also,<br />
please DO NOT mail product back to the manufacturer, nor bring it to a service center. You<br />
may also want to consult the web site listed on the cover of this manual.<br />
Two-Year Limited Warranty<br />
What does it cover?<br />
• Any defect in material or workmanship; provided; however, Smart Product Innovations’<br />
liability will not exceed the purchase price of the product<br />
For how long?<br />
• Twelve months after the date of original purchase<br />
What will we do to help you?<br />
• Provide you with a reasonably similar replacement product that is either new or factory<br />
refurbished<br />
How do you get service?<br />
• Save your receipt as proof of the date of sale<br />
• Check our on-line service site at www.cleancutdispenser.com, or call our number, +1<br />
(866) 599-7066, for general warranty service<br />
• If you need parts or accessories, please call +1 (866) 599-7066<br />
What does your warranty not cover?<br />
• Damage from commercial use<br />
• Damage from misuse, abuse or neglect<br />
• Products that have been modifi ed in any way<br />
• Products used or serviced outside the country of purchase<br />
• Glass parts and other accessory items that are packed with the unit<br />
• Shipping and handling costs associated with the replacement of the unit<br />
• Consequential or incidental damages (Please note, however, that some states do not<br />
allow the exclusion or limitation of consequential or incidental damages, so this limitation<br />
may not apply to you)<br />
15
SMART PRODUCT INNOVATIONS, INC.<br />
Copyright © 2011 Smart Product Innovations, Inc.<br />
US Patent No: 6,994,408<br />
2011-0315 E<br />
is a trademark of Clean Cut Int’l, LLC, Juno Beach, Florida, USA<br />
Made in China Printed in China