
Create successful ePaper yourself
Turn your PDF publications into a flip-book with our unique Google optimized e-Paper software.
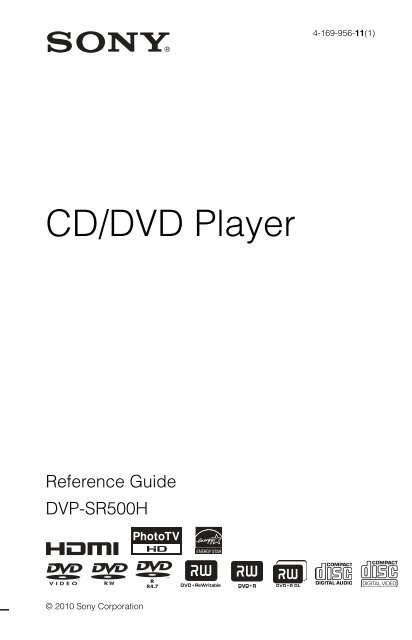
<strong>CD</strong>/<strong>DVD</strong> <strong>Player</strong><br />
Reference Guide<br />
DVP-SR500H<br />
© 2010 Sony Corporation<br />
4-169-956-11(1)
2<br />
WARNING<br />
To reduce the risk of fire or<br />
electric shock, do not expose<br />
this apparatus to rain or<br />
moisture.<br />
To avoid electrical shock, do<br />
not open the cabinet. Refer<br />
servicing to qualified<br />
personnel only.<br />
The AC power cord must be<br />
changed only at a qualified<br />
service shop.<br />
Batteries or batteries<br />
installed apparatus shall not<br />
be exposed to excessive heat<br />
such as sunshine, fire or the<br />
like.<br />
CAUTION<br />
The use of optical instruments with<br />
this product will increase eye<br />
hazard. As the laser beam used in<br />
this <strong>CD</strong>/<strong>DVD</strong> player is harmful to<br />
eyes, do not attempt to disassemble<br />
the cabinet.<br />
Refer servicing to qualified<br />
personnel only.<br />
This symbol is<br />
intended to alert the<br />
user to the presence<br />
of uninsulated<br />
“dangerous voltage”<br />
within the product’s enclosure that<br />
may be of sufficient magnitude to<br />
constitute a risk of electric shock to<br />
persons.<br />
This symbol is<br />
intended to alert the<br />
user to the presence<br />
of important<br />
operating and<br />
maintenance (servicing)<br />
instructions in the literature<br />
accompanying the appliance.<br />
Precautions<br />
To prevent fire or shock hazard,<br />
do not place objects filled with<br />
liquids, such as vases, on the<br />
apparatus.<br />
The player is not disconnected<br />
from the AC power source as<br />
long as it is connected to the wall<br />
outlet, even if the player itself<br />
has been turned off.<br />
Do not install this player in a<br />
confined space, such as a<br />
bookshelf or similar unit.<br />
Install the player so that the AC<br />
power cord can be unplugged<br />
from the wall socket<br />
immediately in the event of<br />
trouble.<br />
If the player is brought directly<br />
from a cold to a warm location,<br />
or is placed in a very damp room,<br />
moisture may condense on the<br />
lenses inside the player. Should<br />
this occur, the player may not<br />
operate properly. In this case,<br />
remove the disc and leave the<br />
player turned on for about half an<br />
hour until the moisture<br />
evaporates.<br />
For customers in the U.S.A<br />
Owner’s Record<br />
The model and serial numbers are<br />
located at the rear of the unit.<br />
Record the serial number in the<br />
space provided below. Refer to<br />
them whenever you call upon your<br />
Sony dealer regarding this product.<br />
Model No. DVP-SR500H<br />
Serial No.______________<br />
CAUTION<br />
You are cautioned that any<br />
changes or modifications not<br />
expressly approved in this manual<br />
could void your authority to<br />
operate this equipment.<br />
b<br />
This equipment has been tested<br />
and found to comply with the<br />
limits for a Class B digital device,<br />
pursuant to Part 15 of the FCC<br />
Rules. These limits are designed to<br />
provide reasonable protection<br />
against harmful interference in a<br />
residential installation. This<br />
equipment generates, uses, and can<br />
radiate radio frequency energy<br />
and, if not installed and used in<br />
accordance with the instructions,<br />
may cause harmful interference to<br />
radio communications. However,<br />
there is no guarantee that<br />
interference will not occur in a<br />
particular installation. If this<br />
equipment does cause harmful<br />
interference to radio or television<br />
reception, which can be<br />
determined by turning the<br />
equipment off and on, the user is<br />
encouraged to try to correct the<br />
interference by one or more of the<br />
following measures:<br />
– Reorient or relocate the<br />
receiving antenna.<br />
– Increase the separation between<br />
the equipment and receiver.<br />
– Connect the equipment into an<br />
outlet on a circuit different from<br />
that to which the receiver is<br />
connected.<br />
– Consult the dealer or an<br />
experienced radio/TV technician<br />
for help.<br />
Important Safety<br />
Instructions<br />
1) Read these instructions.<br />
2) Keep these instructions.<br />
3) Heed all warnings.<br />
4) Follow all instructions.<br />
5) Do not use this apparatus near<br />
water.<br />
6) Clean only with dry cloth.<br />
7) Do not block any ventilation<br />
openings. Install in accordance<br />
with the manufacturer’s<br />
instructions.<br />
8) Do not install near any heat<br />
sources such as radiators, heat<br />
registers, stoves, or other<br />
apparatus (including<br />
amplifiers) that produce heat.<br />
9) Do not defeat the safety<br />
purpose of the polarized or<br />
grounding-type plug. A<br />
polarized plug has two blades<br />
with one wider than the other.<br />
A grounding type plug has two<br />
blades and a third grounding<br />
prong. The wide blade or the<br />
third prong are provided for<br />
your safety. If the provided<br />
plug does not fit into your<br />
outlet, consult an electrician for<br />
replacement of the obsolete<br />
outlet.<br />
10)Protect the power cord from<br />
being walked on or pinched<br />
particularly at plugs,<br />
convenience receptacles, and<br />
the point where they exit from<br />
the apparatus.<br />
11)Only use attachments/<br />
accessories specified by the<br />
manufacturer.<br />
12)Use only with the cart, stand,<br />
tripod, bracket, or table<br />
specified by the manufacturer,<br />
or sold with the apparatus.<br />
When a cart is used, use caution<br />
when moving the cart/
apparatus combination to avoid<br />
injury from tip-over.<br />
13)Unplug this apparatus during<br />
lightning storms or when<br />
unused for long periods of<br />
time.<br />
14)Refer all servicing to qualified<br />
service personnel. Servicing is<br />
required when the apparatus<br />
has been damaged in any way,<br />
such as power-supply cord or<br />
plug is damaged, liquid has<br />
been spilled or objects have<br />
fallen into the apparatus, the<br />
apparatus has been exposed to<br />
rain or moisture, does not<br />
operate normally, or has been<br />
dropped.<br />
Note about the discs<br />
Do not use the following discs:<br />
– A disc recorded in a color system<br />
other than NTSC, such as PAL or<br />
SECAM (this player conforms to<br />
the NTSC color system).<br />
– A disc that has a non-standard<br />
shape (e.g., card, heart).<br />
– A disc with a label or sticker on<br />
it.<br />
Region code<br />
Your player has a region code<br />
printed on the back of the unit and<br />
only will play commercial <strong>DVD</strong>s<br />
(playback only) labeled with<br />
identical region codes. This system<br />
is used to protect copyrights.<br />
Commercial <strong>DVD</strong>s labeled<br />
will also play on this player.<br />
Depending on the commercial<br />
<strong>DVD</strong>, there may be no region code<br />
indication, even though playing the<br />
commercial <strong>DVD</strong> is prohibited by<br />
area restrictions.<br />
00V 00Hz<br />
NO.<br />
00W<br />
DVP–XXXX<br />
X Region<br />
0-000-000-00<br />
ALL<br />
code<br />
Copyrights<br />
This product incorporates<br />
copyright protection technology<br />
that is protected by U.S. patents<br />
and other intellectual property<br />
rights. Use of this copyright<br />
protection technology must be<br />
authorized by Macrovision, and<br />
is intended for home and other<br />
limited viewing uses only unless<br />
otherwise authorized by<br />
Macrovision. Reverse<br />
engineering or disassembly is<br />
prohibited.<br />
Manufactured under license<br />
from Dolby Laboratories. Dolby<br />
and the double-D symbol are<br />
trademarks of Dolby<br />
Laboratories.<br />
Manufactured under license<br />
under U.S. Patent #: 5,451,942 &<br />
other U.S. and worldwide<br />
patents issued & pending. DTS<br />
and DTS Digital Out are<br />
registered trademarks and the<br />
DTS logos and Symbol are<br />
trademarks of DTS, Inc. © 1996-<br />
2008 DTS, Inc. All Rights<br />
Reserved.<br />
“<strong>DVD</strong>+RW,” “<strong>DVD</strong>-RW,”<br />
“<strong>DVD</strong>+R,” “<strong>DVD</strong>+R DL,”<br />
“<strong>DVD</strong>-R,” “<strong>DVD</strong> VIDEO,” and<br />
“<strong>CD</strong>” logos are trademarks.<br />
MPEG Layer-3 audio coding<br />
technology and patents licensed<br />
from Fraunhofer IIS and<br />
Thomson.<br />
This <strong>DVD</strong> player incorporates<br />
High-Definition Multimedia<br />
Interface (HDMI) technology.<br />
HDMI, the HDMI Logo and<br />
High-Definition Multimedia<br />
Interface are trademarks or<br />
registered trademarks of HDMI<br />
Licensing LLC.<br />
This product meets ENERGY<br />
STAR ® guidelines for energy<br />
efficiency.<br />
ENERGY STAR and the<br />
ENERGY STAR mark are<br />
registered U.S. marks.<br />
ENERGY STAR is a registered<br />
mark owned by the U.S.<br />
government.<br />
About this manual<br />
“<strong>DVD</strong>” may be used as a general<br />
term for commercial <strong>DVD</strong>s,<br />
<strong>DVD</strong>+RWs/<strong>DVD</strong>+Rs/<strong>DVD</strong>+R<br />
DLs (+VR mode) and <strong>DVD</strong>-RWs/<br />
<strong>DVD</strong>-Rs/<strong>DVD</strong>-R DLs (VR mode,<br />
video mode).<br />
3
4<br />
Playback<br />
Control Menu display<br />
Use the Control Menu to select a function and<br />
to view related information.<br />
Press DISPLAY.<br />
To change the Control Menu display, press<br />
DISPLAY again.<br />
OFF<br />
OFF<br />
SET<br />
ON<br />
A Control Menu items<br />
B Currently playing title/Total number of<br />
titles<br />
C Currently playing chapter/Total number<br />
of chapters<br />
D Playing time<br />
E Selected disc type<br />
F Playback status<br />
G Selected item icon/menu options<br />
H Operation message<br />
I Selected Control Menu item<br />
Menu list<br />
1 2 ( 2 7 )<br />
1 8 ( 3 4 )<br />
T 1 : 3 2 : 5 5<br />
PROGRAM<br />
ENTER Quit: DISPLAY<br />
PLAY<br />
<strong>DVD</strong> VIDEO<br />
Item Item Name, Function<br />
TITLE/SCENE/TRACK<br />
CHAPTER/INDEX<br />
TRACK<br />
Selects the title, scene, track, chapter, or index<br />
to be played.<br />
TIME/TEXT<br />
Checks the elapsed time and the remaining<br />
playback time.<br />
Input the time code for picture and music search<br />
(<strong>DVD</strong> only).<br />
ORIGINAL/PLAY LIST<br />
Selects the type of title (<strong>DVD</strong>-VR mode) to be<br />
played: ORIGINAL, or edited PLAY LIST.<br />
PROGRAM* 1, * 2<br />
Selects the title, chapter, or track to play in the<br />
order you want.<br />
1 Select “SET t,” then select the title (T),<br />
chapter (C), or track (T) you want to<br />
program.<br />
2 Repeat selecting the title, chapter, or track.<br />
3 Press N.<br />
SHUFFLE* 1, * 2<br />
Plays the title, chapter or track in random order.<br />
REPEAT* 1, * 2<br />
Plays all titles/tracks/albums or a single title/<br />
chapter/track/album/file repeatedly.<br />
A-B REPEAT* 1, * 2<br />
Specifies the parts you want to play repeatedly.<br />
1 During playback, select “SET t,” then<br />
press ENTER.<br />
The “A-B REPEAT” setting bar appears.<br />
2 When you find the starting point (point A),<br />
press ENTER.<br />
3 When you reach the ending point (point B),<br />
press ENTER again.<br />
PARENTAL CONTROL<br />
Set to prohibit playback on this player.<br />
PLAYER t: Playback of some <strong>DVD</strong> VIDEOs<br />
can be limited according to a predetermined<br />
level such as the age of the users. Scenes may be<br />
blocked or replaced with different scenes<br />
(Parental Control).<br />
PASSWORD t: Enter a 4-digit password<br />
using the number buttons. Also use this menu to<br />
change the password.<br />
Parental Control (limited playback)<br />
You can set a playback limitation level.<br />
1 Select “PLAYER t,” then press ENTER.<br />
Enter or re-enter your 4-digit password, then<br />
press ENTER.
2 Press X/x to select “STANDARD,” then<br />
press ENTER.<br />
Press X/x to select an area, then press<br />
ENTER.<br />
When you select “OTHERS t,” select and<br />
enter a standard code. See “PARENTAL<br />
CONTROL AREA CODE LIST” at the end<br />
of this manual.<br />
3 Press X/x to select “LEVEL,” then press<br />
ENTER.<br />
Press X/x to select the level, then press<br />
ENTER.<br />
Parental Control setting is complete.<br />
The lower the value, the stricter the<br />
limitation.<br />
To turn off the Parental Control function, set<br />
“LEVEL” to “OFF.”<br />
If you forget your password, enter “199703” in<br />
the password box, press ENTER, and then enter<br />
a new 4-digit password.<br />
SETUP<br />
QUICK: Use Quick Setup to choose the desired<br />
language of the on-screen display, the aspect<br />
ratio of the TV and the audio output signal.<br />
CUSTOM: In addition to the Quick Setup<br />
setting, you can adjust various other settings<br />
(page 7).<br />
RESET: Returns the settings in “SETUP” to the<br />
default setting.<br />
ZOOM* 1<br />
Magnifies the image up to four times the<br />
original size, scroll using C/X/x/c.<br />
ANGLE<br />
Changes the angle.<br />
CUSTOM PICTURE MODE<br />
Selects the picture quality that best suits the<br />
program you are watching.<br />
STANDARD: displays a standard picture.<br />
DYNAMIC 1: produces a bold dynamic picture<br />
by increasing the picture contrast and the color<br />
intensity.<br />
DYNAMIC 2: produces a more dynamic<br />
picture than DYNAMIC 1 by further increasing<br />
the picture contrast and color intensity.<br />
CINEMA 1: enhances details in dark areas by<br />
increasing the black level.<br />
CINEMA 2: white colors become brighter and<br />
black colors become richer, and the color<br />
contrast is increased.<br />
MEMORY t: adjusts the picture in greater<br />
detail.<br />
SHARPNESS<br />
Exaggerates the outline of the image to produce<br />
a sharper picture.<br />
OFF: cancels this option.<br />
1: enhances the outline.<br />
2: enhances the outline more than 1.<br />
AV SYNC<br />
Adjust the delay between the picture and sound.<br />
This function is not effective when:<br />
– you use the DIGITAL OUT (COAXIAL)<br />
jack, and set “DOLBY DIGITAL” and “DTS”<br />
in “AUDIO SETUP” to “DOLBY DIGITAL”<br />
and “ON” respectively (page 8).<br />
– you connect a Dolby Digital or DTScompliant<br />
device via the HDMI OUT jack,<br />
and set “DOLBY DIGITAL” and “DTS” in<br />
“AUDIO SETUP” to “DOLBY DIGITAL”<br />
and “ON” respectively (page 8).<br />
1 Select “SET t,” then press ENTER.<br />
The “AV SYNC” adjustment bar appears.<br />
2 Press c repeatedly to adjust the delay.<br />
Each time you press C/c, the delay is<br />
adjusted by 10 milliseconds.<br />
3 Press ENTER.<br />
The selected setting takes effect.<br />
To reset the “AV SYNC” setting, press CLEAR<br />
in step 2.<br />
TVS (TV Virtual Surround)<br />
Selects surround sound effect when connecting<br />
a stereo TV or 2 front speakers. This only works<br />
when playing a multichannel Dolby audio<br />
sound track. Furthermore, if the player is set up<br />
to output the signal from the DIGITAL OUT<br />
(COAXIAL)/HDMI OUT jack, the surround<br />
effect will only be heard when “DOLBY<br />
DIGITAL” is set to “D-PCM” in “AUDIO<br />
SETUP” (page 8).<br />
OFF: Cancels the setting.<br />
TVS DYNAMIC THEATER/<br />
TVS DYNAMIC/<br />
TVS WIDE: These modes are effective when<br />
the distance between the front L and R speakers<br />
is short, such as with built-in speakers on a<br />
stereo TV.<br />
TVS NIGHT: This feature is useful when you<br />
want to hear the dialog and enjoy the surround<br />
sound effects of “TVS WIDE” at low volume.<br />
TVS STANDARD: Use this setting when you<br />
want to use TVS with 2 separate speakers.<br />
* 1 To return to normal play, select “OFF” or press<br />
CLEAR.<br />
* 2 The play mode is canceled when:<br />
– you open the disc tray.<br />
– you turn off the player.<br />
,continued<br />
5
6<br />
◆Items for DATA discs<br />
Item Item Name, Function<br />
ALBUM<br />
Selects the album that contains music and photo<br />
files to be played.<br />
FILE<br />
Selects the photo file to be played.<br />
ALBUM<br />
Selects the album that contains video file to be<br />
played.<br />
FILE<br />
Selects the video file to be played.<br />
DATE<br />
Displays the date the picture was taken by a<br />
digital camera.<br />
INTERVAL*<br />
Specifies the duration for which the slides are<br />
displayed on the screen.<br />
EFFECT*<br />
Selects the effects to be used for changing slides<br />
during a slide show.<br />
MODE 1: the images randomly cycle through<br />
the effects.<br />
MODE 2: the next image sweeps in from top<br />
left to bottom right.<br />
MODE 3: the image sweeps in from top to<br />
bottom.<br />
MODE 4: the image sweeps in from left to<br />
right.<br />
MODE 5: the image stretches out from the<br />
center of the screen.<br />
OFF: turns off this function.<br />
MEDIA<br />
Selects the media type you want to play.<br />
VIDEO: plays video files.<br />
PHOTO (MUSIC): plays photo and music files<br />
as a slide show. You can view a slideshow with<br />
sound when music and photo files are placed in<br />
the same album. If the playing time of either<br />
music or photos is longer, the longer one<br />
continues without sound or image.<br />
PHOTO (BGM): plays photo files with the<br />
player’s internal background sound. To choose<br />
the melody of the background sound, press<br />
AUDIO repeatedly while viewing the image.<br />
MUSIC: plays music files. Press SUBTITLE<br />
while playing music files that contain<br />
unsynchronized lyric information. The player<br />
supports MP3 ID3 Lyrics only.<br />
* Depending on the file, this function may not be<br />
possible.<br />
To play VIDEO <strong>CD</strong>s with PBC<br />
functions<br />
When you start playing a VIDEO <strong>CD</strong> with<br />
PBC (Playback control) functions, the menu<br />
for your selection appears.<br />
To play without using PBC<br />
Press ./> or the number buttons while<br />
the player is stopped to select a track, then<br />
press N or ENTER. To return to PBC<br />
playback, press x twice, then press N.<br />
To lock the disc tray (Child Lock)<br />
You can lock the disc tray to prevent it being<br />
opened by mistake.<br />
When the player is in standby mode, press in<br />
order, O RETURN, ENTER, and [/1 on the<br />
remote.<br />
The player turns on and “ ” (LOCKED)<br />
appears on the front panel display. The Z<br />
button on the player does not work while the<br />
Child Lock is set.<br />
To unlock the disc tray<br />
When the player is in standby mode, press in<br />
order, O RETURN, ENTER, and [/1 on<br />
the remote again.<br />
Controlling TVs with the remote<br />
You can control the sound level, input source,<br />
and power switch of your Sony TV with the<br />
supplied remote.<br />
If your TV is listed in the table below, set the<br />
appropriate manufacturer’s code.<br />
When you replace the batteries of the remote,<br />
set the appropriate code number again.<br />
1 While holding down TV [/1, press the<br />
number buttons to select your TV’s<br />
manufacturer’s code.<br />
2 Release TV [/1.<br />
Code numbers of controllable TVs<br />
Sony 01 (default)<br />
Hitachi 02
LG/Goldstar/NEC 04<br />
MGA/Mitsubishi 13<br />
Panasonic 19<br />
Philips 21<br />
Pioneer 16<br />
RCA 10<br />
Samsung 20<br />
Sharp 18<br />
Toshiba 07<br />
Viewing a high quality slide<br />
show (PhotoTV HD)<br />
If you have a Sony TV that is compatible with<br />
“PhotoTV HD,” you can enjoy the best<br />
quality images. “PhotoTV HD” is activated<br />
when the player is connected to a TV by an<br />
HDMI cord and “JPEG RESOLUTION” in<br />
“HDMI SETUP” is set to “PhotoTV HD”<br />
(page 8).<br />
CUSTOM Menu<br />
You can adjust various settings.<br />
Press DISPLAY when the player is in stop<br />
mode, select (SETUP), and then<br />
select “CUSTOM.” The CUSTOM menu<br />
appears.<br />
Menu list<br />
Item Item Name, Function<br />
LANGUAGE SETUP<br />
OSD (On-Screen Display): Switches the<br />
display language on the screen.<br />
MENU* 1 : Selects the desired language for the<br />
disc’s menu (<strong>DVD</strong> VIDEO only).<br />
AUDIO* 1 : Switches the language of the sound<br />
track. When you select “ORIGINAL,” the<br />
language given priority in the disc is selected.<br />
(<strong>DVD</strong> VIDEO only)<br />
SUBTITLE* 1 : Switches the language of the<br />
subtitle recorded on the <strong>DVD</strong> VIDEO. When<br />
you select “AUDIO FOLLOW,” the language<br />
for the subtitles changes according to the<br />
language you selected for the sound track.<br />
(<strong>DVD</strong> VIDEO only)<br />
SCREEN SETUP<br />
TV TYPE: Selects the aspect ratio of the<br />
connected TV.<br />
16:9<br />
4:3 LETTER BOX<br />
4:3 PAN SCAN<br />
SCREEN SAVER: When set to “ON,” the<br />
screensaver appears when the player is in pause<br />
or stop mode for 15 minutes. Press N to turn<br />
off the screen saver.<br />
BACKGROUND: Selects the background<br />
color or picture on the TV screen. If you set<br />
“JACKET PICTURE,” even though the disc<br />
does not contain a jacket picture, the<br />
“GRAPHICS” picture appears.<br />
BLACK LEVEL: Selects the black level (setup<br />
level) for video signals output from the jacks<br />
other than COMPONENT VIDEO OUT/HDMI<br />
OUT.<br />
BLACK LEVEL (COMPONENT OUT):<br />
Selects the black level (setup level) for video<br />
signals output from the COMPONENT VIDEO<br />
OUT jacks.<br />
PROGRESSIVE (COMPONENT OUT<br />
ONLY)* 2 : Sets to “ON” if your TV aspects<br />
progressive format signals.<br />
MODE (PROGRESSIVE): This setting is<br />
effefctive only when you set “PROGRESSIVE<br />
(COMPONENT OUT ONLY)” to “ON.”<br />
“AUTO” detects the format either the filmbased<br />
or video-based, and converts to the<br />
appropriate version.<br />
4:3 OUTPUT: This setting is effective only<br />
when you set “TV TYPE” to “16:9.” Select<br />
“FULL” when you can change the aspect ratio<br />
on your TV.<br />
CUSTOM SETUP<br />
AUTO STANDBY: Sets the Auto Standby<br />
setting on or off. If you select “ON,” the player<br />
enters standby mode when left in stop mode for<br />
more than 30 minutes.<br />
AUTO PLAY: When set to “ON,” the player<br />
automatically starts playback when the player is<br />
turned on by a timer (not supplied).<br />
,continued<br />
7
8<br />
PAUSE MODE: Selects the picture in pause<br />
mode. Normally select “AUTO.” When the<br />
picture is output in high resolution, set to<br />
“FRAME.” (<strong>DVD</strong> only)<br />
TRACK SELECTION: Gives the sound track<br />
which contains the highest number of channels<br />
priority when you play a <strong>DVD</strong> VIDEO on<br />
which multiple audio formats (PCM, DTS, or<br />
Dolby Digital format) are recorded. If you<br />
select “AUTO,” priority is given. (<strong>DVD</strong><br />
VIDEO only)<br />
IMAGE QUALITY: Selects the priority<br />
display to either high quality image or quick<br />
speed. (Photo files only)<br />
MULTI-DISC RESUME: Switches the Multidisc<br />
Resume setting on or off. Resume playback<br />
can be stored in memory for up to 6 different<br />
<strong>DVD</strong> VIDEOs/VIDEO <strong>CD</strong>s. If you start the<br />
settings again, the resume point is cleared.<br />
(<strong>DVD</strong> VIDEO/VIDEO <strong>CD</strong> only)<br />
AUDIO SETUP<br />
AUDIO DRC (Dynamic Range Control)* 3 :<br />
Set according the surrounding environment. Set<br />
to “TV MODE” when the smallest sounds are<br />
indiscernible, or set to “WIDE RANGE” when<br />
the listening environment is good, for example,<br />
in a home movie theater.<br />
DOWNMIX* 3 : Switches the method for<br />
mixing down to 2 channels when you play a<br />
<strong>DVD</strong> which has rear sound elements (channels),<br />
or is recorded in Dolby Digital format.<br />
Normally select “DOLBY SURROUND.”<br />
DIGITAL OUT: Selects if audio signals are<br />
output via the DIGITAL OUT (COAXIAL)/<br />
HDMI OUT jack. When you select “ON,” set<br />
also the following “DOLBY DIGITAL,”<br />
“DTS,” or “48kHz/96kHz PCM.”<br />
DOLBY DIGITAL: Selects the type of Dolby<br />
Digital signal. Set to “D-PCM” when the player<br />
is connected to an audio component without a<br />
built-in Dolby Digital decoder.<br />
DTS: Selects the type of DTS audio signal. Set<br />
to “ON” when you play a <strong>DVD</strong> VIDEO with<br />
DTS sound tracks. Do not set to “ON” when<br />
you connect the player to an audio component<br />
without a DTS decoder.<br />
48kHz/96kHz PCM: Selects the sampling<br />
frequency of the digital audio output signal.<br />
(<strong>DVD</strong> VIDEO only)<br />
HDMI SETUP<br />
You can adjust items related to HDMI<br />
connection.<br />
HDMI RESOLUTION* 2 : Selects the type of<br />
video signal output from the HDMI OUT jack.<br />
If “AUTO (1920×1080p)” (default) is selected,<br />
the player outputs video signals of the highest<br />
resolution acceptable for your TV. If the picture<br />
is not clear, unnatural or otherwise not to your<br />
satisfaction, try another option that suits the<br />
disc, TV/projector, etc. For details, refer also to<br />
the instruction manual supplied with the TV/<br />
projector, etc.<br />
You cannot select this when “JPEG<br />
RESOLUTION” is set to “PhotoTV HD.”<br />
JPEG RESOLUTION: Selects the type of<br />
JPEG resolution so that you can enjoy a high<br />
picture quality via HDMI connection.<br />
This setting is effective only when you set “TV<br />
TYPE” to “16:9.” You cannot select this when<br />
“HDMI RESOLUTION” is set to “720×480p.”<br />
“(1920×1080i) HD ” and “(1920×1080i)<br />
HD” are effective only when you set “HDMI<br />
RESOLUTION” to “1920×1080i.” If you set<br />
this setting to “PhotoTV HD,” “(1920×1080i)<br />
HD ” or “(1920×1080i) HD,” the effect,<br />
rotation, and zoom functions are not available.<br />
YCBCR/RGB (HDMI): Selects the type of<br />
HDMI signal output from the HDMI OUT jack.<br />
Set to “RGB” if the playback picture is<br />
distorted. You cannot select this when “JPEG<br />
RESOLUTION” is set to “PhotoTV HD.”<br />
AUDIO (HDMI): Selects the type of audio<br />
signal output from the HDMI OUT jack. Set to<br />
“PCM” if you connect the player to a TV that is<br />
not compatible with DOLBY DIGITAL/DTS<br />
signals.<br />
* 1 When you select “OTHERS t,” select and<br />
enter a language code. See “LANGUAGE<br />
CODE LIST” at the end of this manual.<br />
* 2 If the picture does not appear normally or goes<br />
blank, reset the setting. Press [/1 to turn off,<br />
enter “369,” and then press [/1 to turn on the<br />
player again.<br />
* 3 This function affects the output from the<br />
following jacks:<br />
– AUDIO OUT L/R jacks.<br />
– DIGITAL OUT (COAXIAL)/HDMI OUT<br />
jack only when “DOLBY DIGITAL” is set to<br />
“D-PCM.”
Information<br />
Troubleshooting<br />
If you experience any of the following<br />
difficulties while using the player, use this<br />
troubleshooting guide to help remedy the<br />
problem before requesting repairs. Should<br />
any problem persist, consult your nearest<br />
Sony dealer.<br />
The power is not turned on.<br />
c Check that the power cord is connected<br />
securely.<br />
There is no picture/picture noise appears.<br />
c Re-connect the connecting cord securely.<br />
c The connecting cords are damaged.<br />
c Check the connection to your TV and switch<br />
the input selector on your TV so that the signal<br />
from the player appears on the TV screen.<br />
c The disc is dirty or flawed.<br />
c Press [/1 to turn off the player, and enter<br />
“369” using the number buttons on the remote,<br />
then press [/1 to turn on the player again.<br />
There is no sound.<br />
c Re-connect the connecting cord securely.<br />
c The connecting cord is damaged.<br />
c The player is in pause mode or in Slow-motion<br />
Play mode.<br />
c The player is in fast forward or fast reverse<br />
mode.<br />
The remote does not function.<br />
c The batteries in the remote are weak.<br />
c The remote is not pointed at the remote sensor<br />
on the player.<br />
c When you operate the player by pressing<br />
buttons on the remote in sequence, press the<br />
buttons within 5 seconds of each other.<br />
The disc does not play.<br />
c The disc is turned over.<br />
Insert the disc with the playback side facing<br />
down.<br />
c The disc is skewed.<br />
c The player cannot play certain discs.<br />
c The region code on the <strong>DVD</strong> does not match<br />
the player.<br />
c Moisture has condensed inside the player.<br />
c The player cannot play a recorded disc that is<br />
not correctly finalized.<br />
The player does not operate properly.<br />
c When static electricity, etc., causes the player<br />
to operate abnormally, unplug the player.<br />
The disc tray does not open and “ ”<br />
(LOCKED) appears on the front panel<br />
display.<br />
c Child Lock is set (page 6).<br />
The disc tray does not open and<br />
“ ” (TRAY LOCKED) appears on<br />
the front panel display.<br />
c Contact your Sony dealer or local authorized<br />
Sony service facility.<br />
“C13” appears on the front panel display.<br />
c Clean the disc with a cleaning cloth or check<br />
its format.<br />
“C31” appears on the front panel display.<br />
c Re-insert the disc correctly.<br />
There is no picture/sound when connected<br />
to the HDMI OUT jack.<br />
c Change the “HDMI RESOLUTION” setting<br />
in “HDMI SETUP.” The problem may be<br />
solved.<br />
c The equipment connected to the HDMI OUT<br />
jack does not conform to the audio signal<br />
format, in this case set “AUDIO (HDMI)” in<br />
“HDMI SETUP” to “PCM.”<br />
c Try the following: 1Turn the player off and<br />
on again. 2Turn the connected equipment off<br />
and on again. 3Disconnect and then connect<br />
the HDMI cord again.<br />
Playable file format<br />
Video: MPEG-1 (Cyber-shot data)/MPEG-4<br />
(simple profile)*<br />
Photo: JPEG (DCF format)<br />
Music: MP3 (except for mp3PRO)/WMA<br />
(except for WMA Pro)*/AAC*/LPCM/<br />
WAVE<br />
* Files with copyright protection (Digital Right<br />
Management) cannot be played.<br />
Supported extensions: “.mpg”, “.mpeg”,<br />
“.mp4”, “.jpg”, “.mp3”, “.wma”, “.m4a”,<br />
“.wav”<br />
Supported discs: <strong>DVD</strong>, <strong>DVD</strong>±RW/±R/±R<br />
DL, Music <strong>CD</strong>/Super V<strong>CD</strong>, <strong>CD</strong>-R/-RW<br />
DATA <strong>CD</strong>s recorded according to ISO<br />
9660 Level 1/Level 2, or its extended<br />
format, Joliet.<br />
,continued<br />
9
10<br />
DATA <strong>DVD</strong>s recorded according to UDF.<br />
The player will play any file in the above,<br />
even if the file format differs. Playing such<br />
data may generate noise that can result in<br />
speaker damage.<br />
To play a complex hierarchy of folders may<br />
take some time. Create albums with no<br />
more than two hierarchies.<br />
Some video, photo, and music files may not<br />
play, depending on the encoding/recording<br />
condition.<br />
To start playback and proceed to the next or<br />
another album/file may take some time.<br />
The player will recognize a maximum of<br />
200 albums and 600 files. It can recognize<br />
up to 300 music files and 300 photo files<br />
when “PHOTO (MUSIC)” is selected.<br />
The player may not play a combination of<br />
two or more video files.<br />
The player cannot play a video file of size<br />
more than 720 (width) × 576 (height)/2 GB.<br />
Depending on the file, playback may not be<br />
smooth. You are recommended to create the<br />
file at a lower bit rate.<br />
The player may not play back the high bit<br />
rate video file on the DATA <strong>CD</strong> smoothly.<br />
You are recommended to play back using<br />
DATA <strong>DVD</strong>.<br />
When playing visual data that is not<br />
supported by MPEG-4 format, only sound<br />
will be heard.<br />
Note about recordable media<br />
Some recordable media cannot be played on<br />
this player due to the recording quality or<br />
physical condition of the disc, or the<br />
characteristics of the recording device and<br />
authoring software. The disc will not play if it<br />
has not been correctly finalized. Also some<br />
DATA discs created in Packet Write format<br />
cannot be played.<br />
For player that cannot play images that<br />
contain a copy protection only<br />
Images in <strong>DVD</strong>-VR mode with CPRM<br />
(Content Protection for Recordable Media)<br />
protection may not be played.<br />
Note on playback operations of <strong>DVD</strong>s and<br />
VIDEO <strong>CD</strong>s<br />
Some playback operations of <strong>DVD</strong>s and<br />
VIDEO <strong>CD</strong>s may be intentionally set by<br />
software producers. Since this player plays<br />
<strong>DVD</strong>s and VIDEO <strong>CD</strong>s according to the disc<br />
contents the software producers designed,<br />
some playback features may not be available.<br />
Also, refer to the operating instructions<br />
supplied with the <strong>DVD</strong>s or VIDEO <strong>CD</strong>s.<br />
Note on discs<br />
This unit is designed to playback discs that<br />
conform to the Compact Disc (<strong>CD</strong>) standard.<br />
DualDiscs and some music discs encoded<br />
with copyright protection technologies do not<br />
conform to the Compact Disc (<strong>CD</strong>) standard.<br />
Therefore, these discs may not be compatible<br />
with this unit.<br />
Specifications<br />
System<br />
Laser: Semiconductor laser<br />
Outputs<br />
AUDIO OUT (L/R): Phono jack<br />
DIGITAL OUT (COAXIAL): Phono jack<br />
COMPONENT VIDEO OUT(Y, PB, PR):<br />
Phono jack<br />
VIDEO OUT: Phono jack<br />
HDMI OUT: HDMI 19 pin-Standard<br />
Connector<br />
General<br />
Power requirements: 120 V AC, 60 Hz<br />
Power consumption: 10 W<br />
Dimensions (approx.): 320 × 38 × 209 mm<br />
(12 5 /8 × 1 1 /2 × 8 1 /4 in.) (width/height/depth)<br />
incl. projecting parts<br />
Mass (approx.): 1.2 kg (2 lb 11 oz)<br />
Operating temperature: 5 °C to 35 °C<br />
(41 °F to 95 °F)<br />
Operating humidity: 25 % to 80 %<br />
Supplied accessories<br />
Audio/Video cord (phono plug × 3 y<br />
phono plug × 3) (1)<br />
Remote commander (remote) (1)<br />
Size AA (R6) batteries (2)<br />
Specifications and design are subject to<br />
change without notice.
LANGUAGE CODE LIST<br />
1 page 7<br />
Code Language Code Language Code Language Code Language<br />
1027 Afar<br />
1028 Abkhazian<br />
1032 Afrikaans<br />
1039 Amharic<br />
1044 Arabic<br />
1045 Assamese<br />
1051 Aymara<br />
1052 Azerbaijani<br />
1053 Bashkir<br />
1057 Byelorussian<br />
1059 Bulgarian<br />
1060 Bihari<br />
1061 Bislama<br />
1066 Bengali;<br />
Bangla<br />
1067 Tibetan<br />
1070 Breton<br />
1079 Catalan<br />
1093 Corsican<br />
1097 Czech<br />
1103 Welsh<br />
1105 Danish<br />
1109 German<br />
1130 Bhutani<br />
1142 Greek<br />
1144 English<br />
1145 Esperanto<br />
1149 Spanish<br />
1150 Estonian<br />
1151 Basque<br />
1157 Persian<br />
1165 Finnish<br />
1166 Fiji<br />
1171 Faroese<br />
1174 French<br />
1181 Frisian<br />
PARENTAL CONTROL AREA CODE LIST<br />
1 page 4<br />
1183 Irish<br />
1186 Scots Gaelic<br />
1194 Galician<br />
1196 Guarani<br />
1203 Gujarati<br />
1209 Hausa<br />
1217 Hindi<br />
1226 Croatian<br />
1229 Hungarian<br />
1233 Armenian<br />
1235 Interlingua<br />
1239 Interlingue<br />
1245 Inupiak<br />
1248 Indonesian<br />
1253 Icelandic<br />
1254 Italian<br />
1257 Hebrew<br />
1261 Japanese<br />
1269 Yiddish<br />
1283 Javanese<br />
1287 Georgian<br />
1297 Kazakh<br />
1298 Greenlandic<br />
1299 Cambodian<br />
1300 Kannada<br />
1301 Korean<br />
1305 Kashmiri<br />
1307 Kurdish<br />
1311 Kirghiz<br />
1313 Latin<br />
1326 Lingala<br />
1327 Laothian<br />
1332 Lithuanian<br />
1334 Latvian;<br />
Lettish<br />
1345 Malagasy<br />
1347 Maori<br />
1349 Macedonian<br />
1350 Malayalam<br />
1352 Mongolian<br />
1353 Moldavian<br />
1356 Marathi<br />
1357 Malay<br />
1358 Maltese<br />
1363 Burmese<br />
1365 Nauru<br />
1369 Nepali<br />
1376 Dutch<br />
1379 Norwegian<br />
1393 Occitan<br />
1403 (Afan)Oromo<br />
1408 Oriya<br />
1417 Punjabi<br />
1428 Polish<br />
1435 Pashto;<br />
Pushto<br />
1436 Portuguese<br />
1463 Quechua<br />
1481 Rhaeto-<br />
Romance<br />
1482 Kirundi<br />
1483 Romanian<br />
1489 Russian<br />
1491 Kinyarwanda<br />
1495 Sanskrit<br />
1498 Sindhi<br />
1501 Sangho<br />
1502 Serbo-<br />
Croatian<br />
1503 Singhalese<br />
1505 Slovak<br />
1506 Slovenian<br />
1507 Samoan<br />
1508 Shona<br />
1509 Somali<br />
1511 Albanian<br />
1512 Serbian<br />
1513 Siswati<br />
1514 Sesotho<br />
1515 Sundanese<br />
1516 Swedish<br />
1517 Swahili<br />
1521 Tamil<br />
1525 Telugu<br />
1527 Tajik<br />
1528 Thai<br />
1529 Tigrinya<br />
1531 Turkmen<br />
1532 Tagalog<br />
1534 Setswana<br />
1535 Tonga<br />
1538 Turkish<br />
1539 Tsonga<br />
1540 Tatar<br />
1543 Twi<br />
1557 Ukrainian<br />
1564 Urdu<br />
1572 Uzbek<br />
1581 Vietnamese<br />
1587 Volapük<br />
1613 Wolof<br />
1632 Xhosa<br />
1665 Yoruba<br />
1684 Chinese<br />
1697 Zulu<br />
1703 Not specified<br />
ISO 639: 1988 (E/F) standard<br />
Code Area Code Area Code Area Code Area<br />
2044 Argentina<br />
2047 Australia<br />
2046 Austria<br />
2057 Belgium<br />
2070 Brazil<br />
2079 Canada<br />
2090 Chile<br />
2092 China<br />
2115 Denmark<br />
2165 Finland<br />
2174 France<br />
2109 Germany<br />
2248 India<br />
2238 Indonesia<br />
2254 Italy<br />
2276 Japan<br />
2304 Korea<br />
2363 Malaysia<br />
2362 Mexico<br />
2376 Netherlands<br />
2390 New Zealand<br />
2379 Norway<br />
2427 Pakistan<br />
2424 Philippines<br />
2436 Portugal<br />
2489 Russia<br />
2501 Singapore<br />
2149 Spain<br />
2499 Sweden<br />
2086 Switzerland<br />
2528 Thailand<br />
2184 United<br />
Kingdom
Printed in China<br />
4-169-956-11(1)