Operating Instructions ERM Unit - Drive Lines Technologies
Operating Instructions ERM Unit - Drive Lines Technologies
Operating Instructions ERM Unit - Drive Lines Technologies

You also want an ePaper? Increase the reach of your titles
YUMPU automatically turns print PDFs into web optimized ePapers that Google loves.
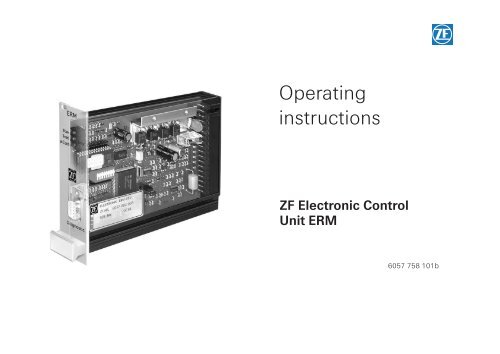
<strong>Operating</strong><br />
instructions<br />
ZF Electronic Control<br />
<strong>Unit</strong> <strong>ERM</strong><br />
6057 758 101b
Subject to alterations in design<br />
Copyright by ZF<br />
The present documentation is protected by copyright.<br />
Any kind of reproduction or dissemination in whatever<br />
form that does not exclusively correspond to documentation<br />
objectives will be prosecuted if no prior approval by<br />
ZF Friedrichshafen AG was granted.<br />
Printed in Germany<br />
ZF Friedrichshafen AG, MC-C / 2001-03<br />
Issue: 2005-02
Companies repairing ZF units are responsible for their<br />
own work safety.<br />
To avoid injury to personnel and damage to products, all<br />
safety regulations and legal requirements which apply to<br />
repair and maintenance work must be adhered to.<br />
Before starting work, mechanics must familiarize themselves<br />
with these regulations.<br />
Personnel required to carry out repairs on ZF products<br />
must receive appropriate training in advance. It is the<br />
responsibility of each company to ensure that their repair<br />
staff is properly trained.<br />
6057 758 101 - 2005-02 3<br />
Safety instructions<br />
The following safety instructions appear in this manual:<br />
NOTE<br />
Refers to special processes, techniques, data, use of<br />
auxiliary equipment, etc.<br />
CAUTION<br />
This is used when incorrect, unprofessional working<br />
practices could damage the product.<br />
!<br />
DANGER<br />
This is used when lack of care could lead to personal<br />
injury or death.
General Information<br />
Read this manual carefully before starting any tests or<br />
repair work.<br />
CAUTION<br />
Pictures, drawings and components do not always<br />
represent the original object, but are used to illustrate<br />
working procedures.<br />
Pictures, drawings and components are not to scale.<br />
Conclusions about size and weight should not be drawn<br />
(even within a complete illustration). Always follow the<br />
working steps as described in the text.<br />
After completion of repair work and testing, skilled staff<br />
must satisfy themselves that the product is functioning<br />
correctly.<br />
6057 758 101 - 2005-02 4
1 Technical data . . . . . . . . . . . . . . . . . . . . . . . . . . . 6<br />
1.1 Technical data, installation dimensions . . . . . . . 6<br />
1.2 Circuit board removal and installation . . . . . . . . 8<br />
1.3 Circuit board configuration . . . . . . . . . . . . . . . . . 10<br />
1.4 Pin assignment . . . . . . . . . . . . . . . . . . . . . . . . . . . 12<br />
1.5 Summary of pin assignment . . . . . . . . . . . . . . . . 14<br />
2 Description . . . . . . . . . . . . . . . . . . . . . . . . . . . . . 16<br />
2.1 General configuration . . . . . . . . . . . . . . . . . . . . . 16<br />
2.2 Coding clutch / brake . . . . . . . . . . . . . . . . . . . . . 18<br />
2.3 Controller for transfer function . . . . . . . . . . . . . . 19<br />
3 <strong>Operating</strong> modes . . . . . . . . . . . . . . . . . . . . . . . . . 20<br />
3.1 <strong>Operating</strong> mode “open loop (current)” . . . . . . . . 20<br />
3.1.1 Function diagram . . . . . . . . . . . . . . . . . . . 20<br />
3.1.2 Pin assignment . . . . . . . . . . . . . . . . . . . . . 21<br />
3.1.3 Technical instructions . . . . . . . . . . . . . . . . 22<br />
3.1.4 Startup . . . . . . . . . . . . . . . . . . . . . . . . . . . . 22<br />
3.2 <strong>Operating</strong> mode “open loop (torque)” . . . . . . . . . 23<br />
3.2.1 Function diagram . . . . . . . . . . . . . . . . . . . 23<br />
3.2.2 Pin assignment . . . . . . . . . . . . . . . . . . . . . 24<br />
3.2.3 Technical instructions . . . . . . . . . . . . . . . . 25<br />
3.2.4 Startup . . . . . . . . . . . . . . . . . . . . . . . . . . . . 25<br />
3.3 <strong>Operating</strong> mode “controlled with Ø sensing” . . . 26<br />
3.3.1 Function diagram . . . . . . . . . . . . . . . . . . . 26<br />
3.3.2 Pin assignment . . . . . . . . . . . . . . . . . . . . . 27<br />
3.3.3 Technical instructions . . . . . . . . . . . . . . . . 28<br />
3.3.4 Startup . . . . . . . . . . . . . . . . . . . . . . . . . . . . 28<br />
6057 758 101 - 2005-02 5<br />
Table of contents<br />
3.4 <strong>Operating</strong> mode “controlled with Ø calculation” 30<br />
3.4.1 Function diagram . . . . . . . . . . . . . . . . . . . 30<br />
3.4.2 Pin assignment . . . . . . . . . . . . . . . . . . . . . 31<br />
3.4.3 Technical instructions . . . . . . . . . . . . . . . . 32<br />
3.4.4 Startup . . . . . . . . . . . . . . . . . . . . . . . . . . . . 33<br />
3.5 <strong>Operating</strong> mode “closed-loop control” . . . . . . . . 34<br />
3.5.1 Function diagram . . . . . . . . . . . . . . . . . . . 34<br />
3.5.2 Pin assignment . . . . . . . . . . . . . . . . . . . . . 35<br />
3.5.3 Technical instructions . . . . . . . . . . . . . . . . 36<br />
3.5.4 Startup . . . . . . . . . . . . . . . . . . . . . . . . . . . . 36<br />
3.6 Additional functions max-power / zero-power . 37<br />
4 Identification and causes of failure /<br />
corrective action . . . . . . . . . . . . . . . . . . . . . . . . . 38
Technical Data Electronic control unit <strong>ERM</strong><br />
1 Technical data<br />
1.1 Technical data, installation dimensions<br />
Nominal direct voltage for ZF<br />
hysteresis clutches and brakes at<br />
nominal torque and a coil<br />
temperature of 120 °C: 30 V DC<br />
Permissible residual ripple: 1.5 V<br />
<strong>Operating</strong> voltage range: 24 V to 36 V DC<br />
Open circuit power consumption: < 150 mA<br />
Maximum current input: 2.8 A<br />
(depending on unit size)<br />
Fuse: fine-wire fuse 4A<br />
medium time-lag fuse<br />
Voltage output: 10 V = +/– 0.8 V<br />
20 mA<br />
(Ra min = 500 Ω)<br />
Frequency input: input resistance<br />
RE ≥ 3.3 kΩ<br />
Switching threshold “low” to “high” > 11.5 V DC<br />
Switching threshold “high” to “low” < 4.0 V DC<br />
6057 758 101 - 2005-02 6<br />
Ambient temperature: 0 to + 50 °C<br />
Storage temperature: -30 to + 70 °C<br />
Humidity class: DIN IEC 68, part 2-30<br />
Safety class according<br />
to DIN 40 050: IP 30<br />
Rack: 19” 7 TE plug-in module<br />
Connection: 18-pin pull-off screw-type<br />
terminal (within the scope<br />
of supply)<br />
Weight: 0.6 kg<br />
NOTE<br />
The screw-type terminal block is not suitable for bus<br />
assembly. Make sure that connecting cables are long<br />
enough or that the screw-type terminal block on the<br />
rear of the assembly rack is accessible.
Electronic control unit <strong>ERM</strong> Technical Data<br />
Installation dimensions<br />
35<br />
128<br />
6057 758 101 - 2005-02 7<br />
182.5<br />
170<br />
015242<br />
111.5<br />
92
Technical Data Electronic control unit <strong>ERM</strong><br />
1.2 Circuit board removal and installation<br />
Removal:<br />
1. Switch off operating voltage.<br />
CAUTION<br />
If the operating voltage is not switched off, product and<br />
system can be damaged.<br />
2. Remove terminal strip (2) from plug connector (3).<br />
3. Remove screws (1 + 4).<br />
4. Carefully pull board out of the rack without tilting.<br />
6057 758 101 - 2005-02 8<br />
Installation:<br />
1. Carefully insert board into rack, guiding slot without<br />
tilting.<br />
2. Tighten screws (1 + 4) so that the cooling attachment<br />
on the board contacts the metal rack and thus ensures<br />
optimum heat dissipation.<br />
NOTE<br />
Do not exceed permissible tightening torque to avoid<br />
board damage.<br />
3. Make sure that operating voltage is switched off.<br />
CAUTION<br />
If the operating voltage is not switched off, product and<br />
system can be damaged.<br />
4. Introduce terminal strip (2) into plug connector (3).<br />
CAUTION<br />
Contacts must not be damaged, otherwise perfect functioning<br />
of the system is not ensured.
Electronic control unit <strong>ERM</strong> Technical Data<br />
6057 758 101 - 2005-02 9<br />
1<br />
2<br />
3<br />
4<br />
015239
Technical Data Electronic control unit <strong>ERM</strong><br />
1.3 Circuit board configuration<br />
Designation Function<br />
LED (1)<br />
“Power” Supply voltage is applied and <strong>ERM</strong> program is ready.<br />
LED (2)<br />
“Feedb.” Closed-loop control operating mode, i.e. DIL switch position 5 and 6 = “1”.<br />
LED (3) • Ø sensing operation, DIL switch position 5 = “1” and 6 = “0” or<br />
“Ø-Contr.” • Ø calculation operation, DIL switch position 5 = “0” and 6 = “1”.<br />
• LED “Ø-Contr.” flashes, if the setting procedure has not been carried<br />
out in the operating mode Ø calculation or Ø sensing.<br />
Connection for Diagnostic connector for ZF MOBiDIG tester<br />
diagnostic unit K-cable, acc. to ISO 9141<br />
Jumper For function selection. e.g. feed rate interruption, emergency brake<br />
Fuse Fine-wire fuse 4 A, medium time-lag fuse<br />
DIL switches Setting of various operating modes and unit sizes<br />
Program memory Includes microprocessor operating program<br />
Data memory Contains operating parameters<br />
Terminal strip 18-pin<br />
6057 758 101 - 2005-02 10
Electronic control unit <strong>ERM</strong> Technical Data<br />
1<br />
2<br />
3<br />
Program memory<br />
Connection for diagnostic unit<br />
1 2 3 4 5 6 7 8<br />
OPEN<br />
6057 758 101 - 2005-02 11<br />
DIL switches Cooling attachement Fuse<br />
Microprocessor<br />
017182<br />
Jumper Data memory E 2 PROM Terminal strip
Technical Data Electronic control unit <strong>ERM</strong><br />
1.4 Pin assignment<br />
fv PNP<br />
fn PNP<br />
Example for external<br />
analog input, e.g. SPS<br />
+24 V to +36 V<br />
Stop Set<br />
6057 758 101 - 2005-02 12<br />
+<br />
–<br />
10 k<br />
10 k<br />
Soll<br />
Ist<br />
11<br />
10<br />
12<br />
13<br />
7<br />
9<br />
5<br />
8<br />
7<br />
9<br />
5<br />
8<br />
17 18<br />
1 2<br />
1 2 3 4 5 6 7 8<br />
OPEN<br />
1<br />
2<br />
3<br />
Jumper<br />
14 15<br />
14 15<br />
16<br />
6<br />
015241<br />
Alternative function<br />
Web tear recognition<br />
PIN 17, 18 (+24 V to +36 V)
Electronic control unit <strong>ERM</strong> Technical Data<br />
NOTE<br />
The electronic control unit does not require the potentiometer to<br />
fulfill any particular requirements. However, mechanical requirements<br />
regarding installation need to be considered.<br />
Recommendations for potentiometer:<br />
Resistance value: 1 kΩ - 47 kΩ<br />
Type: magnetoresistive potentiometer, for voltage<br />
input nom. value also wire potentiometer<br />
can be used.<br />
Jumper-Position:<br />
Appropriate function is activated by inserting a jumper.<br />
1<br />
2<br />
3<br />
● ●<br />
● ●<br />
● ●<br />
as supplied: standard functions,<br />
tear recognition, friction compensation<br />
terminal 14: current zero function;<br />
terminal 15; current max. function<br />
terminal 8: Ø actual 0 - 5 V, instead of 0 - 10 V<br />
NOTE<br />
Pos. 1 and 2 must never be connected simultaneously.<br />
6057 758 101 - 2005-02 13
Technical Data Electronic control unit <strong>ERM</strong><br />
1.5 Summary of pin assignment<br />
PIN Function<br />
1 ground (–)<br />
2 ground (–)<br />
3 no assignment<br />
4 no assignment<br />
5 analog ground<br />
6 current return cable (measurement input)<br />
clutch / brake max. 2.55 A<br />
(depending on unit size)<br />
7 voltage output 10 V ± 0.8 V DC<br />
max. load 20 mA;<br />
load impedance Ra min = 500 Ω<br />
8 voltage input, actual value (0 to +10 V)<br />
input resistance Ri = 200 kΩ;<br />
Input may also be supplied by external analog<br />
sources, provided the voltage refers to ground<br />
(PIN 5) and the max. value does not exceed<br />
+10 V.<br />
6057 758 101 - 2005-02 14<br />
PIN Function<br />
9 voltage input, nominal value (0 to +10 V)<br />
input resistance Ri = 200 kΩ;<br />
Input may also be supplied by external analog<br />
sources, provided the voltage refers to ground<br />
(PIN 5) and the max. value does not exceed<br />
+10 V.<br />
10 digital input “stop”<br />
input resistance 4.7 kΩ;<br />
input current 5 to 8 mA;*<br />
Umax = operating voltage<br />
Function is maintained as long as the signal is<br />
on.<br />
11 digital input “set” (push-button)<br />
input resistance 4.7 kΩ;<br />
input current 5 to 8 mA;*<br />
Umax = operating voltage<br />
12 frequency input - fn (roller speed)<br />
frequency 3 to 1000 Hz;<br />
input resistance 3.3 kΩ<br />
pulse ≥ 0.5 ms, interpulse period ≥ 0.5 ms<br />
input resistance 3.3 kΩ
Electronic control unit <strong>ERM</strong> Technical Data<br />
PIN Function<br />
13 frequency input - fv (feedrate)<br />
frequency 3 to 1000 Hz;<br />
input resistance 3.3 kΩ<br />
pulse ≥ 0.5 ms, interpulse period ≥ 0.5 ms<br />
input resistance 3.3 kΩ<br />
14 output roller speed<br />
output voltage 24 V DC;<br />
max. load 50 mA;<br />
max. load impedance 10 kΩ;<br />
A suppressor diode must be used with inductive<br />
load (no varistor!)<br />
input current - zero<br />
load current 1 to 2 mA;*<br />
For functions consult relevant operation mode.<br />
Function is maintained as long as the signal is on.<br />
15 output feedrate<br />
output voltage 24 V DC;<br />
max. load 50 mA;<br />
max. load impedance 10 kΩ;<br />
A suppressor diode must be used with inductive<br />
load (no varistor!)<br />
input current - max.<br />
load current 1 to 2 mA;*<br />
For functions consult relevant operation mode.<br />
Function is maintained as long as the signal is on.<br />
6057 758 101 - 2005-02 15<br />
PIN Function<br />
16 current output clutch / brake<br />
max. 2.55 A (depending on unit size)<br />
NOTE: Limit for EBU 2000!<br />
17 voltage supply + 24 V to + 36 V<br />
max. current 2.8 A (depending on unit size)<br />
18 voltage supply + 24 V to + 36 V<br />
max. current 2.8 A (depending on unit size)<br />
* NOTE<br />
Gold-plated contacts are recommended for pushbutton,<br />
switch and relais.
Description Electronic control unit <strong>ERM</strong><br />
2 Description<br />
2.1 General configuration<br />
The ZF electronic control unit <strong>ERM</strong> can control ZF<br />
hysteresis clutches and brakes in different operating<br />
modes, as required by the application.<br />
The <strong>ERM</strong> is controlled by a microprocessor and features<br />
programming, operation and diagnosis interfaces.<br />
The <strong>ERM</strong> is designed for optimum supply of the ZF<br />
hysteresis clutches EKU and the ZF hysteresis brakes<br />
EBU. Controlled operating modes with size coding are less<br />
suitable for performance optimized brake range.<br />
The DIL switches enable the following operating modes<br />
to be set:<br />
• <strong>Operating</strong> mode: “open-loop control (current)”<br />
This operating mode is set by the manufacturer, i.e. it<br />
is not necessary to change the DIL switch positions.<br />
Current is set and kept constant in accordance with<br />
the nominal value input.<br />
<strong>Operating</strong> mode “open-loop control (current)”<br />
1 2 3 4 5 6 7 8 DIL switch<br />
0 0 0 0 0 0 0 0 as supplied<br />
6057 758 101 - 2005-02 16<br />
• <strong>Operating</strong> mode “open-loop control (torque)”<br />
The DIL switches must be set to suit unit size<br />
(Y Y Y Y) (see page 18).<br />
Torque is set and kept constant in accordance with the<br />
nominal value input.<br />
Hereby, the interdependence of the nominal voltage<br />
value/torque is subject to approximate linear distribution.<br />
<strong>Operating</strong> mode “open-loop control (torque)”<br />
1 2 3 4 5 6 7 8 DIL switch<br />
Y Y Y Y 0 0 . . <strong>Unit</strong> size - coding (characteristic)<br />
• <strong>Operating</strong> mode “controlled with Ø sensing”<br />
The DIL switches must be set to suit unit size<br />
(Y Y Y Y) (see page 18).<br />
Setting procedure:<br />
• sense maximum roller Ø<br />
• push set key<br />
• release set key<br />
(reference value for max. Ø is accepted).<br />
NOTE<br />
Data are stored in non-volatile memory; data are not<br />
erased when the supply voltage is switched off.
Electronic control unit <strong>ERM</strong> Description<br />
The reference value for the max. Ø is not erased when the<br />
supply voltage is switched off. It can therefore be used<br />
when the <strong>ERM</strong> is fitted, i.e. it can be stored in E 2 PROM.<br />
The stored reference value is deleted when another operating<br />
mode is selected (“open-loop control” or “closed loop<br />
control”).<br />
Production speed and nominal traction may be altered<br />
even during operation.<br />
<strong>Operating</strong> mode “controlled with Ø sensing”<br />
1 2 3 4 5 6 7 8 DIL switch<br />
Y Y Y Y 1 0 . . <strong>Unit</strong> size - coding (characteristic)<br />
• <strong>Operating</strong> mode: “controlled with Ø calculation”<br />
The DIL switches must be set to suit unit size<br />
(Y Y Y Y) (see page 18).<br />
Setting procedure:<br />
• approach maximum roller Ø<br />
• push set key when production speed is reached<br />
6057 758 101 - 2005-02 17<br />
NOTE<br />
If a frequency < 3 Hz is already reached during a setting<br />
procedure, no reference values will be transferred (LED 3<br />
continues flashing). Frequency range 3 - 1000 Hz.<br />
Stored reference values are deleted when another operating<br />
mode is selected (“open-loop control” or “closed loop<br />
control”).<br />
• release set key (reference values for max. Ø is<br />
accepted).<br />
Production speed and nominal traction may be altered<br />
even during operation.<br />
<strong>Operating</strong> mode “controlled with Ø calculation”<br />
1 2 3 4 5 6 7 8 DIL switch<br />
Y Y Y Y 0 1 . . <strong>Unit</strong> size - coding (characteristic)
Description Electronic control unit <strong>ERM</strong><br />
• <strong>Operating</strong> mode “closed-loop control”<br />
The DIL switches must be set to suit unit size<br />
(Y Y Y Y) (see page 18).<br />
PD, PI and PID are available for position-and-force<br />
closed-loop control.<br />
The I portion can be blocked by stop input. Thus, the<br />
last controlled torque is maintained when the unit is<br />
stopped.<br />
<strong>Operating</strong> mode “closed-loop control”<br />
1 2 3 4 5 6 7 8 DIL switch<br />
Y Y Y Y 1 1 0 0 PD for position control<br />
Y Y Y Y 1 1 1 0 PI for force control<br />
e.g. with mech. compensator<br />
Y Y Y Y 1 1 1 1 PI for force control<br />
e.g. with no-travel tension sensor or freely<br />
programmable<br />
Y Y Y Y 1 1 0 1 PID for position or force control<br />
2.2 Coding clutch / brake<br />
NOTE<br />
With DIL switches 1-4, the <strong>ERM</strong> control unit can be set to<br />
the corresponding clutch or brake.<br />
6057 758 101 - 2005-02 18<br />
Coding Type nomi- nomi-<br />
DIL switch nal nal<br />
current torque<br />
1 2 3 4 5 6 7 8 [A] [Nm]<br />
1 0 0 0 EKU 0.3 0.9 0.4<br />
0 1 0 0 EKU 1 1.3 1.0<br />
1 1 0 0 EKU 3 1.5 3.0<br />
0 0 1 0 EKU 10 1.8 12.0<br />
1 0 1 0 EBU 0.1 0.4 0.15<br />
0 1 1 0 EBU 0,3 0.75 0.4<br />
1 1 1 0 EBU 1 1.25 1.1<br />
0 0 0 1 EBU 3 1.25 3.3<br />
1 0 0 1 EBU 10 1.5 12.0<br />
0 1 0 1 EBU 30 2.2 39.0<br />
1 0 0 1 EBU 60 G 1.5 82.0<br />
0 1 0 1 EBU 200 G 2.2 268.0<br />
1 1 0 1 EBU 250/1 1.1 0.6<br />
0 0 1 1 EBU 500/3 1.4 2.5<br />
1 0 1 1 EBU 1000/10 1.9 9.0<br />
0 1 1 1 EBU 2000/30 2.7 26.0<br />
0 0 1 1 EBU 500/30G 1.4 25.0<br />
1 0 1 1 EBU 1000/100G 1.9 90.0<br />
0 1 1 1 EBU 2000/300G 2.7 260.0<br />
0 1 1 1 EBU 2000/600G 2.7 520.0
Electronic control unit <strong>ERM</strong> Description<br />
2.3 Controller for transfer function<br />
PD for position control<br />
PI for force control<br />
e.g. mech. compensator<br />
PI for force control<br />
e.g. no-travel tension sensor<br />
PID for position or<br />
force control<br />
Coding<br />
DIL switch<br />
1 2 3 4 5 6 7 8<br />
0 0<br />
Coding<br />
DIL switch<br />
1 2 3 4 5 6 7 8<br />
1 0<br />
Coding<br />
DIL switch<br />
1 2 3 4 5 6 7 8<br />
1 1<br />
Coding<br />
DIL switch<br />
1 2 3 4 5 6 7 8<br />
0 1<br />
6057 758 101 - 2005-02 19<br />
017601
<strong>Operating</strong> modes Electronic control unit <strong>ERM</strong><br />
3 <strong>Operating</strong> modes<br />
3.1 <strong>Operating</strong> mode “open-loop (current)”<br />
3.1.1 Function diagram<br />
ZF Hysteresis brake<br />
015234<br />
Roller<br />
6057 758 101 - 2005-02 20<br />
�<br />
Tensile force F (N)<br />
Current I (A)<br />
ZF electronic control unit<br />
current<br />
Feed rate v (m/s)<br />
characteristic<br />
Nominal<br />
traction<br />
2.55A<br />
Nominal 10 V<br />
traction<br />
015236
Electronic control unit <strong>ERM</strong> <strong>Operating</strong> modes<br />
3.1.2 Pin assignment<br />
Designation PIN connection<br />
Voltage supply plus 24 - 36 V 17, 18<br />
Voltage supply ground 1, 2<br />
Nominal traction sensor 7, 5, grinder 9<br />
Hysteresis brake 16, 6<br />
6057 758 101 - 2005-02 21<br />
+24 to +36 V<br />
17 18<br />
11<br />
10<br />
12<br />
13<br />
7<br />
9<br />
5<br />
8<br />
1 2<br />
Nominal traction<br />
ZF electronic unit <strong>ERM</strong><br />
16<br />
6<br />
015235<br />
Hysteresis brake /<br />
clutch
<strong>Operating</strong> modes Electronic control unit <strong>ERM</strong><br />
3.1.3 Technical instructions<br />
LED: “Power” ON<br />
Control: Current is set by the electronic system<br />
in accordance with the nominal value<br />
input.<br />
DIL switch setting:<br />
DIL switch setting<br />
DIL switches<br />
1 2 3 4 5 6 7 8<br />
0 0 0 0 0 0 0 0<br />
Jumper position: Jumper position “2” (see 1.4, page 13)<br />
can activate further functions.<br />
6057 758 101 - 2005-02 22<br />
3.1.4 Startup<br />
1. The electronic control unit is disconnected.<br />
2. Make sure that voltage is within the range given under<br />
“1. Technical Data”! (see page 6)<br />
3. Check polarity (plus / minus) !<br />
CAUTION<br />
Unpermitted voltage and polarity may damage the<br />
installation!<br />
4. Switch off operating voltage!<br />
5. Connect the <strong>ERM</strong>!<br />
6. Switch on operating voltage!<br />
“Power” LED must light up.<br />
7. The installation is ready for operation.<br />
NOTE<br />
Should the installation not function properly, see<br />
“4. Identification and causes of failure / corrective action”<br />
(see page 38)!
Electronic control unit <strong>ERM</strong> <strong>Operating</strong> modes<br />
3.2 <strong>Operating</strong> mode “open-loop control (torque)”<br />
3.2.1Function diagram<br />
ZF Hysteresis brake<br />
015243<br />
Roller<br />
6057 758 101 - 2005-02 23<br />
�<br />
Tensile force F (N)<br />
Current I (A)<br />
Feed rate v (m/s)<br />
ZF electronic control unit<br />
current<br />
characteristic<br />
TN<br />
Nominal<br />
traction<br />
Nominal 9 V<br />
traction
<strong>Operating</strong> modes Electronic control unit <strong>ERM</strong><br />
3.2.2 Pin assignment<br />
Designation PIN connection<br />
Voltage supply plus 24 - 36 V 17, 18<br />
Voltage supply ground 1, 2<br />
Nominal traction sensor 7, 5, grinder 9<br />
Hysteresis brake 16, 6<br />
6057 758 101 - 2005-02 24<br />
+24 to +36 V<br />
17 18<br />
11<br />
10<br />
12<br />
13<br />
7<br />
9<br />
5<br />
8<br />
1 2<br />
Nominal traction<br />
ZF electronic unit <strong>ERM</strong><br />
16<br />
6<br />
015 235<br />
Hysteresis brake /<br />
clutch
Electronic control unit <strong>ERM</strong> <strong>Operating</strong> modes<br />
3.2.3 Technical instructions<br />
LED: “Power” ON<br />
Control: Torque is set by the electronic system<br />
in accordance with the nominal value<br />
input.<br />
DIL switch setting:<br />
<strong>Unit</strong> size coding clutch / brake,<br />
see page 18<br />
DIL switch setting<br />
DIL switches<br />
1 2 3 4 5 6 7 8<br />
0 0 0 0<br />
0 0 0 0<br />
Jumper position: Jumper position “2” (see 1.4, page 13)<br />
can activate further functions.<br />
6057 758 101 - 2005-02 25<br />
3.2.4 Startup<br />
1. The electronic control unit is disconnected.<br />
2. Make sure that voltage is within the range given under<br />
“1. Technical Data”!<br />
(see page 6)<br />
3. Check polarity (plus / minus)!<br />
CAUTION<br />
Unpermitted voltage and polarity may damage the<br />
installation!<br />
4. Switch off operating voltage!<br />
5. Connect the <strong>ERM</strong>!<br />
6. Switch on operating voltage!<br />
“Power” LED must light up.<br />
7. The installation is ready for operation.<br />
NOTE<br />
Should the installation not function properly, consult<br />
“4. Identification and causes of failure / corrective action”<br />
(see page 38)!
<strong>Operating</strong> modes Electronic control unit <strong>ERM</strong><br />
3.3 <strong>Operating</strong> mode “controlled with Ø sensing”<br />
3.3.1Function diagram<br />
ZF Hysteresis brake<br />
015233<br />
�<br />
Roller<br />
Current I (A)<br />
Sensor<br />
Tensile force F (N)<br />
ZF Electronic control unit<br />
current<br />
characteristic<br />
6057 758 101 - 2005-02 26<br />
Feed rate v (m/s)<br />
Nominal<br />
traction<br />
���<br />
U-Ø<br />
actual Ø<br />
015236<br />
Sensor zero position equals 0 V<br />
�����<br />
(as shown by the broken line)<br />
TN<br />
max. nominal<br />
traction<br />
Ø sensor value<br />
017181
Electronic control unit <strong>ERM</strong> <strong>Operating</strong> modes<br />
3.3.2 Pin assignment<br />
Designation PIN connection<br />
Voltage supply plus 24 - 36 V 17, 18<br />
Voltage supply ground 1, 2<br />
Ø actual sensor 7, 5, grinder 8<br />
Nominal traction sensor 7, 5, grinder 9<br />
Set key 11, (17, 18)<br />
Hysteresis brake 16, 6<br />
actual Ø<br />
6057 758 101 - 2005-02 27<br />
Set<br />
+24 to +36 V<br />
17 18<br />
11<br />
10<br />
12<br />
13<br />
7<br />
9<br />
5<br />
8<br />
1 2<br />
ZF electronic unit <strong>ERM</strong><br />
Nominal traction<br />
16<br />
6<br />
015232<br />
Hysteresis brake /<br />
clutch
<strong>Operating</strong> modes Electronic control unit <strong>ERM</strong><br />
3.3.3 Technical instructions<br />
LED: “Power” ON<br />
“Ø contr.” flashes until the setting<br />
procedure is complete<br />
DIL switch setting:<br />
Controlled with Ø sensing<br />
<strong>Unit</strong> size coding clutch / brake,<br />
see page 18<br />
DIL switch setting<br />
DIL switches<br />
1 2 3 4 5 6 7 8<br />
1 0 0 0<br />
1 0 0 0<br />
1 0 0 0<br />
Jumper position: Jumper position “2” and “3” (see 1.4,<br />
page 13) can activate further functions.<br />
6057 758 101 - 2005-02 28<br />
3.3.4 Startup<br />
1. The electronic control unit is disconnected.<br />
2. Make sure that voltage is within the range given under<br />
“1. Technical Data”! (see page 6)<br />
3. Check polarity (plus / minus)!<br />
CAUTION<br />
Unpermitted voltage and polarity may damage the<br />
installation!<br />
4. Switch off operating voltage!<br />
5. Connect the <strong>ERM</strong>!<br />
6. Switch on operating voltage!<br />
“Power” LED must light up.<br />
“Ø-Contr.” LED must flash.
Electronic control unit <strong>ERM</strong> <strong>Operating</strong> modes<br />
7. Setting of Ø nom. value potentiometer<br />
• Voltage values UDa and UDi measured at random<br />
potentiometer setting.<br />
• Nom. voltage UDanominal is calculated.<br />
Da<br />
Q = ___<br />
Di<br />
⎛ Q UD ⎞<br />
a<br />
nominal = ∆ U _______<br />
⎝ Q – 1 ⎠<br />
UDanominal = nominal voltage outer diameter<br />
Da = outer diameter<br />
Di = inner diameter<br />
UD<br />
a<br />
UD<br />
i<br />
Q<br />
= voltage outer diameter<br />
= voltage inner diameter<br />
= diameter ratio<br />
∆U = voltage difference<br />
• Set UDa nominal by potentiometer.<br />
∆ U = UD a – UD i<br />
6057 758 101 - 2005-02 29<br />
8. Set max. roller Ø.<br />
9. Push “set” key.<br />
10. Release “set” key.<br />
Reference Ø is accepted,<br />
“Ø contr.” lights up.<br />
11. The installation is ready for operation.<br />
NOTE<br />
Should the installation not function properly, consult<br />
“4. Identification and causes of failure / corrective action”<br />
(see page 38)!
<strong>Operating</strong> modes Electronic control unit <strong>ERM</strong><br />
3.4 <strong>Operating</strong> mode “controlled with Ø calculation”<br />
3.4.1Function diagram<br />
ZF Hysteresis brake<br />
Roller<br />
Tensile force F (N)<br />
�<br />
015237<br />
6057 758 101 - 2005-02 30<br />
�<br />
Current I (A)<br />
Feed rate v (m/s)<br />
ZF Electronic control unit<br />
current characteristic Ø calculator<br />
v<br />
Nominal<br />
traction<br />
TN<br />
max. nominal<br />
tensile force<br />
Ø Calc. value<br />
017181
Electronic control unit <strong>ERM</strong> <strong>Operating</strong> modes<br />
3.4.2 Pin assignment<br />
Designation PIN connection<br />
Voltage supply plus 24 - 36 V 17, 18<br />
Voltage supply ground 1, 2<br />
Nominal traction sensor 7, 5, grinder 9<br />
Friction factor 7, 5, grinder 8<br />
Roller speed fn 12<br />
Feed rate fv 13<br />
Set key 11, (17, 18)<br />
Hysteresis brake 16, 6<br />
6057 758 101 - 2005-02 31<br />
� �<br />
� �<br />
���<br />
+24 to +36 V<br />
��<br />
��<br />
��<br />
��<br />
�<br />
�<br />
�<br />
�� ��<br />
�<br />
� �<br />
ZF electronic unit <strong>ERM</strong><br />
Nominal traction<br />
Hysteresis brake /<br />
clutch<br />
��<br />
�<br />
015238
<strong>Operating</strong> modes Electronic control unit <strong>ERM</strong><br />
3.4.3 Technical instructions<br />
LED: “Power” ON<br />
Control: “Ø contr.” flashes until the setting<br />
procedure is complete<br />
Sampling rate: updating of frequency, 10 Hz<br />
(100 ms)<br />
Detection of<br />
web tear: <strong>ERM</strong> offers output signals for roller and<br />
feed stoppage (f < 3 Hz), which are<br />
evaluated and possibly identified as web<br />
tear by a machine controller.<br />
Terminal 14: voltage if roller speed<br />
frequency < 3 Hz<br />
Terminal 15: voltage if feed rate<br />
frequency < 3 Hz<br />
see jumper position<br />
* measured on PIN 17, 18.<br />
6057 758 101 - 2005-02 32<br />
Compensation<br />
of friction: With minor traction, installation friction<br />
may be relatively high compared to the<br />
brake torque needed. This must be<br />
considered when calculating the brake<br />
torque.<br />
Determination<br />
of potentiometer<br />
voltage for the<br />
friction factor: The friction factor is the result of the<br />
relation between friction torque and<br />
nominal torque and is expressed as<br />
voltage value and set by an additional<br />
potentiometer at terminal 8.<br />
friction torque<br />
Uterminal 8 = ______________ * 10<br />
nominal torque
Electronic control unit <strong>ERM</strong> <strong>Operating</strong> modes<br />
Setting of DIL switches:<br />
Jumper position: Jumper position “1” or “2”<br />
(see 1.4, page 13) can activate further<br />
functions.<br />
3.4.4 Startup<br />
Adjustable filter constant<br />
New condition<br />
Filter constant<br />
Controlled with Ø calculation<br />
<strong>Unit</strong> size coding clutch / brake, see page 18<br />
DIL switch setting<br />
1. The electronic control unit is disconnected.<br />
Filter time 7 8<br />
0.5 sec 0 0<br />
2.5 sec 0 1<br />
1.5 sec 1 0<br />
0.2 sec 1 1<br />
DIL switches<br />
1 2 3 4 5 6 7 8<br />
0 1<br />
0 1<br />
0 1<br />
0 1<br />
2. Make sure that voltage is within the range given under<br />
“1. Technical Data”! (see page 6)<br />
6057 758 101 - 2005-02 33<br />
3. Check polarity (plus / minus)!<br />
CAUTION<br />
Unpermitted voltage and polarity may damage the<br />
installation!<br />
4. Switch off operating voltage!<br />
5. Connect the <strong>ERM</strong>!<br />
6. Switch on operating voltage!<br />
“Power” LED must light up.<br />
“Ø contr.” must flash.<br />
7. Set max. roller speed Ø and production speed (> 3 Hz).<br />
8. Push “set” key.<br />
9. Release “set” key.<br />
Reference Ø is accepted,<br />
“Ø contr.” lights up.<br />
10. Installation is ready for operation.<br />
NOTE<br />
Should the installation not function properly, consult<br />
“4. Identification and causes of failure / corrective action”<br />
(see page 38)!
<strong>Operating</strong> modes Electronic control unit <strong>ERM</strong><br />
3.5 <strong>Operating</strong> mode “closed-loop control”<br />
3.5.1Function diagram<br />
Dancer<br />
Weight force<br />
Roller<br />
ZF Hysteresis brake<br />
Current I (A)<br />
015230<br />
Tensile force F (N)<br />
Spring<br />
6057 758 101 - 2005-02 34<br />
Dancer<br />
ZF Electronic control unit<br />
current characteristic controller<br />
Feed rate v (m/s)<br />
Actual<br />
traction<br />
Nominal<br />
traction<br />
015231
Electronic control unit <strong>ERM</strong> <strong>Operating</strong> modes<br />
3.5.2 Pin assignment<br />
Designation PIN connection<br />
Voltage supply plus 24 - 36 V 17, 18<br />
Voltage supply ground 1, 2<br />
Actual traction sensor 7, 5, grinder 8<br />
Nominal traction sensor 7, 5, grinder 9<br />
Stop key 10, (17, 18)<br />
Hysteresis brake 16, 6<br />
Actual<br />
traction<br />
6057 758 101 - 2005-02 35<br />
Stop<br />
+24 to +36 V<br />
17 18<br />
11<br />
10<br />
12<br />
13<br />
7<br />
9<br />
5<br />
8<br />
1 2<br />
ZF electronic unit <strong>ERM</strong><br />
Nominal traction<br />
16<br />
6<br />
015232<br />
Hysteresis brake /<br />
clutch
<strong>Operating</strong> modes Electronic control unit <strong>ERM</strong><br />
3.5.3 Technical instructions<br />
LED: “Power” ON<br />
“Feedb.” ON<br />
Stopping the installation: Stop contact blocks I portion<br />
(not necessary for PD position<br />
control).<br />
Sampling rate: 100 Hz (10 ms)<br />
DIL switch setting:<br />
<strong>Operating</strong> mode “closed-loop control”<br />
<strong>Unit</strong> size coding clutch / brake,<br />
see page 18<br />
Controller transfer function, see page 19<br />
DIL switch setting<br />
DIL switches<br />
1 2 3 4 5 6 7 8<br />
1 1<br />
1 1<br />
1 1<br />
1 1<br />
Jumper position: Jumper positions “2” and “3”<br />
(see 1.4, page 13) can activate further<br />
functions.<br />
6057 758 101 - 2005-02 36<br />
3.5.4 Startup<br />
1. The electronic control unit is disconnected.<br />
2. Make sure that voltage is within the range given under<br />
“1. Technical Data”! (see page 6)<br />
3. Check polarity (plus / minus)!<br />
CAUTION<br />
Unpermitted voltage and polarity may damage the<br />
installation!<br />
4. Switch off operating voltage!<br />
5. Connect the <strong>ERM</strong>!<br />
6. Switch on operating voltage!<br />
“Power” LED and “Feedb.” LED must light up.<br />
7. The installation is ready for operation.<br />
NOTE<br />
Should the installation not function properly, consult<br />
“4. Identification and causes of failure / corrective action”<br />
(see page 38)!
Electronic control unit <strong>ERM</strong> <strong>Operating</strong> modes<br />
3.6 Additonal functions max-power / zero-power<br />
(Imax / Imin)<br />
Clutch power flow can be influenced irrespective of<br />
operating mode. Zero or max. power for <strong>ERM</strong> possible<br />
(depends on size of unit connected). Optional limitation of<br />
max. power by MobiDig 200 program.<br />
Application / Use<br />
• Max-power e.g. for emergency stop<br />
• Zero-power e.g. for start-up<br />
Activation of additional functions<br />
Jumper on <strong>ERM</strong> board must be in Pos. 2. Pos. 1 must not<br />
be connected!<br />
(cf. 1.4 Jumper position).<br />
• Input for max-power function: Pin 15<br />
• Input for min-power function: Pin 14<br />
• Ground: Pin 1 or 2<br />
Each function remains active as long a signal is present on<br />
input (low level, cf. 1.1 Technical data).<br />
6057 758 101 - 2005-02 37
Failure identification Electronic control unit <strong>ERM</strong><br />
4 Identification and causes of failure / corrective action<br />
Failure identification Causes Corrective action<br />
LED Ø contr. flashes ➢ Repeat setting procedure<br />
(operating mode “controlled<br />
with Ø sensing”)<br />
(see page 28)<br />
LED Ø contr. flashes ➢ Repeat setting procedure<br />
(operating mode “controlled<br />
with Ø calculation”)<br />
(see page 33)<br />
“Power” LED does not No operating voltage or too low ➢ Check operating voltage<br />
light up<br />
<strong>ERM</strong> fuse is defective ➢ Replace defective fuse<br />
6057 758 101 - 2005-02 38<br />
Program does not run correctly ➢ Consult ZF<br />
All 3 LED lights will flash <strong>Operating</strong> voltage too low or too high ➢ Check operating voltage<br />
(sequentially)<br />
Reference voltage too low ➢ Check load resistance<br />
Short-circuit or interruption at current ➢ Correct short-circuit /<br />
output, or coil is bridged interruption<br />
Missing size ➢ see operating mode, setting of<br />
DIL switches (see page 18)