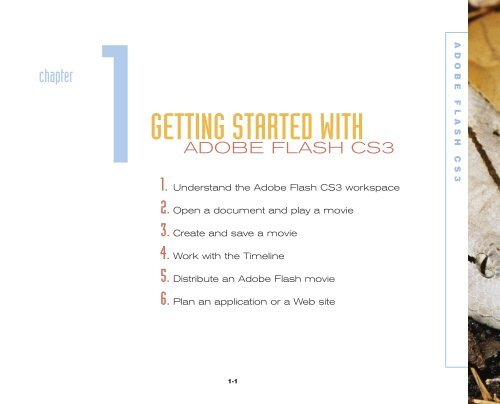
Getting Started with Adobe Flash CS3 - Cengage Learning
Getting Started with Adobe Flash CS3 - Cengage Learning
Getting Started with Adobe Flash CS3 - Cengage Learning

Create successful ePaper yourself
Turn your PDF publications into a flip-book with our unique Google optimized e-Paper software.
1-4283-1963-8_01_Rev4.qxd 6/27/07 1:39 PM Page 1<br />
chapter<br />
1<br />
GETTING STARTED WITH<br />
ADOBE FLASH <strong>CS3</strong><br />
1. Understand the <strong>Adobe</strong> <strong>Flash</strong> <strong>CS3</strong> workspace<br />
2. Open a document and play a movie<br />
3. Create and save a movie<br />
4. Work <strong>with</strong> the Timeline<br />
5. Distribute an <strong>Adobe</strong> <strong>Flash</strong> movie<br />
6. Plan an application or a Web site<br />
1-1<br />
ADOBE FLASH <strong>CS3</strong>
1-4283-1963-8_01_Rev4.qxd 6/27/07 1:40 PM Page 2<br />
chapter<br />
1<br />
GETTING STARTED WITH<br />
ADOBE FLASH <strong>CS3</strong><br />
Introduction<br />
<strong>Adobe</strong> <strong>Flash</strong> <strong>CS3</strong> Professional is a development<br />
tool that allows you to create compelling<br />
interactive experiences, often by<br />
using animation. You can use <strong>Flash</strong> to create<br />
entire Web sites, including e-commerce,<br />
entertainment, education, and personal use<br />
sites. In addition, <strong>Flash</strong> can be used to create<br />
applications, such as games and simulations,<br />
that can be delivered over the Web and on<br />
DVDs. They can even be scaled to be displayed<br />
on mobile devices, such as cell<br />
phones. While it is known as a tool for creating<br />
complex animations for the Web, <strong>Flash</strong><br />
also has excellent drawing tools and tools for<br />
creating interactive controls, such as navigation<br />
buttons and menus. Furthermore, <strong>Flash</strong><br />
provides the ability to incorporate sounds<br />
and video easily into an application.<br />
<strong>Flash</strong> has become the standard for both<br />
professional and casual applications and Web<br />
developers. <strong>Flash</strong> is popular because the<br />
program is optimized for the Web. Web<br />
developers need to provide high-impact<br />
experiences for the user, to make sites come<br />
alive and turn them from static text and<br />
pictures to dynamic, interactive experiences.<br />
The problem has been that incorporating<br />
high-quality graphics and motion into a Web<br />
site can dramatically increase the download<br />
1-2<br />
time and frustrate viewers as they wait for an<br />
image to appear or for an animation to play.<br />
<strong>Flash</strong> directly addresses this problem by<br />
allowing developers to use vector images,<br />
which reduce the size of graphic files. Vector<br />
images appeal to designers because they are<br />
scalable, which means they can be resized<br />
and reshaped <strong>with</strong>out distortion. For example,<br />
you could easily have an object, such as<br />
an airplane, become smaller as it moves<br />
across the screen <strong>with</strong>out having to create<br />
the plane in different sizes.<br />
In addition, <strong>Flash</strong> provides for streaming<br />
content over the Internet. Instead of waiting<br />
for the entire contents of a Web page to load,<br />
the viewer sees a continuous display of<br />
images. Streaming allows the movie to start<br />
playing when the Web site is opened, and it<br />
continues as frames of the movie are delivered<br />
to the viewer’s computer. Another reason<br />
<strong>Flash</strong> has become a standard is that it is<br />
made by <strong>Adobe</strong>. <strong>Adobe</strong> makes other programs,<br />
such as Dreamweaver, Fireworks,<br />
Photoshop, and Illustrator. Together these<br />
products can be used to create compelling<br />
interactive Web sites and applications. The<br />
programs are bundled in various ways in<br />
Creative Suite (<strong>CS3</strong>) products that provide<br />
common user interfaces and integration<br />
features.
1-4283-1963-8_01_Rev4.qxd 6/27/07 1:40 PM Page 3<br />
Tools You’ll Use<br />
1-3
1-4283-1963-8_01_Rev4.qxd 6/27/07 1:40 PM Page 4<br />
LESSON 1<br />
What You’ll Do<br />
▼<br />
In this lesson, you will learn about the<br />
development workspace in <strong>Adobe</strong> <strong>Flash</strong><br />
and how to change <strong>Flash</strong> settings to customize<br />
your workspace.<br />
UNDERSTAND THE<br />
ADOBE FLASH <strong>CS3</strong><br />
WORKSPACE<br />
Organizing the <strong>Flash</strong><br />
Workspace<br />
As a designer, one of the most important<br />
things for you to do is to organize your<br />
workspace—that is, to decide what to have<br />
displayed on the screen and how to<br />
arrange the various tools and panels.<br />
Because <strong>Flash</strong> is such a powerful program<br />
<strong>with</strong> many tools, your workspace may<br />
become cluttered. Fortunately, it is easy to<br />
customize the workspace to display only<br />
the tools needed at any particular time.<br />
The development process in <strong>Flash</strong> operates<br />
according to a movie metaphor: you create<br />
scenes on a stage; these scenes run in<br />
frames on a Timeline. As you work in<br />
<strong>Flash</strong>, you create a movie by arranging<br />
objects (such as graphics and text) on the<br />
stage, and then animating the objects<br />
using the Timeline. You can play the<br />
movie on the stage, as you are working on<br />
it, by using the movie controls (start, stop,<br />
rewind, and so on).<br />
When you start <strong>Flash</strong>, three basic parts of<br />
the workspace are displayed: a menu bar that<br />
organizes commands <strong>with</strong>in menus, a stage<br />
where objects are placed, and a Timeline<br />
used to organize and control the objects on<br />
the stage. In addition, one or more panels<br />
may be displayed. Panels, such as the Tools<br />
panel, are used when working <strong>with</strong> objects<br />
and features of the movie. Figure 1 shows a<br />
typical <strong>Flash</strong> workspace.<br />
Stage<br />
The stage contains all of the objects (such<br />
as drawings) that are part of the movie that<br />
will be seen by your viewers. It shows how<br />
the objects behave <strong>with</strong>in the movie and<br />
how they interact <strong>with</strong> each other. You can<br />
resize the stage and change the background<br />
color applied to it. You can draw<br />
objects directly on the stage or drag them<br />
from the Library panel to the stage. You<br />
can also import objects developed in<br />
another program directly to the stage. You<br />
can specify the size of the stage, which will<br />
be the size of the area <strong>with</strong>in your browser<br />
window that displays the movie. The gray<br />
area surrounding the stage is the<br />
Pasteboard. You can place objects on the<br />
FLASH 1-4 <strong>Getting</strong> <strong>Started</strong> <strong>with</strong> <strong>Adobe</strong> <strong>Flash</strong> <strong>CS3</strong>
1-4283-1963-8_01_Rev4.qxd 6/27/07 1:40 PM Page 5<br />
Pasteboard as you are creating a movie.<br />
However, neither the Pasteboard nor the<br />
objects on it will appear when the movie is<br />
played in a browser or the <strong>Flash</strong> Player.<br />
Timeline<br />
The Timeline is used to organize and control<br />
the movie’s contents by specifying when each<br />
object appears on the stage. The Timeline is<br />
critical to the creation of movies, because a<br />
movie is merely a series of still images that<br />
appear over time. The images are contained<br />
<strong>with</strong>in frames, which are segments of the<br />
Tools panel<br />
Drawing, paint, editing,<br />
and selection tools<br />
View tools<br />
Color tools<br />
Options<br />
Properties panel<br />
(Property inspector)<br />
FIGURE 1<br />
A typical <strong>Flash</strong> workspace<br />
Timeline. Frames in a <strong>Flash</strong> movie are similar<br />
to frames in a motion picture. When a <strong>Flash</strong><br />
movie is played, a playhead moves from frame<br />
to frame in the Timeline, causing the contents<br />
of each frame to appear on the stage in<br />
a linear sequence.<br />
The Timeline indicates where you are at<br />
any time <strong>with</strong>in the movie and allows you<br />
to insert, delete, select, and move frames. It<br />
shows the animation in your movie and the<br />
layers that contain objects. Layers help to<br />
organize the objects on the stage. You can<br />
-Stage-<br />
Document properties<br />
button<br />
Menu bar<br />
draw and edit objects on one layer <strong>with</strong>out<br />
affecting objects on other layers. Layers are<br />
a way to stack objects so they can overlap<br />
and give a 3-D appearance on the stage.<br />
Panels<br />
Panels are used to view, organize, and modify<br />
objects and features in a movie. The most<br />
commonly used panels are the Tools panel,<br />
the Properties panel (also called the<br />
Property inspector), and the Library panel.<br />
For example, the Property inspector is used<br />
Pasteboard<br />
Lesson 1 Understand the <strong>Adobe</strong> <strong>Flash</strong> <strong>CS3</strong> Workspace FLASH 1-5<br />
Playhead<br />
Color and Swatches<br />
panels grouped<br />
Library panel
1-4283-1963-8_01_Rev4.qxd 6/27/07 1:40 PM Page 6<br />
to change the properties of an object, such<br />
as the fill color of a circle. The Property<br />
inspector is context sensitive, so that if you<br />
are working <strong>with</strong> text it displays the appropriate<br />
options, such as font and font size.<br />
You can control which panels are displayed<br />
individually or you can choose to display<br />
panel sets. Panel sets are groups of the most<br />
commonly used panels. In addition, you can<br />
control how a panel is displayed. That is,<br />
you can expand a panel to show all of its features<br />
or collapse it to show only the title bar.<br />
Tools panel<br />
The Tools panel contains a set of tools<br />
used to draw and edit graphics and text. It<br />
is divided into four sections.<br />
Tools—Includes draw, paint, text, and selection<br />
tools, which are used to create lines,<br />
shapes, illustrations, and text. The selection<br />
tools are used to select objects so that they<br />
can be modified in several ways.<br />
View—Includes the Zoom tool and the<br />
Hand tool, which are used to zoom in on<br />
and out of parts of the stage and to pan the<br />
stage window, respectively.<br />
Colors—Includes tools and icons used to<br />
change the stroke (border of an object) and<br />
fill (area inside an object) colors.<br />
Options—Includes options for selected<br />
tools, such as allowing you to choose the<br />
size of the brush when using the Brush tool.<br />
Although several panels open automatically<br />
when you start <strong>Flash</strong>, you may choose to<br />
display them only when they are needed.<br />
This keeps your workspace from becoming<br />
too cluttered. Panels are floating windows,<br />
meaning that you can move them around<br />
the workspace. This allows you to group<br />
(dock) panels together as a way to organize<br />
them in the workspace. You can also make<br />
room in the workspace by collapsing panels<br />
so only their title bars are displayed. You<br />
use the Window menu on the menu bar to<br />
display and hide panels.<br />
Arranging panels can be a bit tricky. It’s<br />
easy to start moving panels around and<br />
find that the workspace is cluttered <strong>with</strong><br />
panels arranged in unintended ways.<br />
Stand-alone<br />
panel<br />
FIGURE 2<br />
Arranging panels<br />
While you cannot use the <strong>Flash</strong> Undo feature<br />
in the Edit menu to undo a panel<br />
move, you can always close a panel or<br />
choose the Default option from the<br />
Workspace command in the Windows<br />
menu. This command displays the default<br />
panel arrangement, which is a good starting<br />
position when working <strong>with</strong> <strong>Flash</strong>.<br />
If you choose to rearrange panels, first<br />
decide if you want a panel to be grouped<br />
(docked) <strong>with</strong> another panel, stacked above<br />
or below another panel, a floating panel, or<br />
simply a stand-alone panel. An example of<br />
each of these is shown in Figure 2.<br />
Floating panel Title bar<br />
FLASH 1-6 <strong>Getting</strong> <strong>Started</strong> <strong>with</strong> <strong>Adobe</strong> <strong>Flash</strong> <strong>CS3</strong><br />
Grouped<br />
panels<br />
Stacked<br />
panels
1-4283-1963-8_01_Rev4.qxd 6/27/07 1:40 PM Page 7<br />
The key to any rearrangement of panels is<br />
the blue drop zone that appears when a<br />
panel is being moved. The drop zone is the<br />
area to which the panel can move and is<br />
indicated by either a blue line or a rectangle<br />
<strong>with</strong> a blue border. A single blue line<br />
indicates the position for stacking a panel<br />
above or below another panel. A rectangle<br />
<strong>with</strong> a blue border indicates the position<br />
for grouping panels. If you move a panel<br />
<strong>with</strong>out using a drop zone, the panel<br />
FIGURE 3<br />
Grouping the Library panel<br />
becomes a floating panel and is neither<br />
grouped nor stacked <strong>with</strong> other panels. To<br />
move a panel, you drag the panel by its tab<br />
until the desired blue drop zone appears,<br />
then you release the mouse button. (Note:<br />
Dragging a panel by its tab moves only<br />
that panel. To move a grouped panel, you<br />
must drag the group by its title bar.)<br />
Figure 3 shows the Library panel being<br />
grouped <strong>with</strong> the Color and Swatches<br />
panels. Notice the rectangle <strong>with</strong> the blue<br />
border that surrounds the Color panel.<br />
This indicates the drop zone for the<br />
Library panel and the other panels<br />
included in the group. Figure 4 shows the<br />
Library panel being ungrouped and<br />
stacked below the Color and Swatches<br />
panels. The blue line indicates the drop<br />
zone for the Library panel and shows<br />
where it will be stacked.<br />
Rectangle <strong>with</strong><br />
blue border<br />
Lesson 1 Understand the <strong>Adobe</strong> <strong>Flash</strong> <strong>CS3</strong> Workspace FLASH 1-7
1-4283-1963-8_01_Rev4.qxd 6/27/07 1:40 PM Page 8<br />
In addition to moving panels, you can<br />
collapse them so that only the title bar<br />
appears, and then you can expand them<br />
to display the entire panel. The Collapse<br />
button is located in the upper-right<br />
corner of each panel, as shown in<br />
Figure 4. The Collapse button is a toggle<br />
button, which means it changes or<br />
FIGURE 4<br />
Ungrouping the Library panel<br />
toggles between two states. When<br />
clicked, the Collapse button changes to<br />
theExpand button. One other way to collapse<br />
some panels is <strong>with</strong> the Collapse to<br />
Icons button, also shown in Figure 4.<br />
Finally, if you want to close a panel, you<br />
can use the Close button, as shown in<br />
Figure 4.<br />
Regardless of how you decide to customize<br />
your development workspace,<br />
the stage and the menu bar are always<br />
displayed. Usually, you display the<br />
Timeline, Tools panel, Library panel,<br />
Property inspector, and one or more<br />
other panels.<br />
When you start a new <strong>Flash</strong> document<br />
(movie), you can set the document properties,<br />
such as the size of the window (stage)<br />
the movie will play in, the background<br />
color, and the speed of the movie in frames<br />
per second. You can change these settings<br />
using the Document Properties dialog box,<br />
which can be displayed using the<br />
Document command on the Modify menu.<br />
You can also change the settings using the<br />
Property inspector. To increase the size of<br />
the stage so that the objects on the stage<br />
can be more easily edited, you can change<br />
the magnification setting using commands<br />
on the View menu or by using the View<br />
tools in the Tools panel.<br />
FLASH 1-8 <strong>Getting</strong> <strong>Started</strong> <strong>with</strong> <strong>Adobe</strong> <strong>Flash</strong> <strong>CS3</strong><br />
Collapse<br />
to Icons<br />
button<br />
Close<br />
button<br />
Collapse<br />
button<br />
Blue line<br />
indicating<br />
the drop zone<br />
QUICKTIP<br />
When working <strong>with</strong> panels, you can collapse, move,<br />
and close them as suits your working style. Settings<br />
for an object are not lost if you close or collapse a<br />
panel. If, at any time the panels have become confusing,<br />
simply return to the Default workspace and<br />
open panels as needed.
1-4283-1963-8_01_Rev4.qxd 6/27/07 1:40 PM Page 9<br />
FIGURE 5<br />
The Open/Create screen<br />
Start <strong>Adobe</strong> <strong>Flash</strong> and work<br />
<strong>with</strong> Panels<br />
1. Start the <strong>Adobe</strong> <strong>Flash</strong> <strong>CS3</strong> program .<br />
2.<br />
The <strong>Adobe</strong> <strong>Flash</strong> <strong>CS3</strong> Open/Create screen<br />
appears, as shown in Figure 5. This screen<br />
allows you to open a recent document or<br />
create a new <strong>Flash</strong> file.<br />
Click <strong>Flash</strong> File (ActionScript 3.0) under<br />
Create New.<br />
3. Click Window on the menu bar, point to<br />
Workspace, then click Default.<br />
4. Click Window on the menu bar, then note<br />
the panels <strong>with</strong> check marks indicating they<br />
are displayed. Use the check marks to identify<br />
the panels.<br />
TIP The Swatches panel may be grouped<br />
<strong>with</strong> the Color panel.<br />
5. With the Windows menu still displayed, click<br />
Hide Panels.<br />
6. Click Window on the menu bar, then click Color.<br />
7. Click Window on the menu bar, then click Library.<br />
8. Click Window on the menu bar, point to<br />
Properties, then click Properties.<br />
9. Point to the far left of the workspace until<br />
the Tools panel is displayed.<br />
When the Tools panel is hidden, it can be<br />
displayed by pointing to the far left of the<br />
workspace. When you move the mouse away<br />
from the Tools panel, it hides again.<br />
10.Click the Library tab, then drag the panel to<br />
the stage as a floating panel.<br />
(continued)<br />
Lesson 1 Understand the <strong>Adobe</strong> <strong>Flash</strong> <strong>CS3</strong> Workspace FLASH 1-9
1-4283-1963-8_01_Rev4.qxd 6/27/07 1:40 PM Page 10<br />
11.Click the Library tab, drag the panel to on top<br />
of the Color tab, then when a rectangle <strong>with</strong> a<br />
blue border appears, release the mouse button.<br />
The Library panel is grouped <strong>with</strong> the Color<br />
and Swatches panels, as shown in Figure 6.<br />
12.Click the Collapse to Icons button in the<br />
upper-right corner of the grouped panels, as<br />
shown in Figure 6.<br />
13.Click the Color panel icon to display<br />
the grouped panels <strong>with</strong> the Color panel<br />
active, then click the Color panel icon<br />
again to collapse the panel.<br />
14.Click the Expand Dock button in the<br />
upper-right corner of the grouped panels to<br />
expand the panel group.<br />
15.Click the Library tab, drag the Library panel<br />
below the Color and Swatches panels until the<br />
blue line appears, then release the mouse<br />
button.<br />
Note: Mac users will not see a blue line. Rather,<br />
the tabs switch position as they are dragged.<br />
16.Click the Properties panel Collapse button<br />
in the title bar, as shown in Figure 6, to<br />
collapse the panel.<br />
17.Click the Properties panel Expand button<br />
in the title bar to expand the panel.<br />
18. Click the Properties panel Close button to<br />
close the panel.<br />
19.Click Window on the menu bar, point to<br />
Properties, then click Properties.<br />
20.Click Window on the menu bar, point to<br />
Workspace, then click Default.<br />
The default workspace is displayed.<br />
You started <strong>Flash</strong> and configured the workspace<br />
by hiding, moving, and displaying selected panels.<br />
FIGURE 6<br />
Library panel grouped <strong>with</strong> the Color and Swatches panels<br />
Understanding your workspace<br />
Organizing the <strong>Flash</strong> workspace is like organizing your desktop. You may work more<br />
efficiently if you have many of the most commonly used items in view and ready to use.<br />
Alternately, you may work better if your workspace is relatively uncluttered, giving you<br />
more free “desk space.” Fortunately, <strong>Flash</strong> makes it easy for you to decide which items<br />
to display and how they are arranged while you work. For example, to toggle the Main<br />
toolbar, click Window on the menu bar, point to Toolbars, then click Main. You should<br />
become familiar <strong>with</strong> quickly opening, collapsing, expanding, and closing the various<br />
windows, toolbars, and panels in <strong>Flash</strong>, and experimenting <strong>with</strong> different layouts and<br />
screen resolutions to find the workspace that works best for you.<br />
FLASH 1-10 <strong>Getting</strong> <strong>Started</strong> <strong>with</strong> <strong>Adobe</strong> <strong>Flash</strong> <strong>CS3</strong><br />
Title bar<br />
Collapse button<br />
Collapse<br />
to Icons<br />
button<br />
Grouped<br />
panels
1-4283-1963-8_01_Rev4.qxd 6/27/07 1:40 PM Page 11<br />
FIGURE 7<br />
Document Properties dialog box<br />
FIGURE 8<br />
Completed changes to Document properties<br />
Change the Document<br />
Properties<br />
1. Click the Document properties button<br />
in the Property inspector to<br />
display the Document Properties dialog box.<br />
2. Click inside the Title text box, then type My<br />
workspace.<br />
3. Click inside the Description text box, then<br />
type This is a typical workspace setup.<br />
TIP Text entered into the Title and Description<br />
text boxes, which are actually fields, can be<br />
used by Web-based search engines to display<br />
files developed using <strong>Flash</strong>.<br />
4. Double-click the number in the width text<br />
box, type 400, double-click the number in<br />
the height text box, then type 300.<br />
5. Click the Background color swatch, then<br />
click the blue color swatch in the far-left<br />
column of the color palette.<br />
6. Review the remaining default values shown in<br />
Figure 7, then click OK.<br />
7. Drag the scroll bars at the bottom and the<br />
right of the stage to center the stage.<br />
8. Click View on the menu bar, point to<br />
Magnification, then click Fit in Window.<br />
Your screen should resemble Figure 8.<br />
9. Click File on the menu bar, then click Save.<br />
10. Navigate to the drive and folder where your data<br />
files are stored, type workspace for the file -<br />
name, then click Save.<br />
TIP Click Browse Folders to open the<br />
Navigation pane if it is not open.<br />
11.Click File on the menu bar, then click Close.<br />
You set the document properties including the size<br />
of the stage and background color, then set the<br />
magnification and saved the document.<br />
Lesson 1 Understand the <strong>Adobe</strong> <strong>Flash</strong> <strong>CS3</strong> Workspace FLASH 1-11
1-4283-1963-8_01_Rev4.qxd 6/27/07 1:40 PM Page 12<br />
LESSON 2<br />
What You’ll Do<br />
▼<br />
In this lesson, you will open a <strong>Flash</strong><br />
document (movie) and then preview,<br />
test, and save the movie.<br />
OPEN A DOCUMENT<br />
AND PLAY A MOVIE<br />
Opening a Movie in <strong>Flash</strong><br />
<strong>Flash</strong> files are called documents and have an<br />
.fla file extension. If you have created a<br />
movie in <strong>Flash</strong> and saved it <strong>with</strong> the name<br />
mymovie, the filename will be mymovie.fla.<br />
Files <strong>with</strong> the .fla file extension can only be<br />
opened using <strong>Flash</strong>. After they are opened,<br />
you can edit and resave them.<br />
Another file format for <strong>Flash</strong> movies is the<br />
<strong>Flash</strong> Player (.swf) format. These files are<br />
created from <strong>Flash</strong> movies using the Publish<br />
command. <strong>Flash</strong> .swf movies can be played<br />
in a browser <strong>with</strong>out the <strong>Flash</strong> program, but<br />
the <strong>Flash</strong> Player must be installed on the<br />
computer. <strong>Flash</strong> Players are pre-installed on<br />
almost all computers. For those that do not<br />
have the player, it can be downloaded free<br />
from the <strong>Adobe</strong> Web site, www.adobe.com<br />
Because .swf files cannot be edited in the<br />
<strong>Flash</strong> program, you should preview them on<br />
the stage and test them before you publish<br />
them. Be sure to keep the original .fla file so<br />
that you can make changes at a later date.<br />
Previewing a Movie<br />
After opening a <strong>Flash</strong> movie, you can preview<br />
it <strong>with</strong>in the workspace in several<br />
ways. When you preview a movie, you play<br />
the frames by directing the playhead to<br />
move through the Timeline, and you watch<br />
the movement on the stage.<br />
Control menu commands (and<br />
keyboard shortcuts)<br />
Figure 9 shows the Control menu commands,<br />
which resemble common<br />
DVD-type options:<br />
■ Play ([Enter] (Win) or [return] (Mac))<br />
begins playing the movie frame by<br />
frame, from the location of the<br />
playhead to the end of the movie. For<br />
example, if the playhead is on Frame 5<br />
and the last frame is Frame 40, choosing<br />
the Play command will play<br />
Frames 5–40 of the movie.<br />
FLASH 1-12 <strong>Getting</strong> <strong>Started</strong> <strong>with</strong> <strong>Adobe</strong> <strong>Flash</strong> <strong>CS3</strong>
1-4283-1963-8_01_Rev4.qxd 6/27/07 1:40 PM Page 13<br />
QUICKTIP<br />
When a movie starts, the Play command changes to<br />
a Stop command. You can also stop the movie by<br />
pressing [Enter] (Win) or [return] (Mac).<br />
■ Rewind ([Ctrl] [Alt] [R] (Win)) or<br />
[option] [R] (Mac) moves the playhead<br />
to Frame 1.<br />
■ Step Forward (.) moves the playhead<br />
forward one frame at a time.<br />
■ Step Backward (,) moves the playhead<br />
backward one frame at a time.<br />
You can turn on the Loop Playback setting<br />
to allow the movie to continue playing<br />
repeatedly. A check mark next to the Loop<br />
FIGURE 9<br />
Control menu commands<br />
Playback command on the Control menu<br />
indicates that the feature is turned on. To<br />
turn off this feature, click the Loop Playback<br />
command.<br />
Controller<br />
You can also preview a movie using the<br />
Controller. To display the Controller, click<br />
the Controller option on the Toolbars<br />
command of the Window menu.<br />
QUICKTIP<br />
The decision of which controls to use (the Control<br />
menu, keyboard shortcuts, or the Controller) is a<br />
matter of personal preference.<br />
DVD-type<br />
commands<br />
Testing a Movie<br />
When you play a movie <strong>with</strong>in the <strong>Flash</strong><br />
workspace, some interactive functions<br />
(such as buttons that are used to jump<br />
from one part of the movie to another) do<br />
not work. To preview the full functionality<br />
of a movie you need to play it using a <strong>Flash</strong><br />
Player. You can use the Test Movie command<br />
on the Control menu to test the<br />
movie using a <strong>Flash</strong> Player.<br />
QUICKTIP<br />
You can drag the Playhead in the Timeline to play<br />
frames and display their contents on the stage. This<br />
process, called "scrubbing," provides a quick way to<br />
view parts of the movie.<br />
Documents, Movies, and Applications<br />
As you work in <strong>Flash</strong>, you are creating a document. When you save your work as an<br />
.fla file, you are saving the document. This is consistent <strong>with</strong> other <strong>Adobe</strong> products<br />
such as Photoshop that use the word document to refer to work created in that<br />
progam. In addition, because <strong>Flash</strong> uses a movie metaphor <strong>with</strong> a stage, Timeline,<br />
frames, animations, and so on, the work done in <strong>Flash</strong> is often referred to as a<br />
movie. So, the phrase <strong>Flash</strong> document and the phrase <strong>Flash</strong> movie are synonymous.<br />
Applications are products, such as games, that have been developed using <strong>Flash</strong>.<br />
Applications usually contain multiple <strong>Flash</strong> documents or movies that are linked.<br />
Lesson 2 Open a Document and Play a Movie FLASH 1-13
1-4283-1963-8_01_Rev4.qxd 6/27/07 1:40 PM Page 14<br />
Open and play a movie using<br />
the Control menu and the<br />
Controller<br />
1. Open fl1_1.fla from the drive and folder<br />
where your Data Files are stored, then save<br />
it as demomovie.fla.<br />
2. Click View on the menu bar, point to<br />
Magnification, then click Fit in Window.<br />
3. Click Control on the menu bar, then click<br />
Play. Notice how the playhead moves across<br />
the Timeline as the blue circle moves from<br />
the left to the right, as shown in Figure 10.<br />
4. Click Control on the menu bar, then<br />
click Rewind.<br />
5. Press [Enter] (Win) or [return] (Mac) to play<br />
the movie, then press [Enter] (Win) or<br />
[return] (Mac) again to stop the movie<br />
before it ends.<br />
6. Click Window on the menu bar, point to<br />
Toolbars, then click Controller.<br />
7. Use all the buttons on the Controller to preview<br />
the movie, then close the Controller.<br />
8. Point to the Playhead in the Timeline, then<br />
click and drag the Playhead back and forth to<br />
view the contents of the frames and view the<br />
movie.<br />
You opened a <strong>Flash</strong> movie and previewed it, using<br />
various controls.<br />
FIGURE 10<br />
Playhead moving across Timeline<br />
FLASH 1-14 <strong>Getting</strong> <strong>Started</strong> <strong>with</strong> <strong>Adobe</strong> <strong>Flash</strong> <strong>CS3</strong><br />
Playhead
1-4283-1963-8_01_Rev4.qxd 6/27/07 1:40 PM Page 15<br />
Menu bar<br />
may replace<br />
application<br />
menu bar<br />
when player<br />
is open<br />
FIGURE 11<br />
<strong>Flash</strong> Player window<br />
Test a movie<br />
1. Click Control on the menu bar, then click<br />
Test Movie to view the movie in the <strong>Flash</strong><br />
Player window, as shown in Figure 11.<br />
2. Click Control on the menu bar of the <strong>Flash</strong><br />
Player window (Win) or application menu bar<br />
(Mac), then review the available commands.<br />
3. Click File on the menu bar of the <strong>Flash</strong> Player<br />
window (Win) or application menu bar (Mac),<br />
then click Close to close the <strong>Flash</strong> Player window.<br />
4. Navigate to the drive and folder where you saved<br />
the movie and notice the demomovie.swf file<br />
that has been created, then close the dialog box.<br />
TIP When you test a movie, <strong>Flash</strong> automatically<br />
creates a file that has an .swf extension<br />
in the folder where your movie is stored<br />
and then plays the movie in the <strong>Flash</strong> Player.<br />
5. Click File on the menu bar, then click Close,<br />
to close the demomovie.fla document, saving<br />
changes if prompted.<br />
You tested a movie in the <strong>Flash</strong> Player window and<br />
closed the <strong>Flash</strong> document.<br />
Using the <strong>Flash</strong> Player<br />
To view a <strong>Flash</strong> movie on the Web, your computer needs to have the <strong>Flash</strong> Player<br />
installed. An important feature of multimedia players, such as <strong>Flash</strong> Player, is the ability<br />
to decompress a file that has been compressed to give it a small file size that can be<br />
delivered more quickly over the Internet. In addition to <strong>Adobe</strong>, companies such as<br />
Apple, Microsoft, and RealNetworks create players that allow applications, developed<br />
<strong>with</strong> their and other company’s products, to be viewed on the Web. The multimedia<br />
players are distributed free and can be downloaded from the company’s Web site. The<br />
<strong>Flash</strong> Player is created by <strong>Adobe</strong> and is available at www.adobe.com.<br />
Lesson 2 Open a Document and Play a Movie FLASH 1-15
1-4283-1963-8_01_Rev4.qxd 6/27/07 1:40 PM Page 16<br />
LESSON 13<br />
What You’ll Do<br />
▼<br />
In this lesson, you will create a <strong>Flash</strong> movie<br />
that will include a simple animation, and then<br />
you will save the movie.<br />
CREATE AND SAVE<br />
A MOVIE<br />
Creating a <strong>Flash</strong> Movie<br />
<strong>Flash</strong> movies are created by placing<br />
objects (graphics, text, sounds, photos,<br />
and so on) on the stage, editing these<br />
objects (for example, changing their<br />
brightness), animating the objects, and<br />
adding interactivity <strong>with</strong> buttons and<br />
menus. You can create graphic objects in<br />
<strong>Flash</strong> using the drawing tools, or you can<br />
create them in another program, such as<br />
<strong>Adobe</strong> Fireworks, Illustrator, or Photoshop,<br />
and then import them into a <strong>Flash</strong> movie.<br />
In addition, you can acquire clip art and<br />
stock photographs and import them into<br />
a movie. When objects are placed on the<br />
stage, they are automatically placed in a<br />
layer and in the currently selected frame<br />
of the Timeline.<br />
Figure 12 shows a movie that has an oval<br />
object created in <strong>Flash</strong>. Notice that the<br />
playhead is on Frame 1 of the movie. The<br />
object placed on the stage appears in<br />
Frame 1 and appears on the stage when<br />
the playback head is on Frame 1. The dot<br />
in Frame 1 on the Timeline indicates that<br />
this frame is a keyframe. The concept of<br />
keyframes is critical to understanding how<br />
<strong>Flash</strong> works. A keyframe indicates that<br />
there is a change in the movie, such as the<br />
start or end of an animation, or the playing<br />
of a sound. A keyframe is automatically<br />
designated in frame 1 of every layer. In<br />
addition, you can designate any frame to<br />
be a keyframe.<br />
The oval object in Figure 12 was created<br />
using the Oval tool. To create an oval or a<br />
rectangle, you select the desired tool and<br />
then drag the pointer over an area on the<br />
stage. Note: <strong>Flash</strong> groups the Oval and<br />
Rectangle tools using one button. To display<br />
a menu of the tools available, click and<br />
hold the rectangle (or oval) button in the<br />
Tools panel until the menu opens, and then<br />
click the tool you want to use. If you want<br />
to draw a perfect circle or square, press and<br />
hold [Shift] after the tool is selected, and<br />
then drag the pointer. If you make a mistake,<br />
you can click Edit on the menu bar,<br />
and then click Undo. To edit an object, you<br />
must first select it. You can use the<br />
Selection tool to select an entire object or<br />
group of objects. You drag the Selection<br />
FLASH 1-16 <strong>Getting</strong> <strong>Started</strong> <strong>with</strong> <strong>Adobe</strong> <strong>Flash</strong> <strong>CS3</strong>
1-4283-1963-8_01_Rev4.qxd 6/27/07 1:40 PM Page 17<br />
tool pointer around the entire object to<br />
make a marquee selection. An object that<br />
has been selected displays a dot pattern or a<br />
blue border.<br />
Creating an Animation<br />
Figure 13 shows another movie that has<br />
40 frames, as specified in the Timeline. The<br />
arrow in the Timeline indicates a motion<br />
animation that starts in Frame 1 and ends<br />
in Frame 40. In this case, the object will<br />
move from left to right across the stage.<br />
The movement of the object is caused by<br />
having the object in different places on the<br />
FIGURE 12<br />
Oval object in Frame 1<br />
Object on the stage is in Frame 1<br />
on the Timeline<br />
stage in different frames of the movie. In<br />
this case, Frame 20 will display the object<br />
midway through the animation. A basic<br />
motion animation requires two keyframes.<br />
The first keyframe sets the starting<br />
position of the object, and the second<br />
keyframe sets the ending position of the<br />
object. The number of frames between the<br />
two keyframes determines the length of<br />
the animation. For example, if the<br />
starting keyframe is Frame 1 and the ending<br />
keyframe is Frame 40, the object will<br />
be animated for 40 frames. Once the two<br />
keyframes are set, <strong>Flash</strong> automatically fills<br />
Arrow indicates<br />
motion<br />
animation<br />
The brightness<br />
of the object<br />
has been<br />
changed<br />
in the frames between them, <strong>with</strong> a<br />
process called motion tweening.<br />
Adding an Effect to an Object<br />
In addition to animating the location of an<br />
object (or objects), you can also animate<br />
an object’s appearance; for example, its<br />
shape, color, brightness, or transparency.<br />
The color of the circle on the left of the<br />
stage in Figure 13 has been lightened using<br />
the Brightness effect on the Property inspector.<br />
When the movie is played, the color of<br />
the circle will start out light and then<br />
become darker as it moves to the right.<br />
FIGURE 13<br />
Motion animation<br />
Lesson 3 Create and Save a Movie FLASH 1-17
1-4283-1963-8_01_Rev4.qxd 6/27/07 1:40 PM Page 18<br />
Create objects using<br />
drawing tools<br />
1. Click File on the menu bar, then click New.<br />
2. Click OK in the New Document window to<br />
choose <strong>Flash</strong> File (ActiveScript 3.0) as the<br />
new document to create, then save the movie<br />
as tween.<br />
3. Click View on the menu bar, point to<br />
Magnification, then click Fit in Window.<br />
4. Click and hold the Rectangle tool (or the<br />
Oval tool if it is displayed) on the Tools panel<br />
to display the list of tools, as shown in Figure<br />
14, then click the Oval tool .<br />
5. Verify that the Object Drawing option in the<br />
Options panel is deselected, as shown in<br />
Figure 14.<br />
6. Click the Fill color tool color swatch on<br />
7.<br />
the Tools panel, then, if necessary, click the<br />
red color swatch in the left column of the<br />
color palette.<br />
Click the Stroke color tool color swatch<br />
on the Tools<br />
panel, then, if necessary, click the black color<br />
swatch in the left column of the color palette.<br />
8. Press and hold [Shift], then drag the Oval<br />
tool on the stage to draw the circle, as shown<br />
in Figure 15.<br />
Pressing and holding [Shift] creates a circle.<br />
9. Click the Selection tool on the Tools panel,<br />
then drag a marquee selection around the<br />
object to select it, as shown in Figure 16.<br />
The object appears covered <strong>with</strong> a dot pattern.<br />
You created an object using the Oval tool and then<br />
selected the object using the Selection tool.<br />
FIGURE 14<br />
Object Drawing option<br />
Object Drawing option<br />
is not selected<br />
FIGURE 15<br />
Drawing a circle<br />
FIGURE 16<br />
Creating a marquee selection<br />
FLASH 1-18 <strong>Getting</strong> <strong>Started</strong> <strong>with</strong> <strong>Adobe</strong> <strong>Flash</strong> <strong>CS3</strong>
1-4283-1963-8_01_Rev4.qxd 6/27/07 1:40 PM Page 19<br />
Indicates the<br />
active frame<br />
FIGURE 17<br />
The circle on the right side of the stage<br />
Using options and shortcuts<br />
There is often more than one way to complete a particular function when using<br />
<strong>Flash</strong>. For example, if you want to change the font for text you have typed, you can<br />
use Text menu options or the Property inspector. In addition, <strong>Flash</strong> provides context<br />
menus that are relevant to the current selection. For example, if you point to a<br />
graphic and right-click (Win) or [control] click (Mac), a menu appears <strong>with</strong> graphicrelated<br />
commands, such as distort and smooth. Shortcut keys are also available for<br />
many of the most common commands, such as [Ctrl] [Z] (Win) or [Z] (Mac) for<br />
Undo.<br />
Create basic animation<br />
1. Click Insert on the menu bar, point to<br />
Timeline, then click Create Motion Tween.<br />
A blue border surrounds the object.<br />
2. Click Frame 40 on Layer 1 on the Timeline.<br />
3. Click Insert on the menu bar, point to<br />
Timeline, then click Keyframe.<br />
A second keyframe is defined in Frame 40,<br />
and Frames 1–40 appear shaded.<br />
4. Click and then drag the circle to the right<br />
side of the stage, as shown in Figure 17.<br />
5. Press [Enter] to play the movie.<br />
The playhead moves through the Timeline in Frames<br />
1– 40, and the circle moves across the stage.<br />
You created a basic motion tween animation by inserting<br />
a keyframe and changing the location of an object.<br />
Change the brightness<br />
1. Click Window on the menu bar, point to<br />
Properties, then verify that Properties is<br />
checked.<br />
2. Click Frame 1 on Layer 1, then click the circle.<br />
3. Click the Color Styles list arrow in the<br />
Property inspector, then click Brightness.<br />
4. Click the % list arrow, then drag the slider<br />
up to 70%.<br />
5. Click anywhere on a blank area of the Property<br />
inspector to close the slider if necessary.<br />
6. Play the movie, then save your work.<br />
The circle becomes brighter as it moves across<br />
the stage.<br />
You used the Property inspector to change the<br />
brightness of the object in one of the keyframes.<br />
Lesson 3 Create and Save a Movie FLASH 1-19
1-4283-1963-8_01_Rev4.qxd 6/27/07 1:40 PM Page 20<br />
LESSON 4<br />
What You’ll Do<br />
▼<br />
In this lesson, you will add another layer,<br />
allowing you to create an additional animation,<br />
and you will use the Timeline to<br />
help organize your movie.<br />
WORK WITH<br />
THE TIMELINE<br />
Understanding the Timeline<br />
The Timeline organizes and controls a<br />
movie’s contents over time. By learning<br />
how to read the information provided in<br />
the Timeline, you can determine and<br />
change what will be happening in a movie,<br />
frame by frame. You can determine which<br />
objects are animated, what types of<br />
animations are being used, when the<br />
various objects will appear in a movie,<br />
which objects will appear on top of others,<br />
and how fast the movie will play. Features<br />
of the Timeline are shown in Figure 18<br />
and explained in this lesson.<br />
Using Layers<br />
Each new <strong>Flash</strong> movie contains one layer,<br />
named Layer 1. Layers are like transparent<br />
sheets of acetate that are stacked on top of<br />
each other. This is shown in Figure 19,<br />
which also shows how the stacked objects<br />
appear on the stage. Each layer can contain<br />
one or more objects. You can add layers<br />
using the Layer command on the Insert<br />
menu or by clicking the Insert Layer icon<br />
on the Timeline. Placing objects on differ-<br />
ent layers helps avoid accidentally making<br />
changes in one object while editing<br />
another.<br />
When you add a new layer, <strong>Flash</strong> stacks it on<br />
top of the other layer(s) in the Timeline.<br />
The stacking order of the layers in the<br />
Timeline is important because objects<br />
on the stage appear in the same stacking<br />
order. For example, if you have two<br />
overlapping objects, and the top layer has<br />
a drawing of a tree and the bottom layer<br />
has a drawing of a house, the tree appears<br />
as though it is in front of the house. You can<br />
change the stacking order of layers simply by<br />
dragging them up or down in the list of<br />
layers. You can name layers, hide them so<br />
their contents do not appear on the stage,<br />
and lock them so that they cannot be edited.<br />
Using Frames<br />
The Timeline is made up of individual segments<br />
called frames. The content of each<br />
layer is displayed in frames as the playhead<br />
moves over them while the movie plays.<br />
Frames are numbered in increments of five<br />
for easy reference, while colors and symbols<br />
FLASH 1-20 <strong>Getting</strong> <strong>Started</strong> <strong>with</strong> <strong>Adobe</strong> <strong>Flash</strong> <strong>CS3</strong>
1-4283-1963-8_01_Rev4.qxd 6/27/07 1:40 PM Page 21<br />
are used to indicate the type of frame (for<br />
example, keyframe or motion animation).<br />
The upper-right corner of the Timeline<br />
contains a Frame View icon. Clicking<br />
this icon displays a menu that provides<br />
different views of the Timeline, showing<br />
more frames or showing thumbnails of the<br />
objects on a layer, for example. The status<br />
bar at the bottom of the Timeline indicates<br />
the current frame (the frame that the playhead<br />
is currently on), the frame rate<br />
(frames per second), and the elapsed time<br />
from Frame 1 to the current frame.<br />
FIGURE 18<br />
Elements of the timeline<br />
Layers<br />
Playhead Current<br />
frame<br />
Frame<br />
rate<br />
Elapsed<br />
time<br />
Using the Playhead<br />
The playhead indicates which frame is<br />
playing. You can manually move the playhead<br />
by dragging it left or right. This<br />
makes it easier to locate a frame that you<br />
may want to edit. Dragging the playhead<br />
also allows you to do a quick check of the<br />
movie <strong>with</strong>out having to play it.<br />
Understanding Scenes<br />
When you create a movie, Scene 1 appears in<br />
the Timeline. You can add scenes to a movie<br />
at any time. Scenes are a way to organize<br />
Frames<br />
Status bar<br />
On layer 1<br />
Frame View<br />
icon<br />
long movies. For example, a movie created<br />
for a Web site could be divided into several<br />
scenes: an introduction, a home page, and<br />
content pages. Each scene has its own<br />
Timeline. You can insert new scenes by using<br />
the Insert menu. Scenes can be given<br />
descriptive names, which will help you find<br />
them easily if you need to edit a particular<br />
scene. The number of scenes is limited only<br />
by the computer’s memory. There are some<br />
drawbacks to using scenes, including potentially<br />
larger file sizes and longer download<br />
times for the viewer.<br />
On layer 2 On layer 3<br />
FIGURE 19<br />
The concept of layers<br />
Lesson 4 Work <strong>with</strong> the Timeline FLASH 1-21
1-4283-1963-8_01_Rev4.qxd 6/27/07 1:40 PM Page 22<br />
Working <strong>with</strong> the Timeline<br />
Figure 20 shows the Timeline of a movie<br />
created in Lesson 3 <strong>with</strong> a second object, a<br />
square at the top of the stage. By studying the<br />
Timeline, you can learn several things about<br />
this movie. First, the second object is placed<br />
on its own layer, Layer 2. Second, the layer<br />
has a motion animation (indicated by the<br />
arrow and blue background in the frames).<br />
Third, the animation runs from Frame 1 to<br />
FIGURE 20<br />
The Timeline of a movie <strong>with</strong> a second object<br />
Frame 40. Fourth, if the objects intersect<br />
during the animation, the square will be on<br />
top of the circle, because the layer it is placed<br />
on (Layer 2) is above the layer that the circle<br />
is placed on (Layer 1). Fifth, the frame rate is<br />
set to 12, which means that the movie will<br />
play 12 frames per second. Sixth, the playhead<br />
is at Frame 1, which causes the contents<br />
for both layers of Frame 1 to be<br />
displayed on the stage.<br />
QUICKTIP<br />
You can adjust the height of the Timeline by positioning the<br />
mouse over the bottom edge, then dragging the border up<br />
or down.<br />
FLASH 1-22 <strong>Getting</strong> <strong>Started</strong> <strong>with</strong> <strong>Adobe</strong> <strong>Flash</strong> <strong>CS3</strong>
1-4283-1963-8_01_Rev4.qxd 6/27/07 1:40 PM Page 23<br />
FIGURE 21<br />
Drawing a square<br />
FIGURE 22<br />
Positioning the square at the bottom of the stage<br />
Add a layer<br />
1. Save tween.fla as layers.fla.<br />
2. Click Frame 1 on Layer 1.<br />
3. Click Insert on the menu bar, point to<br />
Timeline, then click Layer.<br />
A new layer—Layer 2—appears at the top of<br />
the Timeline.<br />
You added a layer to the Timeline.<br />
Create a second animation<br />
1. Click Frame 1 on Layer 2.<br />
2. Select the Rectangle tool on the Tools<br />
panel, press and hold [Shift], then draw a<br />
square resembling the dimensions and<br />
position of the square, shown in Figure 21.<br />
3. Click the Selection tool on the<br />
4.<br />
Tools panel, then drag a marquee around<br />
the square to select the object.<br />
Click Insert on the menu bar, point to<br />
Timeline, then click Create Motion Tween.<br />
5. Click Frame 40 on Layer 2, click Insert on<br />
the menu bar, point to Timeline, then click<br />
Keyframe.<br />
6. Drag the square to the bottom of the<br />
stage, as shown in Figure 22, then play the<br />
movie.<br />
The square appears on top if the two objects<br />
intersect.<br />
You drew an object and used it to create a second<br />
animation.<br />
Lesson 4 Work <strong>with</strong> the Timeline FLASH 1-23
1-4283-1963-8_01_Rev4.qxd 6/27/07 1:40 PM Page 24<br />
Work <strong>with</strong> layers and view<br />
features in the Timeline<br />
1. Click Layer 2 on the Timeline, then drag it<br />
below Layer 1.<br />
Layer 2 is now the bottom layer.<br />
2. Play the movie and notice how the square<br />
appears beneath the circle if the objects<br />
intersect.<br />
3. Click Layer 2 on the Timeline, then drag it<br />
above Layer 1.<br />
4. Play the movie and notice how the square<br />
appears above the circle if they intersect.<br />
5. Click the Frame View icon on the end of<br />
6.<br />
the Timeline to display the menu.<br />
Click Tiny to display more frames and notice<br />
how the frames in the Timeline change.<br />
7. Click the Frame View icon<br />
Short, as shown in Figure 23.<br />
, then click<br />
8. Click the Frame View icon , click<br />
Preview, then note the object thumbnails<br />
that appear on the Timeline.<br />
9. Click the Frame View icon<br />
click Normal.<br />
, then<br />
You changed the order of the layers, the display of<br />
frames, and the size of the Timeline.<br />
FIGURE 23<br />
Changing the view of the Timeline<br />
Bar used to<br />
change the size<br />
of the Timeline<br />
Frame View icon<br />
FLASH 1-24 <strong>Getting</strong> <strong>Started</strong> <strong>with</strong> <strong>Adobe</strong> <strong>Flash</strong> <strong>CS3</strong>
1-4283-1963-8_01_Rev4.qxd 6/27/07 1:40 PM Page 25<br />
New frame rate<br />
FIGURE 24<br />
Changing the frame rate<br />
<strong>Getting</strong> Help<br />
<strong>Flash</strong> provides a comprehensive Help feature that can be very useful when first learning<br />
the program. You can access Help by clicking commands on the Help menu. The Help<br />
feature includes the <strong>Flash</strong> manual, which is organized by topic and can be accessed<br />
through the index or by using a keyword search. In addition, the Help menu contains<br />
samples and tutorials that cover basic <strong>Flash</strong> features.<br />
Modify the frame rate<br />
1. Double-click the Frame Rate icon on the<br />
bottom of the Timeline to open the Document<br />
Properties dialog box.<br />
2. Double-click 12, type 3 in the Frame rate text<br />
box, then compare your Document Properties<br />
dialog box to Figure 24.<br />
3. Click on a blank area of the stage, then click OK.<br />
4. Play the movie and notice that the speed of<br />
the movie changes.<br />
TIP The letters fps stand for frames per<br />
second. Frames per second is the unit of<br />
measurement for movies.<br />
5. Verify the Properties panel is displayed. If not,<br />
click Window, Properties, Properties.<br />
Notice the Properties panel provides information<br />
about the stage, including size and background<br />
color.<br />
6. Click the Size button in the<br />
7.<br />
Properties panel to display the Document<br />
Properties dialog box.<br />
This is a way to open the dialog box <strong>with</strong>out<br />
using the Modify menu.<br />
Change the frame rate to 18, then repeat<br />
Steps 3 and 4.<br />
8. Change the frame rate to 12 in the Properties panel.<br />
9. Click Frame 20 on the Timeline and notice<br />
the position of the objects on the stage.<br />
10 Drag the playhead left and right to display<br />
specific frames.<br />
11.Save your work.<br />
You changed the frame rate of the movie and used<br />
the playhead to display the contents of frames.<br />
Lesson 4 Work <strong>with</strong> the Timeline FLASH 1-25
1-4283-1963-8_01_Rev4.qxd 6/27/07 1:40 PM Page 26<br />
LESSON 5<br />
What You’ll Do<br />
▼<br />
In this lesson, you will prepare a movie for<br />
distribution in various formats.<br />
DISTRIBUTE AN ADOBE<br />
FLASH MOVIE<br />
Distributing Movies<br />
When you develop <strong>Flash</strong> movies, the<br />
program saves them in a file format (.fla)<br />
that only users who have the <strong>Flash</strong> program<br />
installed on their computers can<br />
view. Usually, <strong>Flash</strong> movies are viewed on<br />
the Web as part of a Web site or directly<br />
from a viewer’s computer using the <strong>Flash</strong><br />
Player. <strong>Flash</strong> files (.fla) cannot be viewed<br />
on the Web using a Web browser. They<br />
must be converted into a <strong>Flash</strong> Player file<br />
(.swf) so that the Web browser knows the<br />
type of file to play (.swf) and the program<br />
needed to play the file (<strong>Flash</strong> Player).<br />
In addition, the HTML code needs to be<br />
created that instructs the Web browser<br />
to play the swf file. Fortunately, <strong>Flash</strong><br />
generates both the swf and HTML files<br />
when you use the publish feature of<br />
<strong>Flash</strong>.<br />
The process for publishing a <strong>Flash</strong> movie<br />
is to create and save a movie and then<br />
click the Publish command on the File<br />
menu. You can also specify various set-<br />
tings, such as dimensions for the window<br />
in which the movie plays in the browser,<br />
before publishing the movie. Publishing<br />
a movie creates three files: an HTML file,<br />
a <strong>Flash</strong> Player (.swf) file, and a<br />
JavaScript file. The JavaScript file is<br />
needed to detect the <strong>Flash</strong> Player when<br />
viewers use certain browsers. Both the<br />
HTML and swf files retain the same name<br />
as the <strong>Flash</strong> movie file, but <strong>with</strong> different<br />
file extensions:<br />
■ .html—the HTML document<br />
■ .swf—the <strong>Flash</strong> Player file<br />
For example, publishing a movie named<br />
layers.fla generates layers.html and<br />
layers.swf. The HTML document contains<br />
the code that the browser interprets to<br />
display the movie on the Web. The code<br />
also specifies which <strong>Flash</strong> Player movie the<br />
browser should play. Sample HTML code<br />
referencing a <strong>Flash</strong> Player movie is shown<br />
in Figure 25. If you are familiar <strong>with</strong><br />
HTML code, you will recognize this as a<br />
complete HTML document. Even if you are<br />
FLASH 1-26 <strong>Getting</strong> <strong>Started</strong> <strong>with</strong> <strong>Adobe</strong> <strong>Flash</strong> <strong>CS3</strong>
1-4283-1963-8_01_Rev4.qxd 6/27/07 1:40 PM Page 27<br />
not familiar <strong>with</strong> HTML code, you might<br />
recognize the code, as seen in Figure 25,<br />
that the browser uses to display the <strong>Flash</strong><br />
movie. For example, the movie value is set<br />
to layers.swf; the background color is set to<br />
white (#ffffff is the code for white), and<br />
the display dimensions (determined by the<br />
size of the stage) are set to 550x400.<br />
FIGURE 25<br />
Sample HTML code<br />
Code specifying the <strong>Flash</strong> Player<br />
movie that the browser will play<br />
<strong>Flash</strong> provides several other ways to distribute<br />
your movies that may or may not involve<br />
delivery on the Web. You can create a standalone<br />
movie called a projector. Projector files,<br />
such as Windows .exe files, maintain the<br />
movie’s interactivity. Alternately, you can create<br />
self-running movies, such as QuickTime<br />
.mov files, that are not interactive.<br />
.swf file extension indicates<br />
a <strong>Flash</strong> Player file<br />
You can play projector and non-interactive<br />
files directly from a computer, or you can<br />
incorporate them into an application, such<br />
as a game, that is downloaded or delivered<br />
on a CD or DVD. In addition, <strong>Flash</strong> provides<br />
features for creating movies specifically for<br />
mobile devices, such as cell phones.<br />
Code specifies color Code specifies size<br />
Lesson 5 Distribute a <strong>Flash</strong> Movie FLASH 1-27
1-4283-1963-8_01_Rev4.qxd 6/27/07 1:41 PM Page 28<br />
Publish a movie for distribution<br />
on the Web<br />
1. Verify layers.fla is open.<br />
2. Click File on the menu bar, then click<br />
Publish.<br />
The files are automatically generated and<br />
saved in the same folder as the <strong>Flash</strong><br />
document.<br />
3. Use your file management program to navigate<br />
to the drive and folder where you save<br />
your work, then be sure All Files is selected<br />
as the File type to display.<br />
4. Notice the three files that begin <strong>with</strong><br />
“layers,” as shown in Figure 26.<br />
Layers.fla, the <strong>Flash</strong> movie; layers.swf,<br />
the <strong>Flash</strong> Player file; and layers.html, the<br />
HTML document; and the JScript file appear<br />
in the window.<br />
5. Double-click layers.html to play the movie<br />
in the browser.<br />
TIP Click the browser button on the<br />
taskbar if the movie does not open automatically<br />
in your browser.<br />
Notice the animation takes up only a portion<br />
of the browser window, as shown in Figure<br />
27. This is because the stage size is set to<br />
550x440, which is smaller than the browser<br />
window.<br />
6. Close the browser.<br />
You used the Publish command to create an<br />
HTML document and a <strong>Flash</strong> Player file, then you<br />
displayed the HTML document in a Web browser.<br />
FIGURE 26<br />
The three layers files after publishing the movie<br />
Your files may be listed<br />
in a different order<br />
FIGURE 27<br />
The animation played in a browser window<br />
FLASH 1-28 <strong>Getting</strong> <strong>Started</strong> <strong>with</strong> <strong>Adobe</strong> <strong>Flash</strong> <strong>CS3</strong>
1-4283-1963-8_01_Rev4.qxd 6/27/07 1:41 PM Page 29<br />
FIGURE 28<br />
The <strong>Flash</strong> Player window playing the <strong>Flash</strong> Player movie<br />
Create a projector file<br />
1. Return to <strong>Flash</strong>, click File on the menu bar,<br />
then click Publish Settings to open the<br />
Publish Settings dialog box.<br />
2. Verify the Formats tab is selected.<br />
Notice the various file formats that can be<br />
generated automatically when you publish a<br />
<strong>Flash</strong> document.<br />
3. Click the Windows Projector (.exe) (Win) or<br />
Macintosh Projector (Mac) check box.<br />
4. Click Publish, then click OK.<br />
5. Navigate to the drive and folder where you<br />
save your work, then be sure All Files is<br />
selected as the File type to display.<br />
6. Double-click layers.exe (Win), or layers<br />
(Mac), then notice that the application plays<br />
in the <strong>Flash</strong> Player window, as shown in<br />
Figure 28.<br />
In this case, the <strong>Flash</strong> Player window is<br />
sized to the dimensions of the stage.<br />
(Note: You must have the <strong>Flash</strong> Player<br />
installed to view the movie.)<br />
7. Close the <strong>Flash</strong> Player window.<br />
8. Close layers.fla in <strong>Flash</strong>, saving your<br />
changes if prompted.<br />
You created and displayed a stand-alone<br />
projector file.<br />
Lesson 5 Distribute a <strong>Flash</strong> Movie FLASH 1-29
1-4283-1963-8_01_Rev4.qxd 6/27/07 1:41 PM Page 30<br />
LESSON 6<br />
What You’ll Do<br />
▼<br />
In this lesson, you will learn how to plan<br />
a <strong>Flash</strong> application. You will also learn<br />
about the guidelines for screen design<br />
and the interactive design of Web pages.<br />
PLAN AN APPLICATION OR A<br />
WEB SITE<br />
Planning an Application or a<br />
Web site<br />
<strong>Flash</strong> can be used to develop animations<br />
(movies) that are part of a product, such as<br />
a game or educational tutorial, and delivered<br />
on CD, DVD, or a mobile device. You<br />
can use <strong>Flash</strong> to create enhancements to<br />
Web pages, such as animated logos and<br />
interactive navigation buttons. You can<br />
also use <strong>Flash</strong> to create entire Web sites.<br />
No matter what the application, the first<br />
step is planning. Often, the temptation is<br />
to jump right into the program and start<br />
developing movies. The problem is that<br />
this invariably results in a more time-consuming<br />
process at best; and wasted effort,<br />
resources, and money at worst. The larger<br />
in scope and the more complex the project<br />
is, the more critical the planning process<br />
becomes. Planning an application or an<br />
entire Web site should involve the following<br />
steps:<br />
Step 1: Stating the Purpose (Goals). “What,<br />
specifically, do we want to accomplish?”<br />
Determining the goals is a critical step in<br />
planning because goals guide the development<br />
process, keep the team members on<br />
track, and provide a way to evaluate the<br />
application or Web site, both during and<br />
after its development.<br />
Step 2: Identifying the Target Audience.<br />
“Who will use the application or Web site?”<br />
Understanding the potential viewers helps<br />
in developing an application or a Web site<br />
FLASH 1-30 <strong>Getting</strong> <strong>Started</strong> <strong>with</strong> <strong>Adobe</strong> <strong>Flash</strong> <strong>CS3</strong>
1-4283-1963-8_01_Rev4.qxd 6/27/07 1:41 PM Page 31<br />
that can address their needs. For example,<br />
children respond to exploration and surprise,<br />
so having a dog wag its tail when the<br />
mouse pointer rolls over it might appeal to<br />
this audience.<br />
Step 3: Determining the Treatment. “What<br />
is the look and feel?”<br />
The treatment is how the application or<br />
Web site will be presented to the user,<br />
including the tone, approach, and emphasis.<br />
Tone. Will the application or Web site be<br />
humorous, serious, light, heavy, formal, or<br />
informal? The tone of a site can often be<br />
used to make a statement, projecting a progressive,<br />
high-tech, well-funded corporate<br />
image, for instance.<br />
Approach. How much direction will be<br />
provided to the user? An interactive game<br />
might focus on exploration, while an informational<br />
Web site might provide lots of<br />
direction, such as menus.<br />
Emphasis. How much emphasis will be<br />
placed on the various multimedia elements?<br />
For example, a company may want<br />
to develop an informational application or<br />
Web site that shows the features of its new<br />
product line, including animated demonstrations<br />
of how each product works. The<br />
budget might not allow for the expense of<br />
creating the animations, so the emphasis<br />
would shift to still pictures <strong>with</strong> text<br />
descriptions.<br />
Step 4: Developing the Specifications and<br />
Storyboard. “What precisely does the application<br />
or Web site include and how does it<br />
work?”<br />
The specifications state what will be<br />
included in each screen, including the<br />
arrangement of each element and the<br />
functionality of each object (for example,<br />
what happens when you click the button<br />
Rich Media Content and Accessibility<br />
<strong>Flash</strong> provides the tools that allow you to create compelling applications and Web<br />
sites by incorporating rich media content, such as animations, sound, and video.<br />
Generally, incorporating rich media enhances the user’s experience. However,<br />
accessibility becomes an issue for those persons who have visual, hearing, or<br />
mobility impairments, or have a cognitive disability. Designers need to utilize techniques<br />
that help ensure accessibility, such as providing consistency throughout the<br />
applications and Web site in navigation and layout, labeling graphics, captioning<br />
audio content, and providing keyboard access.<br />
labeled Skip Intro). Specifications should<br />
include the following:<br />
Playback System. The choice of what configuration<br />
to target for playback is critical,<br />
especially Internet connection speed,<br />
browser versions, screen resolution, and<br />
plug-ins.<br />
Elements to Include. The specifications<br />
should include details about the various<br />
elements that are to be included in the site.<br />
What are the dimensions for the animations,<br />
and what is the frame rate? What are<br />
the sizes of the various objects such as photos,<br />
buttons, and so on? What fonts, font<br />
sizes, and font formatting will be used?<br />
Should video or sound be included?<br />
Functionality. The specifications should<br />
include the way the program reacts to<br />
an action by the user, such as a mouse click.<br />
For example, clicking a door (object) might<br />
cause a doorbell to ring (sound), the door<br />
Lesson 6 Plan a Web Site FLASH 1-31
1-4283-1963-8_01_Rev4.qxd 6/27/07 1:41 PM Page 32<br />
to open (an animation), an “exit the<br />
program” message to appear (text), or an<br />
entirely new screen to be displayed.<br />
User Interface. The user interface involves<br />
designing the appearance of objects (how<br />
each object is arranged on the screen) and<br />
the interactivity (how the user navigates<br />
through the site).<br />
A flowchart is a visual representation of how<br />
the contents in an application or a Web site<br />
are organized and how various screens are<br />
linked. It provides a guide for the developer<br />
and helps to identify problems <strong>with</strong> the<br />
navigation scheme before work begins.<br />
Figure 29 shows a simple flowchart<br />
illustrating the site organization and links.<br />
FIGURE 29<br />
Sample Flowchart<br />
A storyboard shows the layout of the various<br />
screens. It describes the contents and illustrates<br />
how text, graphics, animation, and<br />
other screen elements will be positioned. It<br />
also indicates the navigation process, such as<br />
menus and buttons. Figure 30 shows a storyboard.<br />
The exact content (such as a specific<br />
photo) does not have to be decided, but it is<br />
important to show where text, graphics,<br />
photos, buttons, and other elements, will be<br />
placed. Thus, the storyboard includes placeholders<br />
for the various elements.<br />
Using Screen Design<br />
Guidelines<br />
The following screen design guidelines are<br />
used by application and Web developers.<br />
The implementation of these guidelines is<br />
affected by the goals of the site, the<br />
intended audience, and the content.<br />
Balance—Balance in screen design refers<br />
to the distribution of optical weight in the<br />
layout. Optical weight is the ability of an<br />
object to attract the viewer’s eye, as determined<br />
by the object’s size, shape, color,<br />
and so on. Figure 30 shows a fairly wellbalanced<br />
layout, especially if the logo has<br />
as much optical weight as the text description.<br />
In general, a balanced design is more<br />
appealing to a viewer. However, for a game<br />
application or entertainment site, a<br />
balanced layout may not be desired.<br />
FIGURE 30<br />
Sample Storyboard<br />
FLASH 1-32 <strong>Getting</strong> <strong>Started</strong> <strong>with</strong> <strong>Adobe</strong> <strong>Flash</strong> <strong>CS3</strong>
1-4283-1963-8_01_Rev4.qxd 6/27/07 1:41 PM Page 33<br />
Unity—Intra-screen unity has to do <strong>with</strong><br />
how the various screen objects relate and<br />
how they all fit in. For example, a children’s<br />
game might only use cartoon characterizations<br />
of animals for all the objects—including<br />
navigation buttons and sound control<br />
buttons, as well as the on-screen characters.<br />
Unity helps the screen objects reinforce each<br />
other. Inter-screen unity refers to the design<br />
that viewers encounter as they navigate from<br />
one screen to another, and it provides consistency<br />
throughout the site. For example, all<br />
navigation buttons are located in the same<br />
place on each screen.<br />
Movement—Movement refers to the way<br />
the viewer’s eyes move through the objects<br />
on the screen. Different types of objects and<br />
various animation techniques can be used to<br />
draw the viewer to a location on the screen.<br />
For example, a photo of a waterfall may<br />
cause the viewer's eyes to follow the flow of<br />
the water down, especially if the waterfall is<br />
animated. The designer could then place an<br />
object, such as a logo or link, below the<br />
waterfall.<br />
Using Interactive Design<br />
Guidelines<br />
In addition to screen design guidelines,<br />
interactive guidelines determine the interactivity<br />
of the site. The following guidelines<br />
are not absolute rules but are affected by<br />
the goals of the site, the intended audience,<br />
and the content:<br />
■ Make it simple, easy to understand, and<br />
easy to use so that viewers do not have<br />
to spend time learning what the site is<br />
about and what they need to do.<br />
Project Management<br />
Developing Web sites or any extensive application, such as a game, involves project<br />
management. A project plan needs to be developed that provides the project scope<br />
and identifies the milestones, including analyzing, designing, building, testing, and<br />
launching. Personnel and resource needs are identified, budgets built, tasks<br />
assigned, and schedules developed. Successful projects are a team effort relying on<br />
the close collaboration of designers, developers, project managers, graphic artists,<br />
programmers, testers, and others. <strong>Adobe</strong> provides various product suites, such as<br />
their Creative Suite 3 (<strong>CS3</strong>) Web Collection series, that include programs such as<br />
<strong>Flash</strong>, Dreamweaver, Fireworks, Photoshop, and Illustrator. These are the primary<br />
tools needed to develop interactive applications and Web sites. These programs are<br />
designed for easy integration. So, a graphic artist can use Photoshop to develop an<br />
image that can easily be imported into <strong>Flash</strong> and used by an animator. In addition,<br />
other tools in the suites, such as <strong>Adobe</strong> Bridge and <strong>Adobe</strong> Version Cue, help ensure<br />
efficient workflow when working in a team environment.<br />
■ Build in consistency in the navigation<br />
scheme. Help the users know where<br />
they are in the site and help them<br />
avoid getting lost.<br />
■ Provide feedback. Users need to know<br />
when an action, such as clicking a button,<br />
has been completed. Changing its<br />
color or shape, or adding a sound can<br />
indicate this.<br />
■ Give the user control. Allow the user<br />
to skip long introductions; provide<br />
controls for starting, stopping, and<br />
rewinding animations, video, and<br />
audio; and provide controls for<br />
adjusting audio.<br />
Lesson 6 Plan a Web Site FLASH 1-33
1-4283-1963-8_01_Rev4.qxd 6/27/07 1:41 PM Page 34<br />
The <strong>Flash</strong> Workflow Process<br />
After the planning process, you are ready to<br />
start work on the <strong>Flash</strong> documents.<br />
Following are steps that can be used as<br />
guidelines in a general workflow process<br />
suggested by <strong>Adobe</strong>.<br />
Step 1: Create and/or acquire the elements<br />
to be used in the application. The elements<br />
include text, photos, drawings,<br />
video, and audio. The elements become<br />
the raw material for the graphics, animations,<br />
menus, buttons, and content that<br />
populate the application and provide the<br />
interactivity. You can use the various<br />
<strong>Flash</strong> drawing and text tools to create<br />
your own images and text content; or, you<br />
can use another program, such as <strong>Adobe</strong><br />
Photoshop, to develop the elements, and<br />
then import them into <strong>Flash</strong>. Alternately,<br />
you can acquire stock clip art and photographs.<br />
You can produce video and audio<br />
content in-house and import it into <strong>Flash</strong><br />
or you can acquire these elements from a<br />
third party.<br />
Step 2: Arrange the elements and create<br />
the animations. Arrange the elements<br />
(objects) on the Stage and in the Timeline<br />
to define when and how they appear in<br />
your application. Once the elements are<br />
available, you can create the various animations<br />
called for in the specifications.<br />
Step 3: Apply special effects. <strong>Flash</strong> provides<br />
innumerable special effects that can be<br />
applied to the various media elements and<br />
animations. These include graphic and text<br />
filters, such as drop shadows, blurs, glows,<br />
and bevels. In addition, there are effects for<br />
sounds and animations such as fade-ins and<br />
Using the <strong>Flash</strong> Help Feature<br />
<strong>Flash</strong> provides a comprehensive Help feature that can be very useful when first learning<br />
the program. You can access the Help panel from the Help menu. The Help feature is<br />
organized by categories, including Using <strong>Flash</strong>, which have several topics such as<br />
<strong>Getting</strong> <strong>Started</strong> and Workspace overview. In addition, you can use the Help search<br />
feature to search for topics related to keywords, such as Timeline. Other resources not<br />
affiliated <strong>with</strong> <strong>Adobe</strong> are available through the Web. You may find some by searching the<br />
Web for <strong>Flash</strong> resources.<br />
fade-outs, acceleration and deceleration,<br />
and morphing.<br />
Step 4: Create the interactivity. <strong>Flash</strong> provides<br />
a scripting feature, ActionScript,<br />
which allows you to develop programming<br />
code to control how the media elements<br />
behave, including how various<br />
objects respond to user interactions, such<br />
as clicking buttons and rolling over<br />
images.<br />
Step 5: Test and publish the application.<br />
Testing should be done throughout the<br />
development process, including using the<br />
Test Movie feature in the Control menu to<br />
test the movie using the <strong>Flash</strong> Player and<br />
to publish the movie in order to test it in a<br />
browser.<br />
FLASH 1-34 <strong>Getting</strong> <strong>Started</strong> <strong>with</strong> <strong>Adobe</strong> <strong>Flash</strong> <strong>CS3</strong>
1-4283-1963-8_01_Rev4.qxd 6/27/07 1:41 PM Page 35<br />
FIGURE 31<br />
The <strong>Flash</strong> Help categories<br />
FIGURE 32<br />
The <strong>Flash</strong> Help Search feature<br />
Use <strong>Flash</strong> Help<br />
1. Start a new <strong>Flash</strong> document.<br />
2. Click Help on the menu bar, then click <strong>Flash</strong><br />
Help.<br />
3. Click Using <strong>Flash</strong> to expand the category, as<br />
shown in Figure 31, then click Workspace.<br />
4. Click The Timeline, then click About the<br />
Timeline.<br />
5. Read through the text in About the Timeline.<br />
6. Click Using <strong>Flash</strong> to collapse the list.<br />
7. Click in the Search text box, then type<br />
panel, as shown in Figure 32.<br />
8. Click Search, then click Customize the<br />
workspace.<br />
9. Read the article Customize the workspace.<br />
10.Close the Help panel and exit the <strong>Flash</strong><br />
program.<br />
You used the <strong>Flash</strong> Help feature to access information<br />
on the Timeline and the workspace.<br />
Lesson 6 Plan a Web Site FLASH 1-35
1-4283-1963-8_01_Rev4.qxd 6/27/07 1:41 PM Page 36<br />
SKILLS REVIEW<br />
Start <strong>Flash</strong>, open a movie, and set the<br />
movie properties and magnification.<br />
1. Start <strong>Flash</strong>, open fl1_2.fla, then save it as<br />
skillsdemo1.<br />
2. Display the Document Properties dialog box,<br />
add a title, Animated Objects, then add a<br />
description, A review of skills learned in<br />
Chapter 1.<br />
3. Change the movie window dimensions to<br />
width: 550 px and height: 450 px.<br />
4. Change the background color to blue.<br />
(Hint: Select the blue color swatch in the<br />
left column of the color palette.)<br />
5. Close the Document Properties dialog box.<br />
6. Change the magnification to 50% using the<br />
View menu (Hint: Click View, point to<br />
Magnification, then click 50%.).<br />
7. Change the magnification to Fit in Window.<br />
Close, display, and collapse panels.<br />
1. Hide all panels.<br />
2. Display the Property inspector, the Align<br />
panel, and the Library panel.<br />
3. Group the Library and Align panels.<br />
4. Ungroup the Library panel from the Align<br />
panel and position it below the Align panel.<br />
5. Collapse the Property inspector and Library<br />
panels.<br />
6. Close the Library panel to remove it from<br />
the screen.<br />
7. Expand the Property inspector.<br />
8. Display the Default workspace.<br />
Play and test a movie.<br />
1. Drag the playhead to view the contents<br />
of each frame. Use the commands in the<br />
Control menu to play and rewind the movie.<br />
2. Press [Enter] (Win) or [return] (Mac) to play<br />
and stop the movie.<br />
3. Use the Controller to rewind, play, stop, and<br />
start the movie.<br />
4. Test the movie in the <strong>Flash</strong> Player window,<br />
then close the test movie window.<br />
Create an object, create a basic<br />
animation, and apply an effect.<br />
1. Insert a new layer above the heading layer,<br />
then select Frame 1 of the new layer.<br />
2. Draw a red circle in the lower-left corner of<br />
the stage, approximately the same size as<br />
the green ball.<br />
3. Select the circle, then create a Motion Tween<br />
to animate the circle so that it moves across<br />
the screen from left to right, beginning in<br />
Frame 1 and ending in Frame 60. (Hint: Add<br />
a keyframe in the ending frame.)<br />
4. Use the Selection Tool to select the circle (if<br />
necessary), then change the brightness<br />
from 0% to 60%, in the last frame of the<br />
animation.<br />
5. Play the movie, then rewind it.<br />
Add a layer, change the frame rate,<br />
and change the view of the Timeline.<br />
1. Add a new layer above layer 3, select Frame 1,<br />
then create a second circle in the lower-right<br />
corner of the stage that’s approximately the<br />
same size as the circle you created in the<br />
lower-left corner of the stage.<br />
2. Create a Motion Tween to animate the circle<br />
so that it moves across the screen from<br />
right to left beginning in Frame 1 and ending<br />
in Frame 60.<br />
3. Use the Selection Tool to select the circle,<br />
then change the brightness from 0%<br />
to −60% in the last frame of the animation.<br />
4. Play the movie.<br />
5. Change the frame rate to 8 frames per second,<br />
play the movie, then change the frame<br />
rate to 12.<br />
FLASH 1-36 <strong>Getting</strong> <strong>Started</strong> <strong>with</strong> <strong>Adobe</strong> <strong>Flash</strong> <strong>CS3</strong>
1-4283-1963-8_01_Rev4.qxd 6/27/07 1:41 PM Page 37<br />
SKILLS REVIEW (CONTINUED)<br />
6. Change the view of the Timeline to display<br />
more frames.<br />
7. Change the view of the Timeline to display a<br />
preview of the object thumbnails.<br />
8. Change the view of the Timeline to display<br />
the Normal view.<br />
9. Use the playhead to display each frame,<br />
then compare your screens to Figure 33.<br />
10. Save the movie.<br />
Publish a movie.<br />
1. Click File on the menu bar, then click<br />
Publish.<br />
2. Open your browser, then open<br />
skillsdemo1.html.<br />
TIP Be sure All Files is selected as the<br />
File type to display.<br />
3. View the movie, then close your browser.<br />
Create a projector file.<br />
1. Display the Publish Settings dialog box.<br />
2. Select the appropriate projector setting for<br />
your operating system and remove all of the<br />
other settings.<br />
3. Publish the movie.<br />
4. Navigate to the drive and folder where you<br />
save your work, then open the skillsdemo1<br />
projector file.<br />
5. View the movie, then close the <strong>Flash</strong> Player<br />
window.<br />
6. Save and close the <strong>Flash</strong> document.<br />
7. Exit <strong>Flash</strong>.<br />
FIGURE 33<br />
Completed Skills Review<br />
<strong>Getting</strong> <strong>Started</strong> <strong>with</strong> <strong>Adobe</strong> <strong>Flash</strong> <strong>CS3</strong> FLASH 1-37
1-4283-1963-8_01_Rev4.qxd 6/27/07 1:41 PM Page 38<br />
PROJECT BUILDER 1<br />
A friend cannot decide whether to sign<br />
up for a class in <strong>Flash</strong> or Dreamweaver. You<br />
help her decide by showing her what you<br />
already know about <strong>Flash</strong>. Since you think<br />
she’d enjoy a class in <strong>Flash</strong>, you decide to<br />
show her how easy it is to create a simple<br />
animation. You decide to animate three<br />
objects. The first object enters the stage<br />
from the left side and moves to the middle<br />
of the stage. The second object starts at the<br />
middle of the stage covering the first object<br />
and moves to the right and off the stage.<br />
The third object moves from above the<br />
stage to below it. All three objects intersect<br />
at the middle of the stage.<br />
1. Open a <strong>Flash</strong> document, then save it as<br />
demonstration.<br />
2. Change the view to 50%.<br />
3. Use the tools on the Tools panel to create<br />
a simple shape or design, and place it off the<br />
left side of the stage, halfway down the stage.<br />
4. Select the object and insert a motion tween.<br />
5. Insert a keyframe in Frame 20, then move<br />
the object to the middle of the stage.<br />
6. Insert a new layer, then select Frame 20 of<br />
the layer and insert a keyframe.<br />
7. Create another object that is a different<br />
shape and that is slightly larger than the first<br />
object and that covers the first object, then<br />
select the object and insert a motion tween<br />
for the object.<br />
8. Insert a keyframe in Frame 40, then move the<br />
object to the right side off the stage.<br />
9. Insert a new layer, then select Frame 1 of<br />
the layer.<br />
10. Draw an object off the top of the stage,<br />
about midway across the stage.<br />
11. Animate the object to move straight down and<br />
off the bottom of the stage for 40 frames.<br />
FIGURE 34<br />
Sample completed Project Builder 1<br />
12. Change the brightness of the object to 70%<br />
in Frame 40.<br />
13. Add a background color.<br />
14. Preview the movie and test it.<br />
15. Save the movie, then compare it to the<br />
example shown in Figure 34.<br />
FLASH 1-38 <strong>Getting</strong> <strong>Started</strong> <strong>with</strong> <strong>Adobe</strong> <strong>Flash</strong> <strong>CS3</strong>
1-4283-1963-8_01_Rev4.qxd 6/27/07 1:41 PM Page 39<br />
PROJECT BUILDER 2<br />
You’ve been asked to develop a simple<br />
movie about recycling for a day care center.<br />
For this project, you will add two animations<br />
to an existing movie. You will<br />
show three objects that appear on the<br />
screen at different times, and then move<br />
each object to a recycle bin at different<br />
times. You can create the objects using<br />
any of the Tools on the Tools panel.<br />
1. Open fl1_3.fla, then save it as recycle.<br />
2. Play the movie and study the Timeline to<br />
familiarize yourself <strong>with</strong> the movie’s current<br />
settings. Currently, there are no animations.<br />
3. Insert a new layer above Layer 2, insert a<br />
keyframe in Frame 10 of the new layer,<br />
then draw a small object in the upper-left<br />
corner of the stage.<br />
4. Create a motion animation that moves the<br />
object to the recycle bin. (Note: The object<br />
may appear outside the recycle bin.)<br />
5. Insert a new layer above the top layer, insert<br />
a keyframe in Frame 20, draw a small object<br />
in the upper-center of the stage, then create<br />
a motion animation that moves the object<br />
to the recycle bin.<br />
6. Insert a new layer above the top layer, insert<br />
a keyframe in Frame 30, draw a small object<br />
in the upper-right corner of the stage, then<br />
create a motion animation that moves the<br />
object to the recycle bin.<br />
7. Move Layer 1 to the top of all the layers.<br />
8. Play the movie and compare it to Figure 35.<br />
9. Save the movie.<br />
This figure shows the<br />
animated objects <strong>with</strong><br />
outlines of their positions<br />
during the animations.<br />
Your completed project<br />
will not show these<br />
outlines<br />
FIGURE 35<br />
Sample completed Project Builder 2<br />
<strong>Getting</strong> <strong>Started</strong> <strong>with</strong> <strong>Adobe</strong> <strong>Flash</strong> <strong>CS3</strong> FLASH 1-39
1-4283-1963-8_01_Rev4.qxd 6/27/07 1:41 PM Page 40<br />
DESIGN PROJECT<br />
Figure 36 shows the home page of a Web<br />
site. Study the figure and answer the following<br />
questions. For each question, indicate<br />
how you determined your answer.<br />
1. Connect to the Internet, then go to www.<br />
argosycruises.com.<br />
2. Open a document in a word processor or<br />
open a new <strong>Flash</strong> document, save the file as<br />
dpc1, then answer the following questions.<br />
(Hint: Use the <strong>Flash</strong> Text tool.)<br />
■ Whose Web site is this?<br />
■ What is the goal(s) of the site?<br />
■ Who is the target audience?<br />
■ What treatment (look and feel) is used?<br />
■ What are the design layout guidelines<br />
being used (balance, movement, etc.)?<br />
■ How can animation enhance this page?<br />
■ Do you think this is an effective design<br />
for the company, its products, and its target<br />
audience? Why, or why not?<br />
■ What suggestions would you make to<br />
improve on the design, and why?<br />
FIGURE 36<br />
Design Project<br />
FLASH 1-40 <strong>Getting</strong> <strong>Started</strong> <strong>with</strong> <strong>Adobe</strong> <strong>Flash</strong> <strong>CS3</strong>
1-4283-1963-8_01_Rev4.qxd 6/27/07 1:41 PM Page 41<br />
PORTFOLIO PROJECT<br />
There are numerous companies in the<br />
business of developing Web sites for others.<br />
Many of these companies use <strong>Flash</strong> as one<br />
of their primary development tools. These<br />
companies promote themselves through<br />
their own Web sites and usually provide<br />
online portfolios <strong>with</strong> samples of their<br />
work. Log onto the Internet, then use your<br />
favorite search engine (use keywords such<br />
as <strong>Flash</strong> developers and <strong>Flash</strong> animators)<br />
to locate three of these companies, and<br />
generate the following information for<br />
each one. A sample is shown in Figure 37.<br />
1. Company name:<br />
2. Contact information (address, phone,<br />
and so on):<br />
3. Web site URL:<br />
4. Company mission:<br />
5. Services provided:<br />
6. Sample list of clients:<br />
7. Describe three ways they seem to have used<br />
<strong>Flash</strong> in their own sites. Were these effective?<br />
Why, or why not?<br />
8. Describe three applications of <strong>Flash</strong> that they<br />
include in their portfolios (or showcases or<br />
samples). Were these effective? Why, or<br />
why not?<br />
9. Would you want to work for this company?<br />
Why, or why not?<br />
10. Would you recommend this company to<br />
another company that was looking to<br />
enhance its Web site? Why, or why not?<br />
FIGURE 37<br />
Portfolio Project<br />
<strong>Getting</strong> <strong>Started</strong> <strong>with</strong> <strong>Adobe</strong> <strong>Flash</strong> <strong>CS3</strong> FLASH 1-41
1-4283-1963-8_01_Rev4.qxd 6/27/07 1:41 PM Page 42