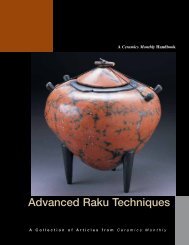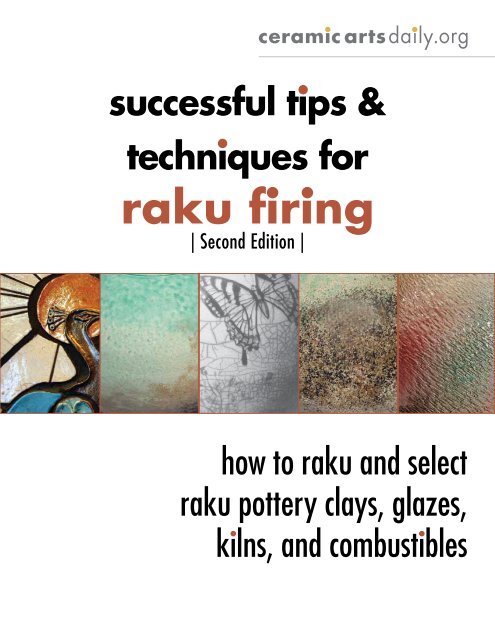
raku firing - Ceramic Arts Daily
raku firing - Ceramic Arts Daily
raku firing - Ceramic Arts Daily

You also want an ePaper? Increase the reach of your titles
YUMPU automatically turns print PDFs into web optimized ePapers that Google loves.
ceramic artsdaily.org<br />
successful tips &<br />
techniques for<br />
<strong>raku</strong> <strong>firing</strong><br />
| Second Edition |<br />
how to <strong>raku</strong> and select<br />
<strong>raku</strong> pottery clays, glazes,<br />
kilns, and combustibles<br />
www.ceramicartsdaily.org | Copyright © 2011, <strong>Ceramic</strong> Publications Company | Successful Tips & Techniques for Raku Firing | Second Edition | i
Successful Tips and Techniques for Raku Firing:<br />
How to <strong>raku</strong> and select <strong>raku</strong> pottery clays,<br />
glazes, kilns, and combustibles.<br />
Raku <strong>firing</strong> is exciting and fun. Whether you’re <strong>raku</strong> <strong>firing</strong> in your own studio or taking part in a group <strong>raku</strong> <strong>firing</strong> at a<br />
school, workshop or community center, <strong>raku</strong> offers many rewards. Raku <strong>firing</strong> is one of the most exciting processes in<br />
ceramics. After you place your pottery into a hot <strong>raku</strong> kiln, the anticipation builds as you wait for that final moment when<br />
the intense heat begins to melt the <strong>raku</strong> glazes. When you remove the pieces, you can feel the heat and hear the pings<br />
of your red hot work rapidly cooling, then it’s into the <strong>raku</strong> combustibles for a round of flame and smoke. Many surprises<br />
await you as you clean the surface and reveal the wonders of <strong>raku</strong> pottery.<br />
How to Raku by John Ramer Sherrill<br />
Raku pottery is tremendously popular. The wide range of <strong>raku</strong> glazing and <strong>raku</strong> <strong>firing</strong> methods, and the surprises that come<br />
from every <strong>firing</strong> hold the interest of potters everywhere. While many achieve consistent results, many potters as well as<br />
students have been unhappy with their <strong>raku</strong> attempts. Here is a rundown of the basics you need for success at <strong>firing</strong> <strong>raku</strong>.<br />
Raku Clay by Bill Jones<br />
The <strong>raku</strong> <strong>firing</strong> process requires a porous non-vitrified clay that can withstand rapid heating and cooling without cracking<br />
or breaking from the thermal shock. By this definition, any clay that can withstand such stresses can be considered a <strong>raku</strong><br />
clay; however, some clays will provide a greater degree of success. When deciding on a suitable <strong>raku</strong> pottery clay, your<br />
chances for success increase with bodies specifically formulated or adjusted for the <strong>raku</strong> pottery process.<br />
Raku Glazes by Steven Branfman<br />
A <strong>raku</strong> glaze is any glaze you use in the <strong>raku</strong> pottery method. It doesn’t have to be a glaze specifically designed for <strong>raku</strong>,<br />
formulated to fire at the temperature you fire your <strong>raku</strong> ceramics to, nor homemade or commercial. Read how your <strong>raku</strong><br />
glaze can be most anything. The key to success is understanding the <strong>raku</strong> <strong>firing</strong> process and the ability to predict how a<br />
particular glaze reacts to that process.<br />
Buying a Raku Kiln<br />
There are many configurations for <strong>raku</strong> kilns—top loaders, front loaders, top hats, car kilns, and clam shells. Some top<br />
hats have pulley systems, springs, counterweights, and guiding tracks to raise and lower the chamber. Without the lifting<br />
mechanism, a large top-hat kiln requires two people to safely lift the body off, while smaller kilns require only one person.<br />
Here’s a brief overview of what you need to know to buy the <strong>raku</strong> kiln you need.<br />
How to Make a Raku Mural by Barbara VanSickle<br />
When we think of <strong>raku</strong> we mostly think of pots that will sit on a shelf. Barbara VanSickle shows you how making a <strong>raku</strong><br />
mural gives you a chance to explore making art for the walls. Her technique is complete from design to final mounting.<br />
Testing Raku Combustibles by Frank James Fisher<br />
The most commonly used combustibles for <strong>raku</strong> post-<strong>firing</strong> reduction are paper and sawdust. Although there are many<br />
types of paper, the most popular are shredded office documents and shredded newspaper. Newspaper can help you get<br />
the colors in a luster glaze to appear more intense while sawdust burns much slower and creates a speckled surface.<br />
Here’s information on testing with leaves, grass, and other natural combustibles that would give different results.<br />
www.ceramicartsdaily.org | Copyright © 2011, <strong>Ceramic</strong> Publications Company | Successful Tips & Techniques for Raku Firing | Second Edition | 1
Raku pottery has become tremendously popular<br />
in the United States. The wide range of<br />
glazing and <strong>firing</strong> methods, and the surprises<br />
that lurk in every <strong>firing</strong> hold the interest of<br />
potters year after year.<br />
Many achieve consistent results, but I’ve talked to<br />
dozens of established potters as well as students who have<br />
been unhappy with their <strong>raku</strong> attempts. Most complained<br />
that they had been unable to find specific information to<br />
properly guide them in their efforts.<br />
For my own early efforts, I obtained several books on<br />
the subject, but found them frustratingly long on philosophy<br />
and short on technique. I still couldn’t properly fire<br />
a <strong>raku</strong> pot, but I could use my new-found knowledge of<br />
Zen to cope with the situation. I don’t believe there are<br />
many <strong>raku</strong> enthusiasts who are interested in my philoso-<br />
How to Raku<br />
by John Ramer Sherrill<br />
Spring Swallow tails,<br />
15 in. (38 cm) in height,<br />
with clear glaze over<br />
polychrome slips, and<br />
burnished lid carbonblackened<br />
during post<strong>firing</strong><br />
reduction, by John<br />
Ramer Sherrill.<br />
phy, wondrous as it may be, but I know for certain that<br />
some want to know how to do <strong>raku</strong>.<br />
Select a Raku Clay<br />
A wide variety of clays can be used to make <strong>raku</strong> pottery.<br />
Be aware, though, that the clay used determines much of the<br />
character of the finished piece.<br />
Most suppliers sell a body designated as “<strong>raku</strong>” clay,<br />
which is usually a grogged clay that includes Kyanite. It is<br />
the clay of choice for really massive <strong>raku</strong> pieces. Suppliers<br />
also usually have bodies that are designated as “ovenware”<br />
clay. These clays, which contain less grog (easier on the<br />
hands), often make an ideal <strong>raku</strong> body. I use ovenware clay<br />
almost exclusively.<br />
For more information, see “Raku Pottery Clay” on<br />
page 5.<br />
www.ceramicartsdaily.org | Copyright © 2011, <strong>Ceramic</strong> Publications Company | Successful Tips & Techniques for Raku Firing | Second Edition | 2
Form and Dry Raku Pieces<br />
Raku pots are usually wheelthrown or handbuilt. I’ve<br />
heard from several sources that cast pieces cannot be <strong>raku</strong><br />
fired, but I’ve never had a problem with them although<br />
you’ll need to test them.<br />
Some consideration needs to be given to proper drying.<br />
As a general rule, drying pots of 3 pounds or less does<br />
not require special handling. I often force dry and bisque<br />
fire the same day. Flat pieces and large pots must be dried<br />
slowly and evenly, though. Large ovenware pots will<br />
often survive fast drying, but the stresses that are thereby<br />
induced will cause them to crack at a later stage.<br />
Decorate with Slips<br />
If you want a colorful pot, you may use oxides or stains<br />
in the glaze, but they may mask the dark crackles to some<br />
degree; some almost entirely obliterate them. For that reason,<br />
I use colored slips under a clear glaze. My slip base<br />
is simple—1 part ball clay to 1 part EPK kaolin. Just mix<br />
it with water to a cream consistency and add stain. I use<br />
commercial stains in percentages ranging from 2% (dark<br />
blue and green stains) to as much as 30% (pink stains).<br />
In order to choose the stains that will work well, it is<br />
good to know their chemical components. Most commercial<br />
stains will block carbon to some extent, with the<br />
worst offenders being those that contain iron or vanadium.<br />
Vanadium is present in most warm-tone commercial<br />
stains, so you should use titanium yellow, praseodymium<br />
yellow or zirconium yellow in combination with other<br />
vanadium-free stains to formulate your own palette.<br />
Ideally, the slip should be brushed or dipped on at the<br />
leather-hard stage, but it works on bisqueware as well.<br />
When brushing, you should apply three coats for dark<br />
colors (when you don’t want the body showing through)<br />
and two coats for lighter colors (a warm-tone body showing<br />
through some, such as pale green, can be very attractive).<br />
The pot should then be bisque fired in the cone 08<br />
to cone 04 range.<br />
Glaze Raku Ware<br />
After bisquing, the pot is ready for glazing and the final<br />
<strong>firing</strong>. Glaze should be applied fairly thickly. If you dip,<br />
the consistency should be about that of thick cream,<br />
and one dipping should suffice. If you brush, the glaze<br />
should be somewhat thicker, and two or three coats<br />
should be applied. Evenness of application is not particularly<br />
important.<br />
It is somewhat traditional to leave the area near the<br />
base unglazed. This will turn quite black in a good post<strong>firing</strong><br />
reduction, when carbon penetrates the still-hot pot.<br />
Other areas may be left unglazed as well. These areas may<br />
be random or symmetrical, and can greatly enhance the<br />
beauty of the finished piece.<br />
Webbed Jar, 14 inches high, wheel-thrown ovenware clay,<br />
<strong>raku</strong> fired; blackened areas were taped to resist the glaze.<br />
Select a Raku Kiln<br />
Because red-hot pots are removed from the kiln, it is<br />
apparent that many models simply are not appropriate<br />
for <strong>raku</strong> <strong>firing</strong>. Large kilns of any type, when opened at<br />
temperature, radiate heat so fiercely that it would be foolhardy<br />
to attempt <strong>raku</strong>ing. Top-loading kilns are not ideal<br />
since you must position yourself above the kiln in order to<br />
reach inside, and the rising heat can be overpowering.<br />
Small (2 cubic feet or less) front-loading electric kilns<br />
may be used, but most <strong>raku</strong> <strong>firing</strong> is done in gas kilns especially<br />
constructed for that purpose. See “Buying a Raku<br />
Kiln” page 8.<br />
Fire a Raku Kiln<br />
Raku kilns, unlike conventional kilns, are usually loaded<br />
on a single level, and spaces between pots are left a bit<br />
wider in order to facilitate their removal. It is certainly<br />
possible to use multiple levels, but it isn’t worth the<br />
hassle, as far as I am concerned.<br />
Traditionally, the maturity of the glaze is determined<br />
visually. The kiln is opened, and the pot surfaces are examined<br />
for complete glaze melt. If mature, the glazes will<br />
appear wet and reflective. I strongly recommend using<br />
a pyrometer in conjunction with this technique, noting<br />
the temperature at which maturation occurs. After a few<br />
www.ceramicartsdaily.org | Copyright © 2011, <strong>Ceramic</strong> Publications Company | Successful Tips & Techniques for Raku Firing | Second Edition | 3
<strong>firing</strong>s, you will need to look only at the pyrometer to<br />
determine unloading time. There is some medical evidence<br />
that prolonged or repeated staring into a red-hot kiln can<br />
damage vision.<br />
When examining the pot for complete glaze melt,<br />
look for bubbles in the glaze, as these can mar an otherwise<br />
perfect pot. Even if the bubbles burst when the<br />
kiln is opened, unsightly craters will remain. Bubbles<br />
are almost always present on my pots because I fire<br />
rapidly, so I simply assume their presence, and take<br />
steps to remove them.<br />
To accomplish this, partially open the kiln just long<br />
enough to drop the temperature by 200°F or so (I give it<br />
about a 10-second count). Close the kiln and bring the<br />
temperature back up to near maturity. Give it a couple<br />
of minutes for the craters to heal. If you have clusters of<br />
bubbles, you may have to repeat the procedure.<br />
Post-<strong>firing</strong> Reduction in<br />
Raku Firing<br />
The final phase of <strong>raku</strong> <strong>firing</strong> requires<br />
the still-hot pot to be placed in combustible<br />
materials inside a fireproof<br />
receptacle that can be covered, the<br />
tighter the better. The combustible<br />
material can be sawdust, straw, leaves,<br />
newspapers or anything else that<br />
readily catches fire. I prefer a bed of<br />
sawdust covered with crumpled newspapers,<br />
but I suggest trying different<br />
materials to discover what best suits<br />
you. See “Finding the Right Combustibles<br />
for Raku Firing” on page 16.<br />
In any case, the bed of combustibles<br />
should be prepared in advance of the<br />
<strong>firing</strong>.<br />
Post-<strong>firing</strong> reduction is where the<br />
novice usually runs into problems. It<br />
is potentially a dangerous process, so<br />
always take precautions and exercise<br />
extreme care. You will be working<br />
closely with temperatures up to<br />
1800°F, so you must train yourself<br />
recipes<br />
The following gloss glazes are dependable<br />
and work well with underglazes and<br />
colored slips.<br />
Clear Raku Glaze<br />
Cone 06<br />
Gerstley Borate ............... 70 %<br />
Plastic Vitrox Clay ............. 30<br />
100 %<br />
Translucent White<br />
Raku Glaze<br />
Cone 08<br />
Gerstley Borate ............... 80 %<br />
Cornwall Stone ............... 20<br />
100 %<br />
Clear to Cloudy<br />
Raku Glaze<br />
Cone 08<br />
Gerstley Borate ............... 75 %<br />
Feldspar (Soda or Potash) ....... 25<br />
100 %<br />
to touch nothing without first considering whether or<br />
not it may be hot. After a long <strong>raku</strong>ing session, I actually<br />
catch myself hesitating before entering my home, considering<br />
whether or not the doorknob is hot. It is a useful<br />
habit to cultivate.<br />
Cover as much of your body as possible (always wear long<br />
sleeves), but don’t wear polyester. Taste in clothing is not<br />
the problem; the problem is polyester will melt and conform<br />
to your body like hot glue. Heat-resistant gloves are a must.<br />
A hat and face mask are not absolutely necessary, but are<br />
a good idea. I prefer to remove large pots by hand, but for<br />
this, special heat-resistant insulated gloves must be used. For<br />
smaller pots, long metal tongs are suitable.<br />
Reduction techniques vary quite a lot, so I will simply<br />
describe my own; modify as you wish. I remove the pot<br />
and place it on a fire proof surface, then wait for cracks<br />
to appear in the glaze on the rapidly cooling surface. In<br />
bright sunshine, these cracks generally appear as shiny<br />
lines. They will announce their appearance with audible<br />
pings or pops.<br />
Only then do I place the pot into the reduction receptacle.<br />
This action takes place for a small pot, such as a<br />
bud vase, in as little as 10 seconds. A very large vessel<br />
(5 pounds and up) may require 90 seconds or even longer.<br />
This timing from kiln to post-<strong>firing</strong> reduction is very<br />
important, as it will, in large part, determine what kind of<br />
crackle effect will be achieved. I find<br />
that the sequence I have described<br />
gives deep, dark, widely-spaced<br />
crackles usually interspersed with<br />
networks of finer lines. Varying the<br />
timing should soon show you how to<br />
get the effect you prefer.<br />
How to Quench<br />
a Raku Pot<br />
A lot of pots are lost in the <strong>raku</strong> step<br />
called “quenching.” After reducing<br />
for a minute or more, the pot is<br />
removed with tongs and submerged<br />
immediately in a container of water.<br />
The water hisses and bubbles, and<br />
the hot pot rolls about as if in pain.<br />
Those with narrow mouths will<br />
gyrate wildly, and will sometimes<br />
rocket themselves clear out of the<br />
container. All this commotion by a<br />
suddenly animated pot is undeniably<br />
a lot of fun, but I no longer enjoy it<br />
because I no longer do it.<br />
These days, I just leave small pots<br />
in the tightly covered reduction<br />
chamber for about 5 minutes, remove them and place them<br />
on the ground to cool. I leave large pots in reduction for<br />
up to 30 minutes, long enough for them to drop below<br />
the quartz-inversion temperature (1063°F), because that is<br />
when a large exposed pot is in serious danger of cracking.<br />
As far as I’ve been able to determine, the only thing I lose<br />
by not quenching pots are pots and, yes, a bit of fun.<br />
After the pot cools enough to handle, all that remains is<br />
to scrub it vigorously with a metal pad or wire brush.<br />
www.ceramicartsdaily.org | Copyright © 2011, <strong>Ceramic</strong> Publications Company | Successful Tips & Techniques for Raku Firing | Second Edition | 4
The <strong>raku</strong> <strong>firing</strong> process requires a porous nonvitrified<br />
clay that can withstand rapid heating to lowfire<br />
temperatures (approximately 1700º–1950ºF)<br />
and rapid cooling without cracking or breaking<br />
from the thermal shock. By this definition, any clay that<br />
can withstand such stresses can be considered a <strong>raku</strong> clay;<br />
however, some clays will provide a greater degree of success,<br />
especially those with a high fireclay content. It’s important<br />
to recognize that when deciding on a suitable <strong>raku</strong><br />
clay, your chances for success increase with bodies specifically<br />
formulated or adjusted for the <strong>raku</strong> process.<br />
Additions<br />
Most clay bodies can be used for <strong>raku</strong> by adding up to<br />
50% grog. Grog, which is crushed, fired clay, opens the<br />
body thus making it less prone to thermal shock. Other<br />
materials you can add to increase the ability of a body to<br />
withstand thermal shock include silica sand and kyanite.<br />
Silica sand can be used as a substitute for grog, especially<br />
at the lower <strong>raku</strong> temperatures. Because it’s not<br />
as absorbent as grog, you may recognize some gains in<br />
plasticity. Kyanite is a refractory material that matures<br />
at about cone 36. One of the characteristics of kyanite<br />
is that it expands when heated, which counteracts some<br />
clay shrinkage. It also creates a network of needle-like<br />
crystals allowing you to make larger forms. Commercial<br />
<strong>raku</strong> clay bodies contain one or a combination of these<br />
ingredients depending on other qualities you need in a<br />
body, such as the ability to make large work, or whether<br />
you’re throwing or handbuilding. You can add any of<br />
these materials to an existing body simply by wedging<br />
them in. Using a pug mill or clay mixer provides a more<br />
homogenous mix, and dry batching provides a more<br />
consistent mix.<br />
Bisque Firing<br />
Most <strong>raku</strong> clays can be fired as high as cone 6–10 since<br />
they are formulated as stoneware clays. But clay is clay<br />
and it should be noted that when bisque <strong>firing</strong> for <strong>raku</strong>,<br />
you should not bisque fire higher than cone 04 (1950°F).<br />
Raku Clay<br />
by Bill Jones<br />
Between approximately 2000°F and 2200°F the material<br />
becomes more dense and glasslike, thereby losing some<br />
of its ability to withstand thermal shock.<br />
Tips for Buying Raku Clay<br />
Most clay suppliers offer a range of <strong>raku</strong> clay bodies<br />
that can usually match the qualities you’re familiar with<br />
in your regular body. They will be able to guide you<br />
either through their product descriptions or in consultation,<br />
and many clay producers will even custom blend a<br />
clay from your own recipe.<br />
Plasticity: Clays with coarser grog are more suitable<br />
for handbuilding, while finer grog makes a better throwing<br />
clay. Some commercial clays are suitable for both.<br />
Thermal shock: The larger and thicker the pieces, the<br />
more suitable and shock resistant the clay has to be. Increasing<br />
the shock resistance means adding more nonplastic<br />
refractory material, which may decrease plasiticity.<br />
Color: The color of the <strong>raku</strong> clay body influences<br />
the colors of your glazes. Light-colored or buff bodies<br />
produce lighter, more brilliant glaze colors and bring<br />
out subtle shades, while darker clay bodies have a more<br />
muting affect. Raku clays made from buff stoneware,<br />
kaolins and ball clays produce lighter colors, while adding<br />
earthenware clays and colorants like iron oxide or<br />
burnt umber will create darker bodies.<br />
Texture: Adding grog to a clay body affects the texture<br />
since the grog is already fired and does not shrink. While<br />
this is not much of a factor with fine or medium grog,<br />
it is more noticeable with coarse grog. If you’re looking<br />
for smooth texture, you’ll want a body with fine grog,<br />
sand or kyanite. You can also create unusual textures by<br />
wedging in sawdust or paper pulp, which also opens the<br />
body and increases resistance to thermal shock.<br />
As with any clay or glaze, you should test a <strong>raku</strong> body<br />
before you invest a sizeable amount of energy in forming<br />
work. Many suppliers offer samples that you can test,<br />
or you can try out different additions to your existing<br />
body. Mark all of your samples and keep good records<br />
of your results.<br />
www.ceramicartsdaily.org | Copyright © 2011, <strong>Ceramic</strong> Publications Company | Successful Tips & Techniques for Raku Firing | Second Edition | 5
In my workshops, I get asked many questions but never<br />
“What is a <strong>raku</strong> glaze?” Why? Because everyone<br />
knows what a <strong>raku</strong> glaze is. Right? It’s a glaze that<br />
is labeled “<strong>raku</strong>.” Wrong. It’s time to expand your<br />
thinking and understand exactly what this whole <strong>raku</strong><br />
glaze thing is about.<br />
A <strong>raku</strong> glaze is any glaze you use in the <strong>raku</strong> method. It<br />
doesn’t have to be a glaze specifically designed for <strong>raku</strong>,<br />
formulated to fire at the temperature you fire your <strong>raku</strong><br />
to, nor homemade or commercial. It can be most anything.<br />
The key to success is understanding the <strong>raku</strong> <strong>firing</strong><br />
process and the ability to predict how a particular glaze<br />
reacts to that process.<br />
Raku, as practiced in the West, is a low-fire method in<br />
which we quickly heat the ware, remove the ware from<br />
the kiln when the glaze has melted, and perform some<br />
type of post-<strong>firing</strong> process to the piece. The post-<strong>firing</strong><br />
phase is usually an immersion in an organic combustible<br />
material to affect the final outcome on the glaze and the<br />
Raku Glazes<br />
by Steven Branfman<br />
Sprayed stoneware<br />
glaze under clear<br />
<strong>raku</strong> glaze, by<br />
Steven Branfman.<br />
raw clay. Deciding when the glaze has melted takes practice<br />
and is best done by observation, though many potters<br />
use pyrometers to aid in making that decision. Raku is<br />
exciting, often unpredictable to the novice, and fun to do.<br />
Applying Raku Glaze<br />
Glazing work for <strong>raku</strong> can be done by all the methods<br />
known—dipping, pouring, brushing, spraying, splashing,<br />
dripping, sponging—you name it. Glazes also can be used<br />
alone or in combination. Keep in mind that the application<br />
of a glaze has a direct effect on the result.<br />
Dedicated Raku Glazes<br />
Glazes specifically designed for <strong>raku</strong> fall into two categories—homemade<br />
and commercially prepared. If you mix<br />
your own, you’ll find scores of recipes. Search the internet,<br />
ask friends, look in any book on glazes or <strong>raku</strong>, and<br />
look in magazines. In no time you will find more glazes<br />
than you could use in a lifetime. Of course, to mix your<br />
www.ceramicartsdaily.org | Copyright © 2011, <strong>Ceramic</strong> Publications Company | Successful Tips & Techniques for Raku Firing | Second Edition | 6
Multi-layered, brushed, commercial low-fire glazes.<br />
own glazes you must have a stock of materials, mixing<br />
paraphernalia, knowledge, and interest. If this doesn’t<br />
turn you on there are myriad manufacturers that produce<br />
almost as many <strong>raku</strong> glazes. The advantage of using commercial<br />
glazes is that you are given instruction on how to<br />
use the glaze, you have a sample of the fired glaze to help<br />
guide your results, and the formulation (although not<br />
the results!) will be consistent time after time. Of course,<br />
commercial glazes are a bit more expensive than mixing<br />
your own.<br />
Low-Fire Glazes for Raku Firing<br />
Glazes used in the <strong>raku</strong> process need not be “<strong>raku</strong>”<br />
glazes at all. At its core, <strong>raku</strong> is a low-temperature <strong>firing</strong><br />
method. The fact that we remove the ware from the kiln<br />
while the pots are hot and the glaze is molten is irrelevant.<br />
Understanding this opens up a whole new world<br />
of glazes. Any glaze that’s formulated to fire at the low<br />
temperature of <strong>raku</strong> can be used. First, you must decide at<br />
what temperature you are <strong>firing</strong>. Most <strong>raku</strong> is done in the<br />
cone 010 –06 range. Begin by choosing glazes that both<br />
appeal to you in color and that fire in your range. You<br />
will have to experiment but I have never found a glaze<br />
that I couldn’t use successfully.<br />
High-Fire Glazes for Raku Firing<br />
We are not limited only to glazes that melt at the low temperatures.<br />
With greater understanding of the <strong>raku</strong> process,<br />
even mid-range and high-fire glazes can be used in<br />
the low-temperature range of <strong>raku</strong>. Try using your regular<br />
Brushed stoneware glaze under clear <strong>raku</strong> glaze.<br />
stoneware glazes as slips. Over the glaze, apply a clear or<br />
white <strong>raku</strong> or other low-temperature glaze. The low-temperature<br />
glaze causes the high-fire glaze to melt giving you<br />
a new palette of colors to work with.<br />
Other Glazes for Raku Pottery<br />
In addition to glazes, slips, engobes, underglazes, overglazes,<br />
china paints, underglaze pencils, oxides, and stains<br />
are all viable in the <strong>raku</strong> process.<br />
Raku Pottery Food Safety<br />
No matter what type of glaze or decorative material you<br />
use, <strong>raku</strong> is inherently unsafe for use as domestic ware.<br />
The rapid <strong>firing</strong>, removal of the ware, and subsequent<br />
post-<strong>firing</strong> phase all contribute to fragility, porosity, and<br />
thin, easily flaked glaze surfaces. Not all materials used<br />
in <strong>raku</strong> glazes are toxic. In fact, most are not. Confusion<br />
arises when you realize that over the centuries some of the<br />
most prized teabowls by tea masters have been <strong>raku</strong> fired.<br />
Be safe, and think of your <strong>raku</strong> ware as decorative and<br />
not functional.<br />
www.ceramicartsdaily.org | Copyright © 2011, <strong>Ceramic</strong> Publications Company | Successful Tips & Techniques for Raku Firing | Second Edition | 7
Buying a Raku Kiln<br />
Unloading a top-hat <strong>raku</strong> kiln.<br />
Raku <strong>firing</strong> is expressive, exciting, and fun.<br />
Whether you’re <strong>raku</strong>ing in your own studio, or<br />
taking part in a group <strong>firing</strong> at a school, workshop<br />
or community center, <strong>raku</strong> offers many rewards.<br />
But the process requires more than just enthusiasm;<br />
you need the proper equipment and tools to make the event<br />
successful. If you’re interested in getting started with <strong>raku</strong><br />
or in adding <strong>raku</strong> to your program, here are a few pointers<br />
for getting off to a good start with the right kiln—the most<br />
important tool you’ll need.<br />
The Basic Raku Process<br />
With <strong>raku</strong> you begin by placing your work in a cold kiln<br />
and bringing it up to temperature, approximately 1800–<br />
1900ºF. The rate at which you attain this temperature is<br />
based on a variety of factors: size of the work, size and<br />
type of kiln, burner output, etc. A <strong>raku</strong> session usually<br />
consists of <strong>firing</strong> more than one load, so the ability to preheat<br />
the waiting work, unload the hot ware safely, reload,<br />
and then reheat the kiln all need to be considered. The<br />
choice of fuel—natural gas, wood, electric or propane—<br />
is important because each of these carries limitations<br />
as well as benefits. You’ll need to consider the physical<br />
location of the kiln so that it can be placed with ample<br />
space around it for safety and space to work. And finally,<br />
by Steven Branfman<br />
consider whether you’ll be <strong>firing</strong> alone, with an assistant,<br />
or with a group.<br />
Configurations<br />
There are many configurations for <strong>raku</strong> kilns—top loaders,<br />
front loaders, top hats, car kilns, and clam shells.<br />
Some top hats have pulley systems, springs, counter<br />
weights, and guiding tracks to raise and lower the chamber.<br />
Without the lifting mechanism, a large top-hat kiln<br />
requires two people to safely lift the body off, while<br />
smaller kilns require only one person. After gaining<br />
experience, most <strong>raku</strong> potters gravitate to one specific<br />
style and design. The important thing with any kiln is that<br />
you are comfortable with its workings. It must accommodate<br />
your work. It must be possible to safely open the<br />
extremely hot kiln, remove the contents, reload, and close<br />
it up again losing as little heat as possible. Before buying<br />
or building a kiln, do as much observation, participation,<br />
and research as possible.<br />
Temperature<br />
Even though most <strong>raku</strong> <strong>firing</strong> takes place in the cone<br />
010–04 range some of the kilns on the market are rated for<br />
higher temperatures—up to cone 10. While some kilns are<br />
designed specifically for <strong>raku</strong>, others were originally de-<br />
www.ceramicartsdaily.org | Copyright © 2011, <strong>Ceramic</strong> Publications Company | Successful Tips & Techniques for Raku Firing | Second Edition | 8
signed as stoneware kilns that can be used for <strong>raku</strong> or were<br />
modified for <strong>raku</strong>. You’ll need to check with manufacturers<br />
about the full capabilities of their kilns.<br />
Fuel<br />
Raku kilns can be fired with natural gas, wood, propane<br />
or electric (see page 36). If using propane, you’ll need to<br />
purchase or rent a tank. While a 20 lb. tank works on<br />
warm days or with smaller kilns, it is recommended that<br />
you get a larger, refillable tank, or purchase two or three<br />
smaller tanks and gang them together with the appropriate<br />
connectors. You can take 30, 40, 60, 70, and even 100<br />
pound tanks in for refilling. With propane, more surface<br />
area in the tanks means more gas will be produced assuring<br />
a steady supply. This is especially important as you get into<br />
larger kilns with bigger burners. With natural gas, you are<br />
limited to the available pressure and location of a gas line,<br />
but there is some flexibility because you can lead a gas hose<br />
to the burner.<br />
Burners<br />
Burners are rated by their output, which is measured in<br />
Btu’s (British thermal units). Natural gas and propane use<br />
different orifice sizes so you’ll need to specify which kind<br />
of fuel you’ll be using. Kiln manufacturers have done the<br />
engineering for their kilns and have matched the appropriate<br />
burner(s) with the unit, taking size, insulation, and<br />
temperature range into consideration. Many manufacturers<br />
also offer regulators, gauges, and safety features with their<br />
burner, which are described in their literature. If you’re<br />
building your own kiln, instructions should include burner<br />
specifications. If not, consult with a burner supplier. Kiln<br />
size, construction materials and type of gas being used is all<br />
the information they will need.<br />
Electric<br />
While any electric kiln can be used for <strong>raku</strong>, there are some<br />
electric kilns on the market specifically designed for <strong>raku</strong>.<br />
Regardless, you’ll need to either locate the kiln outside, or<br />
near an outside entrance so you can unload the kiln and<br />
quickly move your pieces outdoors for the subsequent post<strong>firing</strong><br />
phase. One hazard with using a standard electric kiln<br />
is that the power must be shut off before reaching into it<br />
with metal tongs to eliminate the possibility of accidentally<br />
touching a live element. Some electric kilns are built with a<br />
lifting mechanism, which raises the entire body of the kiln,<br />
including all the electrics, up and out of the way when loading<br />
and reloading.<br />
The Do-It-Yourself Option<br />
One option is to build a <strong>raku</strong> kiln from one of the many<br />
plans available in books and online. We have two plans on<br />
our website at www.potterymaking.org, one for a fiber-lined<br />
wire-frame design, and the other a small fiber-lined barrel.<br />
Another inexpensive option for the DIY route is to purchase<br />
a kit. Some kits, which include all the materials needed to<br />
Raku Kiln Manufacturers<br />
Axner ............................. www.axner.com<br />
Bracker’s Good Earth Clays ...........www.brackers.com<br />
<strong>Ceramic</strong> Services .............www.ceramicservices.com<br />
Clay Art Center ................ www.clayartcenter.net<br />
L&R Specialties, Inc. ................www.claydogs.com<br />
Laguna ...........................www.laguna.com<br />
Mile Hi <strong>Ceramic</strong>s, Inc. (Zen Kilns) . www.milehiceramics.com<br />
Nabertherm ................... www.nabertherm.com<br />
New Mexico Clay Co. ................www.nmclay.com<br />
Olympic Kilns ....................www.greatkilns.com<br />
Seattle Pottery Supply ...........www.cruciblekilns.com<br />
Sugar Creek Industries (Good Kilns) www.sugarcreekind.com<br />
Summit Kilns ..............www.swiftweb.com/summit<br />
Ward Burner Systems ............ www.wardburner.com<br />
not only build a kiln, but also essential extras like tongs,<br />
furniture, gloves, etc.<br />
Safety<br />
Raku is inherently a dangerous activity, but no more so<br />
than working around a bonfire. If you purchased a commercial<br />
kiln, you’ll need to read, understand, and follow all<br />
safety instructions provided by the manufacturer because<br />
their warnings are based on experience and following them<br />
assures an accident-free experience. If building your own, be<br />
sure that you’re comfortable and confident in your design<br />
and experience. The appropriate clothing, gloves, and eye<br />
protection are critical for protection against the kiln’s heat<br />
for any of those handling the work, and in both solo and<br />
group situations, attention must be paid to the “choreography”—the<br />
dance—of the <strong>raku</strong> <strong>firing</strong> process. It is certainly<br />
not the time to be tripping over one another.<br />
Cost<br />
Many commercial <strong>raku</strong> kilns are priced under $1000 with<br />
a few fetching more than $2500 because of the need for<br />
higher end functionality. Building your own <strong>raku</strong> kiln from<br />
a kit or rounding up all the pieces and parts can lower your<br />
costs. It is similar to buying a computer or any other major<br />
appliance; determine what’s in your budget and then look<br />
around, but don’t forget to factor in tongs, gloves, goggles,<br />
shelves, and the other equipment you’ll need. We’ve listed<br />
most of the manufacturers and their website, and several of<br />
these sell through distributors, which may be closer to home<br />
so you’ll pay less for shipping.<br />
Test Drive<br />
If you haven’t tried <strong>raku</strong>, but have always been fascinated by<br />
the spontaneity, immediacy and simplicity of the craft, by all<br />
means, sign up for a workshop. You’ll be amazed at what<br />
a great activity this is and why it’s one of the most popular<br />
clay studio techniques around, enjoyed by thousands of potters<br />
of all ages.<br />
www.ceramicartsdaily.org | Copyright © 2011, <strong>Ceramic</strong> Publications Company | Successful Tips & Techniques for Raku Firing | Second Edition | 9
How to Make<br />
a Raku Mural<br />
“White Pines,” 24 inches in height.<br />
The idea of creating <strong>raku</strong><br />
murals happened quite<br />
naturally. A few years ago<br />
I was fortunate enough to<br />
be asked to create a retirement gift<br />
for a dear friend and former colleague.<br />
I needed to design something<br />
very special. I knew that he<br />
was partial to <strong>raku</strong> surfaces. During<br />
visits to his home, I was struck<br />
by its impressive open-concept architecture<br />
with the tall, wide wall<br />
spaces. The more I thought about<br />
what to make, the clearer it became:<br />
a <strong>raku</strong> mural.<br />
The problem was I had no idea<br />
on how to proceed. My experience<br />
with <strong>raku</strong> was limited and,<br />
although I had previously created<br />
some murals for a school installation<br />
with children, I’d never<br />
attempted anything like this. The<br />
by Barbara VanSickle<br />
school project gave me some of the<br />
technical knowledge and experience<br />
of creating, drying and mounting<br />
the clay tiles but I needed inspiration<br />
for the subject matter.<br />
I turned to my own environment<br />
and my love of Art Nouveau<br />
stained glass to come up with the<br />
design for “India Blue Peacock.”<br />
Two doors down the road from<br />
me lives a family that raises India<br />
Blues. I hear the peacock calls all<br />
through the days from early spring<br />
to late fall. Linking the peacock<br />
with the Art Nouveau stained-glass<br />
look was quite natural.<br />
Since making this first mural,<br />
I have continued to look to my<br />
own experiences and environment<br />
for inspiration.<br />
Prepare Paper Template<br />
Begin a mural by making a series<br />
of small drawings. Whatever your<br />
inspiration, remember that simplified<br />
edges work best (as in stained<br />
glass) and that some areas naturally<br />
lend themselves to being cut into<br />
sections. If you have areas that<br />
would be too large for one tile,<br />
plan how you’ll adapt your work<br />
by adding divisions in the tiles that<br />
add to the overall design. Enlarge<br />
the drawing to actual size, then use<br />
a marker to highlight the lines. On<br />
larger projects, you’ll need to cut<br />
your plan into smaller pieces. If so,<br />
www.ceramicartsdaily.org | Copyright © 2011, <strong>Ceramic</strong> Publications Company | Successful Tips & Techniques for Raku Firing | Second Edition | 10
number each piece on the back to<br />
make it easier to reassemble later<br />
(figure 1).<br />
Prepare the Slab<br />
Roll out a slab to a thickness<br />
of approximately 3 8 inch on a<br />
textured material, such as rubber<br />
shelf liner or placemats. The<br />
textured rubber material provides<br />
a perfect backing for the tile,<br />
which helps prevent warping during<br />
drying and <strong>firing</strong>. It also makes<br />
the slabs easy to carry without<br />
distorting (figure 2). Remove any<br />
unwanted marks with a rib and<br />
rolling pin, being sure to roll the<br />
slab no thinner than 1 3 inch. Thinner<br />
tiles are more likely to warp<br />
during drying and <strong>firing</strong> (figure<br />
3). Peel off the rubber backing,<br />
then join slabs together as needed<br />
(figure 4). Place the slabs on a flat<br />
surface, and cover it with plastic<br />
for about a day.<br />
1 2<br />
3 4<br />
Transfer the Design<br />
Lay the paper pattern on the slab,<br />
then using a blunt tool, such as<br />
the dull end of a wooden skewer,<br />
trace over the marker lines. When<br />
the template is removed, you will<br />
be able to use the incised lines as<br />
guides for adding any relief or textures.<br />
Trim the edges of your panel<br />
using a straightedge and a sharp,<br />
dry knife, then cut the panel into<br />
individual tiles (figure 5).<br />
Create the Pieces<br />
Arrange your cut tiles on a large<br />
board or table to form your mural<br />
and add any relief or impressed<br />
designs. Once you’ve completed<br />
all the additions, cut through any<br />
pieces that overlap from tile to tile.<br />
Clean up and smooth all edges.<br />
Drying process<br />
Cover the entire mural with plastic,<br />
and place sandbags strategi-<br />
www.ceramicartsdaily.org | Copyright © 2011, <strong>Ceramic</strong> Publications Company | Successful Tips & Techniques for Raku Firing | Second Edition | 11
cally to keep the pieces as flat as<br />
possible during the drying phase.<br />
Tip: I make sandbags by cutting<br />
up old sheets into 12-inch squares,<br />
then scoop sand onto them, bring<br />
the edges up and fasten them with<br />
rubber bands. They are a great<br />
tool to have around the studio<br />
(figure 6). Check on the mural<br />
daily as warping can be reduced<br />
by relocating the sandbags if you<br />
catch it right away. Once leather<br />
hard, turn the tiles over and recover<br />
with plastic to allow them<br />
5 6<br />
7 8<br />
9 10<br />
to dry slowly (about a week in my<br />
studio). Remove the plastic, turn<br />
the tiles right side up, and give the<br />
work at least another day to dry<br />
before bisque <strong>firing</strong>.<br />
Glazing<br />
Reassemble all the pieces to form<br />
the mural before glazing. This<br />
makes it much easier to apply the<br />
glazes accurately. If you’re masking<br />
any areas, apply your tape<br />
or resist material. I prefer to use<br />
black graphic tape as it provides<br />
www.ceramicartsdaily.org | Copyright © 2011, <strong>Ceramic</strong> Publications Company | Successful Tips & Techniques for Raku Firing | Second Edition | 12
excellent contrast, and can easily<br />
be rearranged without leaving<br />
residue on the bisqued tiles. It<br />
also creates perfectly straight lines<br />
(figure 7). Apply glazes according<br />
to your original drawings. I prefer<br />
to brush them on by completing<br />
all of one glaze color at a time on<br />
the entire mural before moving to<br />
the next glaze (figure 8).<br />
Raku<br />
I fire my mural pieces in a <strong>raku</strong><br />
kiln (figure 9). Due to the extreme<br />
range of reduction effects that influence<br />
the glaze surface and color<br />
development, try to fire tiles that<br />
will be side by side in the mural<br />
in the same load. If possible place<br />
11 12<br />
13 14<br />
them in the same reduction chamber<br />
together. Use a pyrometer and<br />
time each fire to get the greatest<br />
consistency between loads, and try<br />
to fire under the same conditions<br />
if your work will take longer than<br />
a day. This process takes considerable<br />
planning but the results are<br />
well worth the effort. If you get<br />
too much or too little reduction on<br />
a particular piece, remember that<br />
you can always refire.<br />
Assemble the mural<br />
Reassemble the mural (figure<br />
10) and measure the finished<br />
height and width. This is the base<br />
measurement for your mounting<br />
board. Where and how your<br />
www.ceramicartsdaily.org | Copyright © 2011, <strong>Ceramic</strong> Publications Company | Successful Tips & Techniques for Raku Firing | Second Edition | 13
The Three Sisters, 22 inches<br />
in height, <strong>raku</strong> fired, by<br />
Barbara Vansickle.<br />
India Blue Peacock, 48 inches in<br />
height.<br />
work is hung determines the type<br />
of material for mounting. If you’re<br />
working on a project any larger<br />
that 8 square feet, use plywood.<br />
For smaller murals, I recommend<br />
5 8-inch-thick medium density fiber<br />
board (MDF) as it is lighter, though<br />
on larger murals it can warp.<br />
For a mural the size made here,<br />
mark the MDF board roughly<br />
three-fourths of the way up from<br />
the bottom edge and drill ¼-inch<br />
holes 2 inches in from either side.<br />
Countersink the holes on the<br />
front of the board deep enough<br />
for a ¼-inch nut to be flush with<br />
the face. Drill two large diameter<br />
washers to accept the hanging wire<br />
and bend them slightly outward.<br />
Attach the washers to the back of<br />
the board through the ¼-inch bolt<br />
head and tighten (figure 11).<br />
Prime the MDF and, when thoroughly<br />
dry, apply paint (I prefer<br />
matt black). Allow the paint to<br />
dry completely for 24 hours, then<br />
spread a good quality construction<br />
glue to the mounting board, keeping<br />
it off anywhere that will show<br />
when done (figure 12). Beginning<br />
at the bottom, apply the glue to<br />
the back of the tiles, one or two<br />
at a time, and assemble. The glue<br />
dries very fast, so you’ll need to<br />
work quickly (figure 13).<br />
When it is completely dry (at<br />
least 8 hours), grout the mural.<br />
Remember in your planning that<br />
grout comes in many colors so<br />
it can further enhance the final<br />
project. Follow the manufacturer’s<br />
instructions. Once the grout begins<br />
to thicken, pour it on the mural<br />
paying particular attention to the<br />
small spaces between each tile<br />
(figure 14). Gradually remove the<br />
extra grout using a damp sponge,<br />
changing the water frequently<br />
(figure 15). Allow to dry.<br />
Thread heavy duty picture wire<br />
through the holes in the washers<br />
and adjust the length appropriately.<br />
www.ceramicartsdaily.org | Copyright © 2011, <strong>Ceramic</strong> Publications Company | Successful Tips & Techniques for Raku Firing | Second Edition | 14
Testing Raku<br />
Combustibles<br />
Raku <strong>firing</strong> dates back to sixteenth-century Japan.<br />
The Japanese tradition was based on an oxidized<br />
<strong>firing</strong> and cooling method. The introduction of<br />
a combustible reduction atmosphere is a recent<br />
North American development, and it’s this process of doing<br />
something to a piece after it has been pulled from the<br />
fire that distinguishes Western <strong>raku</strong> from Japanese <strong>raku</strong>.<br />
The most commonly used combustible for <strong>raku</strong><br />
reduction is paper. I’ve used two types of paper—<br />
shredded office documents and shredded newspaper.<br />
My preference is newspaper because the colors in a<br />
luster glaze appear more intense and display greater<br />
color variety. This may be a result of the chemicals in<br />
the newspaper’s printing inks.<br />
Another common <strong>raku</strong> combustible is sawdust. Sawdust<br />
burns more like cinders in a fire, much slower than paper,<br />
and the areas of contact between the sawdust and the<br />
glaze surface often become speckled.<br />
In considering other natural combustibles, such as<br />
leaves and grass clippings (two materials that I have too<br />
by Frank James Fisher<br />
much of in my yard), I wondered how these materials<br />
would affect glaze color and surface. A side-by-side test to<br />
measure the differences would be an interesting project.<br />
How to Test Raku Combustibles<br />
I began by throwing four similar spheres from white<br />
stoneware clay and bisque <strong>firing</strong> them. I selected Del Favero<br />
Luster as the glaze because it has a sensitive range of<br />
color depending on the post-<strong>firing</strong> reduction. I wiped each<br />
sphere with a damp sponge to remove any surface dust<br />
before glazing. Each sphere was dipped upside down to ¹∕ ³<br />
of its height into a well-mixed bucket of Del Favero glaze.<br />
When dry, I loaded an airbrush with Del Favero Luster<br />
and sprayed a transition band along the longitude of the<br />
sphere. Again, I kept the glaze well mixed by shaking the<br />
airbrush’s reservoir during the application. The sphere<br />
surface had both a thick, dipped application and a thin,<br />
sprayed application. The bottom third of the sphere was<br />
left bare (see above). This would provide a comparison of<br />
the carbonization on the surface.<br />
www.ceramicartsdaily.org | Copyright © 2011, <strong>Ceramic</strong> Publications Company | Successful Tips & Techniques for Raku Firing | Second Edition | 15
Placing sphere into a can of combustibles.<br />
A glazed sphere<br />
before <strong>raku</strong> <strong>firing</strong>.<br />
With the glaze thoroughly dry, the four spheres were<br />
loaded into the <strong>raku</strong> kiln and fired to 1800ºF. When the<br />
glazed surface on the spheres appeared glassy, the kiln was<br />
turned off, the lid was removed, and, in quick succession,<br />
each sphere was rapidly pulled and placed into four separate,<br />
but identical, galvanized trashcans. Three cans were<br />
filled ¹∕ ³ full with newspaper, grass clippings, and leaves<br />
respectively, and a fourth can was filled half full of sawdust<br />
since the density of sawdust prevents the sphere from<br />
submerging into the combustible.<br />
When each combustible burst into flames, we waited 10<br />
seconds before sealing the can with the lid. The sawdust<br />
sphere also received a coating of sawdust to cover the top<br />
surface before the lid was sealed. The lids were reasonably<br />
tight and very little smoke escaped. We did not ‘burp’<br />
the lid during reduction to re-ignite the combustibles.<br />
After an hour, the spheres had cooled down and each was<br />
removed. Under warm tap water, the surfaces were rinsed<br />
of any clinging, blackened combustible without scrubbing<br />
with a cleanser. After drying for a week, the four spheres<br />
recipe<br />
Del Favero Luster<br />
Gerstley Borate .................80 %<br />
Cornwall Stone .................20<br />
100%<br />
Add: Copper Carbonate ............2 %<br />
Del Favero Luster settles very quickly, so<br />
it’s important to remix this glaze preceding<br />
each dip.<br />
were given a thin coat of sealer to bring out the blacks on<br />
the bare clay surface.<br />
Ratings of Raku Combustibles<br />
To say the least, I was shocked. The two main variables<br />
were the spontaneity of the combustible material and the<br />
amount of oxygen hidden within the layers of combustible.<br />
Both of these variables affected the strength of reduction<br />
occurring in each can.<br />
Each sphere exhibited a very distinct look. If I hadn’t<br />
experienced the test myself, I wouldn’t have believed the<br />
variety of color in the results. The difference between the<br />
newspaper, the leaves, and the sawdust was very dramatic.<br />
The grass clippings appeared to be a visual blend of<br />
the results seen using newspaper and leaves. The carbonization<br />
on the bare surfaces was virtually identical on all<br />
four spheres.<br />
When I <strong>raku</strong>, newspaper remains my combustible of<br />
choice with an occasional handful of sawdust for added<br />
texture just before the can lid is sealed.<br />
www.ceramicartsdaily.org | Copyright © 2011, <strong>Ceramic</strong> Publications Company | Successful Tips & Techniques for Raku Firing | Second Edition | 16
Shredded<br />
Newspaper<br />
I understand why newspaper is a<br />
preferred combustible choice—<br />
very strong reduction. Paper burns<br />
rapidly upon contact with the fired<br />
clay surface. The quicker ignition<br />
removes the oxygen rapidly from<br />
the air providing a strong reduction<br />
atmosphere. Less oxygen<br />
results in flashes of red from the<br />
copper in the glaze. Paper is a<br />
flexible material and compresses<br />
easily allowing a lot of paper to<br />
be packed into a can for a maximum<br />
oxygen burn-off. The paper<br />
left minimal markings on the final<br />
glaze surface. The surface showed<br />
no discernible difference between<br />
the thick and thin applications of<br />
glaze, and nearly all the paper that<br />
was in the can was ignited.<br />
Sawdust<br />
The sawdust sphere had a very<br />
strong reduction and an interesting<br />
speckled texture on the glaze surface.<br />
Each dot of black represented<br />
burned sawdust. The sphere was<br />
buried half-way into the sawdust.<br />
The upper surface was then covered<br />
with additional sawdust leaving<br />
no exposed glaze surface to<br />
receive oxygen. Had the surface of<br />
the glaze been exposed to oxygen,<br />
a very different outcome would<br />
have resulted. The surface showed<br />
no discernible difference between<br />
the thick and thin applications of<br />
glaze. The sawdust in the can that<br />
came in contact with the sphere<br />
surface ignited while the remaining<br />
sawdust was virtually untouched. A<br />
stiff brush was needed to dislodge<br />
the cindered sawdust from the<br />
glaze surface.<br />
Dry Leaves<br />
The leaves had minimal effect on<br />
reduction. The dry leaves were stiff<br />
and did not compress as readily<br />
as the newspaper, and there were<br />
pockets of oxygen, more than the<br />
other combustibles tested. During<br />
reduction, the availability of oxygen<br />
caused the copper to turn<br />
green. The leaves did not burst<br />
into flames with the same intensity<br />
as the newspaper; instead, it was<br />
more of a gradual build, igniting<br />
approximately half of the leaves.<br />
Leaves are similar to paper regarding<br />
surface contact—virtually no<br />
affect on the glazed surface. The<br />
glaze displayed a green mottling<br />
on the thick application but not<br />
on the thin application. Slight reduction<br />
occurred near the bottom<br />
of the sphere on the glazed areas.<br />
This is a result of the weight of the<br />
sphere pressing into the leaves and<br />
smothering out the oxygen.<br />
Grass Clippings<br />
The can filled with grass clippings<br />
provided a varied reduction. Some<br />
of the surface had a smoky bronze<br />
coloring and other areas had a<br />
green/white surface similar to the<br />
leaves. The grass clippings were<br />
reasonably dry, but did not ignite<br />
readily like the newspaper. It was<br />
more of a slow, smoldering burn<br />
with flames clearly visible, igniting<br />
approximately half of the grass clippings.<br />
Because the grass clippings<br />
did not burn readily, oxygen was<br />
not quickly consumed. The smoke<br />
was very heavy and thick, and may<br />
have contributed to the vertical areas<br />
of dark reduction up the side of<br />
the sphere. The glaze surface displayed<br />
a distinct green mottling on<br />
the thick glaze application but not<br />
on the thin application. The burning<br />
grass left a few black dashes<br />
on the glaze surface.<br />
www.ceramicartsdaily.org | Copyright © 2011, <strong>Ceramic</strong> Publications Company | Successful Tips & Techniques for Raku Firing | Second Edition | 17
ceramic artsdaily.org/bookstore<br />
YOUR RESOURCE FOR ALTERNATIVE FIRING<br />
If you’re looking for the best information on alternative <strong>firing</strong>, check out the <strong>Ceramic</strong> <strong>Arts</strong> <strong>Daily</strong><br />
Bookstore. With more than 75 books and DVDs on every aspect of ceramic art, you’re sure to find<br />
exactly what you’re looking for to explore alternative <strong>firing</strong> technqiues. From forming and decorating to<br />
glazing and <strong>firing</strong>, here are 4 of our best selling books to get you started. Check them out!<br />
Raku John Mathieson<br />
This informative and inspirational guide discusses the clays and glazes suitable<br />
for <strong>raku</strong>. Mathieson also examines kilns and burners, as well as <strong>firing</strong> and post<strong>firing</strong><br />
reduction. Along the way he takes a look at the work being done in this<br />
field around the world. This book is perfect for the beginner who needs an<br />
overview of the entire <strong>raku</strong> process.<br />
Softcover | Order code G075 | ISBN 978-1-57498-166-7 | Price $26.95<br />
LoW-FiRinG & BuRnishinG suMi von DassoW<br />
Low-<strong>firing</strong> and Burnishing covers techniques of <strong>firing</strong> and finishing at low<br />
temperature eliminating the need for costly kilns or lengthy waits between making<br />
and finishing your work. This book provides step-by-step information focusing<br />
on various approaches to low <strong>firing</strong> and natural finishes, such as burnishing, terra<br />
sigillata, smoke <strong>firing</strong>, pit <strong>firing</strong>, saggar <strong>firing</strong> and <strong>raku</strong> techniques.<br />
Softcover | Order code CA66 | ISBN 978-1-57498-293-0 | Price $26.95<br />
Raku FiRinG: advanced techniques<br />
Raku <strong>firing</strong> is the most exciting and stimulating of all ceramic processes. It allows artists to<br />
spontaneously create surface effects not available with any other ceramic technique. By working<br />
directly with the fire, they can continue the creative process until the very end. This book provides<br />
a wealth of information and inspiration and covers a wide range of topics including production<br />
techniques, kiln construction, glaze formulation, tools and more.<br />
Softcover | Order code CA77 | ISBN 978-1-57498-301-2 | Price $29.95<br />
Raku, Pit & BaRReL: Firing techniques<br />
Raku, pit and barrel <strong>firing</strong> are three of the most popular <strong>firing</strong> techniques in<br />
ceramics. Accessible to anyone involved in this medium, the unifying theme is<br />
the ability to work directly with the fire to achieve unique results not available<br />
with conventional <strong>firing</strong> techniques. Each section contains some of the most<br />
beautiful work now being produced in this field, as well as extensive how-to<br />
techniques and step-by-step instructions.<br />
Softcover | Order code CA55 | ISBN 978-1-57498-288-6 | Price $29.95<br />
www.ceramicartsdaily.org | Copyright © 2011, <strong>Ceramic</strong> Publications Company | Successful Tips & Techniques for Raku Firing | Second Edition | 18