Techniques - Ceramic Arts Daily
Techniques - Ceramic Arts Daily
Techniques - Ceramic Arts Daily

Create successful ePaper yourself
Turn your PDF publications into a flip-book with our unique Google optimized e-Paper software.
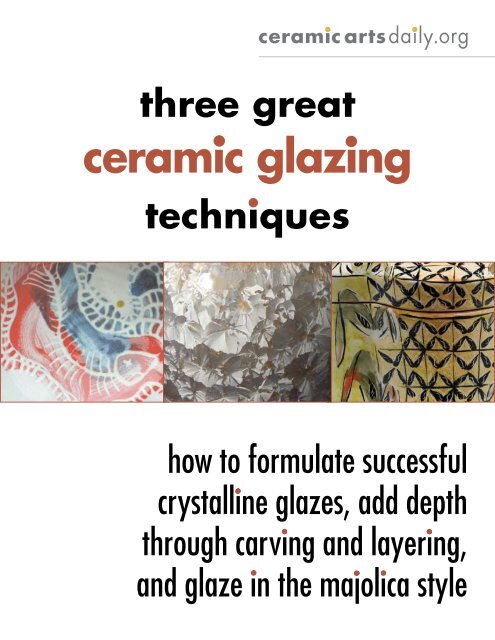
three great<br />
ceramic artsdaily.org<br />
ceramic glazing<br />
techniques<br />
how to formulate successful<br />
crystalline glazes, add depth<br />
through carving and layering,<br />
and glaze in the majolica style<br />
www.ceramicartsdaily.org | Copyright © 2010, <strong>Ceramic</strong> Publications Company | Three Great <strong>Ceramic</strong> Glazing <strong>Techniques</strong> | i
Three Great <strong>Ceramic</strong> Glazing <strong>Techniques</strong><br />
how to formulate successful crystalline glazes, add depth through<br />
carving and layering, and glaze in the majolica style<br />
Trying out new glazing techniques is always exciting because you don’t know quite where you’ll end up -- even a mistake<br />
could hold a pleasant surprise! If you’d like to try something new, then one or all of these great glazing techniques may be<br />
just what you need.<br />
These three glazing techniques are as varied as their origins. Majolica (also spelled maiolica) originates from the Mediterranean<br />
and is the techniques of applying color on top of a glaze; Lisa Bare Culp brings us up to date with contemporary commercial<br />
glazing techniques; and crystalline glazes originated in Europe and require specific glazes and firing conditions.<br />
Whether you’re looking for a fresh look or looking to see what you can do with a new glazing technique, you’ll find your<br />
answers in these three great approaches.<br />
The Magic of Majolica by Clay Cunningham<br />
Posey Bacopoulos shares the historically rich and beautiful process of majolica<br />
glazing, a decorative process where colorful imagery is painted over a white glaze.<br />
This wonderful glazing technique allows her to create vibrant imagery on pottery<br />
without fear of the colors running or blending together as many glazes do when they<br />
accidentally overlap. Majolica is the perfect technique for Posey in her small studio,<br />
as it requires only one glaze, a few overglazes, and an electric kiln.<br />
Adding Depth to Your Glazes by Lisa Bare Culp<br />
If you’re looking for some different glaze techniques, here are three glaze projects<br />
you can try out. Lisa Bare Culp learned a lot from her experiments with sgraffito,<br />
layering, mixing slip with stoneware glazes and multiple firings. She uses commercial<br />
glazes as an artistic tool that she shares with students, and here she demonstrates a<br />
pouring technique, a carving technique and a layering technique.<br />
The Mystery of Crystals by William Schran<br />
Crystalline glazes are among the most admired in ceramics. The fact that these<br />
crystals “grow” in the kiln seems a bit of a mystery to most, but to William Schran it<br />
was a mystery he had to figure out. Once achievable only at high-fire temperatures,<br />
Bill demonstrates how you can get elegant crystals at cone 6 using a programmable<br />
or manual electric kiln. He includes his recipes and his firing programs so you’ll<br />
achieve success.<br />
www.ceramicartsdaily.org | Copyright © 2010, <strong>Ceramic</strong> Publications Company | Three Great <strong>Ceramic</strong> Glazing <strong>Techniques</strong> | 1
The Magic of Majolica<br />
by Clay Cunningham<br />
Majolica glazing techniques allow Posey Bacopoulos to create both bold lines and areas of bright color, as in the oil<br />
and vinegar ewer set above, without the fear of having them run or blur during the firing.<br />
In her numerous workshops,<br />
Posey Bacopoulos shares with<br />
her students the historically rich<br />
and colorfully beautiful process<br />
of majolica glazing, a decorative<br />
process where colorful imagery<br />
is painted over a white glaze. This<br />
wonderful technique allows her to<br />
create vibrant imagery on pottery<br />
without fear of the colors running<br />
or blending together as many glazes<br />
do when they accidentally overlap.<br />
Posey creates and fires her work in<br />
her small New York City studio.<br />
Majolica is the perfect technique for<br />
her as it requires only one glaze, a<br />
few overglazes, and an electric kiln.<br />
Here’s how she does it.<br />
Applying the<br />
Base Glaze<br />
The process begins with any<br />
leather-hard or bone dry pot<br />
made from earthenware clay;<br />
Posey uses Stan’s Red from<br />
Highwater Clay. Before bisque<br />
firing, a thin layer of red terra<br />
sigillata is painted onto the foot<br />
of the pot, as well as any places<br />
that are to remain unglazed (figure<br />
1). This creates a nice, rich<br />
shine to the exposed clay, and<br />
also helps to create a water-tight<br />
surface on the pot. When the pot<br />
is bone dry, fire it to cone 05½<br />
on a slow cycle.<br />
www.ceramicartsdaily.org | Copyright © 2010, <strong>Ceramic</strong> Publications Company | Three Great <strong>Ceramic</strong> Glazing <strong>Techniques</strong> | 2
1<br />
Apply terra sigillata to the<br />
lid of the bone dry piece.<br />
5<br />
Outline the floral foreground<br />
with black stain.<br />
2<br />
Dip the exterior. Smooth<br />
out any overlaps with a<br />
finger.<br />
6<br />
Use a stylus for creating<br />
sgraffito decoration.<br />
Glaze the bisqued pot with the PB<br />
Matte Majolica Glaze. Mix the glaze<br />
to a consistency slightly thicker than<br />
‘normal’ glaze thickness. Smaller forms<br />
can be dipped using glazing tongs while<br />
for larger forms such as the one in this<br />
demonstration, the glaze needs to be<br />
poured and dipped. Pour the glaze into<br />
the pot’s interior and dip it onto the<br />
exterior (figure 2). Take care to keep the<br />
glaze from overlapping too excessively.<br />
Heavily overlapped majolica glaze shows<br />
the discrepancies of thickness after firing<br />
and could crawl or pinhole if too thick.<br />
With a sponge, wipe the foot of the<br />
pot thoroughly clean. If making a lidded<br />
vessel, remove the glaze on the rim of<br />
the pot and the underside of the lid with<br />
a sponge to avoid the lid sticking to the<br />
pot in the kiln (figure 3). After the glaze<br />
dries, smooth out any air bubbles, drips,<br />
or pinholes by gently rubbing the surface<br />
and dusting off the loosened material.<br />
Use a mask or respirator when rubbing<br />
or blowing the glaze dust.<br />
Clean the lip, lid, and foot<br />
with a sponge.<br />
Coat the foreground with<br />
wax resist.<br />
Draw on the design over<br />
the glaze with a pencil<br />
first.<br />
Designing a ‘blossom’<br />
with a finger.<br />
www.ceramicartsdaily.org | Copyright © 2010, <strong>Ceramic</strong> Publications Company | Three Great <strong>Ceramic</strong> Glazing <strong>Techniques</strong> | 3<br />
3<br />
7<br />
4<br />
8<br />
Inglaze Decoration<br />
Once the piece has ‘cured’ for a day, it is<br />
time to decorate! Begin by using a soft #2<br />
pencil to lightly draw out the decoration<br />
(figure 4). Using the pencil first allows you<br />
to run through ideas before committing<br />
fully with the brush and stains. Decoration<br />
can be as minimal as a few dots of color or<br />
as elaborate as an overall pattern covering<br />
the piece. The choice is up to you. If you<br />
make a mistake, it can be gently ‘erased’<br />
with a finger.<br />
Unlike painting, where the background<br />
is usually painted on first, the majolica<br />
technique begins with painting the foreground<br />
using a stain paste and working<br />
backward toward the background so<br />
that colors are always painted onto a<br />
white ground. For her decoration, Posey<br />
often chooses floral motifs. However, the<br />
motifs that adorn her work are patterns,<br />
rather than actual representations of nature,<br />
that she uses to divide and define the<br />
space of the pottery in interesting ways.
9<br />
Add a middle ground<br />
around the waxed foreground.<br />
12<br />
Add pattern and line work<br />
with black stain or paste.<br />
10<br />
Wax over the decoration<br />
and brush on the background.<br />
13<br />
Mix the stain paste to a thinned glaze<br />
consistency. If it’s too watery, it may<br />
drip or run down the side of your pot.<br />
Too thick, and the brush will not glide<br />
easily across the raw glaze surface. (To<br />
learn how to create your own stain<br />
pastes, see page 6). Starting with the<br />
foreground, apply the stain pastes with a<br />
brush. Posey uses a Marx 5 Long Dagger<br />
brush which is perfect for long, flowing<br />
lines with varied thickness. To create an<br />
added layer of interest to your decoration,<br />
load your brush by first dipping it<br />
into one color and then dabbing a second<br />
color onto the tip. When the brush<br />
moves across the surface of the pot, the<br />
colors gracefully blend together. Loading<br />
the brush can add an element of depth<br />
and interest to your brushwork.<br />
To boldly outline your shapes, apply a<br />
smooth coat of black stain or paste with<br />
a Marx Dagger 636 brush (figure 5).<br />
Deemed by Posey as the “Magic Brush,”<br />
this brush is angled at the tip which allows<br />
for great line variance as you move<br />
Add sgraffito work on the<br />
lid to match the jar.<br />
11<br />
Spray the lid using an<br />
atomizer for additional<br />
texture.<br />
14<br />
Drawings included on the<br />
bottom of the pot.<br />
it. With practice, beautiful flowing lines<br />
are possible. The black lining around the<br />
shapes helps to define it from the rest of<br />
the pot, as well as creating a dark color<br />
on which to carve back through. Known<br />
as sgraffito, the process of scratching<br />
through the black outline to the white<br />
glaze underneath is a great technique<br />
to help define a shape or to add a little<br />
extra decoration (figure 6). Though<br />
any semi-sharp object can be used for<br />
sgraffito, avoid using objects that are<br />
very sharp or thin, such as a needle tool,<br />
as they make lines that are too skinny<br />
and offer very little line variance. Posey<br />
recommends and uses a Kemper Wire<br />
Stylus WS.<br />
After finishing all the foreground decoration,<br />
it’s time to start working toward<br />
the background. Instead of painting the<br />
middle ground and background color<br />
around the shapes painted on the pot,<br />
which can hinder the fluidity and evenness<br />
of your background, Posey prefers<br />
to wax resist her foreground decoration.<br />
www.ceramicartsdaily.org | Copyright © 2010, <strong>Ceramic</strong> Publications Company | Three Great <strong>Ceramic</strong> Glazing <strong>Techniques</strong> | 4
Large oval box, 11 inches (28 cm) in length, earthenware with majolica base glaze and overglaze stains.<br />
Apply a thin coat of wax resist<br />
directly over the decoration (figure<br />
7). Once dry, the middle ground<br />
and then the background color can<br />
be applied directly onto the entire<br />
pot and voila, the wax prevents<br />
the new stain from absorbing into<br />
the glazed pot. If the wax goes<br />
outside of the decoration’s border,<br />
don’t worry. A thin white line surrounding<br />
the decoration can add a<br />
loose, gestural quality to the piece.<br />
Since the foremost decoration is<br />
already painted and now waxed,<br />
any new overglaze colors brushed<br />
over will appear to be directly behind<br />
the initial drawings, thus creating<br />
a middle ground. Posey uses<br />
her finger to dab additional color,<br />
for example, creating the center of<br />
a ‘blossom’ (figure 8). The blossoms<br />
are then elaborated upon<br />
with brushwork (figure 9). Once<br />
this decoration has been applied,<br />
coat it with wax resist. Depending<br />
on the number of layers desired in<br />
the drawing, this could be done in<br />
one or two steps, or may require<br />
multiple sessions of applying decorative<br />
elements and waxing.<br />
Once all individual objects of<br />
decoration are painted on and<br />
protected with wax resist, it’s<br />
time to give the rest of the piece<br />
an overall hue. Though it can be<br />
left white, Posey prefers to liven<br />
up the surface with a uniting<br />
color. To apply the background<br />
color, Posey uses a Loew-Cornell<br />
275 brush as it can hold a large<br />
amount of stain paste and creates<br />
a nice, wide swath of color (figure<br />
10). Here she brushes vanadium<br />
stain paste onto the piece directly<br />
Tall oval box, 8 inches (20 cm) in<br />
height, earthenware, with majolica<br />
base glaze and overglaze stains.<br />
www.ceramicartsdaily.org | Copyright © 2010, <strong>Ceramic</strong> Publications Company | Three Great <strong>Ceramic</strong> Glazing <strong>Techniques</strong> | 5<br />
Photo credit: Process images by clay cunningham, images of finished Pieces by Kevin noble.
NOTE<br />
Even though the wax<br />
is dry, allow it to cure<br />
for twenty-four hours<br />
before touching it with<br />
your hands. If it is still<br />
damp, it may stick to<br />
your fingers and thus<br />
pull the stain decoration<br />
off. However, it is safe<br />
to use a sponge on the<br />
waxed areas before the<br />
wax cures.<br />
Glaze Materials<br />
Though most surface<br />
treatments can be<br />
adapted to work in<br />
more than one firing<br />
range, terra sigillata and majolica<br />
techniques are primarily<br />
intended only for low-fire. Posey<br />
Bacopoulos discusses using terra<br />
sigillata to create a satiny smooth<br />
and more water tight surface<br />
along with making stain pastes<br />
for use with the majolica decorating<br />
technique.<br />
over her previous decoration. The<br />
entire surface can be colored or<br />
the decoration can be painted in<br />
any manner or pattern to design<br />
the background. To add variety<br />
to the surface, a small atomizer<br />
filled with rutile stain paste can be<br />
sprayed onto the surface (figure<br />
11). This allows for a varied and<br />
mildly textured surface similar to<br />
pottery fired in atmospheric kilns.<br />
After applying the background,<br />
use a small damp sponge and<br />
carefully wipe over the waxed<br />
decoration to remove any beads of<br />
residual glaze.<br />
Finishing and Firing<br />
With the entire piece colored,<br />
any additional decoration can be<br />
added on top of the background<br />
color using the black stain or paste<br />
(figure 12). Here Posey paints on a<br />
grid design which adds additional<br />
patterning as well as helping to<br />
compose the space within the form<br />
Terra Sigillata<br />
Terra sigillata is an ultrarefined<br />
slip that can be applied<br />
to bone dry (or bisque fired)<br />
clay. When brushed onto bonedry<br />
wares, the extreme fineness<br />
of the platelets in the terra sig<br />
causes them to naturally lay<br />
flat on the surface, resulting in<br />
a smooth, satiny coating, even<br />
with just a very thin translucent<br />
layer. If the terra sig is polished<br />
of the pot. As before, sgraffito can<br />
be used to add variety to lines or<br />
for further decoration (figure 13).<br />
Don’t forget the foot and the inside<br />
of the pot. Adding small, yet<br />
similar, decoration to the inside<br />
of your pottery helps relate all the<br />
parts of the work to one another,<br />
and gives the viewer an additional<br />
‘surprise’ to find later (figure 14).<br />
Load the glazed piece into the<br />
electric kiln and fire to cone 05.<br />
Fire the kiln slowly, particularly<br />
in the latter stage of the firing, for<br />
a total time of no less than twelve<br />
hours. This allows the glaze to<br />
even out and allows any additional<br />
gasses in the clay to burn off<br />
slowly, ensuring that your colors<br />
are even and free from pinholes.<br />
The good news is that majolica<br />
glazes are typically very stable,<br />
meaning they won’t run. Not only<br />
does that mean that you won’t<br />
have any glaze to grind off the<br />
bottom of your pot, your decoration<br />
won’t run either.<br />
when still slightly damp with a<br />
soft cloth, the pad of your finger,<br />
or a thin piece plastic, it will<br />
give a high gloss without heavy<br />
burnishing. Since it is a slip,<br />
and not a glaze, Terra sig will<br />
not run or stick to other pieces<br />
in the kiln or to a kiln shelf. It<br />
works best at low temperatures<br />
retaining a gloss appearance<br />
even in pit and barrel firing, but<br />
can be fired higher with adjustments<br />
to the mix.<br />
www.ceramicartsdaily.org | Copyright © 2010, <strong>Ceramic</strong> Publications Company | Three Great <strong>Ceramic</strong> Glazing <strong>Techniques</strong> | 6
Making Terra<br />
Sigillata<br />
Terra sig can be made from any<br />
clay, though some have a smaller<br />
particle size and will have a greater<br />
yield. No matter what clay you<br />
use, in order for terra sig to settle<br />
properly, it must be deflocculated,<br />
which makes the particles repel<br />
one another and keeps the finest<br />
particles in suspension. To achieve<br />
the best results, use a combination<br />
of 1 part sodium silicate and 1part<br />
soda ash, based on the dry weight<br />
of clay. Weigh out the deflocculant<br />
and dissolve thoroughly in hot water<br />
(already measured into a larger<br />
container). Slowly add the desired<br />
clay and blend thoroughly with<br />
Applying terra sigillata to foot of the bone dry pot.<br />
Mix the stain paste to the consistency of peanut<br />
butter.<br />
a mixer or a large wire whisk.<br />
(Red or white earthenware can be<br />
used and colorants can be added<br />
to both after the middle layer is<br />
extracted). Allow the terra sig to<br />
sit undisturbed for several days or<br />
until three distinct layers become<br />
visible. Delicately remove the<br />
middle layer using a ball syringe<br />
or similar device, being careful not<br />
to overly disturb the mixture as<br />
a whole. This middle layer is the<br />
terra sig. Put it in a separate container<br />
for use. The top layer will<br />
be mostly water and the bottom<br />
layer will essentially be sludge,<br />
both can be discarded. The sig<br />
layer is now ready for use or can<br />
be colored if desired, generally 1<br />
cup of sig to 1 tbsp. of stain.<br />
Majolica Stain<br />
Pastes<br />
Majolica stains are made with<br />
frits and/or Gerstley borate, which<br />
are fluxes and glass formers.<br />
They allow the stain pastes to<br />
melt into the white base majolica<br />
glaze they are layered on top of<br />
and add to an overall and consistent<br />
glossy finish.<br />
Majolica is a low-fire technique,<br />
you can use any commercial stain<br />
or coloring oxide to achieve the<br />
color you want.<br />
Always test your recipes first<br />
before using them on finished<br />
work. And always wear a respirator<br />
or similar safety equipment<br />
when handling dry materials.<br />
Add stain paste base to the colorant, 3½ parts paste<br />
to 1 part colorant by volume.<br />
Prepared stain pastes. Consistency remains the<br />
same with each batch.<br />
www.ceramicartsdaily.org | Copyright © 2010, <strong>Ceramic</strong> Publications Company | Three Great <strong>Ceramic</strong> Glazing <strong>Techniques</strong> | 7<br />
Photo credit: clay cunningham.
Recipes<br />
Toasty Red Brown Terra<br />
Sigillata<br />
Cone 05<br />
Water . . . . . . . . . . . . . . . . . . . . . . . . .14 cups<br />
Red Art Clay . . . . . . . . . . . . . . .1,500 grams<br />
Sodium Silicate . . . . . . . . . . . . . . . . . . 1 tsp .<br />
Mix thoroughly and allow to settle into three<br />
distinct parts . Pour off the top, thinnest layer .<br />
Pour the remaining liquid (middle layer) into a<br />
lidded container to use as your terra sigillata .<br />
Discard the bottom sludge . Use on leatherhard<br />
or bone dry ware .<br />
PB Matte Majolica<br />
Cone 05<br />
Ferro Frit 3124 . . . . . . . . . . . . . . . . . 65 %<br />
EPK Kaolin . . . . . . . . . . . . . . . . . . . . 20<br />
Dolomite . . . . . . . . . . . . . . . . . . . . . 10<br />
Silica . . . . . . . . . . . . . . . . . . . . . . . . 5<br />
Total . . . . . . . . . . . . . . . . . . . . . . . . .100 %<br />
Add: Zircopax . . . . . . . . . . . . . . . . . 10 %<br />
Epsom salts solution<br />
Put water into a mixing container and add dry<br />
ingredients . Once settled, stir vigorously while<br />
adding a saturated Epsom salt solution (approximately<br />
1 tsp . per 1000 gram batch) . Add water<br />
to achieve a thick, creamy consistency slightly<br />
thicker than a typical glaze . To make a saturated<br />
Epsom salt solution, mix Epsom salts into a cup<br />
of water until no more will dissolve .<br />
Stain Paste Base<br />
Cone 05<br />
Ferro Frit 3124 . . . . . . . . . . . . . . . . . .50 %<br />
Gerstley Borate . . . . . . . . . . . . . . . . . .50<br />
Total 100 %<br />
Mix by volume . This is the base recipe for making<br />
colors to paint on over the base glaze .<br />
Stain and Oxide<br />
Colorants<br />
For commercial stains, the ratio should be 3½<br />
parts Stain Paste Base to 1 part colorant by<br />
volume . (Most commercial stains will work,<br />
but test first .)<br />
Green: Mason Florentine Green 6202<br />
Mason Bermuda Green 6242<br />
Blue: Mason Navy Blue 6386<br />
Yellow: Mason Vanadium Yellow 6404<br />
Purple: Mason Pansy Purple 6385<br />
Chartreuse: Mason Chartreuse 6236<br />
Brown: Mason Chocolate Brown 6124<br />
Gray: Mason Charcoal Grey 6528<br />
Black: Duncan EZ Stroke Black EZ012<br />
For oxides, mix 1 part Stain Paste Base to 1 part<br />
oxide by volume .<br />
Brown: Red Iron Oxide<br />
Turquoise: Copper Carbonate<br />
For all Stain Pastes, mix to the consistency of<br />
creamy peanut butter and thin as needed for<br />
brushing .<br />
Amaco Majolica<br />
Decorating Colors<br />
(GDC series )<br />
GDC Red #54<br />
GDC Purple #55<br />
GDC Royal Blue #21<br />
GDC Avocado #47<br />
GDC Real Orange #65<br />
GDC Rose #38<br />
These work great right out of the jar<br />
to be brushed onto the Majolica Glaze .<br />
No mixing or measuring of materials<br />
required . For other colors, see the<br />
Amaco catalog .<br />
Test tiles of stain pastes painted<br />
over majolica glaze and glaze<br />
fired to cone 05.<br />
www.ceramicartsdaily.org | Copyright © 2010, <strong>Ceramic</strong> Publications Company | Three Great <strong>Ceramic</strong> Glazing <strong>Techniques</strong> | 8
Adding Depth to Your Glazes<br />
by Lisa Bare Culp<br />
As a potter and inhome<br />
instructor for<br />
many years, I’ve<br />
always mixed my own<br />
glazes, or relied on other professionals<br />
who mix dry glazes to my<br />
specifications. Recently, an idea for<br />
a single pot challenged me to experiment<br />
with commercially-made<br />
glazes. The outcome has been succesful<br />
with vibrant new color selections,<br />
time savings and the convenience<br />
of readily available glazes<br />
screened for toxicity—all this without<br />
compromising my workspace<br />
or my standards.<br />
What changed my thinking on<br />
commercially prepared glazes was<br />
my desire to introduce bold new<br />
colors into my work. I envisioned<br />
a piece with contrasting matt<br />
black-and-white slip surfaces<br />
offset against a single area glazed<br />
in vibrant red. My local supplier<br />
recommended a food-safe, nontoxic<br />
red glaze, Mayco’s Stroke &<br />
Coat Cone 06.<br />
Early Experiments<br />
Early tests resulted in pieces with<br />
dramatic and beautiful contrasts<br />
between my porcelain slips and the<br />
red glaze. In one test, I used Stroke<br />
& Coat SC-73 Candy Apple Red,<br />
to highlight areas of bisqueware.<br />
In another, I used SC-74 Hot<br />
Tamale. Sometimes I applied the<br />
glaze with a big brush in a single,<br />
expressive stroke. Other times, I<br />
squeezed the colors from a slip<br />
trailer and a turkey baster.<br />
After these loose applications,<br />
I dipped the entire piece in my<br />
usual cone 6 glazes. Because of<br />
their gum content, the commercial<br />
glazes resisted my glazes slightly,<br />
making the bold strokes of color<br />
come through vividly. Stroke<br />
edges were blended and their<br />
colors softly striking against the<br />
cone 6 palette. The outcome was<br />
as satisfying technically as it was<br />
aesthetically; I was satisfied with<br />
the melt (Stroke & Coat is a glaze,<br />
not an underglaze), the color and<br />
Fish Bowl, matt<br />
white glaze over<br />
commercial glazes,<br />
fired to cone 6.<br />
www.ceramicartsdaily.org | Copyright © 2010, <strong>Ceramic</strong> Publications Company | Three Great <strong>Ceramic</strong> Glazing <strong>Techniques</strong> | 9
the absence of pinholing or other<br />
major flaws at cone 6.<br />
A New Tool<br />
Further experiments with sgraffito,<br />
layering, mixing with slip and<br />
stoneware glazes, and multiple<br />
firings have opened up commercial<br />
glazes as a new artistic tool—albeit<br />
an unexpected one—to share with<br />
students. They have learned the importance<br />
of experimenting with new<br />
surfaces, new materials, combining<br />
Asparagus Tray<br />
techniques and achieving balance<br />
with different kinds of material.<br />
If you’d like to experiment with<br />
commercially prepared glazes, I’ve<br />
included three of my projects for<br />
you to try. Mixing my own recipes<br />
will always be an important part of<br />
understanding the science behind<br />
the art of pottery making. But successfully<br />
integrating commercial<br />
glazes in the mix is just one more<br />
way to pursue the function and<br />
beauty of ceramics.<br />
Pouring<br />
Squeeze a large amount of<br />
Stroke & Coat SC-73 Candy<br />
Apple Red across the interior of<br />
a bisque-fired bowl . Use a 2-inch<br />
brush to apply a thin coat of<br />
Mayco’s Elements Chunkies EL<br />
203 Coal Dust (this is a low-fire<br />
effect glaze with crystals) over<br />
the Candy Apple Red .<br />
A nice feathered edge is created<br />
when the piece is dipped<br />
into a cone 6 black glossy glaze .<br />
www.ceramicartsdaily.org | Copyright © 2010, <strong>Ceramic</strong> Publications Company | Three Great <strong>Ceramic</strong> Glazing <strong>Techniques</strong> | 10
Carving<br />
Apply a thick coat of Mayco Stroke & Coat<br />
SC-71 Purple-Licious and SC-74 Hot Tamale<br />
with a large brush to the interior surface of<br />
a leather-hard bowl . Once the colors are<br />
slightly dry, the design is carved through<br />
the glaze with a loop tool, then bisque fired<br />
to cone 08 . Dip the entire piece twice in a<br />
cone 6 matt white glaze and fire to cone 6 in<br />
oxidation . The commercial colors show well<br />
through the white matt .<br />
Note: If the carved lines are too fine they<br />
may fill in when the glaze melts .<br />
Fish Bowl<br />
www.ceramicartsdaily.org | Copyright © 2010, <strong>Ceramic</strong> Publications Company | Three Great <strong>Ceramic</strong> Glazing <strong>Techniques</strong> | 11
Gear Dish<br />
Gear Dish, slab-built stoneware.<br />
Layering<br />
On a heavily textured, bisque-fired piece, apply a cone 6 por-<br />
celain black slip as a stain, wiping off the high spots with a<br />
damp sponge .<br />
Use a 2-inch brush to apply Stroke & Coat SC-71 Purple-<br />
Licious to the high spots with a dry brush technique . Next,<br />
dry brush Mayco’s Stroke & Coat Red SC-74 Hot Tamale and<br />
SC-27 Sour Apple onto the interior . Apply a thick coat of the<br />
red glaze in isolated areas to obtain a bright color .<br />
Apply wax resist to the interior surface of the piece and<br />
allow to dry . Dip the entire piece in a cone 6 blue glaze .<br />
www.ceramicartsdaily.org | Copyright © 2010, <strong>Ceramic</strong> Publications Company | Three Great <strong>Ceramic</strong> Glazing <strong>Techniques</strong> | 12
The Mystery of Crystals<br />
Four vessels, to<br />
8 inches in height,<br />
thrown B-Mix clay.<br />
Glazes are as follows.<br />
Left to right: Fa’s<br />
Cone 6 Base (Revised)<br />
glaze with 3%<br />
manganese dioxide<br />
and .5% cobalt<br />
carbonate; MFE (Dan<br />
Turnidge Revised)<br />
glaze with 3%<br />
manganese dioxide<br />
and 1% cobalt<br />
carbonate; Fa’s Cone<br />
6 Base glaze revised<br />
with 3% manganese<br />
dioxide and .5%<br />
cobalt carbonate; and<br />
MFE (Dan Turnidge<br />
Revised) glaze with<br />
3% manganese<br />
dioxide and 1%<br />
cobalt carbonate.<br />
by William Schran<br />
My fascination with<br />
macrocrystalline<br />
glazes began as a<br />
graduate student.<br />
While visiting a local exhibition<br />
of an individual’s collection, I discovered<br />
two small porcelain bottles<br />
by Herbert Sanders. The glazes appeared<br />
to have blue colored snowflakes<br />
frozen on a transparent sky<br />
of orange. From that initial encounter,<br />
macrocrystalline glazing<br />
has become a process that I’ve revisited<br />
many times over the years.<br />
Sanders had published Glazes<br />
for Special Effects in 1974, which<br />
contained recipes for crystalline<br />
glazes. In 1976, I began experimenting<br />
with several recipes listed<br />
in the book, but since it was difficult<br />
to fire our electric kilns to<br />
the required cone 9–10 temperature<br />
range, I had little success. An<br />
article by David Snair in <strong>Ceramic</strong>s<br />
Monthly provided additional glaze<br />
recipes and techniques for preparing<br />
the pots for firing. Though<br />
all the recipes were for cone 9, a<br />
comment in the article stated that<br />
firing to cone 6 would also produce<br />
crystals. I had some limited<br />
success with these glazes, but that<br />
comment stuck in my head.<br />
Fast forward to 1994. Discussions<br />
of glazes with a group of my<br />
students lead to a question about<br />
crystalline glazes. This one question<br />
resulted in a semester-long<br />
series of glaze tests that resulted in<br />
few successes. It was the problem I<br />
had encountered years before, our<br />
electric kilns only reached cone<br />
9–10 with much difficulty. The<br />
lack of success producing crystals<br />
by my students only strengthened<br />
my resolve to find a solution. It<br />
was then, that I recalled the Snair<br />
article and the comment about<br />
cone 6.<br />
With additional information<br />
gathered through Internet searches<br />
and interlibrary loans, I discovered<br />
some artists experimenting with<br />
crystalline glazes at lower temperatures.<br />
Since we conducted our<br />
glaze firings to cone 6 at school,<br />
I decided to target this temperature<br />
for my testing. My initial<br />
www.ceramicartsdaily.org | Copyright © 2010, <strong>Ceramic</strong> Publications Company | Three Great <strong>Ceramic</strong> Glazing <strong>Techniques</strong> | 13
experiments involved firing cone<br />
10 glaze recipes only to cone 6.<br />
These tests resulted in the discovery<br />
that crystalline glazes could be<br />
produced in this lower temperature<br />
range by simply introducing<br />
additional fluxes. The flux that<br />
seemed to produce the best results<br />
was lithium carbonate. Other<br />
materials that would function as a<br />
powerful flux were either soluble<br />
or contained additional silica and<br />
alumina, which are not desirable<br />
in crystalline glazes.<br />
All of my experiments with crystalline<br />
glaze firings, up until fall<br />
2006, have been done in a manually<br />
operated electric kiln. The<br />
kiln has infinite controls, so with<br />
careful monitoring, I was able to<br />
control the firing schedule fairly<br />
accurately. A digital pyrometer is<br />
an essential tool to closely track<br />
temperature changes, especially<br />
during long holding cycles. Acquisition<br />
of my first kiln with a programmable<br />
controller has allowed<br />
for more complicated, repeatable<br />
firing schedules. The ability to be<br />
able to alter temperature ramp<br />
speeds and specific temperature<br />
hold times have opened up new<br />
avenues of experimentation. I<br />
have also found that, for both<br />
types of kilns, a direct vent system<br />
is important for rapid cooling<br />
cycles and maintaining an oxidizing<br />
atmosphere.<br />
Crystalline<br />
Technique<br />
I’ve developed techniques through<br />
years of experimentation, adopting<br />
processes that worked, eliminating<br />
those that produced only limited<br />
success. Web searches and recent<br />
publications provide a variety of<br />
approaches to this very involved<br />
process, and each individual needs<br />
to conduct tests to find the process<br />
that makes the most sense for his<br />
or her particular circumstances.<br />
Crystalline glazes produce the<br />
best results when applied to a<br />
smooth white clay body. Many<br />
artisans work with a porcelain<br />
clay body. Porcelain comes with its<br />
own set of issues and I have found<br />
a cone 10 porcelaneous stoneware<br />
clay—B-Mix or Bee-Mix—that<br />
works very well with my glazes.<br />
I chose to use a cone 10 clay to<br />
reduce the amount of alumina that<br />
might be picked up by the glaze.<br />
A normal glaze has a mix of<br />
silica/flux/alumina in a ratio that<br />
provides a glassy surface and<br />
remains in place when melted on<br />
a vertical surface. A crystalline<br />
glaze contains little or no alumina,<br />
which would inhibit crystal<br />
growth. The glaze is comprised of<br />
silica, flux and a saturation of zinc<br />
oxide. This highly fluxed mix of<br />
materials leads to a very fluid glaze<br />
and steps must be taken to avoid<br />
destroying kiln shelves or the kiln.<br />
Catch Basins<br />
and Pedestals<br />
Every pot must have its own catch<br />
plate/basin to contain the glaze<br />
that runs off the pot. The catch<br />
plate need not be made from the<br />
same clay as the pot. The plate can<br />
be wheel thrown or hand built.<br />
Each pot must also have some type<br />
of pedestal device to facilitate re-<br />
www.ceramicartsdaily.org | Copyright © 2010, <strong>Ceramic</strong> Publications Company | Three Great <strong>Ceramic</strong> Glazing <strong>Techniques</strong> | 14
1<br />
Crystalline glazes run off the pot so you need to raise<br />
the piece on a pedestal that sits in a catch basin. It’s<br />
important to select a pedestal that closely matches the<br />
diameter of the foot. Preparing several sizes allows<br />
you to select one with the correct fit.<br />
Apply three to four coats of glaze to achieve the<br />
desired thickness, brushing each layer in a different<br />
direction to ensure that brush strokes aren’t visible<br />
and you have an even coating.<br />
a mix of white glue, which holds<br />
the pedestal in place before firing,<br />
and kaolin, which acts as a separating<br />
agent after firing. Striking<br />
with a sharp chisel or heating with<br />
a small torch just below the joint<br />
with the pot removes the pedestal.<br />
After encountering a number<br />
of problems with each of these<br />
www.ceramicartsdaily.org | Copyright © 2010, <strong>Ceramic</strong> Publications Company | Three Great <strong>Ceramic</strong> Glazing <strong>Techniques</strong> | 15<br />
3<br />
Pieces ready to load in the kiln. Each<br />
glazed pot is positioned on a pedestal<br />
that is placed in a catch basin.<br />
moval of the pot after firing. Some<br />
potters use insulating firebrick<br />
to create the pedestal. The brick<br />
must be at least a 2600K-type and<br />
coated with kiln wash. Another<br />
technique involves throwing the<br />
pedestal from the same clay body<br />
as the pot. After bisque firing, the<br />
pedestal is attached to the pot with<br />
2<br />
4<br />
After the firing, the fluid glaze will<br />
have run down over the pedestal and<br />
into the catch basin.
5<br />
The pedestal and catch basin are removed<br />
by tapping with a small chisel<br />
along the line where the pedestal<br />
joins the pot.<br />
6<br />
Excess pedestal material and glaze<br />
are ground off the bottom using a<br />
bench grinder fitted with a silicon<br />
carbide grinding wheel.<br />
methods, such as pots falling over<br />
or broken foot rings, I sought<br />
another solution. Ellie Blair, a<br />
fellow crystalline artist, provided<br />
this process to me—the pedestals<br />
are a mix of equal parts by volume:<br />
alumina, kaolin and sawdust.<br />
Add just enough water to bind the<br />
materials and form the mix into<br />
¾-inch thick “biscuits” cut to the<br />
foot diameter of the bisque fired<br />
pot using round cookie cutters.<br />
I’ve found this material to stand<br />
up well to the melting glaze and<br />
soft enough to be easily knocked<br />
off with a chisel. Any remaining<br />
pedestal is easily ground away<br />
from the pot.<br />
Glaze Application<br />
Crystalline glazes may be applied<br />
like most other glaze, but since<br />
I don’t have spray equipment or<br />
room in my studio to store large<br />
I use a portable flat lap machine<br />
fitted with diamond grinding and<br />
smoothing disks to even out and<br />
smooth the bottom of the foot with<br />
100 and 260 grit disks. Since water is<br />
used in this process, I do this in the<br />
studio, but still wear eye protection.<br />
Self-adhesive diamond disks or silicon<br />
carbide disks can be attached to plastic<br />
bats and the potters wheel used<br />
to grind and smooth the bottoms.<br />
WARNING<br />
Proper eye and respiratory<br />
protection must be<br />
worn during this process.<br />
Do all grinding<br />
outside the studio, if<br />
possible.<br />
www.ceramicartsdaily.org | Copyright © 2010, <strong>Ceramic</strong> Publications Company | Three Great <strong>Ceramic</strong> Glazing <strong>Techniques</strong> | 16<br />
7
uckets of glaze, I apply crystalline<br />
glazes by brush. Most of the<br />
time I mix a few hundred grams at<br />
a time, which is sufficient to glaze<br />
two or three small pots. Since the<br />
crystalline glaze contains no added<br />
clay to keep the glaze in suspension,<br />
you don’t want to add just<br />
water to wet the glaze. To wet the<br />
glaze, I use a CMC gum solution<br />
by adding about two heaping<br />
tablespoons of CMC powder to<br />
one quart of hot water. I let the<br />
powder soak into the water for at<br />
least 24 hours. The soaked gum<br />
is then stirred, resulting in a thin<br />
honey consistency. I add this to the<br />
dry glaze, stir and pass through<br />
40 mesh, then 80 mesh sieves.<br />
The wetted glaze should have the<br />
consistency of thick honey.<br />
Apply the glaze fairly thick. I apply<br />
one coat by brush horizontally<br />
around the pot. When that dries,<br />
I apply a second coat vertically,<br />
then a third coat in a diagonal direction<br />
to the upper ²/ ³ of the pot.<br />
Sometimes I’ll apply a fourth coat<br />
to the top.<br />
On the interior of vase/bottle<br />
forms and on the exterior of<br />
bowls, I use a cone 6 stoneware<br />
glaze. I selected a glaze that fits my<br />
clay body to create a watertight<br />
seal. With a crystalline glaze on<br />
just the interiors of bowls, I don’t<br />
have be concerned with pedestals<br />
or catch plates.<br />
Firing<br />
Pots, with their pedestals and<br />
catch plates, are loosely loaded in<br />
the kiln. In my 4 cubic-foot-kiln,<br />
I will have at the most a dozen<br />
pots. Avoid using too much kiln<br />
furniture. It takes more energy and<br />
time to heat and cool kiln furniture<br />
than it does the pots. Always<br />
use witness cones in every firing.<br />
Even if you fire with a programmable<br />
kiln and don’t look at the<br />
cones during the firing, they will<br />
be the best record of the firing.<br />
Keep meticulous notes of every<br />
firing. Keep a logbook of your firings<br />
and cross-reference each glaze<br />
to its firing. Fara Shimbo and Jon<br />
Singer gave the best advice during<br />
a presentation at the Lattice<br />
Structures Crystalline Glaze Symposium<br />
in fall 2005: When you’re<br />
testing, change only one thing at a<br />
time. If you alter the glaze in any<br />
way, change only one amount or<br />
material at a time. Do not change<br />
anything else. If you alter the firing<br />
schedule, do not change the glaze<br />
until you see what change the firing<br />
has made.<br />
Should the pot come out of the<br />
firing with few or no crystals, take<br />
heart and give it another chance.<br />
If the glaze has not filled the catch<br />
plate, simply apply another coat of<br />
the same glaze or a different glaze<br />
and fire it again. Should the catch<br />
plate be filled with glaze, it will<br />
be necessary to remove the pot<br />
from the pedestal, grind the foot<br />
even and create another pedestal<br />
and catch plate. I have refired<br />
some pots up to five times before<br />
I achieved results that were to my<br />
satisfaction.<br />
Cleanup<br />
After the firing, knock the pedestal<br />
loose with a small chisel or screwdriver.<br />
Strike the pedestal material,<br />
not the joint between the pots<br />
and pedestal. I use a bench grinder<br />
www.ceramicartsdaily.org | Copyright © 2010, <strong>Ceramic</strong> Publications Company | Three Great <strong>Ceramic</strong> Glazing <strong>Techniques</strong> | 17
fitted with a silicon carbide grinding<br />
wheel to remove any remaining<br />
pedestal material and glaze.<br />
I do all of my grinding outside<br />
and I always wear proper eye and<br />
respiratory protection. After coarse<br />
grinding, I use a portable flat lap<br />
fitted with diamond disks to even<br />
out and smooth the foot. Silicon<br />
carbide disks and diamond disks<br />
with self adhesive backing can be<br />
attached to plastic bats and used on<br />
the wheel to grind and smooth pot<br />
bottoms. Squirting or spraying with<br />
water while grinding will help keep<br />
down the dust.<br />
Firing Schedule<br />
Use one of the following firing<br />
schedules for cone 6 crystalline<br />
glazes. You will need to experiment<br />
to determine the best firing<br />
schedule for your kiln. The ability<br />
of the kiln to respond to rapid<br />
heating and cooling ramps is a<br />
critical factor in successful crystalline<br />
glazes. Kilns should be loaded<br />
loose, using as little kiln furniture<br />
as possible. Older, well-used elements<br />
may not be able to keep up<br />
with programmed demands of the<br />
kiln. I’ve found heavy duty elements<br />
begin to be unable to keep<br />
up with the programmed firing<br />
schedule after about forty crystalline<br />
firings.<br />
For Manual Kilns with Infinite Control<br />
n Low – ½ hour<br />
n Medium – ½ hour<br />
n High – cone 6 over<br />
n Turn off kiln, cool to holding<br />
temperature (1850°F–1880°F)<br />
Bottle, 7 inches in height, thrown B-Mix clay,<br />
with Fa’s #5 (Revised) glaze with additions of 4%<br />
manganese dioxide and 1% cobalt carbonate.<br />
n Turn on kiln to a medium setting<br />
and monitor closely .<br />
n Try to maintain the holding<br />
temperature for 3–4 hours .<br />
Each section of the kiln may need to have a different setting to maintain a constant<br />
temperature . For my kiln, a setting of #3 on the top and middle section, and “M” setting<br />
on the bottom section provided a fairly consistent reading .<br />
www.ceramicartsdaily.org | Copyright © 2010, <strong>Ceramic</strong> Publications Company | Three Great <strong>Ceramic</strong> Glazing <strong>Techniques</strong> | 18
For Programmable Kilns<br />
Note: My kiln uses an “S” type platinum thermocouple with the thermocouple offset<br />
turned off . Each kiln may indicate a different temperature when cone 6 bends over . Use<br />
witness cones and closely monitor them until the correct peak temperature is determined .<br />
n Increase temperature<br />
350°F per hour to 700°F<br />
n Increase temperature<br />
750°F per hour to 2000°F<br />
n Increase temperature<br />
150°F per hour to 2210°F<br />
(this puts cone 6 over,<br />
cone 7 at 1 o’clock position)<br />
Crystalline<br />
Base Glazes<br />
MFE<br />
(Dan Turnidge Revised)<br />
Cone 6<br />
Ferro Frit 3110 . . . . . . . . . . . . . . . . .50 .0 %<br />
Silica (325 mesh) . . . . . . . . . . . . . . .22 .5<br />
Zinc Oxide . . . . . . . . . . . . . . . . . . . .22 .5<br />
95 .0 %<br />
Add: . . . . . . . . Lithium Carbonate 1–5 .0 %<br />
Fa’s Base (Revised)<br />
Cone 6<br />
Zinc Oxide . . . . . . . . . . . . . . . . . . . .25 .0 %<br />
Dolomite . . . . . . . . . . . . . . . . . . . . . .5 .0<br />
Ferro Frit 3110 . . . . . . . . . . . . . . . . 51 .0<br />
Silica (325 mesh) . . . . . . . . . . . . . . .19 .0<br />
100 .0 %<br />
Add: Lithium Carbonate . . . . . . . . .2–4 .0 %<br />
n Hold at 2210ºF for 10 minutes<br />
n Cool down 750°F per hour to<br />
2000°F, hold for 1 hour<br />
n Cool down 750°F per hour to<br />
1900°F, hold for 3 hours<br />
n Kiln off, vent off, total firing<br />
9–9½ hours<br />
Higher holding temperatures results in fewer but larger crystals with more ground (areas<br />
without crystals) exposed .<br />
Fa’s #5 (Revised)<br />
Cone 6<br />
Zinc Oxide . . . . . . . . . . . . . . . . . . . .27 .0 %<br />
Talc . . . . . . . . . . . . . . . . . . . . . . . . . 5 .0<br />
Ferro Frit 3110 . . . . . . . . . . . . . . . . .50 .0<br />
Spodumene . . . . . . . . . . . . . . . . . . . .4 .0<br />
Silica (325 mesh) . . . . . . . . . . . . . . .14 .0<br />
100 .0 %<br />
Add: Titanium Dioxide . . . . . . . . . . . .2 .0 %<br />
Colorants<br />
Add the following colorants individually or in<br />
combination:<br />
Cobalt Carbonate . . . . . . . . . . . .0 .25–3 .0 %<br />
Copper Carbonate . . . . . . . . . . .0 .5–6 .0 %<br />
Manganese Dioxide . . . . . . . . . . 0 .5–3 .0 %<br />
Iron Oxide . . . . . . . . . . . . . . . . . 0 .5–3 .0 %<br />
Rutile . . . . . . . . . . . . . . . . . . . . .0 .5–3 .0 %<br />
Nickel Oxide . . . . . . . . . . . . . . . .0 .25–3 .0 %<br />
www.ceramicartsdaily.org | Copyright © 2010, <strong>Ceramic</strong> Publications Company | Three Great <strong>Ceramic</strong> Glazing <strong>Techniques</strong> | 19