Developing glazes - Ceramic Arts Daily
Developing glazes - Ceramic Arts Daily
Developing glazes - Ceramic Arts Daily
You also want an ePaper? Increase the reach of your titles
YUMPU automatically turns print PDFs into web optimized ePapers that Google loves.
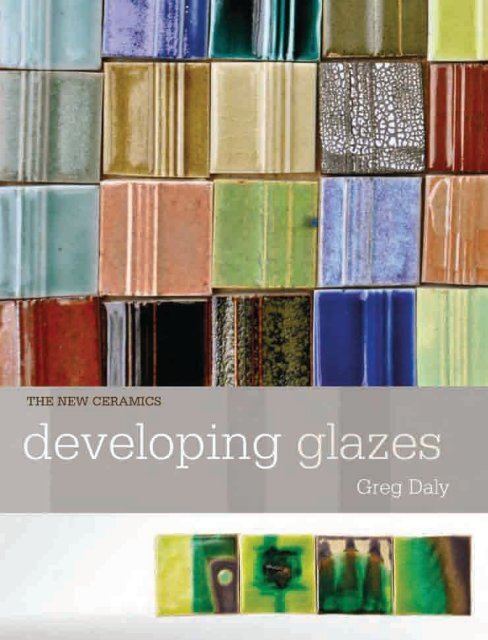
<strong>Developing</strong> <strong>glazes</strong><br />
Greg Daly
First published in Great Britain 2013<br />
by Bloomsbury Publishing Plc<br />
50 Bedford Square<br />
London WC1B 3DP<br />
www.acblack.com<br />
ISBN 978-1-4081-3495-5<br />
Published simultaneously in the US by<br />
The American <strong>Ceramic</strong> Society<br />
600 N. Cleveland Ave., Suite 210<br />
Westerville, Ohio, 43082, USA<br />
http://ceramicartsdaily.org<br />
ISBN 978-1-57498-331-9<br />
Copyright © Greg Daly 2013<br />
CIP Catalogue records for this book are available from the British<br />
Library.<br />
All rights reserved. No part of this publication may be reproduced<br />
in any form or by any means – graphic, electronic or mechanical,<br />
including photocopying, recording, taping or information storage<br />
and retrieval systems – without the prior permission in writing of<br />
the publishers.<br />
Greg Daly has asserted his right under the Copyright, Design and<br />
Patents Act 1988 to be identified as the author of this work.<br />
Typeset in 10 on 13pt Rotis Semi Sans<br />
Book design by Susan McIntyre<br />
Cover design by Sutchinda Thompson<br />
Edited by Kate Sherington<br />
Printed and bound in China.<br />
This book is produced using paper that is made from wood grown<br />
in managed, sustainable forests. It is natural, renewable and<br />
recyclable. The logging and manufacturing processes conform to the<br />
environmental regulations of the country of origin.<br />
title page Greg Daly, etched<br />
lustred bowl, see p. 11.<br />
contents page Two <strong>glazes</strong><br />
applied in four different<br />
ways, see p. 27.<br />
Contents<br />
1 Introduction to <strong>glazes</strong> ....................................................................................... 5<br />
2 Getting started ................................................................................................. 28<br />
3 Systems for glaze testing ...............................................................................35<br />
4 Fluxes and colour ............................................................................................ 75<br />
5 <strong>Developing</strong> colour ........................................................................................... 78<br />
6 Glaze recipes ..................................................................................................... 91<br />
Ingredient conversions 126<br />
Suppliers 127<br />
Index 128
2<br />
Getting started<br />
Before we begin testing, you need to consider how you will record your glaze testing<br />
and mixing. We need to record these tests in order to be able to make sense of them<br />
later, and to be able to identify the glaze test and recipe that goes with a particular<br />
test tile. It is important to keep records of recipes, firings and outcomes, and to have a<br />
procedure for mixing and applying the tests. It is easy to develop a mental block with<br />
glaze testing, due to the time you assume it will take. Record-keeping, weighing the<br />
glaze ingredients, mixing and applying the glaze to test tiles or rings, as well as firing<br />
the tests, seems like a lot of work, but if you are prepared and organised, the process<br />
doesn’t take long at all, and the effort is small compared to the rewards.<br />
Recording<br />
You should record all your glaze tests in one large book or using a centralised electronic<br />
system like a spreadsheet, rather than multiple scraps of paper, which are easily lost.<br />
Use a simple numbering system for ease of identification and reference – there is<br />
nothing wrong with starting at 1, 2, 3, 4, 5… Alternatively, you may choose a prefix for<br />
a particular series of glaze tests, e.g. for copper reds, as in CR1, CR2, CR3, etc. It doesn’t<br />
matter if you use shorthand markings on the glaze tests, as long as you know and can<br />
identify the mark the following week or in five years’ time.<br />
Another, quite different approach to numbering is to code the various elements of<br />
the test, a particularly useful tactic when you are using a number of glaze bases. Give<br />
<strong>glazes</strong> a letter from the alphabet. For example, the E base glaze referred to in this book<br />
is nepheline syenite 55, whiting 16, talc 13, kaolin 16. The right-hand colour blend in<br />
Figure 5.5 (p. 83) shows the glaze test tile E-1/27 OX-S. In this case, the base glaze<br />
is E and the colour blend number is 1. The tile number from the colour blend is 27,<br />
i.e. the 27th tile when counting left to right across the rows. OX stands for oxidised<br />
firing, S for stoneware. No other test would have the same marking. The code identifies<br />
the base glaze, the colour blend the test is from, the tile number, whether the test is<br />
reduced or oxidised, and the firing range. This is the system I use to identify a number<br />
of glaze tests. It is handy to do when you use the same base a lot to explore colour,<br />
especially using colour blends.<br />
Have a system and stick to it. It is important to make comments in your testing<br />
book next to the glaze recipe (or, these days, on a spreadsheet, with a photo). Note the<br />
clay body, the materials used (feldspar, kaolin, etc.), and the firing – whether it was<br />
overfired, reduced earlier or later than normal (e.g. a delay in starting the reduction<br />
of the kiln can influence the result). Firing an electric kiln may take longer than usual,<br />
Figure 2.1. My glaze<br />
testing area.<br />
and this could also influence the result. Minor changes may seem nothing at the time<br />
but could be the missing piece of information when a glaze comes out one way in a<br />
test and another on a pot.<br />
Weighing and mixing<br />
Measuring spoons, cups, hats, boots, pinches and handfuls are all volumetric measures.<br />
Glazes can be made using the volumetric method, but more commonly a measurement<br />
of weight is used to find the correct proportions of glaze ingredients. Accurate scales<br />
are required. A set of triple-beam balance scales or digital scales using grams or ounces<br />
as a unit of measurement is ideal. Don't make your weight measurements too small.<br />
For example, when trying to weigh out a test that you have reduced to a total amount<br />
of 20g, inaccuracies may occur when weighing very small amounts – say, less than<br />
1g. On the whole, materials are relatively inexpensive, so it is worth doing the test<br />
properly and weighing out no less than 50g, or better still, 100g, a quantity that will<br />
enable you to weigh the glaze correctly and apply it with confidence. Keep the mix<br />
28 29
<strong>Developing</strong> <strong>glazes</strong><br />
until after the firing; if a glaze looks promising, you will be able to try it in the next<br />
firing on a larger surface – and it is already made up!<br />
Scale is another factor to consider. How often does a colour on a wall-paint chart<br />
look right, but application to a larger area changes its character? After a successful<br />
test, one is apt to mix up a large amount and glaze most of the work for the next<br />
firing. Mix 1kg of glaze and apply it to a few pots. Place them in different parts of the<br />
kiln and see what comes out. You may find that the glaze responds differently in some<br />
areas; it may take time to get to know a glaze completely.<br />
Safety<br />
It is good practice to keep your studio clean and wear a good dust mask. Keep this<br />
in a sealed container between uses and wash it out with warm soapy water after<br />
use, taking off the filters first. Replace dust masks regularly and never bring food<br />
and drinks into the studio. Some of the materials are toxic and carcinogenic, while<br />
dust can lead to silicosis. Your supplier can provide you with Material Safety Data<br />
Sheets (MSDS).<br />
Don’t underestimate the dangers of any of the materials. Keep the glaze-testing<br />
area clean. Because materials can accumulate in the body, some potters I know have a<br />
blood test for heavy metals every few years. Be sensible.<br />
I would suggest that you keep a small amount of each of your materials in an<br />
easily accessible container (100–500g) rather than scooping small amounts from<br />
large bins. This allows for easy access and quick, less messy weighing up. Carrying<br />
material from bulk storage can result in more being dropped than is needed for<br />
the test.<br />
Mixing<br />
There are many approaches to mixing and preparing glaze tests. One of the most<br />
common is to use a pestle and mortar. A small amount of water is poured into the<br />
mortar, then ingredients are added and mixed with the pestle, with more water<br />
added if required, before the glaze is sieved. This slow process is what can put potters<br />
off testing. I originally used this method, but now my procedure is quite different,<br />
with no noticeable change to the finished results – I’ve described the process below.<br />
I use materials of a fine mesh size, silica at 350 mesh, for example; your supplier<br />
can tell you what size the materials are ground to. If I use an un-ground material<br />
such as wood, ash or rock dust, I sieve it first. Materials such as natural bone ash<br />
and some barium carbonates are lumpy and hard to break down, and both sieving<br />
and the use of pestle and mortar may be required. (This problem is caused by the<br />
materials having been water-ground and heat-dried by the manufacturer). Synthetic<br />
bone ash (tri-calcium phosphate) will give the same or a very similar result without<br />
the lumps.<br />
30<br />
top left and right<br />
Figure 2.2. Adding material<br />
to water (left) and mixing<br />
the glaze (right).<br />
above left and right<br />
Figure 2.3. Dipping a test<br />
ring (left), and brushing<br />
three glaze thicknesses<br />
onto a tile (right). Note that<br />
the tile has a texture for the<br />
glaze to break on.<br />
Getting started<br />
As the glaze is weighed, the materials are put into a container with some water.<br />
Adding the dry material to water means there is less dust and results in a glaze that<br />
will mix easily with no lumps. If it is left for a few minutes while other tests are<br />
weighed, you will find that the glaze will mix without trouble. For mixing the glaze, I<br />
use a nylon paintbrush, 2–3 cm (¾–1¼ in.) thick, which breaks down and mixes the<br />
ingredients quickly. An electric hand mixer is also very effective. Water is added to<br />
achieve the desired consistency. There is no set ratio of water to material. A glaze with<br />
a high clay content may requires nearly twice as much water as a glaze without clay,<br />
while a glaze with magnesium carbonate light (a very fine material) will require more<br />
water than the same glaze with magnesium carbonate heavy.<br />
For a glaze test, you should add more water. To obtain the most from your glaze<br />
test, varying thicknesses of glaze need to be applied and thus a thinner mix is<br />
required. The first application is the thin application (if it was being applied over an<br />
iron body you would just be able to see the colour of the body). The second coating<br />
31
<strong>Developing</strong> <strong>glazes</strong><br />
gives a normal thickness of application, 1–2 mm, while the third application is thick,<br />
2–3 mm. You won’t know at that stage what the best thickness will be, but you do<br />
know that thickness will play an important role in the surface effect and colour<br />
response. By applying only one thickness of glaze you are limiting the amount of<br />
information to be gained, and as time has been invested in the recipe decision, as<br />
well as weighing and mixing the glaze, so the time invested in application (not to<br />
mention the nature of the test tile) is all-important. How to apply the glaze test is<br />
again a choice – it may be by dipping, pouring or brushing. All the test tiles in this<br />
book were brushed. Brushing has advantages, being quick and clean, but the brush<br />
can also give an uneven application, which affects the possible outcomes. If a ring<br />
test is used, then dipping is best.<br />
Using white-firing clay test tiles or rings gives a brighter colour response than using<br />
a coloured clay. If you normally use an iron-bearing clay, do use it as the base for your<br />
tests, but try the tests on other clays as a comparison. As we have seen in Chapter 1,<br />
even different white-firing clays can change the glaze response (p. 17).<br />
Figure 2.4. Application of<br />
10 <strong>glazes</strong>, with thick and<br />
thin application next to<br />
each other.<br />
Figure 2.5. A variety of<br />
glaze test forms – rings, tiles,<br />
extruded tiles and bowl.<br />
Potters like using different objects to test their <strong>glazes</strong> on. Keep this in mind when<br />
deciding what kind of test shape to use: it should be large enough to see colour<br />
development, the effects of different thicknesses of glaze (with space for an oxide<br />
stroke to gauge future colour development), and various brush decoration qualities;<br />
and to observe texture from a stamp, raised trailed slip, fabric pattern, finger lines left<br />
from making rings, and so on. It is important to see how and if a glaze breaks or pools,<br />
and how it reacts on a thin edge such as the rim of a bowl or cup. This information is<br />
acquired from the object you decide to test the glaze on. A shallow bowl or large tile is<br />
ideal when testing variations of one glaze, as all the tests – e.g. the additions of silica<br />
in a glaze to overcome crazing – can be contained on one object.<br />
Figure 2.5, above, displays several testing units. Tiles are made very easily with an<br />
extruder; in one morning, a few hundred can be made. Note the free-standing tiles<br />
on the left: these are extruded and cut, the design of the die allowing the base to<br />
be broken off easily for storage, while also allowing the glaze test to be fired on a<br />
75-degree angle for observing possible glaze movement. The test tiles used in this<br />
32 33


