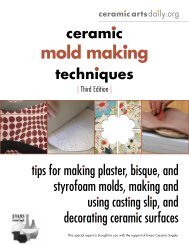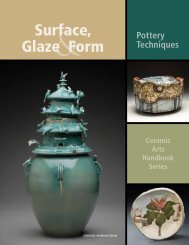
Download a FREE Excerpt - Ceramic Arts Daily
Download a FREE Excerpt - Ceramic Arts Daily
Download a FREE Excerpt - Ceramic Arts Daily

You also want an ePaper? Increase the reach of your titles
YUMPU automatically turns print PDFs into web optimized ePapers that Google loves.
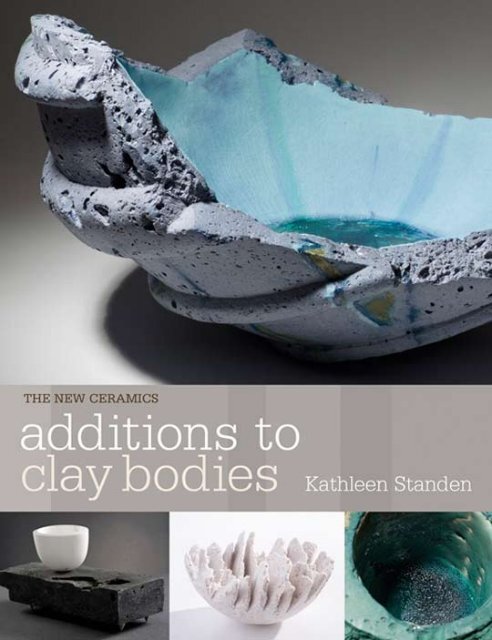
First published in Great Britain in 2013 by<br />
Bloomsbury Publishing Plc<br />
50 Bedford Square<br />
London WC1B 3DP<br />
www.bloomsbury.com<br />
ISBN 978-1-4081-5394-9<br />
Published simultaneously in the US by<br />
The American <strong>Ceramic</strong> Society<br />
600 N. Cleveland Ave., Suite 210<br />
Westerville, Ohio, 43082, USA<br />
http://ceramicartsdaily.org<br />
ISBN: 978-1-57498-333-3<br />
Copyright © Kathleen Standen 2013<br />
CIP Catalogue records for this book are available from the British<br />
Library and the US Library of Congress.<br />
All rights reserved. No part of this publication may be reproduced<br />
in any form or by any means – graphic, electronic or mechanical,<br />
including photocopying, recording, taping or information storage<br />
and retrieval systems – without the prior permission in writing of<br />
the publishers.<br />
Kathleen Standen has asserted her right under the Copyright, Design<br />
and Patents Act 1988 to be identified as the author of this work.<br />
Typeset in 10 on 13pt Rotis Semi Sans<br />
Book design by Susan McIntyre<br />
Cover design by Sutchinda Thompson<br />
Edited by Kate Sherington<br />
Printed and bound in China.<br />
This book is produced using paper that is made from wood grown<br />
in managed, sustainable forests. It is natural, renewable and<br />
recyclable. The logging and manufacturing processes conform to the<br />
environmental regulations of the country of origin.<br />
front cover: Top: Kathleen Standen,<br />
Haze II, 2011. Porcelain clay body,<br />
organic additions, body stains and<br />
oxides, glaze, 40 x 22 cm (15¾ x 8¾<br />
in). Photo: Roland Paschhoff. Bottom,<br />
left: Fred Gatley, Erosion, 2009. Pinchformed<br />
and polished bone china<br />
bowl, with inclusions of iron oxide,<br />
fired to 1220°C (2228°F), diameter: 4<br />
cm (1½ in.), with slabbed base, white<br />
St Thomas clay with additions of river<br />
silts, sand and brick grogs, 1020°C<br />
(1868°F) sawdust-fired, 6 x 15 cm (2½<br />
x 6 in). Silver feet attached. Photo: by<br />
the artist. Bottom, centre: Dominique<br />
Bivar Segurado, Calcium Bowl, 2004.<br />
Porcelain clay, press-moulded and<br />
hand-cut, unglazed, fired to 1240°C<br />
(2264°F). Photo: Dougal Waters.<br />
Bottom, right: Kathleen Standen,<br />
Green Rock Pool (detail), 2009.<br />
Porcelain clay body, organic additions,<br />
body stains and oxides, glaze. Photo:<br />
Roland Paschhoff.<br />
back cover: Jim Turner, Black and White<br />
Bottles, 2009. Thrown and extruded<br />
altered forms, fibre slip on top of<br />
glaze with fibre, once-fired to 1300°C<br />
(2372°F), height: 65 and 55 cm (25½<br />
and 21¾ in). Photo: Roland Paschhoff.<br />
frontispiece: Kathleen Standen,<br />
Landmarks II, 2009. Porcelain clay<br />
body, organic additions, oxides, 26 x<br />
15 cm (10¼ x 6 in).<br />
Photo: Roland Paschhoff.<br />
right: Kathleen Standen, White Rock<br />
Pools, 2009. Porcelain clay body,<br />
organic additions, body stains and<br />
oxides, glaze, 10 x 11 cm (4 x 4¼ in).<br />
Photo: Roland Paschhoff.
Contents<br />
Acknowledgements 7<br />
Introduction ................................................................................................................ 9<br />
1 Clays .................................................................................................................... 13<br />
2 Hard materials .................................................................................................. 25<br />
3 Combustible materials ...................................................................................45<br />
4 Impressions, imprints and dipping ..............................................................65<br />
5 Fibres ................................................................................................................. 75<br />
6 Metal ...................................................................................................................95<br />
7 Colour ................................................................................................................111<br />
Glossary 123<br />
Suppliers 124<br />
Bibliography 126<br />
Index 127
1<br />
left: Kathleen Standen,<br />
Horizon with vessel, 2011.<br />
Photographed in the<br />
scenic village of Glandore,<br />
West Cork, Ireland,<br />
coloured porcelain clay<br />
fired to 1220°C (2228°F),<br />
18 x 34 cm (7 x 13½ in).<br />
Photo: by the artist.<br />
right: Ian MacFarlane digging<br />
up clay at Gartenkeir<br />
Farm, Coalshaughton,<br />
Clackmannanshire, Scotland.<br />
Photo: Fiona Byrne-Sutton.<br />
Clays<br />
One of the first decisions that a ceramicist will make concerns choice of clay. Most<br />
artists find something to suit them from commercial clays sold in bulk by pottery<br />
suppliers. But there are alternatives and this chapter introduces artists who want<br />
something different that is not just ‘off the shelf’. Examples of artists who work<br />
in this way include Fiona Byrne-Sutton, who digs her own clay; David Binns, who<br />
collects granular materials from around the world to add to clay; and myself, Kathleen<br />
Standen, making clay from scratch using dry, raw materials.<br />
Digging up your clay<br />
Fiona Byrne-Sutton makes large press-moulded vessels, which explore the heritage<br />
of Central Scotland. She travels from her Glasgow studio to Clackmannanshire in the<br />
Forth River Valley area, where farmer Ian MacFarlane digs up orange firing clay for<br />
Fiona, on his own land.<br />
Preparation<br />
Byrne-Sutton does not process this clay in terms of ‘washing’ and ‘sieving’, and only<br />
removes large pebbles to prevent her pots ‘blowing’ in the kiln. There are risks in<br />
this, but she welcomes blisters appearing in the clay due to bits of coal or silica. The<br />
13
Additions to clay bodies<br />
Unfired Clackmannanshire clay, straight from the ground, is<br />
marbled grey and brown with iron ochre. Photo: Helen Gilmour.<br />
boulders or fragments of clay are pressed into the surface of her large vessels, just as<br />
they have been dug up, to the extent that you can see the line of the shovel and the<br />
naturally occurring strata of secondary iron ochre and white clay.<br />
Byrne-Sutton describes her Clackmannanshire vessels as ‘rural pots embedded with<br />
ferns, Scots pine, boulders of clay from a farm; an embedded biodiversity echoing a<br />
local human population with strong communal links.'<br />
The Clyde River area near Glasgow is another of her favoured locations for collecting<br />
clay samples and this strath clay is a deeper red than Clackmannanshire clay, due to a<br />
higher percentage of iron oxide. Her Glasgow vessels are 'urban, painted with topsoil<br />
slip. They are pressed with "weeds" that have arrived on the wind, growing out of<br />
roadside crevices, opportunist, seeking out their chances like migrant city residents.’<br />
All these elements represent the personality of the material and the place.<br />
Process<br />
Byrne-Sutton’s forms start off in a plaster mould lined with Scarva black Earthstone<br />
clay. Sometimes she presses vermiculite into the clay before filling the mould,<br />
which helps the thick walls dry evenly and reduces the overall weight, an important<br />
consideration in large forms. She advises that care be taken with vermiculite, as it can<br />
cause the clay to blister. It should be pressed, rather than wedged, into the clay.<br />
Vermiculite in the black Scarva gives a warm, toasty speckle to the ceramic body,<br />
which Byrne-Sutton says makes the black clay ‘sing’. She then partially paints the<br />
interior of the form with white slip, before pressing in lumps of found clay. This allows<br />
the orange tones of the dug clay to stand out from the black base. Seasonal plants are<br />
pressed in and painted over with Clackmannanshire slip, dug from the ground. The slip<br />
will fire white or different shades of orange depending on which clay strata it was dug<br />
from. White slip is sometimes mixed with found clay to give a greater range of colour<br />
tones. Red iron oxide, manganese dioxide and copper wire all give different blacks<br />
14<br />
Black Scarva Earthstone, vermiculite on left, perlite on right.<br />
Photo: Helen Gilmour.
above left: Fiona Byrne-Sutton<br />
building up the wall of the<br />
vessel: Pressing and not wedging<br />
vermiculite into the clay body<br />
avoids creating air pockets, helps<br />
the thick walls dry evenly and<br />
makes the bowl lighter after<br />
firing. Photo: Helen Gilmour.<br />
above right: Surface decoration:<br />
boulders of marbled<br />
Clackmannanshire clay are<br />
inserted into black-firing<br />
Earthstone. The grey clay fires<br />
white while the iron ochre in<br />
the clay body reverts to red iron<br />
oxide when fired; the boulders<br />
show the sedimentation patterns<br />
of the clay in the ground.<br />
Vermiculite is rolled into the<br />
surface and the golden speckle<br />
makes the black clay come to<br />
life. Unlike perlite, it doesn’t<br />
disappear during firing. Photo:<br />
Richard Campbell.<br />
right: Surface decoration:<br />
seasonal plants are pressed<br />
in and painted over with<br />
Clackmannanshire slip. The slip<br />
will fire white, or different shades<br />
of orange, depending on the clay<br />
strata from which it has been<br />
dug. Photo: Helen Gilmour.<br />
Clays<br />
15
16<br />
above: Fiona Byrne-Sutton, Clackmannanshire Roadside,<br />
2011. Black Earthstone, press-moulded, with vermiculite,<br />
Clackmannanshire clay slips from the ground, red iron<br />
oxide painted on Earthstone, copper wire, manganese and<br />
copper dioxide mixed to give gold, shoe polish, beeswax.<br />
Once-fired to 1160°C (2120°F), 19 x 53 cm (7½ x 21 in).<br />
Photo: Michael Wolchover.<br />
left: Top tile is Earthstone and vermiculite, showing brown<br />
husks of vermiculite remaining; bottom tile is Earthstone and<br />
perlite, of which only pock marks or small cavities remain.<br />
Both tiles were fired by Fiona Byrne-Sutton to 1180°C (2156°F).<br />
Photo: Fiona Byrne-Sutton.
Fiona Byrne-Sutton,<br />
Rhapsody in Orange and<br />
Black Clackmannanshire,<br />
2010. Press-moulded black<br />
Earthstone clay, vermiculite,<br />
Clackmannanshire<br />
boulders and slip from<br />
the ground, red iron oxide<br />
painted on Earthstone,<br />
copper wire. Once-fired<br />
to 1160°C (2120°F), 19<br />
x 53 cm (7½ x 21 in).<br />
Photo: Michael Wolchover.<br />
when painted and fired onto black Earthstone, building up a painterly surface. She<br />
works intuitively and very quickly at this stage to create pattern, colour and texture.<br />
A long soak partway through firing, before taking the temperature up high to<br />
1160°C (2120°F), helps to set the colour in this once-fired work.<br />
Collecting china clay and plants<br />
The most southern region of the UK is where most businesses involved in the extraction<br />
and processing of high-quality china clay for the ceramics industry are based. It is also<br />
the home of Jenny Beavan, a ceramicist who has spent more than a decade making<br />
work here, and who has important links to this area. The industries have undergone<br />
much change in recent decades, including decommissioning, and in 2001 Imerys<br />
Minerals granted Beavan permission to study all aspects of their work at the Fal Valley<br />
China Clay Pits in Cornwall.<br />
She has observed the important role of water in all stages of the extraction and<br />
processing of china clay and kept a diary of her observations. Her frequent visits to<br />
the pits were also recorded using photography, drawing and words, and this was the<br />
genesis for a new body of work.<br />
When I first saw Jenny Beavan’s ceramics, the words ‘frozen movement’ came to<br />
mind. And that was before I had read the titles: Beach Erosion, Oscillation, Upsurge<br />
and Energised Water.<br />
What interests Beavan is movement in relation to natural change, such as decay,<br />
17
Additions to clay bodies<br />
disintegration, relocation and reformation, and in particular the role water plays in<br />
this action. She has collected materials from the pits, both combustible and noncombustible,<br />
which become part of the fabric of her unusual compositions. The series<br />
of four photographs below shows stages in the making of Beach Erosion. Beavan has<br />
arranged curved slabs of clay into a walled mould and then poured and placed a range<br />
of additions including molochite, sand, plants and china clay slip.<br />
She continues to visit china clay pits in Cornwall and to create work that reflects<br />
her observations. Her ceramic works are held in public and private collections in the<br />
UK and abroad.<br />
Adding molochite to the clay in the mould.<br />
Adding china clay slip over the top of the slabs and additions.<br />
18<br />
Adding sands. Adding plants.<br />
Jenny Beavan, Upsurge (detail), 2001. China clay matrix<br />
with processed china clay, glazes and glass, 1260°C<br />
(2300°F), 55 x 55 cm (21½ x 21½ in). Photos: by the artist.
Jenny Beavan, Beach Erosion,<br />
2011. Porcelain with china<br />
clay, combustible material,<br />
beach sands and pebbles,<br />
glazes and glass, fired to<br />
1260°C (2300°F), 40 x 40 cm<br />
(15¾ x 15¾ in). Photo: by the<br />
artist.<br />
Collecting granular material<br />
Clays<br />
A brief introduction to the ceramicist David Binns is relevant here because, despite not<br />
digging up his clay, he does collect granular material from particular locations, which<br />
bestow each of his works with a specific sense of place.<br />
His research and testing of found materials has yielded interesting results, with<br />
grey granite from the mountains of North Wales, beach shingle from the east coast of<br />
England, and pink granite gathered during a visit to Tasmania. He always travels with<br />
collecting bags, looking for the opportunity to gather interesting granular material.<br />
Binns, however, tells a cautionary tale concerning the addition of found materials in<br />
ceramic work. In his enthusiasm to develop new surfaces, he collected and mixed beach<br />
shingle into porcelain clay, having picked out obvious pieces of seaweed and shell, and<br />
created a boat form. This was promptly exhibited, but fortunately failed to sell. Within<br />
a few weeks, the form had disintegrated. Binns concluded that the shingle must have<br />
included fragments of calcium-bearing rock, such as limestone. The stones had calcined<br />
and then slowly absorbed atmospheric moisture, creating a monumental case of lime<br />
spit. As a result Binns advises washing and pre-firing all found material. Any calcium<br />
19
Additions to clay bodies<br />
material will turn to soluble quick lime, leaving the remainder stable and inert.<br />
The Thames and Deptford Creek in London is where artist Fred Gatley collects mud,<br />
pebbles and other hard debris, as well as organic material, for his work. The creek also<br />
provides much of the inspiration for his sculptural work, which explores the vessel<br />
arranged on a base.<br />
Chapter 2 will look at both Binns’ and Gatley’s work in more detail (pp. 28–31 and<br />
32–5, respectively).<br />
20<br />
above left: Examples of<br />
made, found and industrial<br />
aggregates, added in<br />
varying amounts to clay<br />
bodies. Clockwise from<br />
top left: copper-stained<br />
porcelain (5%), granular flint,<br />
recycled bottle glass, fused<br />
zircon, beach shingle, dense,<br />
fused mullite.<br />
above right: Test samples of<br />
porcelain and terracotta,<br />
with additions of found and<br />
made aggregate materials<br />
in varying percentages.<br />
left: David Binns, Two<br />
Piece Standing Form, 2008.<br />
Porcelain with copper and<br />
terracotta aggregates,<br />
copper-stained porcelain<br />
with molochite aggregate,<br />
fired 1160–1220°C<br />
(2120–2228°F), ground and<br />
polished, 42 x 53 x 24 cm<br />
(16½ x 21 x 9½ in).<br />
Photos: by the artist.
Various grog materials<br />
collected from the Thames<br />
at low tide. As these<br />
are found materials, the<br />
artist has identified them<br />
as closely as possible.<br />
Photo: Fred Gatley.<br />
Brick<br />
Red Stock<br />
Making your own clay<br />
Clays<br />
An alternative to using commercial clay or blends is to make your own clay from<br />
scratch, using the dry, raw minerals. I measure and mix the dry ingredients, add them<br />
to water, sieve this mixture and finally spread it out to firm up on plaster slabs.<br />
Why do I go to all this trouble to make a clay body? The answer lies partly in where<br />
I live and work, as well as my background. My studio is in a coastal village in southwest<br />
Ireland and this place has a strong influence on my ceramic work. My work has a<br />
painterly quality, exploring the colours and textures of the location, influenced in part<br />
by my father, an artist who captured his impressions of the world using oils on canvas.<br />
The extra work of making my own clay allows me to add accurate amounts of colour<br />
(oxides and body stains) to the body, and to choose grog and other additions to mix<br />
in at any stage of the making process. This flexibility allows me to capture the spirit of<br />
my home.<br />
I make my clay in quantities ranging from 1 to 50 kg (2¼ to 110¼ lbs) depending<br />
on the project I am working on, but the process is the same each time. I always work<br />
in a well-ventilated area and wear a face mask. If adding colour, I protect my hands<br />
with vinyl gloves.<br />
Mixed China<br />
Staffordshire Blue<br />
Dark Multi Stock<br />
Yellow Stock<br />
21
Additions to clay bodies<br />
Recipe for porcelain clay<br />
Provided by the technician at The City Lit Institute, Holborn, London<br />
right: Measure out the dry materials and the water into two<br />
separate buckets.<br />
below left: Mix the dry materials together, then add them in<br />
scoops to the water. Allow each scoop to dissolve before<br />
adding the next. (This is a similar process to making plaster.)<br />
below right: Leave the wet mixture for about 20 minutes and<br />
then sieve through a 60-mesh sieve. Stir in any remaining dry<br />
materials that you did not want to sieve, such as molochite<br />
and silica. If this is the end of your process, the completed clay<br />
can be spread out on plaster to firm up, then wedged and<br />
stored, wrapped in plastic, for up to a week before using. If<br />
you wish to add fibres and perlite, the process continues on<br />
the opposite page. Photos: Kathleen Standen.<br />
22<br />
China clay 21<br />
Flint 23<br />
Potash Feldspar 18<br />
Black ball clay 18<br />
Silica sand 10<br />
Molochite 10<br />
(Fine, medium or coarse)<br />
If I want to make 10 kg (22 lbs), for example, then each item should be multiplied by<br />
100. I always write down the exact measurements, as I need to weigh in batches of<br />
500g (1 lb), and tick off as I go along. It is very easy to lose track.<br />
Preparing clay with additions of cotton linter and perlite<br />
I always wear a mask and gloves and work in a well-ventilated area.
ight: Soak strips of cotton linter in water and then break up<br />
into a mushy mixture.<br />
below left: Squeeze out as much water as possible from the<br />
cotton linter.<br />
below right: Add the cotton linter to the wet clay and blend<br />
with an electric mixer, to give an even, smooth mixture. You<br />
have now mixed up your own paperclay.<br />
bottom left: Add the measured perlite to the paperclay.<br />
bottom right: Spread out onto plaster to firm up a little and<br />
then put into a labelled bucket until ready to use.<br />
Photos: Kathleen Standen.<br />
Clays<br />
23