deployment & maintenance document - Find and develop open ...
deployment & maintenance document - Find and develop open ...
deployment & maintenance document - Find and develop open ...
You also want an ePaper? Increase the reach of your titles
YUMPU automatically turns print PDFs into web optimized ePapers that Google loves.
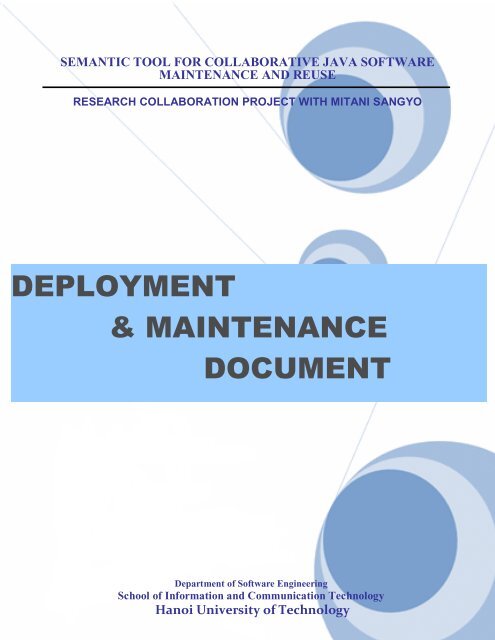
SEMANTIC TOOL FOR COLLABORATIVE JAVA SOFTWARE<br />
MAINTENANCE AND REUSE<br />
RESEARCH COLLABORATION PROJECT WITH MITANI SANGYO<br />
DEPLOYMENT<br />
& MAINTENANCE<br />
DOCUMENT<br />
Department of Software Engineering<br />
School of Information <strong>and</strong> Communication Technology<br />
Hanoi University of Technology
Deployment & Maintenance Document<br />
INDEX<br />
INDEX .................................................................................................. 1<br />
1 Introduction ..................................................................................... 2<br />
2 Server Deployment ......................................................................... 2<br />
2.1 Install JDK ................................................................................................ 2<br />
2.2 Install Apache Tomcat Server ................................................................ 4<br />
2.3 Deploy services in Apache Tomcat server ............................................ 9<br />
3 Client Deployment ........................................................................ 14<br />
1
Deployment & Maintenance Document<br />
1 Introduction<br />
This <strong>document</strong> will introduce how to deploy both server <strong>and</strong> client parts in the Win7 OS.<br />
All pre-requisite softwares are provided in the Pre-requisite Softs folder of the DVD<br />
To deploy in other system, download corresponding JDK, Apache Tomcat server<br />
versions in their home sites:<br />
JDK: http://www.oracle.com/technetwork/java/javase/downloads/index.html<br />
Apache Tomcat: http://tomcat.apache.org/<br />
The installation will be similar on most of OS.<br />
2 Server Deployment<br />
Select a quite powerful computer to be a good server. Server will provide services for<br />
clients-in form of a plug-in in IDE Eclipse<br />
There are 2 pre-requisite softwares to deploy server:<br />
JDK: Provide Java Virtual Machine for any Java application<br />
Apache Tomcat server: To deploy Services.<br />
This guide will introduce how to install all software in the win7 OS.<br />
2.1 Install JDK<br />
JDK Version: jdk-6u10-windows-i586-p, is provided in the Pre-requisite Softs folder<br />
1. Double click on the file jdk-6u10-windows-i586-p.exe<br />
2. Select Accept button<br />
2
3. Select Next button<br />
Deployment & Maintenance Document<br />
4. Wait a moment to finish the installation<br />
5. Click finish<br />
3
Deployment & Maintenance Document<br />
2.2 Install Apache Tomcat Server<br />
Apache Tomcat Server version: apache-tomcat-6.0.20, is provided in the Pre-requisite<br />
Softs folder<br />
1. Double click on the file apache-tomcat-6.0.20.exe<br />
2. Select Next button<br />
4
3. Select I Agree button<br />
4. Select Next button<br />
Deployment & Maintenance Document<br />
5
Deployment & Maintenance Document<br />
5. Choose folder to install Tomcat <strong>and</strong> select Next button<br />
6. Set the configuration of Tomcat server (Port, user & pass for administrator).<br />
Suggestion: let the port be default: 8080. Then select Next button<br />
6
Deployment & Maintenance Document<br />
7. Select JRE folder (it will be automatically settled if you successfully install JDK<br />
in the previous section). Then select Install button<br />
8. Select Finish button<br />
7
Deployment & Maintenance Document<br />
2.3 Setting Tomcat memory heap size<br />
8
Deployment & Maintenance Document<br />
Because of huge owl data, administrator has to set Tomcat memory heap size:<br />
1. Open Tomcat configuration GUI<br />
2. Open tab Java<br />
3. Set field Maximum memory pool to 1024MB or higher<br />
4. Restart service or Tomcat, if any<br />
2.4 Deploy services in Apache Tomcat server<br />
After successfully installing pre-requisite softs, we now will deploy our services<br />
1. Open Tomcat setup folder. Then, go into bin folder<br />
2. Double click on tomcat6w.exe<br />
3. Select Start button (if this button is disabled, then tomcat is already running)<br />
4. Wait a moment<br />
9
Deployment & Maintenance Document<br />
5. Open the browser (In this guide, we use firefox. Other browsers are absolutely<br />
similar). Enter “http://localhost:8080/” in the address box, then hit enter on the<br />
keyboard<br />
6. Select Tomcat Manager link, enter the administration account (is settled when<br />
installing Tomcat in the previous section). Then click OK<br />
10
Deployment & Maintenance Document<br />
7. Scroll the page to the WAR file to deploy part:<br />
8. Select the SEService.war file (Provided in the Products folder of the DVD).<br />
Then select button Deploy <strong>and</strong> wait a moment<br />
11
Deployment & Maintenance Document<br />
9. The page will be refreshed. Scroll a little bit to view the link SEService. If it is<br />
seen, then the <strong>deployment</strong> is successful.<br />
10. Select SEService Link to check<br />
12
Deployment & Maintenance Document<br />
11. Enter http://localhost:8080/SEService/WebServicePort?wsdl in the address bar.<br />
This is our first set of services.<br />
12. Enter http://localhost:8080/SEService/DataServicePort?wsdl in the address bar.<br />
This is our second set of services.<br />
13
Deployment & Maintenance Document<br />
13. If necessary, check the firewall, or <strong>open</strong> port 8080 (Ask your internet<br />
administrator for detail)<br />
3 Client Deployment<br />
Client will be installed as an plug-in of IDE Eclipse.<br />
To install IDE Eclipse, we have to install JDK first, then extract Eclipse.zip file<br />
3.1 Install JDK<br />
Refer to the install JDK part of the Server Deployment<br />
3.2 Install Eclipse<br />
Download any Eclipse version at http://www.eclipse.org/downloads/. Or it can be access<br />
from in the Pre-requisite Softs folder of the DVD (That version is helios-newest version<br />
at the time of this <strong>document</strong> writing: eclipse-jee-helios-win32.zip).<br />
Extract eclipse-jee-helios-win32.zip to any folder in the Client machine. Then, eclipse is<br />
successfully installed.<br />
3.3 Install MitaniSEPlugin<br />
MitaniSEPlugin is an Eclipse plug-in that assist <strong>develop</strong>ers, tester, … <strong>and</strong> project<br />
manager of a collaborated Project . It is provided in the Products folder of the DVD<br />
14
Deployment & Maintenance Document<br />
To install this Plug-in in IDE Eclipse:<br />
1. Close IDE Eclipse if it is <strong>open</strong>ed.<br />
2. Open the Eclipse Extraction folder in the previous step<br />
3. Open plugins folder. Copy MitaniSEPlugin_1.0.0.jar from Products folder of<br />
the DVD to this folder.<br />
15
4. Open Eclipse application<br />
Deployment & Maintenance Document<br />
5. Select Workbench icon to begin working with Eclipse<br />
16
Deployment & Maintenance Document<br />
1 2<br />
6. Click on the Open SED Perspective (2) item on the menu or hit on the quick<br />
item (1) in Eclipse bar to activate MitaniSEPlugin Perspective.<br />
17
Deployment & Maintenance Document<br />
7. This perspective containing 6 views. But to work with them, you have to choose<br />
server <strong>and</strong> login successfully.<br />
8. Enter the server link (As settled in the Server Deployment Server Section). Hit the<br />
Test button, if the following dialog appear, then everything is OK<br />
Note that, by default, the server URI will be http://192.168.0.100:8080/. It<br />
includes 3 parts: http://, the IP of server: (in this case: 192.168.0.100) <strong>and</strong> the port<br />
of Apache Tomcat (in this case: 8080, as settled when installing Tomcat)<br />
If the connection is OK, you can press hit button Store URI, which will store the<br />
Server URI in the Eclipse. Hence, even when you close the Eclipse, <strong>and</strong> re<strong>open</strong> it<br />
in another day, the value still can be retrieved.<br />
9. Now, the client is working well. Refer to other <strong>document</strong>s to underst<strong>and</strong> how to<br />
use our software in form of an Eclipse plug-in<br />
18
Deployment & Maintenance Document<br />
3.4 Important notes<br />
To ensure security, users can do anything before login. Hence, Opening or activating<br />
other views except Account Management view will trigger errors. For example, error in<br />
Document <strong>and</strong> Source code Support’s View:<br />
After successful login, to reactivate error view, close it first, then right click at the SE<br />
perspective <strong>and</strong> use the Reset function<br />
In the process of working with Eclipse, if you have already closed some views, to re<strong>open</strong><br />
them, there are several options:<br />
Reset the SE perspective<br />
19
Deployment & Maintenance Document<br />
Reactivate the SE perspective, then use Window Show Views function<br />
4 Server <strong>maintenance</strong><br />
If any problem occurs, we can reset the server, as the following instruction<br />
4.1 Introduction of the Server files:<br />
Open tomcat installation folder:<br />
Every <strong>deployment</strong>s will be webapps folder. SEService is our concerns.<br />
20
Double click on the SEService folder<br />
Access /WEB-INF/Data folder:<br />
Deployment & Maintenance Document<br />
21
Deployment & Maintenance Document<br />
JavaDocumentOntology: Ontology of the system. This file will never changes. It is used<br />
when we have worked with the system for the first time<br />
db.xml: Configuration file, containing all user accounts. Each time the administration<br />
creates a user, this file will be updated. There are 3 types of information for each user:<br />
User name<br />
Password<br />
His corresponding URI in the semantic annotation<br />
When user/admin changes their password, this file also will be automatically updated.<br />
Right after deploying the service, there just one account for admin, with user name <strong>and</strong><br />
password both being “admin”<br />
Annotation: Folder, containing the following important data:<br />
Rule folder: containing all semantic rules of the system. This folder will never<br />
changes<br />
22
Deployment & Maintenance Document<br />
Backup Folder: It may not appear right after the server <strong>deployment</strong>. However,<br />
when the administration use the backup function in the Annotation Editor<br />
View, an owl file will be created in this folder. This owl file contains all data of<br />
the system, <strong>and</strong> can be used to restore the system when necessary.<br />
o Therefore, periodically, the administration should use back up function to<br />
guarantee the system is reverted back when coping with conflicts, errors,<br />
etc.<br />
Some owl files (Directly contained in Annotation folder)<br />
o If there is an owl file (file with .owl extension) in the Annotation folder,<br />
when the Tomcat server is restarted, it will load all semantic annotation in<br />
this file to the whole system.<br />
o Tomcat server will load all direct .owl files in this Annotation folder<br />
4.2 What the administration should do if the system getting with<br />
fatal error?<br />
First of all, the administrator should use backup function in the Annotation Editor View<br />
Next, when the system is in fatal error:<br />
1. Stop Tomcat service, <strong>and</strong> restart. All data that is not saved will be lost. If the<br />
system is working well when checking, then the following steps can be omitted.<br />
2. Stop Tomcat service again <strong>and</strong> do as followings<br />
3. Open Tomcat Installation folder. Go into webapps folder, SEService folder,<br />
WEB-INF folder, Data folder, Annotation folder respectively.<br />
4. Open Backup folder, choose the version of the backup file that you want (The<br />
name of backup file: BackupOwlData_MM_dd_yyyy’T’hh_mm_ss. For<br />
example: BackupOwlData_09_19_2010T09_32_21). Copy that file to Annotation<br />
folder. (If there are more than one .owl file in the Annotation folder, it’s OK but<br />
remember to remove error <strong>and</strong> unnecessary files. All data from .owl file directly<br />
in the Annotation folder will be loaded to the system)<br />
23
5. Restart the service.<br />
Deployment & Maintenance Document<br />
5 Install Test-Data<br />
After installing system for the first time, Server works with blank data of Users account<br />
<strong>and</strong> Software Source Code Annotation.<br />
If you wish to test system with pre-build data: use files in Products/TestData directory<br />
of the DVD.<br />
1. Replace db.xml in the Webroot/Data of Tomcat/Webapp/SEService/WEB-<br />
INF/Data by db.xml<br />
2. Add owl file (8MB) to the sub folder Annotation<br />
Some Accounts to login (Admin can <strong>open</strong> the db.xml file to check )<br />
1. DatTT pass 123<br />
2. hienpt pass 123<br />
3. ducna pass 123<br />
Remember to Config memory heap size of Tomcat:<br />
1. Open Tomcat configuration GUI<br />
2. Open tab Java<br />
3. Set field Maximum memory pool to 1024MB or higher<br />
4. Restart service or Tomcat, if any<br />
24


