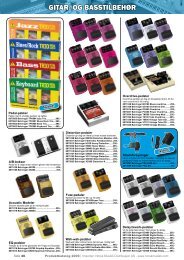
Mini MP 170 V.V. Mini MP 220 V.V.
Mini MP 170 V.V. Mini MP 220 V.V.
Mini MP 170 V.V. Mini MP 220 V.V.

Create successful ePaper yourself
Turn your PDF publications into a flip-book with our unique Google optimized e-Paper software.
The foot, the blades, Emulsifying disc can be<br />
entirely dismantled, (Robot-Coupe’s exclusive<br />
patented system), thereby ensuring easy cleaning,<br />
perfect hygiene and simple maintenance.<br />
USES &<br />
EXA<strong>MP</strong>LES<br />
The <strong>Mini</strong> <strong>MP</strong> <strong>170</strong> V.V. and <strong>Mini</strong> <strong>MP</strong> <strong>220</strong> V.V. make<br />
it possible to process smaller quantities in any<br />
number of ways. As this takes very little time, we<br />
advise you to keep a close eye on the preparation,<br />
in order to obtain the desired result.<br />
CATERING AND RESTAURANT WORK<br />
• Soups, creamed soups<br />
•Vegetable purees : carrots, spinach, celery,<br />
turnips, French beans, etc.<br />
• Mousses : vegetable, fish<br />
•Fruit compotes<br />
• Sauces : green, rouille, remoulade, cream<br />
emulsions, tomato or parsley<br />
• Bisques : langoustines and shellfish<br />
• Pancake batter<br />
HYGIENE<br />
The equipment must be clean at all stages of<br />
production.<br />
It is vital to clean the power mixer thoroughly between<br />
each job using a detergent or disinfectant.<br />
• N.B. NEVER USE PURE BLEACH<br />
- Dilute the detergent/disinfectant following the<br />
manufacturer’s instructions on the label.<br />
- Scrub well if necessary.<br />
8<br />
- Leave the disinfectant/detergent to take effect if<br />
necessary.<br />
- Rinse thoroughly.<br />
-Dry properly using a clean cloth.<br />
W A R N I N G<br />
CLEANING<br />
As a precaution, always unplug your appliance<br />
before cleaning it (risk of electrocution).<br />
After using the power mixer in a hot preparation,<br />
cool the bottom of the foot in cold water before<br />
dismantling the bell from the foot.<br />
After completion of preparation, clean immediately<br />
to prevent food from sticking to surfaces.<br />
• MOTOR UNIT<br />
Never put the motor unit and its handle in water,<br />
clean them with a damp cloth or a sponge.<br />
• FOOT AND BELL<br />
It is possible to proceed in two ways:<br />
• Simple cleaning procedure<br />
- Place the foot and bell into a suitable container<br />
with water and switch on for a few seconds to<br />
clean the bell and the foot.<br />
- After unplugging the appliance – essential –,<br />
making sure that no water finds its way into the foot.<br />
- Detach the bell from the foot to avoid a build-up<br />
of condensation.<br />
• Complete cleaning procedure<br />
- Unplug the power mixer.<br />
- Rinse the bell under the tap.<br />
- Remove the bell from the foot, then remove the<br />
blades. Be careful to avoid damaging the surface<br />
of the blade shaft and the watertight seals. Do not<br />
use too strong a detergent when cleaning the parts.<br />
- Ensure that all the different parts are thoroughly<br />
dried before reassembly.<br />
• BLADES AND EMULSIFYING DISC<br />
In order to clean the appliance thoroughly, the<br />
blades and the disc must be removed from the bell<br />
beforehand.<br />
After they have been cleaned, make sure you always<br />
dry the disc or blades properly to avoid oxidation.<br />
• BLADES<br />
I<strong>MP</strong>ORTANT<br />
Check that your detergent is suitable for cleaning plastic<br />
parts. Some washing agents are too alkaline (e.g.<br />
high levels of caustic soda or ammonia) and totally<br />
incompatible with certain types of plastic, causing<br />
them to deteriorate rapidly.<br />
MAINTENANCE<br />
The performance of the cut essentially depends on<br />
the state of your blades and their wear. The blades<br />
are subject to wear and as such need to be replaced<br />
from time to time to ensure the consistent quality of<br />
the end product.<br />
You are also advised to change, at the same time,<br />
the washer and the watertight seals.<br />
• FOOT SEAL<br />
In order to maintain a perfect watertight seal between<br />
the foot and the bell it is necessary to check the wear<br />
of the seal regularly and replace it if necessary.