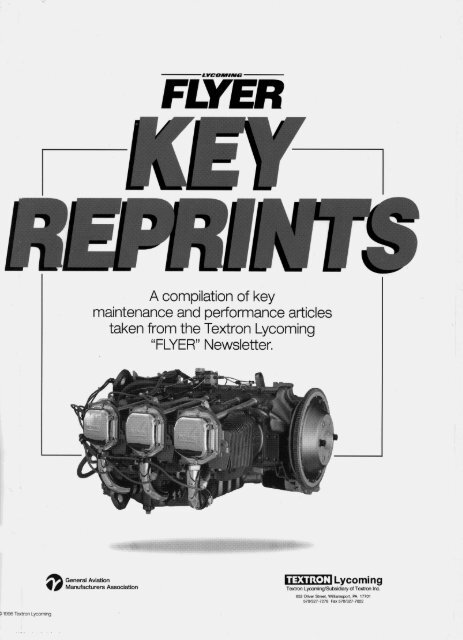
TEXTRON Lycoming FLYER Newsletter's Key Reprints
TEXTRON Lycoming FLYER Newsletter's Key Reprints
TEXTRON Lycoming FLYER Newsletter's Key Reprints

Create successful ePaper yourself
Turn your PDF publications into a flip-book with our unique Google optimized e-Paper software.
<strong>FLYER</strong><br />
KEY REPRINTS<br />
A compilation of key<br />
maintenance and performance articles<br />
taken from the Textron <strong>Lycoming</strong><br />
“<strong>FLYER</strong>” Newsletter.
GENERAL<br />
INDEX<br />
The articles contained herein are not intended to supersede manufacturers' service<br />
publications, instructions or manuals or any other official publications, but are provided<br />
in order to augment or explain in pilot's or mechanic's language these publications, as<br />
well as provide other supplemental helpful information for our customers and operators.<br />
Title Page No.<br />
Facts About The Flyer and <strong>Key</strong> <strong>Reprints</strong>....................................................................................................................... 3<br />
Some Definitions of Terms ........................................ ....................................................................................................<br />
How To Get Textron <strong>Lycoming</strong> Engine and Accessory M aintenance Publications ............................................................ 5<br />
Determining Engine Condition of High Time Piston Powerplants ............................. ........................................ 6<br />
Questions Asked by Pilots and M echanics........................................................................................................................... 8<br />
Definitions Applicable to TBO, Engine Replacement, and Engine Rebuild........................................................................ 8<br />
O il A n a ly sis ........................................................................................................................................................................... 11<br />
W hat Is An Aerobatic Engine?............................................................................................................................... 12<br />
Low Compression Engine - Grade 100 Aviation Fuel........................................................................................................ 13<br />
Fuel Contam ination......................... ......................... .................................................................................................... 15<br />
Do Not Use Automotive Gasoline In Textron <strong>Lycoming</strong> Aircraft Engines......................................................................... 15<br />
Let's Talk Turbocharging........................... ................................................................................................... 16<br />
Information About Textron <strong>Lycoming</strong> Approved Full-Flow Oil Filters............................................................................ 17<br />
Detonation And Preignition ....................................................................................... 18<br />
N itrid in g -W h at Is It?............................................................................................................................................................. 18<br />
Compression Ratio-An Explanation As It Relates To Textron Lycom ing Engines ............................................................ 19<br />
"W atts" Horsepower................................................................................................................................. 20<br />
Cut-Away Of A Four Cylinder Powerplant.......................................................................... 20<br />
Your Engine And The Fixed Pitch Propeller................................................................................. 21<br />
Induced Engine Damage...................................................... ................... 22<br />
The W histle Slot............................................................................................................... 24<br />
W elding Is Not Recommended........................................................ .............................. 25<br />
Look W hat They Are Doing To Our Engines ...................................................................................................................... 25<br />
Questions To Ask The Engine M odifier.............................. ........................................ ......................................... .28<br />
Engine Balance......................................................................... 29<br />
Fuel Injector or Carburetor.................................................................................................................................................... 30<br />
The "Same Engine" M yth ............................................................................ ............................................. 30<br />
The Unfortunate Choice............................................................................................................................. 31<br />
Low Time Engine M ay Not M ean Quality and Value.......................................................................................................... 32<br />
OPERATION<br />
Hard Facts About Engine Break-In..................................................... ................................................ 35<br />
Leaning Textron <strong>Lycoming</strong> Engines........................... ............ ............................................. ....................................... 36<br />
Proper Leaning at Cruise Aids Safe Flight-And Saves $ Dollars........................................................................................ 38<br />
Operating The Direct Drive Fixed Pitch <strong>Lycoming</strong> Engine................................................................................................ 39<br />
Operating Your <strong>Lycoming</strong> Engines At Takeoff And Climb................................................................................................. 39<br />
The Exhaust Gas Temperature (EGT) and Fuel M anagement ......................... ................................................... 40<br />
Landings and Takeoffs from High Elevation Airports ............................................................................ 42<br />
Basic Power Sequence ....................................................... . . . . . . . . ..................................................................... 42<br />
An Explanation Of Power Settings.......................... ....................... .................................. ........................................ 43<br />
Considerations For Low Power Low RPM Cruise ............................................................................ 43<br />
Induction Icing................................................. ........................... 45<br />
Cold Weather Operations.................................................... ................. 47<br />
National Transportation Safety Board Warning On Simulated Engine-Out Maneuvers ...................................................... 49<br />
Importance Of The Cylinder Head Temperature............................. .................................................................................. 50<br />
M ore On Cylinder Head Temperature ........................................................................................ 50<br />
Interpreting Your Engine Instruments ..................................................................... 51<br />
Engine Starting Suggestions ................................................ ................................................................... 51<br />
Use Of Fuel Boost Pumps W ith Textron <strong>Lycoming</strong> Engines............................................................................................... 52<br />
1
A void Sudden Cooling O f Y our Engine.................................. ............................................... ........................................ 52<br />
Sticking V alves-D o N ot N eglect The W arning Sign s.......................................................................................................... 53<br />
O perational A nd M aintenance Procedures To A void Sticking V alves............................................................................... 54<br />
Tips From The H a n g ar..................................................... ............................................................................................ 55<br />
The Pilot And Turbocharging ............................................................................................... 56<br />
TBO Trade-offs or Tips from Fred .................................... ....... .................................... ............ 60<br />
Thieves Of Aircraft Engine Power .................................. .......................................................... 62<br />
Wet Air Effect On Engine Power ................................. .............................................................. 64<br />
Frequency O f Flight A nd Its Effect O n The Engine.............................................................................. .......................... 65<br />
A Review of O ld W ives Tales................................... ...................................................................................................... 65<br />
Spark Plug Fouling 66.......................<br />
66<br />
Test Y our K now ledge O n Engines.......................................................................................................................... 66<br />
MAINTENANCE<br />
M echanic's Creed........................................ ....................................................................... 71<br />
The Basics O f M aintenance In G eneral A viation................................................................................................................. 71<br />
A sk A bout Reference Publications Before Y our Engine Is Taken A part............................................................................. 72<br />
A ir Filter M aintenance................................................................................................................................... 73<br />
The Oil And Your Engine ................................................... ..................... . 73<br />
O il and Filter Change Recom m endations................................................................................................................. 74<br />
M ore A bout O il A nd Y our A ircraft Engine ...................................................................................... 74<br />
M aintaining O il Levels of W et Sum p Engines......................................................................................................... 76<br />
Tips For Changing Y our Spin On O il Filt e r......................................................................................................................... 76<br />
Suggestions if M etal is Found in the Screens or Filter ..................................................................................... 77<br />
Safety Tip-Sealant U se......................................................................................................................................................... 78<br />
U nderstanding Engine Color Codes.................................. ................................................... ........................................ 78<br />
Reciprocating Engine Break-in and Oil Consumption Limits ................................... ....................................... 79<br />
The Compression Check As A Maintenance Aid ................................. ........................................ 82<br />
Spark Plugs-K ey To Sm ooth Engine O peration, I ...................................................................................... ..................... 84<br />
Spark Plugs-K ey To Sm ooth Engine O peration, II............................................................................................................... 84<br />
Is Y our Spark Plug Connector O vertorqued? ............................ ................................................. 86<br />
Why Rotate Spark Plugs......................................................................... 86<br />
M aintenance Suggestions From The Lycom ing Service H anger.......................................................................................... 87<br />
Engine Hoses............................................................................88<br />
Checking and A djusting D ry Tappet Clearance on Lycom ing Engines............................................................... ............... 88<br />
Some Tips On The <strong>Lycoming</strong> 0-235 Engine .................................. ........... ........................... 89<br />
Importance of the Correct Base Nut Tightening Procedure ............................... .............. .......................... 90<br />
Fuel Injector N ozzles H ave Been Im proved................................ ....... ............................................................. 90<br />
U nauthorized A dditions To Y our Engine Can Cause Trouble............................................................................................. 91<br />
A Simple Check Of Internal Engine Timing ........................................ .................................. 91<br />
Installation of Counterw eight Rollers................................ ............................................................................................. 92<br />
Safety N otes......................................................................................................................................................................... 92<br />
Engine Suggestions For O perators............................... .............................................................................................. 92<br />
Recom m endations For A ircraft O r Engine Struck By Lightning........................................................................................ 93<br />
Recom m endation Regarding Use O f Incorrect Fuel............................................................................................................ 93<br />
Propeller Ground Strike or Sudden Stoppage Can Be Dangerous......................... .............................................................. 93<br />
Keep Your Direct Drive Engine Starter Clean To Avoid Trouble........................ .............................................................. 94<br />
N otes on Replacing Connecting Rods or Pistons................................................................................................................. 94<br />
D oes Y our N ose Seal Leak ?................................................................................................................................................. 95<br />
Cam & Tappet W ear............................................................................................................................................................. 96<br />
Exhaust System M aintenance - Pay Now, or Pay Later .............................. ........................................... .. ........................ 96<br />
H igh Tim e C ylinders............................................................................................................................................................. 98<br />
Top O verhaul?.............................................................................................................. 98<br />
Lycom ing M odel Codes for Reciprocating Engines...................................... ....................................... ................ 99<br />
2
Facts About The Flyer and <strong>Key</strong> <strong>Reprints</strong><br />
Textron <strong>Lycoming</strong> has been pleased and impressed by the number of<br />
requests for copies of the "<strong>Key</strong> <strong>Reprints</strong>" - pleased by your many favorable<br />
comments concerning it, and impressed by the thirst for knowledge by operators<br />
of General Aviation aircraft engines.<br />
Some of our readers may wonder how authentic is the Flyer and <strong>Key</strong><br />
<strong>Reprints</strong> - or - are these two publications an official word from Textron<br />
<strong>Lycoming</strong>?<br />
In answer to the above question, yes, the information in the Flyer and <strong>Key</strong><br />
<strong>Reprints</strong> is official policy and information that is accurate at the time it is<br />
written. It supplements our other official service publications.<br />
Some of the articles published are based on information contained in Service<br />
Bulletins, Service Instructions, and Service Letters. In addition, other articles are<br />
taken from actual field test data carried on by Textron <strong>Lycoming</strong> personnel.<br />
Furthermore, the Textron <strong>Lycoming</strong> factory is a central collecting agency on its<br />
aircraft engines in the field. Experiences and information from all over the<br />
world provide feed back that is recorded and analyzed. We share this<br />
information with our readers in the Flyer and <strong>Key</strong> <strong>Reprints</strong>.<br />
During the preparation process of each article, updating of service<br />
information is part of the procedure. After articles are written, each one is<br />
carefully screened and checked by management, engineering, and service<br />
personnel to insure accuracy before being released for publication.<br />
The Flyer does not have an established publishing date for each issue. It was<br />
published an average of once or twice per year during the 1970s and 1980s.<br />
Four issues were published during 1991 and 1992. None have been published<br />
since that time, and the latest issue is Number 53.<br />
The original concept of the Flyer has not changed since the first issue was<br />
published in 1964. Approximately 85% of the prepared text deals with technical<br />
information related to Textron <strong>Lycoming</strong> engines, and the remaining 15%<br />
covers general newsworthy items. Distribution of the Flyer is made to owners<br />
and operators of Textron <strong>Lycoming</strong> powered aircraft, authorized distributors,<br />
and others who write us and request that we place them on our mailing list, with<br />
all costs of printing and mailing absorbed by Textron <strong>Lycoming</strong>. It is the<br />
intention of Textron <strong>Lycoming</strong> to continue to make available service,<br />
maintenance, and operational data in the Flyer and <strong>Key</strong> <strong>Reprints</strong> to assist the<br />
owner and operator improve their engine's performance and reliability.<br />
PERMISSION TO REPRINT<br />
Permission to reprint material from the<br />
Textron <strong>Lycoming</strong> "<strong>Key</strong> <strong>Reprints</strong>" is<br />
granted, so long as the context of<br />
information remains intact and appropriate<br />
credit is given.<br />
3
GENERAL<br />
4
Some Definitions Of Terms<br />
If you are not sure of the meaning of such terms as<br />
normally aspirated, turbocharged, supercharged or direct<br />
drive engines, then perhaps you'll want to read our<br />
simplified definition of them.<br />
The Normally Aspirated Engine is one that is not turbocharged<br />
or supercharged. If the airplane has a manifold<br />
pressure gauge, at full takeoff power at sea level on a standard<br />
day it would indicate a MP reading of approximately<br />
29" of Hg. Takeoff power at 5,000 ft. density altitude airport<br />
would read about 24" MP. The normally aspirated engine<br />
uses atmospheric pressure and is thereby altitude limited.<br />
Direct Drive Engines are those piston powered engines<br />
where the propeller is bolted on the end of the crankshaft and<br />
the prop turns at the same speed as the crankshaft.<br />
Geared Engines are usually the higher powered, more<br />
complex engines using a reduction gear on the nose of the<br />
aircraft, and with the prop attached to it. As a result, the prop<br />
will turn somewhat slower than the crankshaft, resulting in a<br />
lower prop noise level. When the engine is geared, we<br />
precede the engine designation with a "G." Thus a geared,<br />
opposed (0) normally aspirated <strong>Lycoming</strong> engine with a 480<br />
cubic inch displacement of the cylinders would be<br />
designated a GO-480 model.<br />
Turbocharged Engines as manufactured by <strong>Lycoming</strong><br />
simply consist of a turbocharger unit with a small turbine<br />
wheel attached by a common shaft to a compressor wheel,<br />
and utilizes the engine exhaust gas by directing it over the<br />
turbine wheel to drive the compressor. The horsepower loss<br />
in operating the turbocharger is negligible. Turbocharging<br />
can provide greater utility to the piston engine by providing<br />
sea-level horsepower, in some models, as high as 20,000<br />
feet; or it can be used to add horsepower to the engine<br />
particularly for takeoff. The faster the engine runs, the more<br />
air the turbocharger can pack into the cylinder to compensate<br />
for the thin air of altitude, or to increase the horsepower.<br />
Although this definition is somewhat over-simplified, it is a<br />
basic definition of turbocharging of General Aviation powerplants.<br />
Where turbocharging is used with a fuel injected,<br />
opposed Textron <strong>Lycoming</strong> engine with a 540 cubic inch<br />
displacement, we designate it as a TIO-540 model. "T"<br />
represents the -turbocharging.<br />
Supercharged Engines as manufactured by Textron<br />
<strong>Lycoming</strong> used a compressor wheel to pack air into the cylinders;<br />
but the compressor is driven by the crankshaft<br />
through an intricate gearing system, which takes considerable<br />
horsepower from the engine to operate. In comparison<br />
with a turbocharged engine, it is a medium altitude<br />
powerplant.<br />
Although supercharged engines could be built by Textron<br />
<strong>Lycoming</strong>, new aircraft designs during the past twenty or<br />
5<br />
more years have used turbocharging instead of<br />
supercharging because of the advantages that turbocharging<br />
offers.<br />
A supercharged, geared, opposed, fuel injected Textron<br />
<strong>Lycoming</strong> engine with cylinders of 540 cubic inch<br />
displacement is designated an IGSO-540 model. "S"<br />
represents supercharging.<br />
How To Get Textron <strong>Lycoming</strong> Engine &<br />
Accessory Maintenance Publications<br />
All publications may be ordered through authorized<br />
Textron <strong>Lycoming</strong> distributors, or direct from Textron<br />
<strong>Lycoming</strong>. If ordered by mail direct from Textron<br />
<strong>Lycoming</strong>, payment in the form of check or money order<br />
must be submitted with the request as outlined in the latest<br />
revision of Textron <strong>Lycoming</strong> Service Letter No. 114. Fax or<br />
telephone orders will be accepted if payment is made with a<br />
credit card: American Express, Visa, and Master Card are<br />
accepted.<br />
The available maintenance publications for Textron<br />
<strong>Lycoming</strong> engines and accessories consist of the following:<br />
OPERATOR'S MANUAL<br />
The Operator's Manual contains information of use to<br />
pilots and maintenance personnel. It contains engine<br />
specifications, inspection procedures, operational<br />
information, and is used in conjunction with the Pilots<br />
Operating Handbook for the aircraft.<br />
OVERHAUL MANUALS<br />
The Overhaul Manual is a guide for major repair of the<br />
engine. It contains complete disassembly, inspection, repair,<br />
reassembly and test procedures for the various Textron<br />
<strong>Lycoming</strong> reciprocating engines. When used in conjunction<br />
with the applicable parts catalog and service bulletins,<br />
service instructions, and service letters, this manual provides<br />
an authoritative text for complete overhaul of the engine.<br />
Overhaul Manuals for current Textron <strong>Lycoming</strong> engines are<br />
published in loose-leaf format so that revisions may be easily<br />
inserted.<br />
PARTS CATALOGS<br />
Textron <strong>Lycoming</strong> Parts Catalogs are illustrated to permit<br />
identification of parts; they are kept up-to-date by revision<br />
and supplemental listings. A referenced numerical index is<br />
also included.<br />
SERVICE BULLETINS, INSTRUCTIONS, LETTERS<br />
These publications are issued as required. Service<br />
Bulletins are mandatory, and require some modification or<br />
inspection to be accomplished on the engine within a<br />
specified time. Service Instructions cover a variety of<br />
subjects; such as repair processes, modification procedures,<br />
inspection procedures and overhaul methods. Service Letters
are of an informative nature, usually pertaining to service<br />
policy or vendor products.<br />
SPECIAL SERVICE PUBLICATIONS.<br />
These publications are concerned with topics of general<br />
interest or subjects that are too lengthy for inclusion in<br />
maintenance manuals.<br />
ENGINE SPECIFICATIONS AND INSTALLATION<br />
DRAWINGS<br />
These materials are needed by those who are planning to<br />
install a particular engine model in their aircraft.<br />
OWNER ADVISORY<br />
This notification will be sent without charge to all<br />
applicable aircraft owners listed in the FAA database when a<br />
mandatory Service Bulletin is issued and it appears that it<br />
may affect the engine in your aircraft.<br />
Determining Engine Condition Of High Time<br />
Piston Powerplants<br />
As an engine builds operating hours and approaches<br />
TBO, which may be either the manufacturer's recommended<br />
operating hours, or a calendar year limit before overhaul, the<br />
question arises concerning the decision to either continue<br />
flying, or top overhaul, major overhaul, or exchange engines.<br />
Here is a quick reference checklist to help make such a<br />
decision, followed by a brief explanation of the nine points.<br />
1. Oil consumption-any unusual increase?<br />
2. Engine history and calendar age.<br />
3. How has the engine been operated?<br />
4. Pilot's opinion of the engine.<br />
5. Maintenance - what kind has the engine received?<br />
6. What does the oil filter tell?<br />
7. What has been the trend in compression checks?<br />
8. What do the spark plugs show?<br />
9. Refer to the engine manufacturer's service letter for<br />
engine life and recommended overhaul periods.<br />
Along with the above quick reference checklist, as an<br />
engine manufacturer we would like to share our experience<br />
with interested operators by discussing the nine points:<br />
I. OIL CONSUMPTION<br />
The operator and maintenance people should know what<br />
has been the general history of oil consumption during the<br />
life of an engine.<br />
A possible danger signal concerning engine health is a<br />
definite increase in oil consumption during the recent 25 to<br />
50 hours of flight time. The oil screens and filter should be<br />
carefully observed for signs of metal. Maintenance should<br />
6<br />
also take a good differential compression check at this time.<br />
They should also look in the cylinders with a gooseneck light<br />
or a borescope to detect any unusual conditions in the<br />
combustion chamber.<br />
If you haven't looked at your air filter lately, it would be<br />
a good idea to carefully inspect it for wear and proper fit.<br />
This is all the more important when operating in dusty areas,<br />
and definitely could be a cause of increased oil consumption.<br />
II. ENGINE HISTORY AND CALENDAR AGE<br />
If a powerplant has been basically healthy throughout its<br />
life, this would be a favorable factor in continuing to operate<br />
it as the engine approached high time. Alternately, if it has<br />
required frequent repairs, the engine may not achieve its<br />
expected normal life. The engine logbook should contain this<br />
accumulative record.<br />
Another important aspect of an engine's history would be<br />
its calendar age. Engine flight time and calendar age are<br />
equally important to the operator. We have observed that<br />
engines infrequently flown do tend to age or deteriorate<br />
more quickly than those flown on a regular basis. Therefore,<br />
Textron <strong>Lycoming</strong> recommends both an operating hour limit<br />
and a calendar year limit between overhauls. Service<br />
Instruction 1009 gives these recommendations, but other<br />
items in this check list will help to determine if an overhaul<br />
or engine exchange is needed before the engine reaches these<br />
recommended limits.<br />
III. PILOT'S OPINION OF THE ENGINE<br />
The pilot's opinion of the powerplant based on his<br />
experience operating it is another important point in our<br />
checklist. He will have an opinion based on whether it has<br />
been a dependable powerplant, and whether or not he has<br />
confidence in it. If the pilot lacks confidence in an engine as<br />
it approaches the manufacturer's recommended limits, this<br />
could be a weighty factor in the decision to continue flying<br />
or to overhaul it. He should consult with his maintenance<br />
personnel concerning their evaluation of the condition of his<br />
powerplant.<br />
IV. OPERATION<br />
The basic question here would be how the engine has<br />
been operated the majority of its life. Some engines<br />
operating continuously at high power, or in dusty conditions,<br />
could have a reduced life. Likewise, if the pilot hasn't<br />
followed the manufacturer's recommendations on operation<br />
it may cause engine problems and reduce the expected life.<br />
This becomes a more critical influence on a decision in<br />
single engine aircraft, and also for single or twin engine<br />
planes flown frequently at night or in IFR conditions.<br />
V. MAINTENANCE<br />
Good maintenance should aid in achieving maximum<br />
engine life; alternately, poor maintenance tends to reduce the<br />
expected life. We notice among those powerplants coming<br />
back to the factory for remanufacture or overhaul, that the
smaller engines in general have had less care and attention,<br />
and in a number of instances have been run until something<br />
goes wrong. The higher powered engines have generally had<br />
better maintenance and show evidence that the operators do<br />
not wait until something goes wrong, but tend to observe the<br />
manufacturer's recommended operating hour or calendar<br />
limits to overhaul. The engine logbook should properly<br />
reflect the kind of maintenance provided the engine or<br />
engines. The technician who regularly cares for an engine<br />
will usually have an opinion about it's health.<br />
VI. WHAT DOES THE OIL TELL?<br />
Clean oil has consistently been an important factor in<br />
aiding and extending engine life. A good full flow oil filter<br />
has been a most desirable application here. When the filter is<br />
exchanged, ask the mechanic to open it and carefully<br />
examine for any foreign elements, just as is accomplished at<br />
oil change when the engine oil screen is also examined for<br />
the same purpose. Just as the spark plugs tell a story about<br />
what is going on in the engine, so the engine oil screen and<br />
the external oil filter tell a story about the health of an<br />
engine. Whether the engine is equipped with an oil filter or<br />
just a screen, oil changes should have been accomplished in<br />
accordance with the manufacturer's recommendations. These<br />
oil changes should have been recorded in the engine<br />
logbook.<br />
If oil is analyzed, it should be done at each oil change in<br />
order to establish a baseline. Analysis is a tool which only<br />
gives useful information when a dramatic departure from the<br />
established norm occurs. (See "Spectrometric Oil Analysis"<br />
later in this section.<br />
VII. COMPRESSION CHECKS<br />
What has been the trend in compression in at least the<br />
last two differential compression checks? The differential<br />
compression check is the more reliable type and should be<br />
taken on a warm engine. If the differential check reveals<br />
25% loss or more, then trouble may be developing.<br />
Some operators are confused by the compression check<br />
and its application. A compression test should be made<br />
anytime faulty compression is suspected, anytime the pilot<br />
observes a loss of power in flight, when high oil<br />
consumption is experienced, or when soft spots are noticed<br />
while hand pulling the prop.<br />
Many maintenance technicians do a compression check at<br />
each oil change, and it is also considered part of the 100hour<br />
engine inspection and the annual inspection. Most<br />
experienced maintenance men feel that the differential<br />
compression check is best used to chart a trend over a period<br />
of flight hours. A gradual deterioration of charted<br />
compression taken during maintenance checks would be a<br />
sound basis for further investigation.<br />
7<br />
VIII. SPARK PLUGS<br />
The spark plugs when removed and carefully observed,<br />
tell the skilled mechanic what has been happening in the<br />
cylinders during flight, and can be a helpful factor in<br />
deciding what to do with a high time engine:<br />
1. Copper run out and/or lead fouling means excessive<br />
heat.<br />
2. Black carbon and lead bromide may indicate low<br />
temperatures, the type of fuel being used, and possibly<br />
excessive richness of fuel metering at idle.<br />
3. Oil fouled plugs may indicate that piston rings are<br />
failing to seat, or excessive wear is taking place.<br />
4. The normal color of a spark plug deposit is generally<br />
brownish gray.<br />
5. In high compression and supercharged engines, a<br />
cracked spark plug porcelain will cause or has been caused<br />
by preignition.<br />
IX. ENGINE MANUFACTURER'S RECOMMENDED<br />
OVERHAUL LIFE<br />
Service Instruction 1009 is the Textron <strong>Lycoming</strong><br />
published recommendation for operating hour and calendar<br />
year limits until engine overhaul as they apply to each<br />
specific engine model. The amount of total operating time on<br />
an engine will be a basic factor in any decision to either<br />
continue flying, change, top, or major overhaul the<br />
powerplant. Operators should be reminded, however, that the<br />
hours of service life shown in the service instruction are<br />
recommendations for engines as manufactured and delivered<br />
from the factory. These hours can normally be expected<br />
provided recommended operation, periodic inspections,<br />
frequent flights, and engine maintenance have been<br />
exercised in accordance with respective engine operator's<br />
manuals.<br />
If an operator chooses to operate an engine beyond the<br />
recommended limits, there are factors to consider. The cost<br />
of overhaul is likely to be greater as engine parts continue to<br />
wear, and the potential for failure may also increase.<br />
Operators who have top overhauled their engine at some<br />
point in the engine life invariably want to know if this<br />
extends the life of the engine. This is an important question.<br />
The chances are that if the operator applies the checklist we<br />
have been discussing and comes up with favorable answers<br />
to these questions about his engine, he can probably get the<br />
hours desired-with only a few exceptions. But a top<br />
overhaul does not increase the official life or TBO of the<br />
engine.<br />
We are surprised from time to time to have owners tell us<br />
they top overhauled their engine at some point less than the<br />
major overhaul life fo.r no reason other than somebody said it<br />
was a good idea. Unless the manufacturer recommends it, or<br />
there is a problem requiring a top overhaul, this is a needless
cost. If the engine is healthy and running satisfactorily, then<br />
leave it alone!<br />
One other point deserves attention here; there is no<br />
substitute or cheap route to safety in the proper maintenance<br />
or correct overhaul of an engine.<br />
CONCLUSION:<br />
Apply all of these basic nine points concerning your<br />
engine or engines and then make a decision whether to top<br />
overhaul, major overhaul, exchange engines, or continue<br />
flying.<br />
Questions Asked By The Pilots or Mechanics<br />
About Textron <strong>Lycoming</strong> Geared And<br />
Mechanically Supercharged Engines<br />
QUESTION - I hear the term "Shower of Sparks" relative<br />
to ignition systems. What does this term mean to pilots?<br />
ANSWER - It means that while the engine is cranking<br />
during a start, that a prolonged series of sparks is jumping<br />
the spark plug gap as compared to one single spark. This<br />
results in improved cold weather starting.<br />
QUESTION - During starts with the shower of sparks<br />
ignition system, I get some pretty severe kickbacks. Why?<br />
ANSWER - The common cause here is the retard breaker<br />
doesn't close, resulting in a start attempt on the advance<br />
points. A simple check is to run the engine at about 700<br />
RPM and for a fraction of a second hold the starter switch to<br />
the start position. The tachometer will indicate an immediate<br />
drop in RPM if the retard points are operating. There will be<br />
no drop in RPM with a malfunctioning retard breaker.<br />
CAUTION - This check not recommended on our direct<br />
drive engines using automotive type starters.<br />
QUESTION - At what RPM should I check my mags?<br />
ANSWER - Where the airplane manual says. For<br />
example, checking at a lower than indicated RPM may give a<br />
higher than normal mag drop.<br />
QUESTION - Is the actual mag drop in RPM very<br />
important?<br />
ANSWER - No. We are more concerned that the mag<br />
drop is less than 50 RPM between the two mags and smooth,<br />
rather than whether it's 50-75 or 150. Again, it should be<br />
within the limits as indicated in the manual.<br />
QUESTION - I noticed some of your engines show<br />
practically no mag drop. Is this normal?<br />
ANSWER - Yes, but give it a little more time and I think<br />
you'll note some mag drop. However, if in doubt about any<br />
mag drop, be suspicious of a hot mag. Reduce engine RPM<br />
to idle and turn switch to off and see if engine dies out. If it<br />
8<br />
keeps running, beware of hot mag. It's sad but true that we<br />
will still have people getting hurt due to hot mags.<br />
QUESTION - Can I save the engine any by using less<br />
than take-off power?<br />
ANSWER - Indeed not. In fact, harm to the engine can be<br />
caused by using less than take-off power.<br />
Definitions Applicable to TBO, Engine<br />
Replacement, and Engine Rebuild<br />
A condensed version of several articles.<br />
TIME BETWEEN OVERHAUL (TBO)<br />
Textron <strong>Lycoming</strong> publishes, and updates from time to<br />
time as needed, Service Instruction 1009. This document sets<br />
forth factory recommendations for time between overhaul<br />
(TBO). Aircraft owners often have questions concerning<br />
TBO, and the need for engine overhaul or replacement. This<br />
condensed article will answer many of those questions.<br />
Published in Service Instruction 1009 is a table listing<br />
recommended operating hour limits for all <strong>Lycoming</strong> engine<br />
models. Some owners are inclined to think that the number<br />
of hours listed is some magic number that an engine is<br />
certain to obtain, but after which it will immediately fail to<br />
operate. Actually the recommended number is not magic at<br />
all. It is the average number of operating hours a particular<br />
model is expected to achieve, but there are many qualifying<br />
factors.<br />
The recommended operating hours (TBO) for Textron<br />
<strong>Lycoming</strong> aircraft engines only applies to those engines that<br />
incorporate genuine Textron <strong>Lycoming</strong> parts. Reliability and<br />
average service life also cannot be predicted when an engine<br />
has undergone any modification not approved by Textron<br />
<strong>Lycoming</strong>. Other factors affecting the operating life of an<br />
engine are operating conditions, frequency of operation, and<br />
the manner in which the engine is operated and maintained.<br />
OPERATING CONDITIONS<br />
Engines installed in aircraft that are used to apply<br />
chemicals (crop dusting) may be affected by those chemicals<br />
and therefore are subject to shorter than normal<br />
recommended TBOs. Operation in dusty conditions, or in an<br />
atmosphere of salt air near the ocean are examples of<br />
conditions that may have a detrimental affect on engine<br />
condition, and on the capability of reaching the<br />
recommended TBO.<br />
OPERATING TECHNIQUE<br />
Pilot technique is another factor affecting engine life.<br />
Following manufacturer recommendations could be<br />
categorized as good operation. On the other hand, complete<br />
disregard for these recommendations could conceivably<br />
cause engine destruction in as little as 100 hours. Although
this would be extreme and unusual, pilots who regularly<br />
Cl. at steep angles, make abrupt throttle changes,<br />
improperly lean the engine in climb, exceed maximum<br />
specified manifold pressure and/or RPM, chop throttles<br />
abruptly and let down rapidly causing rapid contraction of<br />
metals that have been up to operating temperatures are using<br />
techniques that may shorten TBO.<br />
GOOD VS. IRREGULAR MAINTENANCE<br />
Regular maintenance, performed by qualified personnel<br />
using factory recommended inspection procedures and<br />
intervals, will contribute to engine performance and the<br />
capability of reaching the manufacturer recommended TBO<br />
hours. Stretching inspection or oil change intervals may<br />
create the illusion of saving money, but is really false<br />
economy. Regular oil changes and scheduled maintenance<br />
play an important role in achieving recommended TBO.<br />
THE FOUR STROKE CYCLE<br />
FREQUENCY OF FLIGHT<br />
Frequency of flight also plays an important part in the<br />
operating history of an engine. Engines flown only<br />
occasionally and with extended periods between oil changes<br />
subject to corrosion because of acids that build up in the<br />
o il and attack internal metallic parts of the engine. Only<br />
regular oil changes can eliminate these acids.<br />
Moisture that enters through the breather or exhaust<br />
system can cause rusting of cylinders and other steel parts.<br />
Rings may take a set and stick in the groove. Condensation<br />
in the magnetos may cause shorting of the breaker points.<br />
Flying as often as possible to bring the engine temperatures<br />
up to their normal operating levels will help to eliminate<br />
9<br />
moisture. A ground run of the engine only is not considered<br />
satisfactory. Frequent flights are needed.<br />
The number of hours that need to be flown each month,<br />
and the length of time between flights cannot be specified for<br />
every aircraft and engine. Variables such as geographic<br />
location and local temperature and humidity must be<br />
considered. Inactivity and time will cause hardening of<br />
gaskets, seals, and hoses. Long periods between flights can<br />
be expected to cause excessive wear during engine start due<br />
to loss of the protective oil film on bearing surfaces during<br />
the long periods of inactivity. Regardless of the operating<br />
hours, those engines that have not reached the recommended<br />
number of operating hours for TBO in a twelve year period<br />
must be overhauled or replaced during that twelfth year.<br />
DECISION TIME<br />
The timing of engine overhaul or replacement is<br />
sometimes the result of government regulations. Anytime<br />
that regulations are not a factor, the engine owner must make<br />
the decision to overhaul or replace the engine based on<br />
knowledge of the engine and the conditions under which it<br />
has been operated. This decision may come before the<br />
engine has reached the recommended number of operating<br />
hours, or in some cases, after that number of operating hours<br />
has been achieved.<br />
TBO recommendations apply to the engine, and in some<br />
cases engine accessories and propellers. There is the<br />
possibility that certain components such as magnetos,<br />
ignition harness, governors, and other engine driven<br />
accessories may require overhaul or replacement prior to<br />
engine overhaul. This decision, too, is to be made by the<br />
party responsible for maintaining the engine, or by the<br />
accessory manufacturer.<br />
NEW ENGINE<br />
A new engine is a product manufactured by Textron<br />
<strong>Lycoming</strong> Williamsport containing all new parts and<br />
accessories, and meeting all production test specifications,<br />
quality control tests, and regulations necessary to hold and<br />
maintain a “production certificate” issued by the FAA. When<br />
this engine has met each of these criteria and is shipped to an<br />
airframe manufacturer, it will be subject to further testing<br />
during flight test of the aircraft for its certification<br />
acceptance. When the ultimate purchaser receives the<br />
aircraft, it may have also been subjected to ferry time.<br />
However, all flight testing and ferry time will be logged. The<br />
user then receives the engine with the full Textron <strong>Lycoming</strong><br />
Williamsport new engine warranty, accompanied by an<br />
Engine Logbook.<br />
REMANUFACTURED ENGINE<br />
To the aircraft engine purchaser, the “remanufactured”<br />
engine, as provided by Textron <strong>Lycoming</strong>-Williamsport,<br />
offers the opportunity to obtain many of the benefits of a<br />
new engine, but at a price. savings.
The general term "remanufacture" has no specific<br />
definition in FAA Regulations. We have observed it to be<br />
considered generally the same in the industry as a major<br />
overhaul. However, the Textron <strong>Lycoming</strong> Factory<br />
Remanufactured Engine is in a somewhat different category.<br />
The specifications for the factory remanufacture of our<br />
engines are carefully written and made an integral part of our<br />
Repair Station Manual, which specifies precisely what must<br />
be done to an engine. The factory remanufacture<br />
specifications get their authority from FAR, Part 43. The<br />
factory of original manufacture is the only organization<br />
given the authority to return an engine to a "zero-time"<br />
condition.<br />
A Textron <strong>Lycoming</strong> Factory Remanufactured Engine is<br />
defined as an aircraft engine originally designed and<br />
manufactured by Textron <strong>Lycoming</strong> that has been<br />
disassembled, repaired or altered, and inspected in<br />
accordance with <strong>Lycoming</strong> Service Bulletins and/or<br />
Instructions, incorporating applicable mandatory engineering<br />
changes, and any Airworthiness Directives, at the <strong>Lycoming</strong><br />
factory. Tolerances and limits established and published by<br />
<strong>Lycoming</strong>, and approved rework procedures, are used during<br />
the remanufacturing of the engine so that the engine is<br />
brought back to zero time. It is important to note that the<br />
<strong>Lycoming</strong> factory is the only agency authorized by the FAA<br />
to return a <strong>Lycoming</strong> engine to ZERO time. Such engines<br />
retain their original serial number, but the letter "R" is added<br />
preceding the letter "L" on the data plate which designates<br />
remanufactured by <strong>Lycoming</strong>.<br />
Thus, a factory remanufactured engine that has been<br />
returned to zero time, by <strong>Lycoming</strong>'s definition, has all the<br />
foregoing, plus the fact that it is done by <strong>Lycoming</strong> at its<br />
factory, by factory personnel with manufacturing and<br />
engineering expertise. This factory remanufactured engine<br />
must also meet the same production test specifications used<br />
for a new engine. With each Textron <strong>Lycoming</strong> factory<br />
remanufactured engine an Engine Logbook is furnished with<br />
Textron <strong>Lycoming</strong> Form No. 489 attached on the inside of<br />
the first page. Additionally, each engine released through the<br />
remanufacturing system is accompanied by a maintenance<br />
release that refers to the factory order to which all work was<br />
performed, and showing that it was inspected by FAA<br />
authorized personnel.<br />
OVERHAULED ENGINE<br />
Overhaul is a term which certainly means different things<br />
to different people. When the aircraft owner has run a<br />
factory new engine to TBO, and then paid for an overhaul,<br />
that owner usually has expectations of running the engine<br />
until the manufacturer's recommended TBO has again been<br />
achieved. These expectations may or may not be realistic<br />
depending on what the overhauler puts into the overhaul.<br />
There is no specific definition of the term overhaul in the<br />
Code of Federal Regulations for Aeronautics and Space<br />
10<br />
(FAR). FAR Part 43 states the following about Maintenance,<br />
Rebuilding and Alteration.<br />
(a) Each person maintaining or altering, or performing<br />
preventive maintenance, shall use methods, techniques, and<br />
practices acceptable to the Administrator. He shall use the<br />
tools, equipment, and test apparatus necessary to assure<br />
completion of the work in accordance with accepted industry<br />
practices. If special equipment or test apparatus is<br />
recommended by the manufacturer involved, he must use<br />
that equipment acceptable to the Administrator.<br />
(b) Each person maintaining or altering, or performing<br />
preventive maintenance, shall do that work in such a manner<br />
and use materials of such quality, that the condition of the<br />
aircraft, airframe, aircraft engine, propeller, or appliance<br />
worked on will be at least equal to its original or properly<br />
altered conditions (with regard to aerodynamic function,<br />
structural strength, resistance to vibration and deterioration,<br />
and other qualities affecting airworthiness).<br />
The Textron <strong>Lycoming</strong> overhaul manuals, as<br />
supplemented by appropriate service bulletins, service<br />
instructions, and service letters, clearly stipulate the work to<br />
be done to accomplish an overhaul. We, at Textron<br />
<strong>Lycoming</strong>, do not distinguish between major overhaul and<br />
overhaul. We prefer to use the one word, overhaul, because<br />
we want it to be as broad as possible. Overhaul means the<br />
entire engine must be considered part by part as per the<br />
applicable overhaul manuals. To accomplish this, there must<br />
be complete teardown so that all parts can be examined. In<br />
overhaul, there are certain parts that must be replaced,<br />
regardless of condition as per the overhaul manuals, and<br />
Textron <strong>Lycoming</strong> Service Bulletin No. 240. The remaining<br />
parts must then be examined as required by one or more of<br />
the following: (1) visual examination for discrepancy, (2)<br />
non-destructive testing or other mechanical examination, and<br />
(3) dimensional checking. At this point, parts must conform<br />
to the fits and limits specifications listed as part of the<br />
Textron <strong>Lycoming</strong> Overhaul Manual, and the Table of<br />
Limits.<br />
By means of overhaul manuals for the various engine<br />
models, Textron <strong>Lycoming</strong> makes available all maintenance<br />
data and information necessary to maintain, repair, or<br />
overhaul engines that are in service. In addition, Service<br />
Bulletin 240 lists the parts that are recommended for<br />
replacement at overhaul. Service Instruction No. 1009 lists<br />
the recommended overhaul periods for the various engine<br />
models. However, the FAA has no specific requirements that<br />
the repair agency must comply with the <strong>Lycoming</strong> manual,<br />
or with the applicable service bulletins and instructions. The<br />
final decision on the type of maintenance or repair<br />
accomplished is left to the mechanic doing the work. When<br />
the mechanic signs for the overhaul of an aircraft engine, he<br />
certifies that he has performed the work using methods,<br />
techniques, and practices acceptable to the FAA<br />
Administrator. While the factory remanufactured engine
goes back to zero time, previous time on an overhauled<br />
engine is carried forward in the engine logbook.<br />
In addition to manufacturing and remanufacturing aircraft<br />
engines, Textron <strong>Lycoming</strong> also overhauls engines at the<br />
<strong>Lycoming</strong> factory. These overhauled engines exceed<br />
industry standards for quality through the use of genuine<br />
Textron <strong>Lycoming</strong> parts and full factory support. Although<br />
these engines do not become zero-time as when<br />
remanufactured, a policy of extensive parts replacement<br />
insures a quality product which has a parts and labor<br />
warranty against defects in material and workmanship.<br />
Customers may choose either a "custom overhaul" or an<br />
"exchange overhaul." Both of these overhauls provide expert<br />
workmanship and replacement of all the parts recommended<br />
for replacement in Service Bulletin 240.<br />
The exchange overhaul has the advantage of very short<br />
aircraft down time. A freshly overhauled exchange engine<br />
can be shipped to the aircraft owner's airport for installation,<br />
and the old engine core can be returned to <strong>Lycoming</strong> after it<br />
has been removed and replaced.<br />
The owner who orders a custom overhaul gets his or her<br />
own engine back after overhaul. The disadvantage is the time<br />
required to remove the engine, ship it for overhaul, have the<br />
overhaul completed, and then have the freshly overhauled<br />
engine returned and reinstalled in the aircraft. To some<br />
owner's, getting their own engine back is worth the wait.<br />
TOP OVERHAUL VS. MAJOR OVERHAUL<br />
The industry originated the terms Top Overhaul and<br />
Major Overhaul years ago to identify and make a distinction<br />
between the degrees of work done on an engine. Textron<br />
<strong>Lycoming</strong> Williamsport defines a top overhaul as the repair<br />
or overhaul of those parts on the outside of the crankcase<br />
without completely disassembling the entire engine. It<br />
includes the removal of the cylinders and deglazing the<br />
cylinder walls, inspection of the pistons, valve operating<br />
mechanism, valve guides, and replacing piston rings. A<br />
major overhaul consists of the complete disassembly of an<br />
engine, its repair, re-assembly and testing to assure proper<br />
operation. Nevertheless, whether the work accomplished is a<br />
top or major overhaul, Federal Aviation Regulations require<br />
that it meet regulations, which were quoted at the very<br />
beginning of this discussion of overhaul.<br />
OVERHAUL - A SUMMARY<br />
To summarize, all engine overhauls are not the same.<br />
The Textron <strong>Lycoming</strong> factory overhauled engine is a<br />
QUALITY product which assures long-term reliability to<br />
meet your expectations. An overhauled engine carries<br />
forward all previous time in the engine logbook; a factory<br />
remanufactured engine goes back to zero time. The cheapest<br />
overhaul may not be the best. There should be no<br />
compromise with safety. <strong>Lycoming</strong> provides overhaul<br />
manuals and related service publications to aid operators in<br />
the field to accomplish a top overhaul, or the more complete<br />
11<br />
major overhaul; but the overhauling agency must comply<br />
with the performance rules set forth in Section 43 of the<br />
Federal Aviation Regulations. Textron <strong>Lycoming</strong><br />
Williamsport can supply either a custom or an exchange<br />
engine overhaul.<br />
Oil Analysis<br />
Much is heard these days about the use of oil analysis as<br />
a tool for helping to determine engine condition. However,<br />
the vast majority of the general aviation public do not<br />
understand how this tool is to be used. We will attempt here<br />
to set forth a brief summary of the subject.<br />
Oil analysis is not new, but it came late to general<br />
aviation as a maintenance tool. The object is to examine oil<br />
samples from an engine, and break down the sample in parts<br />
per million in order to determine the internal health of the<br />
engine. This is based on the fact that all lubricated engine<br />
parts wear and deposit a certain amount of metallic particles<br />
in the oil. The number of particles per million of each metal<br />
determines the wear pattern for the particular engine being<br />
analyzed. It is of the utmost importance to understand that<br />
the results of the analysis is only pertinent to THE ENGINE<br />
BEING ANALYZED, although accumulation of data on any<br />
specific engine series is a basis for establishing standards for<br />
that series of engine.<br />
The fact that is important is a sharp rise above normal of<br />
the amount of a particular metal in the oil. It is imperative<br />
then to build a case history of each engine, wherein a sharp<br />
rise in any one metal will indicate abnormal engine wear.<br />
The analysis can also tell you whether the oil contains other<br />
liquid contaminants such as gasoline or water. Gasoline<br />
contamination of the oil can result from blow-by from the<br />
combustion chamber caused by poor combustion, bad<br />
timing, improper fuel mixture, worn rings, and the like.<br />
Water contamination is usually restricted to condensed<br />
vapor, but this vapor combines with the fuel combustion<br />
products to form harmful metal-attacking acids. Based on<br />
this contamination in the oil, the analysis will be able to<br />
pinpoint improper mixture, poor maintenance, etc.<br />
Textron <strong>Lycoming</strong> Service Letter No. L171, entitled<br />
"General Aspects of Spectrometric Oil Analysis", provides a<br />
guide for the use of oil analysis in measuring engine health.<br />
The information is in general terms since the health of each<br />
engine must be determined on its own merits.<br />
Differences in manufacturing processes may cause a<br />
variation in analysis results for different engine models. The<br />
amount of tin plating, copper plating, nitriding, etc.,<br />
performed during manufacture has a definite relationship to<br />
the oil analysis reports. It is not uncommon, for example, to<br />
see what seems to be high copper content early in the life of<br />
an engine, only to have this content continually decrease as<br />
the engine accumulates time, and then disappear altogether.
Poor air filter maintenance, running the aircraft on the<br />
ground with carburetor/alternate air on, and holes in the air<br />
intake system are all factors which will allow an engine to<br />
ingest dirt and foreign matter. The result of this will show up<br />
as high iron (cylinder barrels) and chrome (piston rings)<br />
content at the next oil analysis. Neither time nor space<br />
permits us here to list all of the variables involved (indeed<br />
we do not profess to know them all) but it should be obvious<br />
to everyone that a continuing history of each engine is the<br />
only criteria by which its health can be determined.<br />
Remember that several samples taken at the regular oil<br />
change intervals must be analyzed to determine the normal<br />
characteristics of an engine, and also remember that the first<br />
few samples on factory fresh engines will read high as new<br />
parts are wearing in and conforming to each other.<br />
Excessively heavy wear of internal engine parts will<br />
show up as traces in parts per million during analysis long<br />
before detrimental flaking or scoring takes place, and almost<br />
always before any outward indication of trouble. This initial<br />
departure from normal is not usually any reason to tear the<br />
engine down. An investigation and timely and appropriate<br />
corrective action (replacing the air filter, perhaps) by the<br />
operator will usually result in trace elements returning to<br />
normal at the next oil change. If long TBO's are to be<br />
achieved, it is MOST IMPORTANT that clean air be<br />
provided to the engines.<br />
Basically and briefly, that is the oil analysis story. It is a<br />
good tool IF PROPERLY USED. Like any other tool, it is<br />
only one of many things that must be used to determine<br />
engine health.<br />
What Is An Aerobatic Engine?<br />
A Flyer reader wrote to express interest in a <strong>Lycoming</strong><br />
IO-360 engine. He went on to say that the engine would be<br />
used in an aircraft capable or unlimited aerobatics. A<br />
statement like this indicates a need for explanation of the<br />
differences between the standard <strong>Lycoming</strong> engine and the<br />
aerobatic <strong>Lycoming</strong> engine. Aerobatic flight with a nonaerobatic<br />
engine could result in engine stoppage from either<br />
fuel or oil starvation.<br />
It should first be explained that unlimited acrobatic flight<br />
implies that the aircraft may be flown in any attitude with no<br />
limitations. Although an aircraft may have excellent<br />
aerobatic capability, every aircraft and engine does have<br />
limitations which must not be exceeded.<br />
Any engine which employs a float type carburetor for<br />
fuel metering is immediately eliminated from use in a fully<br />
aerobatic aircraft. Inverted flight for more than a few<br />
seconds would cause the carburetor to stop metering fuel and<br />
the engine to stop running. While carbureted engines are<br />
used in some aircraft with limited aerobatic capability, only<br />
12<br />
positive G maneuvers and very brief periods of inverted<br />
flight are possible.<br />
To operate correctly, an engine must have fuel which is<br />
properly metered in proportion to the air entering the engine<br />
induction system. The fuel injector measures air flow and<br />
meters fuel to the inlet ports of each cylinder. Unlike the<br />
carburetor, a fuel injector is not affected by unusual aircraft<br />
attitudes. Therefore, all <strong>Lycoming</strong> engines that are designed<br />
for aerobatic flight are equipped with a fuel injector.<br />
Delivery of metered fuel to the combustion chamber is<br />
not the only challenge addressed in designing an aerobatic<br />
aircraft engine. It is also necessary to provide lubricating oil<br />
to many points in an operating engine regardless of the<br />
aircraft attitude. Two different methods have been used to<br />
provide oil for aerobatic engines manufactured by Textron<br />
<strong>Lycoming</strong>.<br />
The flat, opposed cylinder aerobatic engines first offered<br />
by <strong>Lycoming</strong> were designated AIO-320 or AIO-360. These<br />
engines were the dry sump type with appropriate oil inlet and<br />
outlet connections as well as two crankcase breather<br />
connections. Necessary lines and an external oil tank with a<br />
revolving pickup capable of reaching oil in almost any<br />
aircraft attitude were then supplied by the aircraft<br />
manufacturer. This type of installation provided aerobatic<br />
capability, but it was complicated enough to be very<br />
expensive. A simpler, more universally usable system was<br />
needed.<br />
Most <strong>Lycoming</strong> engines are termed "wet sump" engines<br />
because oil is stored internally in a sump at the bottom of the<br />
crankcase. When the engine is inverted, the oil will be in the<br />
top of the crankcase rather than in the oil sump. To maintain<br />
a continuous flow of oil during inverted flight, an oil pick-up<br />
line must be provided near the top of the engine as well as in<br />
the oil sump. <strong>Lycoming</strong> aerobatic engines carrying an AEIO<br />
designation use inverted oil system hardware to adapt oil<br />
pickup lines at the top and bottom of the wet sump engine.<br />
This inverted oil system comprises two major<br />
components: the oil valve and the oil separator. Several other<br />
items of hardware adapt the system to the <strong>Lycoming</strong> engine<br />
so that oil is available to the oil pump in either the upright or<br />
inverted position. These hardware items include a standpipe<br />
in the sump which acts as the engine breather during inverted<br />
flight, a special adapter or plug at the oil sump suction<br />
screen, and other hoses and fittings.<br />
In addition to the inverted Oil system, <strong>Lycoming</strong> makes<br />
other engine modifications to adapt standard engine models<br />
to aerobatic use. Some models of the AEIO-540 engine have<br />
a baffle added in the oil sump to eliminate oil loss through<br />
the oil separator. Also the flow of oil to the oil pickup in the<br />
accessory case is limited in the inverted position. To improve<br />
this oil flow, holes are machined in the upper rear wall of the<br />
crankcase.
With these changes completed, the engine is capable of<br />
inverted flight in addition to normal upright flight. Because<br />
the oil pick up points are at the top and bottom of the engine,<br />
knife-edge flight or flight at very high up or down pitch<br />
angles have some limitations; these limitations do not<br />
prevent engines from being used in aircraft which perform<br />
all the maneuvers required for international aerobatic<br />
competition. Engines built with the inverted oil system and<br />
incorporating the other modifications discussed earlier are<br />
certified by the FAA as acrobatic engines.<br />
Aerobatic engines subjected to the exceedingly stressful<br />
maneuvers developed in recent years are also limited by<br />
possible damage to the crankshaft flange. Textron <strong>Lycoming</strong><br />
Service Bulletin No. 465 requires periodic inspections of all<br />
crankshafts installed in aircraft that are used for aerobatics<br />
The meanings of the letters and numbers in the<br />
<strong>Lycoming</strong> engine designation are fully explained elsewhere<br />
in this publication, but the AE part of the AEIO indicates<br />
"aerobatic engine." <strong>Lycoming</strong> is currently producing AEIO-<br />
320, AEIO-360 and AEIO-540 aerobatic engines which<br />
range from 150 to 300 horsepower. One of these models<br />
should be installed in a general aviation aircraft which is<br />
designed for aerobatic flight.<br />
Low Compression Engine-<br />
Grade 100 Aviation Fuel<br />
Condensedfrom two articles on this subject<br />
Many <strong>Lycoming</strong> engines designated as low compression<br />
engines were originally certified to use Grade 80 aviation<br />
gasoline. The fuel was rated at 80 octane when the engine<br />
was leaned for cruise, and at 87 octane when it was set at<br />
rich for takeoff and climb. This aviation gasoline contained<br />
one half milliliter of lead per gallon. Owners of aircraft that<br />
use engines certified to use Grade 80 fuel occasionally have<br />
questions about the use of higher leaded fuels.<br />
During the mid-1970s, announcement of a single grade<br />
aviation fuel for all reciprocating aircraft engines created a<br />
furor which gradually faded away as pilots and mechanics<br />
became more knowledgeable of the actual effects of using<br />
the new fuel, Grade 100LL. Grade 100LL has two milliliters<br />
of lead per gallon and is rated at 100 octane when the engine<br />
is leaned for cruise, and at 130 octane when the mixture is<br />
set at rich. The fuel is designated as "low lead" because the<br />
previous fuel with a 100/130 octane rating contained twice<br />
as much lead, four milliliters per gallon.<br />
For all practical purposes, Grade 80 fuel with one half<br />
milliliter of lead has been phased out and is no longer<br />
available. Use of Grade 100LL fuel in engines certified for<br />
80 octane fuel can result in increased engine deposits both in<br />
the combustion chamber and in the engine oil. It may require<br />
increased spark plug maintenance and more frequent oil<br />
changes. The frequency of spark plug maintenance and oil<br />
13<br />
drain periods will be governed by the type of operation.<br />
Operation at full rich mixture requires more frequent<br />
maintenance periods; therefore it is important to use<br />
approved mixture leaning procedures.<br />
To reduce or keep engine deposits at a minimum when<br />
using the leaded fuel available today, it is essential that the<br />
following four conditions of operation and maintenance are<br />
applied. These procedures are taken directly from Service<br />
Letter No. L 185.<br />
A. GENERAL RULES<br />
1. Never lean the mixture from full rich during take-off,<br />
climb, or high performance cruise operation unless the<br />
airplane owners manual advises otherwise. However, during<br />
takeoff from high elevation airports or during climb at higher<br />
altitudes, roughness or reduction of power may occur at full<br />
rich mixture. In such a case the mixture may be adjusted<br />
only enough to obtain smooth engine operation. Careful<br />
observation of temperature instruments should be practiced.<br />
2. Operate the engine at maximum power mixture for<br />
performance cruise powers and at best economy mixture for<br />
economy cruise power; unless otherwise specified in the<br />
airplane owners manual.<br />
3. Always return the mixture to full rich before<br />
increasing power settings.<br />
4. During let-down and reduced power flight operations,<br />
it may be necessary to manually lean or leave mixture setting<br />
at cruise position prior to landing. During the landing<br />
sequence the mixture control should then be placed in the<br />
full rich position, unless landing at high elevation fields<br />
where operation at a lean setting may be necessary.<br />
5. Methods for manually setting maximum power or best<br />
economy mixture.<br />
a. Engine Tachometer - Airspeed Indicator Method:<br />
The tachometer and/or the airspeed indicator may be<br />
used to locate, approximately, maximum power and best<br />
economy mixture ranges. When a fixed-pitch propeller<br />
is used, either or both instruments are useful indicators.<br />
When the airplane uses a constant speed propeller, the<br />
airspeed indicator is useful. Regardless of the propeller<br />
type, set the controls for the desired cruise power as<br />
shown in the owners manual. Gradually lean the mixture<br />
from full rich until either the tachometer or the airspeed<br />
indicator are reading peaks. At peak indication the<br />
engine is operating in the maximum power range.<br />
b. For Cruise Power: Where best economy operation<br />
is allowed by the manufacturer, the mixture is first<br />
leaned from full rich to maximum power, then leaning is<br />
slowly continued until engine operation becomes rough<br />
or until engine power is rapidly diminishing as noted by<br />
an undesirable decrease in airspeed. When either<br />
condition occurs, enrich the mixture sufficiently to<br />
obtain an evenly firing engine or to regain most of the<br />
lost airspeed or engine RPM. Some slight engine power
and airspeed must be sacrificed to gain a best economy<br />
mixture setting.<br />
c. Exhaust Gas Temperature Method (EGT): Refer to<br />
the article on this subject in the Operations section of<br />
this book.<br />
Recommended fuel management-manual leaning will<br />
not only result in less engine deposits and reduced<br />
maintenance cost, but will provide more economical<br />
operation and fuel saving.<br />
B. ENGINE GROUND OPERATION<br />
The engine ground operation greatly influences<br />
formation of lead salt deposits on spark plugs and exhaust<br />
valve stems. Proper operation of the engine on the ground<br />
(warm-up, landing, taxi and engine shut-down) can greatly<br />
reduce the deposition rate and deposit formation which cause<br />
spark plug fouling and exhaust valve sticking.<br />
1. Proper adjustment of the idle speed (600 to 650 RPM)<br />
fuel mixture, and maintenance of the induction air system<br />
will ensure smooth engine operation and eliminate<br />
excessively rich fuel/air mixtures at idle speeds. This will<br />
minimize the separation of the nonvolatile components of the<br />
high leaded aviation fuels greatly retarding the deposition<br />
rate.<br />
2. The engine should be operated at engine speeds<br />
between 1000 and 1200 RPM after starting and during the<br />
initial warm-up period. Avoid prolonged closed throttle idle<br />
engine speed operation (when possible). At engine speeds<br />
from 1000 to 1200 RPM, the spark plug core temperatures<br />
are hot enough to activate the lead scavenging agents<br />
contained in the fuel which retards the formation of the lead<br />
salt deposits on the spark plugs and exhaust valve stems.<br />
Avoid rapid engine speed changes after start-up and use only<br />
the power settings required to taxi.<br />
3. Rapid engine cool down from low power altitude<br />
changes, low power landing approach and/or engine shutdown<br />
too soon after landing or ground runs should be<br />
avoided.<br />
4. Prior to the engine shut-down, the engine speed should<br />
be maintained between 1000 and 1200 RPM until the<br />
operating temperatures have stabilized. At this time the<br />
engine speed should be increased to approximately 1800<br />
RPM for 15 to 20 seconds, then reduced to 1000 to 1200<br />
RPM and shut-down immediately using the mixture control.<br />
C. LUBRICATION RECOMMENDATIONS<br />
Many of the engine deposits formed by combustion,<br />
regardless of the lead content of fuel used, are in suspension<br />
within the engine oil and are not removed by a full flow<br />
filter. When sufficient amounts of these contaminants in the<br />
oil reach high temperature areas of the engine they can be<br />
baked out, resulting in possible malfunctions such as in<br />
exhaust valve guides, causing sticking valves. The<br />
recommended periods of 50-hour interval oil change and<br />
14<br />
filter replacement for all engines using full-flow filtration<br />
system and 25-hour intervals for oil change and screen<br />
cleaning for pressure screen systems must be followed. If<br />
valve sticking is noted, all guides should be reamed using the<br />
procedures as stated in latest editions of Service Instruction<br />
No. 1116 and/or Service Instruction No. 1425, and the time<br />
between oil and filter changes should be reduced.<br />
D. SPARK PLUGS<br />
The fuel management techniques outlined previously will<br />
aid in minimizing spark plug fouling. Engine operation,<br />
spark plug selection, and spark plug maintenance are all<br />
factors that help to keep engines operating smoothly with<br />
leaded fuels.<br />
If the magneto check before or after flight reveals any<br />
roughness caused by a fouled spark plug, open the throttle<br />
slowly and smoothly to cruise RPM, and lean the mixture as<br />
far as possible (yet with a smooth engine). After several<br />
seconds leaned, return to the proper mixture position for<br />
takeoff and recheck the magneto. If two such attempts do not<br />
clear the fouled plug, then return to the line and report the<br />
problem to maintenance.<br />
Spark plugs should be rotated from top to bottom on a<br />
50-hour basis, and serviced on a 100-hour basis. If excessive<br />
spark plug lead fouling occurs, the selection of a hotter plug<br />
from the approved list in Service Instruction No. 1042 may<br />
be necessary. However, depending on the type of lead<br />
deposit formed, a colder plug from the approved list may<br />
better resolve the problem. Depending on the lead content of<br />
the fuel and the type of operation, more frequent cleaning of<br />
the spark plugs may be necessary. Where the majority of<br />
operation is at low power, such as patrol, a hotter plug would<br />
t<br />
LEAD FOULING<br />
DEPOSITS LEAST<br />
ADVERSE TO GOOD<br />
SPARK PLUG<br />
OPERATION<br />
I<br />
LEAD BROMIDE<br />
AND<br />
Combustion deposit fouling fundamentals<br />
be advantageous. If the majority of operation is at high<br />
cruise power, a colder plug is recommended.<br />
Spark plug fouling is not limited to engines that were<br />
certified for 80-octane aviation fuel, but which are using the<br />
higher leaded 100-octane gasoline. Therefore, the techniques
ecommended herein for operation and maintenance apply to<br />
all <strong>Lycoming</strong> piston engines, but with emphasis on the 80octane<br />
engine using 100-octane fuel.<br />
E. SUMMARY<br />
When Grade 80 aviation gasoline was first phased out,<br />
the highly leaded Grade 100 green fuel was the only alternative<br />
for some operators. During that period of time, in the<br />
middle 1970s, exhaust valve erosion was a concern for the<br />
operators of low compression engines. There are two reasons<br />
why this should not cause concern today. First, Grade 100LL<br />
does not cause this problem, and second, the newer materials<br />
used in Textron <strong>Lycoming</strong> exhaust valves for more than 15<br />
years are highly resistant to erosion.<br />
In addition, Grade 1OOLL has proved to be a satisfactory<br />
fuel for all Textron <strong>Lycoming</strong> reciprocating aircraft engines.<br />
The higher octane level does not change engine operating<br />
temperatures. and engine deposits on the spark plugs and in<br />
the oil can be managed by using the techniques outlined in<br />
previous paragraphs.<br />
Fuel Contamination<br />
With the increase in recent years of the number of fuel<br />
injectors on our engines, has been a number of complaints<br />
about a mysterious occasional engine "miss" in flight. We<br />
have been able to verify that the majority of these complaints<br />
on fuel injected powerplants are from contamination in the<br />
fuel - principally water. We have been telling operators for<br />
many years that fuel injectors and their systems are more<br />
vulnerable to contamination than are carburetors. Since<br />
water and other contaminants collect on the bottom of the<br />
airplane fuel tank, it also makes good sense not to make a<br />
practice of running a fuel tank dry.<br />
Careful draining of fuel sumps for water will help<br />
alleviate the "miss" problem. A sufficient amount of fuel<br />
must be drained to ensure getting the water. Experience<br />
indicates that draining should be accomplished before<br />
refueling because fuel servicing mixes the water and fuel,<br />
and the water may not have settled to the bottom of the tank<br />
until the airplane is airborne. Learn to identify suspended<br />
water droplets in the fuel which causes the fuel to have a<br />
cloudy appearance: or the clear separation of water from the<br />
colored fuel after the water has settled to the bottom of the<br />
fuel tank.<br />
The Flyer articles reprinted here provide product<br />
information. Informed pilots and mechanics<br />
contribute to safe flying.<br />
Do Not Use Automotive Gasoline In Textron<br />
<strong>Lycoming</strong> Aircraft Engines That are Certified<br />
for Aviation Gasoline<br />
Automotive Gasoline Could Be Dangerous To Your Health<br />
Reviewed June 1995<br />
In <strong>Lycoming</strong> Flyer No. 25, dated February 1976, we told<br />
operators not to use automotive gasoline in our aircraft<br />
engines, and listed seven reasons against its use. Service<br />
Letter No. L199, dated January 1983, reiterated that policy<br />
by stating: "Textron <strong>Lycoming</strong> does not approve the use of<br />
any fuel other than those specified in our latest edition of<br />
Service Instruction No. 1070. Although Supplemental Type<br />
Certificates (STC) now make the use of automotive fuel,<br />
which meets minimum specified standards, legal for use in<br />
some aircraft, reciprocating engine manufacturers and most<br />
major oil companies do not approve. While it is true that<br />
octane levels appear adequate, these organizations are of the<br />
opinion that the varying quality control standards applicable<br />
to automobile gasoline produce undue risk when it is used in<br />
aircraft. Several specific reasons are given for the nonapproval<br />
of automobile fuel:<br />
1. Its use reduces safety. Although an operator may find<br />
that the engine runs well on a specific grade of auto fuel,<br />
there is no assurance that fuel from the same tank will be of<br />
the same quality when purchased the next time. Risk is<br />
increased.<br />
2. Its use can void warranty, or result in cancellation of<br />
the owner's insurance.<br />
3. The storage characteristics of automotive fuel are less<br />
desirable in comparison with the good storage characteristics<br />
of aviation gasoline. After several months, stored automotive<br />
fuel may suffer loss of octane rating, and tends to deteriorate<br />
into hard starting, along with forming gum deposits that<br />
cause sticking exhaust and intake valves, and fuel metering<br />
problems, resulting in rough running engines. The turnover<br />
of automotive fuel is so fast that long-lasting storage<br />
characteristics are not required.<br />
4. The additives in automotive fuels are chemically<br />
different from those designed for aviation, and contain<br />
auxiliary scavengers which are very corrosive, and under<br />
continued use can lead to exhaust valve failures. They also<br />
cause rust and corrosion in the internal parts of the engine.<br />
The allowable additives for aviation gasoline are rigidly<br />
tested and controlled. There is no uniform control of<br />
additives in automotive gasoline. Many different additives<br />
are used, depending on the fuel manufacturer. For example,<br />
one fuel company adds a detergent to clean carburetors. This<br />
additive creates a significant increase in the affinity of the<br />
gasoline for water which can cause fuel filter icing problems<br />
in flight if outside temperatures are cold enough.<br />
5. Automotive fuels have higher vapor pressures than<br />
aviation fuel. This can lead to vapor lock during flight<br />
because the fuel companies advise that automotive fuels can
have double the vapor lock pressures of aviation gasoline,<br />
depending on the seasons of the year, and the location<br />
because of climatic conditions. In addition, automotive fuel<br />
also increases the possibility of vapor lock on the ground<br />
with a warm engine on a hot day.<br />
6. Although the fuel octane numbers shown on the pump<br />
of automotive and aircraft gasolines may be similar, the<br />
actual octane ratings are not comparable due to the different<br />
methods used to rate the two types of fuels. Furthermore,<br />
aviation gasolines have a lean and rich rating, i.e. 100/130,<br />
whereas motor gas is not tested for a rich rating.<br />
7. Automotive fuel used in an aircraft engine may lead to<br />
destructive detonation or preignition and potential engine<br />
failure at high power conditions.<br />
8. The actual Mo-Gas fuel requirements range from<br />
meeting ASTM or government specifications only in six<br />
states, to few or no minimum requirements in the remaining<br />
44 states, as opposed to the uniform strict requirements for<br />
aviation fuel.<br />
SUMMARY:<br />
Auto fuel is now being used as a substitute for Grade 80<br />
aviation gasoline under STC's issued by the FAA. Most<br />
major oil companies and engine manufacturers continue to<br />
recommend that aircraft piston engines be operated only on<br />
aviation gasoline. Deterioration of engine and fuel system<br />
parts have been reported in aircraft using auto fuel.<br />
Operators should consider the added risk of using auto fuel<br />
in aircraft. Remember - a pilot can't pull over to the side of<br />
the road when fuel creates a problem with the engine.<br />
Let's Talk Turbocharging<br />
The advent of the lightweight turbocharger has been<br />
called the shot of adrenaline which the piston engine needed<br />
to remain the prime method of powering general aviation<br />
type aircraft. Although in some respects this may be an<br />
overstatement, it does have much merit, and it is the<br />
lightweight turbocharger that has enabled general aviation<br />
aircraft to operate above adverse weather in the smooth air of<br />
the higher altitudes, and to realize the increased true air<br />
speed not possible with normally aspirated engines. So this is<br />
the "why" of turbocharging, and since it is possible that there<br />
is a turbocharged <strong>Lycoming</strong> engine in your present or future,<br />
we are going to review the very basics of turbocharging and<br />
bring the reader up to the present "state of the art" of it.<br />
The aircraft engine, as any reciprocating engine, is a heat<br />
engine which derives its power from the burning of a<br />
mixture of air and fuel, which has been mixed in the proper<br />
proportions by a fuel metering device. The amount of power<br />
the engine develops will be directly proportional to the total<br />
mass of air pumped through the engine, providing the<br />
fuel/air ratio is kept constant. This can be varied in a<br />
normally aspirated (unturbocharged) engine by changing the<br />
16<br />
throttle setting and/or changing the RPM. Let us go over that<br />
again. Changing the throttle will vary the manifold pressure<br />
available to the cylinder during the intake stroke. As a result<br />
the cylinder will develop a given amount of power on each<br />
power stroke. So if we increase manifold pressure to the<br />
cylinder, we will in turn receive more power from the<br />
engine. Now if we keep the manifold pressure constant, but<br />
increase the number of power strokes by increasing the<br />
RPM, we will also receive more power from the engine. We<br />
see that changing either the throttle setting (manifold<br />
pressure) or the number of power strokes per minute (RPM),<br />
will result in varying the total air mass flow through the<br />
engine and will determine the horsepower the engine will<br />
develop. So in essence, a reciprocating engine is also an air<br />
pump, and if the fuel/air ratio is kept constant the power<br />
developed will vary directly with the mass of air consumed.<br />
We are limited in the speed at which we can operate the<br />
engine because of engine and prop mechanical limitations.<br />
So the only other way to change the mass flow is to increase<br />
the manifold pressure. We all know, however, that as we<br />
ascend in altitude the air becomes less dense which reduces<br />
the mass flow through the engine with the result of a power<br />
loss that is proportional to the reduced mass air flow through<br />
the engine. You have noted that in climb with a normally<br />
aspirated engine, it is necessary to keep opening the throttle<br />
if you are to keep the air speed and the rate of climb<br />
constant. So we see that if there was a way we could put the<br />
engine into a container so it could be kept at sea level<br />
conditions, we could maintain the same performance<br />
regardless of ambient conditions and altitude.<br />
A long time ago, a smart engineer who was thinking<br />
along these same lines reasoned that if he built an air pump<br />
into the engine that could pump the less dense air at altitude<br />
up to the same pressure he had at sea level, he would be able<br />
to maintain sea level horsepower. So he designed a<br />
centrifugal air compressor and placed it between the fuel<br />
metering system and the intake pipes. The pump consisted of<br />
an impeller, diffuser and collector. The impeller was driven<br />
at about twelve times crankshaft speed and this high<br />
rotational speed imparted a large velocity of energy to the air<br />
passing through. Now as the fuel/air charge leaves the<br />
impeller, it goes to the diffuser where vanes smooth out the<br />
air flow while allowing the mixture to slow down so that the<br />
velocity pressure acquired from the rapid rotational speed of<br />
the impeller is transformed into static pressure. This air mass<br />
is then stored momentarily and equalized in the collector and<br />
is then drawn into the cylinders. Our engineer now has his<br />
air pump, but how was he to drive it? Well he could drive it<br />
from the accessory gear train or from the rear of the<br />
crankshaft, but both of these methods robbed the engine of<br />
horsepower it could deliver to the propeller. Although superchargers<br />
for many years have been driven mechanically off<br />
the crankshaft, our engineer realized he had not reached the<br />
ultimate in the "state of the art" of supercharging, so he<br />
began looking for another means of driving his air pump.
Our hypothetical engineer realized that the largest<br />
percent of energy released by burning the fuel/air mixture<br />
was going out of the exhaust pipe in the form of heat.<br />
Realizing if he could in some way harness this wasted<br />
energy to drive his air pump, the horsepower normally<br />
robbed from the engine to drive the impeller could be used<br />
by the propeller.<br />
We have all noted a windmill turning in the breeze, so<br />
our engineer rightfully reasoned if he put a turbine wheel in<br />
the exhaust stream he could take the hot exhaust gas under<br />
pressure and expand it as it passed through the wheel to<br />
extract energy. He took an impeller, connected it by a<br />
common shaft to the turbine and he had a means of driving<br />
his air pump by energy which was formerly going to waste.<br />
Supercharging by means of using exhaust gases to drive the<br />
air pump is called turbocharging. Now our engineer had<br />
progressed to the point where he required a means of<br />
controlling his turbocharger. As he climbed in altitude the<br />
pump must constantly put out a higher pressure ratio in order<br />
to maintain sea level conditions. He reasoned that if he can<br />
dump the exhaust gas at sea level through a butterfly valve in<br />
a leg off the exhaust pipe and ahead of the turbine wheel, he<br />
will be able to control the amount of energy being used to<br />
drive the turbine and thus control the speed of the<br />
compressor.<br />
The butterfly valve (wastegate) can be positioned by<br />
means of mechanical linkage, but the disadvantage in this<br />
system is that the engine can be overboosted, causing<br />
detonation and severe engine damage if someone "forgets"<br />
and leaves the wastegate in the closed position. So our<br />
engineer was looking for an automatic means for control<br />
which would eliminate someone putting "Murphy's Law"<br />
into practice. (Murphy's Law states that if something can be<br />
done incorrectly, someone is bound to do it.) So he came up<br />
with an automatic system that sensed compressor discharge<br />
pressure and positioned the wastegate to maintain the correct<br />
manifold pressure.<br />
The system contains two basic components. The<br />
controller, which senses the compressor discharge pressure<br />
and regulates engine oil pressure used as the muscle for the<br />
actuator on the wastegate. When the controller calls for more<br />
compressor discharge pressure, it closes the oil bleed line<br />
from the wastegate so the wastegate actuator sees higher<br />
engine oil pressure and thus closes the butterfly. When the<br />
compressor discharge pressure comes up to the desired<br />
control pressure, the controller will bleed oil from the<br />
wastegate to maintain the correct butterfly position which in<br />
turn will maintain the correct compressor discharge pressure.<br />
Now the system is complete and automatic and except in<br />
cases of poor or abrupt throttle management, it does not<br />
overboost.<br />
The automatic control system just described is basic, but<br />
it is the basis for most control systems used on <strong>Lycoming</strong><br />
engines. In another article we will also talk about the<br />
17<br />
changes required in an engine to make it suitable for<br />
turbocharging, and the difference between an engine<br />
designed for turbocharging and the one that has just had a<br />
turbocharger added. We will also discuss turbocharging to<br />
increase power at sea level instead of only using it to<br />
maintain sea level pressure at altitude. (See "The Pilot and<br />
Turbocharging").<br />
Information About <strong>Lycoming</strong> Approved Full-<br />
Flow Oil Filters<br />
Although Textron <strong>Lycoming</strong> publication SSP-885-1<br />
covers the latest information concerning full-flow oil filters<br />
for our engines, we feel it is also important to emphasize and<br />
explain key aspects of the publication to help people in the<br />
field. SSP-885-1 is concerned with full-flow oil filters in our<br />
direct drive engines, but does include one exception, the<br />
geared TIGO-541 which powers the Piper Pressurized<br />
Navajo.<br />
Operators and mechanics must carefully read SSP-885-1<br />
before handling the various types of <strong>Lycoming</strong> approved<br />
filters. Special note should be made of the differences of<br />
installing the AC vs. Champion filters. The AC is installed<br />
with the housing not turned, but with an attaching bolt<br />
through the center of the housing, torqued to 20-25 foot<br />
pounds.<br />
The Champion spin-on filter calls for a different<br />
installation in that the filter housing itself is turned to a<br />
torque of 18-20 foot pounds. Never exceed the maximum<br />
torque limit. Maintenance people in the field using both<br />
types of filters must be very careful during installation of this<br />
part.<br />
SSP-885-1 data includes the new Champion Full-flow<br />
Spin-On Filter. The latter is an added improvement over<br />
older methods of filtration, and is installed as optional<br />
equipment on all direct drive Textron <strong>Lycoming</strong> aircraft<br />
engines. Some of the advantages of the Champion Spin-On<br />
Filter include a resin impregnated paper that constitutes the<br />
filter element, which is heat cured, acid resistant, and<br />
capable of removing contaminants that would be injurious to<br />
the engine. The spin-on was designed to save weight and<br />
also shorten maintenance time, and is available in long and<br />
short sizes. There is no need to replace elements, O-rings,<br />
and various nuts and bolts and washers, or to clean the<br />
filtering units.<br />
All models of Textron <strong>Lycoming</strong> direct drive engines can<br />
be converted to use the <strong>Lycoming</strong> approved full-flow filter<br />
element or full-flow spin-on oil filter; however, before<br />
installing, check the distance between the firewall and the<br />
mounting pad on the accessory housing. Do not over-torque<br />
the filter at installation. After installation of the full-flow<br />
filter, always ground run the engine before flight and get oil<br />
temperature into the bottom of the green arc on the gage.
After a good runup, shut engine down and inspect the filter<br />
area for oil leaks. Also check engine oil level; addition of the<br />
filter assembly will require adding approximately one quart<br />
of oil.<br />
Along with the filter and converter (a simple converter<br />
kit is required with some engines), Champion has developed<br />
a new "can opener" service tool for the aviation mechanic.<br />
The tool easily cuts open the filter without contaminating it<br />
so the element can be examined for any signs of metal chips<br />
indicating engine deterioration.<br />
Before discarding the filter elements of the AC or the<br />
Champion filters, an examination of the filter element should<br />
be made by unfolding the pleated element and examining the<br />
material trapped for evidence of internal engine damage. In<br />
new or newly overhauled engines, some small particles of<br />
metallic shaving might be found; these are generally caused<br />
during manufacture and should not be cause for alarm.<br />
However, positive evidence of internal engine damage found<br />
in the filter element justifies further examination to<br />
determine the cause.<br />
To examine the AC filter element, remove the outer<br />
perforated paper cover, and using a sharp knife, cut through<br />
the folds of the element at both ends close to the metal caps.<br />
For examination of the Champion spin-on filter, Tool CT-<br />
470 must be used to cut the top of the can.<br />
Clean engine oil is essential to long engine life.<br />
Consequently, the quest for better ways to keep the<br />
lubricating oil free from contaminants is endless.<br />
Detonation And Preignition<br />
Although knowledge of detonation and preignition may<br />
be "old hat" to the old timers in aviation, lots of people in<br />
our industry are still somewhat confused over the difference<br />
between the two, and what causes either of them.<br />
DETONATION<br />
There is a limit to the amount of compression and the<br />
degree of temperature rise that can be tolerated within an<br />
engine cylinder and still permit normal combustion. When<br />
this limit is exceeded, detonation can take place. Piston<br />
engines are vulnerable to detonation at high power output<br />
because combustion temperature and pressure are, of course,<br />
higher than they are at low or medium powers. Leaning the<br />
mixture at high power can cause it.<br />
Unless detonation is heavy, there is no cockpit evidence<br />
of its presence. Light to medium detonation may not cause<br />
noticeable roughness, observable cylinder head or oil<br />
temperature increase, or loss of power. However, when an<br />
engine has experienced detonation we see evidence of it at<br />
tear down as indicated by dished piston heads, collapsed<br />
valve heads, broken ring lands, or eroded portions of valves,<br />
18<br />
pistons and cylinder heads. Severe detonation can cause a<br />
rough running engine and high cylinder head temperature.<br />
PREIGNITION<br />
Preignition, as the name implies, means that combustion<br />
takes place within the cylinder before the timed spark jumps<br />
across the spark plug terminals. This condition can often be<br />
traced to excessive combustion deposits or other deposits<br />
(such as lead) which cause local hot spots. Detonation often<br />
leads to preignition. However, preignition may also be<br />
caused by high power operation at excessively leaned<br />
mixtures. Preignition is usually indicated in the cockpit by<br />
engine roughness, backfiring, and by a sudden increase in<br />
cylinder head temperature. It may also be caused by a<br />
cracked valve or piston, or a broken spark plug insulator<br />
which creates a hot point and serves as a glow spot.<br />
Specifically, preignition is a condition similar to early timing<br />
of the spark. Preignition is a serious condition in the<br />
combustion chamber and will cause burnt pistons and tuliped<br />
intake valves.<br />
The best temporary in-flight methods for correcting<br />
preignition and detonation are to reduce the cylinder<br />
temperature by retarding the throttle, enriching the mixture,<br />
opening cowl flaps if available, or a combination of all of<br />
these.<br />
Nitriding -- What Is It?<br />
<strong>Lycoming</strong> Engineering, in their continuing effort to<br />
improve our engines, developed a better method of<br />
manufacturing hardened alloy steel cylinder barrels a<br />
number of years ago by means of a method known as<br />
nitriding. Simply described, the addition of nitrogen to the<br />
surface of an alloy steel produced a hard, wear-resistant<br />
surface. Commercially, the introduction of nitrogen into the<br />
surface layers of alloy steel is brought about by subjecting<br />
the practically finished parts to an atmosphere of ammonia<br />
gas. The process requires special heat treating furnaces<br />
which are air tight and capable of holding the parts at a high<br />
temperature. At this heat level (975°F), the ammonia gas<br />
flowing into the furnace is broken down into its elements of<br />
hydrogen and nitrogen, and this is the source of the nitrogen<br />
which penetrates the surfaces of the steel. In order to<br />
produce a satisfactory nitrided surface, the process must be<br />
operated for an extended period of time, generally from 25<br />
to 80 hours. Along with cylinder barrels, <strong>Lycoming</strong> nitrides<br />
all its crankshafts and some gears.<br />
The nitriding process applied to cylinder barrels has been<br />
thoroughly service tested in military as well as commercial<br />
service. After having been FAA type tested, we began<br />
production of engines using nitrided cylinders in 1960. The<br />
service record of these cylinders has been excellent. In fact,<br />
our management was so impressed with the favorable service<br />
record of the nitrided cylinder that they changed from
chrome to nitrided cylinders in all our higher powered<br />
turbocharged and supercharged engines. Some favorable<br />
characteristics of nitrided barrels are as follows:<br />
1. Reduced cylinder wall wear - the harder a surface the<br />
more difficult to wear down.<br />
2. Natural choked barrels provide improved piston ring<br />
life due to a resulting straight cylinder wall when engine is<br />
hot or operating, and a better job of sealing.<br />
3. Nitriding permits use of chrome plated piston rings,<br />
which are more wear resistant and quite compatible with<br />
hardened steel.<br />
4. Nitriding provides a hardened surface with an<br />
increased fatigue strength.<br />
5. It also has the ability to resist softening when<br />
excessively heated during engine operation.<br />
These worthwhile features in the powerplants have meant<br />
even longer operating life than standard steel barrels, and<br />
they mean dependability and economy.<br />
Now chrome plated cylinders cannot be obtained from<br />
the factory, but the identification specification for them has<br />
been an orange band around the cylinder base, or the<br />
equivalent. color on the edges of the top cylinder head tins<br />
between the two valve push rod shroud tubes. The color<br />
coding for the nitrided cylinders is azure blue and will<br />
appear in either of the two locations indicated above. The<br />
band around the cylinder base is used when cylinders are<br />
painted black as a separate operation prior to engine<br />
assembly. The color coding on the top edges of the cylinder<br />
head fins has been used on engines painted all gray after<br />
assembly.<br />
From the service standpoint on nitrided cylinders,<br />
there are three methods of handling an engine at<br />
overhaul.<br />
1. The barrels can simply be reworked and returned<br />
to service if they are not beyond service limits.<br />
2. The barrel can be reground and then chrome<br />
plated, hut the factory has achieved better results with<br />
nitriding and uses method three.<br />
3. The old cylinder may he discarded and replaced<br />
with a new one as in the <strong>Lycoming</strong> factory overhaul and<br />
remanufacture programs.<br />
CHROME VS. NITRIDING<br />
Either method provides a satisfactory hard wearing<br />
surface, but application of the chrome plate is a critical<br />
operation. Engines with chrome or nitride hardened barrels<br />
have a good wear characteristic, and are more rugged than<br />
standard steel barrels. In spite of hardened barrels, a good,<br />
properly maintained air filter is still a must. Pistons are<br />
moving up and down at a rate of more than two thousand<br />
times per minute, and when dirt or any abrasive is introduced<br />
into the combustion chambers, it causes a lapping process<br />
19<br />
which rapidly wears metal away. No engine can digest dirt<br />
and give a satisfactory service life.<br />
Compression Ratio - An Explanation As It<br />
Relates To Textron <strong>Lycoming</strong> Engines<br />
We aren’t attempting to make mechanics out of pilots by<br />
writing about compression ratio in aircraft engines, but we<br />
desire to help both groups by providing a simplified<br />
description as it relates to our engines.<br />
In order to gain a reasonable amount of work from an<br />
internal combustion engine, we must compress the fuel/air<br />
mixture during each power stroke. The fuel/air charge in the<br />
cylinder can be compared to a coil spring in that the more it<br />
is compressed, (within limits), the more work it is potentially<br />
capable of doing.<br />
Engineering tells us that the compression ratio of an<br />
engine is a comparison of the volume of space in a cylinder<br />
when the piston is at the bottom of the stroke to the volume<br />
of space when the piston is at the top of the stroke. For<br />
example, if there are 140 cubic inches of space in the<br />
cylinder when the piston is at the bottom and 20 cubic inches<br />
of space when the piston is at the top of the stroke, the<br />
compression ratio would be 140 to 20 or usually represented<br />
at 7:l.<br />
LOW COMPRESSION HIGH COMPRESSION<br />
Although we can create a more efficient engine by<br />
increasing the compression ratio, there are limits and a<br />
compromise is needed. If the pressure is too high, premature<br />
ignition will occur and produce overheating. Compression<br />
ratio is a controlling factor in the maximum horsepower<br />
developed by an engine, but it is limited by present day fuel<br />
grades and the high engine speeds and manifold pressures<br />
required for takeoff.<br />
Our normally aspirated engines are generally categorized<br />
as either low-compression or high-compression powerplants.<br />
In surveying the complete range of all <strong>Lycoming</strong> engine<br />
models, we note that compression ratios vary all the way
from a low 6.5:1 to a high of 10:1. Engineering has generally<br />
established the low-compression group as those with a<br />
compression ratio of 6.5:1 to 7.9:l; and the high-<br />
compression group from 8:l and higher.<br />
All <strong>Lycoming</strong> engines in the high-compression category<br />
require. a minimum of Grade 100LL (blue) or 100/130<br />
(green) octane, FAA approved aviation fuel, and nothing<br />
less. With high-compression engines we must stress the<br />
importance of the manufacturer’s recommendations as<br />
outlined in the Engine Operator’s Manual or in the Pilot’s<br />
Operating Handbook. These engines require not only the<br />
correct fuel, but the proper oil, precise timing and a good air<br />
filter. All are. very important in order to protect this high<br />
performance powerplant.<br />
“Watts” Horsepower<br />
by F. G. Rohm, Chief Qualification Engineer (Ret..)<br />
This interesting article was written for us by Fred<br />
Rohm, who was our Chief Qualification Engineer when<br />
he retired. Fred had a career of 44 years in the industry,<br />
with a majority of those years spent at Textron<br />
<strong>Lycoming</strong>. Most of his career at <strong>Lycoming</strong> was as Chief<br />
Experimental Engineer, which establishes his<br />
qualifications to author this kind of article.<br />
James Watt, Scottish physicist, had an engine problem<br />
even in 1769. Although steam engines had been invented<br />
before he was born, they were crude, inefficient machines<br />
and only a few were in use. So he had, after much<br />
experimental work, developed a relatively efficient<br />
condensing steam engine, the forerunner of the present day<br />
type.<br />
Being a good business man, Watt tried to sell his engine<br />
to coal mine operators who were then using draft horses to<br />
supply power to drive the pumps which kept the mines free<br />
of water. But the mine owners had sales resistance! They<br />
insisted on knowing exactly how many horses each engine<br />
would replace, or, in other words, the horsepower of the<br />
engine. How much work would his steam engine do? This,<br />
then, was James Watt’s problem.<br />
Although simple machines such as sailing vessels,<br />
windmills, and waterwheels had been used for centuries,<br />
Watt realized that for the most part, the majority of work in<br />
the world had been done by man and his domesticated<br />
animals. Work was measured and paid for by the day, from<br />
“sun to sun”. With the advent of reliable clocks, work was<br />
then accounted and paid for by the hour. Evaluating work by<br />
this time method, it was assumed that all men and animals<br />
could and did perform the same amount of work. This was<br />
far from being true.<br />
Watt realized that in order to have his steam engine used<br />
by the coal mine operators he would have to answer their<br />
questions - “how much work will it do, and how many men<br />
20<br />
and horses will it replace?” Since the “power” of one horse<br />
was a generally known and a constant quantity, he would<br />
have to determine the “power” of his engine in order to<br />
compare it with the horses which it was to replace. His<br />
problem then was to define “power.”<br />
Power did not mean force. The mine owners cared<br />
nothing about the force Watt’s engine might exert. They<br />
wanted to know how fast the engine would pump water out<br />
of the mine; in other words, how fast will the engine do the<br />
work? Simply, that was the definition of “power.”<br />
The methodical physicist experimenting with draft horses<br />
used to operate mine pumps found that, on an average, a<br />
horse pulling with a force equal to a weight of 150 pounds<br />
Cut-Away Of A Four Cylinder<br />
Power Plant<br />
FRONT VIEW OF A FOUR CYLINDER<br />
<strong>TEXTRON</strong> LYCOMING POWER PLANT.<br />
SIDE VIEW OF THE<br />
FOUR CYLINDER ENGINE.
walked 2 1/2 miles per hour. Since work is force exerted<br />
through a given distance, it is measured in terms of feet<br />
pounds. Thus, on an average, one horse could do work at the<br />
rate of 33,000 feet pounds per minute or 550 feet pounds per<br />
second.<br />
Watt's definition for one horsepower, which has now<br />
become universal, was, therefore, the doing of work at the<br />
rate of 33.000 feet pounds per minute. Today, all<br />
conventional power producing units are rated on this basis.<br />
The 250-horsepower engine in the modern light plane is<br />
capable of doing work at the same rate as that of 250 average<br />
horses. From an interested engineer's point of view, it is<br />
capable of moving 137,500 pounds of weight one foot in one<br />
second. Yet, what a difference there is in its size and weight<br />
(approximately 400 pounds) when compared to the horses it<br />
replaces!<br />
Your Engine And The Fixed Pitch Propeller<br />
The effect the propeller has on engine operation and on<br />
aircraft performance is quite significant. Based on questions<br />
which have been asked by aircraft owners and from<br />
experience gained at the Textron <strong>Lycoming</strong> service hangar.<br />
there are several areas of propeller related information which<br />
may be of interest.<br />
Aircraft equipped with a fixed pitch propeller will<br />
usually have static RPM (full throttle with aircraft standing<br />
still) limitations and full power in flight RPM limitations<br />
spelled out in the Pilot's Operating Handbook. If static RPM<br />
is below the minimum specified, the engine could be low in<br />
power. However, experience has shown that this is not<br />
always true. Faulty induction air systems and/or faulty<br />
exhaust systems have been shown to contribute to<br />
indications of low power. A propeller which is ever so<br />
slightly less than perfect may cause the static RPM to be<br />
outside the designated full throttle static RPM zone. In<br />
addition to these other factors, it is not unusual to find a<br />
tachometer which is inaccurate. If an incorrect static RPM<br />
reading is observed during the engine check, any one or all<br />
of these components could be at fault. The tachometer may<br />
be the easiest to check as there are hand-held devices that<br />
quickly give an RPM reading that will verify the accuracy of<br />
the standard aircraft instrument. Knowing the accuracy limits<br />
of the aircraft tachometer may eliminate the need for further<br />
examination of the engine and propeller, or it may confirm<br />
the need for further troubleshooting. In any case, consider<br />
each component of the system before blaming low static<br />
RPM reading on one of them.<br />
Another aspect of operation with a fixed pitch propeller<br />
came in the form of a question from a <strong>Lycoming</strong> engine<br />
owner. He indicated that the propeller provided by the<br />
airframe manufacturer had been exchanged for a cruise<br />
propeller. (This exchange should only be done with FAA<br />
21<br />
approval.) With the new cruise propeller is use, an increase<br />
in fuel usage was soon apparent. Operating costs increased<br />
and an explanation was requested.<br />
It is well known that the amount of horsepower taken<br />
from an engine will have a direct relationship to the amount<br />
of fuel used. Therefore, it can be deduced that use of the<br />
cruise propeller increased the horsepower requirement. This<br />
deduction deserves some additional explanation.<br />
As an example, the standard propeller supplied with an<br />
aircraft may allow the engine to develop 180 horsepower at<br />
2700 RPM at full throttle, in flight at sea level, with a<br />
standard temperature. The <strong>Lycoming</strong> 0-360-A Series<br />
normally aspirated engine illustrates this example.<br />
Next, let us assume that this same engine/propeller<br />
combination is operated at 75% power with a "best<br />
economy" fuel air mixture setting. Again, assume sea level<br />
and standard temperature to simplify and standardize the<br />
discussion. Seventy-five percent power will require about<br />
2450 RPM with a brake specific fuel consumption of .435<br />
pounds per brake horsepower hour. Also, 75% of the 180<br />
rated horsepower is equal to 135 horsepower. Fuel usage at<br />
this power and mixture setting will be 58.7 pounds per hour<br />
or 9.8 gallons per hour. The mathematics to arrive at this fuel<br />
usage are simple:<br />
180 HP X 75% of power = 135 HP<br />
135 HP X .435 BSFC = 58.7 lbs. of fuel<br />
58.7 lbs. of fuel - 6 lbs. per gal. = 9.8 gal. per hour<br />
Having made some assessments about what can happen<br />
with a standard propeller, now we will try to see what<br />
happens when a cruise propeller is installed in place of the<br />
original. The first thing we must know about the cruise<br />
propeller is that it has more pitch than the standard propeller.<br />
This means it will take a bigger "bite" of air than the original<br />
propeller with each revolution. This bigger bite of air will<br />
have an effect on aircraft performance and on how the<br />
engine may be operated.<br />
Taking a bigger bite of air increases the resistance to the<br />
turning propeller. Perhaps it may be easiest to imagine what<br />
happens by considering your hand when held in the air<br />
stream outside a moving automobile with the palm forward<br />
as compared to having the side of the hand forward. Because<br />
of this increased resistance, the static RPM will be lower<br />
than with the original propeller. The same thing will be true<br />
when full throttle, in flight RPM, is compared to that of the<br />
standard propeller at a similar altitude and temperature. This<br />
will reduce takeoff performance of any aircraft. Using the<br />
earlier example, the engine was rated at 180 horsepower at<br />
full throttle and 2700 RPM. Now, in spite of applying full<br />
throttle, the increased resistance reduces the maximum<br />
attainable RPM to something less than 2700. As a result of<br />
not developing the rated 2700 RPM, the engine also will not<br />
develop the power for which it was rated. Since maximum<br />
power is less than full rated, aircraft performance will suffer.
This should be considered before a fixed pitch propeller is<br />
chosen or exchanged for a different model.<br />
At this point we must return to the original question.<br />
Why does the engine require more fuel with the cruise<br />
propeller? It is an accepted fact that the cruise propeller is<br />
more efficient for cruise operation, so it would not be<br />
unusual to follow this line of thinking. Seventy-five percent<br />
of rated power, using the original propeller at sea level and<br />
standard temperature, required a throttle setting to achieve<br />
2450 RPM. Therefore, without more thoughtful<br />
consideration, it seems logical that the cruise propeller might<br />
also be set for 2450 RPM when 75% power is desired. Of<br />
course there is an increase in performance, but this can be<br />
attributed to the more efficient cruise propeller. Next comes<br />
the realization that the improved cruise performance isn't all<br />
efficiency. Instead of 9.8 gallons of fuel, the engine is now<br />
using a greater amount of fuel per hour. For purposes of this<br />
illustration, let us assume that the number is 11 GPH. By<br />
reversing the mathematics used earlier, it is possible to<br />
estimate the horsepower and percentage of power actually<br />
being used as a result of operating the cruise prop at 2450<br />
RPM with a best economy fuel air mixture.<br />
11 GPH X 6 lbs. per gallon = 66 pounds<br />
66 pounds + .435 BSFC = 151.7 horsepower<br />
151.7 HP 180 rated HP = 84.3% of power<br />
Assuming a fuel usage of 11 gallons per hour for this<br />
problem provides a reasonably realistic example of the<br />
change that a different fixed pitch propeller might create. It<br />
also illustrates the need for pilots to change their habits when<br />
a propeller is changed. In addition to the change of habits,<br />
the discussion shows a real need to reevaluate the takeoff,<br />
climb, and cruise performance of an aircraft if the fixed pitch<br />
propeller is changed for a different model.<br />
Another very important point concerns leaning.<br />
Remember that <strong>Lycoming</strong> recommends leaning to best<br />
economy only at 75% of rated horsepower or less. It is very<br />
possible that leaning to roughness or to peak on the EGT<br />
gage could cause serious damage if the engine is actually<br />
producing more than 75% of rated horsepower as shown in<br />
this illustration.<br />
With this information as background, it is easy to see that<br />
setting a desired power with a fixed pitch propeller can only<br />
be accomplished if the pilot has a chart that applies to the<br />
specific aircraft/engine/propeller combination. Although the<br />
power chart for a new aircraft may come from data obtained<br />
by test flying with a calibrated torque meter, a fairly accurate<br />
chart can be derived for any fixed pitch propeller and engine<br />
combination. Briefly, this is done by finding the maximum<br />
available RPM at any particular altitude and applying data<br />
from the propeller load curve.<br />
To conclude, the purpose of this article is to make readers<br />
more aware of some operational aspects of the fixed<br />
pitch propeller. Usually it is only necessary to accept the<br />
22<br />
material provided by the airframe manufacturer and to use<br />
the engine/propeller as directed. If a propeller change is<br />
made, or on those rare occasions when we question the<br />
power available to the propeller, the material presented here<br />
could prove to be helpful.<br />
Induced Engine Damage<br />
From time to time a field service report states that an<br />
engine has damage. After further examination of the engine,<br />
this damage may be classified as "induced damage." To<br />
clarify what is meant by this term, induced engine damage is<br />
a failure or unsatisfactory condition which results from<br />
operational or maintenance practices employed after the<br />
engine is placed in service. Although there are a variety of<br />
conditions which may fall into the induced damage category,<br />
this article will discuss two particular types of failure and the<br />
circumstances which can induce them.<br />
Examination of an engine that is reported to have low<br />
compression, loss of power, erratic operation, metal<br />
contamination, or even complete engine stoppage may result<br />
in a determination that pistons are burned or valves<br />
stretched. (Stretched valves are sometimes said to be<br />
tuliped.) These two types of damage can be initiated in a<br />
number of ways, but the chain of events is often the same;<br />
detonation is followed by preignition and the engine damage<br />
has begun. To prevent burned pistons and tuliped (or<br />
stretched) valves, action must be taken to eliminate the<br />
possibility of detonation and preignition.<br />
Detonation is a phenomena which can occur in any<br />
internal combustion engine. The possibility of detonation<br />
cannot be completely eliminated. By definition, detonation is<br />
a violent explosion. When used with reference to a spark<br />
ignition internal combustion engine like the Textron<br />
<strong>Lycoming</strong> aircraft piston engines, detonation indicates<br />
abnormal combustion. Essentially, detonation is an<br />
uncontrolled explosion of the unburned gases in the engine<br />
combustion chamber. Some engines are more susceptible to<br />
detonation than others. For example, turbocharged engines<br />
are more susceptible than similar non-turbocharged models<br />
and engines with higher compression ratios are more likely<br />
to exhibit detonation than engines with lower compression<br />
ratios.<br />
Detonation may occur in an aircraft engine as a result of<br />
maintaining a manifold pressure that is too high for the<br />
specific engine speed and mixture setting being used. The<br />
engine power (i. e. speed and manifold pressure) and mixture<br />
settings recommended in the Pilots' Operating Handbook<br />
(POH) for a particular aircraft model have been determined<br />
by a detonation survey. These surveys use special<br />
instrumentation to detect and record detonation as it occurs.<br />
Based on these surveys, the detonation limiting conditions<br />
are defined. Data from the surveys indicate that detonation<br />
occurs in varying degrees; it is sometimes possible to operate
an engine for relatively long periods in the first minor phase<br />
of detonation without inducing damage. Textron <strong>Lycoming</strong><br />
does not recommend or condone engine operation which<br />
even approaches conditions which might cause detonation.<br />
The laboratory quality equipment used for the detonation<br />
survey is not practical for use in an aircraft engaged in<br />
normal flight operations. Without this equipment, the pilot<br />
may not know that detonation is occurring, and it is<br />
impossible to establish the fine line between the first phase<br />
of minor detonation and the detonation magnitude which<br />
induces preignition and/or engine damage. For this reason it<br />
is imperative that power and mixture recommendations of<br />
the POH be carefully observed.<br />
Preignition is a circumstance that causes destructive<br />
engine damage and will be examined here briefly. Most<br />
<strong>Lycoming</strong> engines are designed for ignition of the fuel/air<br />
mixture at 20 crankshaft angle degrees before the piston<br />
reaches top dead center during the compression stroke. Some<br />
engine models specify ignition at 18o, 23, or 25 before top<br />
dead center. If ignition of the fuel/air mixture occurs before<br />
the scheduled point in the operational sequence of events,<br />
preignition exists and the compression stroke continues as<br />
the burning fuel/air mixture is trying to expand. This subjects<br />
the combustion chamber and pistons to temperatures and<br />
pressures far in excess of those experienced during normal<br />
combustion. These excessive temperatures and pressures<br />
cause damage to pistons and valves. In some cases both<br />
burned pistons and stretched valves will be found in an<br />
engine which has been subjected to preignition.<br />
Considering the millions of hours flown each year in<br />
piston powered aircraft, engine damage from detonation and<br />
preignition is quite rare. The infrequency of the happening<br />
means little if your engine is the one affected. Therefore it<br />
seems appropriate to look more closely at some of the factors<br />
which lead to detonation and preignition.<br />
The possibility of overboost is a characteristic of all<br />
supercharged and turbocharged engines. Generally,<br />
overboost means the application of manifold pressure which<br />
exceeds the limit specified by the manufacturer. Early<br />
versions of the manually controlled turbocharger allowed<br />
quite a few pilots to inadvertently induce damage by<br />
overboost. With this system, the turbocharger wastegate was<br />
normally left full open for takeoff; full throttle would<br />
produce 28 to 30 inches of manifold pressure. After takeoff<br />
at full throttle, gradual closing of the wastegate would slowly<br />
increase turbocharger speed and manifold pressure to<br />
maintain climb power to cruise altitude or to the critical<br />
altitude of the engine. The system worked fine until the<br />
wastegate was inadvertently left in the closed position. If the<br />
pilot then applied full throttle for takeoff or a go-round, it<br />
could produce 60 inches or more of manifold pressure and<br />
failure of the engine.<br />
More recent turbocharger installations usually include a<br />
pressure relief valve and/or an automatic wastegate control<br />
23<br />
which helps to avoid the possibility of overboost. Even with<br />
these protective devices, it is still possible to overboost by<br />
rapid throttle operation and/or inattention to limiting<br />
manifold pressures at low engine speeds.<br />
Automatic controllers may not be capable of preventing<br />
overboost if full throttle operation is attempted before engine<br />
oil is warmed up sufficiently. Textron <strong>Lycoming</strong> Service<br />
Instruction 369F addresses the problem of overboost and<br />
recommends, depending on the severity and duration of the<br />
overboost, a log book entry, engine inspection, or complete<br />
engine overhaul including replacement of the crankshaft.<br />
As stated earlier, ignition of the fuel/air mixture must<br />
take place at precisely the right time. A spark plug which has<br />
been dropped, or damaged in some other way, may induce<br />
preignition by causing a "hot spot" in the combustion<br />
chamber which self-ignites the fuel/air mixture. This could<br />
also occur from use of unapproved spark plugs. Flight with<br />
defective magnetos or flight in excess of certified aircraft<br />
limits may allow cross firing within the magneto, improperly<br />
sequenced ignition of the fuel/air mixture, and engine<br />
damage. Proper magneto to engine timing is also an<br />
important factor. The timing is affected by wear and<br />
therefore should be checked and reset at specified intervals.<br />
Regular, meticulous spark plug and magneto maintenance<br />
will help to avoid preignition and possible engine damage<br />
from these sources.<br />
Although overboost and incorrect ignition timing are<br />
causes of induced engine damage, this damage can often be<br />
attributed to fuel and the fuel/air mixture. The first problem<br />
related to fuel is simply having improper fuel in the aircraft<br />
tanks. A piston powered aircraft refueled with jet fuel would<br />
have a fuel blend with greatly reduced octane level. A piston<br />
engine should not be started when even small amounts of jet<br />
fuel have been added to aviation gasoline because engine<br />
contamination and detonation are likely: attempted flight<br />
under these conditions will certainly result in destructive<br />
detonation and preignition. The use of 80 octane aviation<br />
fuel in an engine certified for 100 octane aviation fuel will<br />
produce similar results.<br />
The lubricating oil may be a source of octane reducing<br />
fuel contamination. Excessively worn piston rings may allow<br />
enough oil into the combustion chamber to dilute the fuel/air<br />
mixture. The dilution will reduce the octane rating of the fuel<br />
and can lead to detonation and engine damage. While this<br />
scenario is not entirely typical of the engine that uses large<br />
amounts of oil because of worn or broken piston rings, it is<br />
possible for this situation to occur.<br />
Even the use of 100 octane fuel in an engine in good<br />
mechanical condition does not eliminate all the possibilities<br />
of induced engine damage. Most engines operated at takeoff<br />
power or at a power setting in the high cruise range need a<br />
relatively rich fuel/air mixture to help cool the engine and<br />
reduce possibilities of detonation. Since lean fuel/air<br />
mixtures and high power settings promote detonation, it is
ecommended that <strong>Lycoming</strong> engines not be leaned at power<br />
settings which produce more than 75% of rated engine<br />
power unless this operation is approved in the POH. The<br />
pilot, by simply leaning the mixture excessively at power<br />
settings above the cruise ranges, may be responsible for<br />
inducing the detonation and preignition which leads to<br />
tuliped valves and burned pistons.<br />
And finally, a small amount of dirt in the fuel system<br />
may be responsible for clogging a fuel injector nozzle or<br />
nozzles. A partially clogged fuel injection nozzle will reduce<br />
fuel flow to that cylinder and will cause a lean fuel/air<br />
mixture. A nozzle which is partially clogged in an aircraft<br />
that has a pressure operated fuel flow indicator will cause<br />
that indicator to display a higher than normal fuel flow.<br />
Leaning in an attempt to correct the high indicated fuel flow<br />
will result in an even leaner mixture in the affected cylinder.<br />
Again it is possible that a burned piston or tuliped valve will<br />
be the final result.<br />
Understanding and avoiding those factors which lead to<br />
induced engine damage is certainly preferable to the<br />
discovery of tuliped valves or burned pistons in your engine.<br />
This entire discussion is aimed at promoting an<br />
understanding which will allow pilots and maintenance<br />
personnel to direct their efforts to those elements which will<br />
reduce the possibility of induced engine damage. Observing<br />
the refueling of the aircraft and checking the fuel system for<br />
indications of contamination are tasks expected of the pilot.<br />
Meticulous management of power and fuel/air mixture as<br />
recommended by the POH is also a pilot activity which will<br />
enhance the possibility of avoiding induced damage.<br />
Maintenance personnel play an equally important role.<br />
Troubleshooting a fuel injected engine for rough idle may<br />
lead to the cleaning or changing of partially clogged fuel<br />
injector nozzles. Damage could result if the engine were<br />
operated at takeoff or climb power with reduced fuel flow to<br />
one or more cylinders. A close check of magneto timing and<br />
magneto condition at regular inspection intervals will help to<br />
insure the continued satisfactory operation of any engine.<br />
There are some "after-the-damage" factors that<br />
maintenance personnel should consider. Suppose that a<br />
power loss has been reported. A compression check reveals<br />
low compression; a stretched or tuliped valve may be found.<br />
This is an indication that the engine has experienced<br />
detonation and preignition. A borescope examination should<br />
be conducted to see if a piston has been burned. A burned<br />
piston often results in damage to cylinder walls and piston<br />
skirts; it also may contaminate the engine with metal<br />
particles. There is no healing process for this damage. In<br />
some cases it is possible to repair the engine by removing the<br />
metal contamination from the engine and oil system,<br />
including the oil cooler, and by replacing all damaged parts,<br />
but often it is necessary to replace the entire engine. If an<br />
engine is to be repaired, it must be remembered that<br />
repairing the damage is not enough; the cause of the<br />
24<br />
malfunction which induced detonation and preignition must<br />
also be found and corrected. Did a magneto malfunction<br />
produce ignition outside the normal firing sequence? Were<br />
manufacturer-approved spark plugs installed in the engine?<br />
Did a cracked spark plug induce preignition? Was an<br />
approved fuel used, and if so, is there evidence of fuel<br />
contamination? Whatever the malfunction, it must be<br />
corrected along with the damage or the same problem could<br />
reoccur.<br />
To conclude, induced damage in the form of tuliped<br />
valves and burned pistons can usually be avoided by<br />
understanding the sequence of events which lead to this form<br />
of engine damage. Careful attention to detail is required of<br />
pilots and maintenance personnel. Compared to the expense<br />
of repairing or replacing a damaged engine, it is worth the<br />
time and effort necessary to avoid induced engine damage.<br />
The Whistle Slot<br />
We often tend to believe-what we know, everyone<br />
knows. While participating in a flight instructor refresher<br />
recently, a young lady from Maine provided a reminder that<br />
this is often not the case.<br />
This lady and her husband fly in Maine throughout the<br />
year. During the winter, they and their aircraft are frequently<br />
exposed to extremely cold temperatures During the past<br />
winter, they had an unfortunate experience. The end of the<br />
engine breather tube froze over, a pressure build up occurred<br />
in the crankcase, and the crankshaft nose seal ruptured. The<br />
oil leak that resulted covered the aircraft with oil from nose<br />
to tail. Fortunately, a safe landing was made before all oil<br />
was lost.<br />
As she related her story, another flight instructor quickly<br />
indicated that he had also experienced the same problem<br />
several years earlier. The safe landings in both cases are<br />
good news. The bad news is the expense incurred to repair<br />
the engine.<br />
An incident like this is preventable, and for that reason it<br />
is important that we repeat ourselves from time to time. We<br />
should not assume that everyone knows about the "whistle<br />
slot" or other methods of insuring adequate crankcase<br />
venting.<br />
First, the cause of this incident. Moisture is expelled from<br />
the engine crankcase through the breather tube which often<br />
extends through the bottom of the engine cowling into the air<br />
stream. Under very cold conditions, this moisture may freeze<br />
and continue a buildup of ice until the tube is completely<br />
blocked.<br />
It is normal practice for the airframe manufacturer to<br />
provide some means of preventing freeze-up of the<br />
crankcase breather tube. The breather tube may be insulated,<br />
it may be designed so the end is located in a hot area, it may
e equipped with an electric heater, or it may incorporate a<br />
hole, notch or slot which is often called a "whistle slot." The<br />
operator of any aircraft should know which method is used<br />
for preventing freezing of the breather tube, and should<br />
insure that the configuration is maintained as specified by<br />
the airframe manufacturer.<br />
Because of its simplicity, the "whistle slot" is often used.<br />
Although the end of the tube may extend into the air stream,<br />
a notch or hole in the tube is located in a warm area near the<br />
engine where freezing is extremely unlikely. When a<br />
breather tube with whistle slot is changed, the new tube must<br />
be of the same design. Replacing a slotted tube with a nonslotted<br />
tube could result in an incident like the one described<br />
by the lady from Maine.<br />
The Flyer may have carried information on this subject in<br />
the past, but the reminder from someone who had an<br />
unfortunate incident prompted this story. Preventing possible<br />
freezing of the crankcase breather tube by use of a whistle<br />
slot or other means is an important little detail which all of<br />
our readers should be aware of. Many may benefit from the<br />
knowledge.<br />
Welding Is Not Recommended<br />
If you are told that a cylinder head on your engine should<br />
be welded because of a crack, think long and hard about the<br />
step you are about to take. The argument is that it is less<br />
expensive to recondition a cylinder head than to buy a new<br />
one. This is true when the only consideration is getting your<br />
aircraft back in the air as cheaply as possible. For the long<br />
run, welding the aluminum parts of an aircraft engine to<br />
repair cracks may not be a permanent solution, and may<br />
cause you many headaches.<br />
The recommendation to replace rather than weld is based<br />
on years of experience and thousands of examinations in the<br />
Textron <strong>Lycoming</strong> Metallurgical Laboratory. Based on this<br />
experience, the vast knowledge of the individuals who work<br />
in this Met Lab should not be ignored. The brief explanation<br />
that follows will attempt to relate some of this experience<br />
and to explain why welding is not generally recommended.<br />
Starting with two very basic but critical items in the<br />
welding process, we look at the material to be welded and<br />
the welder. The material is an aluminum alloy, and it takes<br />
more than just a very good welder to successfully weld<br />
aluminum. The experience in qualifying welders at the<br />
factory shows that only the most outstanding can pass the<br />
annual FAA qualifying examination for Aircraft Certified<br />
Welder. Even a good welder may leave tungsten in the weld.<br />
This causes it to be unsatisfactory.<br />
Even an expert welder with complete knowledge of the<br />
aluminum alloy material cannot assure a satisfactory weld in<br />
a cracked engine part. There are many inherent pitfalls over<br />
which the welder has no control. Cylinder heads are made of<br />
25<br />
aluminum alloy. Cracks sometimes occur inside the dome<br />
area. The metallurgists consider repair by welding to be<br />
absolutely foolish, and their experience provides them with<br />
good reasons. The surface area in the dome is affected by a<br />
thermochemical attack-to put it simply, corrosion. This<br />
corrosion is a form of oxidation that will not fuse properly<br />
during welding. It is not practical to remove all of the<br />
corrosion because this would entail remachining the entire<br />
interior surface which would change the designed<br />
compression ratio of the engine. In an effort to weld this<br />
area, those who do it make an effort to clean the crack<br />
thoroughly. Unfortunately, this is of little help because the<br />
area adjacent to the cleaned out crack will still be affected by<br />
thermochemical attack. Because this corrosion will not allow<br />
the weld to fuse completely, new cracks are almost certain to<br />
occur.<br />
Thermochemical attack is not something we can see. To<br />
the novice, a welded crack in a cylinder head may look great.<br />
It may not even be possible to identify the weld. But when<br />
the part is dissected by a metallurgist for examination under<br />
a high-powered microscope, the weld, the poor fusion, and<br />
cracks around the weld are immediately identified.<br />
Based on this explanation, readers should now<br />
understand why Textron <strong>Lycoming</strong> does not recommend the<br />
welding of cracks in cylinder heads. These cracks usually<br />
occur as the result of fatigue over long hours of use, and the<br />
odds of achieving long-term satisfaction by welding are<br />
extremely remote. If you are buying an aircraft, watch out<br />
for the engine with reconditioned cylinders that have been<br />
repaired by welding, and if you own an engine which has<br />
experienced cracks, remember that you probably are wasting<br />
money by having those cracks welded. Experience has<br />
shown that replacement of these parts is likely to be most<br />
economical and is likely to cause fewer headaches over the<br />
long run.<br />
Look What They Are Doing To Our Engines<br />
Modification of aircraft, and the engines that power<br />
them, is a very popular activity today. Magazine articles<br />
frequently tell us of the wonderful changes which occur<br />
when a modification has been incorporated; unfortunately,<br />
these articles and those who develop and sell modifications<br />
often do not touch on the detrimental side effects which may<br />
result from the modification. Without question, there are<br />
modifications which are well engineered and which provide<br />
a positive benefit. The problem is that when we get excited<br />
about the prospects of the benefit side, we tend to forget that<br />
there is no free lunch - we don't get the benefit for nothing.<br />
The purpose of this discussion is to point out some of the<br />
hidden problems and costs of engine modification.<br />
Before getting to specifics, it would be well to establish a<br />
background for this discussion. Think for a moment about<br />
how heavily you rely on that <strong>Lycoming</strong> engine every time
you fly. How can you be so comfortable, and so sure the<br />
engine will continue to give you power for flight hour after<br />
flight hour? Isn't it the excellent reputation of the company,<br />
and the solid engine that you place your confidence in? This<br />
does not mean that absolute perfection has been achieved.<br />
Any mechanical device may malfunction, wear out, or at<br />
some time cause a problem for its owner. All of these things<br />
may occasionally apply to a <strong>Lycoming</strong> reciprocating engine,<br />
but we know that any problem we experience with a factory<br />
engine will probably not be life threatening.<br />
Did this reputation for reliability just happen? No, it is<br />
the result of more than 60 years of experience with aircraft<br />
engines. That does not mean that the same individuals who<br />
engineered the <strong>Lycoming</strong> engines of the 1930s and 1940s are<br />
still at <strong>Lycoming</strong>. It does mean that their experience has<br />
been passed on. What has been learned from thousands and<br />
thousands of hours of test-stand running and engineering<br />
flight tests over all of those years provides a solid data base<br />
of knowledge which is used to insure that a certified<br />
<strong>Lycoming</strong> engine is a safe and reliable device when operated<br />
and maintained as recommended by the manufacturer.<br />
With this background, take a look at some of the<br />
modifications being advocated today: for example, "Change<br />
pistons and increase the compression ratio of the engine."<br />
This does increase the horsepower an engine is capable of<br />
producing. It is a tactic <strong>Lycoming</strong> engineers have used for<br />
years. Any <strong>Lycoming</strong> engine with a compression ratio of<br />
8.00:1 or higher requires 100 octane aviation gasoline and<br />
has undergone extensive flight testing to establish an<br />
adequate detonation margin.<br />
An individual or company who proposes to make your<br />
engine more powerful, by whatever means, will usually<br />
concentrate on selling the benefits the modification will<br />
bring. You have an airplane powered by a <strong>Lycoming</strong> 0-235-<br />
K, L, or M engine, for example, and are told that by simply<br />
changing the pistons it will be possible to get your aircraft<br />
off the ground more quickly, to climb faster, and to cruise<br />
faster. This sounds wonderful, and it is true. You ask, why<br />
didn't <strong>Lycoming</strong> make the engine like this to start with? Well<br />
remember this, it was made that way, but it proved to be less<br />
than satisfactory.<br />
By looking at the engine model certification sequence,<br />
we find that the 0-235-engine started as a low compression<br />
engine. The C and E models had a compression ratio (CR) of<br />
6.75:1 and used 80 octane aviation gasoline. Knowing that<br />
higher compression ratios (CR) increase engine efficiency<br />
and that 100 octane fuel would help to prevent detonation at<br />
the higher CR, <strong>Lycoming</strong> certified the 0-235-F and G models<br />
in 1971. The 9.70:1 CR gained 10 horsepower, allowing the<br />
new models to be certified at 125 HP. It did not take long to<br />
find that although these engines ran well in the test cell,<br />
installing them in aircraft and turning them over to pilots in<br />
the field produced poor results. Failure to follow critical fuel<br />
management procedures resulted, in some cases, in<br />
26<br />
detonation, preignition, and burned pistons. Not many of<br />
these engines were installed in airplanes.<br />
The next step for <strong>Lycoming</strong> was to find a compromise<br />
between a 6.75:1 and a 9.70:1 CR which provided acceptable<br />
performance and increased detonation margin. The testing<br />
which followed led to certification of the 0-235-K, L, and M<br />
series engines with a CR of 8.50:1. When the recommended<br />
100 octane aviation gasoline is used in these engine models,<br />
burned pistons are rarely ever encountered.<br />
The 0-235 is just one example of an engine being<br />
modified to something <strong>Lycoming</strong> engineers already know<br />
will demand much closer attention to proper operating<br />
technique than the original. An individual called the factory<br />
recently and said that he intended to modify a 290<br />
horsepower 10-540 engine by replacing the 8.70:1 CR<br />
pistons with 10.00:1 CR pistons. This engine would certainly<br />
produce more horsepower, but there are at least three<br />
problems. First, the modified engine would not be a certified<br />
model and therefore could only be used in an airplane which<br />
is operated in the EXPERIMENTAL category. Second, the<br />
engine would require a full rich mixture setting over much of<br />
its operating envelope in order to avoid detonation. And<br />
third, <strong>Lycoming</strong> models certified for more than 290<br />
horsepower are designed with a heavier crankshaft. Both the<br />
higher horsepower with the lighter crankshaft and the<br />
increased exposure to detonation make the engine less<br />
reliable. This is a modification which is unacceptable in view<br />
of <strong>Lycoming</strong> experience.<br />
The point of this discussion is to show our readers that<br />
<strong>Lycoming</strong>, as a company, has expended a great deal of<br />
effort, and has gained a great deal of experience. The result<br />
is engine models which generally can be expected to operate<br />
reliably as they are certified. When it is suggested that one of<br />
these engines should be modified by installing high<br />
compression pistons, remember that it was done years ago<br />
with poor results. When a modifier with much less<br />
experience than <strong>Lycoming</strong> proposes a change that is almost<br />
certain to produce the same poor results, <strong>Lycoming</strong> is<br />
concerned for the engine owner who may believe that this<br />
simple change can have no harmful effect.<br />
Another favorite modification is the add-on turbocharger.<br />
Are there benefits which become available when this is<br />
done? Of course, and anyone who might consider adding a<br />
turbocharger will be well aware of those benefits as well as<br />
the price of the installation. But will they be aware of hidden<br />
costs, such as the possibility that a turbocharger may cause<br />
problems which will void the engine warranty, or that<br />
modifications to any engine invalidate manufacturer TBO<br />
recommendations? At first glance, these policies may seem<br />
somewhat unfair to the engine owner who wants to add a<br />
turbocharger. But again, the engine manufacturer must rely<br />
on the lessons learned from many years of experience.<br />
The first Textron <strong>Lycoming</strong> model to be turbocharged<br />
was FAA certified in 1961. Since that time, about 60
additional turbocharged engine models have been certified.<br />
The factory turbocharged engine has a number of design<br />
features not usually included on factory-built, normally<br />
aspirated engines. These features are incorporated to help the<br />
engine withstand the additional heat and pressure generated<br />
by the turbocharger and to reduce the possibility of<br />
detonation. Low compression pistons help to deal with<br />
detonation. Valves and valve guides are made of materials<br />
that are more heat resistant. Heat is also carried away from<br />
the pistons by oil that is delivered to the back of the piston<br />
by oil squirts placed in the engine especially for this purpose.<br />
And finally, before an airframe is certified with any factory<br />
engine, the fuel flow and detonation characteristics of that<br />
engine are carefully checked. This detonation survey insures<br />
that power settings specified in the Pilots Operating<br />
Handbook provide an adequate margin so that detonation<br />
and associated engine damage will not occur under any<br />
normal operating circumstances.<br />
When a Supplemental Type Certificate (STC) is issued to<br />
allow addition of a turbocharger to a <strong>Lycoming</strong> engine, the<br />
high-compression pistons usually stay in the engine and oil<br />
squirts are often not available for cooling. On the surface, it<br />
may seem that maintaining a manifold pressure of 30 inches<br />
or less should cause the engine to operate about the same as<br />
a normally aspirated engine. In fact, the engine runs much<br />
hotter because the turbocharger heats the air as it compresses<br />
it. Because the turbocharger must work harder and harder as<br />
the air becomes less dense with an increase in altitude, the<br />
engine may run very hot during climb and during cruise at<br />
altitude. The hot running engine with high compression<br />
pistons must depend heavily on excess fuel for cooling: this<br />
makes correct leaning a critical pilot task. Over the years,<br />
<strong>Lycoming</strong> has received numerous reports of burned pistons<br />
in engines that have field installed turbochargers. From this,<br />
and for the reasons stated earlier, it has been concluded that<br />
in many cases there has been no detonation survey or the<br />
survey did not provide enough data to establish reliable<br />
power setting and leaning procedures. It can be very<br />
expensive to learn about the detrimental effects a<br />
turbocharger may have on an engine after the installation is<br />
already in your airplane.<br />
If you are considering the addition of a turbocharger to<br />
your <strong>Lycoming</strong> engine, be prepared to ask a lot of hard<br />
questions (a list is printed with this article) before putting<br />
your money and your engine on the line. You can help<br />
yourself by obtaining a copy of FAA Advisory Circular<br />
23.909-1. The subject of this AC is "Installation of<br />
Turbochargers in Small Airplanes with Reciprocating<br />
Engines." This circular reinforces previous paragraphs of<br />
this article when it states that "induction air temperature may<br />
become critical at altitude because of the increased<br />
compression of air required" and "the addition of the<br />
turbocharger to an engine not specifically designed for it<br />
may affect carburetor inlet and induction air temperature to<br />
APPRECIABLY REDUCE THE DETONATION<br />
27<br />
MARGIN." Several other related items in the AC include<br />
such statements as detonation characteristics may be<br />
unsatisfactory, a new recommended overhaul period should<br />
be established, the standard diaphragm type fuel pump is not<br />
adequate to supply a turbocharged engine with fuel under all<br />
operating conditions, and the change in the engine power to<br />
altitude relationship should be evaluated to determine if<br />
propeller certification is valid.<br />
Advisory Circular 23.909-1 also mentions the installation<br />
of an intercooler, another popular addition to the<br />
turbocharged engine installation. The AC warns of several<br />
items that must be considered when an intercooler is<br />
installed. It recommends careful evaluation of changes to<br />
engine power, cooling characteristics, operating limits, and<br />
operating procedures. It also states that addition of an<br />
intercooler is likely to significantly affect engine<br />
horsepower.<br />
If engineered and controlled properly, an intercooler<br />
installation can provide benefits such as a cooler running<br />
engine and higher altitude capability. Engine owners should<br />
be wary of an add-on intercooler installation from which<br />
improved takeoff and climb performance are claimed. Only<br />
increased power can improve takeoff and climb<br />
performance, and this would indicate that rated engine power<br />
is being exceeded as a result of the power generated from<br />
cooler induction air. To stay within the FAA certified limits<br />
for the engine, manifold pressure and/or RPM settings may<br />
need to be reduced when an intercooler is installed. The<br />
exact power settings to be used can only be determined by<br />
extensive in-flight testing and careful torque meter<br />
measurement of the power being produced. If this is not<br />
done, the reliability of the engine becomes questionable.<br />
This is the reason that Textron <strong>Lycoming</strong> Service Instruction<br />
No. 1009 states, "Reliability and average service life cannot<br />
be predicted when an engine has undergone any<br />
modification not approved by Textron <strong>Lycoming</strong>."<br />
Polishing and porting is yet another fad which is<br />
receiving a great deal of attention these days. If you are sold<br />
on the idea that this type of engine modifying is done in<br />
automobile racing circles all the time, consider that the TBO<br />
on an automobile racing engine may be less than 100 hours;<br />
would you be satisfied if that were all you could expect from<br />
your aircraft engine? Magazine advertisements have claimed<br />
that cylinder porting will add five horsepower per cylinder.<br />
If the added five horsepower per cylinder is a fact, this<br />
engine is outside its certified limits and would be illegal<br />
except in an experimental category aircraft.<br />
What modifications can be made to a cylinder to achieve<br />
the power increases that are claimed? Polishing alone might<br />
improve airflow and efficiency slightly, but it is not likely<br />
that this improvement would change the power of the engine<br />
enough to be noticeable in the aircraft performance. To go a<br />
step further, if the cylinder head ports were ground out just a<br />
bit, a larger charge of fuel and air would generate additional
power. Again, this kind of change would affect the legal<br />
certification of the engine. It would also affect reliability<br />
because less material in the cylinder head results in reduced<br />
strength. A recent report in the aviation press indicates that at<br />
least two sets of cylinders subjected to this procedure were<br />
found to be unairworthy when inspected by A & P<br />
mechanics and FAA inspectors. One of these sets of<br />
cylinders had been flown at least through a normal engine<br />
break-in period. Cracks were found in the port areas of these<br />
cylinders when they were inspected.<br />
To conclude, this article is not intended to discourage<br />
innovation. It is meant to educate readers who can easily see<br />
and understand the benefits of an engine modification, but<br />
who may not be aware of the effect a modification can have<br />
on reliability and life expectancy of the engine. Years of<br />
experimentation and thousands of engines in the field have<br />
given <strong>Lycoming</strong> engineers and service representatives an<br />
excellent knowledge of what will work, and what will not<br />
work. This knowledge comes from problems and failures as<br />
well as successes. It is from this experience that reliable<br />
engine models are developed. The information shared in this<br />
article is provided to help engine owners. If you own a<br />
<strong>Lycoming</strong> engine and are contemplating a modification of<br />
any kind, use the list of questions provided to help get all the<br />
facts. Be sure you are completely satisfied that the<br />
modification will leave you with an engine which is legal,<br />
safe, and reliable.<br />
Questions To Ask The Engine Modifier<br />
As stated in the companion article "Look What They Are<br />
Doing To Our Engines," a <strong>Lycoming</strong> engine owner should<br />
ask questions before agreeing to an engine modification. The<br />
purpose of this brief discussion is to provide background and<br />
specific questions. The various modifications have one item<br />
in common - they generally propose to improve some or all<br />
of the aircraft performance envelope. This generally<br />
translates to getting more power from the engine than it was<br />
designed for. As a result, there are similar questions to be<br />
asked about each of the various types of modifications.<br />
These may help you:<br />
GENERAL<br />
1. Will the modification cause the engine to produce<br />
more horsepower? How much?<br />
2. If the answer to No. 1 is no, why modify?<br />
3. If the answer to No. 1 is yes, is the modified engine<br />
legal for the aircraft in which it was originally certified?<br />
4. Has the modification been tested thoroughly enough so<br />
that the modifier can define a reduced TBO? Has the new<br />
TBO been stated in writing?<br />
28<br />
5. Will the modifier pick up warranty on the engine after<br />
it is modified? What are the terms of that warranty and are<br />
they stated in written form?<br />
COMPRESSION RATIO INCREASE<br />
1. Ask to see all data from the detonation survey.<br />
a. Are detonation characteristics satisfactory?<br />
b. How do fuel flow schedules compare with those<br />
for the unmodified engine?<br />
2. Since torsional vibration levels will be affected, was a<br />
survey done to insure that new characteristics are acceptable?<br />
a. If no survey was done - why?<br />
b. If survey was done, are the results acceptable?<br />
3. Was a survey done to determine the cooling margin<br />
during climb? Is the margin still sufficient?<br />
4. Will a new power setting chart be provided?<br />
TURBOCHARGER ADD-ON<br />
1. Has a detonation survey been done for your aircraft<br />
model?<br />
2. Has a cooling climb survey been done for your aircraft<br />
model?<br />
3. What does the data from surveys in question 1 & 2<br />
show? Ask to see the data and have it explained.<br />
4. If engine power changes at any altitude, is the<br />
propeller certification still valid?<br />
5. Does the modification replace the low pressure fuel<br />
pump with a fuel pump capable of delivering the higher fuel<br />
pressure needed for a turbocharged installation?<br />
6. If your engine has a compression ratio higher than<br />
8.5:1, do leaning instructions reflect the critical fuel<br />
management procedures necessary to avoid detonation?<br />
INTERCOOLER ADD-ON<br />
1. Are new power setting charts available?<br />
2. Do these charts recommend lower power settings to<br />
compensate for the additional power generated by cooler<br />
intake air?<br />
If you are an engine owner contemplating an engine<br />
modification, these questions should be answered to your<br />
satisfaction since the reliability and longevity of your engine<br />
may be affected. Should you desire assistance or have<br />
questions about engine modifications, call <strong>Lycoming</strong>. We<br />
will be happy to provide assistance if possible. <strong>Lycoming</strong><br />
engineering 717-327-7142.
Engine Balance<br />
After certifying hundreds of flat, opposed cylinder<br />
aircraft engines, and after building more than a quarter<br />
million engines for general aviation, is it possible that<br />
<strong>Lycoming</strong> engineers have not learned what it takes to<br />
produce an engine that is properly balanced? Many engines<br />
have been tested over the years and a great deal of data is<br />
available to support the building of engines to factory<br />
specifications. To put it simply, the subject of engine balance<br />
is well understood by <strong>Lycoming</strong> and is a consideration in the<br />
design and manufacturer of all <strong>Lycoming</strong> engines.<br />
These statements are contrary to what has been implied<br />
by several advertisements and magazine articles. Glowing<br />
reports have appeared in several industry publications; they<br />
say your <strong>Lycoming</strong> engine would be so much better if you<br />
would just take the time and spend the money to have it<br />
"custom balanced". The implication is that the manufacturer<br />
knows nothing about balancing an engine and simply throws<br />
the parts together without consideration of the importance of<br />
balancing. This is absolutely false. <strong>Lycoming</strong> engines are<br />
very carefully balanced to the degree that is necessary. They<br />
are not balanced to a point of absolute perfection because<br />
they run at relatively low speeds (compared to some<br />
automobile engines) and therefore do not require the degree<br />
of balancing being advocated by shops that deal in this<br />
specialty.<br />
To justify this excessive emphasis on balancing, the<br />
automobile racing engine is often cited as another place<br />
where balancing is important. This is like comparing apples<br />
to oranges; the two types of engines are not the same. A<br />
typical <strong>Lycoming</strong> direct drive engine is red-lined at 2700 or<br />
2800 RPM while an auto racing engine may operate at more<br />
than three times this speed.<br />
In order to delve into the subject a little deeper, several<br />
questions were directed to the Senior Analytical Engineer at<br />
<strong>Lycoming</strong>. His responses may help those who have doubts<br />
about the quality of engine balancing done at the factory.<br />
Several <strong>Lycoming</strong> engine components are dynamically<br />
balanced. For non-engineers, that means that the proper<br />
balance is determined while the part is in motion; it is<br />
spinning as it would be during operation. These parts are the<br />
starter ring gear supports and the crankshaft. In addition,<br />
dynamic counterweights are statically balanced to control the<br />
location of the very critical center of gravity.<br />
Balance also includes the control of weights for a number<br />
of moving engine components. Items such as piston pins,<br />
piston plugs, and piston rings are 100% machined to close<br />
tolerances that provide consistent weights. There are three<br />
types of piston plug, and although they are interchangeable,<br />
each type must be used as a set because of their weight<br />
difference. The weight of dynamic counterweights is also<br />
carefully controlled.<br />
29<br />
A second aspect of engine balancing is accomplished by<br />
matching some engine parts by weight. Pistons and<br />
connecting rods are in this category. Both of these parts are<br />
organized in matched sets, by weight, before installation in a<br />
<strong>Lycoming</strong> engine. Should it be necessary to replace one of<br />
these matched parts during the service life of the engine,<br />
there is a system to keep the balance within specified<br />
tolerances. (See "Notes on Replacing Rods or Pistons" in the<br />
Maintenance Section of this book.)<br />
Perhaps the engineering answer to other questions may<br />
be enlightening - or to the non-engineers, confusing. The<br />
point is, <strong>Lycoming</strong> engineers are well aware of what is<br />
needed to make a <strong>Lycoming</strong> engine safe and reliable for the<br />
long TBO times that are recommended for these engines.<br />
Thousands of hours of engine testing followed by days and<br />
weeks of data analysis provide the basis for the <strong>Lycoming</strong><br />
engine design.<br />
The engineering answer as to why there is a need for<br />
matching and balancing of engine parts in this: "As a matter<br />
of sound design practice, matching and balancing<br />
components will load crankshaft bearings in a predictable<br />
manner and reduce the reaction loads at the engine mounts."<br />
Just as we suspected -- right!<br />
Since those engineers did such a good job on that last<br />
question, another was ventured, "Is there any danger or<br />
problem with additional balancing by non-factory<br />
activities?" Those of us who are pilots will understand some<br />
of the response, but it will take those who speak the language<br />
of engineering to comprehend the rest. Here it is: "There are<br />
occasions when dynamic balance of the prop/engine<br />
combination can provide reduced first order vibration, but<br />
additional internal balancing of <strong>Lycoming</strong> engines is not<br />
required nor recommended. The rotating and reciprocating<br />
masses of the six and eight cylinder opposed engines are<br />
inherently balanced. The rotating masses of the four cylinder<br />
opposed design are balanced. The reciprocating masses of<br />
the four cylinder engine are not balanced as a vibratory<br />
inertia moment at second order exists in the plane of the<br />
cylinder center lines. Matching the weights of components<br />
closer will not reduce the second order moment. A redesign<br />
incorporating counter rotating layshafts rotating at twice<br />
engine speed could be implemented.<br />
"Additional internal balancing contributes little to<br />
engine smoothness, and it may even be harmful when<br />
material is removed from highly stressed parts of the<br />
engine."<br />
To summarize, these are the points we have attempted to<br />
communicate by providing information about the balancing<br />
of <strong>Lycoming</strong> reciprocating engines. First, <strong>Lycoming</strong><br />
engineers have acquired vast amounts of data through years<br />
of engine testing. This knowledge is used to insure that<br />
<strong>Lycoming</strong> engines are carefully balanced during<br />
manufacture. It is also used to formulate a system which<br />
allows satisfactory engine balance to be maintained when
weight matched parts are replaced during the operational life<br />
of the engine. The engine balancing done by <strong>Lycoming</strong> is<br />
part of an organized system which is intended to provide a<br />
high-quality product.<br />
The second point is that additional internal custom<br />
balancing is not recommended by <strong>Lycoming</strong>. It simply is not<br />
necessary, and therefore engine owners would be well<br />
advised to save their money.<br />
Fuel Injector or Carburetor<br />
From time to time, there is a question about the<br />
advantages of a fuel injection system over a carburetor. That<br />
is probably the wrong way to approach the matter when there<br />
is a choice to be made. Each of these methods of fuel<br />
metering has its own unique set of characteristics. It may be<br />
helpful to consider the advantages or disadvantages of each<br />
system.<br />
First, consider why we need a carburetor or fuel injector<br />
as a part of any engine. Both devices provide a means of<br />
delivering a metered amount of fuel to be mixed with a<br />
measured volume of air. This is necessary because<br />
combustion can only occur when the air/fuel mixture falls<br />
within a given range. The extreme outside limits of this<br />
range are approximately 20:1 at the lean end and 8:1 on the<br />
rich end. For practical purposes, the operational air/fuel<br />
mixture range for most air cooled <strong>Lycoming</strong> engines will fall<br />
between 16:1 at lean and 10:1 when operating at full rich.<br />
Obviously, both the fuel injector and the carburetor are<br />
capable of metering within these limits.<br />
The float type carburetor is a device which mixes fuel<br />
with air and has been used for many years. It has the<br />
advantage of being relatively simple. There is no diaphragm<br />
or springs - in general, very few moving parts. Installation<br />
on the engine is simple. All of this adds up to the significant<br />
advantage of being the least costly method of fuel metering.<br />
One additional item should also be considered. The fuel lines<br />
to a carburetor are large enough that there is little chance of<br />
them becoming clogged by the very tiny particles of foreign<br />
matter that may be found in the fuel.<br />
Along with these advantages, the disadvantage frequently<br />
attributed to the carburetor is its inherent capability for<br />
developing ice in the vicinity of the throttle plate. For the<br />
pilot who understands and recognizes carburetor icing, this<br />
disadvantage is of little consequence since all certified<br />
aircraft are required to have a carburetor air heating system<br />
which will prevent or eliminate icing.<br />
Since the fuel injector is more complex and expensive<br />
than a carburetor, why should it be considered? Because the<br />
fuel injector has its own set of advantages which in some<br />
cases are worth the additional cost.<br />
30<br />
First, the fuel injector causes air and fuel to be mixed at<br />
the cylinder intake port. Therefore, the refrigeration type<br />
icing that occurs in a carburetor venturi when fuel vaporizes<br />
in moist air cannot happen when a fuel injector is used for<br />
fuel metering. Many pilots consider this to be a significant<br />
advantage.<br />
The primary characteristic of the fuel injector is<br />
improved fuel distribution to each cylinder. This feature<br />
reduces the possibility of one cylinder operating at a very<br />
lean air/fuel mixture while another may be operating near the<br />
rich end of the mixture scale. The improved distribution<br />
allows leaning that results in slightly lower overall fuel<br />
consumption. This is of particular value in the higher<br />
horsepower engines where saving a small percentage of the<br />
fuel being burned may result in a significant dollar savings.<br />
Finally, the fuel injector will meter fuel regardless of its<br />
attitude while a float type carburetor can only operate in an<br />
upright position. This advantage, of operating in any attitude,<br />
makes the fuel injector an ideal fuel metering device for the<br />
engine that is designed for aerobatics.<br />
The "Same Engine" Myth<br />
Questions that frequently are asked of <strong>Lycoming</strong> sales<br />
personnel, engineers, and technical representatives indicate<br />
that there is a myth regarding <strong>Lycoming</strong> piston engines. This<br />
myth seems to be prevalent among aircraft owners and<br />
aviation writers. In the minds of these individuals, each<br />
<strong>Lycoming</strong> engine series is essentially the same. For example,<br />
all 360 cubic inch displacement engines are inherently the<br />
same except for differences in fuel metering or<br />
turbocharging. The idea that these engines are the same is<br />
false. A few specific examples may help to put this myth to<br />
rest.<br />
<strong>Lycoming</strong> builds 0-320 engines that produce 150 HP or<br />
160 HP. The 150 HP O-320-E series engines operate at a<br />
compression ratio of 7.0:1. The 0-320-D series has high<br />
compression pistons which raise the compression ratio to<br />
8.5:1, and increase rated output to 160 HP. Those who<br />
believe that the pistons are the only difference in these<br />
engines will be disappointed when they plan to upgrade their<br />
0-320-E to the higher horsepower by simply changing<br />
pistons. Many models in the 0-320-E series were designed<br />
for the purpose of keeping the cost down. Thousands of<br />
these low compression engines were built with plain steel<br />
cylinder barrels instead of the nitrided barrels used in the 0-<br />
320-D series engines. They also had two narrow bearings<br />
instead of one long front main bearing. The engines were<br />
certified at 150 HP and were not intended to withstand the<br />
additional stress of higher horsepower.<br />
Because of the similarity in designation, it would be easy<br />
to believe that the 0-360-A1A and the IO-360-A1A are the<br />
same engine except that the first engine has a carburetor and
the second a fuel injection system. Here are some features of<br />
each engine for comparison. The 0-360-A1A has a bottom<br />
mounted updraft carburetor, parallel valves, 8.5:1<br />
compression ratio, and produces 180 HP. The IO-360-AIA<br />
features a horizontal front mounted fuel injector, angle<br />
valves, 8.7:1 compression ratio, and is rated at 200 HP. The<br />
IO-360-A1A also incorporates these design items which are<br />
not included in the 0-360: piston cooling nozzles, stronger<br />
crankshaft, tongue and groove connecting rods with stretch<br />
bolts, tuned intake system, and rotator type intake valves.<br />
There are actually few similarities except for the 360 cubic<br />
inch displacement.<br />
There are individuals who have suggested that by putting<br />
10:1 compression ratio pistons in an IO-360 engine, it could<br />
be the same as the HIO-360-D1A. These are some<br />
characteristics of the HIO-360-D1A helicopter engine that<br />
can be compared with the data on the 10-360 listed in the<br />
previous paragraph. To start, the HIO has conical rather than<br />
dynafocal mounts. The main bearing is a thick wall bearing<br />
instead of the thin wall, high crush bearing used in the I0-<br />
360. Other differences include: crankshaft designed for small<br />
crankpins, high speed camshaft, rear mounted RSA7AA1<br />
fuel injector, large intake valves, and torsional vibration<br />
damper magneto drives.<br />
Finally both the Navajo engines and the new<br />
turbocharged <strong>Lycoming</strong> used in the Mooney TLS are<br />
equipped with differential and density controllers that<br />
automatically set the maximum allowable horsepower when<br />
the throttle is advanced fully for takeoff. Some who have not<br />
taken the time to compare these engines have jumped to the<br />
conclusion that the TIO-540-AF1A which powers the<br />
Mooney TLS is simply a derated Navajo engine. This<br />
conclusion could hardly be more inaccurate. The most<br />
obvious difference, even to the complete novice can be seen<br />
by looking at the rocker box covers. The TIO-540-AFIA is<br />
rated at 270 HP and has parallel valve down exhaust<br />
cylinders. The Navajo series has three engines at 310 HP,<br />
325 HP, and 350 HP. All have cylinders designed with up<br />
exhaust and angle valves. Other differences respectively in<br />
the 270 HP AF1A and the Navajo series engines are: small<br />
main bearing instead of large main bearing, 8.0:1<br />
compression ratio rather than 7.3:1, intercooled and nonintercooled,<br />
pressurized Slick magnetos versus Bendix/TCM<br />
magnetos, and an RSA5AD1 fuel injector in place of the<br />
RSA10AD1 injector. There are some other differences, but<br />
those comparisons listed should convince even the most<br />
skeptical that these engines are vastly different.<br />
By making comparisons of various parts and accessories<br />
used in engine models which some individuals have<br />
considered to be much the same, it is possible to illustrate the<br />
differences. Although some <strong>Lycoming</strong> models are closely<br />
related, this cannot be assumed. A review of the engineering<br />
parts list for each engine model by a knowledgeable<br />
individual is the only sure way of establishing similarities<br />
and differences. For those who may have been taken in by<br />
31<br />
the myth that all <strong>Lycoming</strong> engines of a particular<br />
displacement are very much the same, you are now armed<br />
with a better knowledge of this subject.<br />
The Unfortunate Choice<br />
There are many who look for an aircraft engine on the<br />
open market. While there is nothing wrong with this<br />
approach to acquiring a needed powerplant, it sometimes<br />
results in a purchase that is an unfortunate choice. Perhaps a<br />
little information on the possible pitfalls may help to reduce<br />
the number of bad choices.<br />
Individuals working on home-built aircraft are<br />
particularly susceptible to this type of error. At <strong>Lycoming</strong>,<br />
there have been many calls from people who grabbed an<br />
engine that seemed to be an exceptionally good deal -only to<br />
find that this "engine of their dreams" would not fit into the<br />
aircraft they are building.<br />
Consider the circumstances which lead to these<br />
problems. The person looking for an engine is usually<br />
building an aircraft from his own plans or from a kit supplied<br />
by a kit manufacturer.<br />
In the latter case, a particular engine model is often<br />
recommended. Finding that model engine available and for<br />
sale on the open market may be virtually impossible.<br />
<strong>Lycoming</strong> requires an exchange engine core of the same<br />
model for any overhauled or remanufactured engine ordered.<br />
Since the home builder is starting from scratch, there is no<br />
core to exchange. This means a new engine is the only<br />
readily available option; for many this option is prohibitively<br />
expensive.<br />
As the airframe begins to take shape, obtaining a suitable<br />
engine may be reason for some concern and anxiety. When a<br />
<strong>Lycoming</strong> 0-320, 0-360, or other engine with appropriate<br />
horsepower rating is found, there is a temptation to buy now<br />
and ask questions later. This could be a serious mistake.<br />
The article "Low-Time Engine May Not Mean Quality<br />
and Value" that appears next in this booklet explains that old<br />
engines with low time are frequently affected by internal rust<br />
and corrosion. Any engine that is not used frequently should<br />
be preserved. The condition of the engine is just one of the<br />
items to be considered when acquiring a power plant in the<br />
resale market.<br />
Other mistakes often involve the engine model.<br />
Unfortunately there are those who believe that all <strong>Lycoming</strong><br />
0-320 engine models are alike, and that all <strong>Lycoming</strong> 0-360<br />
engine models are also very similar. The <strong>Lycoming</strong><br />
certificated aircraft engine list shows 58 0-320 models and<br />
51 0-360 models. While these engines may be similar in<br />
many respects, it is the differences that are likely to cause<br />
installation problems. These differences should be well<br />
understood before an engine is purchased.
What are the differences that may cause installation<br />
problems? The engine mounts should be considered. Older<br />
engine models were built with conical mounts that make<br />
installation somewhat easier, but which do not dampen<br />
engine vibration as well. With very few exceptions, engines<br />
certified during the 1970s and 1980s have dynafocal mounts.<br />
Although the type of engine mount is not likely to be a<br />
serious problem, the shape of the sump, the location of the<br />
carburetor, or an engine mounted oil filter may result in<br />
airframe interference which makes installation of a particular<br />
engine model difficult or impossible. Some aircraft, for<br />
example, do not have enough space between the engine and<br />
the fire wall for an engine mounted oil filter. In the case of<br />
an engine with a single unit dual magneto, there is nothing<br />
that can be done since the filter is a required part of the<br />
engine design. All <strong>Lycoming</strong> engines with two individual<br />
magnetos can be configured to operate without an oil filter.<br />
Should an oil filter and the space needed to remove it be the<br />
only problem in adapting this type of engine to an airframe,<br />
the filter and adapter can be removed and an oil pressure<br />
screen housing can be installed instead. Should this step be<br />
necessary, the recommended oil change interval is reduced<br />
to 25 hours. A second option would involve removing the<br />
filter from its standard location and mounting it remotely.<br />
Engine to firewall is not the only area where space may<br />
be limited. The sump is often tailored in size and shape to<br />
meet the requirements for a particular airframe. For that<br />
reason the home-builder may find that some engine models<br />
will not fit the plane being built because of interference. As<br />
if this were not enough to be concerned about, the carburetor<br />
or fuel injector location must also be considered. These fuel<br />
metering devices are frequently mounted under the engine in<br />
an updraft configuration, but there are also front and rear<br />
mounted configurations. Some engine models are equipped<br />
with horizontal carburetors. All of these variations in model<br />
may have an effect on engine/airframe fit.<br />
Another error in choice which occurs all too frequently is<br />
the purchase of an engine originally designed for a high wing<br />
aircraft when the builder has a low wing design under<br />
construction. The low wing needs a fuel pump, but the high<br />
wing usually delivers fuel to the carburetor by gravity. In<br />
most cases a fuel pump cannot be added to the engine<br />
because the drive mechanism was not built in during engine<br />
manufacture and the accessory housing was not machined to<br />
allow mounting of a fuel pump.<br />
As a result of contacts with individuals who have made<br />
engine purchases for their aircraft, we know that the<br />
variations in engine configuration outlined in this article<br />
have resulted in problems. The purpose of bringing these<br />
issues to the attention of Flyer and <strong>Key</strong> <strong>Reprints</strong> readers is to<br />
help them avoid making the same mistakes others have<br />
made. If a particular engine model has been recommended<br />
by a kit manufacturer, it is best to search out that model.<br />
Although similar, other engine models may not meet your<br />
32<br />
needs. When buying a used engine in the open market, do<br />
not make an unfortunate choice - get it right the first time.<br />
Low-Time Engine May Not Mean Quality and<br />
Value<br />
Reading the "Aircraft for Sale" advertisements can be<br />
interesting and misleading. As aviation-oriented people, we<br />
are conditioned to look for certain bits of information which<br />
we believe will allow us to evaluate the product offered for<br />
sale. In the case of airplanes, this information can generally<br />
be segregated in three categories - airframe, avionics, and<br />
engine. For purposes of this article, you are on your own<br />
with respect to airframe and avionics. There does seem to be<br />
information on engines which cannot be emphasized too<br />
strongly.<br />
Engine information is usually provided as hours of<br />
operation since new or from some major maintenance event.<br />
For example, 700 TTSN would indicate that this aircraft and<br />
engine have been flown for 700 hours since new from the<br />
factory. Other, but not all, engine related abbreviations<br />
include SMOH (hours since major overhaul, SPOH (hours<br />
since prop overhaul), STOH (hours since top overhaul), and<br />
SFRM (hours since factory remanufacture). Assuming that<br />
the recommended TBO of the engine being considered is<br />
1800 or 2000 hours, it would appear that hours of use in the<br />
400- to 800-hour range would automatically make this<br />
engine a very valuable commodity. Unfortunately this is not<br />
always true, and therefore an advertisement like those<br />
discussed earlier may state numbers and facts which are<br />
absolutely correct, but still misleading.<br />
Consider a situation which occurred recently. A<br />
<strong>Lycoming</strong> IO-360 engine with less than 700 hours since new<br />
was reported to be using oil at the rate of two-thirds quart per<br />
hour and losing oil pressure during flight. On closer<br />
examination, it was determined that deterioration and wear<br />
had caused metal contamination throughout the engine. An<br />
engine overhaul was necessary and it included replacement<br />
of items such as the camshaft, oil pump gears, and pistons.<br />
Why should an engine with less than 700 hours since new be<br />
in this sad state?<br />
It should be apparent that the number of hours the engine<br />
has operated is only part of the story. We need to know all<br />
the facts if we are to understand what may have happened to<br />
this normally reliable engine, and also if we are to determine<br />
the value of a low-time engine in a preowned airplane.<br />
The engine with metal contamination and less than 700<br />
hours of operation had been installed brand new from the<br />
factory - MORE THAN 12 YEARS before. The engine log<br />
book shows that during the first 10 years of service this<br />
engine had averaged less than four hours of flight time each<br />
month. Chances are excellent that there were some months<br />
when the engine was not flown at all.
Textron <strong>Lycoming</strong> Service Instruction No. 1009 states<br />
that the recommended TBO is based on the use of genuine<br />
<strong>Lycoming</strong> parts, average experience in operation, and<br />
continuous service. Continuous service assumes that the<br />
aircraft will not be out of service for any extended period of<br />
time. If an engine is to be out of service for longer than 30<br />
days, it should be preserved as specified in Textron<br />
<strong>Lycoming</strong> Service Letter No. L180. Service Instruction No.<br />
1009 also states that because of the variations in operation<br />
and maintenance, there can be no assurance that an<br />
individual operator will achieve the recommended TBO.<br />
The point of this discussion is simple. A low-time engine<br />
may not add value to an aircraft, and the buyer should be<br />
aware of all factors which may affect the condition and value<br />
of the engine. An engine which is not flown frequently is<br />
subject to deterioration as a result of not being used. When<br />
the engine does not achieve flight operating temperatures on<br />
a regular basis, the moisture and acids that form as a result of<br />
combustion and condensation are not vaporized and<br />
eliminated through the exhaust and crankcase breather. As<br />
moisture and acids collect in the engine, they contribute to<br />
the formation of rust on the cylinder walls, camshaft, and<br />
tappets.<br />
As the engine is run after rust has formed, the rust<br />
becomes a very fine abrasive causing internal engine wear,<br />
particularly to the camshaft and tappets. As these<br />
components wear, they make more metal which attacks the<br />
softer metals in the engine. Piston pin plugs are examples of<br />
parts that may wear rapidly when rust becomes an abrasive<br />
inside the engine. This wear could eventually lead to failure.<br />
The infrequently flown engine is just one example of a<br />
low-time engine not meeting the expectations of a buyer or<br />
new owner. The term zero SMOH is always enticing since it<br />
indicates the engine has been overhauled, has zero hours<br />
since overhaul, and now may be expected to fly happily on<br />
through a full manufacturer recommended TBO. This will<br />
happen in some cases, but in others, there will not be a<br />
chance of this happening. It depends on the quality of the<br />
overhaul.<br />
Textron <strong>Lycoming</strong> Service Bulletin No. 240 recommends<br />
parts to be replaced at overhaul regardless of the apparent<br />
condition of the old parts. The number of these new parts<br />
used in the engine at overhaul will probably determine the<br />
possibilities of achieving a full TBO. Consider that most<br />
overhaulers install reconditioned cylinders on the engines<br />
they overhaul. These cylinders are not traceable. There is no<br />
requirement to maintain a record of their previous history.<br />
They may have only 2000 hours of operation, but they could<br />
just as easily have 5000, 7000, or more hours of operation.<br />
Those cylinders may have been cracked and repaired by<br />
welding - a procedure that <strong>Lycoming</strong> metallurgists do not<br />
recommend because the strength of a repaired cylinder head<br />
may be significantly less than that of a new head. There is no<br />
requirement to let a prospective engine buyer know if<br />
33<br />
cylinders have been welded, and this cannot be determined<br />
even by close examination. The possibility of finding a<br />
reconditioned cylinder with cracks after a few hundred hours<br />
of operation is very real. Should this happen, it will be a<br />
costly experience.<br />
The lesson to be learned here is a very old one - "Buyer<br />
Beware." Whether you are looking at those "Aircraft for<br />
Sale" advertisements or looking for a replacement engine for<br />
an aircraft you already own, consider carefully what you are<br />
about to buy. What do you really know about the engine<br />
other than the low-time number? How much validity does<br />
that number really have? What questions can you ask which<br />
may help you to insure that this engine will meet your<br />
expectations?<br />
Perhaps simply rereading the paragraphs you have just<br />
read may help you to formulate questions you want<br />
answered before taking the plunge. In the case of a low-time<br />
engine with a history of infrequent flight, borescope<br />
examination of the cylinders and an inspection of cam and<br />
tappet surfaces by a competent and knowledgeable A & P<br />
mechanic would be a very wise move. Always remember<br />
that low numbers in the hours of operation records do not<br />
guarantee reaching TBO with many long hours of trouble<br />
free operation. The buyer must investigate every detail of<br />
engine history as closely as possible, and be satisfied that the<br />
product does have the value which the low hours of<br />
operation number suggests.
OPERATION<br />
34
Hard Facts About Engine Break-In<br />
Most people seem to operate on the philosophy that they<br />
can best get their money's worth from any mechanical<br />
device by treating it with great care. This is probably true,<br />
but in many cases it is necessary to interpret what great care<br />
really means. This is particularly applicable when<br />
considering the break-in of a modern, reciprocating aircraft<br />
engine. Aircraft owners frequently ask about the proper<br />
procedures for run-in of a new or remanufactured engine so<br />
they can carefully complete the required steps. Many of<br />
these recommended break-in procedures also apply to<br />
engines which have been overhauled or had a cylinder<br />
replaced.<br />
The first careful consideration for engine run-in is the oil<br />
to be used. The latest revision of Textron <strong>Lycoming</strong> Service<br />
Instruction 1014 should be consulted for this information.<br />
The basic rule which applies to most normally aspirated<br />
<strong>Lycoming</strong> piston engines is simple; use straight mineral oil<br />
of the proper viscosity for the first fifty hours or until oil<br />
consumption stabilizes. Then switch to ashless dispersant<br />
(AD) oil.<br />
The exceptions to the basic rule above are the 0-320-H<br />
and the O/LO-360-E series. These engines may be operated<br />
using either straight mineral oil or ashless dispersant oil,<br />
however, if the engine is delivered with ashless dispersant<br />
oil installed, it must remain on ashless dispersant oil. The<br />
Textron <strong>Lycoming</strong> oil additive P/N LW-16702 must be<br />
added to the 0-320-H and O/LO-360-E engines at airframe<br />
installation, and every 50 hours thereafter or at every oil<br />
change. An FAA-approved lubricating oil that contains, in<br />
the proper amount, an oil additive equivalent to LW-16702<br />
will meet the requirements for the additive as stated in <strong>Lycoming</strong><br />
Service Instruction No. 1014M.<br />
All <strong>Lycoming</strong> turbocharged engines must be broken in<br />
with ashless dispersant oil only.<br />
When taking delivery of a new aircraft, there is another<br />
point which must be emphasized. Some aircraft manufacturers<br />
add approved preservative lubricating oil to protect<br />
new engines from rust and corrosion at the time the aircraft<br />
leaves the factory. This preservative oil must be removed by<br />
the end of the first 25 hours of operation.<br />
Each new or remanufactured engine is given a production<br />
test run at the factory before the engine is delivered to<br />
an aircraft manufacturer or other customer. After installation<br />
in the aircraft, the engine is run again during the test flights.<br />
These test runs will insure that the engine is operating<br />
normally and will provide an opportunity to locate small oil<br />
leaks or other minor discrepancies. In addition, these test<br />
runs do the initial seating of the piston rings. The rest of the<br />
break-in is the responsibility of the pilot who flies the<br />
aircraft during the next 50 hours.<br />
35<br />
A new, remanufactured, or overhauled engine should<br />
receive the same start, warm-up, and preflight checks as any<br />
other engine. There are some aircraft owners and pilots who<br />
would prefer to use low power settings for cruise during the<br />
break-in period. This is not recommended. A good break-in<br />
requires that the piston rings expand sufficiently to seat with<br />
the cylinder walls during the engine break-in period. This<br />
seating of the ring with the cylinder wall will only occur<br />
when pressures inside the cylinder are great enough to cause<br />
expansion of the piston rings. Pressures in the cylinder only<br />
become great enough for a good break-in when power<br />
settings above 65% are used.<br />
Full power for takeoff and climb during the break-in<br />
period is not harmful: it is beneficial, although engine<br />
temperatures should be monitored closely to insure that<br />
overheating does not occur. Cruise power settings above<br />
65%, and preferably in the 70% to 75% of rated power range<br />
should be used to achieve a good engine break-in.<br />
It should be remembered that if the new or remanufactured<br />
engine is normally aspirated (nonturbocharged), it will<br />
be necessary to cruise at the lower altitudes to obtain the<br />
required cruise power levels. Density altitudes in excess of<br />
8000 feet (5000 feel is recommended) will not allow the<br />
engine to develop sufficient cruise power for a good breakin.<br />
For those who still think that running the engine hard<br />
during break-in falls into the category of cruel and unusual<br />
punishment, there is one more argument for high power<br />
settings during engine break-in. The use of low power settings<br />
does not expand the piston rings enough, and a film of<br />
oil is left on the cylinder walls. The high temperatures in the<br />
combustion chamber will oxidize this oil film so that it<br />
creates a condition commonly known as glazing of the<br />
cylinder walls. When this happens, the ring break-in process<br />
stops, and excessive oil consumption frequently occurs. The<br />
bad news is that extensive glazing can only be corrected by<br />
removing the cylinders and rehoning the walls. This is<br />
expensive, and it is an expense that can be avoided by<br />
proper break in procedures.<br />
To summarize, there are just a few items to remember<br />
about engine break-in: (1) If a preservative oil has been<br />
added by the aircraft manufacturer, drain it not later than the<br />
first 25 hours of operation: (2) Follow the engine<br />
manufacturers recommendation regarding the oil to be used<br />
for break-in and the period between changes; (3) Run the<br />
engine at high cruise power levels for best piston<br />
ring/cylinder wall mating; (4) Continue break in operation<br />
for 50 hours or until oil consumption stabilizes. These<br />
simple procedures should eliminate the possibility of cylinder<br />
wall glazing and should prepare the engine for a long<br />
and satisfactory service life.
Leaning Textron <strong>Lycoming</strong> Engines<br />
A direct reprint of Service Instruction 1094D<br />
Revision "D" to Service Instruction No. 1094 supersedes<br />
all previous recommendations and should be used for engine<br />
leaning during normal flight operations. ALL LEANING<br />
RECOMMENDATIONS ARE BASED ON CALIBRATED<br />
INSTRUMENTATION.<br />
Textron <strong>Lycoming</strong> strongly recommends that all engine<br />
instrumentation be calibrated annually. All instrumentation<br />
for manifold pressure, engine RPM, oil temperature,<br />
cylinder head temperature, exhaust gas temperature, and<br />
turbine inlet temperature in the aircraft should be included in<br />
this annual calibration.<br />
Regardless of the fuel metering device, fuel management<br />
of normally aspirated engines is primarily dependant on the<br />
instrumentation available. The method is the same for both<br />
fixed and controllable pitch propellers.<br />
Textron <strong>Lycoming</strong> recommendations for leaning<br />
turbocharged engines in this Service Instruction refers to<br />
Textron <strong>Lycoming</strong> supplied turbocharged engines. For<br />
aftermarket turbocharger installations, contact the STC<br />
holder for proper leaning instructions.<br />
CHT (cylinder head temperature) and TIT (turbine inlet<br />
temperature) probes are required for leaning turbocharged<br />
engines. Refer to latest edition of Service Instruction No.<br />
1422 for proper TIT probe locations and depth.<br />
A. GENERAL RULES<br />
1. Without exception, observe the red-line temperature<br />
limits during takeoff, climb and high performance cruise<br />
power operation.<br />
(a) Cylinder head temperature - maximum limit<br />
listed in the Textron <strong>Lycoming</strong> Operator's<br />
Manual.<br />
(b) Oil temperature limit - maximum limit listed<br />
in the Textron <strong>Lycoming</strong> Operator's Manual.<br />
(c) TIT - maximum allowable limit specified in<br />
the Textron <strong>Lycoming</strong> Operator's Manual.<br />
2. Whenever mixture is adjusted, rich or lean, it should<br />
be done slowly.<br />
3. ALWAYS RETURN MIXTURE SLOWLY TO<br />
FULL RICH BEFORE INCREASING POWER<br />
SETTING.<br />
4. At all times, caution must be taken not to shock cool<br />
the cylinders. The maximum recommended temperature<br />
change should not exceed 50°F per minute.<br />
B. LEANING THE NORMALLY ASPIRATED ENGINES<br />
1. Use full rich mixture during takeoff or climb. Careful<br />
observation of engine temperature instruments should be<br />
practiced to ensure limits specified in Textron <strong>Lycoming</strong><br />
36<br />
operator's manual are never exceeded. Refer to the aircraft<br />
POH (pilot's operating handbook) or AFM (aircraft flight<br />
manual) for more specific instructions.<br />
2. For 5000 feet density altitude and above, or high<br />
ambient temperatures, roughness or reduction of power may<br />
occur at full rich mixture. The mixture may be adjusted to<br />
obtain smooth engine operation. For fixed pitch propeller,<br />
lean to maximum RPM at full throttle prior to takeoff where<br />
airports are 5000 feet density altitude or higher. Limit<br />
operation at full throttle on the ground to a minimum. For<br />
direct-drive, normally aspirated engines with a prop<br />
governor, but without fuel flow or EGT, set throttle at full<br />
power and lean mixture at maximum RPM with smooth<br />
operation of the engine as a deciding factor.<br />
3. For cruise powers where best power mixture is<br />
allowed, slowly lean the mixture from full rich to maximum<br />
power. Best power mixture operation provides the most<br />
miles per hour for a given power setting. For engines<br />
equipped with fixed pitch propellers, gradually lean the<br />
mixture until either the tachometer or the airspeed indicator<br />
reading peaks. For engines equipped with controllable pitch<br />
propellers, lean until a slight increase of airspeed is noted.<br />
4. For a given power setting, best economy mixture<br />
provides the most miles per gallon. Slowly lean the mixture<br />
until engine operation becomes rough or until engine power<br />
rapidly diminishes as noted by an undesirable decrease in<br />
airspeed. When either condition occurs, enrich the mixture<br />
sufficiently to obtain an evenly firing engine or to regain<br />
most of the lost airspeed or engine RPM. Some engine<br />
power and airspeed must be sacrificed to gain a best<br />
economy mixture setting.<br />
NOTE<br />
When leaned, engine roughness is caused by<br />
misfiring due to a lean fuel-air mixture which<br />
will not support combustion. Roughness is<br />
eliminated by enriching slightly until the engine<br />
is smooth.<br />
5. The exhaust gas temperature (EGT) offers little<br />
improvement in leaning the float-type carburetor over the<br />
procedures outlined above because of imperfect mixture<br />
distribution. However, if the EGT probe is installed, lean the<br />
mixture to 100°F on the rich side of peak EGT for best<br />
power operation. For best economy cruise, operate at peak<br />
EGT. If roughness is encountered, enrich the mixture<br />
slightly for smooth engine operation.<br />
6. When installing an EGT probe, the probe must be<br />
installed in the leanest cylinder. Contact the airframe or kit<br />
manufacturer for the correct location. In experimental or<br />
custom applications, multiple probe instrumentation is<br />
required and several power settings should be checked in<br />
order to determine the leanest cylinder for the specific<br />
application.
7. During normal operation, maintain the following<br />
recommended temperature limits:<br />
(a) Cylinder head temperature - limit listed in the<br />
Textron <strong>Lycoming</strong> Operator’s Manual.<br />
(b) Oil temperature limit listed in the Textron<br />
<strong>Lycoming</strong> Operator’s Manual.<br />
8. For maximum service life, maintain the following<br />
recommended limits for continuous cruise operation:<br />
(a) Engine power setting - 65% of rated or<br />
less.<br />
(b) Cylinder head temperatures - 4OO°F. or<br />
below.<br />
(c) Oil temperature - 165°F. - 220°F.<br />
C. LEANING THE TURBOCHARGED <strong>TEXTRON</strong><br />
LYCOMING POWERPLANT.<br />
I. The cylinder head temperature (CHT) and turbine<br />
inlet temperature (TIT) gages are required instruments for<br />
leaning with turbocharging by Textron <strong>Lycoming</strong>. EGT<br />
probes on individual cylinders should not be used for<br />
leaning.<br />
2. During manual leaning, the maximum allowable TIT<br />
for a particular engine must not be exceeded. Check the<br />
POH/AFM or the Textron <strong>Lycoming</strong> Operator’s Manual to<br />
determine these temperatures and fuel flow limits.<br />
3. Maintaining engine temperature. limits may require<br />
adjustments to fuel flow, cowl flaps, or airspeed for cooling.<br />
4. All normal takeoffs, with turbocharged powerplants,<br />
must be at full rich mixture regardless of airport elevation.<br />
5. If manual leaning of the mixture is permitted at<br />
takeoff. climb power, or high performance cruise, it will be<br />
specified in the POH/AFM and will list required ranges for<br />
fuel flow, power settings, and temperature limitations.<br />
6. Leaning to best economy mixture.<br />
(a) Set manifold pressure and RPM for the<br />
desired cruise power setting per the aircraft<br />
POH/AFM.<br />
(b) Lean slowly in small steps, while monitoring<br />
instrumentation, to peak TIT or maximum<br />
allowable TIT, whichever occurs tint.<br />
7. Leaning to best power mixture.<br />
Before leaning to best power mixture, it is necessary to<br />
establish a TIT reference point. This is accomplished as<br />
follows:<br />
(a) Set manifold pressure and RPM for the<br />
highest cruise power setting where leaning to best<br />
economy is permitted per the aircraft POH/AFM.<br />
(b) Lean slowly in small steps until peak TIT or<br />
maximum allowable is reached. Record peak TIT<br />
as a reference point.<br />
(c) Deduct 125°F. from this reference and thus<br />
establish the TIT temperature for best power<br />
mixture operation.<br />
(d) Return the mixture to full rich and adjust<br />
manifold pressure and RPM for the desired cruise<br />
conditions.<br />
(e) Lean mixture to the TIT temperature for best<br />
power mixture operation established in step(C).<br />
8. During normal operation, maintain the following<br />
limits:<br />
(a) Engine power setting - rating listed in the<br />
Textron <strong>Lycoming</strong> Operator’s Manual.
(b) Cylinder head temperature - limit listed in the<br />
Textron <strong>Lycoming</strong> Operator's Manual.<br />
(c) Oil temperature - limit listed in the Textron<br />
<strong>Lycoming</strong> Operator's Manual.<br />
(d) Turbine inlet temperature - limit listed in the<br />
Textron <strong>Lycoming</strong> Operator's Manual.<br />
9. For maximum service life, maintain the following<br />
recommended limits for continuous operation.<br />
(a) Engine power setting - 65% of rated or<br />
less.<br />
(b) Cylinder head temperatures - 400°F. or<br />
below.<br />
(c) Oil temperature - 165°F. - 220°F.<br />
(d) Turbine inlet temperature - maintain<br />
100°F. on rich side of maximum allowable.<br />
D. LEANING THE SUPERCHARGED <strong>TEXTRON</strong><br />
LYCOMING POWERPLANTS.<br />
1. All takeoffs with supercharged powerplants must be at<br />
full rich mixture regardless of the airport elevation.<br />
2. If manual leaning of the mixture is permitted at climb<br />
power, it will be specified in the POH/AFM and will list<br />
required ranges for fuel flow, power settings, and<br />
temperature limitations.<br />
3. Recommended standard cruise power for the<br />
supercharged engine is 65%. At 65% power or less, this type<br />
of engine may be leaned as desired as long as the engine<br />
operates smoothly, and temperatures and pressures are<br />
within manufacturer's prescribed limit.<br />
4. The exhaust gas temperature (EGT) gage is a helpful<br />
instrument for leaning the supercharged engine at cruise<br />
power with a manual mixture control.<br />
Proper Leaning At Cruise Aids Safe Flight-<br />
And Saves $ Dollars<br />
This Article Now Incorporates Material From "A Special On<br />
Fuel Management" Which Has Been Eliminated<br />
Various <strong>Lycoming</strong> Flyer articles have emphasized<br />
proper leaning at the manufacturer's recommended cruise<br />
power. Before delving into the savings to be obtained by<br />
leaning, it may be appropriate to again review those factors<br />
that affect leaning at cruise.<br />
First we must know that cruise power for <strong>Lycoming</strong><br />
normally aspirated engines is generally considered to be<br />
55% to 75% of the maximum power for which the engine is<br />
rated. At these power settings, the engine may be leaned at<br />
any altitude. There has been confusion about the reference<br />
to not leaning below 5000-feet density altitude. Remember<br />
that this reference only applies to those power settings above<br />
the cruise range - those normally used for takeoff and<br />
climb. Once cruise power has been set, leaning to best<br />
38<br />
economy should be standard procedure as damage to the<br />
engine will not occur from leaning at cruise power settings.<br />
In this article we will expand our discussion of leaning<br />
and explain (1) how it saves dollars, and (2) how it aids safe<br />
flight. In a practical approach to our subject, let's look<br />
closely at the chart printed below:<br />
Leaning the normally aspirated, direct drive<br />
<strong>Lycoming</strong> engine at cruise vs. full rich at 4,000<br />
feet density altitude, 75% power.<br />
Engine<br />
Model<br />
Airplane<br />
Model<br />
300 HP Piper Cherokee 300<br />
Full Best Economy<br />
Rich<br />
19+ gals<br />
Engine<br />
Model<br />
250 HP<br />
Full<br />
Rich<br />
16.2 gals.<br />
Engine<br />
Model<br />
180 HP<br />
Full<br />
Rich<br />
11.9 gals.<br />
(Peak EGT)<br />
15.6 gals.<br />
Airplane<br />
Model<br />
Piper Aztec<br />
Best Economy<br />
(Peak EGT)<br />
13.6 gals.<br />
Airplane<br />
Model<br />
Cessna Cardinal<br />
Best Economy<br />
(Peak EGT)<br />
9.7 gals.<br />
Hours Hours<br />
Rich Lean<br />
4.2 hrs. 5.1 hrs.<br />
Hours<br />
Rich<br />
4.3 hrs.<br />
Hours<br />
Lean<br />
5.1 hrs.<br />
Hours Hours<br />
Rich Lean<br />
4.1 hrs. 5.1 hrs.<br />
To put the cost of operating at a full rich mixture setting<br />
during cruise flight into perspective, let us assume that the<br />
cost of aviation gasoline is $2.10 per gallon. In each case it<br />
is only necessary to multiply the difference in gallons<br />
burned at "Full Rich" vs. "Best Economy" times the fuel<br />
price. The number obtained will be the amount saved each<br />
hour of flight by operating at best economy during cruise.<br />
Using the examples above, these are the savings for each of<br />
those aircraft and engines:<br />
Aircraft Fuel burn difference Fuel cost savings<br />
Cherokee 300 3.4 gallons X $2.10 =$7.14perhr.<br />
Aztec<br />
Cardinal<br />
5.2 gallons X $2.10 =$10.92 per hr.<br />
2.2 gallons X $2.10 =$ 4.62 per hr.<br />
While we are on a discussion of unnecessary cost of<br />
operation, another important factor is the damage often done<br />
to engine accessories by operating at full rich at cruise<br />
power. Engines operating at full rich in cruise tend to be<br />
rough, resulting in shaking engine accessories and engine<br />
mounts, thereby considerably reducing their life and often<br />
resulting in expensive early replacement. A properly leaned<br />
engine at cruise power is a smooth engine - and will save<br />
money.
In earlier issues of the Flyer, we have been telling all<br />
concerned about the benefits to the spark plug of proper<br />
leaning at cruise power. That information can be repeated in<br />
this discussion because it helps to illustrate our point on<br />
saving dollars. Proper leaning at cruise helps prevent spark<br />
plug fouling. The maintenance cost to remove and clean<br />
spark plugs can be reduced by good leaning techniques.<br />
Frequent cleaning of spark plugs reduces their life and<br />
requires early replacement. Furthermore, badly fouled spark<br />
plugs could also become a safety-of-flight problem.<br />
For a very interesting safety-of-flight item, let's look at<br />
the chart again. Notice the difference in hours of flight at<br />
full rich vs. lean at cruise. In the illustration of the 180 HP<br />
engine there is one full additional hour of flight when<br />
properly leaned. The other engines provide nearly an<br />
additional hour of flight time when leaned to best economy<br />
during cruise. This is a very real safety of flight fact.<br />
These are some of the more important facts that illustrate<br />
how proper leaning at cruise power aids safe flight - and<br />
saves dollars.<br />
Operating The Direct Drive, Fixed Pitch<br />
<strong>Lycoming</strong> Engine<br />
Some pilots have demonstrated a lack of understanding<br />
with regard to the operation of the direct drive, fixed pitch,<br />
normally aspirated powerplants. When a power chart is<br />
provided, it will indicate that as the airplane is flown at<br />
different altitudes above sea level, it is necessary to use a<br />
higher RPM for adequate cruise performance with an<br />
increase in altitude. A typical example might be the 0-360,<br />
180 HP <strong>Lycoming</strong> powerplant. The power chart by the<br />
airframe manufacturer for this fixed landing gear aircraft<br />
lists 75% power at 7500 feet at 2675 RPM (no manifold<br />
pressure gage in their airplane). The pilot who does not<br />
understand the principles of operation in the thin air at<br />
altitude may observe that red line takeoff RPM is 2700<br />
RPM, and is then reluctant to lean either for cruise or climb<br />
despite the altitude because he is pulling almost the same<br />
RPM as at takeoff.<br />
However, he can and should lean the engine at these<br />
altitudes despite the high RPM, for the horsepower is down<br />
to 75% because of the thinner air. On the other hand, with<br />
any direct drive normally aspirated <strong>Lycoming</strong> engine, he can<br />
and should lean the mixture at any altitude as long as he is in<br />
cruise configuration at 75% power or less.<br />
Let's take a look at the airframe manufacturer's power<br />
chart for the 0-360, 180 HP engine and observe the gradual<br />
increase in RPM required with the increase in altitude, but<br />
maintaining 75% for cruise at each altitude. What the chart<br />
will not show here is that for flight above 7500 feet, it is not<br />
possible to achieve 75% power with a normally aspirated<br />
engine (meaning not turbocharged or supercharged).<br />
39<br />
Altitude<br />
2500<br />
3500<br />
4500<br />
5500<br />
6500<br />
7500<br />
RPM<br />
2550<br />
2575<br />
2600<br />
2625<br />
2650<br />
2675<br />
POWER CHART<br />
Percent Endurance on<br />
of H. P. 59 gals. fuel<br />
75% 4.8 hours<br />
75%<br />
75%<br />
75%<br />
75%<br />
75%<br />
4.8 hours<br />
4.8 hours<br />
4.8 hours<br />
4.8 hours<br />
4.8 hours<br />
Operating Your <strong>Lycoming</strong> Engines At Takeoff<br />
And Climb<br />
Because there are a wide variety of <strong>Lycoming</strong> engines in<br />
operation, the paragraphs below may be helpful in<br />
understanding the different modes of operation required<br />
when operating each type at takeoff and climb power<br />
settings. The Pilots Operating Handbook for the aircraft in<br />
which the engines are installed should be the final authority<br />
as to how the engine should be operated.<br />
DIRECT DRIVE ENGINES<br />
Most normally aspirated engines are rated at full power<br />
for takeoff and climb indefinitely, provided engine<br />
temperatures and pressures are within the green arc area of<br />
the engine instruments. Extra fuel, sensible airspeed, and<br />
cowl flaps, if available, are all helpful in keeping cylinder<br />
head temperatures within desired limits during takeoff or<br />
climb.<br />
Climb requirements may vary; as an example, on a warm<br />
day with the airplane close to gross weight, and a direct<br />
drive engine with a fixed pitch prop, the pilot will need full<br />
throttle all the way to cruise altitude. The same airplane on a<br />
cold day and lightly loaded may not require full power for<br />
climb. After full throttle at takeoff, the pilot may want to<br />
reduce power 100 or 200 RPM and still not see performance<br />
suffer.<br />
Those direct drive normally aspirated engines with a<br />
prop governor are also rated indefinitely at full power, and<br />
the manuals all recommend full power for takeoff, but<br />
specify a small reduction in power, generally to 85% power<br />
climb. Study the specific airplane Pilot's Operating<br />
Handbook for detailed power settings.<br />
GEARED, TURBOCHARGED AND SUPERCHARGED<br />
ENGINES<br />
Turning to the more complex powerplants such as the<br />
geared, turbocharged and supercharged models, the manuals<br />
are quite specific in their description of takeoff and climb<br />
techniques. Our geared and supercharged powerplants have<br />
a limit of five minutes at takeoff power. However, it is<br />
advisable to throttle power to the recommended climb
power as stipulated in the manual as soon as takeoff<br />
obstructions have been cleared and proper airspeed attained.<br />
The turbocharged <strong>Lycoming</strong>s (including the TIGO-541-<br />
E series) do not have a five-minute limit at takeoff power.<br />
However, the manual clearly stipulates a reduction to a<br />
proper climb power when clear of obstacles, and when<br />
climb speed has been established, and cylinder head, oil and<br />
turbine inlet temperatures are within limits. Due to the more<br />
complete engine instrumentation in the airplane, the manuals<br />
allow some leaning at climb, but with the engine instruments<br />
indicating within specified limits listed in the airplane<br />
manual.<br />
The more complex powerplants (geared, supercharged,<br />
and turbocharged) demand smooth, careful operation of the<br />
throttle at all times, particularly at high power, but<br />
especially when engines and oil are not up to normal<br />
operating temperatures such as for the initial takeoff.<br />
Overboost or erratic engine operation will result from abrupt<br />
movements of the throttle. All supercharged and<br />
turbocharged engines must use full rich mixture for all<br />
takeoffs regardless of field elevation.<br />
The Exhaust Gas Temperature (EGT) And<br />
Fuel Management<br />
Since so many operators of our engines frequently ask us<br />
about the use of an exhaust gas temperature with our<br />
powerplants, perhaps we should examine the system, and<br />
also see how it relates to fuel management.<br />
One of the better publications describing the EGT that<br />
we have seen was put out by Alcor Inc., P. O. Box 792222<br />
of San Antonio, Texas 78279-2222. This excellent booklet is<br />
titled, "EGT and Combustion Analysis In A Nutshell",<br />
and is available free to interested operators.<br />
An EGT system is not a complex or expensive item to<br />
install. The more economical kit consists basically of the<br />
gage, wiring, and probe (see illustration). The system<br />
generates its own electricity to operate the instrument.<br />
"EGT Probe and Gage"<br />
40<br />
INSTALLATION INFORMATION<br />
The mechanic must carefully follow the installation<br />
instructions concerning placing the probe in the exhaust<br />
stack. If it is closer than 1 1/2 inches to the cylinder head,<br />
probe life will be limited, or if too far down toward the end<br />
of the exhaust stack, the response on the gage will be slow.<br />
Should there be doubt concerning in which stack a single<br />
probe is to be installed, that information may be available<br />
from the airframe dealer's service department. The operator<br />
might desire the more expensive installation of probes in all<br />
cylinders, therefore the accompanying gage will generally<br />
have a selector switch for individual readings on all cylinder<br />
exhaust stacks. Again, it is most important that the<br />
installation instructions are carefully followed in order to get<br />
reliable readings.<br />
INTERPRETING THE SYSTEM<br />
Most of the EGT manufacturers have standardized on<br />
gage increment markings of 25 F (see illustration). A few<br />
EGT manufacturers will go further and show the<br />
temperature range on the gage as 1200 ° F to 1700 ° F.<br />
The simple gage shown in the illustration is quite<br />
satisfactory for the less complex engines. An advantage of<br />
the EGT over the cylinder head temperature gage is one of<br />
an almost immediate response to manual movement of the<br />
mixture control, as long as it is not a rapid movement of the<br />
control. Remember that the peak or point of maximum<br />
needle deflection of the EGT gage is the basic reference for<br />
fuel management. If an operator has experimented with the<br />
EGT at the engine manufacturer's recommended cruise<br />
power, he observes that gradual leaning does result in peak<br />
EGT. The location of peak EGT on the gage will also vary<br />
with different power settings, changes in altitude, and<br />
change in ambient temperature.<br />
From peak EGT, either increasing or decreasing the fuel<br />
flow causes a decrease in EGT. When richer than peak EGT<br />
cooling occurs because there is excess fuel, and when leaner<br />
than peak, cooling occurs because there is excess air.<br />
Peak EGT with a float-type carbureted engine is<br />
frequently a vague point because of less efficient<br />
distribution (than fuel injection) to the individual cylinders<br />
by this type of metering device. As a result, float-type<br />
carbureted engines tend to operate smoother at +25 ° to +50 °<br />
F on the rich side of peak EGT. Whereas, the fuel injected<br />
engines at 250 H.P. and higher will provide a more precise<br />
peak, and therefore the EGT system is likewise a more<br />
precise method of fuel management with fuel injection.<br />
DEFINITION OF PEAK EGT<br />
A simple definition of peak EGT is given us by<br />
engineering as - the chemically correct mixture of fuel and<br />
air which gives 100% utilization of all the fuel and all the<br />
air. Remember, we said earlier that at mixtures leaner than<br />
peak EGT there is excess air, and at richer mixtures, excess<br />
fuel. Operation at peak EGT, particularly on long flights,
can be an advantage not only for purposes of increased<br />
range, but there is less likelihood of spark plug fouling as<br />
well.<br />
Don't be surprised to see variations in temperature<br />
between individual cylinders where there is a probe for<br />
every cylinder. It is fairly typical to see an average 100 F<br />
variation with fuel injection, and as much as 200 ° F<br />
variation with a float-type carburetor. The latter (carburetor)<br />
variation tends to be greater because fuel/air distribution is<br />
not as good as with fuel injection. In cold outside air<br />
temperature flight conditions, the mixture distribution is<br />
poorer for both fuel injected and carbureted engines.<br />
However, with the float-type carburetor operating in below<br />
freezing ambient temperatures, the fuel/air distribution is<br />
definitely worsened, resulting in noticeable variations in<br />
temperature between individual exhaust stacks.<br />
It is also important to understand that leaning to<br />
roughness at the engine manufacturers recommended cruise<br />
power is not an indication of detonation, but indicates<br />
normal characteristics of distribution to the individual<br />
cylinders. The roughness indicates that the leanest cylinder<br />
has become so lean it is beginning to miss. This is typical of<br />
an engine with a float-type carburetor. Damage to an engine<br />
from leaning does not occur at the manufacturers<br />
recommended cruise power, but takes place at higher than<br />
cruise power.<br />
As far as the pilot is concerned, operating on the lean<br />
side of peak EGT can only be accomplished with fuel<br />
injected engines of at least 250 HP or higher because the<br />
fuel flows in the lower horsepower engines are so small. It<br />
isn't possible with float type carburetors because of the<br />
fuel/air distribution problem. In any case, leaning past the<br />
peak is not recommended.<br />
LIMITATIONS OF POWER AT PEAK EGT<br />
Textron <strong>Lycoming</strong> allows leaning to peak EGT at 75%<br />
power and below on our direct drive normally aspirated<br />
engines. We limit operation at peak EGT on our geared,<br />
supercharged powerplants at 65% power or below. With<br />
<strong>Lycoming</strong> turbocharged engines, where the EGT gage is<br />
used to interpret turbine inlet temperature (TIT), the<br />
maximum allowable TIT specified in the POH should not be<br />
exceeded when attempting to find a peak temperature by<br />
manual leaning. Where a cylinder head temperature is also<br />
available, the operator should always cross-check the head<br />
temperature as a routine procedure when leaning, and<br />
remember that whenever CHT reaches the maximum before<br />
reaching peak EGT, then CHT rather than EGT should<br />
dictate the limit of allowable leaning.<br />
BEST ECONOMY MIXTURE<br />
Best Economy Mixture as it relates to the EGT system<br />
begins at peak. For all practical purposes with <strong>Lycoming</strong><br />
engines, peak EGT is right at the edge of Best Economy<br />
mixture, and is our only practical point of reference in the<br />
41<br />
Best Economy Mixture range. At the manufacturers<br />
recommended cruise power, peak EGT causes a slight loss<br />
of horsepower usually reflected in two or three miles per<br />
hour of airspeed. If the pilot attempts to go leaner than peak<br />
EGT (with fuel injection only), the power decreases rapidly<br />
as fuel flow decreases.<br />
BEST POWER MIXTURE<br />
Best Power Mixture, or sometimes termed Maximum<br />
Power Range, as depicted on the EGT gage, is in the range<br />
of plus 100 F on the rich side of peak. Best Power Mixture<br />
will provide fastest indicated airspeed for a cruise power<br />
setting, although it is generally not considered a practical<br />
economic mixture for cruise purposes. However, Best Power<br />
Mixture generally provides a safe amount of fuel for a<br />
power setting higher than the engine manufacturers<br />
recommended cruise, except that needed for takeoff power.<br />
Again we repeat that maximum leaning (peak EGT) does<br />
not damage an engine at the engine manufacturers<br />
recommended cruise power. Damage is caused by maximum<br />
leaning at higher than recommended cruise power where the<br />
manuals do not spell it out or allow it, and when the aircraft<br />
does not have a complete set of reliable engine instruments<br />
to protect the powerplants. Excessive leaning under the<br />
latter high power conditions can cause detonation and/or<br />
preignition and possible engine failure.<br />
If we were to sum up the major advantages of an EGT to<br />
the operator, they are as follows:<br />
1. Saves fuel - an economy aid.<br />
2. Aids proper mixture control - more precise fuel<br />
management.<br />
3. Helps increase range.<br />
4. Detects some types of engine troubles.<br />
5. Aids peak engine performance at cruise.<br />
6. Helps prevent spark plug fouling.<br />
7. Fits any General Aviation piston aircraft engine.<br />
Although use of the EGT has the advantages listed<br />
above, from a pilot's point of view there are also some<br />
possible disadvantages. Poor mixture distribution to the<br />
cylinders (particularly in carbureted engines) is the primary<br />
reason for these disadvantages. The EGT probe is to be<br />
installed in the leanest cylinder, but this changes with<br />
altitude and power setting, therefore making it very difficult,<br />
or perhaps impossible, to choose a best cylinder for probe<br />
installation. Without an EGT installation the pilot can easily<br />
lean using the leanest cylinder of a carbureted engine by<br />
simply leaning to find engine roughness from the first<br />
indication of "lean misfire", and then richening the mixture<br />
to smooth engine operation.<br />
The pilot must also realize that even with a fuel injected<br />
engine there will be variations in fuel flow. Utilizing an<br />
EGT with probes in each exhaust stack (sometimes called a
combustion analyzer) will show these variations. Trying to<br />
interpret the variations in temperature shown for each<br />
cylinder has caused some pilots to suspect problems with<br />
there engine when it has been operating normally.<br />
Sometimes too much knowledge can be a problem.<br />
Finally, the EGT system must be in perfect working<br />
order to give accurate readings. The probes in the exhaust<br />
system will deteriorate with age and continuous use. This<br />
often causes the gage to read a temperature that is not<br />
accurate, and therefore a peak reading that is not reached<br />
soon enough. This results in overleaning to the lean side of<br />
peak where operation is not recommended. Frequent<br />
maintenance to insure that temperature probes are in good<br />
condition will reduce the possibility of inaccuracies, but the<br />
pilot cannot determine the accuracy of this rather critical<br />
reading during operation.<br />
The exhaust gas temperature system, when well<br />
maintained and thoroughly understood, can be an aid in<br />
proper leaning at cruise power with fuel injected<br />
powerplants. It is hoped that this information will help the<br />
operators of <strong>Lycoming</strong> engines achieve the best possible<br />
engine efficiency through use of the EGT system.<br />
Landings And Takeoffs From High Elevation<br />
Airports<br />
Pilots frequently ask us for information and guidance<br />
concerning landings and takeoffs from high elevation<br />
airports. Our reference point in this discussion will be based<br />
on density altitude. The discussion also requires that we treat<br />
separately operation of normally aspirated, turbocharged,<br />
and supercharged engines at high elevation airports.<br />
NORMALLY ASPIRATED<br />
The normally aspirated engine performs and reacts to<br />
density altitude. As an example, this type powerplant at<br />
takeoff from an airport with an indicated altitude of 3,000<br />
feet, but with an ambient temperature at 85°F, would have a<br />
density altitude of more than 5,000 feet. The engine would<br />
lack some 20 to 25% of its power and also probably run<br />
rough because of a rich mixture on the ground at full rich.<br />
Therefore, the typical normally aspirated direct drive engine<br />
requires the mixture be leaned on the ground for efficient<br />
takeoff performance where airports are 5,000 feet (density<br />
altitude) or higher. The overrich condition is something the<br />
pilot can compensate for by leaning. However, the higher<br />
density altitude with its thinner air cannot be compensated<br />
for with a normally aspirated engine unless a supercharger<br />
or turbocharger unit is added to the powerplant. Thus, at<br />
density altitudes of 5,000 - 6,000 feet, the pilot of a<br />
normally aspirated engine has available to him<br />
approximately 75% of the engine power, and must plan his<br />
takeoff accordingly after setting the mixture.<br />
42<br />
PROCEDURE FOR LEANING<br />
1. The fixed pitch propeller - lean to maximum RPM at<br />
full throttle prior to takeoff where airports are 5,000 feet<br />
density altitude or higher. Limit operation at full throttle on<br />
the ground to a minimum time.<br />
2. The direct drive normally aspirated engine with a prop<br />
governor but without a fuel flow gage, set throttle at full<br />
power and lean mixture at maximum RPM with smooth<br />
operation of the engine as a deciding factor.<br />
3. With fuel injection, if the powerplant has a marked<br />
fuel flow gage, then set mixture in accordance with<br />
instructions on the fuel flow gage and/or in accordance with<br />
the airplane Pilot's Operating Handbook.<br />
4. Pressure carburetor - All <strong>Lycoming</strong> engines equipped<br />
with Bendix PS carburetors have an automatic mixture<br />
control which does not require leaning for takeoff.<br />
5. Turbocharged and supercharged engines - All takeoffs<br />
must be at full rich mixture because the engine is brought<br />
back to sea level horsepower which does not permit leaning.<br />
DESCENT<br />
Regardless of the field elevation where the pilot intends<br />
to land, the descent from cruise altitude to traffic pattern<br />
altitude should be made with the engine leaned for smooth<br />
engine operation. Low elevation fields (below 5,000 feet<br />
density altitude) will require that the mixture be moved to<br />
full rich in the "before landing checklist". Landing at<br />
airports above 5,000 feet density altitude, the mixture must<br />
be leaned to smooth engine operation during traffic pattern<br />
flight and landing; otherwise, the engine may stop on the<br />
runway because of excessive richness.<br />
Basic Power Sequence<br />
(Governed Engines)<br />
TO INCREASE POWER - first, enrich mixture, increase<br />
RPM, then follow with throttle.<br />
TO DECREASE POWER - first, reduce throttle, reduce<br />
RPM, and then adjust mixture.<br />
INCREASING POWER - enrich mixture first to ensure<br />
protecting the engine against damage from higher power<br />
when previously leaned out for a lower power setting.<br />
Next, increase RPM because in some models the engine<br />
and propeller would have undesirable pressure and stresses<br />
with a high manifold pressure and lower RPM.<br />
Then, follow with the appropriate manifold pressure now<br />
that the mixture and RPM have been correctly set to<br />
accommodate the increased throttle.<br />
DECREASING POWER - Most models of our engines<br />
require the basic procedure for decrease of power by<br />
retarding throttle, followed by RPM. However, we do have
an exception in several older models of our geared normally<br />
aspirated powerplants, such as the GO-480 and GO-435<br />
series. In the climb configuration, we recommended full<br />
throttle throughout the climb for internal fuel cooling with<br />
RPM reductions initially to 3000 RPM and then 2750 RPM<br />
for prolonged climb.<br />
Turbocharged and Supercharged engines require careful<br />
application of the basic power sequences as outlined in the<br />
beginning. It is also possible to create an overboost<br />
condition on these engines by going to takeoff manifold<br />
pressure at cruise RPM. such as might take place in an<br />
unexpected go-around. The stresses and pressures on prop<br />
and engine would create a threat to both.<br />
An Explanation Of Power Settings<br />
A letter received here at the factory asked a question we<br />
have heard quite often:<br />
"Is it a fact, or is it fiction, that engines with constant<br />
speed props should not use power settings where inches of<br />
mercury exceed RPM in hundreds? I am referring of course<br />
to non-turbocharged engines in general ."<br />
The answer to this question is easily found in cruise<br />
power charts of the airframe Pilot's Operating Handbook.<br />
Whatever the combinations of RPM and MP listed in the<br />
charts - they have been flight tested and approved by the<br />
airframe and powerplant engineers. Therefore, if there are<br />
power settings such as 2100 RPM and 24" MP in the power<br />
chart, they are approved for use.<br />
The confusion over so-called "squared" power settings<br />
(i. e. 2400 x 24" MP), appears to have been a carry-over<br />
from some models of the old radial engines which were<br />
vulnerable to excessive bearing wear where a MP higher<br />
than "squared" was used. More pressure on the bearings<br />
with the higher than "squared" MP was the cause of their<br />
problem. However, changes in design, metals, and lubricants<br />
permit changes in operation in the more modern flat<br />
opposed powerplants.<br />
Let's look at the power charts in a couple of the Pilot's<br />
Operating Handbooks of two different aircraft<br />
manufacturers, but where both are using the four cylinder<br />
200 HP <strong>Lycoming</strong> engine.<br />
Cessna's Model 177 RG. using the <strong>Lycoming</strong> 10-360-<br />
AIB6D, in the cruise range at 6,000 feet, lists a cruise power<br />
setting range at that altitude of anywhere from 2100 RPM to<br />
2500 RPM with variations all the way from 18" MP to 24"<br />
MP. They list a recommended Power setting for 66% power<br />
at 2100 RPM at 24" MP.<br />
The Piper Arrow, powered by the <strong>Lycoming</strong> 10-360-C<br />
series engine. lists the following cruise power settings at<br />
6,000 feet in their chart at 65% power at full throttle (about<br />
23" MP)x 2100 RPM.<br />
43<br />
The complete'chart for 65% power is shown as follows:<br />
Altitude<br />
SL<br />
1,000<br />
2,000<br />
3,000<br />
4,000<br />
5,000<br />
6.000<br />
2100 RPM<br />
25.9 MP<br />
25.6 MP<br />
25.4 MP<br />
25.1 MP<br />
24.8 MP<br />
F. T. MP<br />
F. T. MP<br />
2400 RPM<br />
22.9 MP<br />
22.7 MP<br />
22.5 MP<br />
22.2 MP<br />
22.0 MP<br />
21.7 MP<br />
21.5 MP<br />
After studying the power chart, the pilot would<br />
undoubtedly then ask what combination of RPM and MP<br />
would be best to use at cruise. We recommend the pilot try<br />
the various combinations offered by the power chart over a<br />
five-minute period when flying in smooth air, and use the<br />
listed RPM and MP combination which gave the least<br />
vibration and the lowest noise level.<br />
In addition to the quieter and smoother consideration,<br />
lower RPM means lower friction hp. This reduced loss of<br />
horsepower due to friction also translates to slightly<br />
improved fuel economy.<br />
The Pilot's Operating Handbook is the basic reference<br />
for the pilot as this subject illustrates.<br />
Considerations For Low Power Low RPM<br />
Cruise<br />
The high price of aviation fuel is causing aircraft owners<br />
and pilots to review their operations in search of ways to<br />
keep operating costs down. Those operating aircraft with<br />
controllable propellers have been requesting information on<br />
cruise operation in the low RPM range - 1800 or 1900 RPM<br />
for example. The number of queries received indicates a<br />
great deal of interest, and therefore it seems appropriate to<br />
share the information on this subject with all of our readers.<br />
The Textron <strong>Lycoming</strong> Engine Operator's Manual has<br />
performance curves applicable to each engine series. The<br />
curve for the 10-540-K series. 300 horsepower engine is<br />
printed here as a reference for this article. The curve does<br />
provide data on the maximum manifold pressure (MP),<br />
which may be used with any particular RPM at sea level and<br />
at altitude. The limiting manifold pressure line clearly<br />
restricts high manifold pressures with low RPM settings.<br />
There is a good reason for this; high manifold pressure and<br />
low RPM is similar to allowing your automobile to lug up<br />
hill in fourth gear. The pinging you hear in your automobile<br />
tells you that detonation is occurring and you should shift<br />
down to a lower gear. In an aircraft, detonation is not likely<br />
to be heard as damage occurs in the engine and it is then too<br />
late for preventive measures. For this reason, engine
CURVE NO.15013<br />
LYCOMING<br />
AIRCRAFT ENGINE<br />
PERFORMANCE DATA<br />
MAXIMUM POWER MIXTURE<br />
UNLESS OTHERWISE NOTED<br />
MODEL IO-54O K, L M, SERVES<br />
COMPRESSION RATIO<br />
FUEL INJECTOR<br />
E104MX RSA-IOAD1<br />
FUEL GRADE, MINIMUM 100/130<br />
NO EXTERNAL MIXTURE<br />
HEATER USED<br />
CORRECT FOR DIFFERENCE BETWEEN<br />
ATTEMPS AND ACTUAL INLET AIR TEMP<br />
ACCORDANCE WITH NOTE 4<br />
valve guides which could lead to<br />
sticking valves.<br />
NOTED Particularly during cold weather<br />
8.7:1 operation low power operation may<br />
100/130 allow both the oil and cylinder head<br />
temperatures to fall below the normal<br />
range. This is detrimental to good<br />
engine health. Oil temperature in<br />
particular should be maintained<br />
between 165°F and 220°F to achieve<br />
maximum service life. At lower<br />
temperatures, the moisture which<br />
gathers as a result of combustion will<br />
not vaporize and be expelled. This<br />
can cause dilution of the oil which<br />
detracts<br />
properties.<br />
from its lubricating<br />
I<br />
The Pilot's Operating Handbook<br />
for each aircraft provides a variety of<br />
power settings that most often show<br />
18 19 20 21 22 23 24 25 26 27 28 29<br />
ABSOLUTE MANIFOLD PRESSURE IN<br />
-<br />
1 2 3 4<br />
50<br />
5 6 7 8 10 11 12 13 14 1516<br />
17i<br />
PRESSURE ALTITUDE IN THOUSANDS OF FEE<br />
19 20 21 22 23Z<br />
24 2100 or 2200 RPM as the minimum<br />
for cruise. The table shown here is for<br />
Sea Level and Altitude Performance Curve - 10-540-K, -L, -M, -S the IO-540-K series engine which was<br />
operation should be within the limitations established in the<br />
Pilot's Operating Handbook (POH).<br />
illustrated in the curve shown earlier.<br />
Using that curve,<br />
note that cruise flight at 6000 feet using<br />
1900 RPM would<br />
be limited to approximately 55% of power<br />
Although there are restrictions, it is quite apparent that with manifomanifold<br />
pressure set at 24 inches. As shown in the<br />
operation is possible in the 1800 to 1900 RPM range. Lower curve, 24 inches<br />
of MP is very near the limiting manifold<br />
RPM will result in less friction horsepower with a resultant pressure line<br />
fuel savings, but most of the fuel flow reduction experienced<br />
will be the result of a much lower power<br />
setting and therefore reduced performance.<br />
This raises a question about the amount of LYCOMING MODEL IO<br />
and therefore close to the maximum available.<br />
R TABLE SETTING -<br />
540-K, -L, -M SERIES, 300 HP ENGINE<br />
benefit in terms of cost savings that might<br />
actually be achieved by using the lower RPM<br />
settings<br />
settings for<br />
for<br />
cruise.<br />
cruise.<br />
Alt.<br />
Feet<br />
165 HP Rated Rated<br />
Temp RPM and MAN. Press.<br />
°F 2100 2200 2300 2400<br />
195 HP - 65% Rated<br />
RPM and MAN. Press.<br />
2100 2200 2300 2400<br />
225 HP - 75% Rated<br />
RPM and MAN. Press.<br />
2200 2300 2400<br />
One of the first considerations of low RPM<br />
cruise is that power settings this low should not<br />
SL 59<br />
1.000 1.000 55 .55<br />
2.000 52<br />
22.5 21.8 21.2<br />
22.3 21.6 21.0<br />
22.1 21.4 20.7<br />
20.7<br />
20.5<br />
20.2<br />
25.6<br />
25.3<br />
25.1<br />
24.7<br />
24.4<br />
24.2<br />
23.8<br />
23.5<br />
23.3<br />
23.2<br />
22.9<br />
22.7<br />
27.6<br />
27.3<br />
27.1<br />
26.6<br />
26.3<br />
26.1<br />
25.8<br />
25.5<br />
25.2<br />
be used during the engine break-in period. 3.00 48 21.9 21.2 20.5 20.0 24.8 23.9 23.0 22.5 26.8 25.8 24.9<br />
During the break-in period, normal climb 4.000 45 21.7 21.0 20.3 19.8 24.6 23.7 22.8 22.2 26.5 25.6 24.6<br />
power as specified in the Pilots Operating<br />
Handbook should be used. To seat the piston<br />
rings in a new or overhauled engine, cruise the<br />
aircraft at 65% to 75% power for the first 50<br />
hours, or until oil consumption has stabilized.<br />
Low power for break-in may result in glazed<br />
5.000 41<br />
6.000 38<br />
7.000<br />
8.000 31<br />
9.000 27<br />
9.000 2<br />
10,000 2.3<br />
1.000 19<br />
21.5 20.8 20.1 19.6<br />
21.3 20.6 19.8 19.3<br />
21.0 34 20.4 19.6<br />
19.1<br />
20.8 20.2 19.4 18.9<br />
20.6 20.0 19.2 18.6<br />
20.4 19.8 19.0<br />
20.4 19.8 19.0 18.4<br />
20.2 19.6 18.7 18.2<br />
24.3<br />
24.0<br />
23.7<br />
23.5<br />
23.2<br />
22.9<br />
22.5<br />
22.5<br />
22.3<br />
22.0<br />
21.8<br />
21.5<br />
21.2<br />
22.0<br />
21.7<br />
21.5<br />
21.2<br />
21.0<br />
20.7<br />
20.4<br />
25.3<br />
25.0<br />
24.4<br />
24.1<br />
23.8<br />
cylinder walls and high oil consumption<br />
can only be cured by cylinder removal<br />
that<br />
and<br />
12000<br />
13.000<br />
16<br />
12<br />
20.0 19.4 18.5<br />
- 19.2 18.3<br />
18.0<br />
17.7<br />
rehoning. 14.000 9 - - 18.0 17.3<br />
There are some other considerations of low<br />
15,000 5 — — 16.9<br />
power cruise operation. Low manifold To maintain constant power, correct<br />
manifold pressure approximately 0.18" Hg for each<br />
pressures, below an arbitrary point of perhaps<br />
18 inches for continuous cruise, may case<br />
10°F variation in induction air temperature emperature from standard altitude temperature. Add<br />
pressure manifold for air temperature<br />
temperature<br />
above<br />
above<br />
standard<br />
standard; subtract for temperature below<br />
excessive oil usage, and oil buildup in the<br />
44
Quite frequently, someone will ask if the engine will last<br />
longer if it is run at a slower RPM setting. The answer must<br />
be qualified. Operation at the recommended cruise RPM<br />
settings should allow the engine to reach TBO if it has<br />
regular oil changes, is operated within normal temperature<br />
ranges and is well cared for by pilots and maintenance<br />
personnel. Longer engine life may be expected from most<br />
engines when the operator is willing to sacrifice maximum<br />
performance for conservative cruise operation in the 60% to<br />
65% power range. For many engines these power settings<br />
are achieved at 2100 or 2200 RPM rather than the 1800 or<br />
1900 RPM mentioned earlier in this discussion.<br />
In summary, it is possible to run an engine at cruise<br />
using 1800 or 1900 RPM. A curve from the Engine<br />
Operator’s Manual should be consulted to insure that<br />
manifold pressure limits are not exceeded. In reality, the<br />
recommendations of the Pilot’s Operating Handbook provide<br />
the best guidance for operation of an aircraft/engine<br />
combination, and therefore the recommendations and<br />
limitations of the POH should be observed.<br />
Lest We Forget - The Engine Will Not Run<br />
Without Air<br />
INDUCTION ICING AND OTHER<br />
OBSTRUCTIONS<br />
Rewritten and combined with article “Induction Icing”<br />
The gasoline engine operates on a fuel/air mixture that is<br />
ignited by the spark plugs. Engines do not run when any of<br />
these elements are missing. Pilots know positively that they<br />
must refuel the aircraft on a regular basis if they want to fly<br />
without incident, but the possibility of losing the air part of<br />
he fuel/air mixture is not always considered and understood<br />
as well as it should be. Perhaps the personal experience of<br />
several individuals, and some facts about induction system<br />
CARBURETOR ICE<br />
45<br />
icing can be used to help Flyer readers avoid an accident<br />
caused by lack of air for their engine.<br />
Remember that any material that reduces or cuts off the<br />
flow of air in the induction system has the potential to cause<br />
a loss of power. A material failure of the air filter is one<br />
problem which is reported all too often. The filter is very<br />
necessary to keep dirt out of the engine: it must be inspected<br />
frequently and should be changed on some regular schedule.<br />
A filter which is several years old and has filtered the air<br />
during hundreds of hours of operation may be tired. One<br />
pilot reported that on turn up of the engine before takeoff, he<br />
could nor get the static RPM that his engine and fixed pitch<br />
propeller should have produced. He wisely elected to return<br />
to the line and have the engine inspected. The air filter had<br />
pulled loose from its supporting frame and was lodged in the<br />
intake system where it was cutting off the air supply.<br />
If this incident had occurred in flight, the engine would<br />
possibly not have been producing enough power to maintain<br />
altitude. Depending on the particular airframe, there are<br />
some options which might be utilized to regain some of the<br />
lost power. An alternate air system or carburetor heat system<br />
is designed into the induction system primarily to combat<br />
induction icing, but use of these systems may possibly help<br />
when intake air is blocked by other foreign materials. In<br />
some cases. just leaning the mixture may help to regain a<br />
little of the lost power.<br />
Several years ago there was a reported loss of engine<br />
power in heavy rain. In that case, a paper air filter was being<br />
used. When saturated with water, the paper filter element<br />
became swollen so that airflow was impeded. In this case,<br />
the use of carburetor heat to bypass the filter and releaning<br />
to achieve a better fuel/air mixture were successful tactics<br />
that kept the aircraft flying until a safe, on airport landing<br />
could be made. We should keep in mind that it is not the<br />
ingestion of water through the engine that causes a serious<br />
loss of power; it is the reduced airflow.<br />
Some pilots of aircraft that utilize a fuel injected engine<br />
believe that this engine makes them immune to induction<br />
icing. This is not so. Although the pilot flying with a fuel<br />
injected engine does not have the same threat of icing at the<br />
venturi as those with a carburetor, rain, snow, slush, and<br />
cold temperatures may cause a blockage (impact ice) to air<br />
flow in other parts of the induction system.<br />
As an example, the pilot of a fuel injected single<br />
reported flying at 11,000 feet in light drizzle. The<br />
temperature was slightly above freezing and water readily<br />
ran off the windscreen. Although this would seem to be a no<br />
problem situation, the engine started to lose power. After<br />
consideration of the available options, the manual alternate<br />
air system was activated. The engine immediately regained<br />
power and flight was continued to the home base<br />
destination. After landing, the aircraft was taken into the<br />
hanger for examination. It was found that the air filter was<br />
covered with a layer of ice that had cut off the airflow. This
is not an isolated or unusual case. When water is near<br />
freezing, movement of the water molecules may sometimes<br />
cause instantaneous freezing. This glazing over of the air<br />
filter is a known phenomena which pilots should expect and<br />
be ready to cope with. Again, bypassing the blockage of<br />
impact ice by use of alternate air proved to be a successful<br />
tactic for this pilot.<br />
The most subtle and insidious of the airflow blockage<br />
possibilities is probably refrigeration ice, known more<br />
commonly as carburetor ice, that forms in the vicinity of the<br />
"butterfly" or throttle plate. Unfortunately, there are many<br />
pilots who are not fully aware of what carburetor ice can do<br />
or what to do about it when it does occur. An indication of<br />
this are statements made by pilots involved in power loss<br />
accidents who have said that they tried carburetor heat,<br />
found it did not work, and then returned the control to the<br />
cold position. Carburetor heat does not provide instant relief<br />
when applied after ice has formed in the carburetor. Once<br />
heat is applied, it should be left on until engine power<br />
returns. Left uncorrected, ice accumulation in the carburetor<br />
may cause complete engine stoppage.<br />
Every pilot who flies an aircraft powered by a carbureted<br />
engine should be thoroughly educated about carburetor ice.<br />
They should know that under moist conditions (a relative<br />
humidity of 50% to 60% is moist enough), carburetor ice<br />
can form with any outside air temperature from 20 to 90°F.<br />
It is most likely in the 30 ° to 60°F range. Temperatures in<br />
the carburetor can drop 60 ° to 70°F (refrigerator effect) as a<br />
result of fuel vaporization and the carburetor venturi effect.<br />
It also happens that carburetor ice forms more readily when<br />
the engine is operated in the lower power range. It will form<br />
while taxiing and this makes it very important to check<br />
engine power before takeoff and to remove the ice if<br />
necessary. Care should be taken to avoid dusty or dirty<br />
conditions when utilizing carburetor heat on the ground.<br />
Next, it is imperative that the pilot recognize carburetor<br />
ice when it forms during flight. The loss of power that<br />
occurs will cause a reduction of RPM when flying with a<br />
fixed pitch propeller, and a loss of manifold pressure when a<br />
controllable pitch propeller is used. In either case, a loss of<br />
altitude or airspeed will occur. These symptoms may<br />
sometimes be accompanied by vibration or engine<br />
roughness. In any case, it is a good idea to consider<br />
carburetor ice as the cause of any unexplained power loss<br />
during cruise flight.<br />
Once a power loss is noticed by the pilot, immediate<br />
action should be taken to eliminate ice which has already<br />
formed in the carburetor, and to prevent further ice<br />
formation. This is accomplished by applying full carburetor<br />
heat which will initially cause a further loss of power<br />
(perhaps as much as 15%) and, possibly, engine roughness.<br />
The additional power loss is caused by the heated air that is<br />
being directed into the induction system. Heated air makes<br />
the mixture richer and also melts the ice which then goes<br />
46<br />
through the engine as water. The throttle may be advanced<br />
and the mixture may be leaned to help get some of the lost<br />
power back, but immediately after the application of<br />
carburetor heat the pilot must be patient and keep the<br />
airplane flying until the ice has completely melted and<br />
normal power returns. How long this will take depends on<br />
the severity of the icing, but the pilot should expect a delay<br />
of 30 seconds to several minutes. Under the circumstances,<br />
this period of time will be stressful and always seems longer<br />
than it really is, but the knowledgeable pilot will not retreat<br />
from use of carburetor heat. Carburetor heat should remain<br />
in the hot position until power returns.<br />
In conditions where carburetor ice is likely to form, the<br />
pilot may use heat during cruise to prevent the formation of<br />
ice in the carburetor. It is also appropriate to use full<br />
carburetor heat, if needed, to prevent icing when operating<br />
at low power for instrument approaches, or for flight in the<br />
traffic pattern. Unless the aircraft is equipped with a<br />
carburetor air temperature (CAT) gage, and very few<br />
general aviation aircraft are, use of full carburetor heat is<br />
recommended. An unknown amount of partial heat can<br />
actually cause induction ice in the float type carburetor. This<br />
may occur when moisture in crystal form in the incoming air<br />
that would ordinarily pass through the induction system<br />
without any problem is melted by the partial heat. This<br />
moisture then freezes when it comes in contact with the cold<br />
metal of the throttle plate.<br />
Whenever carburetor heat is used in the landing<br />
configuration, and a go-around or touch-and-go takes place,<br />
there are some important steps for the pilot to remember.<br />
The throttle must be advanced and the carburetor heat lever<br />
placed in the cold position. The order in which these steps<br />
are accomplished is not too important, but both must be<br />
done. Leaving the carburetor heat on during a go-around<br />
will result in a loss of power that could be critical at low<br />
altitude and low airspeed.<br />
Do not use carburetor heat for takeoff or climb with a<br />
<strong>Lycoming</strong> engine as it is not necessary, and it may bring on<br />
detonation and possible engine damage. An exception to this<br />
rule might be justified in extremely cold weather conditions<br />
such as those found in the Arctic, and these conditions<br />
require a special knowledge to accommodate operation<br />
under such extreme conditions.<br />
A review of the material discussed in this article should<br />
help pilots to cope with reduction of engine power when it is<br />
caused by loss of intake air for combustion. A thorough<br />
understanding of the air intake system and the knowledge to<br />
competently deal with induction icing are essential to safe<br />
flight in general aviation aircraft. Pilots are encouraged to<br />
enhance the safety of their flying by knowing what to expect<br />
and what steps to take when the air flow to the engine is cut<br />
off for any reason.
Cold Weather Operations<br />
A note that came in the mail from a Flyer reader<br />
included a suggestion that went something like this. "How<br />
about an article dealing more extensively with the cold start<br />
problem?" This suggestion was a good one as it provided an<br />
opportunity to share information about a variety of cold<br />
weather considerations to help get the engine started and to<br />
keep it operating during cold weather conditions. Many of<br />
the items included here come from the article "Cold Weather<br />
Tips" that was compiled from the knowledge of several<br />
experienced pilots and originally published in a 1960s-era<br />
Lycominig Flyer.<br />
Although the suggestion made in the first paragraph was<br />
aimed at helping with cold weather starting, this article has<br />
been expanded to include tips and information on preflight,<br />
starting, in-flight safety, and engine operational<br />
considerations. Keep in mind that this material deals with<br />
normal cold weather operation experienced at temperatures<br />
to -25 F, and not the extremely low temperatures that may<br />
be found in Arctic regions. Operation in those regions may<br />
require more specialized knowledge.<br />
Let's start with the general health of the engine. When<br />
attempting a start under adverse conditions, it is imperative<br />
that the engine be well maintained and in excellent operating<br />
condition. Spark plugs and magneto points should be<br />
properly gapped and ready to function effectively. In<br />
addition to the ignition system, the proper functioning of<br />
other systems such as the induction, priming, exhaust, and<br />
carburetor heat can have an effect on the starting and<br />
operation of the engine.<br />
Regular maintenance should include having the heating<br />
system checked for leaks. This cold weather tip is worthy of<br />
a separate little sentence all its own - Remember, you can't<br />
smell carbon monoxide.<br />
In cold weather, preheat is another factor that must be<br />
considered prior to starting the engine. There are specific<br />
guidelines in Textron <strong>Lycoming</strong> service instructions which<br />
establish when preheat should be used, but how much. or the<br />
method of preheat is generally left to the good judgment of<br />
the pilot or maintenance person doing the preheating. Use of<br />
the heated dip stick is not recommended by Textron<br />
<strong>Lycoming</strong>, although most other methods are considered to<br />
be satisfactory. For most <strong>Lycoming</strong> models, preheat should<br />
be applied anytime temperatures are at 10°F or lower. The<br />
exception to this rule is the 76 series models that include the<br />
0-320-H, and the O/LO-360-E. These engines should be<br />
preheated when temperatures are below 20 ° F. It is<br />
recommended that these guidelines be followed even when<br />
multi-viscosity oil is being used. In addition to hard starting,<br />
failure to preheat the entire engine and oil supply system as<br />
recommended may result in minor amounts of abnormal<br />
wear to internal engine parts, and eventually to reduced<br />
engine performance and shortened TBO time.<br />
47<br />
Water is one of the most likely contaminants of aviation<br />
gasoline. The engine will not run on water, and although we<br />
may get away with small amounts of moisture in the fuel<br />
during warm weather, flight into freezing temperatures<br />
makes any amount of moisture in the fuel system very<br />
critical. Even a tiny bubble of moisture may freeze in the<br />
fuel line and totally cut off the flow of fuel. Two steps<br />
should be taken to avoid this problem. First, avoid water<br />
contamination if possible. Keep fuel tanks full to prevent<br />
condensation, and be sure fuel caps do not allow leakage if<br />
the aircraft is parked outside in rain or snow. Second, look<br />
for contamination before every flight by religiously draining<br />
fuel tanks and sumps.<br />
If flight is planned for bad weather, the preflight<br />
inspection should include observation of the relief opening<br />
in the engine breather tube so that any freezing of moisture<br />
at the end of the breather will not result in a loss of engine<br />
oil. (See "The Whistle Slot" in this book.)<br />
Once on board the aircraft, check the fuel selector valve<br />
for freedom of movement. It may be frozen fast (this has<br />
happened) and you'd better find it out while still on the<br />
ground.<br />
Most of the time, we think of starting any engine as a<br />
very simple process. Just engage the starter and listen for the<br />
engine to start purring. Unfortunately, when the weather<br />
turns cold it is not always that simple. When dealing with a<br />
reciprocating aircraft engine, it may be essential to get a<br />
start on the first try in order to avoid icing over the spark<br />
plugs and making an immediate start impossible. In order to<br />
achieve a start on the first try, there are a number of factors<br />
to be considered. Those factors will be discussed in the<br />
following paragraphs.<br />
Although it might be good procedure to use an external<br />
power source for starting during very cold weather, most of<br />
us expect our battery to do the job. We should remember<br />
that the battery is handicapped by cold weather. Particularly<br />
when a single viscosity oil is being used, the colder the<br />
temperature, the more cranking energy required. Combine<br />
this with reduced battery output at lower temperatures and it<br />
can be a serious handicap.<br />
While on the subject of batteries, remember that freezing<br />
temperatures provide a perfect opportunity to destroy an<br />
aircraft battery. The battery with a full charge survives<br />
nicely, but one that is discharged will freeze. Once this<br />
happens, the problem can only be remedied by replacing the<br />
battery, so it is very worthwhile to take preventive measures.<br />
Should the battery be run down during an attempt to start, do<br />
not leave it; get it charged immediately. And finally, be<br />
absolutely certain that the master switch is always OFF<br />
while the aircraft is parked between flights. If left on, the<br />
battery will discharge and freeze. These rather minor<br />
mistakes can be quite expensive.
Oil is another factor to be considered in the cold weather<br />
starting process. All oils are affected by temperature and<br />
tend to thicken as the temperature drops. The engine may be<br />
reluctant to turn over when the oil is stiff; a summer weight<br />
oil is not suitable in cold weather. It is also the condition<br />
which brings out the primary advantage of multiviscosity<br />
oils and of preheating. Because multiviscosity oils are<br />
thinner (lower viscosity), they allow the engine to be turned<br />
over more easily. The easier and quicker oil flow also<br />
promotes faster lubrication of internal engine parts when the<br />
engine does start. Since the proper oil viscosity is so<br />
important in all aspects of engine starting and operation, the<br />
recommendations of oil grade vs. temperature range shown<br />
in Textron <strong>Lycoming</strong> Service Instruction No. 1014 should<br />
be followed.<br />
Probably the most important factor in starting an engine<br />
is achieving a fuel/air mixture that is satisfactory for<br />
combustion. Since the engine usually starts very easily,<br />
many pilots are unaware of or ignore the change of starting<br />
procedure needed to successfully start under varying<br />
temperature conditions. In warm weather the air is less<br />
dense and therefore must be mixed with a lesser amount of<br />
fuel than in cold weather. In addition to this, in warm<br />
weather the fuel will vaporize readily and make starting<br />
easier. Simply stated, as temperatures go down it becomes<br />
more and more important that we have a plan for priming<br />
that will achieve the correct fuel/air mixture.<br />
When priming a carbureted engine, the pilot's plan must<br />
consider the temperature, the number of cylinders which<br />
have priming lines installed, and the number of strokes of<br />
the primer needed to produce the correct fuel/air mixture.<br />
The primer lines are ordered or installed by the airframe<br />
manufacturer and not all aircraft are configured the same.<br />
Some aircraft have actually been produced with only one<br />
cylinder being primed, and these engines are extremely hard<br />
to start in cold weather. The number of cylinders that are<br />
primed must be considered since the total fuel delivered by<br />
the primer will be divided and sent to these cylinders. As the<br />
air becomes colder and denser, the amount of prime used<br />
must be increased, but the number of strokes to be used<br />
should be planned as a result of some trial and error<br />
experimentation for each aircraft a pilot flies. When the<br />
correct number of primer strokes for each temperature range<br />
has been established, the engine will usually start very<br />
quickly. We may find that an engine starts easily when one<br />
stroke of the primer is used in the sixty-degree range, two<br />
strokes in the fifty-degree range, three strokes in the fortydegree<br />
range, etc. This is an example of the trial and error<br />
we might use to establish the number of primer strokes to<br />
use under any particular temperature condition.<br />
While discussing the priming of an engine, there have<br />
been situations where primer lines become clogged. This<br />
makes engine starting difficult and negates any trial and<br />
error experimentation that may have been done. When<br />
maintenance is done on an aircraft before the start of winter,<br />
48<br />
it may be wise to have those primer lines checked to insure<br />
that fuel will flow through them.<br />
The amount of fuel needed to achieve the correct fuel/air<br />
mixture for starting a fuel injected engine is controlled by<br />
timing rather than number of primer strokes. With the<br />
electric fuel pump on, moving the mixture control to the rich<br />
position allows fuel to flow to the cylinders. For cold<br />
weather starting, it may be necessary to keep the mixture<br />
control in rich somewhat longer than in warm weather.<br />
The fuel part of the fuel/air mixture may be the part we<br />
have the most control over during the engine start, but keep<br />
in mind that the amount of throttle opening does have an<br />
effect on the air that is pumped through the engine. Just as<br />
we compensate for cold/dense air by adding more fuel for<br />
start, it may also be appropriate to reduce the air part of the<br />
mixture when the temperature is very cold. For example, if<br />
the throttle is normally set open one half inch for warm<br />
weather starting, it may be helpful to reduce this to one<br />
quarter inch in cold weather. Again, it will require some<br />
experimentation to determine what is needed to achieve the<br />
correct fuel/air mixture for any particular aircraft at any<br />
temperature range.<br />
When an engine does not start easily, it can be<br />
frustrating. Of course this can occur at any time of the year<br />
and it is very tempting to just keep grinding away with the<br />
starter in an attempt to get it going. Should this happen to<br />
you, RELAX. Take care of that starter or it may fail. The<br />
general rule for starters is that they should only be operated<br />
for short periods, and then allowed to cool. If engine start<br />
has not occurred after three, 10-second periods of operation<br />
with a pause between each, a five minute cooling off period<br />
is required. Without this time limit for operation and an<br />
adequate cooling off period, the starter will overheat and is<br />
likely to be damaged or to fail completely.<br />
The previous paragraphs have addressed several issues<br />
that relate to the cold weather preflight and the cold weather<br />
start. There are other cold weather items that should be<br />
considered in the operation of the engine.<br />
Assuming the engine has kicked off, check for an<br />
indication of oil pressure. Learn the characteristics relative<br />
to response of oil pressure indications of your<br />
aircraft/engine combination. On most single engine aircraft<br />
an almost immediate response is noted. On twin engine<br />
aircraft the response may be much slower. On some twins,<br />
the oil pressure may go up and during warm up may drop<br />
again for a short period of time, then again rise to normal.<br />
All cases mentioned may be normal, but the important thing<br />
is to know what to expect from your aircraft/engine<br />
combination.<br />
After start, do not idle engine below 1000 RPM. It's not<br />
good practice to idle engines below 1000 RPM at any time.<br />
This is particularly true during cold weather to prevent lead
fouling of spark plugs. (Exception - Piper Pressurized<br />
Navajo)<br />
Now here's a tip for the novice pilots. When setting up<br />
for cruise configuration, be precise, read your instruments<br />
and remember what you read. Example: If you decide on 22<br />
inches of manifold pressure, set it right on 22. If the RPM is<br />
to be 2350, make it 2350. Select an altitude. Trim the<br />
aircraft to hold that selected altitude. Note airspeed. Now, if<br />
anything changes, barring turbulent air, it has to be a change<br />
in power. Perhaps it is carburetor or induction air icing.<br />
Suppose you picked up a bit of carburetor ice and the engine<br />
suffers a slight power loss. There will be a slight drop in<br />
manifold pressure, a loss in airspeed. and the aircraft will<br />
want to lose altitude, and if you hold altitude you'll find<br />
back pressure on the wheel is required. Therefore, even<br />
though you didn't discover the power loss through<br />
instrument scanning, you'll get a warning through the<br />
"heavy" wheel or stick.<br />
During flight in very low temperatures, exercise constant<br />
speed props about every 30 minutes to help prevent<br />
congealing of oil in the prop dome.<br />
Should one engine of a twin, for any reason indicate the<br />
prop must be feathered, don't tarry too long with reduced<br />
power in very cold weather. At reduced power, the oil may<br />
congeal making feathering an impossibility.<br />
A tip for every pilot, don't run one set of fuel tanks<br />
nearly dry before switching tanks. Switch with plenty of fuel<br />
remaining in the tanks first used. This is "money in the<br />
bank," should you find the selector valve frozen.<br />
Although carburetor ice is not necessarily a wintertime<br />
phenomena, a check of carburetor heat should be made<br />
during the engine run-up. Generally speaking, we can say<br />
that carburetor heat should never be used for takeoff, but<br />
there is one exception. This exception occurs when<br />
operating in temperatures so cold that application of<br />
carburetor heat produces a rise in RPM. Most pilots will<br />
never find themselves in circumstances which require use of<br />
carburetor heat for takeoff and climb; those who fly<br />
carbureted engines will almost certainly have occasion to<br />
use carburetor heat during cruise or let down. Use of the full<br />
hot or full cold position is recommended. An intermediate<br />
setting should only be selected if the aircraft is equipped<br />
with a carburetor air temperature (CAT) gage.<br />
Engine operating temperature is another item that is not<br />
usually given enough consideration in cold weather. We<br />
usually are very cautious about high oil temperature which<br />
we know is detrimental to good engine health, while a low<br />
oil temperature is easier to accept. The desired oil<br />
temperature range for <strong>Lycoming</strong> engines is from 165<br />
degrees to 220 degrees F. If the aircraft has a winterization<br />
kit, it should be installed when operating in outside air<br />
temperatures (OAT) that are below the 40 to 45 degree F.<br />
range. If no winterization kit is supplied and the engine is<br />
49<br />
not equipped with a thermostatic bypass valve, it may be<br />
necessary to improvise a means of blocking off a portion of<br />
the air flow to the oil cooler. Keeping the oil temperature<br />
above the minimum recommended temperature is a factor in<br />
engine longevity. Low operating temperatures do not<br />
vaporize the moisture that collects in the oil as the engine<br />
breathes damp air for normal combustion. When minimum<br />
recommended oil temperatures are not maintained, oil<br />
should be changed more frequently than the normally<br />
recommended 50 hour change cycle. This is necessary in<br />
order to eliminate the moisture that collects and<br />
contaminates the oil.<br />
And finally, power-off let downs should be avoided.<br />
This is especially applicable to cold weather operations<br />
when shock cooling of the cylinder heads is likely. It is<br />
recommended that cylinder head temperature change not<br />
exceed 50°F. per minute. Plan ahead, reduce power<br />
gradually and maintain some power throughout the descent.<br />
Also keep the fuel/air mixture leaned out during the descent.<br />
If an exhaust gas temperature gage is installed with a<br />
normally aspirated engine, keep it peaked to insure the<br />
greatest possible engine heat for the power setting selected;<br />
for a turbocharged installation, lean to peak during descent<br />
unless otherwise specified in the Pilot's Operating<br />
Handbook, or under conditions where the limiting Turbine<br />
Inlet Temperature would be exceeded.<br />
Exposure to snow, frost and cold weather while flying<br />
requires the consideration of many factors, both airframe<br />
and engine related. This discussion deals with issues relating<br />
to the engine. While there may be other issues, those items<br />
which are asked about most frequently have been discussed.<br />
Safer flying and longer engine life could result from careful<br />
consideration of the material addressed.<br />
National Transportation Safety Board<br />
Warning On Simulated Engine-Out Maneuvers<br />
The fatal crash of a light twin in which a flight instructor<br />
and an applicant for a multiengine rating were killed<br />
prompted the NTSB to issue an urgent warning to all pilots<br />
simulating an engine-out condition on multiengine airplanes.<br />
The Board's investigation revealed that some flight<br />
instructors do use the fuel selector or the mixture control to<br />
shut down an engine to test a multiengine applicant.<br />
Although this is a recommended procedure, the urgent<br />
warning was aimed at flight instructors who were using this<br />
procedure at altitudes too low for continued safe flight.<br />
The NTSB observed that use of such procedures at<br />
traffic pattern altitudes may not permit instructors enough<br />
time to overcome possible errors on the part of the applicant.<br />
The recommendation by the NTSB means that all simulated<br />
engine-out operation at the lower altitudes should be
accomplished by retarding the throttle, and this should be<br />
done slowly and carefully to avoid engine damage or failure.<br />
Many flight instructors down through the years used the<br />
technique of abruptly cutting an engine with a multiengine<br />
candidate to test his emotional reaction and judgment with<br />
this extreme technique. Big radial piston engines with short,<br />
stubby crankshafts could tolerate the abrupt technique.<br />
However, flat opposed piston engines with their long<br />
crankshafts and attached counterweights could not as readily<br />
take the abuse of suddenly snapping a throttle shut,<br />
particularly at takeoff or climb power. Use of the latter<br />
technique would tend to detune crankshaft counterweights<br />
and could possibly result in a nasty engine failure.<br />
Since it was common technique by flight instructors to<br />
terminate power abruptly to simulate an engine power loss,<br />
we had to protect the engine. As a result, we published in<br />
our Engine Operator's Manual and in Service Bulletin No.<br />
245, the recommendation that if the power was abruptly<br />
terminated, it must be accomplished with the mixture<br />
control. Of course, this was intended for the higher altitudes<br />
where a complete engine shut-down could be conducted<br />
safely. The student was to identify the dead engine by<br />
retarding that throttle to about 12 inches MP to simulate zero<br />
thrust, or similar to having the prop feathered. At that point<br />
the instructor could immediately return the mixture to an<br />
engine operating condition and power would be available if<br />
needed<br />
In our publications we then explained the reason for<br />
using the mixture to abruptly terminate power. By putting<br />
the mixture control in idle cutoff position with the throttle in<br />
a normal open or operating position, the pilot merely cut off<br />
the fuel, but allowed the air to continue to fill the cylinders<br />
with resulting normal compression forces that are sufficient<br />
to cushion the deceleration of the engine and prevent the<br />
detuning of the crankshaft counterweights.<br />
However, any practice of simulated engine-out condition<br />
at low altitudes should be best accomplished by a slow<br />
retardation of the throttle in accordance with the NTSB<br />
recommendation. This careful technique will protect the<br />
engine, and at the same time provide for instant power if it is<br />
needed.<br />
Importance Of The Cylinder Head<br />
Temperature<br />
Although the smaller four cylinder engines of the low<br />
compression, low horsepower variety do not generally use a<br />
cylinder head temperature gage, the higher powered, more<br />
complex powerplants require a cylinder head temperature<br />
gage in order to prevent unwitting abuse by the pilot. If<br />
head temperatures are higher than normal during flight,<br />
it should not be ignored because there is some reason for<br />
it. It may be caused by hot ambient temperatures, a lean fuel<br />
50<br />
metering device at higher than cruise power, bad baffles or<br />
leaking cowling, or malfunctioning of the ignition system.<br />
Even old and tired engine mounts that allow the engine to<br />
sag slightly may cause a change in the air-flow pattern and<br />
an abnormal increase in CHT. It is also possible that a<br />
mechanical problem may be developing in the engine.<br />
When higher than normal cylinder head temperatures are<br />
showing on the gage, the pilot should take steps to bring the<br />
temperatures down to the normal operating range in order to<br />
keep the remaining flight safe. Head temperatures may be<br />
reduced by:<br />
1. Enriching the mixture<br />
2. Adjusting cowl flaps<br />
3. Reducing power<br />
4. Any combination of the above<br />
We suggest that in order to help the mechanic diagnose<br />
the problem, the pilot or some member of the crew should<br />
make a written record of the engine instrument readings<br />
during the above flight condition and present it to the<br />
maintenance people.<br />
A first step in diagnosing abnormal cylinder head<br />
temperatures would be insuring that the gages are providing<br />
accurate readings. If they are, the mechanic can then<br />
proceed to check engine baffles that may have deteriorated,<br />
proper flow of the fuel metering device, and then other more<br />
time consuming checks for ignition or mechanical<br />
malfunction.<br />
More On Cylinder Head Temperature<br />
The cylinder head temperature gage (CHT) helps the<br />
pilot protect his engine against the threat of excessive heat.<br />
Most General Aviation aircraft take the CHT off the hottest<br />
single cylinder of the four, six or eight cylinder powerplants<br />
determined by extensive flight tests. Optional installations<br />
offer readings from all cylinders. In <strong>Lycoming</strong> engines, all<br />
cylinders are drilled to accommodate a CHT bayonet type<br />
thermocouple.<br />
Some operators in the field have been using a spark plug<br />
gasket-type installation in order to get cylinder head<br />
temperature readings. Textron <strong>Lycoming</strong> Engineering does<br />
not currently approve this method of determining CHT. Not<br />
only is the method less accurate than the recommended<br />
thermocouple type, but the temperature readings differ<br />
noticeably from the approved installations.<br />
Minimum in-flight CHT should be 150 F (65 C), and<br />
maximum in most direct drive normally aspirated <strong>Lycoming</strong><br />
engines is 500 F (260 C). Some of our higher powered<br />
more complex engines have a maximum limit of 4750 F<br />
(2450 C). Although these are minimum and maximum<br />
limits, the pilot should operate his or her engine at more
easonable temperatures in order to achieve the expected<br />
overhaul life of the powerplant. In our many years of<br />
building engines, the engines have benefited during<br />
continuous operation by keeping CHT below 400 F in<br />
order to achieve best life and wear of the powerplant. In<br />
general, it would be normal during all year operations, in<br />
climb and cruise to see head temperatures in the range of<br />
350 F to 435 F.<br />
If an engine has bayonet probes in all cylinders, it is not<br />
unusual to see variations in CHT readings on fuel injected<br />
engines of 100 O F between cylinders, and as much as 150 F<br />
on engines with float-type carburetors. With the latter, an<br />
important cause of the variation is the kind of distribution of<br />
fuel and air to the individual cylinders. Other influences on<br />
CHT are such items as cylinder baffles, cowling, cowling<br />
flaps, location of engine accessories and of course manual<br />
control of fuel mixture.<br />
It is very important that the CHT probes be checked on a<br />
regular basis. When these bayonet probes deteriorate, they<br />
tend to give readings that are less than the actual<br />
temperature of the cylinder head. This can result in<br />
operation above the recommended maximum temperature<br />
without the pilot even knowing it.<br />
Operators frequently ask about the difference between<br />
the CHT and EGT (exhaust gas temperature) systems, and<br />
their meaning to the pilot during operation of the engine or<br />
engines. The EGT probe is installed in a different location<br />
from the CHT, or about four inches from the cylinder head<br />
down the exhaust stack. Although the EGT has some<br />
troubleshooting ability, it is primarily a fuel management<br />
instrument. On the other hand, the CHT is an engine<br />
instrument designed to protect the powerplant against its<br />
enemy, excessive heat.<br />
Interpreting Your Engine Instruments<br />
The present day piston engine instruments used in the<br />
typical general aviation airplane are not precision laboratory<br />
instruments. We exclude the turbine and jet powered aircraft<br />
from this discussion and will consider only piston engines,<br />
recognizing that the more expensive pressurized twin engine<br />
models may also be exceptions.<br />
Nevertheless, the purpose of this brief presentation is a<br />
practical approach to interpreting the readings of your<br />
engine instruments in accomplishing a safe and efficient<br />
flight. If, for example, you were to observe an irregular<br />
reading of one engine instrument, it calls for a cross-check<br />
on all other instruments, and not relying on one instrument<br />
as a basis for a decision affecting flight.<br />
Since the engine is dependent on fuel, we consider the<br />
gasoline gage as a related engine instrument. If pilots are<br />
going to attempt to stretch their flight range close to limits,<br />
they should be aware of the errors in the gages vs. the actual<br />
51<br />
usable fuel. Some modern single engine aircraft have had<br />
the gas gage show several gallons remaining, when in reality<br />
the tank was empty. Others have indicated a specific number<br />
of gallons when filled, but actually the tank held several<br />
gallons less than indicated.<br />
Therefore, in planning for each flight, remember that<br />
general aviation engine instruments are not precision<br />
laboratory types, so cross-check, and give yourself an extra<br />
margin for safety.<br />
Suggestions On Engine Starts<br />
An important part of the engine starting procedure is the<br />
priming technique involved. Of course, the pilot's operating<br />
handbook will specify the steps in starting a specific model<br />
engine. However, some of the pilot handbooks may not<br />
explain why certain procedures are used in the starting<br />
process.<br />
Priming can be best accomplished with an engine<br />
priming system, as opposed to use of the throttle. The<br />
primer pumps extra fuel directly into the cylinder intake port<br />
or induction system. Some float-type and pressure<br />
carburetors also provide a supplemental source of priming.<br />
<strong>Lycoming</strong> engines of more than 118 HP have a throttle<br />
pump which can be used for priming under moderate<br />
ambient temperature conditions while turning the engine<br />
with the starter.<br />
Pilots should, however, be advised that excessive throttle<br />
priming can cause flooding of the carburetor and airbox, and<br />
result in a fire in the induction system or on the outside<br />
where the fuel drains overboard. If the operator floods the<br />
engine by pumping the throttle and has a fire, it is possible<br />
to handle such a fire in the early stages by continuing to turn<br />
the engine with the starter, thereby sucking the fire back into<br />
the engine. Furthermore, if there is any fire on the outside of<br />
the engine, if the engine starts there is a good chance it will<br />
blow out the external fire.<br />
Flooding of the engine without a fire, the operator<br />
should open the throttle full and close the mixture; (see<br />
Operator's Handbook on mixture) and turn the engine over<br />
several times with the starter to clear it; then begin again<br />
with a normal start routine.<br />
Most <strong>Lycoming</strong> fuel injected engines are simply primed<br />
by turning the fuel boost pump on, opening the mixture<br />
briefly to full rich, and cracking the throttle. Any pumping<br />
of the throttle is ineffective until the engine begins to fire.<br />
FUEL CONTAMINATION-Water (says the FAA) is<br />
the principal contamination of aviation fuel. For a safe<br />
flight, carefully drain fuel sumps at each preflight.
Use Of Fuel Boost Pumps With Textron<br />
<strong>Lycoming</strong> Engines<br />
As an engine manufacturer, we are frequently asked<br />
about the proper use of the fuel boost pump with our<br />
powerplants. Although we can't pretend to be an expert on<br />
the fuel boost pump itself, we have some positive<br />
recommendations concerning its use with our engines.<br />
Where a boost pump is provided by the airframe<br />
manufacturer, and the airframe Pilot's Operating Handbook<br />
has a limited treatment of the use of the fuel boost pump,<br />
perhaps this discussion can provide the necessary fuel boost<br />
pump information for the pilot in order to operate his or her<br />
engine as safely as possible.<br />
It is necessary to supply the engine with a steady,<br />
uninterrupted flow of fuel for all operating conditions.<br />
Entrapped air, temperature changes, pressure drops,<br />
agitation in the fuel lines and other factors affect the release<br />
of air and vapor from the fuel system. Under some<br />
circumstances where an engine mounted fuel pump is<br />
provided it may not be able to pump a continuous fuel<br />
supply free of excessive vapor.<br />
An effective continuous fuel supply is provided by use<br />
of the fuel boost pump. As a general recommendation, the<br />
fuel boost pump should be used with <strong>Lycoming</strong> engines in<br />
all conditions where there is any possibility of excessive<br />
vapor formation, or when a temporary cessation of fuel flow<br />
would introduce undesirable hazards. The conditions under<br />
which Textron <strong>Lycoming</strong> recommends operation of the fuel<br />
boost pump are as follows:<br />
1. Every takeoff.<br />
2. Climb after takeoff unless Pilot's Operating Handbook<br />
says it is not necessary.<br />
3. When switching fuel selectors from one separate fuel<br />
tank to another, the fuel boost pump should be "On" in the<br />
new tank until the operator is assured there will be no<br />
interruption of the fuel flow.<br />
4. Every landing approach.<br />
5. Any time the fuel pressure is fluctuating and the<br />
engine is affected by the fluctuation.<br />
6. Hot weather, hot engine ground operation where fuel<br />
vapor problems cause erratic engine operation<br />
7. Some General Aviation aircraft require the use of the<br />
fuel boost pump during high-altitude flight. This will be<br />
spelled out in the Pilot's Operating Handbook.<br />
8. If the engine mounted fuel pump fails.<br />
If the fuel boost pump is used during ground operation,<br />
don't fail to check the condition of the engine mounted fuel<br />
pump before takeoff by turning the boost pump off briefly,<br />
and then back "on" for takeoff. If the engine mounted pump<br />
has failed, it would be safer to know that on the ground<br />
52<br />
rather than in the air when the fuel boost pump is turned<br />
"off."<br />
When in doubt, do the safest thing and use the fuel boost<br />
pump with <strong>Lycoming</strong> engines. Don't be "stingy" with the<br />
boost pump. In most cases they last the overhaul life of the<br />
engine, and are then exchanged or overhauled themselves.<br />
AS A REMINDER, the airframe Pilot's Operating<br />
Handbook is the authority if boost pump information is<br />
spelled out in it.<br />
Avoid Sudden Cooling of Your Engine<br />
Sudden cooling is detrimental to the good health of the<br />
piston aircraft engine. Textron <strong>Lycoming</strong> Service Instruction<br />
1094D recommends a maximum temperature change of<br />
50°F per minute to avoid shock cooling of the cylinders.<br />
Operations that tend to induce rapid engine cool down<br />
are often associated with a fast let down and return to the<br />
field after dropping parachutists or a glider tow. There are<br />
occasions when Air Traffic Control also calls for fast<br />
descents that may lead to sudden cooling.<br />
The engine problems that may be expected when pilots<br />
consistently make fast letdowns with little or no power<br />
include:<br />
1. Excessively worn ring grooves accompanied by<br />
broken rings.<br />
2. Cracked cylinder heads.<br />
3. Warped exhaust valves.<br />
4. Bent pushrods.<br />
5. Spark plug fouling.<br />
Generally speaking, pilots hold the key to dodging these<br />
problems. They must avoid fast letdowns with very low<br />
power (high cruise RPM and low manifold pressure), along<br />
with rich mixtures that contribute to sudden cooling. It is<br />
recommended that pilots maintain at least 15" MP or higher<br />
and set the RPM at the lowest cruise position. This should<br />
prevent ring flutter and the problems associated with it.<br />
Letdown speed should not exceed high cruise speed or<br />
approximately 1000 feet per minute of descent. Keeping<br />
descent and airspeed within these limits will help to prevent<br />
the sudden cooling that may result in cracked cylinder<br />
heads, warped exhaust valves, and bent pushrods.<br />
The mixture setting also has an effect on engine cooling.<br />
To reduce spark plug fouling and keep the cylinder cooling<br />
within the recommended 50 per minute limit, the mixture<br />
should be left at the lean setting used for cruise and then<br />
richened gradually during descent from altitude. The lean<br />
mixture, maintaining some power, and using a sensible<br />
airspeed should achieve the most efficient engine<br />
temperatures possible.
The operating techniques recommended in this article are<br />
worth consideration as they will be a positive step<br />
toward saving dollars that might be spent on maintenance.<br />
Whatever the circumstances, pilots must plan their flight<br />
operations so that the potential damage caused by sudden<br />
engine cooling can be avoided.<br />
Sticking Valves<br />
Do Not Neglect The Warning Signs<br />
Knowledge gained from the experience of others is<br />
usually the easy way to learn. In the case of sticking valves<br />
that may damage an engine or cause it to fail. it is surely<br />
best if the knowledge is not acquired first hand. The<br />
experience of others is related in the following paragraphs.<br />
One of the regional service managers here at the<br />
<strong>Lycoming</strong> factory indicated that his experience over the<br />
years included working on engines with sticking valves. He<br />
commented that the engine will almost always provide a<br />
warning by running very rough at start up. As the engine<br />
warms up it may then smooth out after a few seconds and<br />
run normally, but the initial roughness is a warning that<br />
preventive maintenance action is required.<br />
Just a few days after these comments were made, a<br />
conversation with an aircraft owner confirmed that the<br />
regional manager’s comments were right on target. This is<br />
the story which the aircraft owner related.<br />
An aircraft had been purchased recently and the owner<br />
flew it to altitude in the vicinity of his home airport to<br />
satisfy himself of the aircraft capability to fly over<br />
mountainous terrain during a planned vacation trip. Content<br />
53<br />
that the aircraft and engine were capable of meeting his<br />
requirements, the vacation trip was undertaken. All went<br />
smoothly on the first 300 mile leg of the trip which ended<br />
with a planned overnight stop.<br />
When the engine was started the next day, it was very,<br />
very rough, but smoothed out and ran normally after a short<br />
time. With the engine running smoothly. the vacation trip<br />
continued to its destination. The aircraft was then tied down<br />
and not operated until it was time for the return trip - a<br />
period of about one week.<br />
As the engine was started for the return trip, it again<br />
gave indications that a valve was momentarily sticking ... it<br />
ran very rough for several seconds, but then smoothed out.<br />
With the engine running smoothly again, the return trip was<br />
started. After one to two hours of flight at altitude, over<br />
mountainous terrain, the engine ran very rough again for a<br />
short period of time, and then smoothed out. The pilot<br />
decided to land at the nearest airport.<br />
Examination of the engine revealed a considerable<br />
amount of oil leakage. The cause-a valve which had stuck<br />
solidly and caused the pushrod to bend. This bending<br />
ruptured the pushrod shroud tube and allowed oil to escape.<br />
This is a classic example of the damage that sticking valves<br />
can cause.<br />
The lesson to be learned is quite simple. Do not neglect<br />
the warning signs. Perhaps the experience related here will<br />
allow others to recognize a rough running engine at start up<br />
as a possible indication of sticking valves. The next step is<br />
to take immediate action to prevent damage.<br />
Although there may be an occasional exception, it is<br />
almost always an exhaust valve that sticks. To prevent
further valve sticking and to reduce the possibility of<br />
damage, all exhaust valve guides should be cleaned of any<br />
carbon, varnish, or other contamination buildup. This is<br />
accomplished by reaming the guides to their original size as<br />
specified in Textron <strong>Lycoming</strong> Publication SSP 1776, Table<br />
of Limits. The latest revision of Textron <strong>Lycoming</strong> Service<br />
Instruction 1425 provides recommendations to reduce the<br />
possibility of valve sticking. In particular, Part III of the<br />
instruction gives a procedure for reaming valve guides that<br />
can be accomplished without removing the engine from the<br />
aircraft or the cylinders from the engine.<br />
Operational and Maintenance Procedures To<br />
Avoid Sticking Valves<br />
Considering that the properly timed sequence of valve<br />
opening and closing is essential to efficient and reliable<br />
engine operation, anytime those valves stick for any reason,<br />
it is a serious problem. Therefore the purpose of this article<br />
is to provide our readers with some insight into this problem<br />
along with methods to help avoid it.<br />
The space between the continuously moving valve stem<br />
and its stationary valve guide is extremely critical. Note that<br />
the amount of clearance can be affected by high<br />
temperatures, engine cleanliness, and extended periods of<br />
engine inactivity. Changes in valve to guide clearance can<br />
occur during the course of engine operation. In other words,<br />
a sticking or broken valve may not be the fault of the engine.<br />
It is possible to promote valve sticking, and there are actions<br />
that can be taken to reduce or eliminate the possibility of<br />
this phenomena. These actions will affect engine cooling,<br />
fuel management, and internal engine cleanliness.<br />
Engine cleanliness is a primary consideration that is<br />
affected by many maintenance and operational procedures.<br />
Proper filter maintenance is one such item. The induction air<br />
filter is the first line of defense in keeping dirt and abrasives<br />
from entering the engine. To prevent dirt from entering the<br />
engine, the filter must form a good seal with the filter<br />
holder, and the induction system should be free of air leaks.<br />
The air filter should be cleaned or changed on a regular<br />
basis. In extremely dusty conditions, a filter change could be<br />
necessary as frequently as every few hours of operation.<br />
The second line of defense against dirt and abrasives is<br />
the full flow oil filter that is standard with most <strong>Lycoming</strong><br />
engines now being produced. Older engines were<br />
manufactured with a pressure screen, but may be converted<br />
to a full flow filter for more effective cleaning of the oil.<br />
Textron <strong>Lycoming</strong> Service Publication SSP-885-1 provides<br />
information and instructions needed for this conversion.<br />
Another contributor to a variety of engine problems,<br />
including valve sticking, is frequent, long periods of<br />
inactivity. An engine should be flown regularly to stay in<br />
tiptop condition. The oil in the sump collects residue from<br />
54<br />
combustion such as moisture, acid, and lead sludge. Flying<br />
the aircraft tends to heat the oil enough to vaporize the<br />
moisture and help eliminate some of these contaminants, but<br />
an engine that is not flown will collect moisture, acids and<br />
gums which may contribute to corrosion and to valve train<br />
problems. In addition to frequent flight, these contaminants<br />
are also eliminated from the engine by changing the oil.<br />
Textron <strong>Lycoming</strong> Service Bulletin No. 480 makes these<br />
recommendations for engines operating under normal (nondusty)<br />
conditions:<br />
a. 50-hour interval oil change and filter replacement for<br />
all engines using a full-flow filtration system.<br />
b. 25-hour interval oil change and screen cleaning for all<br />
engines employing a pressure screen system.<br />
c. A total of four months maximum between oil changes<br />
for either of the systems discussed under a. and b., even if<br />
the engine is not flown.<br />
Reports from aircraft owners continue to indicate that<br />
trouble-free operation through TBO is most often obtained<br />
with engines subjected to frequent oil change intervals.<br />
Absurd as it may seem, an engine which does not fly<br />
regularly should have the oil changed at more frequent flight<br />
time intervals than one that does fly regularly.<br />
Preventing a buildup of contaminants is just as important<br />
as eliminating those that do form. Avoiding long periods of<br />
ground operation is a vital step since moisture can enter the<br />
breather, but will not vaporize when the oil is not heated to<br />
normal operating temperatures. Ground running also<br />
involves a slightly rich mixture which contributes to the<br />
formation of lead sludge in the oil. During flight, the deposit<br />
of lead sludge in the oil can be minimized by proper leaning.<br />
Although some excess fuel is required for engine cooling<br />
during high power operation, proper leaning at cruise power<br />
settings will promote complete burning of the fuel and,<br />
therefore, a minimum of lead sludge deposited in the oil.<br />
This is important since lead sludge is not filtered out, but is<br />
removed by changing the oil. The airframe manufacturers<br />
recommendations and limitations for leaning should be<br />
observed, but it may be beneficial to be aware that when<br />
permitted by the Pilot's Operating Handbook, leaning to<br />
peak EGT at cruise power settings will produce complete<br />
burning of the fuel/air mixture for best economy and<br />
reduction of combustion related contaminants.<br />
Having touched on fuel management and maintenance<br />
items required to keep an engine clean internally, the final<br />
factor affecting potential valve sticking is engine operating<br />
temperature. Some operating procedures already discussed<br />
also have an effect on engine temperature. Prolonged engine<br />
ground run-up at high power settings, for example, can<br />
cause engine overheating or hot spots since cooling air flow<br />
is not always adequate when the aircraft is stationary.<br />
Since proper engine operating temperatures fall within a<br />
minimum and maximum range it is important to consider all
aspects. It must be emphasized that baffles designed to<br />
direct cooling air over the cylinders must be maintained<br />
in good condition. They play an extremely important role.<br />
If these baffles deteriorate or are installed so that cooling air<br />
is not adequately contained and directed, hot spots which<br />
promote a lead or carbon buildup may occur. During hot<br />
weather in particular, those baffles or ducts that direct<br />
cooling air through the oil cooler must also be maintained in<br />
good condition.<br />
The pilot, as well as Maintenance personnel, will play an<br />
important role in insuring that engine operating temperatures<br />
do not promote valve sticking. As mentioned earlier, ground<br />
running far in excess of the time necessary for engine warm<br />
up should be avoided. Also to be considered is continuous<br />
operation at very low aircraft speeds that may not generate<br />
the most efficient flow of cooling air over the engine. This<br />
lack of effective cooling air may cause some areas of the<br />
engine to be excessively hot, and therefore have an effect on<br />
any contaminants that are in the oil. The formation of<br />
deposits is promoted with the exhaust valve guide area the<br />
most likely to be affected. The result of these deposits may<br />
be a stuck or sticking valve.<br />
The other end of the spectrum controllable by the pilot is<br />
excessively rapid cool down of an engine that has been<br />
running at normal operating temperatures. <strong>Lycoming</strong><br />
engines are made with various metals that expand and<br />
contract at different rates when exposed to heat or cold. It is<br />
poor technique to "chop" the power from cruise or higher<br />
power settings to idle and then start a rapid let down which<br />
develops excessive cooling air flow over the engine. It is<br />
always best to reduce power in increments so that engine<br />
temperature changes will occur gradually. It is also<br />
beneficial to continue the engine cooling process after<br />
landing by insuring that several minutes of engine operation<br />
at 800 to 1200 RPM are allowed before shut down. At large<br />
airports this is usually accomplished by the time taxi to the<br />
parking area is completed. At airports where clearing the<br />
runway puts the aircraft in the parking area, a short period of<br />
additional operation in the 800 to 1200 RPM range prior to<br />
engine shut down will allow temperatures to stabilize.<br />
A logical question after this long series of things to do<br />
and things not to do might be this, "Is there any way to tell if<br />
a valve is sticking before serious damage occurs?" There are<br />
sometimes warning signs that should be investigated.<br />
Although there may be other causes, an intermittent<br />
hesitation or miss in the engine may be an indication that<br />
carbon or other similar contaminants have built up inside the<br />
valve guide causing the valve stem to drag instead of<br />
moving freely. These contaminants should be removed by<br />
reaming the guide to the size specified in the Textron<br />
<strong>Lycoming</strong> Table of Limits (SSP 1776). The procedure to be<br />
used when reaming to remove valve guide deposit buildup is<br />
found in Textron <strong>Lycoming</strong> Service Instruction 1425.<br />
Known as "the old rope trick" to many A&P mechanics, this<br />
valve guide reaming procedure restores valve stem to guide<br />
55<br />
running clearance and can be accomplished without<br />
removing the engine from the aircraft.<br />
To summarize, procedures to reduce valve sticking will<br />
also reduce the probability of additional engine damage<br />
which may cause loss of power and the need for costly<br />
repairs. These procedures may be reduced to relatively<br />
simple terms: The maintenance and operational procedures<br />
necessary to avoid sticking valves are those that keep the<br />
engine clean internally and which cause it to run within<br />
proper operating temperature ranges. The items discussed<br />
above should serve as a guide for A&P mechanics and for<br />
pilots.<br />
Tips From The Hangar<br />
These are some of the more common questions asked at<br />
our service hanger:<br />
QUESTION - Do your new, remanufactured, or<br />
overhauled engines require a break-in period that consists of<br />
cruise at low power settings?<br />
ANSWER - Definitely not. Fly them as you would a<br />
high time engine. In fact, so-called "slow" flying may have<br />
harmful effects. The rings may not seat properly resulting in<br />
higher than normal oil consumption.<br />
QUESTION - At what rate of oil consumption does<br />
continued operation of the engine become a hazard?<br />
ANSWER - Generally speaking, when the oil<br />
consumption reaches one quart per hour, corrective action<br />
should be taken. However, maximum permissible for each<br />
particular engine is listed in the engine operator's manual.<br />
QUESTION - What are the dangers of operating an<br />
engine with high oil consumption?<br />
ANSWER - When excessive amounts of oil get past<br />
the rings, there is danger of the ring sticking or breaking<br />
with a dramatic rise in oil consumption. Then oil soaked<br />
carbon forms at a fast rate. At the same time, the presence of<br />
oil in the combustion chamber has the effect of lowering the<br />
octane rating of the fuel. Operating temperatures go up. We<br />
have now set up conditions inviting detonation and/or<br />
preignition.<br />
QUESTION - If I can't get aviation fuel, may I use<br />
automotive fuel if octane rating is equal or higher?<br />
ANSWER - No. As an engine manufacturer, even the<br />
use of automotive fuel where an STC has been issued is<br />
considered risky and is not recommended. There are 4 or 5<br />
good reasons and all are important. They can be summed up<br />
in three words - potential engine failure.<br />
QUESTION - What is the most common cause of<br />
premature engine wear?<br />
ANSWER - Dirt in the air entering the engine through<br />
the carburetor or injector due to worn-out air filter, torn
induction hoses or broken air boxes, and then being carried<br />
through the engine by the oil.<br />
QUESTION - Does the spacer between the propeller<br />
and the engine serve any purpose other than streamlining the<br />
nacelle?<br />
ANSWER - Yes. In many cases, moving the propeller<br />
forward, which increases the clearance between propeller<br />
and cowl, increases propeller efficiency and reduces nacelle<br />
vibration.<br />
QUESTION - In some cases, we note a minor<br />
discrepancy between the engine operator's manual and the<br />
airplane Pilot's Operating Handbook. Which one should be<br />
followed?<br />
ANSWER - The airframe Pilot's Operating Handbook.<br />
For various reasons, after the engine is installed in the<br />
airframe, operational techniques may be altered or certain<br />
restrictions may be placed on the engine. A simple example<br />
would be a placard restricting continuous operation in a<br />
certain RPM range.<br />
QUESTION - I fly an aircraft equipped with a fixed<br />
pitch propeller. During cruise I'm told to keep increasing the<br />
RPM as my cruising altitude is increased. Since I fly pretty<br />
high, in order to hold 65% power, I find the RPM is mostly<br />
at 2550 to 2600. Won't this high RPM reduce the engine<br />
life?<br />
ANSWER - No. The higher RPM won't harm the<br />
engine or reduce service life. Remember, you are increasing<br />
the RPM only to hold the same power you had at a lower<br />
altitude at say, 2350 RPM.<br />
QUESTION - Is there really any difference between<br />
good automotive oil and aviation oil?<br />
ANSWER - Yes indeed there is! Don't ever use<br />
automotive oil in your aircraft engine. These oils are now<br />
blended for use with unleaded fuels, and the additives in<br />
auto oil cause problems in an aircraft engine that operates at<br />
much higher temperatures than the automobile engine. We<br />
have encountered engines with holes burned in pistons due<br />
to the use of automotive oils that have an ash deposit<br />
causing preignition. It seems awfully hard to convince<br />
people who have had great success with the oil used in their<br />
car that it may not be used in their aircraft engine.<br />
NOTE - Since we have had several questions on fuels<br />
and oils, it might be well to mention that we can't think of a<br />
quicker way to void your engine warranty than by using<br />
anything other than the recommended and FAA approved<br />
aviation fuels and oils.<br />
QUESTION - What are some common causes of<br />
excessive oil consumption other than the burning of oil due<br />
to high engine time?<br />
ANSWER - Building up of crankcase pressure due to<br />
"blow-by" caused by ring wear may result in oil being<br />
56<br />
blown out of the breather. The same thing can result from<br />
broken piston rings. Oil may be pumped overboard due to a<br />
faulty vacuum pump or faulty automotive type fuel pump.<br />
QUESTION - My dealer advised me to use straight<br />
mineral oil in my new engine until it's "broken in". How do I<br />
know when it's "broken in"?<br />
ANSWER - When oil consumption has stabilized.<br />
Example: After continued checking of oil consumption you<br />
have determined the engine is consistently using one quart<br />
in a known number of hours. This period should not exceed<br />
50 hours of operation.<br />
QUESTION - I have problems with lead fouling of<br />
spark plugs. What can I, as a pilot, do about it?<br />
ANSWER - Several things. See that you have the<br />
correct spark plugs that are recommended by the engine<br />
manufacturer's charts, not oddballs recommended by some<br />
well-meaning friend. Avoid prolonged idling on the ground.<br />
Avoid power off descents. Lean out at cruise: even on short<br />
cross-country flights. Rotate plugs from bottom to top every<br />
50 hours - or 25 if necessary.<br />
The Pilot And Turbocharging<br />
Combined with "Turbocharging-A Brief Refresher<br />
Turbocharging has been a part of everyday operations for<br />
some pilots and A & P mechanics for many years. The<br />
science of adding a turbocharger to an aircraft engine and<br />
making that system provide a bonus in operating capability<br />
has been well established. The purpose of this combined and<br />
rewritten article is to share our experience and give a<br />
thorough run down of what the General Aviation pilot<br />
should know about turbocharged flat opposed piston<br />
engines. Through a sound basic knowledge, the pilot can<br />
realize more efficient use of his or her turbocharged engine.<br />
WHY TURBOCHARGE?<br />
Experience has taught us that flying high and fast is most<br />
desirable on cross-country flights, and the small,<br />
lightweight, and relatively inexpensive turbocharger makes<br />
this possible. Turbocharging the flat opposed cylinder<br />
aviation engine has also allowed cabin pressurization in<br />
general aviation aircraft.<br />
The turbocharger has made it possible to climb above<br />
most of the undesirable flying weather instead of banging<br />
through the poor visibilities, bumpy air, icing, and slower<br />
speeds of the altitudes below 10,000 feet. The rare loss of an<br />
engine in a twin will not necessarily result in the airplane<br />
being forced to descend into the weather, but will mean<br />
merely slower flight while still maintaining the desired, safe<br />
altitude with the turbocharger helping the engine to produce<br />
the needed power.
With greater flexibility in choice of altitude, it is possible<br />
to take better advantage of favorable winds and avoid<br />
turbulence.<br />
Much safer flight for general aviation aircraft is now<br />
possible over high mountains.<br />
The turbocharged engine allows the pilot to maintain<br />
sufficient cruise power at high altitudes where there is less<br />
drag. This means faster true airspeeds and increased range<br />
with better fuel economy. At the same time the powerplant<br />
has flexibility and can be flown at a low altitude without<br />
gulping fuel like a thirsty turbine.<br />
The turbocharged powerplant is a blessing at high<br />
altitude airports. The normally aspirated engine may be<br />
marginal from these fields, but turbocharging will provide<br />
sea level power and remove the aircraft from the marginal<br />
category at high altitude airports.<br />
The turbocharged piston engine offers the advantage of<br />
high altitude flight without the high cost of a turbine<br />
powered aircraft. The added utility and economy make it<br />
popular with small businesses and also with some<br />
individuals.<br />
WHAT IS TURBOCHARGING?<br />
At the risk of insulting the intelligence and experience<br />
level of some readers, we should nevertheless review, for<br />
anyone interested in the basic principle involved in turbocharging,<br />
and answer the question - What is turbocharging?<br />
This review will be a nontechnical explanation of what<br />
turbocharging does for the reciprocating engine. As you<br />
know, the aircraft engine derives its power from the burning<br />
of a mixture of fuel and air. Assuming that this fuel/air<br />
mixture retains a constant ratio, the amount of power the<br />
engine develops will be directly proportional to the total<br />
mass of air pumped through the engine. Climbing to altitude<br />
in an aircraft equipped with a normally aspirated engine<br />
provides a very realistic example; as the air becomes less<br />
and less dense with altitude, the engine is capable of<br />
producing less and less power as indicated by the decreasing<br />
rate of climb and eventually the total inability to climb<br />
higher.<br />
In simple terms, the turbocharger provides an air pump that<br />
allows us to supply the engine with dense air (and the<br />
oxygen needed for combustion) not only at sea level, but<br />
also when operating in the thin air at altitude. The pump<br />
used in a turbocharger may be described more accurately as<br />
a centrifugal air compressor that is mounted on a shaft. To<br />
power the compressor, the hot exhaust gases that are<br />
discharged as wasted energy in a normally aspirated engine<br />
are now harnessed by directing them through a turbine<br />
wheel that might be described as a very sophisticated<br />
windmill. The turbine wheel is mounted on the same shaft as<br />
the air compressor so that during operation the compressor<br />
and turbine will turn at the same speed. Therefore, as more<br />
57<br />
exhaust gases (energy) are directed over the turbine, both<br />
wheels will turn faster and the density of the air supplied to<br />
the engine by the compressor will increase. This allows the<br />
engine to produce more power. These two wheels mounted<br />
on a shaft are enclosed within housings that separate and<br />
contain the two functions just discussed; this is the<br />
turbocharger.<br />
THE FACTORY TURBOCHARGED ENGINE<br />
When turbocharging first became popular, some<br />
companies used conversion kits to add turbochargers to a<br />
standard normally aspirated engine. These installations<br />
required a Supplemental Type Certificate (STC) issued by<br />
the FAA. The add-on systems did meets with some success,<br />
but the pilot flying with these systems could easily cause<br />
serious engine damage with just a little carelessness.<br />
Damage caused by these add-on systems would not be<br />
covered by engine manufacturer warranty.<br />
Engine manufacturers have been providing a mated<br />
turbocharged engine package for both rotary and fixed wing<br />
aircraft for many years. When the engine manufacturer<br />
certifies such a package,(either carbureted or fuel injected) it<br />
will have several turbocharge-oriented design features, and<br />
manufacturer warranty will apply.<br />
An engine that produces more than normal sea level<br />
manifold pressure for take off and climb will have been<br />
beefed up with a heavier crankshaft for this additional power<br />
requirement. Combustion chambers are protected by using a<br />
lower compression ratio compared to normally aspirated<br />
engines.<br />
As our turbocharged aircraft is flown higher, the<br />
compressor wheel must run faster to compensate for the<br />
thinner air. One problem in compressing air is that it gets
hotter. Therefore, the higher we fly the faster the compressor<br />
must turn. This produces a hotter charge to the cylinders,<br />
usually reflected in higher cylinder head temperatures.<br />
These higher engine temperatures must receive careful<br />
consideration. Engine manufacturers install exhaust valves<br />
and guides of special heat resistant metals to cope with these<br />
temperatures. Special oil squirts in the crankcase direct a<br />
stream of oil on pistons to help cool critical areas.<br />
Textron now has many turbocharged engine models<br />
FAA certified. With the added features incorporated to<br />
compensate for additional heat and stress, the factory<br />
turbocharged engines have proven to be very reliable<br />
powerplants.<br />
CONTROLLING TURBOCHARGER SPEED<br />
Turbochargers in use today may run at speeds up to<br />
110,000 RPM.<br />
Since the speed at which a turbocharger must operate is<br />
dependent upon the power desired from the engine and the<br />
density of the air at the altitude at which the aircraft is<br />
flying, it is necessary to provide the pilot with the capability<br />
of adjusting turbocharger speed. This is accomplished by<br />
controlling the amount of exhaust gas that is directed to the<br />
turbine side of the turbocharger. In those cases where air of<br />
increased density is not needed from the turbocharger (low<br />
altitude or low power required), a wastegate in the exhaust<br />
system is allowed to remain open and the exhaust gas is<br />
vented around the turbine wheel and through the wastegate<br />
to the atmosphere, very much like the normally aspirated<br />
engine. As the demand for dense air increases, the wastegate<br />
can be closed to a position that will force the proper amount<br />
of exhaust gas into the turbine and therefore speed up the<br />
compressor to meet the current demand for denser air.<br />
Adjusting turbocharger speed to meet changing power<br />
requirements is a matter of providing necessary controls<br />
over the wastegate, and therefore the flow of exhaust gas.<br />
AUTOMATIC VS. MANUAL CONTROLS<br />
Control of the wastegate for factory installed<br />
turbochargers is accomplished by two basic methods. These<br />
are manual control or automatic control. Manual control is<br />
also divided into two types; the fixed bleed system and the<br />
throttle/wastegate interconnect.<br />
Those engines utilizing manual control over the<br />
wastegate require much more pilot attention than<br />
installations with automatic control. Pilot workload is<br />
reduced with a turbocharger that utilizes an automatically<br />
controlled wastegate unit. The automatic controller adjusts<br />
for temperature or pressure or both, depending on the<br />
various applications, and permits the turbocharger to be<br />
controlled by normal throttle movements. The automatic<br />
control feature is normally set at the factory and should not<br />
be tampered with in the field.<br />
58<br />
OPERATION<br />
Both the mechanic and the pilot must know how to<br />
operate the specific turbocharged system he works on or<br />
flies, so this information is not intended as a substitute for<br />
the Engine Operator's Manual or the Pilot's Operating<br />
Handbook. The treatment here is more general. But we can<br />
augment those basic references with explanations from the<br />
pilot's point of view.<br />
Probably the most practical consideration of operation<br />
would be to treat the automatic and manual systems<br />
separately. However, before we do just that, there are a few<br />
basic handling or operational requirements that apply to<br />
both systems.<br />
1. The throttle or throttles must be operated smoothly or<br />
the engines will surge, which is hard on the turbocharger<br />
and the engine. Those pilots trying a turbocharged<br />
installation for the first time should be aware of throttle<br />
sensitivity and the need for very smooth throttle movements.<br />
In case of the manual systems, the turbocharger requires<br />
time to follow throttle movement since it may operate at<br />
speeds up to 110,000 RPM. The automatic control systems<br />
experience this same phenomena and, in addition, all<br />
elements of the control system must stabilize following any<br />
movement of the throttle. Good advice is "Move the throttle<br />
controls SLOWLY and WAIT."<br />
2. This advice is also good when leaning the mixture<br />
since the mixture setting has a great effect on engine<br />
operating temperatures. The operating temperatures of a<br />
turbocharged engine will be somewhat higher than those of<br />
a similar normally aspirated engine because the intake air is<br />
heated as it is compressed; this is particularly true at the<br />
higher altitudes where the compressor must work very hard<br />
to supply dense air to the engine. Cylinder head<br />
temperatures may average 300 F higher at altitude, and<br />
smooth, steady operation of the mixture control will insure<br />
that turbine inlet temperature (TIT) limitations are not<br />
exceeded.<br />
3. Power sequence is very important with the<br />
turbocharged engine.<br />
To increase power - Enrich mixture,<br />
Increase RPM, then MP<br />
To decrease power -<br />
Decrease MP, then RPM<br />
4. High altitude flights mean higher turbine speeds and<br />
hotter cylinder head temperatures. Observe these<br />
temperatures and stay within the limits prescribed for best<br />
engine life.<br />
5. Cruise control at altitude is in accordance with the<br />
specific instructions in the airplane Pilot's Operating<br />
Handbook.<br />
6. Turbocharged powerplants require 100 octane aviation<br />
grade fuel as a minimum.
THE MANUALLY CONTROLLED TURBOCHARGER<br />
The simplest form of manual control is the fixed bleed<br />
system. It does not incorporate a wastegate, but allows some<br />
exhaust gas to continuously escape through an orifice of<br />
predetermined size. Size of the orifice establishes the critical<br />
altitude of the engine. The remainder of the exhaust gas is<br />
used to turn the turbocharger mechanism anytime the engine<br />
is running. In this system, engine power is adjusted by the<br />
position of the throttle plate in the carburetor or fuel<br />
injector, and the amount of exhaust gas available to turn the<br />
turbocharger is a result of the power developed at any<br />
particular throttle setting.<br />
Textron <strong>Lycoming</strong> developed a second manual system to<br />
be used primarily in single engine installations. The<br />
throttle/wastegate interconnect system uses positioning of<br />
the cockpit throttle control to actuate both the throttle plate<br />
and the turbocharger wastegate. The design of this<br />
mechanism causes a programmed movement of the throttle<br />
plate and wastegate; the throttle plate starts to move toward<br />
the full open position before movement of the wastegate<br />
affects any change in the exhaust bleed which will cause<br />
turbocharger speed to increase. At the fully advanced<br />
position of the throttle control, the throttle plate is at full<br />
open and the wastegate is closed to its maximum design<br />
limit.<br />
A pressure relief valve is normally included in the<br />
factory developed system of each manually controlled<br />
turbocharger installation. The purpose of this valve is<br />
protection of the engine in case of inadvertent excessive<br />
throttle opening (over boost) by the pilot. With a manually<br />
controlled turbocharger system, the pilot is the controller,<br />
and must limit throttle movement to keep manifold pressure<br />
within the limit specified for the engine.<br />
The pilot should carefully read the Pilot's Operating<br />
Handbook on this equipment, and also get a good checkout<br />
by a competent pilot qualified in the aircraft. Pilot technique<br />
cautions against sudden movements of the throttle, and<br />
recommends instead slow deliberate movements. For<br />
takeoff, this requires very smooth application of the throttle<br />
until manifold pressure indicates about two inches below the<br />
maximum for which the engine is rated. As the turbocharger<br />
speed builds up, the manifold pressure will increase slightly<br />
to the maximum limit. During climb at a fixed throttle<br />
condition, manifold pressure will decrease at the rate of<br />
approximately one inch for each thousand feet. As engine<br />
power deteriorates, the pilot slowly advances the throttle to<br />
maintain the desired manifold pressure until the full throttle<br />
position is reached at the critical altitude.<br />
The pilot should be alert to the reaction of the manifold<br />
pressure in this type engine when leaning at cruise power.<br />
At a fixed RPM and throttle setting, the manifold pressure<br />
will increase as the mixture is leaned to Best Power, and<br />
decrease when further leaned to Best Economy. The<br />
recommended procedure is that at the completion of the<br />
59<br />
leaning procedure, if the manifold pressure is more than one<br />
inch from the beginning MP value, it is recommended that<br />
the mixture be returned to full rich and the MP adjusted<br />
accordingly so that the leaning procedure produces the<br />
desired manifold pressure.<br />
THE AUTOMATICALLY CONTROLLED SYSTEMS<br />
Owners of engines that call for more than field level<br />
manifold pressure to produce rated power should know that<br />
the turbocharger is operating at all times when the engine is<br />
running. These engines usually have turbochargers that are<br />
controlled by automatic systems.<br />
The automatic systems used to control turbocharger<br />
operation utilize devices that sense differences of air<br />
pressure at various points in the induction system, and<br />
utilize any changes to adjust the oil pressure that controls the<br />
position of the wastegate. Not all of these systems are<br />
exactly the same and, therefore, it is very important that the<br />
pilot understand exactly what manifold pressures he should<br />
expect when full throttle is applied for takeoff.<br />
Engines such as the <strong>Lycoming</strong> TIO-541 and TIGO-541<br />
have controller systems that are set to provide red line<br />
manifold pressures when the throttle is full open for takeoff.<br />
Other engines, many of those in the <strong>Lycoming</strong> TIO-540<br />
series, utilize a density controller that will maintain a set<br />
power output at full throttle regardless of variations in<br />
altitude and in temperatures above or below standard; as a<br />
result, manifold pressures at full throttle may indicate<br />
several inches above or below that specified for standard<br />
day conditions.<br />
Although the systems with controllers automatically<br />
protect against overboost at all normal RPM and MP<br />
settings, it is possible to overboost a turbocharged engine<br />
nevertheless. Any sudden straight-arming of the throttles,<br />
particularly on cold engines, can cause an overboost<br />
condition that would exceed the red line. But overboost can<br />
also take place even though the red line MP has not been<br />
exceeded. This occurs where the pilot may have a low RPM<br />
and very high MP. An example of this has been observed<br />
when the pilot has let down with low RPM, then on the final<br />
approach executed a go-around without first advancing<br />
RPM. Thus he could be pulling maximum manifold pressure<br />
(to red line) at low RPM. This would produce a definite<br />
overboost condition, with resulting heavy detonation and<br />
undesirable compressor surge.<br />
The engine manufacturers have service bulletins and<br />
service instructions for reference if this should happen. A<br />
severe overboost could require a major overhaul of the<br />
engine and replacement of the crankshaft.<br />
Of course the nice feature of the automatic system for<br />
the busy pilot during climb is that once the throttles are set,<br />
there is a minimum of adjustment required. Cruise handling<br />
is similar to the other systems described earlier. During let<br />
down there is no worry about high MP because the pilot
merely retards his throttles and the automatic system does<br />
the work for him.<br />
Since the turbocharger is operating during takeoff, all<br />
takeoffs at any altitude require full rich mixture because the<br />
turbocharger provides full rated horsepower, and full rich<br />
mixture is required for that amount of power.<br />
MAINTENANCE<br />
Maintenance for all the turbo systems covered here is<br />
relatively simple. The daily preflight merely calls for a<br />
visual inspection prior to the first flight. Look at turbo<br />
mountings and connections for security, lubricant leakage or<br />
air leakage. There are the usual 50 and 100 hour inspections<br />
that are brief in what they recommend. Mechanics should<br />
not tinker with the system unless they have been specifically<br />
schooled. A very important requirement is the necessity to<br />
avoid dropping any loose items in the induction system.<br />
They will be sucked up and go through the turbine wheel<br />
damaging it and also possibly damaging the engine as well.<br />
This could become very costly.<br />
Any overboosting should be entered in the log book by<br />
the pilot. The mechanic must then refer to the<br />
manufacturer's service publication for the necessary action<br />
to take. When the engine is exchanged or overhauled, the<br />
turbocharger should also be exchanged or overhauled.<br />
SUMMARY<br />
Turbocharging the flat opposed cylinder piston engine<br />
was an innovation that improved and expanded the utility of<br />
the General Aviation airplane. Combining cabin<br />
pressurization and engine turbocharging from the same<br />
compressor included as part of the engine package, provides<br />
simplicity, which leads to low cost and light weight. The<br />
turbocharged piston engine had a great impact on the<br />
helicopter industry, particularly for use in mountainous<br />
areas. Altitude test flights and field experience have<br />
indicated excellent fuel economy and range with the<br />
accompanying higher true airspeeds.<br />
The turbocharger has been quite compatible with<br />
<strong>Lycoming</strong> piston engines. We have tried to give information<br />
on all aspects of turbocharging in an effort to aid pilot<br />
understanding of the subject. There is no substitute for a<br />
good checkout by an experienced pilot; and for specific<br />
knowledge about your aircraft, be sure to read the airplane<br />
Pilot's Operating Handbook. Give the powerplant and turbo<br />
the maintenance they require and the careful operation they<br />
deserve, and they will give you performance with a long and<br />
satisfactory life.<br />
TBO Trade-Offs or<br />
Tips From Fred<br />
Airline deregulation has caused changes. Many aircraft<br />
powered by <strong>Lycoming</strong> reciprocating engines are being used<br />
60<br />
in the commuter market. These aircraft operate under Part<br />
135 of the Federal Air Regulations and generally have a<br />
regular schedule which must be maintained day after day.<br />
The engines of these aircraft, like those operated for<br />
individual or corporate transportation, are expected to reach<br />
the manufacturer's recommended TBO when operated and<br />
maintained as specified in the Pilot's Operating Handbook<br />
(POH) and appropriate maintenance publications.<br />
Many commercial operators have requested assistance<br />
and advice on the subject of operating and maintaining their<br />
engines in a manner that will assist in meeting regular<br />
schedules and achieving recommended engine TBO. In<br />
response to these requests, a series of operating tips has been<br />
developed to emphasize that a slightly more conservative<br />
and cautious mode of operation will help to increase<br />
expected engine life. These tips are directed specifically at<br />
TIO-540-J series engines, but they may be applied to other<br />
<strong>Lycoming</strong> engines as well.<br />
Individual or corporate operators may also find these tips<br />
beneficial for insuring long, reliable engine operational life.<br />
Considering this, it seems appropriate to print these<br />
suggested operating tips for the benefit of all <strong>Lycoming</strong><br />
TIO-540-J series engine owners and operators. These tips<br />
are applicable where maximum engine service life rather<br />
than maximum aircraft performance is the primary<br />
consideration.<br />
"Tips From Fred" were outlined in a memo which is<br />
reprinted below:<br />
1. INTRODUCTION:<br />
This memo was originally directed at Part 135<br />
Commuter usage, but any operator of <strong>Lycoming</strong><br />
turbocharged engines where long engine service life is a<br />
major consideration may benefit. Power settings and<br />
procedures within the normal range, but more conservative<br />
than the maximum allowable limits specified in the Pilot's<br />
Operating Handbook (POH) may be helpful in achieving<br />
this extended engine life. The following suggestions deal<br />
with the engine areas that lead to the necessity of overhaul<br />
by attempting to minimize wear rates and potential cylinder<br />
problems, and to maximize turbo system and wastegate life<br />
through changes in operational procedures. Economic or<br />
performance considerations may require deviation from<br />
ideal recommendations with the possible attending loss of<br />
some of the maximum possible engine service life.<br />
2. GROUND OPERATION:<br />
(a) In extremely cold weather (20 ° F and colder) engine<br />
and/or oil preheating should be utilized to minimize<br />
accelerated cold wear rates during the engine warm-up<br />
period.<br />
(b) Avoid rapid acceleration after any cold start-up and<br />
make every effort to maintain a constant speed of about<br />
1000 RPM during the initial warm-up period for several<br />
minutes.
(c) Adhere to the lubricating oil recommendations for the<br />
average ambient air temperature, as listed in the latest<br />
revision of <strong>Lycoming</strong> Service Instruction No. 1014. Note<br />
that SAE 15W-50 or 20W-50 all temperature oil (MIL-L-<br />
22851 Spec) is approved for use in TIO-540 series engines.<br />
(d) Oil temperature indications should register on the<br />
aircraft gage before takeoff is attempted so that problems<br />
associated with unusually high oil pressure will be<br />
minimized.<br />
(e) All power settings must always be accomplished<br />
slowly and smoothly to minimize possible damage to the<br />
crankshaft dynamic counterweight system.<br />
(f) Taxi at the minimum power setting required to get the<br />
job done.<br />
3. TAKEOFF:<br />
(a) Part throttle takeoffs should be avoided. The fuel<br />
injector metering jet is a two hole unit, which is<br />
interconnected with the throttle. The secondary jet is fully<br />
opened only at full throttle conditions. The richer fuel flow<br />
supplements engine cooling and deters engine damaging<br />
detonation. The turbocharger control system automatically<br />
seeks to maintain approximately a constant density air<br />
charge at the fuel injector entrance. The density controller<br />
setting should be checked routinely with a temperature<br />
probe in accordance with <strong>Lycoming</strong> Curve Number 13225-<br />
C, as described in detail in the latest revision of <strong>Lycoming</strong><br />
Service Instruction No. 1187. It is normal for the takeoff<br />
manifold pressure level to vary significantly as daily<br />
ambient ground level temperature changes. Never attempt to<br />
set rated manifold pressure based upon ambient temperature<br />
comparison and interpolation with the various rated power<br />
levels shown on <strong>Lycoming</strong> Curve Number 3216-C. That<br />
curve is intended only as an explanatory curve and should<br />
not be used for setting manifold pressure at rated conditions<br />
below critical altitude. Items such as a dirty air filter,<br />
alternate air door not completely shut, loose rag or similar<br />
foreign object blocking the air filter will affect the rated<br />
manifold pressure level. The correct density setting can only<br />
be obtained by monitoring compressor discharge<br />
temperature and manifold pressure simultaneously.<br />
(b) The RPM should be at 2575 RPM for takeoff and a<br />
full rich mixture must be utilized.<br />
4. CLIMB:<br />
Climb should be accomplished with engine cooling in<br />
mind. Cowl flaps should always be open for climb. A higher<br />
than normal climb speed of 140 MPH is recommended to<br />
aid cooling. Maximum normal operating power of 2400<br />
RPM. 40" Hg manifold pressure with partial leaning, in<br />
accordance with the POH, is permissible where terrain or<br />
conditions permit. A conservative climb power setting of<br />
2400 RPM, 35" Hg manifold pressure is also recommended<br />
while maintaining cylinder head temperature as cool as<br />
400°F by manual leaning. For maximum engine service life,<br />
61<br />
an exhaust gas temperature of 1400°F should not be<br />
exceeded.<br />
5. CRUISE:<br />
Conservative cruise power settings will also increase<br />
engine service life. A power setting of 2200 RPM and 31"<br />
Hg manifold pressure is recommended for all cruise flight.<br />
A maximum 1450°F exhaust gas temperature and maximum<br />
cylinder head temperature of 420°F is recommended. Slight<br />
enrichment or cowl flap opening should be utilized if the<br />
cylinder head temperature level cannot be maintained. The<br />
preceding conditions correspond to a power setting of about<br />
63 percent at standard conditions and approximately best<br />
power mixture strength. It may be necessary to increase the<br />
cruise manifold pressure setting on a hot day and to decrease<br />
the cruise manifold pressure on a cold day. As a rule of<br />
thumb, modify manifold pressure by 1% for each 10°F<br />
variation from standard altitude conditions. Note that this<br />
cruise power setting is not recommended for new engines or<br />
engines in service following cylinder replacement or top<br />
overhaul of one or more cylinders. Under those<br />
circumstances, to assure the proper ring seating, cruise<br />
should be at 65 percent to 75 percent power for the first 50<br />
hours of operation, or until oil consumption has stabilized.<br />
6. DESCENT:<br />
Rapid cool down during initial descent can damage the<br />
engine. Gradual cool down is preferable. The descent power<br />
reduction should be accomplished in several steps. Ideally,<br />
the descent should begin by nosing the aircraft over slightly<br />
while engine power and mixture remain at the cruise setting.<br />
The added speed will initiate a gradual cool down. When the<br />
CHT has stabilized reduce the manifold pressure to 25" Hg<br />
and relean the mixture to maintain 13500 F exhaust gas<br />
temperature. which will prevent rapid cool down. After a<br />
period of at least one minute, a further reduction of manifold<br />
pressure to 20" Hg and 2000 RPM can be made, if<br />
necessary. Again, mixture should be leaned to maintain<br />
1350 ° F exhaust gas temperature. Cowl flaps should not be<br />
used as an aid in slowing the aircraft during descent.<br />
Descent power settings at greater than 20" Hg manifold<br />
pressure should be utilized for the greatest possible time to<br />
avoid accelerated piston ring wear.<br />
7. LANDING:<br />
(a) Following landing, the minimum necessary taxi<br />
power will aid in engine cool down. Extending the ground<br />
idle cooling period reduces turbocharger temperature and<br />
reduces the tendency of turbo-coking following hot engine<br />
shutdowm. Ideally, a five-minute minimum cooling period<br />
is desirable. Following landing, opting for the second turn<br />
off can aid the cool down.<br />
(b) Higher than required power settings for ground<br />
operation increase the possibility of dirt ingestion into the<br />
engine.
Thieves Of Aircraft Engine Power and How to<br />
Cope With Them.<br />
It appears that some General Aviation pilots are not<br />
really aware of the number of detrimental influences on their<br />
aircraft engines which can be identified as thieves of engine<br />
power, and how they can create an unsafe flight condition.<br />
As an example, in most instances the moderate engine<br />
power loss that occurs from attempting a takeoff at sea level<br />
where an absentminded pilot has left the carburetor heat in<br />
full hot position from the previous landing, may cause a<br />
scare, but not necessarily an accident. But move the<br />
situation to a 5000 feet or higher (density altitude) small<br />
airport, again forget there is full carburetor heat, add a rich<br />
carburetor condition, and the sum total of these combined<br />
power thieves add up to a takeoff or go-around accident.<br />
Similarly, a review of accidents over the years tends to<br />
prove in the majority of cases that it has rarely been one<br />
factor responsible for a crash, but rather one small item,<br />
added to another small factor, added to a third; all of these<br />
small items finally add up to a total beyond the ability of the<br />
pilot to cope. This is how accidents tend to happen. So let's<br />
identify several of these power thieves in an effort to make<br />
flight as safe as we can.<br />
PREVENT POWER LOSS ON TAKEOFF WITH DIRECT<br />
DRIVE ENGINES IN COLD WEATHER<br />
In cool or cold weather, pilots should take extra care<br />
prior to attempting to takeoff with a cold engine and cold<br />
oil, and thereby prevent a temporary power loss during a<br />
critical part of the takeoff. Cold or heavy oil can and quite<br />
often does affect normal operation of the hydraulic lifters.<br />
Remember that aviation lubricants are heavier when cold<br />
than the commonly used automotive engine oils and require<br />
a little more time in warm-up to obtain normal flow in order<br />
to function properly throughout the air cooled aircraft<br />
engine.<br />
To prevent possible power loss, a proper warm-up<br />
should be conducted. The engine is usually warm enough for<br />
pre-flight ground check in above freezing temperatures after<br />
2 to 3 minutes running at 1000 to 1200 RPM. Below<br />
freezing temperatures, the warm-up period should be longer.<br />
With turbocharged powerplants, cold oil and cold engines<br />
require a longer warm-up period to assure proper controller<br />
operation and to prevent manifold pressure overboost.<br />
After the above recommended warm-up period in cool or<br />
cold weather, including magneto and runup check, if the oil<br />
pressure is consistently over maximum red line, have a<br />
knowledgeable mechanic adjust oil pressure so that it does<br />
not exceed red line at takeoff or climb powers, and yet it is<br />
within the recommended green arc area at cruise. Cold<br />
weather tends to require a longer warm-up period.<br />
Another cause of the power loss under these temperature<br />
and flight conditions has been the use of a heavier weight<br />
viscosity of oil than recommended for the ambient<br />
62<br />
temperature flight condition. A heavier weight oil than<br />
recommended in cool or cold weather will tend to prevent<br />
the normal operation of the hydraulic lifters and thereby<br />
cause a loss of power.<br />
Thus, to prevent power loss on takeoff with direct drive<br />
engines, select the proper weight oil for your engine for cold<br />
weather operation Make a careful run-up prior to takeoff<br />
with cold oil and a cold engine and observe engine<br />
instruments. Extend your warm-up period in cold weather<br />
until oil pressure is within recommended limits, or consult a<br />
mechanic concerning a compromise adjustment. If in doubt<br />
about power output, a brief smooth full throttle check is<br />
recommended.<br />
CARBURETOR HEAT OR ALTERNATE AIR HEAT AS<br />
POWER THIEVES<br />
In the opening paragraph, carburetor heat was used as an<br />
example of a cause of power loss, but many pilots aren't sure<br />
they understand the reason for it. Flight tests conducted<br />
many years ago with a precision torque meter installed made<br />
it possible to measure fairly accurately a loss of as much as<br />
15% of engine power when full alternate air or carburetor<br />
heat have been applied. As a specific explanation, there is a<br />
small power loss when we use heat because the pilot has<br />
switched from the direct, colder ram air to an indirect<br />
carburetor heat muff, or a similar indirect source of warm air<br />
with an alternate warm air source from inside the cowling.<br />
This accounts for an average 3% power drop because of the<br />
loss of ram air. The major portion of the engine power loss<br />
is caused by the carburetor heat or alternate air heat. Aircraft<br />
engines are checked for their horsepower output at a<br />
corrected standard temperature of 590 F. Engineering has<br />
provided a simple rule of thumb for the effect of heat on<br />
power, i. e. for every 10 ° F of heat above the standard 59 °<br />
F, there is a 1% power loss. Since the average heat source on<br />
an engine provides at least 100 ° F of heat above standard,<br />
this heat condition causes an average power loss of 10%.<br />
Our measurable total power loss at sea level, standard<br />
conditions is already up to 13%.
When warm air is used by the pilot, the mixture becomes<br />
richer and the engine may roughen with another slight<br />
power loss as a result. In addition, the higher the altitude<br />
with its less dense air, the greater the enriching effect<br />
because the fuel metering device will become richer at<br />
altitude and the engine less efficient. Thus, there will be<br />
another small, difficult to measure, power loss to be added<br />
to the 13% loss already accumulated.<br />
With full carburetor heat applied, most float-type<br />
carburetors react very sluggishly or inefficiently on a<br />
straight-arm throttle technique during a touch-and go<br />
landing or an aborted landing. In some cases, the float-type<br />
carburetor may refuse to accept the throttle when it is<br />
applied in this manner. A gradual, steady application of the<br />
throttle is always the best approach.<br />
We should also remind the pilot that when he uses<br />
carburetor heat or alternate air heat at cruise power that he<br />
should adjust his mixture lean, otherwise he will have a rich<br />
mixture. If the heat causes an undesirable power loss at<br />
cruise, and the pilot has throttle available, he may bring the<br />
manifold pressure up at least to the power reading he had<br />
before application of heat; and if additional power is needed<br />
and available, he may add a maximum of two inches of MP,<br />
or 100 RPM (fixed pitch prop) above the previous power,<br />
and then adjust the mixture. It is possible to compensate for<br />
the horsepower loss due to heat by means of the latter<br />
technique if throttle or RPM are available.<br />
EFFECTS ON POWER AT A HIGH ALTITUDE<br />
AIRPORT ON A HOT DAY<br />
To fly safely at a high altitude airport (5,000 ft. density<br />
altitude and above) on a warm weather day. we must<br />
consider the aerodynamic loss of efficiency on the airplane<br />
and propeller under these conditions, and the power loss<br />
effect on the engine. A good "rule of thumb" for the pilot to<br />
remember is - for each thousand feet above sea level, the<br />
takeoff run increases approximately 25 percent. In the case<br />
of normally aspirated engines (not turbocharged or<br />
supercharged), at an altitude of 10,000 feet, about one-half<br />
of available engine horsepower is lost.<br />
We can create a practical flight problem for the pilot who<br />
is faced with a high elevation field takeoff. At Denver,<br />
Colorado where the field elevation indicated on the airplane<br />
altimeter is 5000 ft., the pilot should consult the density<br />
altitude chart for takeoff. He must know that the published<br />
performance criteria of an aircraft is generally based on<br />
standard atmospheric conditions (temperature 59 ° F,<br />
pressure 29.92 inches of mercury at sea level). In checking<br />
the density chart and applying the ambient temperature of a<br />
summer day of 80 ° F, the careful pilot will note that the<br />
density altitude is actually 7500 feet, and the takeoff<br />
distance at this density altitude will be 2.3 times the sea<br />
level takeoff roll shown in his Pilot's Operating Handbook.<br />
63<br />
If the same pilot flew to Laramie, Wyoming for the next<br />
landing and subsequent takeoff, he might meet these typical<br />
flight conditions:<br />
The field elevation is 7,276 feet, and with an ambient<br />
temperature of 60 ° F, his actual density altitude will be<br />
9,300 feet, with a takeoff roll 2.9 times the sea level takeoff.<br />
Furthermore, the pilot must remember - the higher the<br />
ambient temperature indicates, the higher the density<br />
altitude becomes. At this elevation, the pilot of normally<br />
aspirated aircraft engines should consider takeoffs in the<br />
cool temperatures of early morning or evening hours, rather<br />
than during the hot hours of the day.<br />
Summing up the specific flight condition just discussed,<br />
the pilot must remember-when the temperature becomes<br />
higher than standard (59 ° F), the density of the air is<br />
reduced and aerodynamically affects overall airplane<br />
performance. The horsepower output of the engine is<br />
decreased because its fuel air mixture intake is reduced. The<br />
propeller develops less thrust because the blades are less<br />
efficient. The wings develop less lift because the less dense<br />
atmosphere exerts less force on the wings as airfoils. As a<br />
result, the takeoff distance is increased and the climb<br />
performance reduced.<br />
In order to cope with high elevation airport takeoffs with<br />
normally aspirated engines, whenever the density altitude is<br />
5,000 feet or higher, the pilot must compensate on the<br />
ground before takeoff. With a direct drive engine and a<br />
fixed pitch propeller, run the engine up to takeoff RPM and<br />
lean the mixture until a maximum RPM is noted; leave<br />
mixture at that position and accomplish the takeoff. If the<br />
engine has a governor, run it up to takeoff RPM and then<br />
lean until the engine smooths out and gives the indication of<br />
maximum power. At 5,000 ft. density altitude or higher, the<br />
available horsepower has been reduced so that leaning as<br />
described will not damage a healthy engine. If an EGT<br />
system is available, lean to +100 ° F on the rich side of peak<br />
EGT on a direct drive normally aspirated <strong>Lycoming</strong> engine.<br />
All turbocharged or supercharged engines must use full<br />
rich for takeoff at any elevation airport. This includes either<br />
manually operated turbos or the automatic type.<br />
IGNITION SYSTEM POWER ROBBERS<br />
There are several possibilities whereby the ignition<br />
system can be the cause of power loss in the engine. There is<br />
a power loss of approximately 3% with a single dead<br />
magneto or running on one mag. In fixed wing aircraft, if<br />
the pilot lost a magneto in flight it might not be a serious<br />
situation to complete the flight safely provided other power<br />
robbers didn't begin to add to the problem. But in the case of<br />
the rotary wing aircraft it could be serious during takeoff,<br />
hover or landing because there are the regular inroads on<br />
power - such as operation of the tail rotor, the cooling fan,<br />
the alternator, the transmission, and also power loss from<br />
any excessive rotor blade trim tab position beyond the
manufacturers recommendation. Therefore, magneto<br />
maintenance really is a critical item on rotor wing aircraft.<br />
Other power loss influences in the ignition system<br />
include worn or fouled spark plugs that tend to provide a<br />
weak spark. Likewise, deteriorated magneto points will have<br />
some power loss influence. We have also learned the<br />
difficult way that old, worn or cracked (insulation) ignition<br />
harnesses can cause a loss of power, particularly at altitude.<br />
If this is suspected, it can be checked by means of a harness<br />
tester.<br />
We know that magneto timing, either early or late, has a<br />
detrimental influence on power. Sound maintenance can<br />
eliminate these problems. But coming back to spark plugs,<br />
the correct plug is most important for efficient engine<br />
operation, and Textron <strong>Lycoming</strong> Service Instruction 1042<br />
is the official reference source. Maintenance must also be<br />
careful that long reach plugs are used only in those cylinders<br />
designated by an area of yellow paint in the fin area between<br />
the spark plug and rocker box. Cylinders designed for short<br />
reach plugs may be either gray, blue or unpainted in this<br />
area. If the wrong length plug is used in the cylinder, it will<br />
cause a loss of power and perhaps preignition or detonation.<br />
Champion Spark Plug Company published a bulletin<br />
warning that one dirty cigarette or contaminated plug barrel<br />
can rob an aircraft engine of two horsepower during takeoff.<br />
When dirt and moisture are allowed to accumulate on the<br />
harness terminal (cigarette) or spark plug barrel insulator,<br />
connector well flashover can occur resulting in plug misfire.<br />
The high voltage current will take the easy path to ground<br />
rather than spark between the firing-end electrode gap.<br />
Cigarettes, harness terminals, seals, and spark plug barrels<br />
should be kept clean and dry. When cigarettes are clean, do<br />
not touch them as the moisture on fingers is enough to<br />
contaminate them again. Replacing these parts and pieces at<br />
reasonable periods is inexpensive insurance against the<br />
power thieves. When the latter are at work, sharp<br />
performance and economy are lost.<br />
INDUCTION SYSTEM LEAKS<br />
If the intake pipes are loose at either end, leakage that<br />
tends to lean the mixture will take place and cause a power<br />
loss. It could be critical in the takeoff or climb power<br />
ranges. In most engines the leakage can be detected by<br />
observing fuel dye evidence at the leakage area. Any time<br />
this condition is discovered, it must be remedied before the<br />
aircraft is flown again.<br />
In those engines using a carburetor, we have observed<br />
power loss effects from worn air boxes where the carburetor<br />
heat flapper valve in the air box remains partly open. When<br />
the outside air temperature is above 59 ° F, this malfunction<br />
can create a sneaky power loss, particularly at higher than<br />
cruise power.<br />
64<br />
BLOW-BY AND COMPRESSION LOSS<br />
Another power loss condition is that of blow-by - or oil<br />
blowing by the piston rings and getting into the combustion<br />
chamber in more than desirable amounts. It occurs with<br />
broken or worn piston rings, scored cylinder walls, and bellmouthed<br />
exhaust valve guides. Oil in the combustion<br />
chamber tends to foul spark plugs and reduce their<br />
efficiency. It also lowers the octane rating of the fuel and<br />
tends to cause a loss of power, particularly at takeoff or<br />
climb. If the engine is not close to its normal overhaul life,<br />
then a top overhaul would be in order if more than one<br />
cylinder showed this condition.<br />
Power loss from valve leakage may not be noticeable to<br />
the pilot while in flight. If an exhaust valve becomes burned<br />
and deteriorated at the edge of the head, it may cause an<br />
engine miss in flight. But leaking intake valves are difficult<br />
to detect during flight. The latter either get irregularly seated<br />
and cause a compression loss, or they can also cause a loss if<br />
they get tuliped from preignition. A good differential<br />
compression check will pick up most of these discrepancies<br />
except for some occasions of broken rings. However, any oil<br />
in the combustion chamber from broken rings would, in<br />
addition, call for a visual inspection with a borescope or a<br />
gooseneck light.<br />
SUMMARY:<br />
We can't list all the many power robbing factors here, but<br />
we have tried to list the important ones, along with<br />
recommendations on how to cope with them. Again we want<br />
to remind all concerned of the dangerous difference between<br />
an engine problem where both spark plugs fail to fire in a<br />
cylinder, which is immediately obvious as compared with<br />
the small power loss problem that is not as obvious. The<br />
power thieves take power away in small quantities per<br />
cylinder until several of them happen to occur at the same<br />
time, reaching serious proportions and a definite unsafe<br />
flight condition. Be aware - don't become a victim of power<br />
thieves!<br />
Wet Air Effect On Engine Power<br />
The FAA has published a pamphlet entitled "Wet Air"<br />
that enlightens the pilot concerning this potential danger to<br />
engine power. Scientists state that we can dismiss any<br />
appreciable effect of dampness in the air on the efficiency of<br />
the wing in lifting and the propeller in thrusting. But they<br />
say the effect of water vapor or high humidity on engine<br />
power output can be significant, and should be taken into<br />
consideration when planning takeoffs in muggy or highly<br />
humid weather.<br />
The pamphlet explains the power loss by pointing out<br />
that with water vapor present there is less air entering the<br />
engine. Secondly, this creates an excessive enrichment<br />
because the fuel amount is the same, but the amount of air is
less. Furthermore, the water vapor slows the burning which<br />
slightly affects power, but offers no cooling value to the<br />
engine.<br />
FAA recommends a rough rule of thumb is to keep highmoisture<br />
content in mind, and suggests the pilot consult his<br />
aircraft owner's handbook for takeoff distances, and add<br />
another 10 percent for the possible effects of engine power<br />
loss due to water vapor on a muggy day. The pilot can easily<br />
identify a high water vapor condition by the muggy, hot,<br />
sticky feeling in this kind of weather. The higher the<br />
ambient temperature, the greater the water vapor content in<br />
the air; i. e., at 96 ° F, the water vapor content will be eight<br />
times as great as at 42 ° F. The write-up also states that the<br />
effect of water vapor on supercharged, fuel-injected piston<br />
engines is substantially the same as the effect on other piston<br />
engines. "Fuel injection systems meter fuel on the basis of a<br />
given volume of gas entering the combustion chamber.<br />
whether the gas is air or water vapor, just as the carburetor<br />
does. It cannot discriminate between combustibles and<br />
noncombustibles."<br />
Pilots should be alert to the effect of wet air on the<br />
performance of their engine.<br />
Frequency Of Flight And Its Effect On The<br />
Engine<br />
We have firm evidence that engines not flown frequently<br />
may not achieve the normal expected overhaul life. Engines<br />
flown only occasionally deteriorate much more rapidly than<br />
those that fly consistently. Pilots have asked, "What really<br />
happens to an engine when it's flown only one or two times<br />
per month?" An aircraft engine flown this infrequently tends<br />
to accumulate rust and corrosion internally. This rust and<br />
corrosion is often found when an engine is torn down. Some<br />
operators are running the engines on the ground in an<br />
attempt to prevent rust between infrequent flights. This may<br />
harm rather than help the engine if the oil temperature is not<br />
brought up to approximately 165 ° F, because water and<br />
acids from combustion will accumulate in the engine oil.<br />
The one best way to get oil temperature to 165 ° F is fly the<br />
aircraft. During flight the oil normally gets hot enough to<br />
vaporize the water and most acids and eliminate them from<br />
the oil. If the engine is merely ground run, the water<br />
accumulated in the oil will gradually turn to acid, which is<br />
also undesirable. Prolonged ground running in an attempt to<br />
bring oil temperature up is not recommended because of<br />
inadequate cooling that may result in hot spots in the<br />
cylinders, or baked and deteriorated ignition harness, and<br />
brittle oil seals causing oil leaks. If the engine can't be<br />
flown, then merely pull it through by hand or briefly turn the<br />
engine with the starter to coat the critical parts with oil. If<br />
the engine is flown so infrequently that it does not<br />
accumulate the operating hours recommended for an oil<br />
change (25 hours for a pressure screen system and 50 hours<br />
65<br />
for a full-flow filter system), then the oil should be changed<br />
at four-month intervals to eliminate water and acids.<br />
A Review of Old Wives Tales<br />
Tale Number One-- "The most likely time for an engine<br />
failure to occur is at the first power reduction after takeoff."<br />
Every individual who pilots an aircraft has probably heard<br />
this statement at some time. Is it a true statement? We will<br />
venture a guess and say that perhaps it may have been at<br />
some time in the distant past.<br />
Several years ago this question was asked of me and it<br />
led to questioning some FAA employees and a number of<br />
other pilots about where the justification for this statement<br />
might be found. After several weeks of poking into this<br />
subject, it was finally necessary to conclude that we could<br />
find no justification - that it was simply an "Old Wives<br />
Tale."<br />
A letter which recently came from a Flyer reader takes<br />
this one step further. First it appears that there are many who<br />
continue to repeat this tale. This caused our reader to delve<br />
into the subject a little deeper - perhaps a little more<br />
scientifically than I did. Our reader studied a computer<br />
readout which had data on incidents of engine failure over a<br />
recent three year period. Based on the material in that report,<br />
this reader concluded that engine failures during takeoff are<br />
quite rare, and that failures during cruise are far more<br />
common. This does seem logical since the engines of fixed<br />
wing aircraft run a majority of their operating life in the<br />
cruise power range.<br />
Our reader also had a very believable theory about how<br />
this tale may have gotten started. He wrote, "It seems likely<br />
to me that this idea got started when twin engine flight<br />
instructors would simulate an engine out during takeoff -<br />
right about the time that the student put his hand on the prop<br />
control to reduce power.... Gradually the idea was<br />
propagated that this was the most likely time for an engine<br />
failure, when in reality it was a likely time for an instructor<br />
to simulate a failure."<br />
From these two searches for justification - with none<br />
being found in either case, I believe it is fair to conclude that<br />
"the idea of an engine failure being most likely to occur at<br />
the first power reduction after takeoff" is in fact an old<br />
wives tale. For the sake of safety. lets stop repeating this<br />
false tale and start promoting the idea that we should be<br />
ready to deal with power failure at any time.<br />
A second old wives tale is still being promoted by some<br />
individuals. This tale involves the constant speed propeller<br />
and goes like this: "The RPM in hundreds should not be<br />
exceeded by the manifold pressure in inches of mercury. "<br />
Referred to as a "squared power setting" (i.e. 2400 RPM x<br />
24 inches of MP), it appears that this tale may be the result<br />
of a carry-over from some models of the old radial engines
which were vulnerable to bearing wear at high power<br />
settings. Changes in engine design along with improved<br />
metals and lubricants permit changes in the operation of<br />
modern flat, opposed cylinder power plants.<br />
Any pilot who believes that squared power settings<br />
continue to be necessary should be urged to read and<br />
understand the information in the Pilot's Operating<br />
Handbook (POH). While there are limits to the power which<br />
should be taken from most engines, particularly those which<br />
are turbocharged, the combinations of RPM and MP listed in<br />
the power charts of the POH have been flight tested and<br />
approved by the airframe and powerplant engineers. For<br />
example, if the POH chart lists 2200 RPM and 26 inches of<br />
MP as an approved power setting, pilots should not be<br />
apprehensive about using that setting if it meets their needs.<br />
Isn't it strange that some bits of information come to be<br />
believed by large segments of a population even when they<br />
are untrue? The two issues discussed above are good<br />
examples. Will it ever be possible to get all of our fellow<br />
pilots to reject the two false ideas outlined here? Let's keep<br />
trying.<br />
Spark Plug Fouling<br />
Spark plug fouling in your aircraft engine may be a<br />
problem. It is desirable to reduce the problem as much as<br />
possible. Textron <strong>Lycoming</strong> Service Letter L192 provides<br />
information that may be very helpful in reducing spark plug<br />
fouling. To aid our readers, the entire text of the latest<br />
revision to Service Letter L192 is printed here:<br />
"In many cases spark plug fouling resulting from the<br />
tetraethyl lead (TEL) in aviation fuels can be reduced or<br />
eliminated by proper operating techniques.<br />
"The problem of lead fouling arises when low engine<br />
operating temperatures coupled with a rich mixture prevent<br />
the complete vaporization of the TEL. Under these<br />
conditions, lead deposits can form in the spark plug<br />
electrodes, causing misfiring. By establishing and<br />
maintaining proper engine operating temperatures, the TEL<br />
can be kept properly vaporized and pass out the exhaust<br />
system.<br />
"However, the Champion Spark Plug Company has<br />
designed a spark plug which will reduce or eliminate the<br />
effects of lead fouling. The spark plug REM-37-BY can be<br />
used in the following engines: 0-235; 0-320; IO-320-B, -F,<br />
AIO-320; LIO-320-B; IO-320-A, -D, -E; AEIO-320; HIO-<br />
360-B; HO-360; 0-360-A, -C, -E, -F; IO-360-B, -E, -F;<br />
AEIO-360-B, -H; 0-360-B, -D; IVO-360; VO-360-A, B.<br />
"For operators experiencing lead fouling, the following<br />
operating recommendations are made:<br />
1. By use of the spark plug recommendation charts, be<br />
certain the proper plugs are installed. Do not simply replace<br />
66<br />
the same part number of those removed. A previous<br />
mechanic may have installed the wrong plugs. Reference<br />
latest edition of Service Instruction No. 1042.<br />
2. Rotate top and bottom spark plugs every 25 to 50<br />
hours. Top plugs scavenge better than the bottom ones.<br />
3. Proper adjustment of the idle speed (600 to 650 RPM)<br />
fuel mixture, and maintenance of the induction air system,<br />
will ensure smooth engine operation and eliminate<br />
excessively rich fuel/air mixtures at idle speeds. This will<br />
minimize the separation of the non-volatile components of<br />
the high leaded aviation fuels greatly retarding the<br />
deposition rate.<br />
4. The engine should be operated at engine speeds<br />
between 1000 and 1200 RPM after starting and during the<br />
initial warm-up period. Avoid prolonged closed throttle idle<br />
engine speed operation (when possible). At engine speeds<br />
from 1000 to 1200 RPM, the spark plug core temperatures<br />
are hot enough to activate the lead scavenging agents<br />
contained in the fuel which retards the formation of the lead<br />
salt deposits on the spark plugs and exhaust valve stems.<br />
Avoid rapid engine speed changes after start-up and use<br />
only the power settings required to taxi.<br />
5. After a flooded start, slowly run the engine to high<br />
power to burn off harmful lead deposits, then return the<br />
engine to normal power.<br />
6. Keep engine operating temperatures in the normal<br />
operating range. Too many people think the lower the<br />
temperatures the better. Keep cylinder head temperatures in<br />
normal operating range by use of normal power and proper<br />
leaning. Use oil cooler baffles to keep oil temperature up in<br />
winter.<br />
7. Use normal recommended leaning techniques at cruise<br />
conditions regardless of altitude and re-lean the mixture with<br />
application of alternate air or carburetor heat. If aircraft is<br />
used as a trainer, schedule cross country operation whenever<br />
possible.<br />
8. Rapid engine cool down from low power altitude<br />
changes, low power landing approach and/or engine shutdown<br />
too soon after landing or ground runs should be<br />
avoided.<br />
9. Prior to engine shut-down the engine speed should be<br />
maintained between 1000 and 1200 RPM until the operating<br />
temperatures have stabilized. At this time the engine speed<br />
should be increased to approximately 1800 RPM for 15 to<br />
20 seconds, then reduced to 1000 to 1200 RPM and shutdown<br />
immediately using the mixture control."<br />
Test Your Knowledge On Engines<br />
Check your knowledge of aircraft engines with the<br />
questions below.<br />
A. Multiple Choice. Circle the one best answer.
1. In comparison to fuel injection systems, float-type<br />
carburetor systems are generally considered to be<br />
(a) equally susceptible to icing as a fuel injection<br />
unit.<br />
(b) less susceptible to icing than a fuel injection<br />
unit.<br />
(c) susceptible to icing only when visible<br />
moisture is present.<br />
(d) more susceptible to icing that a fuel injection<br />
unit.<br />
2. The basic purpose of adjusting the fuel/air mixture<br />
control at altitude is to<br />
(a) increase the fuel/air ratio for flying at altitude.<br />
(b) decrease the fuel flow in order to compensate<br />
for decreased air density.<br />
(c) increase the amount of fuel in the mixture to<br />
compensate for the decrease in pressure and<br />
density of the air.<br />
(d) decrease the amount of fuel in the mixture in<br />
order to compensate for increased air density.<br />
3. If the engine of an airplane is permitted to idle for a<br />
long period of time while on the ground,<br />
(a) a hydraulic lock may develop in one or more<br />
cylinders.<br />
(b) the lean mixture may cause the engine to miss<br />
or quit.<br />
(c) the result may be an excessively high oil<br />
pressure.<br />
(d) the spark plugs may become fouled.<br />
4. Assume that on your run-up at an airport where the<br />
elevation is 6,000 feet MSL, you note a slight engine<br />
roughness that is not significantly affected by the magneto<br />
check but grows worse during the carburetor heat check.<br />
Under these circumstances, which of the following would be<br />
your most logical initial action?<br />
(a) check to see that the mixture control is in the<br />
full rich position.<br />
(b) reduce manifold pressure to control<br />
detonation.<br />
(c) check the results obtained with a leaner<br />
setting of the mixture control.<br />
(d) taxi back to the flight line for a maintenance<br />
check.<br />
5. With regard to the use of aviation gasoline, which<br />
statement is true?<br />
67<br />
(a) use of a lower-than-specified grade of fuel<br />
may result in a reduced power output but is<br />
usually less harmful than higher rated fuel.<br />
(b) use of the next higher-than-specified grade of<br />
fuel is permissible if the specified grade of fuel is<br />
not available.<br />
(c) use of the next lower-than-specified grade of<br />
fuel is permissible if the specified grade of fuel is<br />
not available.<br />
(d) use of a higher-than-specified grade of fuel<br />
usually results in lower-than-normal cylinder<br />
head temperatures.<br />
6. If the grade of fuel used in an aircraft engine is lower<br />
than specified for the engine, it will most likely cause<br />
(a) an increase in power which could overstress<br />
internal engine components.<br />
(b) detonation.<br />
(c) lower cylinder head temperatures.<br />
(d) a non-uniform mixture of fuel and air in the<br />
cylinders.<br />
7. Which statement is true regarding aircraft engines that<br />
are equipped with a fuel injection system instead of a<br />
carburetor?<br />
(a) vapor locks during ground operations on hot<br />
days are less apt to occur with fuel injection.<br />
(b) a disadvantage of fuel injection is the<br />
difficulty experienced in cold weather starting.<br />
(c) slow throttle response is one of the<br />
disadvantages of fuel injection.<br />
(d) fuel injection provides better fuel<br />
management and fuel distribution to the engine.<br />
8. The presence of carburetor ice, in an airplane<br />
equipped with a fixed pitch propeller, can be verified by<br />
applying carburetor heat and noting<br />
(a) a decrease in RPM and then a gradual<br />
increase in RPM.<br />
(b) a decrease in RPM and then a constant RPM<br />
indication.<br />
(c) an immediate increase in RPM with no further<br />
change in RPM.<br />
(d) an increase in RPM and then a gradual<br />
decrease in RPM.<br />
9. If the engine oil temperature and cylinder head<br />
temperature gauges have exceeded their normal operating<br />
range, you may have been<br />
(a) operating with higher-than-normal oil<br />
pressure.
(b) using fuel that has a higher-than-specified<br />
fuel rating.<br />
(c) operating with too much power and with the<br />
mixture set too lean.<br />
(d) operating with the mixture set too rich.<br />
10. What change occurs in the fuel/air mixture when<br />
carburetor heat is applied?<br />
(a) the fuel/air mixture becomes leaner.<br />
(b) the fuel/air mixture becomes richer.<br />
(c) no change occurs in the fuel/air mixture.<br />
(d) a decrease in RPM results from the lean<br />
mixture.<br />
11. For maximum engine life and trouble-free operation,<br />
engine break-in during the first 25 to 50 hours of engine<br />
operation should be accomplished by<br />
(a) limiting takeoff power to five minutes per<br />
flight and using 65% power maximum for cruise.<br />
(b) running the engine continuously at 65% to<br />
75% power with full power or maximum power<br />
available for climb.<br />
(c) using less than 100% power for takeoff and<br />
cruising at 75% power or below.<br />
(d) running the engine at 1200 RPM for at least<br />
twenty minutes before the first take off of the<br />
day.<br />
12. The full flow oil filter is very useful in keeping an<br />
engine clean, but it will not filter out<br />
(a) water<br />
(b) acids<br />
(c) lead sludge<br />
(d) all of the above<br />
13. For aircraft with an EGT gage, a good "rule of<br />
thumb" for most general aviation engines at cruise is to lean<br />
to<br />
(a) 50 ° on lean side of peak EGT.<br />
(b) Peak EGT.<br />
(c) 50 on rich side of peak EGT.<br />
(d) 100 ° on rich side of peak EGT.<br />
14. With high relative humidity carburetor icing may be<br />
expected within which of the following ranges?<br />
(a) 32 to 59 ° F<br />
(b) 0 to 15 F<br />
(c) 20 ° to 90 ° F<br />
(d) 0 ° to 59 ° F<br />
68<br />
15. An aircraft engine which develops less and less<br />
power from the point of takeoff to the service ceiling is said<br />
to be<br />
(a) supercharged<br />
(b) normally aspirated<br />
(c) turbocharged<br />
(d) super critical<br />
16. If full carburetor heat is used during cruise for the<br />
prevention of carburetor ice, some of the 15% of power loss<br />
incurred may be regained by<br />
(a) enriching the mixture.<br />
(b) squaring the power setting.<br />
(c) applying one pump of the primer every 15<br />
minutes.<br />
(d) leaning the mixture.<br />
17. The final authority regarding operation of the general<br />
aviation aircraft engine is<br />
(a) engine operator's manual provided by the<br />
engine manufacturer.<br />
(b) Pilot's Operating Handbook provided by the<br />
airframe manufacturer.<br />
(c) aviation circulars distributed by the FAA.<br />
(d) your local fixed base operator.<br />
18. Use of partial heat to prevent carburetor icing is<br />
recommended only if the aircraft has<br />
(a) a carburetor air temperature gage - CAT.<br />
(b) a cylinder head temperature gage - CHT.<br />
(c) an exhaust gas temperature gage - EGT.<br />
(d) an outside air temperature gage - OAT.<br />
B. Supply the best answer to the following essay<br />
questions:<br />
1. Explain why aerobatics or inverted flight should not<br />
be attempted unless the engine has been modified for this<br />
type flying.<br />
2. List two purposes of engine oil.<br />
3. What are the two FAA approved oils for general<br />
aviation?<br />
4. When operating at the manufacturers' recommended<br />
cruise power, at what altitudes may leaning be<br />
accomplished?<br />
5. Of what significance is the 5,000 foot density altitude<br />
reference point for normally aspirated engines?<br />
6. What causes engine roughness when leaning an engine<br />
using a float-type carburetor at recommended cruise<br />
power?
7. The Exhaust Gas Temperature (EGT) system is more 10. Two types of induction ice:<br />
precise as a fuel management instrument with which of the<br />
following?<br />
(a) Impact ice - typically on the air filter.<br />
(a) Impact ice - typically on the air filter.<br />
(a) Float-type carburetor.<br />
(b) Refrigeration ice - forms in the float-type carburetor.<br />
(b) Fuel injection.<br />
8. How can damage to an engine take place as a result of<br />
leaning?<br />
9. What important consideration by the pilot for his<br />
engine must take place with a normally aspirated engine at<br />
airports where the density altitude is 5,000 feet or higher?<br />
10. List two types of induction ice.<br />
ANSWERS TO QUESTIONS<br />
A. MULTIPLE CHOICE RESPONSE<br />
1.d 7. d 13. c<br />
2. b 8. a 14. c<br />
3. d 9. c 15. b<br />
4. c 10. b 16. d<br />
5. b 11. b 17. b<br />
6. b 12. d 18. a<br />
B. ESSAY RESPONSE<br />
1. Loss of engine oil out the breather can cause engine<br />
damage or failure.<br />
2. (a) Lubricate moving parts.<br />
(b) Aid internal cooling of the engine.<br />
3. (a) Straight mineral.<br />
(b) Ashless Dispersant.<br />
4. At any altitude.<br />
5. It is a climb reference point for normally aspirated<br />
powerplants. Climb from sea level through 5,000 feet (some<br />
Cessna's may use 3,000 feet) should be full rich. Continued<br />
climb beyond (3,000 feet) 5,000 feet should use some<br />
leaning to improve engine efficiency.<br />
6. The roughness is not detonation at recommended<br />
cruise power. The leanest cylinder in the less than perfect<br />
distribution pattern is cutting out. Operation in the<br />
roughness area is not acceptable.<br />
7. (b) Fuel injection.<br />
8. Damage to an engine from leaning takes place at<br />
higher than recommended cruise power as detonation where<br />
an aircraft does not have the necessary engine instruments to<br />
indicate the powerplant is being abused.<br />
9. Requires proper leaning for safest, efficient<br />
performance at takeoff.<br />
69
Mechanic's Creed<br />
UPON MY HONOR I swear that I shall hold<br />
in sacred trust the rights and privileges conferred<br />
upon me as a certified mechanic. Knowing full<br />
well that the safety and lives of others are<br />
dependent upon my skill and judgment, I shall<br />
never knowingly subject others to risks which I<br />
would not be willing to assume for myself, or for<br />
those dear to me.<br />
IN DISCHARGING this trust, I pledge<br />
myself never to undertake work or approve work<br />
which I feel to be beyond the limits of my<br />
knowledge: nor shall I allow any non-certified<br />
superior to persuade me to approve aircraft or<br />
equipment as airworthy against my better<br />
judgment; nor shall I permit my judgment to be<br />
influenced by money or other personal gain; nor<br />
shall I pass as airworthy aircraft or equipment<br />
about which I am in doubt, either as a result of<br />
direct inspection or uncertainty regarding the<br />
ability of others who have worked on it to<br />
accomplish their work satisfactorily.<br />
I REALIZE the grave responsibility which is<br />
mine as a certified airman, to exercise my<br />
judgment on the airworthiness of aircraft and<br />
equipment. I, therefore, pledge unyielding<br />
adherence to these precepts for the advancement<br />
of aviation and for the dignity of my vocation.<br />
The Basics Of Maintenance In General<br />
Aviation<br />
Even the "pros" of our industry admit they need to be<br />
reminded from time to time of the basics of General<br />
Aviation maintenance. Therefore to review, the term<br />
maintenance means the inspection, overhaul, repair, upkeep,<br />
and preservation of an aircraft and engine, including the<br />
replacement of parts, according to the FAA. The<br />
owner/operator is responsible for the proper maintenance of<br />
his aircraft and engine. The pilot in command of an airplane<br />
is responsible for:<br />
1. Determining whether the aircraft is in condition for<br />
safe flight.<br />
2. Having a Registration Certificate and a valid<br />
Airworthiness Certificate appropriately displayed in his<br />
aircraft during all operations.<br />
3. Having available in the aircraft an FAA approved<br />
flight manual, or operational limitations.<br />
71<br />
4. Keeping abreast of current regulations concerning the<br />
operation and maintenance of his airplane and engine.<br />
INSPECTIONS<br />
FAR 91.409 establishes minimum requirements<br />
pertaining to annual and 100-hour inspections. Not only<br />
does the FAA require these inspections, but they stipulate in<br />
FAR 91.405 that the owner/operator must maintain the<br />
airworthiness of the aircraft and engine during the time<br />
between the required inspections by having any<br />
airworthiness defects corrected and by ensuring that<br />
maintenance personnel make the proper entries in aircraft<br />
records approving the return to service. Although<br />
maintenance requirements will vary for different types of<br />
aircraft, the FAA states that experience shows most aircraft<br />
will need some type of preventive maintenance every 25hours<br />
flying time, and minor maintenance at least every 100<br />
hours.<br />
ANNUAL INSPECTION<br />
This inspection must be performed within the preceding<br />
12 calendar months, by either a certified A & P mechanic<br />
holding an inspection authorization, an appropriately rated<br />
certified repair station, or the manufacturer of the aircraft.<br />
100-HOUR INSPECTION<br />
An aircraft used to carry passengers for hire, or for flight<br />
instruction for hire, must be inspected within each 100 hours<br />
of time in service by either a certified A & P mechanic, an<br />
appropriately rated certificated repair station, or the<br />
manufacturer. The annual inspection is acceptable as a 100<br />
hour inspection, but the reverse is not true.<br />
DAILY AND PREFLIGHT INSPECTION<br />
The owner/operator may conduct a daily inspection, if so<br />
desired, but the pilot must perform a satisfactory preflight<br />
inspection before flight in order to determine that the aircraft<br />
is airworthy.<br />
AIRWORTHINESS DIRECTIVES<br />
Airworthiness Directives, commonly referred to as "AD<br />
Notes," provide aircraft owners with information of unsafe<br />
conditions. The ADs specify the aircraft or component found<br />
to be unsafe by the FAA, and the conditions, limitations, or<br />
inspections, if any, under which the aircraft may continue to<br />
be operated.<br />
The Federal Aviation Regulation require a presentation<br />
showing the current status of applicable airworthiness<br />
directives, including the method of compliance, and the<br />
signature and certificate number of the mechanic or repair<br />
agency who complied with the AD.<br />
It is the aircraft owner/operator's mandatory<br />
responsibility to assure compliance with all pertinent AD<br />
notes. This includes those AD's of a recurrent or repetitive<br />
nature; for example, an AD may require a certain inspection<br />
every 100 hours. This means that the particular inspection<br />
shall be made and recorded every 100 hours of flight time.
MANUFACTURER'S SERVICE BULLETINS<br />
The FAA states that whenever an aircraft or engine<br />
manufacturer determines, through service experience, that<br />
his product may be improved by some modification, or that<br />
the service life of his product may be extended by some<br />
particular maintenance or repair, he may issue a service<br />
bulletin. The latter will tell what the trouble is and how to<br />
remedy it. The service bulletin is mandatory because it<br />
supplements the manufacturer's maintenance manual that is<br />
required by FARs. The service bulletin usually addresses<br />
those items that affect safety of flight. The <strong>Lycoming</strong><br />
overhaul manual and all applicable service bulletins and<br />
service instructions, used in conjunction with the appropriate<br />
operator's manuals, constitute the engine maintenance<br />
manual required by the FAA / FAR 43. 13.<br />
In addition to service bulletins, Textron <strong>Lycoming</strong> also<br />
publishes service instructions and service letters. A service<br />
instruction is product information that also becomes a part of<br />
the manufacturer maintenance manual, and therefore<br />
compliance with these publications by owners and operators<br />
is required. The service letter at <strong>Lycoming</strong> is product<br />
information which can be optional to the pilot/owner.<br />
PREVENTIVE MAINTENANCE<br />
Preventive maintenance means simple or minor<br />
preservation operations and the replacement of small<br />
standard parts not involving complex assembly operations.<br />
The holder of a pilot certificate issued under FAR 61 may<br />
perform preventive maintenance on any aircraft owned or<br />
operated by him that is not used in air carrier service or air<br />
taxi. All other maintenance, repairs, rebuilding or<br />
alternations must be performed by persons authorized to do<br />
so by the FAA.<br />
Except as noted under "Preventive Maintenance," all<br />
repairs and alterations are classed as either Major or Minor.<br />
Major repairs or alterations must be approved and returned<br />
to service by an appropriately rated certified repair facility,<br />
an A & P mechanic holding an Inspection Authorization, or<br />
a representative of the FAA. Minor repairs and alterations<br />
may be returned to service by an appropriately rated certified<br />
A & P mechanic or repair facility.<br />
PROGRESSIVE MAINTENANCE<br />
This is a continuous maintenance program whereby the<br />
required FAA and manufacturer inspections are<br />
accomplished during the most convenient time, while<br />
keeping the aircraft in a state of continuous airworthiness.<br />
Several General Aviation airframe manufacturers have<br />
established sound Progressive Maintenance programs with<br />
FAA approval. Owners and operators are reminded that<br />
certain FAA requirements must be met before a Progressive<br />
Maintenance program can be used. These requirements are<br />
contained in the Federal Aviation Regulations, Part 43,<br />
"Maintenance, Preventive Maintenance, Rebuilding and<br />
72<br />
Alteration," and Part 91.409, "General Operating and Flight<br />
Rules."<br />
The Progressive Maintenance program has had more<br />
appeal where planes for hire are involved (i. e., commuter,<br />
air taxi, flight instruction), rather than those privately<br />
owned.<br />
AIRCRAFT FLIGHT TEST AFTER REPAIR OR<br />
ALTERATION<br />
The FAA reminds us that whenever a repair or alteration<br />
has been made to your aircraft or engine, the person<br />
authorized to return the aircraft to service should decide if<br />
the flight characteristics have changed or if operation in<br />
flight has been substantially affected. If the decision is<br />
affirmative, the aircraft must be flight tested before it may be<br />
used to carry passengers in accordance with FAR 91.407.<br />
The test pilot must make an operational check of the<br />
maintenance performed and log the flight and findings in the<br />
aircraft records.<br />
Ask About Reference Publications Before Your<br />
Engine Is Taken Apart<br />
People who fly should be concerned about the reliability<br />
of the aircraft they fly and the engine that powers that<br />
aircraft. One key to reliability is regular maintenance by a<br />
knowledgeable A & P mechanic. "Knowledgeable" does not<br />
necessarily mean the mechanic must have every detail of<br />
every job locked in his (or her) memory. It does mean that<br />
the individual should have relevant information readily<br />
available and be able to refer to it as needed.<br />
What has been stated above is not just good common<br />
sense, it is the law. Aviation mechanics are licensed<br />
(certified in aviation terms) under Part 65 of the Code of<br />
Federal Air Regulations (FAR). FAR 65.81 (b) states: "A<br />
certificated mechanic may not exercise the privileges of his<br />
certificate and rating unless he understands the current<br />
instructions of the manufacturer, and the maintenance<br />
manuals, for the specific operation concerned. "Is it possible<br />
for anyone to understand current instructions or maintenance<br />
manuals if they are not available for reference?"<br />
The point which a concerned pilot owner should be<br />
thinking about is this - does my A & P mechanic or<br />
maintenance shop have appropriate maintenance<br />
publications available for reference? While many<br />
maintenance activities do maintain a good reference library,<br />
others certainly do not. This can be easily determined from<br />
the questions that are asked of <strong>Lycoming</strong> service<br />
representatives who continuously respond to phone calls for<br />
help. While the service personnel are available to provide<br />
help when troubleshooting does not readily reveal the source<br />
of, or solution to, a problem, their time is being wasted when<br />
they are asked to dig out information for a mechanic who<br />
has not made the effort to acquire required reference
materials. Without these reference materials, the quality of<br />
maintenance is open to question.<br />
How can publications that apply to <strong>Lycoming</strong><br />
reciprocating engines be obtained - and which ones are<br />
needed? Starting with the last question, an Operator's<br />
Manual should have enough information to satisfy the needs<br />
of the engine owner or pilot. For the maintenance person,<br />
what is needed depends on the depth of maintenance to be<br />
performed and the particular engine models to be<br />
maintained. Once these items have been determined, the<br />
latest revision of Textron <strong>Lycoming</strong> Service Letter No. L114<br />
is a guide to all service publications that are available for<br />
sale. It lists <strong>Lycoming</strong> Parts Catalogs and Overhaul Manuals<br />
which provide much of the information needed for major<br />
work on <strong>Lycoming</strong> reciprocating aircraft engines.<br />
Specialized procedures and amplifying information are<br />
provided from time to time in the form of bulletins, letters.<br />
and instructions. These publications serve as supplements to<br />
the Overhaul Manual. Without these publications to provide<br />
the latest data published by the manufacturer, the A & P<br />
mechanic may not be reminded of a required inspection, or<br />
may be unaware of a new and helpful maintenance<br />
technique.<br />
Service Bulletins are manufacturer publications that are<br />
likely to affect safety of flight. Therefore. a bulletin should<br />
be considered to be mandatory by every aircraft owner and<br />
by all maintenance personnel. In some cases, a bulletin will<br />
become the subject of an FAA Airworthiness Directive<br />
(AD). The AD gets very broad distribution to aircraft owners<br />
and is also mandatory by law. Because they affect aircraft<br />
safety, both the bulletin and the AD should receive the<br />
careful attention of all aircraft owners and maintenance<br />
personnel.<br />
Service instructions are more routine items, but they do<br />
become an a supplement to the FAA required maintenance<br />
manual so their content is both informative and mandatory.<br />
When changing spark plugs, for example, a copy of<br />
<strong>Lycoming</strong> Service Instruction No. 1042 provides a listing of<br />
recommended and approved spark plugs for each engine<br />
model. Use of this reference will insure that the correct<br />
plugs are used.<br />
There is a message here which aircraft owners should<br />
consider. Quality of maintenance cannot always be<br />
determined beforehand, but the chances for good quality<br />
will certainly be better when adequate reference materials<br />
are available. The idea of simply asking what reference<br />
materials are available in your mechanics reference library<br />
would seem to be a good one. It will encourage the<br />
mechanic or maintenance activity to acquire and use<br />
appropriate reference materials and it may help aircraft<br />
owners to determine the quality of maintenance they will<br />
receive.<br />
73<br />
Air Filter Maintenance<br />
(Something the pilot should also know)<br />
Dust or some form of dirt is frequently the principal<br />
factor in premature piston ring, ring groove, and cylinder<br />
wear. If a worn or poorly fit air filter allows as much as a<br />
tablespoon of abrasive dirt material into the cylinders, it will<br />
cause wear to the extent that an overhaul will be required.<br />
Evidence of dust or other dirt material in the induction<br />
system beyond the air filter is indicative of inadequate filter<br />
care, or a damaged filter.<br />
Textron <strong>Lycoming</strong> Service Instruction No. 1002<br />
addresses the proper maintenance of carburetor air filters,<br />
but the information will also apply to fuel injected engines.<br />
One recommendation is keeping ground running to a<br />
minimum. It is also recommended that the air filter be<br />
cleaned daily when operating in dusty conditions. Other<br />
wise, the filter should be inspected daily, and cleaned as<br />
required. If there are any holes or tears in the filter, or if it<br />
shows signs of deterioration, it should be replaced<br />
immediately.<br />
To prevent undesirable combustion chamber wear,<br />
follow the instructions outlined in the Aircraft and Engine<br />
Operator Manuals on filter maintenance procedures. They<br />
will stress such recommendations as inspecting the entire air<br />
induction system to preclude the introduction of unfiltered<br />
air between the filter and fuel injector or carburetor. The<br />
manual also recommends inspecting the carburetor heat<br />
door, or the alternate air door, to ensure that they are<br />
operating correctly and sealing properly. Any accumulation<br />
of dirt and dust in or near the entrance of the alternate air<br />
door or carburetor heat door, will be drawn into the engine if<br />
the above doors are opened. Subsequently, aircraft parked or<br />
stored in dusty areas should have the unfiltered section of the<br />
induction system ahead of the air door examined and<br />
cleaned, if dirty, before use.<br />
The Oil And Your Engine<br />
There are two basic types of FAA approved aviation oils<br />
used in general aviation aircraft piston engines.<br />
1. Straight mineral<br />
2. Ashless dispersant (AD)<br />
Many <strong>Lycoming</strong> engines use straight mineral oil for<br />
"break-in" purposes with a new, remanufactured, or<br />
overhauled engine. The operators should then switch to AD<br />
oil after "break-in" has been accomplished. In those engines<br />
that use straight mineral oil beyond the normal break-in<br />
period (25 to 50 hours), a later switch to AD oil should be<br />
done with caution as loosened sludge deposits may clog oil<br />
passages. Oil screens must be checked after each flight until<br />
clots of sludge no longer appear.
Those <strong>Lycoming</strong> engines that are to be broken-in with<br />
AD oil include all turbocharged models, the 0-320-H, and<br />
the O/LO-360-E<br />
Since modern FAA approved Ashless Dispersant oils<br />
already include additives that make them superior to straight<br />
mineral oil, the use of additional oil additives in Textron<br />
<strong>Lycoming</strong> engines has been very limited. The only additive<br />
approved by Textron <strong>Lycoming</strong> is <strong>Lycoming</strong> part number<br />
LW-16702, an anti-scuffing, anti-wear oil additive. The<br />
policy governing use of this oil additive is spelled out in the<br />
latest revisions of Service Bulletins 446 and 471, and in<br />
Service Instruction 1409. These publications approve the use<br />
of LW-16702 for all <strong>Lycoming</strong> reciprocating engines except<br />
those that utilize a friction type clutch and a common engine<br />
oil system for the transmission and clutch assembly. The use<br />
of LW-16702 is required in certain engine models. These<br />
models are the 0-320-H, 0-360-E, LO-360-E, TO-360-E,<br />
LTO-360-E, TIO and TIGO-541.<br />
Clean engine oil is essential to long engine life, and the<br />
full flow oil filter is an added improvement over older<br />
methods of filtration. Generally, service experience has<br />
shown that the use of external oil filters can increase the<br />
time between oil changes provided filter elements are<br />
replaced at each oil change. However, operation in dusty<br />
areas, cold climates, and where infrequent flights with<br />
long idle periods are encountered, will require<br />
proportionately more frequent oil changes despite use of<br />
the oil filter. The oil and oil filter element should be<br />
routinely replaced after each fifty hours of engine operation,<br />
and the filter should be cut open in order to examine the<br />
material trapped in the filter for evidence of internal engine<br />
damage. In new or recently overhauled engines, some small<br />
particles of metallic shavings might be found, but these are<br />
not dangerous. Metal found after the first two or three oil<br />
changes should be treated as an indication that a serious<br />
problem is developing and a thorough investigation should<br />
be undertaken. The oil filter does not remove contaminants<br />
such as water, acids, or lead sludge from the oil. These<br />
contaminants are removed by changing the oil.<br />
The oil filter is even more important to the high<br />
compression or higher power engine. Some of the aircraft<br />
manufacturers have had good success in the small, lower<br />
compression, four cylinder engines without using a full flow<br />
filter. Generally speaking, these engines are also able to<br />
achieve their expected overhaul life, as long as oil is<br />
consistently changed, and operation and maintenance is<br />
accomplished in accordance with the airframe and engine<br />
manufacturers recommendations.<br />
The latest revision to Textron <strong>Lycoming</strong> Service<br />
Instruction 1014 gives recommendations for lubricating oils,<br />
oil change intervals, and engine break-in. Pilots and<br />
mechanics should know what weight, type, and brand of oil<br />
is being used in the engine being serviced. At each oil<br />
change, this specific information should be recorded in the<br />
74<br />
engine logbook. Except as a temporary measure in an<br />
emergency, different oils should not be mixed. Consistent<br />
indiscriminate mixing of oils may create high oil<br />
consumption problems, or clogged oil control rings and oil<br />
screens.<br />
Oil consumption is a very important engine health trend<br />
to monitor. The operator and maintenance people should<br />
know the general history of oil consumption during the life<br />
of the engine. It is typical of an engine during seating of new<br />
piston rings that oil consumption may be erratic or high; but<br />
after the rings are seated, generally within the first 25 to 50<br />
hours, oil consumption should level off below the maximum<br />
limits established by the manufacturer. Later, during the life<br />
of the engine, if there is a noticeable increase of oil<br />
consumption within a 25 hour period, this could be a<br />
possible danger signal and calls for an investigation. The oil<br />
screens and filter should be carefully observed for signs of<br />
metal. Maintenance personnel should take a compression<br />
check of the cylinders, using differential pressure<br />
equipment, and also look inside the cylinders with a<br />
borescope or gooseneck light to detect any unusual<br />
conditions.<br />
Oil and Filter Change Recommendations<br />
It has often been said that regular doses of clean, fresh oil<br />
provide the least expensive maintenance an owner can<br />
give an engine. Textron <strong>Lycoming</strong> Service Bulletin No. 480<br />
makes these specific recommendations for oil changes under<br />
normal operating conditions:<br />
A. Fifty-hour interval oil change and filter replacement<br />
for all engines using a full-flow oil filtration system.<br />
B. Twenty-five hour interval oil change and screen<br />
cleaning for all engines employing a pressure screen system.<br />
C. Even if the aircraft is flown only a few hours, a total<br />
of four months maximum between changes for both systems<br />
listed under "A" and "B."<br />
More About Oil And Your Aircraft Engine<br />
The earlier article, "The Oil and Your Engine," was so<br />
well received that an expansion of the subject was deemed<br />
appropriate. In the previous article, we listed the two basic<br />
types of oil used in general aviation aircraft piston engines as<br />
straight mineral and ashless dispersant (AD). We also<br />
stressed the importance of clean oil in achieving good engine<br />
life; and oil consumption as an indication of engine<br />
health was another important item discussed.<br />
Continuing our consideration of the oil and the aircraft<br />
engine, the primary purpose of a lubricant is to reduce<br />
friction between moving parts. Another additional<br />
responsibility of the oil is to help cool the engine. As it
circulates through the engine, the oil absorbs heat. Pistons<br />
and cylinder walls are especially dependent on the oil for<br />
cooling. In addition to reducing friction, the oil acts as a<br />
cushion between metal parts. The oil also aids in forming a<br />
seal between the piston and the cylinder wall to prevent<br />
leakage of gases from the combustion chamber. Oils<br />
likewise help reduce wear by picking up foreign particles<br />
and carrying them to a filter where they are removed.<br />
Using a direct drive, wet sump <strong>Lycoming</strong> powerplant as<br />
an example, we can describe the basic lubrication system of<br />
these less complex aircraft engines. A more detailed<br />
description may be found in the Overhaul Manual. In a wet<br />
sump engine the oil is contained in the engine sump as<br />
opposed to a dry sump powerplant where the oil is in an<br />
external oil tank located perhaps in the wheel well or the<br />
rear of the aircraft engine nacelle. In a dry sump engine, the<br />
oil is drawn from the oil tank and pumped throughout the<br />
engine by the pressure section of the oil pump, and then<br />
returned to the oil tank by the scavenge section of the oil<br />
pump. The other basic parts of the oil system are very<br />
similar to those used in the direct drive, wet sump <strong>Lycoming</strong><br />
powerplants.<br />
In the wet sump engine, the oil pump draws oil from the<br />
rear of the sump through the suction screen and sends it to<br />
the oil pressure screen. A bypass valve in some models is<br />
located between the pressure side of the oil sump and the oil<br />
screen. It permits unfiltered oil to bypass the screen and<br />
enter the engine when the oil filter is clogged, or during a<br />
cold start. The spring loading on the bypass valve allows the<br />
valve to open before the oil pressure collapses the screen, or<br />
in the case of cold congealed oil, it provides a low-resistance<br />
path around the screen. It is felt that dirty oil in an engine is<br />
better than no lubrication at all. Most oil systems offer as<br />
optional or standard, a thermostatic bypass valve in this<br />
same location which also contains a pressure relief feature to<br />
bypass the cooler in case it is clogged. As the name implies,<br />
this unit regulates the temperature of the oil by either<br />
running it through the oil cooler if it exceeds a preset<br />
temperature, or bypassing the oil cooler if the oil<br />
temperature is lower than the thermostatic by-pass setting.<br />
Continuing its travel, the oil next encounters a pressure<br />
relief valve. The latter regulates the engine oil pressure by<br />
allowing excessive oil to return to the sump. The oil<br />
continues its travel through drilled passageways throughout<br />
the system and finally returns by gravity to the oil sump<br />
where it begins the journey all over again.<br />
Thus the principal units in the typical wet sump engine<br />
are: a sump of sufficient size to contain the necessary<br />
amount of oil, an engine oil pump, oil cooler and by pass<br />
valve, pressure screen and by pass valve, pressure regulating<br />
valve, oil pressure and temperature instruments in the<br />
cockpit, an oil sump drain, a filler neck to put oil in the<br />
engine, a dipstick to measure the amount of oil, and a<br />
suction oil screen. The full flow oil filter is optional on the<br />
75<br />
small four cylinder powerplants, but is now recommended<br />
for all engines.<br />
We need screens and filters in the oil system to keep the<br />
oil clean as it circulates through the engine. If the oil is<br />
contaminated, it carries that contamination as it circulates.<br />
We also need an oil cooler for most engines so that the oil<br />
temperature may be kept within prescribed limits and the oil<br />
is able to perform its function efficiently. Of course, there is<br />
more to an oil system than this brief description. But for the<br />
operator who need not be a mechanic, this basic information<br />
can be helpful.<br />
The oil companies tell us the basics about their product.<br />
Viscosity of oil is resistance to flow. An oil which flows<br />
slowly has a high viscosity. If oil flows freely, it has a low<br />
viscosity. Unfortunately, viscosity of oil is affected by high<br />
or low temperatures. At below freezing temperatures some<br />
high viscosity oils become virtually solid, which makes<br />
circulation and lubrication impossible. But no matter what<br />
viscosity oil is used, when the outside temperature is 10 ° F<br />
or lower, preheating a <strong>Lycoming</strong> engine is recommended<br />
before attempting to start the engine, or damage to the<br />
powerplant may result. Textron <strong>Lycoming</strong> does not approve<br />
the use of oil dilution for cold weather operation of its<br />
engines. It is extremely important that only oil in the grade<br />
recommended by <strong>Lycoming</strong> be used.<br />
To simplify the selection of oils, they are classified under<br />
an SAE (Society of Automotive Engineers) system, that<br />
divides all oils into groups as follows:<br />
Commercial<br />
Aviation No.<br />
65<br />
80<br />
100<br />
120<br />
Commercial Military<br />
SAE No. Spec. No.<br />
30<br />
40<br />
50<br />
60<br />
1065<br />
1080<br />
1100<br />
1120<br />
If you are looking for a can of 30 weight aviation oil and<br />
it has the number 65 on it, then it is 30 and also 1065 under<br />
the Military Spec. If it has a more complete designation with<br />
the letter "W" added, then 30W indicates the viscosity<br />
(grade) of oil, it does not indicate quality or other essential<br />
characteristics. Generally speaking, any FAA approved<br />
aviation oil on the market does a good job, but it is<br />
recommended that the latest revision to Textron <strong>Lycoming</strong><br />
Service Instruction No. 1014 be consulted to determine the<br />
appropriate grade to be used.<br />
Multiviscosity oils have also been added to the field of<br />
aviation products. These oils cover a broad band of viscosity<br />
levels, and a number of them are approved by the latest<br />
revision to <strong>Lycoming</strong> Service Instruction 1014. These<br />
aviation grade, ashless dispersant (AD) oils have some<br />
definite advantages when used during cold weather. Because<br />
they flow more easily in cold temperatures, starting the<br />
engine is easier and lubrication of engine components gets
started more quickly. Unfortunately the additives that make<br />
these oils capable of operation at all temperatures also tend<br />
to form carbon products during hot weather operation when<br />
the oil usually runs at the high end of the temperature<br />
spectrum. These products may settle out in the valve guides<br />
and contribute to sticking valves. Therefore each owner or<br />
operator should consider the type of operation the aircraft is<br />
used for and take advantage of the qualities offered by<br />
multiviscosity oils while avoiding their use if it may be the<br />
cause of potential problems.<br />
Before we conclude our discussion, we want to remind<br />
our readers of a couple of miscellaneous but important<br />
related items. On multiengine aircraft each engine is<br />
supplied with oil from its own complete and independent<br />
system. Another reminder - every engine has a breather<br />
that can be considered a part of the oil system. If the engine<br />
does not have special provisions for aerobatic flight, and is<br />
flown inverted, the oil will be lost out the breather and a<br />
serious engine failure may result. We definitely recommend<br />
that engines not built for aerobatic flight should not be flown<br />
inverted.<br />
In summing up this brief supplemental bit of information<br />
about the oil and your engine, remember that it was not<br />
intended as instruction as detailed as the knowledge required<br />
of a mechanic. But we think you will agree that the "Typical<br />
Pilot" should know more about his aircraft engine than "Mr.<br />
Typical Driver" knows about his automobile engine-the<br />
penalty for not knowing the basics is greater in aviation.<br />
Maintaining Oil Levels of Wet Sump Engines<br />
In order to avoid confusion over wet sump engines, we<br />
are listing examples of them for clarification so that<br />
operators, line crews, and maintenance personnel can<br />
properly check oil. The following aircraft and engine models<br />
carry a capacity of six quarts of oil:<br />
Aircraft Model<br />
Cessna Skyhawk 172N<br />
Cessna 152<br />
Piper Tomahawk<br />
Beech Skipper<br />
Engine Model<br />
O-320-H2AD<br />
O-235-L2C<br />
O-235-L2C<br />
O-235-L2C<br />
Piper Seminole (Twin) O-360-E1A6D<br />
Grumman American Trainer O-235-C2C<br />
In addition to the aircraft listed previously, there are<br />
others in lesser numbers using these and other engine<br />
models with a six quart oil capacity. In order to be sure what<br />
an engine requires, consult the Pilot's Operating Handbook.<br />
One problem reported to us concerning the six-quart<br />
capacity engines has been that of overfilling the engine with<br />
oil. By referring to the Pilot's Operating handbook the pilot<br />
76<br />
will not confuse his engine with those wet sump powerplants<br />
that have a capacity of eight quarts of oil.<br />
The Pilot's Operating Handbook for the Cessna models<br />
152, and 172N Skyhawk have the following information<br />
concerning the engine oil:<br />
"Capacity of Engine Sump - 6 quarts. Do not operate on<br />
less than 4 quarts. To minimize loss of oil through breather,<br />
fill to 5 quart level for normal flights of less than 3 hours.<br />
For extended flight, fill to 6 quarts. These quantities refer to<br />
oil dipstick level readings. During oil and oil filter changes,<br />
one additional quart is required when the filter is changed."<br />
The Pilot's Operating Handbook for the Piper PA-44-180<br />
Seminole states as follows concerning oil requirements:<br />
"The oil capacity of the <strong>Lycoming</strong> engines is 6 quarts per<br />
engine with a minimum safe quantity of 2 quarts per engine.<br />
It is necessary that oil be maintained at full (6 quarts) for<br />
maximum endurance flights."<br />
The phrase - "a minimum safe quantity of 2 quarts per<br />
engine" - should be explained. If the operator checked oil<br />
after a flight and found less than 2 quarts in the engine, it is<br />
quite probable that engine damage has resulted. No flight<br />
should be started with only 2 quarts of oil in the sump.<br />
Pilots and mechanics should not confuse the models just<br />
discussed with other <strong>Lycoming</strong> four cylinder, wet sump<br />
engines that hold a maximum of 8 quarts of oil. There is no<br />
change in our recommendations when checking oil for the<br />
latter. During normal routine flying, oil levels are best<br />
maintained at the 6 to 7 quart level.<br />
Don't forget - when in doubt, consult the Pilot's<br />
Operating Handbook.<br />
Tips For Changing Your Spin-On Oil Filter<br />
Many of the aircraft engines produced today are<br />
equipped with full flow, spin-on oil filters. For long engine<br />
life, it is necessary to change both the oil and the filter at<br />
regular intervals. The information we receive indicates that<br />
problems are sometimes encountered because proper<br />
procedures are not followed when changing the spin-on<br />
filter. Therefore, it is appropriate to provide a few tips from<br />
a current service instruction.<br />
The hardware that adapts many <strong>Lycoming</strong> engines for<br />
use of the spin-on oil filter includes an oil filter adapter<br />
(<strong>Lycoming</strong> Part Number 15047), and a converter kit<br />
(<strong>Lycoming</strong> Part Number LW-13904). Not all engines use the<br />
oil filter adapter because the accessory housing on some<br />
models is machined to take a converter kit and a spin-on<br />
filter. The kit includes a converter plate that has a gasket<br />
permanently glued to the plate; this gasket seals the plate on<br />
the side that faces the engine. If the spin-on filter seats too<br />
tightly against the opposite side of the plate when it is<br />
installed, the converter plate gasket may be slightly damaged
when the oil filter is subsequently removed. This damage<br />
could result in oil leakage.<br />
To prevent damage to the converter plate gasket, the oil<br />
filter gasket should be lubricated with a thin coating of Dow<br />
Corning Compound (DC-4) before the filter is installed. The<br />
filter should then be installed and hand tightened until the<br />
seating surface makes contact with the lubricated gasket.<br />
The filter should then be turned with a torque wrench until a<br />
torque of 18-20 foot pounds is reached. The 20 foot pound<br />
maximum torque should not be exceeded.<br />
The oil filter element should normally be replaced each<br />
50 hours of engine operation. Before discarding the<br />
element of the full flow filter assembly, an examination of<br />
the filter element should be accomplished. This<br />
examination is very important to flight safety, but recent<br />
reports indicate that some mechanics are not doing this<br />
check for metal that would warn of a developing engine<br />
problem and possible catastrophic failure. The full flow,<br />
spin-on filter may be opened by use of Champion tool CT-<br />
470. This tool is absolutely essential if the job is to be done<br />
correctly. The element is then removed from the filter and<br />
filter material is cut from the end caps. Carefully unfold the<br />
element and examine the material trapped in the filter. In<br />
new or newly overhauled engines some small particles of<br />
metallic shavings might be found, but these are generally of<br />
no consequence and should not be confused with particles<br />
produced by impacting, abrasion or pressure. Evidence of<br />
metal contamination found in the filter element requires<br />
further examination to determine the cause. (See<br />
Suggestions if Metal is Found...).<br />
After the filter element has been replaced and properly<br />
torqued, the lock wire must be replaced and the engine run<br />
to check for oil leaks.<br />
Textron <strong>Lycoming</strong> Service Publication SSP-885-1<br />
provides information about the installation of engine<br />
mounted oil filters.<br />
Suggestions if Metal is Found in the Screens or<br />
Filter<br />
Because the failure to look for metal in the screens and<br />
filter, or ignoring what is found, can lead to catastrophic<br />
engine failure, we'll attempt a logical approach to the proper<br />
action to be taken when metal shows up in the oil screen or<br />
oil filter cartridge.<br />
The lack of printed matter on this subject may be due to<br />
the difficulty in adequately describing types and amounts of<br />
metal. It's like asking for a precise measurement and getting<br />
the answer, "why it's twenty five thousandths plus a little<br />
bit." Therefore, what follows are meant to be general<br />
guidelines, but each case must be considered as an<br />
individual one. Textron <strong>Lycoming</strong> does not consider this<br />
77<br />
discussion a technical bulletin, but merely a source of<br />
generally helpful information.<br />
GENERAL INFORMATION<br />
1. DON'T PANIC on small amounts of shiny flakes or<br />
small amounts of short hair-like bits of magnetic material.<br />
Experience has shown that engines are sometimes pulled<br />
unnecessarily.<br />
2. DON'T PANIC if it's a low time engine. A few bits of<br />
metal left from manufacturing are not too uncommon in the<br />
oil screen or filters on new, remanufactured, or overhauled<br />
engines.<br />
3. DON'T PANIC. Again if it's a low-time engine, it may<br />
be a replacement for one that had previously suffered a<br />
structural failure. The metal may have just been dislodged<br />
from some hiding place in the oil cooler, oil lines or oil tank.<br />
4. Item 3 brings up the importance of properly cleaning<br />
all items transferred from a failed engine to a replacement<br />
engine. On dry sump engines, don't overlook cleaning of the<br />
oil tank. Oil coolers and oil lines should be cleaned by a<br />
proven method, or replaced.<br />
5. In some rare cases where the pleated cylindrical type<br />
oil screen is used, the screen itself may be making metal.<br />
Closely inspect the end of the internal relief valve ball. If the<br />
ball is deformed, this may be the culprit. Replace the screen<br />
assembly.<br />
6. In cases where metal shows up in the filter of a<br />
factory engine that is under warranty, and its origin is<br />
unknown, the metal may be forwarded to the <strong>Lycoming</strong><br />
factory for inspection. In all cases, the factory Product<br />
Support Department should be called before the material is<br />
shipped.<br />
EXAMPLES:<br />
1. Several pieces of shiny flake-like, nonmagnetic, or<br />
several short hair-like pieces of magnetic material - place<br />
aircraft back in service and again check oil screen or filter in<br />
25 hours.<br />
2. As in Item I, but larger amount, such as 45-60 small<br />
pieces - clean screen, drain oil, and refill. Run engine on<br />
ground for 20-30 minutes. Inspect screen. If clean, fly<br />
aircraft for 1 to 2 hours and again inspect screen. If clean,<br />
inspect screen after 10 hours of flight time.<br />
NOTE: In cases one and two, we are determining<br />
whether the small amount of metal was a "one shot and done<br />
deal" (not entirely uncommon).<br />
3. Chunks of metal ranging in size of broken lead pencil<br />
point or greater. Remove suction (sump) screen as large<br />
pieces of metal may have fallen into the sump. In any event,<br />
ground aircraft and conduct investigation. A mixture of<br />
magnetic and nonmagnetic material in this case often times<br />
means valve or ring and piston failure. Removing bottom<br />
spark plugs usually reveals the offending cylinder.
4. Nonmagnetic plating averaging approximately 1/16"<br />
in diameter; may have copperish tint. Quantity found - 1/4<br />
teaspoonful or more; ground aircraft and investigate. If<br />
origin can't be determined and this is a factory engine (not a<br />
field overhaul) that is under warranty, mail metal to<br />
<strong>Lycoming</strong> factory for analysis, attention Product Support.<br />
5. Same as Item 4, but may be slightly larger in size and<br />
minus copperish tint. On direct drive engines, propeller<br />
action may be impaired. Ground aircraft. If origin can't be<br />
determined and it is a factory engine under warranty, mail<br />
material to <strong>Lycoming</strong>, attention Product Support.<br />
6. Nonmagnetic metal brass or copperish colored.<br />
Resembles coarse sand in consistency. Quantity of 1/4<br />
teaspoonful or more - ground aircraft. If origin can't be<br />
determined and it is a factory engine under warranty, mail<br />
metal to <strong>Lycoming</strong>, attention Product Support.<br />
7. Anytime metal is found in the amount of 1/2<br />
teaspoonful or more, it is usually grounds for engine<br />
removal. An exception should be where problem is confined<br />
to one cylinder assembly (rings, valves, piston, cylinder). In<br />
this case, if the entire engine does not appear to be<br />
contaminated, the offending cylinder assembly kit may be<br />
replaced. After corrective action is completed, conduct the<br />
routine ground running and screen inspection as previously<br />
described in Item 2.<br />
8. If any single or several pieces of metal larger than<br />
previously mentioned are found, magnetic or nonmagnetic,<br />
ground aircraft. If this is a factory engine under warranty,<br />
and origin of the metal contamination cannot be determined,<br />
a call may be made to the <strong>Lycoming</strong> Product Support<br />
Department. A good description of the metal may result in<br />
placing its origin. When phoning <strong>Lycoming</strong> or when<br />
returning metal removed from engines, supply the complete<br />
engine model designation, serial number, history of engine,<br />
oil temperatures, oil pressures, and any odd behavior of the<br />
engine on the ground or during flight.<br />
NOTE: Metal samples for analysis can only by accepted<br />
if the engine from which the sample is taken is a new,<br />
remanufactured, or overhauled engine from the <strong>Lycoming</strong><br />
factory and it is still under warranty. Engines overhauled by<br />
other facilities may have parts that cannot be identified by<br />
analysis at <strong>Lycoming</strong>.<br />
POSTSCRIPT<br />
As an important postscript to "Suggestions if Metal is<br />
Found in the Screens or Filter," factory personnel have<br />
become concerned over unnecessary engine removals<br />
because metal was found in a replacement engine after a<br />
prior malfunctioning engine was removed. These<br />
unfortunate engine removals were largely caused by<br />
maintenance personnel failing to thoroughly flush and clean<br />
all aircraft oil system components. Because of the difficulty<br />
of removing contamination from an oil cooler, it is strongly<br />
suggested that a new oil cooler be used with the replacement<br />
78<br />
engine when an engine is removed because it failed. As a<br />
reminder that it is essential to remove metal contamination<br />
from the oil system, the factory Product Support Department<br />
now sends the following tag with every service engine<br />
leaving our factory:<br />
IMPORTANT<br />
Before installing this replacement engine, all<br />
aircraft oil system components, oil coolers, lines and<br />
supply tanks, where used, must be thoroughly cleaned<br />
for contamination. Textron <strong>Lycoming</strong> will not be held<br />
responsible for contamination to this newly installed<br />
engine.<br />
PRODUCT SUPPORT DEPARTMENT<br />
<strong>TEXTRON</strong> LYCOMING<br />
Williamsport, PA 17701<br />
Safety Tip-Sealant Use<br />
The latest revision of Textron <strong>Lycoming</strong> Service<br />
Instruction No. 1125 specifies POB No. 4 Perfect Seal and<br />
silk thread as the generally used items for sealing crankcase<br />
finished parting surfaces that do not employ gaskets. Two<br />
other products, RTV-102 or LOCTITE-515 applied as a<br />
very thin film without silk thread, may be used as alternate<br />
materials for sealing crankcase parting surfaces. Other<br />
sealants have not been tested and approved for this purpose,<br />
and NONE are approved for other uses in the assembly of<br />
<strong>Lycoming</strong> engines. Improper use of these and other sealing<br />
compounds can create serious problems. As an example, a<br />
red colored sealant was used by a mechanic to hold the<br />
pressure screen gasket in place. As the material solidified,<br />
pieces broke loose and eventually blocked the engine's small<br />
oil passages causing oil starvation and engine failure. The<br />
bottom line: only use those sealant materials approved by<br />
the <strong>Lycoming</strong> Overhaul manual and other service<br />
publications, and only use them for approved purposes.<br />
Understanding Engine Color Codes<br />
Hundreds of <strong>Lycoming</strong> engines leave the factory<br />
monthly and are marked with a variety of colors on each<br />
cylinder. These colors have a definite meaning and provide<br />
valuable information about the engine. Questions<br />
concerning these colors and their meanings have been asked<br />
by many owners and maintenance personnel.<br />
In the past, color coding of cylinders was confined to<br />
colored bands around the base of each cylinder. Today, new<br />
methods of painting (enameling) engines, and a need for<br />
quick, easy engine identification were instrumental in<br />
changing color code location.
The factory color code, a large painted stripe, is now<br />
located on the cylinder head between the push rods from the<br />
spark plug boss to bottom of the cylinder head. Additional<br />
color coding has been added to identify cylinders requiring<br />
long reach spark plugs versus short reach spark plugs.<br />
Location of spark plug identification color code is between<br />
the spark plug boss and rocker box.<br />
COLOR CODE FOR CYLINDER IDENTIFICATION<br />
Location-Between push rods on cylinder head, or band<br />
around base of cylinder barrel.<br />
Engine gray or unpainted-Standard steel cylinder<br />
barrels.<br />
Orange stripe-Chrome plated cylinder barrels.<br />
Blue stripe-Nitride hardened cylinder barrels.<br />
*Green stripe-Steel cylinder 0.010 oversize.<br />
*Yellow stripe-Steel cylinder 0.020 oversize.<br />
*Color code applicable only to engines overhauled in the<br />
field. <strong>Lycoming</strong> does not sell oversize cylinders.<br />
COLOR CODE FOR SPARK PLUG IDENTIFICATION<br />
Location-Fin area between spark plug and rocker box.<br />
Engine gray or unpainted-Short reach spark plugs.<br />
Yellow-Long reach spark plugs.<br />
Caution - Use only approved spark plugs for all models<br />
of <strong>Lycoming</strong> engines. See latest revision of Service<br />
Instruction No. 1042 for approved spark plugs.<br />
Reciprocating Engine Break-in and Oil<br />
Consumption Limits<br />
We receive many questions about engine break-in. To<br />
respond to these questions, a complete reprint of Service<br />
Instruction 1427B is included here.<br />
This information applies to all fixed wing and rotary<br />
wing aircraft with horizontal installation of Textron<br />
<strong>Lycoming</strong> reciprocating aircraft engines. The appropriate<br />
action should be taken:<br />
1. When installing factory overhauled, remanufactured or<br />
new Textron <strong>Lycoming</strong> engines.<br />
2. After field overhaul (field overhauled engine or<br />
engine with piston ring change after one or more cylinders<br />
are honed or replaced).<br />
3. When one or more cylinders have rings replaced or<br />
cylinders are replaced (requiring new rings).<br />
NOTE<br />
All engines that have had initial run-in conducted in a<br />
test cell (including all Textron <strong>Lycoming</strong> factory new,<br />
remanufactured and overhauled) should proceed directly<br />
to the FLIGHT TEST section of this Service Instruction<br />
that is applicable to your aircraft.<br />
79<br />
Ideally, a newly overhauled aircraft engine should be<br />
tested in a test cell where operating conditions can be closely<br />
monitored. If the engine is test cell run, the engine must have<br />
intercylinder baffles in place, cooling shroud and club<br />
propeller to provide engine RPM requirements. Where a test<br />
cell is not available, the engine should be tested on a test<br />
stand with a club propeller and a cooling shroud. However,<br />
it is not always convenient to test an engine in this manner.<br />
If a test cell or a test stand is not available, an engine<br />
should be properly tested after it has been installed in the<br />
aircraft. If the engine is run in the aircraft, it should still use<br />
a club propeller for proper air flow cooling. However, the<br />
aircraft propeller may be used. In either case, the intercylinder<br />
baffles must be in place. The engine to cowling<br />
baffles must be new or in good condition to assure proper<br />
cooling air flow differential across the engine. The cylinder<br />
head temperature gage, oil temperature gage, oil pressure<br />
gage, manifold pressure gage, and tachometer must be<br />
calibrated to assure accuracy.<br />
The purpose of a test cell or ground run test if done in<br />
the aircraft is to assure that the engine meets all<br />
specifications, RPM, manifold pressure, fuel flow and oil<br />
pressure. The oil cooler system must hold oil temperatures<br />
within limits shown in applicable Textron <strong>Lycoming</strong><br />
Operator's Manuals.<br />
NOTE<br />
Extended ground operation can cause excessive<br />
cylinder and oil temperatures. Prior to start of a<br />
ground run, the oil cooler system should be<br />
inspected for metal contamination and be free<br />
from air locks. When the engine oil is at<br />
operating temperature, oil goes through cooler<br />
first, then through the oil filter. If a previous<br />
engine failed, the oil cooler, propeller and<br />
governor may be contaminated and should be<br />
replaced or cleaned and inspected by an approved<br />
repair facility.<br />
The purpose for engine break-in is to set the piston rings<br />
and stabilize the oil consumption. There is no difference or<br />
greater difficulty in seating the piston rings of a top<br />
overhauled engine versus a complete engine overhaul.<br />
NOTE<br />
The maximum allowable oil consumption limits<br />
for all Textron <strong>Lycoming</strong> aircraft engines can be<br />
determined by using the following formula:<br />
.006 X BHP X 4 +7.4 = Qt/Hr.<br />
The following procedure provides a guideline for testing<br />
a newly overhauled engine that is mounted in the aircraft.<br />
Information on the "ground run after top overhaul or<br />
cylinder change with new rings" and the "flight test after top<br />
overhaul or cylinder change with new rings" procedures are<br />
published in the applicable Textron <strong>Lycoming</strong> Operator's<br />
Manual.
I. FIXED WING<br />
A. PREPARATION FOR TEST WITH ENGINE<br />
INSTALLED IN AIRCRAFT<br />
1. Pre-oil the engine in accordance with latest edition<br />
of Service Instruction No. 1241.<br />
2. It is particularly important that the cylinder head<br />
temperature gage, oil temperature gage, oil pressure<br />
gage, manifold pressure gage, and tachometer be<br />
calibrated prior to testing.<br />
3. Engine accessories, such as the fuel pump, fuel<br />
metering unit, and magnetos, should be overhauled in<br />
accordance with accessory manufacturer's<br />
recommendations, or replaced with new units before<br />
testing engine. This applies to overhauled engines only.<br />
CAUTION<br />
CHECK THAT ALL VENT AND BREATHER<br />
LINES ARE PROPERLY INSTALLED AND<br />
SECURED AS DESCRIBED IN THE<br />
AIRFRAME MAINTENANCE MANUAL.<br />
4. Install all intercylinder baffles. Install all airframe<br />
baffles and cowling.<br />
5. For optimum cooling during ground testing, a test<br />
club should be used. Where this is not possible, the<br />
regular flight propeller can be substituted but cylinder<br />
head temperature must be monitored closely.<br />
B. GROUND TEST<br />
1. Face the aircraft into the wind.<br />
2. Start the engine and observe the oil pressure gage.<br />
If adequate pressure is not indicated within 30 seconds,<br />
shut the engine down and determine the cause. Operate<br />
the engine at 1000 RPM until the oil temperature has<br />
stabilized or reached 140 ° F. After warm up, the oil<br />
pressure should not be less than the minimum pressure<br />
specified in the applicable operator's manual.<br />
3. Check magneto drop-off as described in the latest<br />
edition of Service Instruction No. 1132.<br />
4. Continue operation at 1000/1200 rpm for 15<br />
minutes. Insure that cylinder head temperature, oil<br />
temperature and oil pressure are within the limits<br />
specified in the operator's manual. Shut the engine down<br />
and allow it to cool if necessary to complete this portion<br />
of the test. If any malfunction is noted, determine the<br />
cause and make the necessary correction before<br />
continuing with this test.<br />
5. Start the engine again and monitor oil pressure.<br />
Increase engine speed to 1500 rpm for a 5-minute period.<br />
Cycle propeller pitch and perform feathering check as<br />
applicable per airframe manufacturer's recommendation.<br />
80<br />
6. Run engine to full-static, airframe-recommended<br />
power for a period of no more than 10 seconds.<br />
7. After operating the engine at full power, allow it<br />
to cool down moderately. Check idle mixture<br />
adjustment prior to shutdown.<br />
8. Inspect the engine for oil leaks.<br />
9. Remove the oil suction screen and the oil pressure<br />
screen or oil filter to determine any contamination. If no<br />
contamination is evident, the aircraft is ready for flight<br />
testing.<br />
NOTE<br />
Compile a log of all pertinent data accumulated<br />
during both the ground testing and flight testing.<br />
C. FLIGHT TEST<br />
WARNING<br />
ENGINE TEST CLUBS MUST BE REPLACED<br />
WITH APPROVED FLIGHT PROPELLERS<br />
BEFORE FLYING AIRCRAFT.<br />
1. Start the engine and perform a normal preflight<br />
run-up in accordance with the engine operator's manual.<br />
2. Take off at airframe recommended takeoff power,<br />
while monitoring RPM, fuel flow, oil pressure, oil<br />
temperature, and cylinder head temperatures.<br />
3. As soon as possible, reduce to climb power<br />
specified in operator's manual. Assume a shallow climb<br />
angle to a suitable cruise altitude. Adjust mixture per<br />
pilot's operating handbook.<br />
4. After establishing cruise altitude, reduce power to<br />
approximately 75% and continue flight for 2 hours. For<br />
the second hour, alternate power settings between 65%<br />
and 75% power per operator's manual.<br />
NOTE<br />
If engine is normally aspirated (nonturbocharged),<br />
it will be necessary to cruise at the<br />
lower altitudes to obtain the required power<br />
levels. Density altitude in excess of 8,000 feet<br />
(5,000 feet is recommended) will not allow the<br />
engine to develop sufficient cruise power for a<br />
good break-in.<br />
5. Increase engine power to maximum airframe<br />
recommendation and maintain for 30 minutes, provided<br />
engine and aircraft are performing within operating<br />
manual specifications.
CAUTION<br />
AVOID LOW MANIFOLD PRESSURE DUR-<br />
ING HIGH ENGINE SPEEDS (UNDER 15"<br />
HG). AND RAPID CHANGES IN ENGINE<br />
SPEEDS WITH ENGINES THAT HAVE DY-<br />
NAMIC COUNTERWEIGHT ASSEMBLIES.<br />
THESE CONDITIONS CAN DAMAGE THE<br />
COUNTERWEIGHTS, ROLLERS, OR BUSH-<br />
INGS, THEREBY CAUSING DETUNING.<br />
6. Descend at low cruise power, while closely<br />
monitoring the engine instruments. Avoid long descents<br />
at low manifold pressure. Do not reduce altitude too<br />
rapidly or engine temperature may drop too quickly.<br />
CAUTION<br />
AVOID ANY CLOSED THROTTLE DE-<br />
SCENTS. CLOSED THROTTLE OPERATION<br />
DURING DESCENTS WILL CAUSE RING<br />
FLUTTER CAUSING DAMAGE TO THE<br />
CYLINDERS AND RINGS.<br />
7. After landing and shutdown, check for leaks at<br />
fuel and oil fittings and at engine and accessory parting<br />
surfaces. Compute fuel and oil consumption and<br />
compare to the limits given in operator's manual. If<br />
consumption exceeds figures shown in manual.<br />
determine the cause before releasing aircraft for service.<br />
8. Remove oil suction screen and oil pressure screen<br />
or oil filter to check again for contamination.<br />
NOTE<br />
To seat the piston rings in a newly overhauled<br />
engine, cruise the aircraft at 65% to 75% power<br />
for the first 50 hours, or until oil consumption<br />
stabilizes.<br />
II. ROTARY WING (HORIZONTAL INSTALLATIONS<br />
ONLY)<br />
Proper break-in of helicopter engines is accomplished by<br />
following a sequence of steps ranging from servicing the<br />
engine on the ground to progressively increasing its power<br />
output during operation. Although this Service Instruction<br />
contains detailed information pertaining to break-in, it is<br />
impossible to cover all aspects of break-in for individual<br />
helicopter models. For that reason, consult the pilot's flight<br />
manual or the pilot's operating handbook (POH) for a<br />
particular helicopter model. Also, refer to the Textron<br />
<strong>Lycoming</strong> Operator's Manual for the engine.<br />
Some facts should be kept in mind regarding break-in of<br />
piston engines employed in helicopters. They are as follows:<br />
Because helicopters always operate at a fixed or rated<br />
engine speed, any reduced RPM required during break-in<br />
must be undertaken with the helicopter on-ground and with<br />
the rotor engaged. During flight, all power reductions must<br />
be made by manifold pressure alone.<br />
81<br />
Manifold Pressure Values. Some helicopters do not have<br />
red line on the manifold pressure gage and therefore use all<br />
rated power. Some are red-lined to airframe limitations and<br />
not to engine performance parameters. In the case of<br />
Textron <strong>Lycoming</strong> model HIO-360-D1A, it has graduated<br />
manifold pressure values that can be obtained from the<br />
Textron <strong>Lycoming</strong> Operator's Manual.<br />
The method of rotor engagement, centrifugal clutch or<br />
manually operated belt drive, must also be considered.<br />
NOTE<br />
Because of the difference in helicopter models,<br />
refer to the helicopter pilot's operating handbook<br />
(POH) for specific methods of operation for a<br />
particular helicopter concerning rotor<br />
engagement and manifold pressure ratings.<br />
A. GROUND TEST<br />
1. Check that engine is serviced with proper grade<br />
and quantity of oil.<br />
2. Review the appropriate starting procedure<br />
detailed in the helicopter pilot's operating handbook<br />
(POH).<br />
3. Position the helicopter to take advantage of<br />
prevailing wind to assist in engine cooling.<br />
4. Insure that throttle and mixture control are at the<br />
full off position.<br />
NOTE<br />
In following step, if adequate oil pressure is not<br />
indicated within 30 seconds, shut the engine<br />
down and determine the cause.<br />
5. Refer to helicopter pilot's operating handbook<br />
(POH) for proper starting procedures. Start engine and<br />
run 5 minutes at idle RPM (1200 - 1450 RPM)<br />
6. Adjust idle mixture and oil pressure as required.<br />
7. Shut engine off.<br />
8. Inspect the engine for oil and fuel leaks.<br />
9. If plug fouling is noted on magneto check,<br />
remove, inspect and test spark plugs. Clean oil and lead<br />
from plug. Reinstall spark plugs and leads. Torque as<br />
required. (Refer to latest edition of Service Instruction<br />
No. 1042).<br />
10. Restart engine and run for 5 minutes at idle speed<br />
(1200- 1450 RPM).<br />
11. Engage rotor, if required, and increase RPM to<br />
50% - 60% of rated engine speed for 5 minutes with rotor<br />
blades at flat pitch (collective full down).<br />
12. Then increase engine RPM to 80% of rated<br />
engine speed for 5 minutes, followed by 100% airframe<br />
manufacturer's rated engine speed for another 5<br />
minutes, provided that oil pressure is normal and that oil
temperature is between 180°F and 200F, with the<br />
cylinder head temperatures between 350 F and 400 °F.<br />
NOTE<br />
For proper break-in, do not exceed 420°F<br />
cylinder head temperature.<br />
13. After running engine for the last 5 minute<br />
segment, cool down as recommended in helicopter<br />
pilot's operating handbook (POH), then shut engine<br />
down.<br />
14. Drain oil and clean the suction screen in the<br />
sump. Also clean oil pressure screen, or replace<br />
pressure oil filter. Make proper oil pressure adjustments<br />
at this time.<br />
15. After reinstalling the suction screen and pressure<br />
screen (or new oil filter) to proper torque, service<br />
engine with correct grade and quantity of oil. (Refer to<br />
latest edition of Service Instruction No. 1014).<br />
16. Start engine and idle at 1450 RPM.<br />
17. Engage rotor, if required, and increase engine<br />
RPM to 2000 RPM. Warm engine to ground-run check<br />
as described in helicopter pilot's operating handbook<br />
(POH).<br />
18. At this time perform magneto check per<br />
helicopter pilot's operating handbook (POH).<br />
B. FLIGHT TEST<br />
Start engine and warm up at 1450 RPM. Engage rotor, if<br />
required, increase engine speed to 75% RPM. Warm up the<br />
engine and conduct a ground check in accordance with the<br />
helicopter pilot's flight manual, including magneto check.<br />
NOTE<br />
It is advisable to have two qualified crew<br />
members aboard to perform the various control<br />
operations and to monitor the engine instruments.<br />
All aircraft and engine operating temperatures<br />
and pressures are to be monitored. If any exceed<br />
the helicopter pilot's flight manual or engine and<br />
aircraft operating manuals limitations, the breakin<br />
is to be discontinued until corrective<br />
maintenance has been performed.<br />
1. Put helicopter into a hover mode for 10 minutes<br />
while charting manifold pressure, fuel pressure, oil<br />
temperature, oil pressure and cylinder head temperature, etc.<br />
2. If engine instruments prove satisfactory, climb to<br />
cruise altitude.<br />
3. Cruise at 70% to 75% of engine rated power for<br />
30 minutes at an airspeed that will allow for a constant<br />
safe altitude.<br />
82<br />
4. At termination of 30 minute flight at 70% to 75%<br />
power, chart manifold pressure and engine temperature.<br />
Increase engine RPM and manifold pressure to<br />
maximum limits allowed in helicopter pilot's operating<br />
handbook (POH). Maintain this power setting for 45<br />
minutes at a constant safe altitude.<br />
5. At the end of 45 minutes, again chart manifold<br />
pressure and engine temperatures.<br />
6. Return to base and hover aircraft for 10 minutes<br />
or cool-down time recommended in helicopter pilot's<br />
operating manual.<br />
C. AFTER FLIGHT-ON GROUND<br />
NOTE<br />
Reference helicopter pilot's operating handbook<br />
(POH) for cool down and shut down procedures.<br />
1. Inspect engine for leaks.<br />
2. Compute fuel and oil consumption. If figures<br />
exceed limits, determine cause(s) and correct before<br />
releasing aircraft.<br />
3. Remove oil suction screen and pressure screen (or<br />
oil filter). Inspect for contamination.<br />
4. After reinstalling the suction screen and pressure<br />
screen (or new filter) to proper torque, service engine<br />
with correct grade and quantity of oil. (Refer to latest<br />
edition of Service Instruction No. 1014.)<br />
After the aircraft has been released, a normally aspirated<br />
engine must be operated on straight mineral oil during the<br />
first 50 hours of operation, or until the oil consumption<br />
stabilizes. (Refer to the latest edition of Service Instruction<br />
No. 1014.) During this time, maintain engine power above<br />
65% and insure that all aircraft and engine operating<br />
temperatures and pressures are monitored and maintained<br />
within limits. Refer to NOTE under step II.B. FLIGHT<br />
TEST.<br />
Compression Check As A Maintenance Aid<br />
In General Aviation the compression check is used quite<br />
universally as a maintenance aid. It was also used for many<br />
years by the military and airline maintenance people on their<br />
reciprocating engines. Despite universal use, little, if<br />
anything, was available in writing as a reference concerning<br />
its application to General Aviation powerplants.<br />
Although two methods of checking compression were<br />
used in the past, only one is in general use today. The direct<br />
compression (old automotive type) has given way almost<br />
completely to the differential compression test because the<br />
differential check is considered the best of the two. It is a<br />
much more precise method of locating specific areas of<br />
trouble and it is simple to use.
WHY A COMPRESSION CHECK?<br />
A compression test can be made any time faulty<br />
compression is suspected, and should be made if the pilot<br />
notices a loss of power in flight, finds high oil consumption,<br />
or observes soft spots when hand pulling the prop. It is also<br />
considered part of the 100-hour engine inspection and the<br />
annual inspection. But most experienced maintenance<br />
personnel feel that the compression check is best used to<br />
chart a trend over a period of flight hours. A gradual<br />
deterioration of charted compression taken during routine<br />
maintenance checks would be a sound basis for further<br />
investigation and possible cylinder removal. This attempt to<br />
reduce the possibility of engine failure is generally called<br />
preventive maintenance.<br />
Preventive maintenance in the form of cylinder removal<br />
should not be done on the basis of one reading. Mechanics<br />
make honest errors and equipment becomes inaccurate.<br />
Even a difference in engine temperature when the check is<br />
done can easily affect the accuracy of the reading.<br />
Because the differential check is so widely used, several<br />
key points regarding this maintenance aid are listed here for<br />
the information of those not familiar with its use.<br />
DIFFERENTIAL COMPRESSION TEST<br />
We will attempt to repeat the operating instructions<br />
which accompany the equipment. This should be read and<br />
followed carefully for best results. The following<br />
recommendations will supplement the instructions<br />
accompanying the equipment:<br />
1. A standard 80 lbs. of input air is recommended. More<br />
pressure makes it difficult to hold the prop.<br />
2. A loss in excess of 25 percent of the 80 lbs., or a<br />
reading of 60/80 is the recommended maximum allowable<br />
loss.<br />
3. The engine should have been run up to normal<br />
operating temperatures immediately preceding the<br />
compression check. In other words, we recommend a hot<br />
engine check.<br />
4. The differential compression equipment must be kept<br />
clean and should be checked regularly for accuracy. Check<br />
equipment with the shutoff valve closed and regulated<br />
pressure at 80 psi (the cylinder pressure gage must indicate<br />
80 psi plus or minus 2 psi) and hold this reading for at least 5<br />
seconds. Home made equipment should be carefully<br />
calibrated.<br />
5. Combustion chambers with five piston rings tend to<br />
seal better than 3 or 4 piston rings, with the result that the<br />
differential check does not consistently show excessive wear<br />
or breakage where 5 piston rings are involved.<br />
6. If erratic readings are observed on the equipment,<br />
inspect compressor system for water or dirt.<br />
7. If low readings result, do not remove the cylinders<br />
without a recheck after running up the engine at least three<br />
minutes, and refer to the cross checks listed later.<br />
83<br />
8. If valves show continual leakage after recheck,<br />
remove rocker box cover and place a fiber drift on the<br />
rocker arm immediately over the valve stem and tap the drift<br />
several times with a one or two-pound hammer. When<br />
tapping valves thusly, rotate the prop so that the piston will<br />
not be on top dead center. This is necessary in some engines<br />
to prevent the valve from striking the head of the piston.<br />
Then rotate engine with the starter and recheck compression.<br />
9. Caution. Take all necessary precautions against<br />
accidental firing of the engines.<br />
CROSS CHECKING IS IMPORTANT<br />
Rather than rely on one source of information<br />
concerning the condition of the combustion chamber, it is<br />
wise to make cross checks, particularly when the<br />
compression readings are questionable. Therefore, we would<br />
like to recommend the following before removing a<br />
cylinder.<br />
1. Remember that spark plugs tell a story. Carefully<br />
check the spark plugs removed from any cylinder with a low<br />
reading.<br />
2. Use at least a goose-neck light or preferably a<br />
borescope and carefully check the top of the piston and<br />
cylinder walls.<br />
3. Consider the health history of the engine. Has it had<br />
previous difficulty of this nature?<br />
4. Has the pilot observed any loss of power in the engine<br />
during flight or during run up?<br />
5. How has the engine been maintained and operated<br />
during its life? If the maintenance and care have been proper<br />
and consistent there is less likelihood of trouble.<br />
6. The supervisor of maintenance should evaluate the<br />
known factors such as those discussed here and make a<br />
recommendation to the pilot.<br />
CONCLUSION<br />
Whatever your opinion of the compression check as a<br />
maintenance aid, it is probable that no pilot or mechanic<br />
would care to omit it during a 100-hour or annual<br />
inspection. On the other hand, since most everyone seems to<br />
use it on the flat opposed engines, we ought to share our<br />
experiences with its application to our powerplants. This has<br />
indicated that the differential is the best method of checking<br />
compression, and particularly so when the readings are<br />
charted as a trend over a number of routine inspections. It is<br />
a good tool for preventive maintenance and aids in avoiding<br />
in-flight failures. Cross checking is good procedure, rather<br />
than relying on one source of information concerning the<br />
condition of the combustion chamber.
Spark Plugs--I<br />
<strong>Key</strong> To Smooth Engine Operation<br />
Hot and Cold Plugs ? ? ?<br />
(Courtesy: Champion Spark Plug)<br />
Today, the term "hot and cold" is commonplace in<br />
general aviation - especially when related to engine spark<br />
plugs.<br />
With the introduction of high compression, and high<br />
horsepower engines, a need for improved spark plugs was<br />
eminent. Spark plugs used in low compression, low<br />
horsepower engines were not compatible with the new, more<br />
sophisticated powerplants. The noncompatibility factor of<br />
existing plugs with new engines resulted in development of<br />
spark plugs capable of operating efficiently at high<br />
compression ratios and high power settings.<br />
Many aircraft operators have come in direct or indirect<br />
contact with the term "hot and cold" during the course of<br />
conversation with other pilots or mechanics. Its meaning and<br />
relationship to engine operation was sometimes rather<br />
vague. What do we mean by "hot and cold" spark plugs?<br />
What is the relationship between an engine and spark plugs?<br />
How important is it to smooth engine operation? These are<br />
but a few questions we will try to answer in this article.<br />
Both spark plug and engine manufacturer working<br />
together determine the proper type spark plug suitable for<br />
each engine model These plugs can be either fine wire or<br />
massive electrode type. Before being released for<br />
production, each new type plug is checked in the laboratory<br />
and under actual flight conditions. They are tested through a<br />
wide range of operating conditions and at different power<br />
settings, and only after both engine and spark plug<br />
manufacturer are completely satisfied with test data are<br />
plugs released for production. To eliminate any possibility of<br />
error in spark plug selection, both manufacturers provide<br />
spark plug charts as a guide for proper plug selection. Final<br />
authority concerning proper plugs for a specific engine is the<br />
engine manufacturer. When selecting spark plugs, be sure to<br />
also consider the spark plugs' heat range.<br />
Operating temperature of the spark plug insulator core<br />
nose is one factor that governs formation of troublesome<br />
combustion deposits. To help overcome this problem,<br />
selection of spark plugs with the proper heat range should be<br />
made. Spark plugs are susceptible to carbon deposits when<br />
the operating temperature of the core nose insulator is at or<br />
below 800 ° F, but an increase of just 100 ° F is sufficient to<br />
eliminate formation of these deposits. Also, lead deposits<br />
form because the bromide scavenger contained in tetraethyl<br />
lead is nonactive at low temperatures. At 900 ° F<br />
temperature, the bromide scavenger is fully activated,<br />
disposing of lead deposits with combustion gases during<br />
exhaust cycle. In this case, an increase of just 100 ° F was<br />
sufficient to make the difference between a smooth and<br />
rough running engine. To eliminate or keep this problem at a<br />
84<br />
minimum, avoid prolonged idling at low RPM, avoid poweroff<br />
let downs, and after flooded starts run engine at medium<br />
RPM before taxiing.<br />
Deposits formed between 1000 ° F and 1300 ° F are low<br />
in volume and electrical conductivity and are least apt to<br />
cause spark plug fouling. This is the reason for selecting a<br />
plug that will operate within the aforementioned temperature<br />
range at all power settings.<br />
Now let's get back to the term "hot and cold" as related to<br />
engine spark plugs. Normally, a hot plug is used in a cold<br />
engine - low horsepower, and a cold plug in a hot engine<br />
- high horsepower. In actuality, these terms refer to the<br />
plugs ability to transfer heat from its firing end to the engine<br />
cylinder head. To avoid spark plug overheating where<br />
combustion chamber or cylinder head temperatures are<br />
relatively high, a cold plug is recommended, such as in a<br />
high compression engine. A cold running plug has the<br />
ability to transfer heat more readily. A hot running plug has<br />
a much slower rate of heat transfer and is used to avoid<br />
fouling when combustion chamber and cylinder head<br />
temperatures are relatively low.<br />
From our discussion, it is clear to see that there is more<br />
to spark plugs than just buying a set and installing them in<br />
your engine. Be sure you know what type of spark plugs to<br />
use with your engine. Also, good spark plug service and<br />
maintenance is as important as proper plug selection. Take<br />
care in selecting and maintaining your plugs, it can result in<br />
many additional hours of smooth engine operation.<br />
Additional spark plug information is always available from<br />
the engine or spark plug manufacturers and other service<br />
organizations.<br />
A listing of approved spark plugs in Service Instruction<br />
No. 1042 is available by writing to Product Support<br />
Department, Textron <strong>Lycoming</strong>, Williamsport, PA 17701.<br />
Additional information about spark plugs and their servicing<br />
may be obtained by writing Champion Spark Plug Division,<br />
P.O. Box 686, Liberty, SC 29657.<br />
Spark Plugs-II<br />
<strong>Key</strong> To Smooth Engine Operation<br />
Spark plugs are frequently blamed for faulty engine<br />
operation which they do not cause. Replacement of old<br />
spark plugs may temporarily improve poor engine<br />
performance because of the lessened demand new spark<br />
plugs make on the ignition system. But this is not the cureall<br />
for poor engine performance caused by worn rings or<br />
cylinders, improper fuel/air mixture, a mistimed magneto,<br />
dirty distributor block, worn ignition harness, or other<br />
engine problems. By analyzing the appearance of spark<br />
plugs that are removed from the engine, it may be possible<br />
to identify problems with the engine.
INTERPRETING THE APPEARANCE OF INSULATOR<br />
TIP DEPOSITS<br />
The firing end of the spark plug should be inspected for<br />
color of the deposits, cracked insulator tips and gap size.<br />
The electrodes should be inspected for signs of foreign<br />
object damage and the massive type also for copper run out.<br />
The normal color of the deposits usually is brownish gray<br />
with some slight electrode wear. These plugs may be<br />
cleaned, regapped and reinstalled. A new engine seat gasket<br />
should be used.<br />
Dry, fluffy black deposits show carbon fouling. This<br />
indicates a rich fuel/air mixture, excessive ground idling,<br />
mixture too rich at idle or cruise, or faulty carburetor<br />
adjustment. The heat range of the plug is also too cold to<br />
burn off combustion deposits.<br />
Oil fouling will be indicated by black, wet deposits on<br />
spark plugs in the bottom position of flat, opposed cylinder<br />
engines. Oily deposits on the top plugs may indicate<br />
damaged pistons, worn or broken piston rings, worn valve<br />
guides, sticking valves, or faulty ignition supply. This same<br />
condition in a new or newly overhauled engine may simply<br />
indicate that piston rings have not yet properly seated.<br />
Lead fouling in mild cases shows as a light tan or brown<br />
film or slight build up on the spark plug firing end. Severe<br />
cases appear as a dark glaze, discolored tip, or as fused<br />
globules. Although mild lead deposits are always present to<br />
some degree, highly leaded fuels, poor fuel vaporization,<br />
operating the engine too cold, and spark plugs not suited for<br />
the particular operation are the usual causes of severe lead<br />
fouling. Extremely fouled plugs should be replaced and the<br />
cause of the fouling corrected.<br />
Watch for bridged electrodes, a deposit of conductive<br />
material between center and ground electrodes that shorts<br />
out the spark plug. The gap may be bridged by ice crystals<br />
that form while trying to start, by carbon particles, by lead<br />
globules, by metallic particles or by ingesting silica through<br />
the air intake. When metallic fusion bridges the electrodes,<br />
the plugs must be replaced, but other deposits may simply by<br />
removed and the plugs returned to service. The cause of<br />
deposits that short out spark plugs requires corrective action.<br />
Electrical and gas corrosion wear spark plug electrodes.<br />
Under normal conditions, this wear occurs slowly and<br />
should be expected. Severe electrode erosion and necking of<br />
fine wire ground electrodes indicates abnormal engine<br />
operation. Fuel metering, magneto timing, and proper heat<br />
range should be checked. Spark plug cleaning and rotation at<br />
scheduled intervals is usually adequate care until spark plug<br />
gap approaches recommended maximum. Spark plugs with<br />
worn electrodes require more voltage for ignition, and<br />
should be discarded when electrodes have worn to half their<br />
original size.<br />
Copper run out is caused by very high temperatures<br />
85<br />
associated with detonation or preignition. It occurs when<br />
high temperatures perforate of burn away the end of the<br />
nickel center electrode sheath and expose the copper core.<br />
Melted copper then runs onto the tip surface and forms<br />
globules or a fused mass across the electrode gap. The<br />
engine must be inspected and the plugs replaced with new<br />
ones.<br />
A hot spot in the cylinder may cause preignition which<br />
can always be detected by a sudden rise in cylinder head<br />
temperature or by rough engine operation. When plugs are<br />
removed after a period of preignition they will have burned<br />
or blistered insulator lips and badly eroded electrodes.<br />
Detonation is the sudden and violent combustion of a<br />
portion of the unburned fuel ahead of the flame front. It<br />
occurs part way through the burning cycle when the<br />
remaining unburned fuel suddenly reaches its critical<br />
temperature and ignites spontaneously. There is severe heat<br />
and pressure shock within the combustion chamber that will<br />
cause spark plugs to have broken or cracked insulator tips<br />
along with damage to the electrodes and lower insulator<br />
seal. Engine parts such as the piston, cylinder head, and<br />
connecting rod may suffer serious damage. When detonation<br />
has occurred, the cylinder must be examined with a<br />
borescope and may require replacement. Corrective action is<br />
imperative.<br />
The cylinders from which spark plugs with the above<br />
conditions were found should be inspected with the aid of a<br />
borescope. It may be desirable to replace the cylinder,<br />
especially if backfiring was reported by the flight crew. The<br />
reason for this precautionary action is that if the engine was<br />
operated under some detonation conditions, but not to the<br />
extent that it caused a complete piston failure, the piston<br />
rings could be broken and a piston failure requiring a<br />
complete engine change may show up at a later date.<br />
DAMAGE FROM EXCESSIVE TEMPERATURES<br />
Overheating of the spark plug barrel, sometimes caused<br />
by damaged cylinder baffles or missing cooling air blast<br />
tubes, may seriously deteriorate the ignition leads. Any<br />
overheating of the spark plug barrel by a defective baffle or<br />
exhaust gas leakage at the exhaust pipe mounting flange can<br />
generate temperatures in the insulator tip sufficient to cause<br />
preignition and piston distress.<br />
OTHER SPARK PLUG PROBLEMS<br />
The cure for threads that are stripped, crossed, or badly<br />
nicked is replacement of the spark plug with a new one.<br />
Dirty threads in the engine may cause the spark plug to seize<br />
before it is seated. Dirty threads also cause poor contact<br />
between the spark plug, spark plug gasket, and the engine<br />
seat. This results in poor heat transfer and will cause<br />
excessive overheating of the spark plug. This condition can<br />
be corrected by making sure that threads are clean, and by<br />
observing the torque specifications when installing new<br />
plugs.
Connector well flashover is caused by an electrical path<br />
along the surface of the insulator, from contact cap to shield.<br />
It occurs when the voltage required to arc across the<br />
electrode gap exceeds the voltage required to track over the<br />
surface of the insulator. This condition is caused by a too-<br />
wide electrode gap, oil, moisture, salt track, or other<br />
conductive deposit on the terminal well surface or lead-in<br />
assembly. When flashover occurs, combustion chamber<br />
residues quickly coat the insulator tip and electrodes so that<br />
the condition may be interpreted as oil or gas fouling. If the<br />
ceramic of the plug is not broken, the plug may be cleaned<br />
and reused. Thorough cleaning of the lead in assembly may<br />
solve the problem, or it may be necessary to replace the<br />
assembly to affect a cure.<br />
ELECTRODE GAPS<br />
The size of the electrode gap has a very definite effect on<br />
spark plug service life and also on the performance of the<br />
engine. Insufficient gap size will not only cause misfiring<br />
during idle, hut will also misfire during cruise power with<br />
lean fuel/air mixture. This intermittent misfiring during<br />
cruise lowers the temperature of the insulator tip to such an<br />
extent that lead deposits forming on the insulators may not<br />
vaporize sufficiently to keep the tips clean.<br />
HINTS FOR SPARK PLUG SERVICING<br />
Spark plugs with cracked, broken or loose insulators or<br />
highly worn electrodes should not be cleaned and reused.<br />
Replace with new aircraft spark plugs.<br />
To prevent damage to spark plugs during removal and<br />
installation, use the right tools for the job.<br />
It is helpful to use anti-seize compound or plain engine<br />
oil on spark plug threads starting two full threads from the<br />
electrode, but DO NOT USE a graphite based compound.<br />
If a spark plug is dropped, discard it and replace with a<br />
new one.<br />
A torque wrench. reading in either foot pounds or inch<br />
pounds, is essential to proper installation of spark plugs.<br />
Is Your Spark Plug Connector Overtorqued?<br />
This is a brief summary of the Champion Spark Plug<br />
instruction for connecting the spark plug to the connector:<br />
Terminal sleeves should be handled only with clean, dry<br />
hands. Before installation, wipe off the connector with a<br />
clean, lint-free cloth moistened in methylethylketone,<br />
acetone, wood alcohol, naptha or clean unleaded gasoline.<br />
Make certain that the inside of the spark plug shielding<br />
barrel is clean and dry. Then, without touching the<br />
connector or spring with the fingers. insert the assembly in a<br />
straight line with the spark plug. Screw the connector nut<br />
into place finger tight - then tighten an additional 1/8 turn<br />
with the proper wrench. Damaged threads or cracked<br />
shielding barrels may result if the connector nuts are<br />
86<br />
tightened excessively. Avoid excessive side load while<br />
tightening.<br />
By comparing the two spark plugs in this picture. you can<br />
see the results of overtorquing at the distorted end of the left<br />
spark plug. Since this distortion may make the spark plug<br />
unusable, great care should be taken to tighten the connector<br />
in accordance with the manufacturer’s instructions.<br />
Why Rotate Spark Plugs<br />
The Positive and The Negative<br />
The policy of rotating spark plugs from top to bottom<br />
has been practiced by mechanics and pilots for many years.<br />
It is common knowledge in the industry that the bottom<br />
plugs are always the dirty ones and the top plugs are the<br />
clean ones. By periodically switching the plugs from top to<br />
bottom, you get a self-cleaning action from the engine<br />
whereby the dirty plug placed in the top is cleaned, while the<br />
clean plug replaced in the bottom gradually becomes dirty.<br />
Based on this cleaning action, a rotational time period must<br />
be established.<br />
Due to the ever-increasing cost of aircraft maintenance<br />
and a desire to get the maximum service life from your<br />
spark plugs, the following information is offered on the<br />
effects of constant polarity and how to rotate plugs to get<br />
maximum service life.<br />
The polarity of an electrical spark. either positive or<br />
negative, and its effects on spark plug electrode erosion has<br />
long been known, but has had little effect on spark plug life<br />
in the relatively low performance engines of the past.<br />
However, in the later, high performance, normally aspirated<br />
and turbocharged engines where cylinder temperature and<br />
pressure are much higher, the adverse effects of constant<br />
polarity are becoming more prevalent. As you can see in the<br />
picture comparing spark plug wear, when a spark plug is<br />
installed in a cylinder that is fired negative and is allowed to
SPARK PLUG FIRED NEGATIVE SPARK PLUG FIRED POSITIVE<br />
ADVERSE ADVERSE<br />
CENTER ELECTRODE GROUND ELECTRODE<br />
WEAR WEAR<br />
remain there for a long period of time, more erosion occurs<br />
on the center electrode than on the ground electrode, and<br />
when a spark plug is fired positive, more erosion occurs on<br />
the ground electrode than on the center electrode. From this<br />
we can see that a periodic exchange of spark plugs fired<br />
positive with those fired negative will result in even wear<br />
and longer spark plug service life.<br />
To get a polarity change, as well as switching the plugs<br />
from top to bottom, the following rotational sequence is<br />
suggested. First, when removing the spark plugs from the<br />
engine, keep them in magneto sets. After the plugs have<br />
been serviced and are ready to be reinstalled in the engine,<br />
make the following plug exchange. For six cylinder engines,<br />
switch the plugs from the odd number cylinders with the<br />
plugs from the even numbered cylinders. For example,<br />
switch 1 with 6, 2 with 5, and 3 with 4. On four cylinder<br />
engines, you must switch 1 with 4, and 2 with 3. During the<br />
following operating period, each plug will be fired at reverse<br />
polarity to the former operating period. This will result in<br />
even spark plug wear and longer service life. This rotational<br />
procedure works equally well on all four and six cylinder<br />
<strong>Lycoming</strong> engines except four cylinder engines equipped<br />
with the single-unit dual magneto. This is a constant polarity<br />
magneto and the only benefit to be gained by rotating the<br />
plugs is the reduction of lead deposit built up on the spark<br />
plugs when a rotational time period is established and<br />
followed. Another exception occurs on a few four cylinder<br />
engines where one magneto will fire all of the top spark<br />
plugs and the other magneto will fire all of the bottom spark<br />
plugs. If the plugs are rotated as previously recommended, a<br />
polarity change will result but since the plugs do not get<br />
moved from top to bottom, no self-cleaning action by the<br />
engine will occur. This may result in the necessity to clean<br />
the bottom plugs at regular intervals as these are always the<br />
dirtiest. For those engines with magnetos which fire all top<br />
or bottom spark plugs the choice of rotating plugs to change<br />
polarity or to obtain bottom to top cleaning action must be<br />
made by the aircraft owner or the A & P mechanic.<br />
87<br />
Maintenance Suggestions From The <strong>Lycoming</strong><br />
Service Hanger<br />
Spark plugs are an important engine accessory. Perhaps<br />
it's because they do such an important job so well, yet are<br />
often taken for granted. This little fellow has character. For<br />
the alert, knowledgeable mechanic, Mr. Plug is ever willing<br />
to reveal its secrets pertaining to the health of the engine's<br />
fuel system, oil consumption, combustion chamber, and even<br />
the engine treatment given by the pilot. At the Textron<br />
<strong>Lycoming</strong> Service Hanger, we have come to lean heavily on<br />
Mr. Plug's ability to "tell a story." Actually, he's our ace<br />
troubleshooter.<br />
To make it possible for Mr. Plug to do even a better job,<br />
we are listing some "do's and don'ts." These tidbits are<br />
directed at both the mechanic and pilot.<br />
The massive electrode type spark plugs are the least<br />
expensive to buy and do a fine job. The fine wire platinum<br />
plug is more expensive but gives longer life, is less prone to<br />
frosting over during cold starts, and appears to be less<br />
susceptible to lead fouling. The more expensive fine wire<br />
iridium plug has all the qualities of the platinum plug, plus<br />
the fact that the iridium material resists lead salts erosion to<br />
a much greater degree than platinum. This results in longer<br />
plug life. So - make your choice.<br />
DON'T - reuse spark plug gaskets.<br />
DO - use the recommended torque when installing plugs.<br />
DON'T - be a throttle jockey. For years we have been<br />
preaching that engines don't like sudden throttle movement.<br />
Well, the spark plugs don't like it either.<br />
DO - after a successful flooded start, slowly apply high<br />
power to burn off harmful plug deposits.<br />
DON'T - close throttle idle any engine. Fuel contains a<br />
lead scavenging agent that is effective only when the plug<br />
nose core temperature is 900 ° F or more. To attain this<br />
temperature, you need a minimum of 1200 RPM, (TIGO-<br />
541 is an exception) Besides, the engine's fuel system is<br />
slightly rich at closed throttle idle. This ends up with Mr.<br />
Plug having a sooty face.<br />
DON'T - fly with worn or dirty air filters or holes in<br />
induction hoses and air boxes, for this is the fastest way of<br />
wearing out engines. Mr. Plug doesn't like it either. One of<br />
his worst enemies is silicon (a fancy name for dirt).<br />
DON'T - you mechanics, attempt to clean lead deposits<br />
from plugs with an abrasive type cleaner (an excellent way<br />
to keep the plug manufacturer on overtime filling<br />
replacement orders). Use the vibrator type cleaner sold by<br />
the plug manufacturers. Then, sparingly use the air powered<br />
abrasive.<br />
DO - properly lean your engine in flight as<br />
recommended by the Pilot's Operating Handbook, and<br />
<strong>Lycoming</strong> Service Instruction No. 1094. In addition to being
helpful to the engine in many ways, it also helps the plugs<br />
run cleaner, more efficiently and longer.<br />
DO - you mechanics, be a little more careful in gap<br />
setting of massive electrode plugs. The top and the bottom of<br />
the ground electrode should be parallel with the center<br />
electrode.<br />
DON'T - reuse obviously worn plugs, regardless of how<br />
they bomb check. More than 50% of the ground electrode<br />
eroded away; the center electrode shaped like a football; the<br />
center core of the ground electrode badly dimpled? If the<br />
answer is yes, replace.<br />
DO - use anti-seize compound when reinstalling plugs.<br />
Caution: only sparingly on the first three threads. Here is not<br />
a case of twice as much being twice as good.<br />
DON'T - accept dirty and stained cigarettes; they may<br />
cause misfire.<br />
DON'T - use any spark plug that has been dropped. One<br />
manufacturer says "If you drop it once, drop it twice-the<br />
second time in the trash barrel."<br />
DON'T - reuse any plug with cracked porcelain,<br />
regardless of how it may have been working or how it bomb<br />
checked. It will cause serious preignition.<br />
DON'T - shrug off oily spark plugs. New, topped, or<br />
majored engines with some oil in the plugs is normal<br />
because rings haven't seated. High-time engine with oily<br />
plugs means rings are wearing out. One oily plug with others<br />
dry, means a problem in the cylinder with the oily plug. (The<br />
bottom plugs are always first to tell the story).<br />
DON'T - clean plugs with a powered wire wheel. This is<br />
known as "a slow death on a fast wheel."<br />
DON'T - you mechanics, determine replacement spark<br />
plugs by referring to model number on old plug in the<br />
engine. The man ahead of you may have installed the wrong<br />
model. Use the manufacturer's chart on all plug<br />
replacements: also consult <strong>Lycoming</strong> Service Instruction<br />
No. 1042, "Factory Approved Spark Plugs."<br />
Engine Hoses<br />
As airplanes and engines attain age, there appears to be a<br />
need to reemphasize the inspection or replacement of engine<br />
hoses or lines carrying fuel, oil, or hydraulic fluid. The hose<br />
manufacturers definitely recommend regular inspection and<br />
replacement of all such hoses at engine overhaul even<br />
though they look good.<br />
Age limit of rubber-steel or fiber banded hose has<br />
generally been established at four years. This limit of four<br />
years is generally considered to be "shelf" life. All hose<br />
manufactured for aircraft use is marked indicating the<br />
quarter year in which it was manufactured. The listing<br />
"4Q92" means the hose was manufactured in the fourth<br />
88<br />
quarter of 1992. Maintenance personnel should not use hoses<br />
with a high "shelf" life age.<br />
To eliminate relatively short "shelf" life limits, Textron<br />
<strong>Lycoming</strong> has phased in Teflon hoses with silicone coated<br />
fire sleeves. These are the only hoses which are available for<br />
field replacement, and they will be found on engines shipped<br />
from the factory<br />
Service Instruction No. 1274 lists the fuel and oil hoses<br />
used by Textron <strong>Lycoming</strong>. It also explains how the<br />
numbering system defines hose size. This instruction should<br />
be used as a reference anytime hoses are to be replaced.<br />
Textron <strong>Lycoming</strong> Service Bulletin No. 509 must also be<br />
complied with if rubber hose is used to carry low-lead<br />
aviation gasoline. Aeroquip, the manufacturer of hose used<br />
by Textron <strong>Lycoming</strong>, has recorded several failures of 601type<br />
rubber hose. Although it is satisfactory for other<br />
purposes, this hose appears to be adversely affected by lowlead<br />
aviation gasoline. 601-type rubber hose used for lowlead<br />
aviation gasoline is to be replaced after no more than<br />
two years of use. Aeroquip and Textron <strong>Lycoming</strong><br />
recommend that rubber hose be replaced with Teflon hose.<br />
Teflon hose is normally unaffected by many of the operating<br />
variables that contribute to rubber hose degradation.<br />
Checking And Adjusting Dry Tappet Clearance<br />
On <strong>Lycoming</strong> Engines<br />
Any time work is done on the valve train of an engine,<br />
such as grinding valves or seats, replacing valves or valve<br />
rockers, or any other component of the valve operating<br />
mechanism, the dry tappet clearance should be checked and<br />
adjusted to insure that the correct tappet clearance is<br />
maintained. Any time tappet clearance is allowed to vary too<br />
far from prescribed limits, the engine will not operate<br />
properly. For example, if clearances are too small, burned<br />
valves or compression loss may result; and if clearances are<br />
too great, the engine will become noisy.<br />
In both cases, the engine will become rough and<br />
mechanical failure may be the result.<br />
The following is a brief description of procedures to<br />
check and adjust the dry tappet clearance. After observing all<br />
safety precautions, rotate the engine until the piston is on top<br />
dead center (TDC) of the cylinder to be checked. (1)<br />
Remove the rocker box cover, and also remove rocker shaft<br />
covers on angle head cylinders, valve rockers, thrust washer<br />
(angle head only), push rods, and shroud tubes. (2) Then<br />
remove hydraulic unit from the tappet body. On TIO-541<br />
and TIGO-541 engines remove the unit with fixture ST-233.<br />
On all other engines use special tool Part No. 64941, that can<br />
be purchased from <strong>Lycoming</strong>, or fabricate a puller from a<br />
piece of wire. NO MAGNET PLEASE. (3) Disassemble the<br />
hydraulic unit and flush out all oil from the unit. Also,
emove all oil from the tappet body. (4) Reassemble<br />
hydraulic unit and install in the tappet body.<br />
CAUTION: Be sure and keep hydraulic units as one<br />
assembly because mixing hydraulic unit parts may result in<br />
changing the leak down rate of the unit and may cause a<br />
rough operating engine.<br />
CAUTION: After cleaning the hydraulic unit and tappet<br />
body, and unit is installed in the engine, do not turn the prop<br />
because this will pump oil into the hydraulic unit and result<br />
in an inaccurate dry tappet clearance check. (5) Next,<br />
replace the shroud tubes using new seals. (6) Install push<br />
rods, valve rockers, and thrust washer on angle head<br />
cylinders only. (7) To check dry tappet clearance, depress<br />
hydraulic unit by pressing on the push rod end of the rocker,<br />
and measuring the clearance between the valve stem and<br />
heel of the rockers by using a feeler gage.<br />
On engines using rotators on the valves, the clearance is<br />
measured between the rotator and the heel of the rocker. In<br />
both cases, the clearance should be .028 to .080 on intake<br />
and exhaust valves on all engines except the TIO-541 and<br />
TIGO-541 series powerplants; the latter should be .040 to<br />
.105. If clearance falls within these limits, no adjustment is<br />
necessary. It not, then adjust to within limits in the following<br />
manner: If clearance is too great, remove the push rod and<br />
install a longer one. If clearance is too small, install a shorter<br />
push rod and recheck to be sure clearance is within limits.<br />
To determine a short push rod from a long one, check the<br />
part number on the end of the push rod. The lowest number<br />
is the shortest rod, and the highest number is the longest rod.<br />
On older type push rods, machined grooves will be found on<br />
one side of the push rod, three grooves represent the short<br />
rod, and no grooves represent the long rods. Consult<br />
<strong>Lycoming</strong> Service Instruction No. 1060, and applicable parts<br />
catalog.<br />
Some Tips On The <strong>Lycoming</strong> 0-235 Engine<br />
Little things are sometimes forgotten. For that reason, a<br />
reminder is sometimes necessary. In the case of the Textron<br />
<strong>Lycoming</strong> 0-235 engine, it is a little different from most<br />
other <strong>Lycoming</strong> models. Other models are equipped with<br />
hydraulic tappets which do not require frequent adjustment.<br />
Occasionally there is a report of an 0-235 which is running<br />
rough or not producing normal power. Investigation often<br />
reveals that the solid tappets of the 0-235 need adjustment.<br />
The <strong>Lycoming</strong> Operator's Manual states that valve rocker<br />
clearance should be checked, and reset if necessary, at each<br />
100-hour inspection. It is important that the procedure<br />
outlined in Service Instruction 1068 for setting this<br />
clearance be followed exactly. We find that since this engine<br />
model is a little different, this inspection item is often<br />
overlooked. This reminder may help operators of the 0-235<br />
engine to keep it running smoothly.<br />
89<br />
A second problem sometimes reported with the 0-235<br />
engine also is the result of it being just a little different from<br />
other <strong>Lycoming</strong> models. Some 0-235 engines which use a<br />
full flow oil filter have had very low oil pressure at idle after<br />
being overhauled. The oil pressure would then increase as<br />
power was increased and decrease as power was reduced.<br />
This inconsistency from the normal oil pressure indications<br />
was traced to improper installation of the oil filter adapter.<br />
Textron <strong>Lycoming</strong> Service Publication SSP-885-1 provides<br />
instructions for this installation,<br />
These instructions specify that for the 0-235 engine only,<br />
a plate - <strong>Lycoming</strong> Part Number LW-12999 -is to be<br />
installed between the accessory housing and the oil filter<br />
adapter. The plate is sandwiched between two gaskets<br />
<strong>Lycoming</strong> Part Number LW-12795. The plate is designed<br />
with a hole that meters the amount of oil flow and prevents<br />
an excessive flow of oil to the idler gear. When this plate is<br />
not installed as required, it results in the oil pressure<br />
discrepancy discussed earlier. Anyone who has occasion to<br />
install the oil filter kit after overhaul - or at any other time,<br />
should follow the instructions carefully and should consider<br />
that the 0-235 installation is slightly different from other<br />
<strong>Lycoming</strong> models.<br />
The preceding paragraphs seem to picture the 0-235<br />
engine as an eccentric problem creator which it certainly is<br />
not. When the engine is maintained and operated in<br />
accordance with manufacturer instructions, it is so reliable<br />
that many models became eligible for an increase in TBO<br />
from 2000 to 2400 hours. Textron <strong>Lycoming</strong> Service Letter<br />
No. L213 gives the details that owners of 0-235 engines<br />
built before mid-1986 may want to examine more closely.<br />
Starting in June of 1986, all new, remanufactured, and<br />
factory overhauled 0-235 engines with compression ratios<br />
of 8.5:1 or 8.1:1 are built with new increased strength<br />
pistons, Part Number LW-18729. This part change, together<br />
with past service history, will allow Textron <strong>Lycoming</strong> to<br />
increase the recommended TBO from 2000 hours to 2400<br />
hours.<br />
For those individuals who own an 0-235 with 8.5:1 or<br />
8.1:1 compression ratio, a TBO Extension Kit is available.<br />
The kit includes four new pistons and all other parts<br />
necessary for the change. It should be noted that the TBO<br />
extension may only be applied to those engines that contain<br />
100% GENUINE <strong>Lycoming</strong> parts.<br />
Those 0-235 models with a compression ratio of 6.75:1<br />
were immediately eligible for the 2400-hour TBO if they<br />
contained 100% GENUINE <strong>Lycoming</strong> parts. For those<br />
owners who have maintained their engine reliability and<br />
durability by using only <strong>Lycoming</strong> parts, this notification of<br />
increased TBO was good news.
Importance Of The Correct Cylinder Base Nut<br />
Tightening Procedure<br />
Six Cylinder Models (Exclusive<br />
of Integral Accessory Drive Models<br />
Integral Accessory Drive Models Four Cylinder Models Eight Cylinder Models<br />
Cylinder Number Systems<br />
(Viewed from Top)<br />
The need to constantly stress the correct cylinder base<br />
nut tightening procedure seems apparent. Operators in the<br />
field are occasionally having engine problems and<br />
malfunctioning after reinstalling cylinders, and not<br />
tightening the cylinder base nuts correctly. The latter tends<br />
to cause crankshaft bearing shifting, crankcase fretting, or<br />
broken cylinder studs, and possible engine failure.<br />
Again we remind all operators in the field that we called<br />
this problem to your attention in Flyer No. 15, published in<br />
1972, and repeated the information in each revision of the<br />
<strong>Key</strong> <strong>Reprints</strong> since that time. In order to properly reinstall<br />
cylinders, consult Textron <strong>Lycoming</strong> Service Instruction No.<br />
1029.<br />
Maintenance people should ensure that torque wrenches<br />
have been correctly calibrated before accomplishing cylinder<br />
base nut tightening. After reinstalling cylinders, a ground run<br />
of the engine should be accomplished as outlined in the<br />
<strong>Lycoming</strong> "Engine Operator's Manual," followed by a<br />
shutdown and inspection. Then the engine should be test<br />
flown normally, and following the flight, a good inspection<br />
of the engine should be made before returning the aircraft to<br />
routine use.<br />
Fuel Injector Nozzles Have Been Improved<br />
Reports from operators of fuel injected engines and from<br />
<strong>Lycoming</strong> service representatives provide some insights into<br />
the subject of clogged fuel injector nozzles. By providing<br />
our readers with information from these sources, it may help<br />
some of them to recognize and treat a similar problem in<br />
their own aircraft.<br />
A letter from the owner of a twin engine aircraft with<br />
<strong>Lycoming</strong> IO0-540 engines indicated that after 900 hours of<br />
operation the engines had performed flawlessly except for<br />
minor problems involving the fuel injection system. This<br />
90<br />
particular aircraft was equipped with an exhaust gas<br />
temperature (EGT) probe at each cylinder so the cylinder<br />
causing a problem could be pinpointed by using the EGT<br />
analyzer. Here is a description of how this problem was<br />
observed by this owner.<br />
From time to time there would be erratic combustion on<br />
one cylinder which would either raise the exhaust gas<br />
temperature as shown on the analyzer (an indication of a<br />
lean mixture on that one cylinder), or in some rare cases the<br />
individual cylinder would become inoperative. Thorough<br />
cleaning of the nozzle and line had little effect, but simply<br />
replacing the nozzle and line caused the cylinder to operate<br />
normally and brought exhaust temperatures back into line;<br />
EGT was again responsive to mixture control.<br />
The basic problem boils down to almost microscopic<br />
pieces of brass, rubber, or other forms or dirt that get into the<br />
fuel nozzle. These bits and pieces are extremely hard to<br />
dislodge and they may severely restrict fuel flow to the<br />
individual cylinder. Cleaning the line and nozzle does not<br />
always remove the dirt and correct the problem, although on<br />
the surface it would appear that it should.<br />
When fuel flow is only partially blocked by dirt in the<br />
injector nozzle, the exhaust gas temperature will rise and not<br />
respond to mixture control until idle cut off is reached. The<br />
reason for this is that the blockage now becomes the primary<br />
restriction and is independent of mixture control position.<br />
In those aircraft that do not have an EGT probe on each<br />
cylinder, erratic combustion or engine surging, which may<br />
be an indication of clogged or dirty fuel injector nozzles or<br />
dirty fuel, may possibly be checked by noting the fuel flow<br />
gage. Those fuel flow gages that actually measure pressure<br />
will have an indicator calibrated to show gallons or pounds<br />
of flow per hour. With this type of instrument, a clogged<br />
nozzle will cause a pressure increase and, therefore, an<br />
unusually high fuel flow indication. Direct flow meters do<br />
not react in this manner.<br />
To pinpoint the individual nozzle or nozzles that are<br />
clogged, it will be necessary for a mechanic to flow check all<br />
lines into containers of equal size. The stream from each<br />
nozzle should be smooth and steady, with no fluctuation.<br />
The amount of fuel from each nozzle should be equal when<br />
the containers are viewed after the flow check is complete. A<br />
clogged nozzle or nozzles may be identified by a smaller<br />
amount of fuel in its container after the flow check period.<br />
As indicated earlier, fuel injector nozzles have<br />
traditionally been difficult to clean. Under no circumstances<br />
should the fuel injector nozzle be probed with a sharp<br />
instrument. The proper method of cleaning described in<br />
Textron <strong>Lycoming</strong> Service Instruction 1275 includes<br />
washing the nozzle thoroughly with acetone and blowing it<br />
out with compressed air. Also, as indicated earlier, there<br />
have been times when cleaning did not return the fuel flow
to normal and the only recourse was replacement of the<br />
nozzle and line to achieve satisfactory engine operation.<br />
The difficult job of cleaning fuel injector nozzles has<br />
been made easier with the introduction of the "two-piece air<br />
bleed injector nozzle." These nozzles are installed in<br />
production engines and are available as replacements for the<br />
nozzles that were used previously. They are physically and<br />
functionally interchangeable with the corresponding old<br />
style nozzle.<br />
The minor fuel flow problems cited by the aircraft owner<br />
in the first few paragraphs of this article were experienced<br />
with old style fuel injector nozzles. The new two-piece<br />
injector nozzles introduced by Textron <strong>Lycoming</strong> Service<br />
Instruction No. 1414 have an advantage; they can be taken<br />
apart for easier cleaning. This feature should make trouble<br />
shooting and repair of dirt related fuel flow restrictions<br />
much easier. We should emphasize that Cleanliness is<br />
Extremely Important when installing, cleaning or working<br />
with fuel injector nozzles as they can very easily be<br />
contaminated with small amounts of dirt. See Textron<br />
<strong>Lycoming</strong> Service Instruction No. 1414 for two-piece nozzle<br />
installation instructions, and Service Instruction 1275 for<br />
cleaning and test information.<br />
Unauthorized Additions To Your Engine Can<br />
Cause Trouble<br />
Some accidents and forced landings have been reported<br />
to us which have been caused by adding certain equipment<br />
to the engines out in the field. In most instances, the<br />
equipment added to the engine has not been approved by the<br />
airframe manufacturer or the engine manufacturer. Here are<br />
two of many examples reported to us:<br />
One owner added a magnetic pickup to the engine oil<br />
drain plug which restricted oil flow to the oil suction screen,<br />
causing oil starvation to the engine, and resulted in failure.<br />
Another owner installed an oil quick-drain plug on the<br />
engine sump of a plane with a retractable landing gear.<br />
When the gear was retracted, it knocked the protruding plug<br />
off, allowing the oil to escape and the engine to fail of oil<br />
starvation.<br />
Operators in the field desiring to add any part to the<br />
engine should first consult with the engine and airframe<br />
manufacturer. Any addition or change of engine parts also<br />
calls for a careful ground run and inspection of the area of<br />
the engine after shutdown. Then the engine should be flown<br />
and the engine instruments carefully observed during the test<br />
flight. After the latter, the engine should again be inspected<br />
for oil or fuel leaks, etc., before flying with passengers. The<br />
Engine Operator's Manual has a ground run checklist and a<br />
flight test record for such occasions.<br />
The Textron <strong>Lycoming</strong> standard warranty statement<br />
summarizes our discussion in the following all inclusive<br />
statement:<br />
91<br />
"Textron <strong>Lycoming</strong> reserves the right to deny any<br />
warranty claim if it reasonably determines that the engine or<br />
part has been subjected to accident or used, adjusted, altered,<br />
handled, maintained, or stored other than as directed in your<br />
operator's manual, or if non-genuine Textron <strong>Lycoming</strong><br />
parts are installed in or on the engine and are determined to<br />
be a possible cause of the incident for which the warranty<br />
application is filed."<br />
A Simple Check Of Internal Engine Timing<br />
The A&P mechanic is often called upon to troubleshoot<br />
an engine problem relating to low power. There are many<br />
causes for this kind of complaint. This article will discuss<br />
one possibility that should be considered if this problem<br />
occurs after an engine has been overhauled or disassembled<br />
for other reasons.<br />
First, let us consider the symptoms. In case of an engine<br />
fitted with a fixed pitch propeller, the static RPM may be<br />
several hundred RPM below what is specified for this<br />
engine/airframe combination. For an engine with constant<br />
speed propeller which has the governor and propeller blade<br />
angle set properly, it is possible that both static RPM and/or<br />
performance may be low. The cause of these symptoms in an<br />
engine which has recently been disassembled may be the<br />
result of improper timing between the crankshaft and the<br />
camshaft. Misalignment by one or two gear teeth may have<br />
occurred during engine assembly.<br />
If these symptoms exist and if improper timing is<br />
suspected, it is not necessary to disassemble the engine to<br />
check the internal engine timing between crankshaft and<br />
camshaft. The procedure for accomplishing this check will<br />
be detailed below for those A&P mechanics who have not<br />
been exposed to this method before.<br />
First, insure that magneto and electrical switches are in<br />
the OFF position. Next, remove the cowling so that rocker<br />
box covers and spark plugs are accessible. Then rotate the<br />
engine so the piston in number one cylinder is positioned at<br />
top dead center on the compression stroke. The number one<br />
cylinder of <strong>Lycoming</strong> engines is the right front cylinder<br />
except for the 541 models which have number one cylinder<br />
at the left front position. For all <strong>Lycoming</strong> direct drive<br />
engine models, the top dead center position of number one<br />
piston can be verified by observing that the mark indicating<br />
the #1 TDC position on the rear side of the starter ring gear<br />
is exactly aligned with the split line of the crankcase at the<br />
top of the engine. As the last step of preparation, remove the<br />
rocker box cover from number two cylinder.<br />
Engine timing is checked by first observing the number<br />
two cylinder valve rocker arms. Both valves should be<br />
closed or nearly closed. The next step is to move the<br />
propeller slightly in one direction. Rocker arm motion<br />
should be seen as one valve starts to open. STOP. Now
otate the engine back to the original position with the #1<br />
TDC mark again aligned with the split in the crankshaft<br />
halves. Both valves should again be closed or nearly closed.<br />
Now move the propeller slightly in the direction opposite<br />
from the first movement. Rocker arm motion should again<br />
be seen as the other valve starts to open. If the two valves<br />
started to open as described with only a small amount of<br />
engine movement in each direction, the engine timing is<br />
correct.<br />
For some individuals it may be simpler to rock the<br />
propeller slightly with a back and forth motion while<br />
observing that first one valve and then the other will start to<br />
open. If movement in either direction exceeds twenty<br />
degrees of engine rotation before motion of the rocker arm<br />
occurs, the crankshaft to camshaft timing is not correct.<br />
If the observed rocker arm movement indicates that<br />
internal engine timing is correct, then this is not the cause of<br />
the low power being investigated. On the other hand, if both<br />
rocker arms do not move from engine rotation within the<br />
parameters discussed earlier, the internal engine timing is<br />
not correct. This indicates a probable error during engine<br />
assembly and it can only be corrected by opening the engine<br />
and realigning the crankshaft and camshaft gears.<br />
Instructions for accomplishing this task will be found in the<br />
appropriate overhaul manual<br />
Installation of Counterweight Rollers<br />
The latest revision of Textron <strong>Lycoming</strong> Service<br />
Instruction No. 1012 provides information on the location<br />
and assembly procedure for counterweights on each<br />
<strong>Lycoming</strong> crankshaft equipped with counterweights. The<br />
illustrations and engine listing in this service instruction<br />
show that some crankshafts may have two or more<br />
counterweights of the same part number attached to the<br />
crankshaft with rollers having unlike part numbers.<br />
This can be a little confusing, and we have had reports<br />
from mechanics who assembled an engine using two<br />
different size rollers (two different part numbers) in the<br />
same counterweight. Another report had the mechanic<br />
identifying the rollers by the size of the part number<br />
lettering rather than reading and comparing the part<br />
numbers. Fortunately, in the cases we are aware of, the error<br />
was corrected before assembly of the engine continued.<br />
To help in clearing up this possible source of confusion,<br />
it should be remembered that each counterweight is<br />
installed with two identical rollers. The rollers will have<br />
the same part number and will be the same size. The next<br />
counterweight on the same crankshaft may use rollers of a<br />
different size and part number, but these two rollers will also<br />
be identical in size.<br />
For more details on the assembly of crankshaft<br />
counterweights see the latest revision of Service Instruction<br />
No. 1012.<br />
92<br />
SAFETY NOTES<br />
In an attempt to reduce the cost of flying, some<br />
operators have resorted to methods of operation<br />
which are considered to be unsafe. Textron<br />
<strong>Lycoming</strong> makes the following recommendations<br />
regarding these practices:<br />
1. Do not advance timing-set timing in<br />
accordance with the Engine Operator's Manual for<br />
the specific engine model.<br />
2. Do not use a hotter spark plug for low power<br />
cruise - unless it is approved for the specific engine<br />
as listed in <strong>Lycoming</strong> Service Instruction No. 1042.<br />
3. Do not abbreviate the warm-up of a<br />
turbocharged engine-follow the instructions of the<br />
manual pertaining to oil temperatures, otherwise an<br />
overboost or erratic power condition will result.<br />
4. Do not use automotive oils in aircraft engines -<br />
they will cause engine damage or possible failure.<br />
5. Do not use automotive fuel in aviation engines.<br />
Quality of automotive fuel varies widely and<br />
additives may result in deterioration of fuel system<br />
components. The engine manufacturers contend that<br />
use of auto fuel in an aircraft induces unnecessary<br />
risk.<br />
Engine Suggestions For Operators<br />
OIL FILTERS<br />
Clean engine oil is essential to long engine life.<br />
Generally, service experience has shown that the use of the<br />
external full flow filter can increase the time between oil<br />
changes provided that the filter elements are replaced at each<br />
oil change. Under normal operating circumstances the oil<br />
should be changed every 50 hours, and the oil filter element<br />
should be replaced after each 50 hours of engine operation.<br />
It is very important that the filter element be cut open in<br />
order to examine the material trapped in the filter for<br />
evidence of internal engine condition. However, operation in<br />
dusty areas or cold climates may require more frequent oil<br />
changes despite the use of an oil filter. An engine which sits<br />
for long periods between flights should have an oil change at<br />
four month intervals regardless of the limited flight time<br />
accumulated. The filter cannot filter water and acids which<br />
may accumulate in the oil.<br />
OIL CONSUMPTION<br />
Oil consumption is a very important trend to monitor in<br />
an engine. The operator and maintenance people should
know the general history of oil consumption during the life<br />
of the engine. It is typical of an engine during seating of new<br />
piston rings that oil consumption may be erratic or high; but<br />
after the rings are seated, generally within the first 25 to 50<br />
hours, oil consumption should level off below the maximum<br />
limits established by the manufacturer. Later, during the life<br />
of the engine, if there is a noticeable increase of oil<br />
consumption within a 25-hour period (one quart or more per<br />
hr.), this could be a danger signal and calls for an<br />
investigation.<br />
The oil screens and filter should be carefully observed<br />
for signs of metal, and maintenance personnel should take a<br />
compression check of the cylinders, preferably using<br />
differential pressure equipment, and also look inside the<br />
cylinders with a borescope or gooseneck light to detect any<br />
unusual condition.<br />
THE AIR FILTER<br />
The induction air filter is a very important element in the<br />
life of an aircraft engine. With the modern high performance<br />
powerplant, the operator must keep dirt and abrasives out of<br />
the engine if it is to attain the expected life and trouble-free<br />
hours. Although this is a maintenance responsibility. the<br />
pilot/owner should be aware that excessive wear and early<br />
failures of reciprocating engine parts is due, in many<br />
instances, to contaminates introduced through or around the<br />
air filter. The aircraft manufacturer's instructions for<br />
maintenance of the air filter must be closely followed. When<br />
operating in very dusty or sandy conditions, it may be<br />
necessary to service the filters daily or every few hours in<br />
accordance with the airframe manufacturer's<br />
recommendations.<br />
Recommendations For Aircraft Or Engine<br />
Struck By Lightning<br />
Textron <strong>Lycoming</strong> Service Bulletin No. 401 makes<br />
recommendations to operators any time an aircraft has been<br />
struck by lightning. It points out that damage to an aircraft,<br />
which has been struck by lightning, is often confined to a<br />
specific area of the structure. In such instances where the<br />
engine and its accessories, controls, fuel or exhaust systems<br />
are involved, it is necessary to evaluate and repair the<br />
damage before the aircraft is flown again.<br />
The Service Bulletin explains that although the path of<br />
the lightning may appear to have been around the external<br />
housings of the engine components, it is nevertheless<br />
impossible to assess the internal damage that might have<br />
occurred by heat during the lightning discharge. Therefore,<br />
in the event the engine has been damaged by lightning,<br />
disassemble and inspect the component parts. Heat<br />
generated by the arcing effect of the electrical discharge can<br />
cause irreparable damage to the hardened surfaces of ball<br />
bearings, crankshaft bearing surfaces, camshaft lobes, gear<br />
93<br />
teeth, and other parts that are surface hardened. These parts<br />
should not be reused if discoloration, cracks, or other<br />
indication of damage by lightning is evident.<br />
Recommendation Regarding Use Of Incorrect<br />
Fuel<br />
There have been incidents of the accidental use of the<br />
wrong fuel-particularly turbine fuel. Turbocharged piston<br />
engines with the term "Turbocharged" painted on the engine<br />
nacelle have been interpreted by refueling crews to require<br />
turbine fuel. We must remind the pilot-in-command again,<br />
as we have over the years, he or she must be responsible for<br />
the proper fuel in the aircraft tanks at refueling.<br />
Turbine fuel, or a mixture of turbine and aviation<br />
gasoline, has proven to be a particularly ruinous fuel for<br />
piston engines. As a result, if the engine has been operated<br />
with this unspecified fuel, qualified maintenance personnel<br />
must make a detailed inspection of the engine with particular<br />
attention to the combustion chambers. If detonation has been<br />
severe enough, further damage will occur to crank pins and<br />
main bearings, counterweights and valve train components.<br />
In view of possible damage, disassembly and inspection of<br />
the engine parts is the only safe recommendation that can be<br />
made after the engine has been operated with improper<br />
fuels. If it has been determined that the engine has been run<br />
on unspecified fuel, do not continue to operate it unless it<br />
has been inspected and certified to be airworthy by<br />
competent maintenance personnel.<br />
Textron <strong>Lycoming</strong> Service Bulletin No. 398 is the latest<br />
reference concerning <strong>Lycoming</strong> engines which have been<br />
operated with unspecified fuel.<br />
Propeller Ground Strike or Sudden Stoppage<br />
Can Be Dangerous<br />
As an engine manufacturer, we are often asked to guide<br />
pilots and mechanics concerning what to do about an engine<br />
after sudden stoppage, or a ground strike by the propeller.<br />
Service Letter No. 163 and Service Bulletin No. 475 state<br />
Textron <strong>Lycoming</strong> position concerning this problem. These<br />
important publications point out that there may be hidden<br />
internal engine damage from such an incident. From the<br />
experience of previous incidents, we know that the unseen<br />
damage to an engine by sudden stoppage or a hard ground<br />
strike has caused subsequent engine failures.<br />
Some failures resulted from an over stressed crankshaft<br />
gear dowel which ultimately sheared. When this part breaks,<br />
all power is lost. Because of this, Textron <strong>Lycoming</strong> Service<br />
Bulletin No. 475 and AD Note 91-14-22 require a mandatory<br />
inspection, and compliance with repair and reassembly<br />
procedures.
In other cases, stoppage or ground strikes have resulted<br />
in over-stressed connecting rod bolts which failed soon<br />
thereafter. When a rod bolt fails, it allows the connecting rod<br />
to get loose and flail inside of the engine causing a nasty<br />
failure with a serious fire potential.<br />
After a prop strike or sudden stoppage, the incident must<br />
be entered in the engine logbook. Textron <strong>Lycoming</strong> must<br />
take the position that in the case of sudden engine stoppage,<br />
propeller strike, or loss of a blade tip, the only safe<br />
procedure is to remove and disassemble the engine and<br />
completely inspect the reciprocating and rotating parts. This<br />
will require a skilled mechanic who knows what to look for<br />
in the affected engine.<br />
Any decision to operate an engine which was involved in<br />
sudden stoppage, propeller strike, or loss of prop blade tip<br />
without disassembly and inspection will violate the AD Note<br />
issued by the FAA and <strong>Lycoming</strong> Service Bulletin No. 475,<br />
both of which are mandatory. Any decision to fly an engine<br />
without complying with these publications must be the<br />
responsibility of the agency returning the aircraft to service.<br />
Keep Your Direct Drive Engine Starter Clean<br />
To Avoid Trouble<br />
Many starters manufactured by Prestolite and Electro<br />
Systems are in use with <strong>Lycoming</strong> engines. From time to<br />
time these starters used on our direct drive engines are<br />
returned to the factory reported as malfunctioning, but<br />
investigation here revealed the problem to be dirt. The<br />
location of the starting motor on many aircraft engines<br />
subjects the Bendix Drive of the starter to contamination<br />
from dust, dirt, and moisture because the drive housing is<br />
open and the engine constantly circulates air around the<br />
starting motor.<br />
Typical indications of a dirty Bendix Drive are:<br />
1. Sluggish operation-operator has to make several<br />
attempts before the starting motor will crank the engine.<br />
2. Noisy operation-a grinding noise when the starter is<br />
energized.<br />
3. Failure to engage.<br />
Whenever any of the above complaints are received, the<br />
starting motor should be removed immediately and the<br />
Bendix Drive cleaned and lubricated. Oil should never be<br />
used because oil in that location collects dust and dirt,<br />
becoming gummy and causing the Bendix Drive to stick.<br />
In most cases it will be necessary to partially disassemble<br />
the starting motor in order to service the Bendix Drive. The<br />
latter should be removed from the motor shaft to insure<br />
thorough cleaning and lubricating. Clean the area in front of<br />
the Bendix Drive pinion before removing the drive from the<br />
shaft.<br />
94<br />
Do not use carburetor cleaner or any solvents that could<br />
damage the rubber block inside the Bendix Drive. Use only<br />
clean petroleum base cleaners such as kerosene or varsol.<br />
Thoroughly clean the Bendix Drive to remove all dirt and<br />
contamination from the screwshaft threads and control nut.<br />
If the drive is exceptionally dirty, the drive pinion cup can be<br />
removed to insure a thorough cleaning job. Do not attempt to<br />
remove the control nut.<br />
After the Bendix Drive has been thoroughly cleaned and<br />
blown dry with compressed air, lubricate the screwshaft<br />
threads and ratchet with a silicone spray. Lubricate the<br />
motor shaft with the same silicone lubricant before installing<br />
the drive assembly on the shaft.<br />
The subject of Textron <strong>Lycoming</strong> Service Instruction<br />
No. 1278 is starter drive lubrication.<br />
Notes on Replacing Connecting Rods or Pistons<br />
An article on Engine Balance explained that certain<br />
engine parts are organized in matched sets, by weight,<br />
before they are installed in an engine being built at the<br />
<strong>Lycoming</strong> factory. Occasionally, it may be necessary to<br />
replace one of these parts during the operational life of the<br />
engine. When this happens, mechanics in the field should<br />
know that <strong>Lycoming</strong> parts which are matched by weight<br />
when an engine is built should only be replaced with parts<br />
which fall within design specifications for service<br />
(replacement) parts.<br />
Starting with connecting rods, the system of marking<br />
specifies that each part will be marked with one of these<br />
letters: A, B, S, D, or E. Connecting rods with the same<br />
identifying letter are installed when the engine is new; if<br />
only one or two rods are to be replaced in the field, they<br />
must be those marked with the letter S. The S indicates a<br />
"service part" which will always have a median weight. Use<br />
of a connecting rod stamped with an S will insure that the<br />
weight match between rods is always within the tolerance<br />
allowed by the <strong>Lycoming</strong> specification for that particular<br />
part number.<br />
If a piston is to be replaced, it is strongly recommended<br />
that the powerplant mechanic refer to <strong>Lycoming</strong> Service<br />
Instruction No. 1243. This service instruction shows that<br />
certain piston part numbers are designed to fall within a<br />
specified standard weight range. Any genuine <strong>Lycoming</strong><br />
piston with that part number will be a satisfactory<br />
replacement, although the weights of each piston should be<br />
compared before installation.<br />
Other pistons are marked as A or B weights and are used<br />
in matched sets when an engine is built. When these pistons<br />
must be replaced as a partial set, "service part" pistons are<br />
provided by Textron <strong>Lycoming</strong>. These will be marked with<br />
AS or BS and are restricted to a very narrow weight range
that falls between the A and B weights. Use of these pistons<br />
as replacements will insure that the entire set, both old and<br />
new, fall within overall weight limit tolerances set by<br />
Textron <strong>Lycoming</strong>.<br />
When pistons are installed in an engine, another<br />
consideration for standardization of weight is the piston pin<br />
plug. Service Instruction No. 1267 describes three piston pin<br />
plugs currently in use. Although these three are<br />
interchangeable, they must be used in complete sets of the<br />
same part number because each part number has a different<br />
weight.<br />
Connecting rods and pistons are one more example of the<br />
need for appropriate reference materials when working on<br />
<strong>Lycoming</strong> engines. Overhaul Manuals, Parts Catalogs, or<br />
service instructions are the source for those details we<br />
cannot retain in memory.<br />
Does Your Nose Seal Leak?<br />
Perhaps the first step In discussing this subject is to first<br />
get the terminology correct. The latest revision of <strong>Lycoming</strong><br />
Service Instruction No. 1324 calls it a Crankshaft Oil Seal.<br />
Although almost everyone knows exactly what you are<br />
talking about when the term Nose Seal is used, correct<br />
terminology can be important. Should this seal leak<br />
immediately after installation, it is possible that the seal was<br />
damaged during the installation process, but a poor fit<br />
between the crankcase and seal or the crankshaft and seal<br />
could also be responsible for the leak.<br />
Before installation of a crankshaft oil seal, it is important<br />
to check the recess into which it fits for proper size.<br />
Excessive wear which enlarges the crankcase bore for any<br />
reason may cause the crankshaft oil seal to leak. An<br />
undersize crankshaft could result in the same poor fit and a<br />
leak. This is usually caused by a rusty or pitted surface<br />
which has been polished excessively. <strong>Lycoming</strong> Service<br />
Instruction No. 1111 specifies the maximum undersize grind<br />
or polish which is allowable for the removal of rust or pits. It<br />
also prescribes the procedures for replating the crankshaft<br />
flange and seal area. Measurement of both the crankshaft<br />
and the crankcase to insure that they meet Table of Limit<br />
tolerances should be standard maintenance procedure before<br />
installation of a crankshaft oil seal.<br />
To avoid damage during installation, it is important to<br />
follow the instructions provided in the latest revision of<br />
<strong>Lycoming</strong> Service Instruction No. 1324. This instruction<br />
gives information on the two types of seals which may be<br />
used in <strong>Lycoming</strong> direct drive engines, the part numbers of<br />
both the standard and the oversized seals, and the method of<br />
installing both types of seal.<br />
When a leak at the crankshaft oil seal develops after<br />
many hours of normal operation, it is usually the result of<br />
other problems. The experienced Field Service Engineers at<br />
95<br />
<strong>Lycoming</strong> indicate that a leaking crankshaft oil seal is<br />
frequently caused by a restricted breather or an oil slinger<br />
clearance that is too tight. The leak might also be caused by<br />
a propeller defect which places an abnormal side load on the<br />
crankshaft oil seal.<br />
To avoid the problem of oil leakage at the crankshaft oil<br />
seal because of an engine breather restriction, examination<br />
of the breather tube to determine its condition is an excellent<br />
idea. If the tube is in good condition, also remember that the<br />
engine expels moisture through the tube. Under freezing<br />
conditions there is some possibility that the moisture may<br />
freeze at the end of the tube and ice will build up until the<br />
tube is completely restricted. Should this happen, pressure<br />
may build up in the crankcase until something gives -<br />
usually the Crankshaft Oil Seal.<br />
Since the airframe manufacturers know this is a<br />
possibility, and since they design with the intention of<br />
preventing engine related problems of this kind, some means<br />
of preventing freeze-up of the crankcase breather is usually a<br />
part of the aircraft design. The breather tube may be<br />
insulated, it may be designed so the end is located in a hot<br />
area. it may be equipped with an electric heater, or it may<br />
incorporate a hole, notch, or slot which is often called a<br />
"whistle slot." Because of its simplicity, the whistle slot is<br />
often used and is located in a warm area near the engine<br />
where it will not freeze. Aircraft operators should know<br />
which method of preventing freeze-up is used and then<br />
insure that the configuration is maintained as specified by<br />
the airframe manufacturer.<br />
Should leakage at the crankshaft oil seal occur as a result<br />
of oil slinger clearance which is too tight, the problem can<br />
initially be identified by checking for excessive end<br />
clearance. This can be done with a dial indicator. Remove<br />
the prop and then push the prop flange to the extreme aft<br />
position and zero the indicator. Then pull the prop flange full<br />
forward and read the travel on the indicator. Compare this<br />
figure with the limits listed in the Table of Limits for the<br />
appropriate engine model.<br />
Should the end clearance exceed the limits specified, the<br />
oil slinger clearance should then be checked. First, remove<br />
the old nose seal and clean the work area. Again, push the<br />
crankshaft to the rear of the engine. Insert a .002 inch feeler<br />
gage about 3/16-inch wide between the oil slinger on the<br />
crankshaft and the crankcase. Again, pull the crankshaft<br />
forward. If the .002-inch feeler gage is pinched tight, the<br />
required .002- to .007-inch clearance has been exceeded.<br />
Lack of appropriate clearance is the result of excessive wear<br />
on the crankcase thrust face which will allow oil to be<br />
pumped out past the crankcase oil seal.<br />
Overhaul time is usually when the crankcase thrust face<br />
might receive needed repair. Should the crankcase oil seal be<br />
leaking excessively, it may simply mean that overhaul<br />
time has arrived early. Fortunately this is something which<br />
does not happen very often.
Crankcases with worn or damaged thrust face areas can<br />
be repaired by reworking the thrust face area to permit<br />
installation of new thrust bearing washers. These bearings<br />
are available as repair items. Thrust bearing washers may be<br />
reused if they do not show wear and if their thickness is<br />
sufficient to maintain compliance with the crankshaft and<br />
crankcase end clearance specifications in the <strong>Lycoming</strong><br />
Table of Limits.<br />
Instructions for repairing the crankcase thrust face are<br />
found in the latest revision of <strong>Lycoming</strong> Service Instruction<br />
No. 1354. This repair should bring the oil slinger clearance<br />
back into tolerance and should cure the leaking crankcase oil<br />
seal which would also have been replaced during the<br />
reassembly of the engine.<br />
The information provided in this brief article may help<br />
aircraft owners to prevent the possibility of a leaking<br />
crankshaft oil seal and to understand the serious nature of the<br />
repair required if this seal is found to be leaking excessively.<br />
Cam and Tappet Wear<br />
The lobes of the camshaft and the tappets that they<br />
continually operate against have always been subject to<br />
wear. Someone recently stated that in recent years there has<br />
been an unacceptable rise in the occurrence of spalling<br />
tappets and worn cam lobes. Is this a factual statement?<br />
Perhaps it may help if we take a look at one or two of the<br />
causes of wear on these parts. From this we may reach a<br />
conclusion about why this statement could possibly be true<br />
today.<br />
Corrosion is a known cause of tappet and cam lobe wear.<br />
The engines of aircraft that are not flown regularly may be<br />
extremely vulnerable to corrosion. When the film of oil<br />
drains from the interior parts of the engine after it has been<br />
run, those parts become prey to the chemical changes that<br />
are caused by moisture, acids, and oxygen. Tappets from<br />
engines which have not been operated for long periods have<br />
been closely examined. Under a microscope, it is not<br />
unusual to find microscopic pits on the face of the tappet.<br />
This is the beginning of trouble. Starting with these very tiny<br />
pits, tiny particles of rust also affect the cam lobes. Once<br />
started, the process is not likely to stop until the wear<br />
reaches a point where these parts are doing an unacceptable<br />
job.<br />
Some people might question the assertion that engines<br />
can attract unusually large amounts of moisture: brief<br />
operating periods, low engine oil operating temperatures,<br />
and condensation all contribute. It might be very surprising<br />
to take an engine which has flown 15 to 25 hours over the<br />
course of four to six months and drain the oil into a clear<br />
container. The amount of water which settles to the bottom<br />
is likely to be more than one would expect. Also remember<br />
that combustion causes acids to collect in the oil. When<br />
96<br />
these are not removed by regular oil changes, the acids, as<br />
well as the moisture, will promote the growth of<br />
microscopic pitting which eventually leads to excessively<br />
worn tappets and cam lobes.<br />
Another factor in the unacceptable rise of tappet spalling<br />
in general aviation engines may be the product that is put<br />
into many of those engines at overhaul. To reduce the costs<br />
of overhaul, there is an increasing tendency to put reground<br />
camshafts and tappets into these engines. Although<br />
camshafts may be reground, there is a very strict limit on the<br />
amount of grinding which can be tolerated. Grind too much<br />
and the hardened surface of the cam lobe is gone. After this<br />
kind of grinding, the cam may look great, but it will be<br />
wearing on the soft metal which was once protected by a<br />
hardened surface. Textron <strong>Lycoming</strong> does not recommend<br />
the use of reground tappets under any circumstances, but<br />
many engines overhauled in the field today come back to the<br />
owner with reground tappets and camshaft. In some cases at<br />
least, these items are nothing more than good looking junk.<br />
Because of the high percentage of refurbished used parts<br />
that go into many overhauls, and the many airplanes that sit<br />
for long periods without being flown, there could be more<br />
tappet spalling today than in the past. These are some of the<br />
reasons why the statement that there has been an<br />
unacceptable rise in spalled tappets and worn cam lobes in<br />
recent years might just be true. Ask about the parts which are<br />
going into your overhaul. It may be less expensive to pay for<br />
new parts at the time of overhaul than it is to pay for<br />
replacing worn out parts before your engine has reached its<br />
expected TBO.<br />
Exhaust System Maintenance<br />
Pay Now Or Pay Later<br />
It is unfortunate that the exhaust systems attached to<br />
aircraft engines are one of the most overlooked and ignored<br />
parts of the aircraft. Almost all aircraft with normally<br />
aspirated engines have an exhaust system supplied by the<br />
airframe manufacturer. Engines which are turbocharged by<br />
<strong>Lycoming</strong> will also have most of the exhaust system<br />
supplied by <strong>Lycoming</strong>.<br />
<strong>Lycoming</strong> technical representatives get many calls about<br />
exhaust system problems. It makes no difference who<br />
supplied the system. There are several areas where<br />
discrepancies may occur: loose baffles in the muffler,<br />
exhaust leaks at the exhaust flange gasket, and slipjoints that<br />
do not slip. Exhaust gas leakage at the exhaust flange gasket<br />
will cause erosion of the aluminum cylinder head material,<br />
and a frozen slipjoint will cause cracks in the exhaust pipe<br />
system. Loose baffles in the muffler may result in a loss of<br />
power. These problems can be minimized by regular exhaust<br />
system maintenance at each periodic inspection.
The muffler should be checked carefully each time the<br />
exhaust system is inspected or anytime a loss of power is<br />
evident. Baffles which have come loose tend to lodge at<br />
various places inside the muffler. When the exhaust outlet is<br />
blocked, a power loss will occur due to the excessive back<br />
pressure created in the exhaust system. Attempting to look<br />
into the muffler may reveal baffling which is loose, but<br />
usually this is not something that can be determined<br />
visually. A sharp bump on the muffler with the palm of the<br />
hand while listening for any rattling sound may produce<br />
better results than looking. If loose baffling is found, the<br />
muffler should be replaced with a new or overhauled unit<br />
before the next flight.<br />
Another important part of the exhaust system is the<br />
exhaust flange gasket. Three different types are available<br />
from <strong>Lycoming</strong>. The manufacturing standard is the<br />
copper/asbestos gasket or the beaded gasket. Where the<br />
beaded exhaust flange type gaskets are used, they must be<br />
assembled (two each per exhaust port flange) with their<br />
beads interlocking. The flat side of the gasket must face<br />
toward the cylinder head, and the raised or bead side, toward<br />
the exhaust stack. After initial installation, exhaust flange<br />
nuts should be carefully retorqued after the first 25 hours of<br />
engine operation. These standard gaskets should not be<br />
reused.<br />
The third type of exhaust flange gasket available from<br />
<strong>Lycoming</strong> has V-shaped spiral wound layers of stainless<br />
steel and asbestos. These gaskets are available for all<br />
<strong>Lycoming</strong> engines using the 2- or 3-hole gasket design. This<br />
design provides a resilient action that automatically adjusts<br />
for mechanical compression, internal pressure variations,<br />
and temperature changes. The spiral wound exhaust flange<br />
gasket has superior sealing qualities and, unless an exhaust<br />
leak is evident, may be reused when the exhaust manifold is<br />
loosened or removed. New gaskets should always be used<br />
when the engine is overhauled.<br />
All exhaust flange gaskets which were originally<br />
designed with asbestos as one of the basic materials are now<br />
manufactured to a new standard. Although the part number<br />
may be the same, asbestos has been replaced with an<br />
alternate material.<br />
At each periodic inspection, the exhaust system should<br />
be checked to insure that exhaust gases are not leaking at the<br />
exhaust flange. A leak can be identified by the powdery<br />
residue which will be evident around the place where the<br />
leak is occurring. This residue may range from white to light<br />
brown in color.<br />
A leak at the exhaust flange gasket is often caused by<br />
improper torquing. Too little torque and the connection<br />
loosens. Too much torque and the gasket will bow slightly<br />
- again allowing exhaust gases to leak. If left uncorrected,<br />
erosion of the aluminum cylinder head material will occur<br />
quite quickly. A loss of material amounting to only a few<br />
thousandths of an inch could be enough to make the cylinder<br />
97<br />
unusable. Therefore, correcting the problem quickly is<br />
essential.<br />
If the aluminum cylinder head material has already<br />
eroded as the result of an exhaust gas leak, repair is<br />
sometimes possible. This cannot be done by hand. Studs<br />
must be removed and the damaged surface refinished by use<br />
of a milling operation. No more than twenty thousandths of<br />
an inch may be removed. Should it be necessary to remove<br />
more than twenty thousandths of an inch to obtain a true<br />
surface, the cylinder should be replaced.<br />
Where erosion of the cylinder head has not occurred,<br />
replacing the exhaust flange gasket with a new one will<br />
usually eliminate the leak. Insuring that the correct torque is<br />
applied during installation of the gasket is necessary to avoid<br />
future problems.<br />
Fortunately, an exhaust leak at the exhaust flange is not a<br />
frequent occurrence. A close visual check at each periodic<br />
inspection and prompt attention to correct any defect which<br />
may be found will usually be enough to avoid the need for<br />
more expensive repairs.<br />
Exhaust systems with slipjoints present another problem.<br />
The joints are necessary because the pipes must move.<br />
Vibration, along with heating and cooling of the system that<br />
causes expansion and contraction make it essential that the<br />
system be designed so that it has flexibility. Exhaust residue<br />
and heat may eventually cause slipjoints to seize. Because a<br />
slipjoint which has seized can be expected to cause breakage<br />
of the exhaust system pipes, regular maintenance to keep<br />
these joints free is a must. Mouse Milk or a similar lubricant<br />
should be applied to the slipjoint at regular intervals to<br />
prevent seizing of the pipes.<br />
Maintenance of an exhaust system with slipjoints is a pay<br />
now or pay later situation. If the preventive maintenance is<br />
not accomplished, it will mean buying new parts for the<br />
exhaust system. Paying for a new exhaust system is not the<br />
worst part. A broken pipe could allow hot exhaust gases to<br />
escape into the engine compartment where there is the<br />
potential for fire which would further damage the aircraft<br />
and present a serious hazard for pilot and passengers.<br />
Maintenance on this type of exhaust system requires that<br />
it be taken apart if the slipjoint will not move. Should a<br />
slipjoint be frozen, Mouse Milk or a good penetrating oil<br />
should be used to free it up. Then each joint must be cleaned<br />
of all exhaust residue and thoroughly examined to insure that<br />
there are no cracks or damage that would prevent free<br />
movement. Before reassembling the exhaust system, the<br />
slipjoint surfaces should be coated with high temperature<br />
lubricant such as Fel-Pro C5A or equivalent.<br />
Exhaust system maintenance probably should not be<br />
considered as complete unless it has included a review of<br />
airframe and engine manufacturer bulletins that may apply.<br />
From time to time product improvements are made<br />
available. A prior review of service bulletins would allow
these to be incorporated when the regular periodic<br />
maintenance is being done.<br />
The reason for this entire discussion is to point out the<br />
need for regular inspections and preventive exhaust system<br />
maintenance. Prevention is always less expensive and less<br />
hazardous than waiting for serious problems to occur.<br />
High Time Cylinders<br />
The aluminum alloy cylinder heads used on air cooled<br />
aircraft engines are subject to high stresses while operating.<br />
In addition, they are heated and cooled with each engine<br />
start up and shut down. Over long periods of operation,<br />
these stresses can lead to fatigue and eventually the cylinder<br />
head may develop cracks.<br />
<strong>Lycoming</strong> metallurgists argue that welding of cracks in<br />
aluminum cylinder heads is not likely to meet with longterm<br />
success. Therefore, an overhauled cylinder has little<br />
chance of being as serviceable as a new cylinder. Even if<br />
there were no cracks at the time of overhaul, metal fatigue is<br />
still a factor to be considered. But how? There is no record<br />
of time in use required for a cylinder assembly. An<br />
overhauled cylinder could have 4000, 6000, or 8000 hours or<br />
more when it is put on an overhauled engine. Even a<br />
cylinder from your own engine with only one trip to TBO<br />
may not make it to TBO a second time.<br />
As a result of the scenario outlined above, <strong>Lycoming</strong> has<br />
for many years recommended new cylinders when engines<br />
are overhauled. To practice what is being preached,<br />
<strong>Lycoming</strong> uses new cylinders on all engines shipped from<br />
the factory at Williamsport , including factory overhauls. It<br />
is less expensive to install new cylinders during the overhaul<br />
as compared to having the engine torn down once or twice<br />
for cylinder replacement before it reaches the recommended<br />
TBO as an overhauled engine. The added reliability must<br />
also be considered.<br />
With all the above a matter of record, there are still<br />
aircraft owners who write to ask for an honest opinion<br />
regarding "the risks of serious cracks in high-time<br />
cylinders." One such letter stated, "...we owners all know<br />
that <strong>Lycoming</strong> would prefer to sell us new cylinders at<br />
overhaul time." This is true, because experience tells us that<br />
new cylinders are in the owners best interest for the long<br />
run.<br />
For all those doubters who have read to this point, it is<br />
not necessary to take the word of anyone at <strong>Lycoming</strong> on<br />
this subject. The following material was written by Richard<br />
L. Collins, long time editor of Flying Magazine and<br />
currently a contributor to AOPA Pilot Magazine. The<br />
material written by Mr. Collins seems to confirm the stand<br />
which <strong>Lycoming</strong> has taken - the more hours of operation<br />
on a cylinder, the more likely it is to crack. With the<br />
permission of CBS Magazines, the following material is<br />
98<br />
reprinted from FLYING, March, 1987. Copyright 1987, CBS<br />
Magazines, from "On Top" by Dick Collins.<br />
CYLINDRICAL OBJECTS<br />
"It's amazing how long it can take to catch on to basic<br />
mechanical truths. This realization was sparked by a<br />
conversation with Jack Riley, Jr., principal in RAM Aircraft.<br />
The subject was the overhaul of the TSIO-520 engine in my<br />
airplane. Riley was surprised that the engine had been<br />
overhauled twice (both times at TBO) and had not had new<br />
cylinders. Then he launched into a dissertation on how the<br />
metal in cylinders wears out with operating time. The engine<br />
log revealed how right he was. On the first run of the engine<br />
from new, there were no cylinder problems. On the second<br />
run, with the original cylinders chromed, there was one<br />
incident of cylinder cracking (between a spark plug and the<br />
fuel injection line). On the third run of the engine, still using<br />
the original cylinders, there were four incidents of cylinder<br />
cracking - three between a plug and the injector and the<br />
fourth a large crack that finally led to a little chunk coming<br />
out of the inside of the cylinder. If I had sprung for new<br />
cylinders on the second overhaul I would have saved a lot of<br />
money, because changing a cylinder isn't exactly<br />
inexpensive. That knowledge - coupled with the fact that<br />
there was another cylinder with 4000 hours, and the rest had<br />
an undetermined amount of time on them (because they were<br />
reconditioned cylinders and no record is kept of total time on<br />
individual parts) - added some urgency to the matter of<br />
getting the engine to RAM for another overhaul and new<br />
cylinders. There is simply a time when some parts wear out.<br />
Until Riley told me that cylinders wear out, I had never<br />
heard of this. But they do, and I'll never again waste<br />
overhaul money on cylinders that have more than two TBO<br />
runs on them. And I'll never buy a reconditioned cylinder<br />
that has an undetermined amount of time on it."<br />
Top Overhaul ? ? ?<br />
We are frequently asked the question - should my engine<br />
have a top overhaul at some point between major overhauls?<br />
Our reply to that question is - top overhauls should only be<br />
done when needed on the diagnosis of a competent<br />
mechanic. It is unfortunate that people spend money<br />
needlessly on a top overhaul.<br />
If the new, remanufactured, or overhauled engine starts<br />
its TBO cycle with new cylinders and is treated to proper<br />
operation, good maintenance, and frequent flight, it should<br />
reach the recommended TBO without a top overhaul along<br />
the way. An overhauled engine that has reconditioned<br />
cylinders is not necessarily a candidate for a top overhaul,<br />
but it is very likely that it will require cylinder replacement<br />
before the recommended TBO is reached.
LYCOMING MODEL CODE FOR RECIPROCATING ENGINES<br />
Each <strong>Lycoming</strong> reciprocating engine has a model designation. The designation is made up of a prefix which is a series of<br />
letters, a three-digit number, and a suffix which combines letters and numbers. The letters and numbers in this model code have<br />
meaning. Most people who fly or work on general aviation aircraft are curious about the meaning of the code, but only a small<br />
number thoroughly understand it. Perhaps the explanation and examples provided here will promote a better understanding of<br />
what the engine model designations mean. Below are some examples:<br />
TO<br />
10<br />
10<br />
PREFIX<br />
L-Left-Hand Rotation Crankshaft<br />
T-Turbocharged (exhaust gas driven)<br />
I-Fuel Injected<br />
G-Geared (reduction gear)<br />
S-Supercharged (mechanical)<br />
V-Vertical Helicopter<br />
H-Horizontal Helicopter<br />
A-Aerobatic<br />
AE-Aerobatic Engine<br />
O-Opposed Cylinders<br />
With the information above and a<br />
few explanatory details, the <strong>Lycoming</strong><br />
engine code is not difficult to<br />
understand. Starting with the prefix<br />
section, an O will be found in the<br />
engine designation of all flat opposed<br />
cylinder engines. In addition to the 0, a<br />
combination of the other letters may be<br />
used to further describe the engine. The<br />
O alone indicates a carbureted engine.<br />
but an IO will show that the engine is<br />
fuel injected. A further example is the<br />
TIGO prefix. Broken down, this says<br />
that the engine is (T) turbocharged, (I)<br />
fuel injected, (G) geared (which means<br />
the prop will run at a lower speed than<br />
the crankshaft) and, finally, the (0) for<br />
opposed cylinders.<br />
360<br />
540<br />
360<br />
DISPLACEMENT<br />
Cubic Inches*<br />
*Note (541)-A<br />
displacement<br />
ending in "I"<br />
indicates a<br />
specific engine<br />
model which<br />
incorporates<br />
integral<br />
accessory drive.<br />
The three-digit number always<br />
provides an indication of engine size in<br />
terms of approximate cubic inches of<br />
displacement. Engines currently in<br />
production at <strong>Lycoming</strong> Williamsport<br />
have displacement values of 235, 320,<br />
360, 435, 480, 540, and 720 cubic<br />
inches.<br />
The suffix of the reciprocating<br />
engine code is a little more complex<br />
and the differences signified by each<br />
letter or number are not readily<br />
apparent. The first characters of the<br />
suffix will always apply to the parts of<br />
the engine indicated in the examples; in<br />
some cases, such as the 10-540-<br />
AAIA5, two characters are used to<br />
designate one section of the engine. The<br />
fourth place in the suffix will<br />
99<br />
CIA6D<br />
AAIA5<br />
A3B6D<br />
SUFFIX<br />
A- or AA-Power Section & Rating<br />
3-Nose Section<br />
B-Accessory Section<br />
6-Counterweight Application<br />
D-Dual Magneto<br />
(Subsequent changes to models<br />
are reflected in the suffix.)<br />
usually be a number to indicate a<br />
specific counterweight application.<br />
Depending upon the need for a<br />
counterweight number, a D may be<br />
used as either the 4th or 5th character.<br />
The D indicates that the engine uses a<br />
dual magneto contained in a single<br />
housing.<br />
To determine the minor differences<br />
in an engine model which are reflected<br />
in the model code suffix, it is necessary<br />
to consult the engine specification.<br />
Most aircraft owners or pilots will have<br />
no need for this type of detail. Those<br />
who are curious about an engine can get<br />
a good idea of its size and character by<br />
simply applying the model code<br />
information which has been presented<br />
in this brief outline.
• NOTES •