roomijsmaker ice cream maker sorbetière ... - Sc.trapeza.ru
roomijsmaker ice cream maker sorbetière ... - Sc.trapeza.ru
roomijsmaker ice cream maker sorbetière ... - Sc.trapeza.ru

Create successful ePaper yourself
Turn your PDF publications into a flip-book with our unique Google optimized e-Paper software.
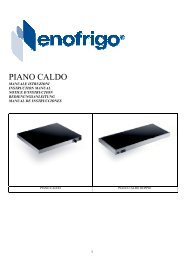
ROOMIJSMAKER<br />
INSTRUCTIES EN RECEPTEN<br />
ICE CREAM MAKER<br />
INSTRUCTIONS AND RECIPES<br />
SORBETIÈRE<br />
MODE D'EMPLOI ET RECETTES<br />
SPEISEEISMASCHINE<br />
BEDIENUNGSANLEITUNG UND REZEPTE<br />
GELATIERA<br />
ISTRUZIONI PER L’USO E RICETTE<br />
HELADERA<br />
INSTRUCCIONES Y RECETAS<br />
GLASSMASKIN<br />
INSTRUKTIONER OCH RECEPT<br />
ISKREM-MASKIN<br />
BRUKSANVISNING OG OPPSKRIFTER<br />
JÄÄTELÖKONE<br />
KÄYTTÖOHJEET JA RESEPTIT<br />
ISMASKINE<br />
INSTRUKTIONER OG OPSKRIFTER<br />
SORVETEIRA<br />
INSTRUÇÕES E RECEITAS<br />
ÍSGERÐARTÆKI<br />
LEIÐBEININGAR OG UPPSKRIFTIR<br />
ΠΑΓΩΤΟΜΗΧΑΝΗ<br />
OΔHΓIEΣ KAI ΣYNTAΓEΣ<br />
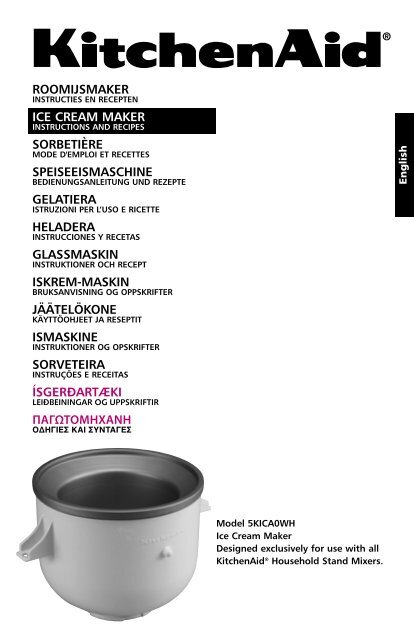
Model 5KICA0WH<br />
Ice Cream Maker<br />
Designed exclusively for use with all<br />
KitchenAid ® Household Stand Mixers.<br />
English
English<br />
Table of Contents<br />
Ice Cream Maker Safety ..................................................................................................1<br />
Important Safeguards .....................................................................................................1<br />
Ice Cream Maker Features ...............................................................................................2<br />
Assembling the Ice Cream Maker Attachment for Tilt-Head Mixer ...................................3<br />
Assembling the Ice Cream Maker Attachment for Bowl-Lift Mixer ...................................5<br />
Using the Ice Cream Maker Attachment .........................................................................7<br />
Tips for Making Perfect Ice Cream ...................................................................................7<br />
Care and Cleaning ..........................................................................................................8<br />
Recipes ...........................................................................................................................8<br />
KitchenAid ® Household Stand Mixer Attachment Warranty ...........................................13<br />
Serv<strong>ice</strong> Centers ..............................................................................................................13<br />
Customer Serv<strong>ice</strong> ..........................................................................................................14
Ice Cream Maker Safety<br />
Your safety and the safety of others are very important.<br />
We have provided many important safety messages in this manual and on your<br />
appliance. Always read and obey all safety messages.<br />
This is the safety alert symbol.<br />
This symbol alerts you to potential hazards that can kill or hurt you<br />
and others.<br />
All safety messages will follow the safety alert symbol and either<br />
the word “DANGER” or “WARNING.” These words mean:<br />
You can be killed or seriously<br />
DANGER injured if you don’t immediately<br />
follow inst<strong>ru</strong>ctions.<br />
You can be killed or seriously injured<br />
if you don’t follow inst<strong>ru</strong>ctions.<br />
WARNING<br />
All safety messages will tell you what the potential hazard is, tell you how to<br />
reduce the chance of injury, and tell you what can happen if the inst<strong>ru</strong>ctions are<br />
not followed.<br />
IMPORTANT SAFEGUARDS<br />
When using electrical appliances, basic safety precautions should always be followed<br />
including the following:<br />
1. Read all inst<strong>ru</strong>ctions.<br />
2. To protect against risk of electrical shock, do not put mixer in water or other liquid.<br />
3. The appliance is not intended for use by young children or infirm persons without<br />
supervision.<br />
4. Unplug from outlet when not in use, before putting on or taking off parts, and<br />
before cleaning.<br />
5. Avoid contacting moving parts. Keep fingers out of discharge opening.<br />
6. Do not operate the mixer with a damaged cord or plug or after the mixer<br />
malfunctions, or is dropped or damaged in any manner. Return the mixer to the<br />
nearest Authorized Serv<strong>ice</strong> Center for examination, repair or electrical or mechanical<br />
adjustment.<br />
7. The use of attachments not recommended or sold by KitchenAid may cause fire,<br />
electric shock or injury.<br />
8. Do not use the mixer outdoors.<br />
9. Do not let the cord hang over the edge of table or counter.<br />
10. This product is designed for household use only.<br />
SAVE THESE INSTRUCTIONS<br />
1<br />
English
English<br />
Ice Cream Maker Features<br />
Freeze Bowl — Once completely frozen,<br />
liquid within the double walls of the bowl<br />
provides thorough, even freezing of <strong>ice</strong><br />
<strong>cream</strong> batter throughout the mixing process.<br />
Drive Assembly — Attaches to the<br />
motor head, above the ring on the beater<br />
shaft, and drives dasher on all European<br />
KitchenAid ® Stand Mixers.<br />
2<br />
Dasher — Engages with the drive assembly<br />
to spread, scrape and mix <strong>ice</strong> <strong>cream</strong> batter<br />
within the freeze bowl.<br />
NOTE: The freeze bowl must be<br />
completely frozen to make <strong>ice</strong> <strong>cream</strong>.<br />
IMPORTANT: Never wash the freeze bowl<br />
in dishwasher.
Assembling the Ice Cream Maker<br />
Attachment for Tilt-Head Mixer*<br />
<br />
To Assemble Freeze Bowl and Dasher:<br />
NOTE: Use the freeze bowl immediately<br />
upon removal from freezer, as it begins to<br />
thaw once removed.<br />
IMPORTANT: Do not pour <strong>ice</strong> <strong>cream</strong><br />
batter into the freeze bowl until all parts<br />
are assembled and the mixer is <strong>ru</strong>nning.<br />
1. Turn stand mixer speed-control to “O”<br />
(off) and unplug mixer.<br />
2. Tilt motor head back and remove<br />
mixing bowl.<br />
3. Place dasher inside the freeze bowl.<br />
4. Place the freeze bowl on bowl-clamping<br />
plate.<br />
5. Gently turn the freeze bowl in<br />
counterclockwise direction (in direction of<br />
) to secure. The freeze bowl should fit<br />
the bowl-clamping plate tightly.<br />
BOWL-<br />
CLAMPING<br />
PLATE<br />
CAUTION: Unplug before inserting of removing parts<br />
* For bowl-lift mixer, see page 5 and 6.<br />
3<br />
English
English<br />
Assembling the Ice Cream Maker<br />
Attachment for Tilt-Head Mixer*<br />
To Attach Drive-Assembly:<br />
1. Be sure speed-control is still on “O”<br />
(off) and mixer is unplugged.<br />
2. Motor head should still be tilted, and<br />
the freeze bowl and dasher should be<br />
in place.<br />
3. Determine your mixer model by checking<br />
for a spring on the beater shaft, and<br />
then position the drive assembly as<br />
illustrated for proper placement.<br />
No Step<br />
Spring<br />
Wider End<br />
(marked “A”)<br />
Narrower<br />
End<br />
(marked “B”)<br />
Step<br />
No Spring<br />
4. Slide drive assembly onto the motor<br />
head until it will not slide any further.<br />
When properly assembled, the outer<br />
curved edges of the drive assembly<br />
should center on the motor head. If<br />
they are not centered, slide the drive<br />
assembly either back or forward until it<br />
is centered on the motor head. Make<br />
sure the drive assembly is securely in<br />
place by pressing upward.<br />
MOTOR HEAD<br />
BEATER<br />
SHAFT<br />
NOTE: If drive assembly will not fit onto<br />
the motor head, try using the other side of<br />
the drive assembly.<br />
5. Lower the motor head to engage the<br />
drive assembly with the dasher. If the<br />
drive assembly doesn’t engage the<br />
dasher, slide the drive assembly either<br />
back or forward until it does engage<br />
the dasher properly.<br />
6. Make sure the motor head is down<br />
completely.<br />
7. Place locking lever in the LOCK position.<br />
8. Before mixing, test the lock by<br />
attempting to raise the motor head.<br />
9. Plug the mixer into a grounded<br />
3-prong outlet.<br />
* For bowl-lift mixer, see page 5 and 6.<br />
4
Assembling the Ice Cream Maker Attachment<br />
for Bowl-Lift Mixer*<br />
To Assemble Freeze Bowl and Dasher:<br />
NOTE: Use the freeze bowl immediately<br />
upon removal from the freezer, as it<br />
begins to thaw once removed.<br />
IMPORTANT: Do not pour <strong>ice</strong> <strong>cream</strong><br />
batter into the freeze bowl until all parts<br />
are assembled and the mixer is <strong>ru</strong>nning.<br />
1. Turn stand mixer speed-control to “O”<br />
(off) and unplug mixer.<br />
2. Place bowl-lift handle in down position<br />
and remove mixing bowl.<br />
3. Fit the freeze bowl into place over the<br />
locating pins.<br />
4. Press down on the back of the freeze<br />
bowl until the bowl pin snaps into the<br />
spring latch.<br />
LOCATING<br />
PIN<br />
NOTE: The freeze bowl is designed to fit all<br />
bowl-lift mixers. If the bowl pin at the back<br />
of the bowl is too short or too long to snap<br />
into the spring latch, remove and rotate the<br />
bowl so the opposite bowl pin faces the<br />
spring latch. Repeat steps 3 and 4.<br />
Pin too<br />
short<br />
Correct<br />
pin fit<br />
5. Place the dasher inside the freeze<br />
bowl.<br />
* For tilt-head mixer, see page 3 and 4.<br />
5<br />
English
English<br />
Assembling the Ice Cream Maker Attachment<br />
for Bowl-Lift Mixer*<br />
To Attach Drive Assembly:<br />
1. Be sure the speed-control is still on “O”<br />
(off) and the mixer is unplugged.<br />
2. Make sure the bowl-lift handle is still in<br />
the down position, and the freeze bowl<br />
and dasher are in place.<br />
3. Determine your mixer model by<br />
checking for a spring on the beater<br />
shaft, then position the drive assembly<br />
as illustrated for proper placement.<br />
4. Slide drive assembly onto the motor<br />
head until it will not slide any further.<br />
When properly assembled, the outer<br />
curved edges of the drive assembly<br />
should center on the motor head. If<br />
they are not centered, slide the drive<br />
assembly either back or forward until it<br />
is centered on the motor head. Make<br />
sure the drive assembly is securely in<br />
place by pressing upward.<br />
BEATER<br />
SHAFT<br />
No Step<br />
Spring<br />
Wider End<br />
(marked “A”)<br />
Narrower<br />
End<br />
(marked “B”)<br />
Step<br />
No Spring<br />
MOTOR<br />
HEAD<br />
NOTE: If drive assembly will not fit onto<br />
the motor head, try using the other side of<br />
the drive assembly.<br />
5. Raise the bowl to engage the dasher<br />
with the drive assembly before mixing.<br />
If the drive assembly doesn’t engage<br />
the dasher, slide the drive assembly<br />
either back or forward until it does<br />
engage the dasher properly.<br />
6. Plug the mixer into a grounded<br />
3-prong outlet.<br />
* For tilt-head mixer, see page 3 and 4.<br />
6
Using the Ice Cream Maker Attachment<br />
To Use:<br />
IMPORTANT: Pouring batter into the<br />
freeze bowl before starting the mixer may<br />
cause the batter to freeze prematurely and<br />
lock the dasher.<br />
1. Store the freeze bowl in the freezer for<br />
a minimum of 15 hours.<br />
2. Prepare <strong>ice</strong> <strong>cream</strong> batter in advance<br />
(see “Tips for Perfect Ice Cream”).<br />
3. Assemble and engage the freeze bowl,<br />
dasher, and drive assembly.<br />
4. Set the mixer to speed 1 (STIR) and<br />
pour the <strong>ice</strong> <strong>cream</strong> batter into the<br />
freeze bowl; mix 20-30 minutes, or<br />
to desired consistency. Add any solid<br />
ingredients such as f<strong>ru</strong>its, nuts, candies,<br />
or chocolate chips, after 12-15 minutes<br />
of the mixing process.<br />
NOTE: If the dasher begins to slip and<br />
make a clicking noise, this is an audible<br />
indicator that the <strong>ice</strong> <strong>cream</strong> is done.<br />
7<br />
5. Remove the dasher and the freeze bowl<br />
and, using a <strong>ru</strong>bber spatula or a plastic<br />
or wooden spoon, transfer <strong>ice</strong> <strong>cream</strong><br />
to dessert dishes or to an airtight<br />
container for storage.<br />
NOTE: The Ice Cream Maker Attachment<br />
will create a soft-consistency <strong>ice</strong> <strong>cream</strong>.<br />
For firmer consistency, store <strong>ice</strong> <strong>cream</strong><br />
in an airtight container in the freezer for<br />
2-4 hours.<br />
IMPORTANT: Do not store <strong>ice</strong> <strong>cream</strong> in<br />
the freeze bowl in the freezer. Prying hard<br />
<strong>ice</strong> <strong>cream</strong> out of the freeze bowl with<br />
metal scoops or utensils may damage the<br />
freeze bowl.<br />
Tips for Making Perfect Ice Cream<br />
The freeze bowl must be completely<br />
frozen to make <strong>ice</strong> <strong>cream</strong> or other<br />
frozen desserts.<br />
For best results, store the freeze bowl<br />
in the back of your freezer where the<br />
temperature is coldest for at least 15<br />
hours. Adjusting your freezer to its<br />
coldest setting will help the freeze bowl<br />
make firmer <strong>ice</strong> <strong>cream</strong> faster.<br />
Storing the freeze bowl in the freezer<br />
at all times allows you the flexibility<br />
to make your favorite frozen desserts<br />
on a whim.<br />
For recipes that need to be pre-cooked,<br />
allow the mixture to cool completely in<br />
the refrigerator.<br />
All batter recipes need to be completely<br />
chilled in the refrigerator before<br />
making <strong>ice</strong> <strong>cream</strong>.<br />
Most <strong>ice</strong> <strong>cream</strong> recipes call for a<br />
combination of <strong>cream</strong>, milk, eggs, and<br />
sugar. The type of <strong>cream</strong> you choose<br />
will determine how rich in flavor and<br />
how <strong>cream</strong>y the texture of the<br />
finished result. The higher percentage<br />
of fat in the <strong>cream</strong>, the richer and<br />
<strong>cream</strong>ier your <strong>ice</strong> <strong>cream</strong> will be.<br />
Any combination can be used, as<br />
long as the liquid measurement stays<br />
the same. Lighter <strong>ice</strong> <strong>cream</strong>s can be<br />
made by using more milk than <strong>cream</strong>,<br />
or by eliminating <strong>cream</strong>. Skim milk will<br />
work, but there will be a not<strong>ice</strong>able<br />
difference in texture.<br />
TYPE OF CREAM FAT %<br />
Heavy Cream .................................... 36%<br />
Whipping Cream .............................. 30%<br />
Light Cream ...................................... 18%<br />
Half and Half .................................... 10%<br />
When mixing an <strong>ice</strong> <strong>cream</strong> recipe that<br />
calls for solid ingredients such as f<strong>ru</strong>its,<br />
nuts, candies, or chocolate chips, it is<br />
best to wait until the final two minutes<br />
of the mixing process to add them.<br />
Ice <strong>cream</strong> making is a two-part process:<br />
conversion and ripening. Mixing batter<br />
into <strong>ice</strong> <strong>cream</strong> is the conversion process<br />
in which the <strong>ice</strong> <strong>cream</strong> consistency will<br />
be similar to soft serve. The ripening<br />
process takes place in the freezer,<br />
where the <strong>ice</strong> <strong>cream</strong> will harden over a<br />
period of 2-4 hours.<br />
(continued on page 8)<br />
English
English<br />
(continued)Tips for Making Perfect Ice Cream (continued)<br />
Follow recommended mixer speeds. Faster<br />
speeds will slow the conversion process.<br />
Batter volume grows significantly<br />
during the conversion process.<br />
Allow the freeze bowl to reach room<br />
temperature before attempting to clean it.<br />
The drive assembly and dasher are<br />
dishwasher safe.<br />
600 mL (2 1 ⁄2 cups )<br />
half-and-half<br />
8 egg yolks<br />
230 g (1 cup) sugar<br />
600 mL (2 1 ⁄2 cups)<br />
whipping <strong>cream</strong><br />
4 teaspoons vanilla<br />
A pinch of salt<br />
Care and Cleaning<br />
8<br />
Initial batter volume should not exceed<br />
1.365 L to produce 1,9 L of <strong>ice</strong> <strong>cream</strong>.<br />
Keep in mind that freezing subdues<br />
sweetness, so recipes won’t taste quite<br />
as sweet once they are frozen.<br />
Wash the freeze bowl in warm water with<br />
mild detergent. Thoroughly dry the freeze<br />
bowl before storing in freezer.<br />
IMPORTANT: Never wash the freeze bowl<br />
in the dishwasher. Hand-wash with warm<br />
water and mild detergent only.<br />
French Vanilla Ice Cream<br />
In medium saucepan over medium heat, heat half-andhalf<br />
until very hot but not boiling, stirring often. Remove<br />
from heat; set aside.<br />
Place egg yolks and sugar in mixer bowl. Attach bowl<br />
and wire whip to mixer. Turn to Speed 2 and mix about<br />
30 seconds, or until well blended and slightly thickened.<br />
Continuing on Speed 2, very gradually add half-andhalf;<br />
mix until blended. Return half-and-half mixture to<br />
medium saucepan; cook over medium heat until small<br />
bubbles form around edge and mixture is steamy, stirring<br />
constantly. Do not boil. Transfer half-and-half mixture into<br />
large bowl; stir in whipping <strong>cream</strong>, vanilla, and salt. Cover<br />
and chill thoroughly, at least 8 hours.<br />
Assemble and engage freeze bowl, dasher, and drive<br />
assembly as directed in attachment inst<strong>ru</strong>ctions. Turn to<br />
STIR Speed (Speed 1). Using a container with a spout,<br />
pour mixture into freeze bowl. Continue on STIR (Speed<br />
1) for 15 to 20 minutes or until desired consistency.<br />
Immediately transfer <strong>ice</strong> <strong>cream</strong> into serving dishes, or<br />
freeze in an airtight container.<br />
Yield: 16 servings (120 mL [ 1 ⁄2 cup] per serving).<br />
VARIATIONS<br />
Fresh Strawberry Ice Cream<br />
In medium bowl, combine 2 cups (500 g) chopped, fresh<br />
strawberries (or other fresh f<strong>ru</strong>it) and 2 to 3 teaspoons<br />
sugar, if desired. Let stand while <strong>ice</strong> <strong>cream</strong> is processing.<br />
Add during last 3 to 5 minutes of freeze time.<br />
Yield: 20 servings (120 mL [ 1 ⁄2 cup] per serving).
(continued) French Vanilla Ice Cream (continued)<br />
450 mL (2 cups)<br />
whipping <strong>cream</strong>,<br />
divided<br />
1 square (30 g [1 oz.])<br />
extra-dark chocolate,<br />
cut into chunks<br />
1 square (30 g [1 oz.])<br />
dark chocolate, cut<br />
into chunks<br />
450 mL (2 cups)<br />
half-and-half<br />
230 g (1 cup) sugar<br />
40 g unsweetened<br />
cocoa powder<br />
8 egg yolks<br />
4 teaspoons<br />
vanilla<br />
A pinch of salt<br />
1 bar (50 g [1.55 oz.])<br />
milk chocolate,<br />
chopped<br />
VARIATIONS<br />
Cookies ’n Cream Ice Cream<br />
Add 100 g ( 1 ⁄2 cup) chopped, <strong>cream</strong>-filled chocolate<br />
sandwich cookies (or other cookies, nuts, or candy) during<br />
last 1 to 2 minutes of freeze time.<br />
Yield: 19 servings (120 mL [ 1 ⁄2 cup] per serving).<br />
Triple Chocolate Ice Cream<br />
In small saucepan, place 120 mL whipping <strong>cream</strong>, extra-dark<br />
chocolate, and dark chocolate. Heat over medium-low heat<br />
until chocolate melts, stirring frequently. Remove from heat;<br />
set aside. In medium saucepan over medium heat, heat<br />
half-and-half until very hot but not boiling, stirring often.<br />
Remove from heat; set aside.<br />
In small bowl, combine sugar and cocoa powder. Set aside.<br />
Place egg yolks in mixer bowl. Attach bowl and wire whip<br />
to mixer. Turn to Speed 2 and gradually add sugar mixture;<br />
mix about 30 seconds, or until well blended and slightly<br />
thickened. Continuing on Speed 2, very gradually add<br />
chocolate mixture and half-and-half; mix until well blended.<br />
Return half-and-half mixture to medium saucepan; stirring<br />
constantly, cook over medium heat until small bubbles form<br />
around edge and mixture is steamy. Do not boil. Transfer<br />
half-and-half mixture into large bowl; stir in remaining<br />
330 mL (11 ⁄2 cups) whipping <strong>cream</strong>, vanilla, and salt.<br />
Cover and chill thoroughly, at least 8 hours.<br />
Assemble and engage freeze bowl, dasher, and drive<br />
assembly as directed in attachment inst<strong>ru</strong>ctions. Turn to<br />
STIR Speed (Speed 1). Using a container with a spout,<br />
pour mixture into freeze bowl. Continue on STIR (Speed 1)<br />
for 10 to 15 minutes or until desired consistency, adding<br />
milk chocolate during last 1 to 2 minutes of freeze time.<br />
Immediately transfer <strong>ice</strong> <strong>cream</strong> into serving dishes, or freeze<br />
in an airtight container.<br />
Yield: 16 servings (120 mL [ 1 ⁄2 cup] per serving).<br />
9<br />
English
English<br />
850 mL (3 1 ⁄2 cups)<br />
whole milk<br />
1 can (415 mL [14 oz.])<br />
unsweetened<br />
condensed milk<br />
230 mL (1 cup) prepared<br />
hot caramel or<br />
butterscotch caramel<br />
topping (about<br />
340 g [12 oz.])<br />
1 package (100 g<br />
[3.4 oz.]) instant<br />
vanilla pudding<br />
1 teaspoon vanilla<br />
A pinch of salt<br />
50- 100 g coarsely<br />
chopped pecans<br />
150 g gingerbread, broken<br />
in small pieces<br />
600 mL (2 1 ⁄2 cups)<br />
whole milk<br />
100 g sugar<br />
1 tablespoon honey<br />
6 egg yolks<br />
Caramel Pecan Ice Cream<br />
In medium bowl, place all ingredients except pecans. Whisk<br />
until well blended and pudding is dissolved. Cover and chill<br />
thoroughly, at least 6 hours.<br />
Assemble and engage freeze bowl, dasher, and drive<br />
assembly as directed in attachment inst<strong>ru</strong>ctions. Turn to STIR<br />
Speed (Speed 1). Using container with spout, pour mixture<br />
into freeze bowl. Continue on STIR (Speed 1) for 15-20<br />
minutes or until desired consistency, adding pecans during<br />
last 1 minute of freeze time. Immediately transfer <strong>ice</strong> <strong>cream</strong><br />
into serving dishes, or freeze in an airtight container.<br />
Yield: 16 servings (120 mL [ 1 ⁄2 cup] per serving).<br />
Gingerbread Ice Cream<br />
In medium saucepan, heat over whole milk until very hot<br />
but not boiling, stirring often. Remove from heat and add<br />
small pieces of gingerbread.<br />
Place egg yolks, honey and sugar in mixer bowl. Attach bowl<br />
and wire whip to mixer. Turn to speed 4 and mix about<br />
30 seconds, or until well blended and slightly whitened.<br />
Stirring constantly, cook the whole milk and gingerbread<br />
mixture until gingerbread melts.Gradually add the egg<br />
yolks, honey and sugar mixture. Do not boil. Remove from<br />
heat; set aside. Cover and chill thoroughly, at least 8 hours.<br />
Assemble and engage freeze bowl, dasher, and drive<br />
assembly as directed in attachment inst<strong>ru</strong>ctions. Turn to<br />
STIR Speed (Speed 1). Using a container with a spout,<br />
pour mixture into freeze bowl. Continue on STIR (Speed 1)<br />
for 10 to 15 minutes or until desired consistency.<br />
Immediately transfer <strong>ice</strong> <strong>cream</strong> into serving dishes, or<br />
freeze in an airtight container.<br />
Yield: 8 servings (120 mL per serving).<br />
10
500 mL (2 cups) reducedfat<br />
(2%) milk<br />
4 (5 x 2 cm [2 x 3 ⁄4 -inch])<br />
strips orange peel<br />
4 (5 x 2 cm [2 x 3 ⁄4 -inch])<br />
strips lemon peel<br />
6 coffee beans<br />
5 egg yolks<br />
170 g ( 3 ⁄4 cup) sugar<br />
750 g raspberries<br />
90 mL ( 1 ⁄4 cup plus 2<br />
tablespoons) water<br />
300 mL (1 1 ⁄4 cups) Simple<br />
Sy<strong>ru</strong>p (recipe follows)<br />
Simple Sy<strong>ru</strong>p<br />
500 g (2 cups) sugar<br />
500 mL (2 cups) water<br />
Creamy Lemon-Orange Gelato<br />
<strong>Sc</strong>ald milk with orange peel, lemon peel and coffee beans<br />
in heavy medium saucepan.<br />
Whisk yolks and sugar in medium bowl to blend.<br />
Gradually whisk half of milk mixture into yolks. Return<br />
yolks to saucepan with remaining milk. Stir over low heat<br />
until mixture thickens slightly and leaves path on back of<br />
spoon when finger is drawn across, about 8 minutes;<br />
do not boil. Strain into medium bowl. Refrigerate until<br />
well chilled.<br />
Assemble and engage freeze bowl, dasher, and drive<br />
assembly as directed in attachment inst<strong>ru</strong>ctions. Turn to<br />
Stir Speed. Using a container with a spout, pour mixture<br />
into freeze bowl. Continue on Stir Speed for 15 to 20<br />
minutes or until desired consistency. Transfer <strong>ice</strong> <strong>cream</strong> to<br />
airtight container and freeze several hours to allow flavors<br />
to ripen. Can be prepared up to 4 days ahead. If frozen<br />
solid, soften slightly in refrigerator about 20 minutes<br />
before serving.<br />
Yield: 8 servings (120 mL [ 1 ⁄2 cup] per serving).<br />
Fresh Raspberry Sorbet<br />
Combine raspberries and water in bowl of food<br />
processor fitted with metal blade. Process until very<br />
smooth; pour through fine mesh strainer, pressing down<br />
lightly on solids trapped in strainer to extract as much<br />
liquid as possible without forcing solids through strainer.<br />
Discard solid. Pour liquid into airtight container and<br />
refrigerate until thoroughly chilled, at least 8 hours.<br />
Assemble and engage freeze bowl, dasher, and drive assembly<br />
as directed in attachment inst<strong>ru</strong>ctions. Turn to STIR (Speed 1).<br />
Combine chilled raspberry ju<strong>ice</strong> and chilled simple sy<strong>ru</strong>p.<br />
Using a container with a spout, pour mixture into freeze<br />
bowl. Continue on STIR (Speed 1) for 7 to 12 minutes or<br />
until desired consistency. Immediately transfer sorbet into<br />
airtight container and freeze at least 2 hours before serving.<br />
Yield: 8 servings (230 mL [1 cup] per serving).<br />
Combine sugar and water in saucepan. Bring to a boil<br />
over medium-high heat; cook and stir until sugar dissolves<br />
completely, about 10 minutes. Transfer to <strong>ice</strong> bath,<br />
stirring until well chilled. Refrigerate until ready to use.<br />
Yield: 710 mL (3 cups) sy<strong>ru</strong>p<br />
11<br />
English
English<br />
Other Sorbets<br />
Substitute the following<br />
quantities of ingredients for<br />
the ingredients listed on the<br />
previous page to make these<br />
sorbets:<br />
230 g (1 cup) sugar<br />
700 mL (3 cups)<br />
whole milk<br />
60 mL ( 1 ⁄4 cup) cane<br />
sugar sy<strong>ru</strong>p<br />
3 ripe mangoes, peeled,<br />
seeded, and chopped<br />
(about 700 mL<br />
[3 cups])<br />
2 tablespoons fresh<br />
lime or lemon ju<strong>ice</strong><br />
2 teaspoons finely<br />
chopped fresh mint,<br />
if desired<br />
Flavor F<strong>ru</strong>it Plus Water<br />
Lemon<br />
Mango<br />
Kiwi<br />
Pineapple<br />
Blueberry<br />
12<br />
475 mL<br />
(2 cups)<br />
lemon<br />
ju<strong>ice</strong><br />
475 mL<br />
(2 cups)<br />
chopped<br />
475 mL<br />
(2 cups)<br />
chopped<br />
475 mL<br />
(2 cups)<br />
chopped<br />
1.2 L<br />
(5 cups)<br />
none<br />
60 to 120 mL<br />
( 1 ⁄4 to 1 ⁄2 cup)<br />
135 mL ( 1 ⁄2 cup<br />
plus 1 tablespoon)<br />
(15 mL) lime ju<strong>ice</strong><br />
75 mL ( 1 ⁄4 cup<br />
plus 1 tablespoon)<br />
lime ju<strong>ice</strong><br />
90 mL ( 1 ⁄4 cup plus<br />
2 tablespoons)<br />
lime ju<strong>ice</strong><br />
Minted Mango Sherbet<br />
Plus<br />
Simple<br />
Sy<strong>ru</strong>p<br />
300 mL<br />
(1 1 ⁄4 cups)<br />
300 mL<br />
(1 1 ⁄4 cups)<br />
300 mL<br />
(1 1 ⁄4 cups)<br />
300 mL<br />
(1 1 ⁄4 cups)<br />
300 mL<br />
(1 1 ⁄4 cups)<br />
In medium saucepan, combine sugar, milk, and corn sy<strong>ru</strong>p.<br />
Heat over medium heat, stirring often, until very hot but<br />
not boiling. Remove from heat; set aside.<br />
Place mangoes and lime ju<strong>ice</strong> in food processor work<br />
bowl; use the multipurpose blade to process until<br />
smooth. Add mango mixture and mint to milk mixture.<br />
Cover and chill thoroughly, at least 8 hours.<br />
Assemble and engage freeze bowl, dasher, and drive<br />
assembly as directed in attachment inst<strong>ru</strong>ctions. Turn to<br />
STIR Speed (Speed 1). Using a container with a spout,<br />
pour mixture into freeze bowl. Continue on STIR<br />
(Speed 1) for 7 to 12 minutes or until desired consistency.<br />
Immediately transfer sherbet into serving dishes, or freeze<br />
in an airtight container.<br />
Yield: 14 servings (120 mL [ 1 ⁄2 cup] per serving).
Length of<br />
Warranty:<br />
KitchenAid ® Household<br />
Stand Mixer Attachment Warranty<br />
Europe, Australia &<br />
New Zealand: Two Year<br />
Full Warranty from date of<br />
purchase.<br />
Other:<br />
One Year Full Warranty<br />
from date of purchase.<br />
KitchenAid<br />
Will Pay For:<br />
KITCHENAID DOES NOT ASSUME ANY RESPONSIBILITY FOR<br />
INDIRECT DAMAGES.<br />
All serv<strong>ice</strong> should be handled locally by<br />
an Authorized KitchenAid Serv<strong>ice</strong> Center.<br />
Contact the dealer from whom the unit<br />
was purchased to obtain the name of the<br />
nearest Authorized KitchenAid Serv<strong>ice</strong><br />
Center.<br />
In the U.K.:<br />
Call: 0845 6011 287<br />
Replacement parts and<br />
repair labor costs to<br />
correct defects in materials<br />
or workmanship. Serv<strong>ice</strong><br />
must be provided by an<br />
Authorized KitchenAid<br />
Serv<strong>ice</strong> Center.<br />
Serv<strong>ice</strong> Centers<br />
13<br />
In Ireland:<br />
M.X. ELECTRIC<br />
Serv<strong>ice</strong> Department<br />
25 Alymer Crescent<br />
Kilcock, CO.KILDARE<br />
Call: 1 679 2398/87 2581574<br />
Fax: 1 628 4368<br />
In Australia:<br />
Call: 1800 990 990<br />
In New Zealand:<br />
Call: 0800 881 200<br />
KitchenAid<br />
Will Not Pay For:<br />
A. Repairs when Ice<br />
Cream Maker is used<br />
for operations<br />
other than normal<br />
household food<br />
preparation.<br />
B. Damage resulting from<br />
accident, alterations,<br />
misuse, abuse, or<br />
installation/operation<br />
not in accordance with<br />
local electrical codes.<br />
English
English<br />
Customer Serv<strong>ice</strong><br />
In U.K. & Ireland: Tollfree number 00800 38104026<br />
Address: KitchenAid Europa, Inc.<br />
PO BOX 19<br />
B-2018 ANTWERP 11<br />
BELGIUM<br />
www.KitchenAid.com<br />
® Registered Trademark of KitchenAid, U.S.A.<br />
Trademark of KitchenAid, U.S.A.<br />
The shape of the stand mixer is a trademark of KitchenAid, U.S.A.<br />
© 2006. All rights reserved.<br />
Specifications subject to change without not<strong>ice</strong>.<br />
9709864 (4042dZw806)<br />
14