QF9SS Cooker hood
QF9SS Cooker hood
QF9SS Cooker hood

You also want an ePaper? Increase the reach of your titles
YUMPU automatically turns print PDFs into web optimized ePapers that Google loves.
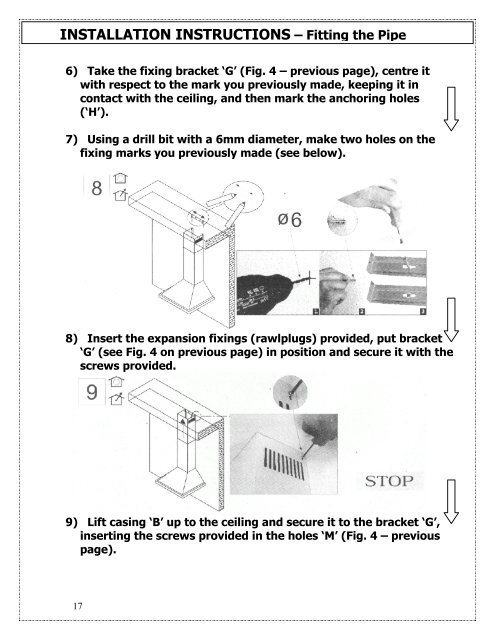
INSTALLATION INSTRUCTIONS – Fitting the Pipe<br />
6) Take the fixing bracket ‘G’ (Fig. 4 – previous page), centre it<br />
with respect to the mark you previously made, keeping it in<br />
contact with the ceiling, and then mark the anchoring holes<br />
(‘H’).<br />
7) Using a drill bit with a 6mm diameter, make two holes on the<br />
fixing marks you previously made (see below).<br />
8) Insert the expansion fixings (rawlplugs) provided, put bracket<br />
‘G’ (see Fig. 4 on previous page) in position and secure it with the<br />
screws provided.<br />
9) Lift casing ‘B’ up to the ceiling and secure it to the bracket ‘G’,<br />
inserting the screws provided in the holes ‘M’ (Fig. 4 – previous<br />
page).<br />
17