Download 12ft Trampoline Set Manual - Pure Global Brands, Inc.
Download 12ft Trampoline Set Manual - Pure Global Brands, Inc.
Download 12ft Trampoline Set Manual - Pure Global Brands, Inc.

You also want an ePaper? Increase the reach of your titles
YUMPU automatically turns print PDFs into web optimized ePapers that Google loves.
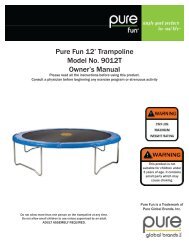
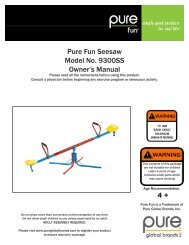
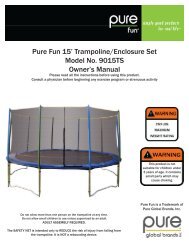
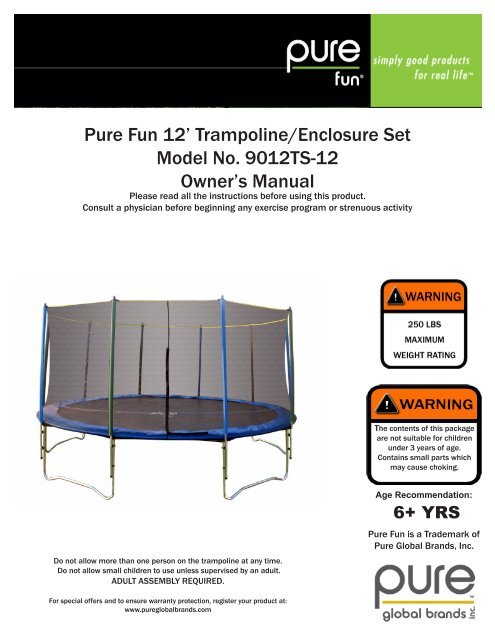
<strong>Pure</strong> Fun 12’ <strong>Trampoline</strong>/Enclosure <strong>Set</strong><br />
Model No. 9012TS-12<br />
Owner’s <strong>Manual</strong><br />
Please read all the instructions before using this product.<br />
Consult a physician before beginning any exercise program or strenuous activity<br />
Do not allow more than one person on the trampoline at any time.<br />
Do not allow small children to use unless supervised by an adult.<br />
ADULT ASSEMBLY REQUIRED.<br />
For special offers and to ensure warranty protection, register your product at:<br />
www.pureglobalbrands.com<br />
The contents of this package<br />
are not suitable for children<br />
under 3 years of age.<br />
Contains small parts which<br />
may cause choking.<br />
Age Recommendation:<br />
6+ YRS<br />
<strong>Pure</strong> Fun is a Trademark of<br />
<strong>Pure</strong> <strong>Global</strong> <strong>Brands</strong>, <strong>Inc</strong>.
OWNERS MANUAL<br />
CUSTOMER SERVICE INFORMATION<br />
Thank you for purchasing our <strong>Pure</strong> Fun 12’ <strong>Trampoline</strong>/Enclosure <strong>Set</strong>.<br />
At <strong>Pure</strong> <strong>Global</strong> <strong>Brands</strong>, we want all of our customers to be completely satisfied with their purchase.<br />
Please take time to review the contents of the product you have just received to make sure that all<br />
of the parts are included. If you find that any parts are missing or damaged, we will happily provide<br />
replacement parts at no charge within 30 days of purchase. Please keep in mind that for select damaged<br />
part replacement requests, we will require a photo for submission to our quality control office.<br />
To order these parts, or if you have any other questions or concerns about this <strong>Pure</strong> <strong>Global</strong> product,<br />
please e-mail the <strong>Pure</strong> <strong>Global</strong> <strong>Brands</strong>, <strong>Inc</strong>. customer service department at:<br />
customerservice@puregbi.com or contact us at 1-866-498-5269. You can also visit our website at:<br />
www.pureglobalbrands.com<br />
If you request replacement parts, please be sure to include the following information in your correspondence:<br />
YOUR NAME<br />
YOUR MAILING ADDRESS<br />
YOUR EMAIL ADDRESS<br />
RETAILER WHERE YOU PURCHASED PRODUCT<br />
DATE OF PURCHASE<br />
ORDER # (IF AVAILABLE)<br />
PRODUCT MODEL #: 9012TS-12<br />
SERIAL #<br />
PRODUCT NAME: 12 Foot TRAMPOLINE/ENCLOSURE COMBO SET<br />
PART # (located in manual)<br />
QUANITITY NEEDED<br />
PICTURE OF DAMAGED PART(s) – SUBMIT VIA Email , Fax, or Mail<br />
Again, thank you for purchasing a <strong>Pure</strong> <strong>Global</strong> <strong>Brands</strong> product.<br />
Sincerely,<br />
Customer Service<br />
<strong>Pure</strong> <strong>Global</strong> <strong>Brands</strong>, <strong>Inc</strong>.<br />
Phone:1-866-498-5269<br />
Email: customerservice@puregbi.com<br />
2253 Vista Parkway, Suite 11<br />
West Palm Beach, FL 33411
LIMITED WARRANTY<br />
<strong>Pure</strong> <strong>Global</strong> <strong>Brands</strong>, <strong>Inc</strong>. warrants this product to be free from defects in workmanship and materials<br />
under normal use and conditions for the duration of the period outlined below FROM THE DATE OF<br />
ORIGINAL PURCHASE. This Limited Warranty is not transferrable and is available only for the<br />
original purchaser of the Product.<br />
The various components of the trampoline/enclosure are warranted against defects and workmanship<br />
for the following time period(s):<br />
• Steel Frame: 2 Years<br />
• Frame Pad: 6 Months<br />
• Jumping Surface: 1 Year<br />
• All Other Parts: 90 Days<br />
All warranty coverage extends only to the original retail purchaser from the date of purchase.<br />
<strong>Pure</strong> Fun’s obligation under this Warranty is limited to replacing or repairing, at <strong>Pure</strong> Fun’s option, the<br />
product at one of its authorized service centers. All products for which a warranty claim is made must<br />
be received by <strong>Pure</strong> Fun at one of its authorized service centers and accompanied by sufficient proof<br />
of purchase (photocopy of the original store receipt, indicating the date of purchase). All freight and<br />
handling fees are the responsibility of the consumer to pay, both to and from <strong>Pure</strong> Fun. All warranty<br />
claims must be preauthorized by <strong>Pure</strong> Fun. Preauthorization can be obtained by calling 866-498-<br />
5269. This warranty does not extend to any product or damage to a product caused by or attributable<br />
to freight damage, abuse, misuse, improper or abnormal usage, or repairs not provided by a <strong>Pure</strong><br />
Fun authorized service center or for products used for commercial or rental purposes. This warranty<br />
does not cover ordinary wear and tear, weathering, failure to follow directions, improper installation,<br />
improper maintenance or acts of Nature (such as damage caused by wind, lightning, snow, water or<br />
ice). Weather damage, damage caused by unauthorized repair work or damage caused by improper<br />
use of the products are not covered by the product warranty. No other Warranty beyond that specifically<br />
set forth above is authorized by <strong>Pure</strong> Fun.<br />
PURE FUN IS NOT RESPONSIBLE OR LIABLE FOR INDIRECT, SPECIAL OR CON-<br />
SEQUENTIAL DAMAGES ARISING OUT OF OR IN CONNECTION WITH THE USE<br />
OR PERFORMANCE OF THE PRODUCT OR OTHER DAMAGES WITH RESPECT TO<br />
ANY ECONOMIC LOSS, LOSS OF PROPERTY, LOSS OF REVENUE OR PROFITS,<br />
LOSS OF ENJOYMENT OR USE, COST OF REMOVAL, INSTALLATION OR OTHER<br />
CONSEQUENTIAL DAMAGES. SOME STATES DO NOT ALLOW THE EXCLUSION OR<br />
LIMITATION OF INCIDENTAL OR CONSEQUENTIAL DAMAGES. ACCORDINGLY, THE<br />
ABOVE LIMITATION MAY NOT APPLY TO YOU. THE WARRANTY EXTENDED HERE-<br />
UNDER IS IN LIEU OF ALL OTHER WARRANTIES AND PURE FUN SPECIFICALLY<br />
DISCLAIMS ANY IMPLIED WARRANTY OF MERCHANTABILITY OR FITNESS FOR A<br />
PARTICULAR PURPOSE IS LIMITED IN ITS SCOPE AND DURATION TO THE TERMS<br />
SET FORTH HEREIN. SOME STATES DO NOT ALLOW LIMITATION ON HOW LONG<br />
AN IMPLIED WARRANTY LASTS. ACCORDINGLY, THE ABOVE LIMITATION MAY<br />
NOT APPLY TO YOU.<br />
This warranty gives you specific legal rights. You may also have other rights, which vary from state to<br />
state.
WARNING<br />
CHOKING HAZARD – Small parts<br />
NOT for children under 3 years.<br />
Warning!<br />
While every attempt is made to ensure the highest degree of protection in all<br />
equipment, we cannot guarantee freedom from injury. The user assumes all risks<br />
of injury due to use. All merchandise is sold on this condition, which no<br />
representative of the company can waive or change.
WARNING<br />
IMPORTANT – PLEASE READ!<br />
WARNINGS – GENERAL SAFETY ADVICE<br />
Ensure the trampoline has been assembled correctly, per the instructions in the manual.<br />
It is essential that the intended site for this trampoline is completely flat and level. If the ground is not level this<br />
will cause movement in the frame and could cause stress on the joined sections.<br />
This trampoline set is over 1 foot 5 inches (51cm) tall. It is only recommended for use by children 6 + YEARS<br />
OF AGE.<br />
DO NOT exceed the recommended MAXIMUM WEIGHT limit of 250lbs (113kgs).<br />
DO NOT allow more than one person on the trampoline at a time.<br />
DO NOT wear glasses or helmets when using the trampoline.<br />
DO NOT use the trampoline in wet, windy or other adverse weather conditions.<br />
DO NOT somersault – this can cause serious injury, resulting in paralysis or death.<br />
DO NOT allow other persons to go under, sit, stand or lie on the trampoline or the frame pads while the tram-<br />
poline is in use.<br />
DO NOT use the trampoline set when under the influence of alcohol, drugs or medication which may impair<br />
the jumper’s judgement and coordination.<br />
ALWAYS wear socks when using the trampoline.<br />
ALWAYS remove jewelry, belt buckles or any other sharp objects before using the trampoline.<br />
ALWAYS jump in the middle of the trampoline bed.<br />
ALWAYS follow the safety warnings stated with your trampoline instructions.<br />
ALWAYS secure the trampoline against unauthorized and unsupervised use.<br />
NEVER wear footwear (e.g. shoes) when using the trampoline.<br />
Children MUST NEVER use the trampoline set unless supervised by a responsible adult with knowledge of<br />
trampoline use.<br />
Children MUST NEVER be left unattended at any time.<br />
Before using this product, inspect and replace any worn, defective or missing parts.<br />
Ensure the trampoline is on level ground with a minimum of 8 feet (2.5M) clear space around the sides, 26 feet<br />
(8M) clear height space above and that no obstructions are under the trampoline.<br />
ALWAYS watch for power lines, overhead cabling, and other hazards or obstructions above, around and be-<br />
low the location where you are installing your trampoline set. Failure to do so can result in serious injury, death,<br />
and property damage for which <strong>Pure</strong> Fun is not liable.<br />
Ensure the Enclosure frame has been assembled correctly per the instructions in the manual.<br />
This Enclosure is NOT a rebounding device, and it should NEVER be used for any other purpose (play pen,<br />
dog run, etc.) or in a manner inconsistent with the information outlined in this manual.<br />
Children MUST NEVER be left unattended inside the Enclosure.<br />
(continued on next page)
WARNING<br />
IMPORTANT – PLEASE READ!<br />
WARNINGS – GENERAL SAFETY ADVICE<br />
We only recommend using the Enclosure with <strong>Pure</strong> Fun <strong>Trampoline</strong>s. Any alterations to the construction or<br />
materials of this Enclosure or deviations from the assembly instructions may result in unforeseeable safety<br />
compromises, and the consumer assumes all responsibility for doing so.<br />
ALWAYS ensure the entrance to the Enclosure is fully closed and secure before jumping on <strong>Trampoline</strong>.<br />
NEVER use the Enclosure Poles or Safety Net as a handhold or grip to assist in entering or exiting the tram-<br />
poline. This will result in damage to your Enclosure, for which <strong>Pure</strong> Fun is not responsible.<br />
ALWAYS enter and exit the enclosure through the zippered opening ONLY; use caution to prevent falls and/or<br />
accidental strangulation.<br />
NEVER attempt to crawl under or climb over the Safety Net to enter/exit the Enclosure area.<br />
If the Safety Net material, Zipper or any other part of the Enclosure becomes damaged, cease using the tram-<br />
poline immediately. Either remove the Net and Enclosure frame from the trampoline entirely and continue use<br />
at your own risk, or cease use until you obtain the necessary replacement parts.<br />
This Safety Net and Enclosure is ONLY intended to help prevent accidental falls from the trampoline mat/bed,<br />
and then ONLY during recommended jumping exercises as described in <strong>Pure</strong> Fun <strong>Trampoline</strong> manuals.<br />
NEVER attempt to rebound off of, swing or hang from the Safety Net or Enclosure poles, nor intentionally at-<br />
tempt to jump into or over the netting, as this may result in serious injury, paralysis or death and severe dam-<br />
age to the Enclosure and <strong>Trampoline</strong>. <strong>Pure</strong> Fun will not be responsible for any damage to the <strong>Trampoline</strong><br />
and Enclosure or consequential injuries resulting from these practices.<br />
NEVER let children take items or toys into the Enclosure.<br />
ALWAYS remove jewelry, belt buckles and sharp objects before entering the Enclosure.<br />
NEVER wear loose fitting clothing, items, or articles with hooks, loops or any features which can easily be-<br />
come snagged in the Safety Net.<br />
Mount and dismount from the trampoline and enclosure with care as injury may result. Children should be as-<br />
sisted when entering and exiting the trampoline to reduce the risk of falling.<br />
The frame of your trampoline set is made of steel and it will conduct electricity. No electrical equipment (lights,<br />
heaters, etc.) should be permitted on or around the trampoline under any circumstance.<br />
Please read and refer to other warnings and use information in the trampoline instructions before use.<br />
Dispose of all packaging materials safely and per local ordinance.<br />
It is possible for the <strong>Trampoline</strong> and Safety Net to be blown about by high wind. If you anticipate high winds,<br />
the <strong>Trampoline</strong> and Safety Net should be moved to a sheltered location or be disassembled. <strong>Pure</strong> Fun is not<br />
responsible for any damage resulting from wind or extreme weather.<br />
See last page of this manual for information on purchasing an Anchor Kit to help secure your trampo-<br />
line against moderate to high winds.
TRAMPOLINE PLACEMENT<br />
The minimum overhead clearance required is 26 feet (8 meters). Ensure that no hazards or obstructions<br />
are near the trampoline such as tree branches, swing sets, swimming pools, electrical power<br />
wires, walls, fences, roof overhangs etc.<br />
Please be aware of the following when selecting a place for your trampoline:<br />
• <strong>Trampoline</strong> must be placed on a level surface.<br />
• The area must be well lit.<br />
• All obstructions from overhead, underneath or around the trampoline must be removed.<br />
• Do not use this trampoline indoors.<br />
• Do not use this trampoline on any slippery/smooth floor surface, uneven or sloping ground<br />
surface.<br />
• Do not place the trampoline on hard surfaces, such as asphalt, stone, concrete etc, as this can<br />
damage the frame.<br />
You increase the risk of serious injury and/or death if you do not follow these guidelines.
Care & Use<br />
This trampoline must be assembled by adults. It must be erected exactly as detailed in the assembly<br />
instructions. Two adults are required to assemble this trampoline. This product should only be used<br />
by children over the age of 6. Please ensure children under the age of 3 years old do not play with<br />
or are given any part of this trampoline when being assembled or when complete as it contains small<br />
parts which may pose a choking hazard.<br />
Please take care during assembly, as the manufacturing process can sometimes result in the occasional<br />
sharp edge and small pieces of waste metalwork. The use of gloves to protect your hands<br />
from pinch points during assembly is also strongly recommended. Should there be any missing parts,<br />
the trampoline must not be used until replacement parts have been fitted.<br />
Your trampoline must be placed on a flat and level surface which is well lit. Under no circumstances<br />
should it be positioned on a hard surface such as concrete or asphalt, unless the ground under the<br />
trampoline plus the recommended free space area is covered with a safety surface. Examples of<br />
suitable surfaces are grass, sand or a play surface intended for this trampoline. It is important not to<br />
place or store anything under your trampoline.<br />
USAGE:<br />
This trampoline is designed and made for family domestic use only within the recommended weight<br />
limit of 250lbs (113kg). This trampoline is not intended for use outside of these guidelines. The user<br />
must remove footwear (shoes) before use. The user must wear socks when using the trampoline.<br />
Misuse can result in injury. Inspect the trampoline before use and always replace worn, defective or<br />
missing parts. The frame pad should always be fitted properly, fully covering the trampoline frame<br />
and springs.<br />
Supervision<br />
Children must always be supervised while they are playing on the trampoline and must be instructed<br />
not to use the trampoline in an inappropriate or hazardous manner.<br />
Remember!<br />
<strong>Trampoline</strong>s are rebounding devices which propel the user to unaccustomed heights and into a variety<br />
of body movements. Rebounding off of the trampoline and striking the frame or springs,<br />
intentionally bounding into the enclosure net or improperly landing on the trampoline mat (bed) may<br />
cause serious injury.<br />
Safety Information: This trampoline is designed and manufactured to provide you and your family<br />
with many years of fun and exercise, but for your benefit and safety, please read this manual carefully<br />
and in full before assembling and using your trampoline.<br />
DO NOT allow more than one (1) person on the trampoline at a time. Multiple jumpers increase the<br />
chance of someone becoming injured. Jumpers may collide with one another, fall off the trampoline,<br />
fall on or through the springs or land incorrectly on the mat. Multiple jumpers increase the chances of<br />
loss of control, collision and falling off. This can result in severe injury or death.<br />
Always secure the trampoline against unauthorized and unsupervised use.
The frame of your trampoline is made of steel and it will conduct electricity. No electrical equipment<br />
(lights, heaters, extension cords, household appliances, etc.) should be permitted on or around the<br />
equipment under any circumstances to avoid the risk of electrocution.<br />
As your trampoline mat is raised off the ground, there is the risk of falling when entering or exiting the<br />
trampoline. Children should be assisted when entering and exiting the trampoline to reduce their risk<br />
of falling.<br />
Do not flip, somersault or perform maneuvers which may cause you to land on the head or neck. Paralysis<br />
or death can result even if you land in the middle of the trampoline mat (bed).<br />
We recommend that the user does not wear loose-fitting clothing or jewelry that may catch or snag<br />
during play. Children should NOT wear helmets while playing on the trampoline. Ensure that children<br />
do not walk or crawl underneath the trampoline even when not in use. Keep the area around and underneath<br />
free from all objects and obstacles at all times.<br />
IMPORTANT: You must not use the trampoline if you have a medical history of neck or back injuries<br />
or a mental or physical condition – an existing condition or injury dramatically increases the risk of<br />
serious injury or death.<br />
No modification should be carried out to the trampoline or any of its components. Any modification<br />
could lead to damage to the product or result in a personal injury.<br />
WEATHER CONDITIONS: Special care should be taken as weather conditions change. In particular,<br />
a wet trampoline mat (bed) is too slippery for safe jumping. Gusty or severe winds can cause<br />
jumpers to lose control. To reduce the chance of injury, use the trampoline only under appropriate<br />
weather conditions. In cold weather, tongues and lips can stick to metal at sub zero temperatures. In<br />
warmer and sunnier weather, parts can become extremely hot, and the temperature should be regularly<br />
checked during play, especially metal parts.<br />
HIGH WINDS: It is possible for the <strong>Trampoline</strong> to be blown about by high wind. If you anticipate<br />
high winds, the <strong>Trampoline</strong> must be moved to a sheltered location, or be disassembled. <strong>Pure</strong> Fun<br />
is not responsible for any damage to property or product resulting from wind or extreme weather.<br />
See last page of this manual for information on purchasing an Anchor Kit to help secure your trampoline<br />
against moderate to high winds.<br />
JUMPER’S ROLE IN PREVENTING ACCIDENTS<br />
Education is the key to safety. Read, understand and practice all safety precautions and warnings<br />
prior to using the trampoline. A controlled jump is when you land and take off from the same point on<br />
the mat. For additional safety tips and instructions, contact a certified trampoline instructor.<br />
Stay in control of your jumps. DO NOT move onto more complicated or more difficult maneuvers until<br />
you have mastered the basic, fundamental bounce.<br />
Always bounce in the middle of the bed. Bouncing near the edge of the bed can lead to injury and<br />
can also stretch the springs. The frame pad is not designed nor intended to support the weight of the<br />
trampoline user. Do not step or jump directly onto the frame pad.<br />
Avoid bouncing too high. Stay low until you can control your bounce and land consistently in the<br />
middle of the bed.<br />
To regain control and stop your jump, bend your knees quickly when you land.
Do not use the trampoline or supervise a child’s use of the trampoline when under the influence of<br />
alcohol, drugs or medications.<br />
Allow each jumper a brief turn on the trampoline. Extended bouncing exposes an over tired user to<br />
an increased risk of injury.<br />
The trampoline mat is several feet from the ground. Jumping off the trampoline to the ground or any<br />
other surface may result in injury. Jumping onto the trampoline from a roof, deck or other object also<br />
represents a risk of injury. Smaller children may need assistance getting up on or down from the<br />
trampoline. Mounting and dismounting properly should be a strict rule from the very beginning. Users<br />
should climb onto the trampoline by placing their hands on the frame and stepping or rolling up<br />
onto the frame, across the springs and onto the mat (bed). Do not step directly on the frame pad or<br />
grasp the frame pad when mounting or dismounting the trampoline. Users should always place their<br />
hands on the frame while mounting or dismounting. To dismount, jumpers should walk to the side of<br />
the mat (bed), bend over and place one hand on the frame, then step from the mat to the ground.<br />
Injury may result from hitting the frame or falling through the springs while jumping or getting on or<br />
off the trampoline. Stay in the center of the trampoline mat when jumping. BE SURE TO KEEP THE<br />
FRAME PAD IN PLACE TO COVER THE FRAME AT ALL TIMES. The frame pad is not designed<br />
nor intended to support the weight of the trampoline user. Do not step or jump directly onto the frame<br />
pad.<br />
SUPERVISOR’S ROLE IN PREVENTING ACCIDENTS<br />
The trampoline is designed and made for family domestic use only by people 6 years and older.<br />
It is the responsibility of the supervisor(s) of trampoline users to provide knowledgeable and mature<br />
supervision. Do not supervise a child’s use of the trampoline when under the influence of alcohol,<br />
drugs or other medications. A supervisor needs to know and enforce all of the rules and warnings set<br />
forth in this manual in order to minimize the likelihood of accidents and injuries and to inform users of<br />
these rules. During periods of time when supervision is unavailable or inadequate, this may require<br />
that the trampoline be disassembled, placed in a secure area or otherwise secured against unauthorized<br />
use. It is the responsibility of the supervisor(s) to be sure that the users are fully aware of the<br />
safety guidelines which are printed on the pads.<br />
DISPOSAL INFORMATION<br />
Never allow the trampoline parts to be placed or used near a fire. If it becomes necessary to dispose<br />
of your equipment, remove springs and disassemble. Store safely and out of reach of children until it<br />
can be properly disposed of. Remember to dispose of it in a safe place and manner so as not to present<br />
any safety hazards.<br />
Check with your local recycler or retailer for recycling or disposal advice.<br />
These instructions are issued in the interest of general safety for the public.<br />
WARNING<br />
Misuse and abuse of this trampoline is dangerous and can cause serious injury or death.
IMPORTANT<br />
It is essential that the intended site for this trampoline is completely flat and level.<br />
If the ground is not level this will cause movement in the frame and could cause<br />
stress on the joined sections. The recommended safe play area is 8 feet (2.5m<br />
around the trampoline on all sides and 26 feet (8m) above the top.<br />
REMOVE all obstacles from play area. A safe play area must be on level ground,<br />
free from all structures, landscaping, trees and branches, rocks, wires, sprinkler<br />
heads and other obstacles. Children can be seriously injured running or colliding<br />
NO MORE THAN ONE PERSON AT A TIME<br />
ON THE TRAMPOLINE! MULTIPLE<br />
JUMPERS WILL INCREASE THE RISK OF<br />
SERIOUS INJURY, INCLUDING BROKEN<br />
NECK, LEG, BACK OR HEAD INJRY.<br />
into such obstacles.<br />
ADULT ASSEMBLY REQUIRED<br />
TWO ADULTS ARE REQUIRED TO ASSEMBLE<br />
DO NOT PERFORM SOMERSAULTS<br />
(FLIPS), AS THIS WILL INCREASE THE<br />
RISK OF LANDING ON THE HEAD OR<br />
NECK, RESULTING IN INCREASED RISK<br />
OF PARALYSIS OR DEATH.
To assemble this trampoline you will need to use the included Spring Tool.<br />
Do not discard or misplace Spring Tool. You will need this to remove/replace springs if required.<br />
PRIOR TO ASSEMBLING:<br />
Please visit: www.pureglobalbrands.com for any important product information updates<br />
and/or additional safety warnings before assembling or using this product.<br />
Use search word: 9012TS<br />
As these are assembled separately, the assembly instructions/parts list for the trampoline are<br />
below, followed by the enclosure assembly instructions/parts list on Page 19.<br />
Please refer to the table for part descriptions and numbers.<br />
The assembly instructions uses these descriptions and numbers as reference.<br />
Make sure you have all parts listed. If you are missing any parts, please contact customer service at<br />
customerservice@puregbi.com or by calling 866-498-5269.<br />
Choose a location on level ground and free from obstacles where you will be using your<br />
trampoline.<br />
Assemble the trampoline in the location it will be used in to ensure proper fit and clearance<br />
from environmental objects. If the trampoline must be moved once it is assembled, you MUST<br />
securely tape the top rail frame joints and use a MINIMUM of 4 adults placed equidistant around<br />
the unit. Failure to do so will result in damage to the assembly.<br />
NEVER DRAG THE ASSEMBLED TRAMPOLINE!<br />
IMPORTANT: USE GLOVES TO PROTECT AGAINST PINCH POINTS DURING ASSEMBLY.<br />
PARTS LIST - 12’ <strong>Trampoline</strong> - 72 Springs - (Enclosure parts list on page 19)<br />
Reference Part Description 12’<br />
Number Number<br />
1 TR800 <strong>Trampoline</strong> Mat 1<br />
2 TR801 Frame Pad 1<br />
3 TR802 Top Rail 8<br />
4 TR803 T-Section 8<br />
5 TR804 “W” Leg Base 4<br />
6 TR805 Vertical Leg Extension 8<br />
7 TR806 Springs 72<br />
8 TR807 Safety Instruction Placard 1<br />
9 TR808 Spring Tool 1<br />
Enclosed are the current specifications and product features available at time of<br />
printing, however, changes may be made in equipment, availability, specifications<br />
and features without notice.<br />
1. 2. 3. 4.<br />
5. 6. 7. 9.
WARNING: READ AND FOLLOW THESE INSTRUCTIONS, PRIOR TO ASSEMBLY<br />
AND USE OF THIS EQUIPMENT.<br />
ASSEMBLE TRAMPOLINE WHERE YOU WILL BE USING IT.<br />
ONCE IT IS ASSEMBLED, MOVING YOUR TRAMPOLINE REQUIRES THAT YOU USE<br />
AT LEAST 4 ADULTS PLACED EQUIDISTANT AROUND THE TRAMPOLINE.<br />
IF IT MUST BE MOVED YOUR WARRANTY REQUIRES THAT YOU TAPE THE TOP<br />
RAIL FRAME JOINTS TO PREVENT SLIPPAGE.<br />
NEVER DRAG YOUR TRAMPOLINE IN ORDER TO MOVE IT!<br />
STEP 1 – FRAME LAYOUT<br />
Check that you have received all parts using the relevant illustrations below. All parts with the same<br />
part # are interchangeable and do not have “right” or “left” section,<br />
THIS TRAMPOLINE HAS 4 LEGS
STEP 2 – TOP RAIL AND SUPPORT ASSEMBLY<br />
1. Slide T-section (#4) onto flattened end of the top<br />
rail (#3). Ensure the hole on the side of the T-section<br />
matches up with the hole on the side of the top rail. If<br />
necessary, use the spring hook tool to help you widen<br />
the T-section so it slides easily on the top rail. Repeat<br />
for the other T-sections, but do not connect the top rail<br />
sections together yet.<br />
IMPORTANT: The holes on the top rail (Part<br />
#3) need to be facing DOWN. You should not<br />
see them when sliding the T-Sections onto<br />
the top rail.<br />
2. Make sure you are not able to see any<br />
holes in the top rail sections before proceeding.<br />
Using the spring hook tool to hold the T-section closed,<br />
fit the leg tubes (#6) over the shut T-sections. You may<br />
need to use a rubber mallet (not included) to assemble<br />
the Leg Extensions down onto the T-sections so that<br />
the flanged part of the tube is resting as close as possible<br />
to the T-section base.<br />
Note: The orientation of the leg tubes is important<br />
(The flanged end needs to fit the T-sections). The<br />
T-sections must be inserted into the wider end of the<br />
leg tubes. Be careful not to pinch your fingers when<br />
compressing the T-sections.<br />
3. Connect two top rail sections together. Repeat for<br />
the other top rail sections as shown in Fig 3.
4. Fit the W-shape Leg Bases (#5) onto the Leg<br />
Extensions (#6) as shown in Fig 4. Compress the<br />
spring pins with your thumb to allow the tubes to be<br />
fully inserted. Make sure they click into place. Fit the<br />
remaining tubes (#5) using these instructions.<br />
5. Turn over the 4 sub-assembled sections and connect<br />
them together. Note that at this stage the sections<br />
can still become easily separated. The assembly will<br />
become rigid only when the trampoline mat is assembled<br />
to the frame.<br />
6. The completed frame should look the same as fig.6.<br />
IMPORTANT!<br />
It is essential that the intended site for this trampoline is completely flat and level. If the ground is<br />
NOT level this will cause movement in the frame and damage the trampoline or cause serious injury.
ONCE YOUR TRAMPOLINE IS ASSEMBLED, MOVING IT REQUIRES THAT YOU securely tape<br />
the top rail frame joints and use a MINIMUM of 4 adults placed equidistant around the unit. Failure<br />
to do so will result in damage to the assembly.<br />
NEVER DRAG YOUR TRAMPOLINE IN ORDER TO MOVE IT!!<br />
STEP 3 – TRAMPOLINE MAT ASSEMBLY<br />
WARNING: Be careful where you place your hands etc. during spring assembly as connector points can<br />
pinch!<br />
When attaching springs to the trampoline mat, you will need another person to help you with this part of the<br />
assembly.<br />
7. Lay out the <strong>Trampoline</strong> Mat (1) inside the frame.<br />
The white cross/Logo and safety labels should be facing upwards.<br />
HOW TO USE THE SPRING TOOL<br />
STEP 1: (Select your spring type A or B).<br />
Attach tool to the free end of the spring with the hook end of the tool. The hook end is located on the end of<br />
one of the tool handles.<br />
STEP 2: With the spring attached, pull the tool towards the frame, extending the spring so it can be hooked<br />
into its corresponding spring hole in the top rail frame.
The following figures show how to connect the springs and tighten the trampoline<br />
mat as evenly as possible:<br />
A. Using a “clock” as a relative guide, choose a point that represents 12 o’clock on your jump mat. Attach the<br />
spring to the V-ring of the jump mat. Attach the hook end of the tool to the other end of spring as shown in the<br />
directions on the previous page and line up to the spring hole. Pull the tool and attach the spring hook so it<br />
links up to the hole in the top rail. Following the diagram on the right, repeat this at the 6 o’clock, 3 o’clock, and<br />
then 9 o’clock points.<br />
B. Repeat this process to attach the remaining springs in a similar way. It is VERY IMPORTANT that the<br />
trampoline mat should tighten as equally as possible. To achieve this, make sure that you always attach two<br />
springs across from each other, otherwise you will not be able to attach all the springs due to the tension on<br />
the trampoline mat. The tension will increase with the number of attached springs.<br />
C. If you notice that a spring is not hooked directly to its corresponding hole in the top rail, but the tension is<br />
too great to currently move it, leave the V-Ring empty on the jump mat that the hole in the top rail should<br />
have been hooked to. Remember to also leave the hole in the top rail empty that the current, incorrectly<br />
installed spring should have been hooked into so that this spring can be inserted there when tension allows for<br />
correction of this issue.<br />
D. After assembly, the space between all springs should be equal.<br />
E. If you notice that you have skipped a hole and/or V-Ring connection, recount and remove or attach any<br />
springs required. NEVER leave spaces on the V-Rings on the jump mat or empty holes on the top rail.<br />
STEP 4 – SAFETY PLACARD ATTACHMENT<br />
A. Using the tie wrap, attach the Safety Instruction Placard (8) to the trampoline. The tie wrap should go around<br />
the Vertical Frame joint and the Top Rail to ensure it remains attached.
STEP 5 – FRAME PAD ASSEMBLY<br />
You will need 2 adults to assemble the frame pad to keep it even during installation.<br />
A. Lay the Frame Pad (2) over the trampoline so that the springs and the steel frame are covered. Ensure<br />
that the Frame Pad covers all metal parts.<br />
B. Make sure that the stitched flap of the frame pad is able to be folded under the top rail.<br />
C. Attach elastic bands to the tramp mat as shown in figure C, but do NOT pull them too tight or they will<br />
break off after a period of use. The bands require a certain amount of slack, as they are<br />
attached to the jumping surface which will have significant vertical movement<br />
during use. Failure to leave slack in the bands will result in the bands tearing loose<br />
from the pad, and/or the pad shifting off of the top rail upon use. For stability you should also<br />
cross the band under itself when looping it around the top rail to prevent wear and tear on the stitched ends of<br />
the elastic bands.<br />
D.Once bands are secured, pull drawstring so the stitched flap fits under the top rail.<br />
E.The trampoline pad should be the slightest bit loose so it “floats” a bit with movement. Keep in mind it<br />
will require readjustment after a period of use.<br />
F. STOP using the trampoline if it shifts during use, and have an adult readjust it.<br />
Enclosure Parts List & Assembly Instructions on Next Page
OR<br />
A B<br />
Enclosure Parts List & Assembly Instructions<br />
Parts List - 12’ Enclosure - 8 Poles<br />
Part Number Description 12’ (4 Legs)<br />
1. Upper Pole<br />
2. Lower Pole<br />
1 Upper Pole 8<br />
2 Lower Pole 8<br />
3 Screw 16<br />
4 Washer and Nut 16<br />
5 Safety Net 1<br />
6 Spacer 16<br />
7 Pole Cover 8<br />
8 Pole Cap 8<br />
9 Safety Nut 16<br />
10 Wrench 1<br />
PARTS DIAGRAM FOR ENCLOSURE<br />
3. Screw 4. Washer and Nut 5. Safety Net 6. Spacer<br />
7. Pole Cover 8. Pole Cap 9. Safety Nut 10. Wrench
Read the Safety Warning information on Page 5 before assembling or using your Enclosure.<br />
STEP 1 – Pole Assembly<br />
A. Put the Upper (1) and Lower (2) sections of the Enclosure Poles together as shown below.<br />
B. If necessary, attach the Pole Caps (8) to the tops of each Enclosure Pole.<br />
C. Slide the Pole Covers (7) over the connected Enclosure Poles.<br />
STEP 2 – Attach Poles to <strong>Trampoline</strong><br />
Note: Each Enclosure Pole requires 2x Screws, Spacers, and Nut Assemblies to attach it to a<br />
<strong>Trampoline</strong> leg.<br />
A. As shown in Diagrams below, place the Enclosure Pole against the <strong>Trampoline</strong> leg, making sure to place<br />
the Spacers between each pole and leg.<br />
B. Insert each Screw through the plastic Spacers and the pole. MAKE SURE that the Screw is inserted<br />
through the pole on the squared side as shown below.<br />
C. Secure the Pole to the <strong>Trampoline</strong> Leg with 2x Nuts and Washers. Once fully tightened, place Safety Cap<br />
on each end.<br />
D. Once the assembly has been completed properly, the support poles should resemble the bottom right<br />
diagram below.
STEP 3 – Attach Safety Net Top<br />
A. Locate the section on the Safety Net with the zippered “doorway” and align it to the desired position you<br />
want it to be on the trampoline.<br />
B. Make sure you note that the sewn edge with the elastic bands with hooked-ends is the bottom of the net.<br />
C. Locate the edge with the pre-sewn hanging loops (the upper edge) and hook a loop at the top of each pole.<br />
(See Diagrams B1 and B2)<br />
D. C. Once the assembly has been completed properly, the Safety Net should resemble the diagram below.<br />
NOTE: Using the below diagrams, locate your Enclosure Hook type and follow these corresponding instructions<br />
when attaching the enclosure bottom as instructed in STEP 4- Attach Safety Net Bottom
STEP 4 – Attach Safety Net Bottom<br />
A. Hook the Net to the V-Rings on the trampoline mat in the direction shown in the diagram below.<br />
B. The Safety Net will begin to be pulled taut, and tighten around the frame as you proceed. Use caution<br />
on pinch points, and apply the necessary force to attach the remaining bands to the V-Rings.<br />
NEVER pull the Safety Net from the mesh netting, as the fabric may tear. Always pull the net from the sewn<br />
seam.<br />
C. As mentioned above, the Safety Net will become very tight as you near completion. It can be helpful to have<br />
another adult assist you in completing this process. The Safety Net should be very tight and will stretch enough<br />
to wrap around the frame, but be careful not to pull too hard from the netting or the bands themselves--try to<br />
direct most of the force from the sewn edges.<br />
IMPORTANT CHECK LIST AFTER COMPLETION OF ENCLOSURE ASSEMBLY<br />
1. ENSURE THAT ALL ATTACHMENT HOOKS ARE STRETCHED TIGHT<br />
2. ENSURE THAT ALL JIGS ARE FASTENED SECURELY<br />
3. ENSURE THAT THE SAFETY NET IS TAUT AND SECURED TIGHTLY (NO SAGGING)<br />
THE SAFETY NET WILL NOT FUNCTION PROPERLY OTHERWISE<br />
SECURE THE NET ENTRANCE WHEN TRAMPOLINE IS IN USE!
CARE AND MAINTENANCE<br />
GENERAL: Your trampoline is designed for year-round outdoor use, so it generally requires very little maintenance.<br />
However, a little care and forethought can add years to your trampoline’s life. Remember that the bed (mat) and frame<br />
pads are made of synthetic materials and are easily damaged by cigarette ends, fireworks and bonfire debris.<br />
With all products it is vital that the equipment is checked regularly and often by an adult. The complete product should be<br />
checked at least once a month and particular attention should be paid to connections and fastenings. If any parts exhibit<br />
signs of wear and tear, they may need to be replaced. Failure to do this may result in the product malfunctioning and<br />
causing an injury. The product must not be used until properly and fully installed and checked.<br />
FRAME: Do not sit or stand on the frame or the frame pads while the trampoline is in use as this restricts the frame’s<br />
natural reflex action. If surface rust appears it should be removed with either a wire brush or coarse sandpaper, and the<br />
area treated with a non-toxic paint.<br />
FRAME PAD: Frame pads are there to protect the user from any accidental fall or landing on the springs and frame. On<br />
NO account should people be permitted to sit or stand on them when the trampoline is in use. You should also make sure<br />
that smaller users do not use the inside edges of the pads as a “handle” when getting up on to the trampoline.<br />
THE MAT: The mat (bed) will, over the years, be gradually weakened by the effects of ultra violet radiation. Therefore,<br />
the more it can be protected from direct sunlight the longer it will last. A little mold or mildew should not harm the mat.<br />
Do make sure that shoes are removed before bouncing and ensure that any other sharp objects such as belt buckles,<br />
brooches and jewelry are also not worn.<br />
THE SPRINGS: NEVER stand on the springs while the trampoline is in use. Try not to bounce near the springs. They<br />
are not designed for this sort of stress and can become stretched and weakened. If you find you have any damaged or<br />
stretched springs, it is important to replace them as soon as possible to avoid potential damage to the trampoline mat and<br />
tension overload on the remaining good springs.<br />
IMPORTANT:<br />
This trampoline was designed and manufactured with quality materials and craftsmanship. With proper care and maintenance,<br />
it will provide all jumpers with years of exercise, fun and enjoyment. Please follow the guidelines below:<br />
This trampoline is designed to withstand a specific weight and usage. Ensure only one person uses the trampoline at<br />
any one time. People over 250 pounds (113kgs) should not use the trampoline. Jumpers should wear socks, gymnastics<br />
shoes or be barefoot when using the trampoline. Street shoes or tennis shoes should NOT be worn while using the trampoline.<br />
To limit damage, do not allow pets onto the mat. Jumpers should remove all sharp objects from their person prior<br />
to using the trampoline. All sharp or pointed objects should be kept off the trampoline mat at all times.<br />
Always inspect the trampoline before each use for worn, damaged or missing parts.<br />
LOOK FOR:<br />
Punctures, holes or tears in the trampoline mat<br />
Sagging trampoline mat<br />
Loose stitching or any kind of deterioration of the mat<br />
Bent or broken frame parts, especially the legs and top rail<br />
Broken, missing or damaged springs<br />
Damaged, missing or insecurely attached frame pad<br />
Protrusions of any type (especially sharp) on the frame, spring or mat<br />
No modification should be carried out to the trampoline or any of its components. Any modification could lead to damage<br />
to the product or to personal injury.<br />
IF YOU FIND ANY OF THE PREVIOUS CONDITIONS, OR ANYTHING ELSE THAT YOU FEEL COULD<br />
CAUSE HARM TO ANY USER, THE TRAMPOLINE SHOULD BE DISASSEMBLED OR SECURED FROM<br />
USE UNTIL THE CONDITION(S) HAS BEEN RECTIFIED.
TO DISASSEMBLE AND/OR MOVE<br />
IN WINDY CONDITIONS - In severe wind conditions, the trampoline can be blown about. If<br />
you expect windy weather conditions, the trampoline should be moved to a sheltered area or disassembled.<br />
To ensure security in normal weather conditions, at least four (4) tie downs should be used.<br />
Secure the trampoline frame to the ground. You can purchase an ANCHOR KIT for your trampoline<br />
from <strong>Pure</strong> Fun, by visiting us on the web at www.pureglobalbrands.com or by calling 866-498-5269.<br />
MOVING THE TRAMPOLINE - When moving the trampoline, a minimum of three people<br />
are required. All connecting points on the top rails should be securely and tightly wrapped with<br />
weather resistant tape, such as duct tape. This will keep the frame intact during the move and prevent<br />
the connector points from dislocating and separating. When moving, lift the trampoline slightly off the<br />
ground and keep it horizontal to the ground. Never drag the trampoline. For any type of other move,<br />
you should disassemble the trampoline. After any move please conduct a full safety inspection.<br />
TO DISASSEMBLE:<br />
ADULTS REQUIRED – A rubber mallet (not included) is required to disassemble some parts of the<br />
trampoline.<br />
1. Unattach the Enclosure Netting by unclasping the net bottom, and then releasing the hoops at the<br />
top. Fold and store the net neatly where it will not be damaged or torn.<br />
2. Remove the Enclosure hardware (Steel Jigs, Spacers, etc.) attaching the poles to the trampoline.<br />
Store this hardware in a resealable zippered plastic bag for later reassembly. Remove and store the<br />
poles in a dry, safe location where they will not present a tripping hazard or become damaged.<br />
3. The Leg Extension (#6) and T-section assemblies (#4) are very tight and do not disassemble easily.<br />
We suggest you use a lubricant before beginning disassembly, specifically on the areas where<br />
the T-section and Leg Extension come together. You should lightly lubricate the visible joint by the<br />
flanged end of the Leg Extension, and apply a small amount of lubricant down the tube of the Leg<br />
Extension. After applying lubrication, make sure to clean excess lubricant from any exterior<br />
surfaces using a degreasing agent. Making sure there is no lubricant/grease on the Leg<br />
extension exterior or the striking surface on the top rail, firmly grip or clamp the Leg Extension and<br />
use a rubber mallet hit the top rail (#3) as shown to the right to disassemble this part.<br />
Before reassembly or storage, any remaining lubricant must be fully cleaned with a degreasing agent<br />
to ensure that the metal does not become damaged and that proper reassembly is achieved. (See<br />
diagram 3.)<br />
4. Do NOT disassemble the T-section (#4) and the top rail (#3); you can keep it as it is. It is not necessary<br />
and it will make re-assembly easier. (See diagram 4)<br />
3. 4.
INFORMATION ON USE OF THE TRAMPOLINE<br />
Initially, get accustomed to the feel and bounce of the trampoline. The focus must be on the fundamentals<br />
of your body position and you should practice each bounce (the basic bounces) until you can<br />
perform each with ease and control.<br />
To break a bounce, flex your knees sharply before your feet come in contact with the mat.<br />
This technique should be practiced as you are learning each of the basic bounces.<br />
The skill of braking should be used whenever you lose balance or control of your jump.<br />
Always learn the simplest bounce first and be consistent with the control of your bounce before moving<br />
on to more difficult and advanced bounces. A controlled bounce is when your take off point and<br />
landing point is the same spot on the mat. If you move up to the next bounce without first mastering<br />
the previous, you increase your risk of injury.<br />
Do not bounce on the trampoline for extended periods of time as fatigue can increase your risk of<br />
injury. Bounce only for a brief period of time. Only one person should bounce on the trampoline at a<br />
time.<br />
Jumpers should wear a t-shirt, shorts or sweats and regulation gymnastics shoes, heavy socks or<br />
be barefoot. If you are just beginning, you may want to wear long sleeve shirts and pants to protect<br />
against scrapes and abrasions until you master correct landing positions and form. Do not wear hard<br />
sole shoes, such as tennis shoes, on the trampoline as this will cause excessive wear on the mat.<br />
You should always mount and dismount properly in order to avoid injury. To mount properly, you<br />
should place your hand on the frame and step or roll up onto the frame, over the springs, and onto the<br />
trampoline mat. Always remember to place your hands onto the frame while mounting or dismounting.<br />
Do not step directly onto the frame pad or grasp the frame pad. To dismount properly, move to the<br />
side of the trampoline and place your hand onto the frame as a support and step from the mat to the<br />
ground. Smaller children should be assisted when mounting and dismounting.<br />
Do not bounce recklessly on the trampoline, as this will increase your risk of injury. The key to safety<br />
and having fun on the trampoline is control and mastering the various bounces. Never try to outbounce<br />
another bouncer in terms of height!<br />
Never allow use of the trampoline by minors without ADULT supervision.
SAFETY CONCERN SITUATIONS:<br />
Mounting and Dismounting: Be very careful when getting on and off the trampoline. DO NOT<br />
mount the trampoline by grabbing the frame pad, by stepping onto the springs, or by jumping onto the<br />
mat from any surface (e.g. a deck, roof, or ladder) as this will increase your risk of injury.<br />
DO NOT dismount by jumping off the trampoline. If small children are playing on the trampoline, they<br />
may need help in mounting and dismounting.<br />
Use of Alcohol or Drugs: DO NOT consume any alcohol or drugs before or while using this<br />
trampoline as this will impair your judgment, reaction time and overall physical coordination.<br />
Multiple Jumpers: NEVER have multiple jumpers (more than one person on the trampoline at any<br />
one time), as you increase the chance of getting injured or damaging the trampoline. Injuries could<br />
occur when you fly off the trampoline, lose control, collide with the other jumper(s), or land on the<br />
springs. Generally, the lightest person on the trampoline will get injured.<br />
Striking the Frame or Springs: When playing on the trampoline, STAY in the center of the mat.<br />
This will reduce your risk of injury from the frame or springs. Always keep the frame pad on the frame.<br />
DO NOT jump or step onto the frame pad, it is not intended to support the weight of a person.<br />
Loss of Control: DO NOT try difficult maneuvers until you have mastered the previous maneuver<br />
as this will increase your risk of injury. A controlled jump is when your take off point and landing point<br />
are on the same spot on the mat. If you lose control when you are jumping on the trampoline, bend<br />
your knees sharply when you land and this will allow you to stop your jump and regain control.<br />
Somersaults (Flips): DO NOT PERFORM somersaults of any type (backwards or forwards) on<br />
this trampoline as this will increase your risk of injury to your neck or back, WHICH MAY RESULT<br />
in DEATH OR PARALYSIS.<br />
Foreign Objects: DO NOT use the trampoline if there are pets, other people, animals or any<br />
objects beneath, above or near the trampoline as this will increase the risk of an injury occurring. DO<br />
NOT hold any foreign objects in your hand and DO NOT place any objects on the trampoline. Please<br />
be aware of what is overhead when you are using the trampoline. Tree branches, wires or other objects<br />
located above the trampoline may result in injury.<br />
Poor Maintenance of <strong>Trampoline</strong>: A trampoline in poor condition will increase your risk of injury.<br />
Please inspect the trampoline before each use for bent steel tubes, torn mat, loose or broken springs<br />
and overall stability of the trampoline.<br />
Weather Conditions: Please be aware of the weather conditions when using the trampoline. Do<br />
not use trampoline if the mat is wet. Do not use the trampoline in windy conditions.<br />
Limiting Access: When the trampoline is not in use, always secure it against access. Remove<br />
ladders, step stairs, etc. to prevent unauthorized and unsupervised access.
LESSON PLAN<br />
The following lessons are recommended in order to learn basic steps and bounces before moving<br />
onto more difficult or complicated bounces. You should read and understand all safety instructions<br />
before mounting the trampoline. A complete discussion and demonstration of body mechanics and<br />
trampoline guidelines should occur between the supervisor and student.<br />
Lesson 1<br />
A. Mounting and Dismounting - Demonstration of proper techniques.<br />
B. The Basic Bounce - Demonstration and practice.<br />
C. Braking (Checking the Bounce) - Demonstration and practice. Learn to stop on command.<br />
D. Hands and Knees - Demonstration and practice. Stress should be on four-point landing and alignment.<br />
Lesson 2<br />
A. Review and practice of techniques learned in Lesson 1.<br />
B. Knee Bounce - Demonstration and practice. Learn the basic down-to-knee and back up before trying<br />
half twist to left and right.<br />
C. Seat Bounce - Demonstration and practice. Learn basic Seat Bounce then add a Knee Bounce,<br />
hands and knees; repeat.<br />
Lesson 3<br />
A. Review and practice skills and techniques learned in previous lessons.<br />
B. Front Drop - All students should be requested to assume the prone position (face down on the<br />
ground) while the instructor checks for faulty positions that could cause injury.<br />
C. Start with a Knee Bounce and then extend body into prone position, land on the mat and return to<br />
feet.<br />
D. Practice Routine - Knee Bounce, Front Bounce, back to feet, Seat Bounce, back to feet.<br />
Lesson 4<br />
A. Review and practice skills and techniques learned in previous lessons.<br />
B. Half-Turn.<br />
- Start from Front Drop position. As you make contact with the mat, push off with arms in either the<br />
right or left direction and turn head and shoulders in same direction.<br />
- During turn, be sure to keep back parallel to mat and head up.<br />
- After completing turn, land in Front Drop position.<br />
After completing this lesson, the student now has a basic understanding of trampoline bounces.<br />
Jumpers should be encouraged to develop their own routines with emphasis on control and form.<br />
A game that can be played in order to encourage students to try and develop routines is “BOUNCE”.<br />
In this game, players count off from 1 to 10. Player one starts with a maneuver. Player two has to do<br />
Player One’s maneuver and add on another. Player Three does the maneuvers of One and Two and<br />
then adds a third maneuver. This continues until a player cannot do the routine properly in the correct<br />
sequence. The first person to miss receives the letter “B”. This continues until someone spells out the<br />
word “BOUNCE”. The last remaining contestant is deemed the winner! Even when playing this game,<br />
it is important to perform your routines under control. Do not try difficult or highly skilled bounces that<br />
you have not yet mastered.<br />
A certified trampoline instructor should be contacted to further develop your<br />
trampoline skills.
BASIC TRAMPOLINE BOUNCES<br />
THE BASIC BOUNCE<br />
Start from standing position, feet shoulder width<br />
apart and head up and eyes on mat. Swing arms<br />
forward, up and around in a circular motion. Bring<br />
feet together while in mid-air and point toes downward.<br />
Keep feet shoulder width apart when landing<br />
on mat.<br />
KNEE BOUNCE<br />
Start with basic bounce and keep it low. Land on<br />
knees keeping back straight, and body erect. Use<br />
arms to maintain balance. Bounce back to basic<br />
bounce position by swinging arms up<br />
SEAT BOUNCE<br />
Land in a flat sitting position. Place hands on<br />
mat besides hips. Return to erect position by<br />
pushing with hands.<br />
FRONT BOUNCE<br />
Start with a low bounce. Land in prone (face<br />
down) position and keep hands and arms extended<br />
forward on mat. Push off the mat with arms to<br />
return to standing position.<br />
180-DEGREE BOUNCE<br />
Start with front bounce position. Push off with left<br />
or right hand and arm (depending on which way<br />
you wish to turn). Maintain head and shoulders in<br />
the same direction and keep back parallel to mat<br />
and head up. Land in prone position and return to<br />
standing position by pushing up with hands and<br />
arms.
FREQUENTLY ASKED QUESTIONS<br />
Question: “I need to mow the grass under my trampoline” or “I need to move my<br />
trampoline across the yard. What is the best way to do this?”<br />
Answer: ONCE YOUR TRAMPOLINE IS ASSEMBLED, TO AVOID DAMAGE TO THE UNIT MOVING THE<br />
TRAMPOLINE REQUIRES THAT YOU TAPE THE TOP RAIL FRAME JOINTS TO PREVENT SLIPPAGE.<br />
MOVING IT OVER DISTANCES REQUIRES THAT YOU USE AT LEAST 4 ADULTS PLACED EQUIDISTANT<br />
AROUND THE TRAMPOLINE. NEVER DRAG YOUR TRAMPOLINE IN ORDER TO MOVE IT!<br />
Question: “My frame pad keeps shifting after just a few minutes of use. What can<br />
I do?”<br />
Answer: YOU PROBABLY HAVE YOUR FRAME PAD TOO TIGHT. RE-SEAT THE PAD BY TAKING IT COM-<br />
PLETELY OFF, AND FOLLOWING THE DIRECTIONS IN STEP 5. REMEMBER: DO NOT TRY TO STRETCH<br />
THE ELASTIC BANDS TO THEIR TIGHTEST POINT. THE BANDS NEED SOME GIVE AS THE JUMP MAT<br />
THEY ARE ATTACHED TO WILL MOVE SIGNIFICANTLY WHEN SOMEONE IS JUMPING ON THE TRAM-<br />
POLINE.<br />
Question: “I need to order springs” or “I need to order a new frame pad, who do I<br />
contact?”<br />
Answer: YOU CAN PURCHASE SPRINGS, FRAME PADS, JUMP MATS AND EVEN LARGE STEEL DI-<br />
RECTLY FROM PURE FUN. PLEASE SUBMIT YOUR REQUEST VIA E-MAIL AT:<br />
customerservice@puregbi.com, OR YOU CAN CALL 866-498-5269 TO SPEAK WITH A REPRESENTATIVE.<br />
IF YOU STILL HAVE YOUR PROOF OF PURCHASE, YOU MAY BE ELIGIBLE FOR A DISCOUNTED RATE<br />
EVEN IF YOU ARE OUT OF WARRANTY.<br />
Question: “Can I use any brand enclosure for my trampoline, or just <strong>Pure</strong> Fun?”<br />
Answer: ENCLOSURE DESIGNS ARE VERY SIMILAR, BUT THERE ARE SOME SPECIFIC DIMENSIONS<br />
LIKE WIDTH BETWEEN LEGS AND SPRING SIZE WHICH CAN AFFECT THE CIRCUMFRENCE OF THE<br />
TRAMPOLINE FRAME. AS SUCH, WE CANNOT SAY WITH CONFIDENCE WHETHER OR NOT ANOTHER<br />
BRAND’S ENCLOSURE WILL FIT YOUR TRAMPOLINE.<br />
Question: “Something was missing from the packaging,” or “I discovered a damaged<br />
piece. What should I do?”<br />
Answer: CONTACT PURE FUN CUSTOMER SERVICE AT: customerservice@puregbi.com or by calling<br />
866-498-5269. YOU MUST HAVE YOUR PROOF OF PURCHASE AND/OR ORDER CONFIRMATION AVAIL-<br />
ABLE TO BE CONSIDERED FOR WARRANTY REPLACEMENT. YOU MUST REPORT MISSING PIECES<br />
WITHIN 30 DAYS FROM DATE OF PURCHASE. PLEASE BE AWARE THAT UNDER OUR LIMITED WAR-<br />
RANTY, FOR SOME PARTS WE REQUIRE A PICTURE OF THE DAMAGED ITEM AND/OR RETURN OF<br />
THE ITEM TO OUR QUALITY CONTROL OFFICE FOR REVIEW.<br />
For more information on this product please visit www.pureglobalbrands.com
<strong>Pure</strong> Fun <strong>Trampoline</strong> Accessories<br />
<strong>Trampoline</strong> Anchor Kit - 9201AK<br />
The <strong>Pure</strong> Fun <strong>Trampoline</strong> Anchor Kit is designed to<br />
help secure large trampolines against rough weather.<br />
Kit includes 4 Tie-down straps, D-rings and ground<br />
anchor stakes.<br />
12’ <strong>Trampoline</strong> Cover - 9212TC<br />
<strong>Pure</strong> Fun’s all-weather <strong>Trampoline</strong> Covers protect and<br />
prolong the life of your trampoline. Useful in keeping<br />
leaves and other debris off of the jumping mat, this<br />
heavy duty 130g polythylene cover resists harmful UV<br />
rays, rain and snow. (Requires removal of enclosure<br />
assembly to attach)<br />
12-Pack Replacement Springs - 9202SK<br />
Replacement 7” trampoline springs for all <strong>Pure</strong> Fun<br />
Large <strong>Trampoline</strong>s (12’ through 15’). Pack of 12.<br />
(Spring Tool not included)<br />
<strong>Trampoline</strong> Ladder - 9200TL<br />
Made from high-carbon steel, this ladder measures 38”<br />
high, perfect for added safety in mounting and dismounting<br />
<strong>Pure</strong> Fun trampolines.<br />
CALL 866-498-5269 FOR PRICING AND<br />
AVAILABILITY ON THESE ITEMS, OR VISIT<br />
www.pureglobalbrands.com