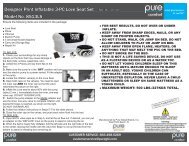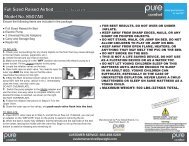
Multi-Purpose Mid-Width #8638 Manual - Pure Global Brands, Inc.
Multi-Purpose Mid-Width #8638 Manual - Pure Global Brands, Inc.
Multi-Purpose Mid-Width #8638 Manual - Pure Global Brands, Inc.

Create successful ePaper yourself
Turn your PDF publications into a flip-book with our unique Google optimized e-Paper software.
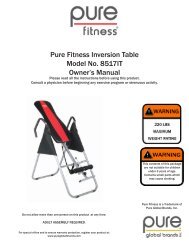
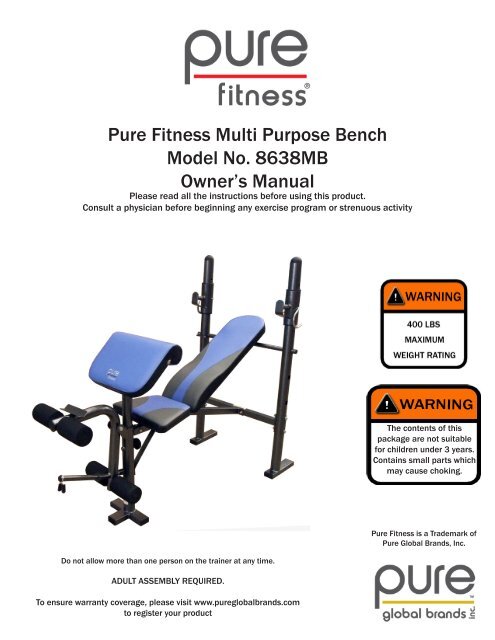
<strong>Pure</strong> Fitness <strong>Multi</strong> <strong>Purpose</strong> Bench<br />
Model No. 8638MB<br />
Owner’s <strong>Manual</strong><br />
Please read all the instructions before using this product.<br />
Consult a physician before beginning any exercise program or strenuous activity<br />
Do not allow more than one person on the trainer at any time.<br />
ADULT ASSEMBLY REQUIRED.<br />
To ensure warranty coverage, please visit www.pureglobalbrands.com<br />
to register your product<br />
The contents of this<br />
package are not suitable<br />
for children under 3 years.<br />
Contains small parts which<br />
may cause choking.<br />
<strong>Pure</strong> Fitness is a Trademark of<br />
<strong>Pure</strong> <strong>Global</strong> <strong>Brands</strong>, <strong>Inc</strong>.
OWNERS MANUAL<br />
CUSTOMER SERVICE INFORMATION<br />
Thank you for purchasing our <strong>Pure</strong> Fitness <strong>Mid</strong>-With <strong>Multi</strong> <strong>Purpose</strong> Bench<br />
At <strong>Pure</strong> <strong>Global</strong> <strong>Brands</strong>, we want all of our customers to be completely satisfied with their purchase.<br />
Please take time to review the contents of the product you just received to make sure that all of the<br />
parts are included. If you find that any parts are missing or damaged, we will happily provide replacement<br />
parts at no charge within 30 days of purchase. Please keep in mind that for select damaged part<br />
replacement requests, we will require a photo for submission to our quality control office.<br />
To order these parts, or if you have any other questions or concerns about this <strong>Pure</strong> <strong>Global</strong> product,<br />
please e-mail the <strong>Pure</strong> <strong>Global</strong> <strong>Brands</strong>, <strong>Inc</strong>. customer service department at:<br />
customerservice@puregbi.com or contact us at 1-866-498-5269.<br />
You can also visit our website at: www.pureglobalbrands.com<br />
If you request replacement parts, please be sure to include the following information in your correspondence:<br />
YOUR NAME<br />
YOUR MAILING ADDRESS<br />
YOUR EMAIL ADDRESS<br />
RETAILER WHERE YOU PURCHASED PRODUCT<br />
DATE OF PURCHASE<br />
ORDER # (IF AVAILABLE)<br />
PRODUCT MODEL #: 8638MB<br />
SERIAL #<br />
PRODUCT NAME: <strong>Pure</strong> Fitness <strong>Mid</strong>-With <strong>Multi</strong> <strong>Purpose</strong> Bench<br />
PART # (located in manual)<br />
QUANTITY NEEDED<br />
PICTURE OF DAMAGED PART(s) – SUBMIT VIA Email , Fax, or Mail<br />
Again, thank you for purchasing a <strong>Pure</strong> <strong>Global</strong> <strong>Brands</strong> product.<br />
Sincerely,<br />
Customer Service<br />
<strong>Pure</strong> <strong>Global</strong> <strong>Brands</strong>, <strong>Inc</strong>.<br />
8040 Belvedere Road<br />
West Palm Beach, FL 33411<br />
1-866-498-5269
LIMITED WARRANTY<br />
<strong>Pure</strong> <strong>Global</strong> <strong>Brands</strong>, <strong>Inc</strong>. warrants this product to be free from defects in workmanship and materials<br />
under normal use and conditions for the duration of the period outlined below FROM THE DATE OF<br />
ORIGINAL PURCHASE. This Limited Warranty is not transferable and is available only for the original<br />
purchaser of the Product.<br />
The various components of this equipment are warranted against defects and workmanship for the<br />
following time period(s):<br />
• Steel Frame 1-year.<br />
• All Other Parts 90-Days<br />
All warranty coverage extends only to the original retail purchaser from the date of purchase.<br />
<strong>Pure</strong> Fitness’s obligation under this Warranty is limited to replacing or repairing, at <strong>Pure</strong> Fitness’s<br />
option, the product at one of its authorized service centers. All products for which a warranty claim<br />
is made must be received by <strong>Pure</strong> Fitness at one of its authorized service centers and accompanied<br />
by sufficient proof of purchase (photocopy of the original store receipt, indicating the date of purchase).<br />
All freight and handling fees are the responsibility of the consumer to pay, both to and from<br />
<strong>Pure</strong> Fitness. All warranty claims must be pre-authorized by <strong>Pure</strong> Fitness. Pre-authorization can be<br />
obtained by calling 866-498-5269. This warranty does not extend to any product or damage to a<br />
product caused by or attributable to freight damage, abuse, misuse, improper or abnormal usage, or<br />
repairs not provided by a <strong>Pure</strong> Fitness authorized service center or for products used for commercial<br />
or rental purposes. This warranty does not cover ordinary wear and tear, weathering, failure to follow<br />
directions, improper installation, improper maintenance, or acts of Nature (such as damage caused<br />
by wind, lightning, snow, water, or ice). Weather damage, damage caused by unauthorized repair<br />
work or damage caused by improper use of the products are not covered by the product warranty. No<br />
other Warranty beyond that specifically set forth above is authorized by <strong>Pure</strong> Fitness.<br />
PURE FITNESS IS NOT RESPONSIBLE OR LIABLE FOR INDIRECT, SPECIAL OR<br />
CONSEQUENTIAL DAMAGES ARISING OUT OF OR IN CONNECTION WITH THE<br />
USE OR PERFORMANCE OF THE PRODUCT OR OTHER DAMAGES WITH RESPECT<br />
TO ANY ECONOMIC LOSS, LOSS OF PROPERTY, LOSS OF REVENUE OR PROFITS,<br />
LOSS OF ENJOYMENT OR USE, COST OF REMOVAL, INSTALLATION OR OTHER<br />
CONSEQUENTIAL DAMAGES. SOME STATES DO NOT ALLOW THE EXCLUSION OR<br />
LIMITATION OF INCIDENTAL OR CONSEQUENTIAL DAMAGES. ACCORDINGLY, THE<br />
ABOVE LIMITATION MAY NOT APPLY TO YOU. THE WARRANTY EXTENDED HERE-<br />
UNDER IS IN LIEU OF ALL OTHER WARRANTIES AND <strong>Pure</strong> Fitness SPECIFICALLY<br />
DISCLAIMS ANY IMPLIED WARRANTY OF MERCHANTABILITY OR FITNESS FOR A<br />
PARTICULAR PURPOSE IS LIMITED IN ITS SCOPE AND DURATION TO THE TERMS<br />
SET FORTH HEREIN. SOME STATES DO NOT ALLOW LIMITATION ON HOW LONG<br />
AN IMPLIED WARRANTY LASTS. ACCORDINGLY, THE ABOVE LIMITATION MAY<br />
NOT APPLY TO YOU.<br />
This warranty gives you specific legal rights. You may also have other rights, which vary from state to<br />
state.
WARNING<br />
CHOKING HAZARD – Small parts<br />
NOT for children under 3 years.<br />
Warning<br />
While every attempt is made to ensure the highest degree of protection in all<br />
equipment, we cannot guarantee freedom from injury. The user assumes all risks<br />
of injury due to use. All merchandise is sold on this condition, which no<br />
representative of the company can waive or change.
WARNING<br />
IMPORTANT – PLEASE READ!<br />
PRIOR TO ASSEMBLING: Please visit: www.pureglobalbrands.com for any important product information updates<br />
and/or additional safety warnings before assembling or using this product. Use search term: 8638MB<br />
WARNINGS – GENERAL SAFETY ADVICE<br />
Please read these instructions in their entirety before use and retain for future reference.<br />
● Ensure that this product has been assembled correctly, per the instructions in the manual.<br />
● DO NOT make any modifications to this equipment or use this machine in any manner it is not intended for.<br />
● This manual is designed to help you assemble, adjust, maintain and use the product. It contains important information<br />
regarding your safety and your use of this equipment.<br />
● NEVER exceed the MAXIMUM WEIGHT LIMIT of 400LBS (181KGS), including accessories and weights.<br />
● ALWAYS check this product before each use for missing or loose attachments, bolts and/or damaged parts. Carefully<br />
inspect the frame, back support bar assembly, anti-tip hooks, lock knob, and the cushion attachments. Check for damage<br />
and proper stability to ensure that all parts are correctly positioned, locked for use and in good working order.<br />
● Failure to properly inspect your machine, improperly securing adjustable components, and/or misuse of this equipment<br />
can result in serious injury and death.<br />
● ALWAYS use the proper weight bars for this machine. This is a <strong>Mid</strong>-With bench, and the correct bars should be used for<br />
use with this bench. DO NOT exceed 400 LBS: Your body weight, the workout bar, and weights used should never total over<br />
400 LBS.<br />
● ALWAYS use a spotter when working out with total weights of over 50 LBS.<br />
● ALWAYS be aware of the position of your extremities and head in relation to both the steel frame and the weights you are<br />
using. Be aware that there are several PINCH POINTS on this unit around which caution must be used. See Page 14 for<br />
Pinch Point locations.<br />
● ALWAYS consult a physician before beginning any exercise program. Ask your doctor to evaluate your present fitness<br />
level and determine the exercise program that is most appropriate for your particular age and/or physical condition.<br />
● IF YOU EXPERIENCE any pain or tightness in your chest, irregular heartbeats, shortness of breath, faintness, dizziness,<br />
or other unusual discomfort while exercising, STOP and consult your physician and/or obtain medical assistance.<br />
● ALWAYS ensure that the back cushion support bar is locked and fully inserted in the post holes.<br />
● ALWAYS ensure that the foam roller supports are fully and evenly centered before use.<br />
● ALWAYS ensure that the steel securing hooks on the weight support collars are securely and evenly inserted.<br />
● ALWAYS ensure that the lock knob for the Preacher Curl addition is fully and securely inserted.<br />
● This machine is intended for indoor individual home use only, it is not designed for commercial use or for use in<br />
communal workout areas.<br />
● DO NOT allow children or pets to use, climb on, or play near this product.<br />
● This machine is only intended for use by persons over the age of 13 years.<br />
● NEVER allow more than one person at a time on this product.<br />
● Ensure that the product is on level ground. If necessary, use a rubber mat under the machine to reduce the possibility of<br />
slipping during use.<br />
● Warm up at least 5-10 minutes before each workout and to cool down for at least 5-10 minutes afterwards.<br />
● NEVER hold your breath while exercising.<br />
● Rest adequately between workouts to allow your muscles to tone and develop.<br />
● DO NOT wear loose fitting clothing, belt buckles, or jewelry, including but not limited to rings, chains, and pins before<br />
commencing exercise; this can be extremely dangerous.<br />
● DO NOT stand or kneel on the seat, backrest or any other component of this item.<br />
● ALWAYS wear the appropriate fitness footwear. DO NOT use this product barefooted or with socks only. If applicable,<br />
ensure that any shoe laces will not become caught in moving parts.<br />
● Dispose of all packaging materials safely and per local ordinance.<br />
● Please retain this information for future reference.
8638MB EXPLODED VIEW
8638MB PARTS LIST<br />
No. Description Qty No. Description Qty<br />
1 UPRIGHT FRAME POSTS 2 35 BOLT M8 x 16 6<br />
2 FRONT LEG 1 36 BOLT M8 x 40 8<br />
3 WEIGHT SUPPORT COLLAR 2 37 FLAT WASHER M10 14<br />
4 SUPPORT TUBE 1 38 FLAT WASHER M8 16<br />
5 BACKREST SUPPORT BAR 1 39 NUT M10 7<br />
6 PREACHER FRAME 1 40 NUT M8 1<br />
7 LEG LIFT 1<br />
8 CONTROL BRACE 1<br />
9 PREACHER CUSHION 1<br />
10 BACK CUSHION 1<br />
11 SEAT CUSHION 1<br />
12 LEG LIFT CROSS BAR 2<br />
13 FLAT PLATE 1<br />
14 ROUND PLATE 2<br />
15 BACKREST TUBE 2<br />
HARDWARE PACK<br />
17 ANTI-TIP HOOK 1 1<br />
17 ANTI-TIP HOOK 2 1<br />
18 SUPPORT PLATE 1<br />
19 FOAM ROLLER 4<br />
20 BUTTERFLY WEIGHT LOCK 1<br />
21 KNOB BOLT 1<br />
22 RUBBER BUMPER 1<br />
23 ROUND PLUG 7<br />
24 RECTANGULAR END CAP 6<br />
25 SQUARE END CAP 1 4<br />
26 SQUARE END CAP 2 4<br />
27 LARGE ROUND PLUG 2<br />
28 POST CAPS 2<br />
29 PREACHER CURL SLEEVE 1<br />
30 COLLAR SLEEVES 4<br />
31 BOLT M10 x 80 4<br />
32 BOLT M10 x 60 2<br />
33 BOLT M8 x 85 1<br />
34 BOLT M8 x 55 1
NOTE: These instructions use the following tools (not included):<br />
2x Pliers<br />
STEP 1: ASSEMBLE UPRIGHT POSTS AND COLLARS WITH ANTI-TIP HOOKS<br />
Locate: 2x Upright Frame Posts (1), Support Tube (4), Backrest Support Bar (5), 4x M10*80 BOLTS (31), 8x M10 Washers (37), 2x<br />
Round Plates (14), 4x M10 Nuts (39), 2x Weight Support Collars (3), Anti-Tip Hooks (17), 4x End Caps (24), 2x Round Plugs (23),<br />
2x Post Caps (28) and 4x Collar Sleeves (30)<br />
A. Position the Support Tube (4) between the Upright Posts (1). Thread a Washer (37) on each of the 4x M10*80 Bolts (31).<br />
B. With the Washer at the Bolt heads, thread a M10*80 bolt through the 2 openings in each Round Plate (14). Place the Round<br />
Plates against the outside of the Upright Posts. Thread the bolts through the Posts and into the 2x holes in the Support Tube (4).<br />
Secure each bolt with a Washer (37) and M10 Nut (39).<br />
C. Place 2x Round Plugs (23) in each open end of the Backrest Support Bar (5). Slide the Bar through one pair of holes in the Upright<br />
Posts and lock into place by turning the bar so the hook engages. (This can be adjusted later before use.)<br />
D. Place the 4 Collar Sleeves (30) into the top and bottom of each Weight Support Collar (3). Slide the Collars onto the Upright Posts<br />
with the weight bar hooks facing in the same direction of the shorter leg on the Upright Posts. Lock the Collars into place using the<br />
two Anti-Tip Hooks (17) by sliding the straight end through both the Collar and the Upright Posts. Place 2x Post Caps (28) on the top<br />
open ends of the Upright Posts.<br />
E. Place 4x Rectangular End Caps (24) on each open end at the bottom of the Upright Posts.
STEP 2: ASSEMBLE CENTER SUPPORT FRAME<br />
Locate: Control Brace (8), Front Leg (2), Support Plate (18), Flat Plate (13), 2x M10*60 Bolts (32), 1x M8*55 Bolt (34), 4x M8*16<br />
Bolts (35), 4x M10 Washers (37), 6x M8 Washers (38), 2x M10 Nuts (39), 1x M8 Nut (40), 1x Preacher Curl Sleeve (29), 3x Rectangular<br />
End Caps (24), 4x Square End Caps 2 (26)<br />
A. Thread one M10 Washer (37) on each of the two M10*60 Bolts (32). Thread these bolts through the Flat Plate (13). Line up the<br />
Control Brace (8) to the two holes in the Support Tube (4). Place the Flat Plate on the rear outer surface of the Support Tube lined<br />
up to the holes in the center. Place the M10 Bolts through this tube and into the Control Brace. Secure the Flat Plate to the Control<br />
Brace with 2x M10 Washers (37) and 2x M10 Nuts (39).<br />
B. Place the Front Leg (2) into the open end of the Control Brace (8). Secure the Front Leg to the Control Brace using the three predrilled<br />
holes in the top and the sides of the Control Brace using 3x M8 Washers (38) and 3x M8*16 Bolts (35).<br />
C. Place the Support Plate (18) against the vertical post on the Front Leg and secure with 1x M8 Washer and 1x M8*16 Bolt (35).<br />
Place the opposite end of the Support Plate against the underside of the Control Brace (8) and connect by placing 1x M8*55 Bolt<br />
(34) and M8 Washer (38) combination down through the Control Brace Tube. Connect this to the underside of the Control Brace using<br />
another M8 Washer and the M10 Nut (40).<br />
D. Place the Preacher Curl Sleeve (29) into the opening at the top of the Front Leg (2). Place 3x Rectangular End Caps (24) into the<br />
open ends at the bottom of the Front Leg. Place 4x Square End Caps (26) into the open ends of the two welded bars near the end of<br />
the Control Brace (8).
STEP 3: ATTACH CUSHIONS AND LEG LIFT BAR<br />
Locate: 2x Backrest Tubes (15), Backrest Cushion (10), Seat Cushion (11), 2x Leg Lift Cross Bars (12), Leg Lift (7), 4x Foam Rollers<br />
(19), 8x M8*40 Bolts (36), 8x M8 Washers (38), 1x M10*85 Bolt (33), 2x M10 Washers (37), 1x M10 Nut (39), Butterfly Weight Lock<br />
(20), 4x Round Plugs (23), 4x Square End Caps 1 (25), 2x Large Round Plugs (27) and 1x Rubber Bumper (22).<br />
A. Place the Leg Lift so the hold in the center is lined up to the brackets on the Front Leg (2). Slide a M10 Washer (37) onto the<br />
M10*85 Bolt (33) and place this combination through the Front Leg brackets and Leg Lift. Secure with another M10 Washer and a<br />
M10 Nut (39).<br />
B. Place the Leg Lift Cross Bars (12) through the two holes at the top and bottom of the Leg Lift (7). Keep these bars centered and<br />
slide the Foam Rollers (19) onto the Cross Bars. Place the Rubber Bumper (22) on the tube end that contacts the Front Leg. Place<br />
the Butterfly Weight Lock (20) on the opposite end of this tube. Place 4x Round Plugs (23) into the ends of the Cross Bars. Insert 2x<br />
Large Round Plugs (27) into the open ends of the Leg Lift.<br />
C. Place 4x Square End Caps 1 (25) into the ends of the Backrest Tubes (15). Line up the two holes in the sides of the 2x Backrest<br />
Tubes and slide these Tubes onto the round welded bar on the Control Brace (8). Lay the top ends of the Backrest Tubes against the<br />
Backrest Support Bar (5) between the posts. Keeping the Backrest Tubes securely inserted onto the welded bar, use 4x M8 Washers<br />
(38) and 4x M8*40 Bolts (36) to attach the Backrest Cushions to the Backrest Tubes. When complete, raise and lower the back<br />
cushion to ensure proper assembly. to the Control Brace.<br />
D. Place the Seat Cushion onto the two welded square bars on the Control Brace (8). Secure the Seat Cushion to the Control Brace<br />
using 4x M8 Washers (38) and 4x M8*40 Bolts (36).
STEP 4: ATTACH PREACHER CURL<br />
Locate: Preacher Cushion (9), Preacher Frame (6), Lock Knob (21), 2x M8*15 Bolts (35) and 2x M8 Washers (38).<br />
A. Place the Preacher Cushion (9) against the Preacher Frame (6). Attach the cushion to the Frame using 2x M8 Washers (38) and<br />
2x M8*15 Bolts (35).<br />
B. Insert the completed Preacher Curl assembly into the top of the Front Leg (2). Secure with the Lock Knob (21). Ensure that the<br />
Lock Knob is inserted on the rear side of the Front Leg, in between the Support Plate (18) and the Front Leg.
USING YOUR MID-WITH MULTI PURPOSE BENCH:<br />
WARM UP/COOL DOWN EXERCISES<br />
WARM UP EXERCISES<br />
A successful exercise program consists of a warm-up, aerobic exercise, and a cooldown.<br />
Do the entire program at least two and preferably three times a week, resting for<br />
a day between workouts. After several months, you can increase your workouts to four<br />
or five times per week.<br />
Warming up is an important part of your workout, and should begin every session. It<br />
prepares your body for more strenuous exercise by heating up and stretching out your<br />
muscles, increasing your circulation and pulse rate, and delivering more oxygen to your<br />
muscles. At the end of your workout, repeat these exercises to reduce sore muscle<br />
problems. We suggest the following warm-up and cool-down exercises:<br />
14<br />
Inner Thigh Stretch<br />
Sit with the soles of your feet together<br />
with your knees pointing outward. Pull<br />
your feet as close into your groin as<br />
possible. Gently push your knees towards<br />
the floor. Hold for 15 counts.<br />
Hamstring Stretch<br />
Sit with your right leg extended. Rest the<br />
sole of your left foot against your right<br />
inner thigh. Stretch toward your toe as far<br />
as possible. Hold for 15 counts. Relax and<br />
then repeat with left leg extended.<br />
Head Roll<br />
Rotate your head to the right for one<br />
count, feeling the stretch up the left side<br />
of your neck. Next, rotate your head back<br />
for one count, stretching your chin to the<br />
ceiling and letting your mouth open.<br />
Rotate your head to the left for one count,<br />
and finally, drop your head to your chest<br />
for one count.<br />
Shoulder Lift<br />
Lift your right shoulder up toward your ear<br />
for one count. Then lift your left shoulder<br />
up for one count as you lower your right<br />
shoulder.
WARM UP/COOL DOWN EXERCISES (CONT.)<br />
WARM UP EXERCISES CONTINUED<br />
15<br />
Calf-Achilles Stretch<br />
Lean against a wall with your left leg in<br />
front of the right and your arms forward.<br />
Keep your right leg straight and the left<br />
foot on the floor; then bend the left leg<br />
and lean forward by moving your hips<br />
toward the wall. Hold, then repeat on the<br />
other side for 15 counts<br />
Toe Touch<br />
Slowly bend forward from your waist,<br />
letting your back and shoulders relax as<br />
you stretch toward your toes. Reach down<br />
as far as you can and hold for 15 counts.<br />
Side Stretch<br />
Open your arms to the side and continue<br />
lifting them until they are over your head.<br />
Reach your right arm as far upward toward<br />
the ceiling as you can for one count. Feel<br />
the stretch up your right side. Repeat this<br />
action with your left arm.
PINCH POINT AND WARNING LABEL LOCATIONS
USING YOUR MID-WITH MULTI PURPOSE BENCH<br />
ALWAYS consult a physician before beginning any exercise program. Ask your doctor to evaluate your<br />
present fitness level and determine the exercise program that is most appropriate for your<br />
particular age and/or physical condition.<br />
ALWAYS make sure that all adjustable components of this bench are fully engaged and securely locked<br />
in place. Using this bench without checking these components can result in serious injury and/or death.<br />
Dumbbell Bench Press<br />
Lay down on the bench and set your feet firmly on the floor. Grip<br />
a pair of Dumbbells, holding each perpendicular to your shoulders.<br />
Raise and lower the dumbbells slowly and evenly, starting<br />
with your hands about 1 inch off your chest, then slowly pushing<br />
up to about 2 inches before full extension of your arms (this will<br />
stop you from locking your elbows and keep your target muscles<br />
tight). Repeat.<br />
Bench Press<br />
Lay down on the bench and set your feet firmly on the floor. Use a<br />
spotter. Grip the bar tightly, squeeze the bar tight and slowly lower<br />
it down to your upper chest (about 1/2 way<br />
between your nipples and collarbone). Stop the bar about 1 inch<br />
off your chest, pause, then slowly push the bar up to about 2<br />
inches before the starting position (this will stop you from locking<br />
your elbows and keep your target muscles tight). Repeat.<br />
Preacher Curl with Weights<br />
Sit on the Preacher Curl bench. Hold the barbell in your hands<br />
with your palms facing up. Place elbows on the preacher curl pad.<br />
Extend your arms and curl arms toward your body, keeping your<br />
elbows on the pad. Hold for one second and lower arms to starting<br />
position. Repeat
Question: “How should I clean my Bench?”<br />
FREQUENTLY ASKED QUESTIONS<br />
Answer: YOU SHOULD CLEAN THIS EQUIPMENT WITH A SOLUTION OF WARM WATER AND<br />
NON-CORROSIVE AND/OR NON-ABRASIVE SOAP. DAMPEN A RAG WITH THIS SOLUTION AND<br />
WIPE COMPLETELY DRY BEFORE USING.<br />
Question: “Is there any maintenance I need to do for my Bench?”<br />
Answer: BEFORE EACH USE, YOU SHOULD ALWAYS DOUBLE CHECK TO MAKE SURE ALL<br />
YOUR BOLTS ARE TIGHT AND SECURE, THE ADJUSTABLE COMPONENTS AND CUSHIONS<br />
ARE SECURELY ATTACHED AND/OR LOCKED, AND THERE IS NO DAMAGE TO THE FRAME OR<br />
ITS PARTS. IF ANY OF THE CONDITIONS ARE FOUND, TIGHTEN BOLTS AND/OR SECURE ANY<br />
ADJUSTABLE COMPONENTS. IF THERE IS ANY DAMAGE, OR IF THE ADJUSTABLE<br />
COMPONENTS DO NOT STAY SECURED, CEASE USE OF THE UNIT IMMEDIATELY, SECURE IT<br />
FROM FURTHER USE AND CONTACT CUSTOMER SERVICE AT: customerservice@puregbi.com<br />
OR BY CALLING 866-498-5269 (9AM-5PM M-F)<br />
Question: “Something was missing from the packaging,” “I need to purchase a replacement part”<br />
or “I discovered a damaged piece. What should I do?”<br />
Answer: CONTACT CUSTOMER SERVICE AT: customerservice@puregbi.com or by calling<br />
866-498-5269. YOU MUST HAVE YOUR PROOF OF PURCHASE AND/OR ORDER<br />
CONFIRMATION AVAILABLE TO BE CONSIDERED FOR WARRANTY REPLACEMENT. YOU<br />
MUST REPORT MISSING PIECES WITHIN 30 DAYS FROM DATE OF PURCHASE. PLEASE BE<br />
AWARE THAT UNDER OUR LIMITED WARRANTY, FOR SOME PARTS WE REQUIRE A PICTURE<br />
OF THE DAMAGED ITEM AND/OR RETURN OF THE DAMAGED ITEM(S) TO OUR QUALITY<br />
CONTROL OFFICE FOR REVIEW.<br />
NOTE THAT WEIGHT BARS, WEIGHTS, DUMBBELLS, ETC. ARE NOT INCLUDED WITH THIS<br />
BENCH. THESE MUST BE PURCHASED SEPARATELY.<br />
CUSTOMER SERVICE:<br />
customerservice@puregbi.com<br />
1-866-498-5269 (9AM-5PM, M-F)