Uniting Your Automated and Manual Test Efforts - SmartBear Support
Uniting Your Automated and Manual Test Efforts - SmartBear Support
Uniting Your Automated and Manual Test Efforts - SmartBear Support

Create successful ePaper yourself
Turn your PDF publications into a flip-book with our unique Google optimized e-Paper software.
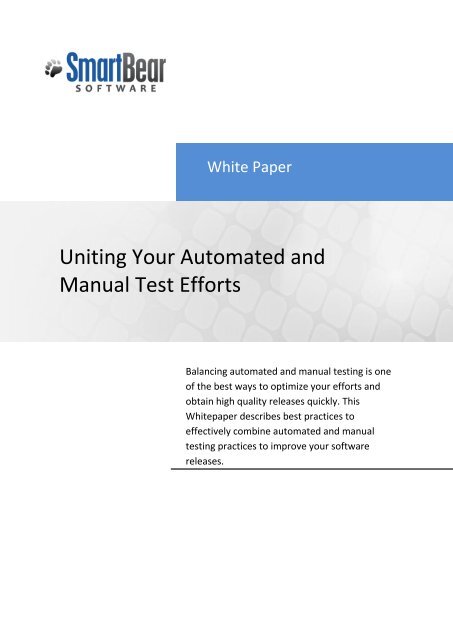
White Paper<br />
<strong>Uniting</strong> <strong>Your</strong> <strong>Automated</strong> <strong>and</strong><br />
<strong>Manual</strong> <strong>Test</strong> <strong>Efforts</strong><br />
Balancing automated <strong>and</strong> manual testing is one<br />
of the best ways to optimize your efforts <strong>and</strong><br />
obtain high quality releases quickly. This<br />
Whitepaper describes best practices to<br />
effectively combine automated <strong>and</strong> manual<br />
testing practices to improve your software<br />
releases.
Introduction<br />
1<br />
<strong>Uniting</strong> <strong>Your</strong> <strong>Automated</strong><br />
<strong>and</strong> <strong>Manual</strong> <strong>Test</strong> <strong>Efforts</strong><br />
Software development teams are always looking for an edge to produce features more quickly<br />
while retaining a high level of software quality. Most software quality teams realize that it<br />
takes both automated <strong>and</strong> manual test efforts to keep pace with quickening release cycles but<br />
are not sure how to get the most out of their testing efforts.<br />
This whitepaper discusses the need for a balanced automated <strong>and</strong> manual test approach <strong>and</strong><br />
describes how to optimize your efforts to obtain the highest quality releases in the shortest<br />
amount of time. The white paper focuses on these topics:<br />
Best practices for planning your automated test effort<br />
Best practices for planning your manual test effort<br />
<strong>Uniting</strong> your automated <strong>and</strong> manual test efforts<br />
Optimizing your test efforts during the QA cycle<br />
Using Retrospectives to improve future testing efforts<br />
Best Practices for Planning <strong>Your</strong> <strong>Automated</strong> <strong>Test</strong> Effort<br />
Many companies run their regression test cases manually, so when does it make sense to begin<br />
automating your regression test cases? In most cases, it’s a good idea to consider automating<br />
your test cases when you can no longer run the regression test cases on each build created. For<br />
example, if you are doing daily or weekly builds of your code for the quality assurance team,<br />
<strong>and</strong> you cannot quickly run your full regression test cases with each build, it is time to consider<br />
automating them. When investing in automation, spend your time wisely using best practice<br />
approaches.<br />
Best Practice 1 – Hire a Dedicated Automation Engineer<br />
Many teams experiment with automation by trying to use an existing manual tester or<br />
programmer, then when the automation effort fails, they scratch their heads to figure out why.<br />
It’s simple: an automation engineer brings years of experience that reduces re-work <strong>and</strong> is<br />
dedicated so that other manual testing <strong>and</strong> programming tasks do not interfere with their role<br />
of automating tests. If costs of another head count are an issue, consider the statistics:<br />
st<strong>and</strong>ard industry results show that it’s 30-100 times less expensive to find defects in QA than<br />
once your software is released to customers! Most companies find that head count concerns<br />
dissipate as they start testing their applications daily <strong>and</strong> reducing QA time while improving<br />
software quality.<br />
Best Practice 2 – Start Small by Attacking <strong>Your</strong> Smoke <strong>Test</strong>s First<br />
Don’t try to automate everything under the sun. Instead, start small – a good place to begin is<br />
by automating your smoke tests. Smoke tests are the basic tests you run on a new build to
2<br />
<strong>Uniting</strong> <strong>Your</strong> <strong>Automated</strong><br />
<strong>and</strong> <strong>Manual</strong> <strong>Test</strong> <strong>Efforts</strong><br />
ensure nothing major was broken with the new build. This group may include only 20 or 25<br />
tests, but by starting with just these, you quickly to see immediate impact from your efforts.<br />
Best Practice 3 – Automate <strong>Your</strong> Regression <strong>Test</strong>s<br />
Once you have automated your smoke tests, move on to your regression tests. Regression<br />
tests ensure that the new build has not broken existing features. Automating your regression<br />
tests may involve automating a large number of tests, so take a methodical approach <strong>and</strong> focus<br />
on the areas of highest impact:<br />
1. Frequently-Performed <strong>Test</strong>s – Start by automating the regression tests that are<br />
frequently performed. Automating a test that gets run once a release cycle isn’t nearly as<br />
impactful as automating a test case that is run 100 times during a release cycle.<br />
2. Time-Consuming <strong>Test</strong>s – Some tests take hours to run: they involve setting up database<br />
table entries, running user interface tests, then querying the database to ensure the data<br />
was h<strong>and</strong>led correctly. When done manually, these tests can take hours, so automating<br />
these tests can free your day up for less time consuming tests.<br />
3. High-Precision <strong>Test</strong>s – Look for tests that require a high degree of precision. By definition,<br />
these test cases have a low tolerance for error: if a mistake is made when running the<br />
test, you have to scrap everything <strong>and</strong> start over again. Such a test may involve complex<br />
mathematical validations, or a complex series of steps you have to follow to execute a<br />
test case that, when interrupted, forces you to start over again. Once these tests are<br />
automated, you will get more consistent results <strong>and</strong> reduce the stress of running them<br />
manually.<br />
Best Practice 4 – Intelligently Organize <strong>Your</strong> <strong>Automated</strong> <strong>Test</strong>s Based on Project <strong>and</strong> Team Size<br />
If you have a small team with one automation engineer, a few manual testers <strong>and</strong> a few<br />
programmers, the likelihood that you will need to split up the automation test effort between<br />
team members is small. Keep the structure simple by organizing your automation tests with<br />
folders inside a single project, with each folder housing the tests for a functional area of your<br />
software. It is also a good practice to have a “common” folder that contains common test cases<br />
that can be re-used by calling them from test cases that reside in your functional area folders.<br />
Examples of re-usable test cases are those for logging in <strong>and</strong> out of the software, sending<br />
emails, etc.<br />
If you have multiple product lines <strong>and</strong> automation engineers, you will have issues if the<br />
automation engineers need to access test cases from within a single project because they will<br />
have concurrency <strong>and</strong> source code checkout issues. To prevent these problems, create a<br />
project suite that contains multiple projects (one for each product line, one for common tests,<br />
etc). Within each project, organize them with folders that are separated by functional area so<br />
that you can quickly find test cases that relate to areas of your software. By having multiple<br />
projects, automation engineers can check those out separately without the worry of<br />
overwriting someone else’s work.<br />
Best Practice 5 – Keep <strong>Your</strong> <strong>Test</strong>s Protected with Source Control<br />
Ever lost your hard drive or overwritten something by mistake? We all have done this, <strong>and</strong>
3<br />
<strong>Uniting</strong> <strong>Your</strong> <strong>Automated</strong><br />
<strong>and</strong> <strong>Manual</strong> <strong>Test</strong> <strong>Efforts</strong><br />
recovering from it can be simple or can be impossible. By using a source control system (like<br />
Subversion, Perforce, ClearCase, TFS, etc.), you can prevent loss of data. As you make changes<br />
to your test cases, check them into your Source Control system <strong>and</strong> if you ever need to roll back<br />
to the prior version, it is simple to do.<br />
Want to learn more about this topic? Watch this movie on how to use your Source<br />
Control system during testing.<br />
Best Practices for Planning <strong>Your</strong> <strong>Manual</strong> <strong>Test</strong> Effort<br />
While automated tests are great for reducing time spent running regression tests, you still need<br />
manual tests for testing new features or enhancing existing features of your software. When<br />
planning out your manual test effort, best practices dictate that you take a methodical<br />
approach that produces great results <strong>and</strong> is repeatable.<br />
Best Practice 1 – Great <strong>Test</strong>ing Starts with Great Requirements<br />
Ever worked on a software project that spent as much time in the QA phase as it did in<br />
development? One where the end result was lots of re-work, missed deadlines <strong>and</strong> frustrated<br />
team members? Much of this re-work can be eliminated by first producing great<br />
requirements. By great requirements, we’re not talking about heavy requirements that fill up<br />
bound notebooks <strong>and</strong> elicit siestas during team reviews. A good requirement has three<br />
attributes:<br />
Succinct yet descriptive narrative<br />
Explicit list of business rules<br />
Prototype - a mockup or wireframe of the functionality<br />
Consider the requirement to the right - it is a poor requirement because the narrative does not<br />
really describe how the feature should work, the business rules are incomplete (they list the<br />
fields but not any behaviors of the<br />
fields) <strong>and</strong> there is no prototype<br />
associated with the requirement to<br />
provide visual <strong>and</strong> functional guidance,<br />
so it is not clear what this screen will<br />
look like once it is completed.<br />
So what does a better requirement look<br />
like? Consider the requirement below:<br />
it has a very descriptive narrative, has an<br />
explicit list of business rules <strong>and</strong> has an attached prototype.
4<br />
<strong>Uniting</strong> <strong>Your</strong> <strong>Automated</strong><br />
<strong>and</strong> <strong>Manual</strong> <strong>Test</strong> <strong>Efforts</strong><br />
Picture above courtesy of <strong>SmartBear</strong> Software’s ALMComplete, a tool for managing<br />
requirements, test cases <strong>and</strong> defects.<br />
Best Practice 2 – Create Positive <strong>and</strong> Negative <strong>Test</strong>s<br />
When creating your test plan, ensure that you have positive test cases (those that ensure the<br />
functionality works as designed), negative test cases (those that ensure that any data entry <strong>and</strong><br />
uncommon use issues are h<strong>and</strong>led gracefully), performance test cases (to ensure that the new<br />
release performs as well as or better than the prior release), <strong>and</strong> relational tests (those that<br />
ensure referential integrity, etc.). Click here for a detailed discussion <strong>and</strong> related best<br />
practices.<br />
Best Practice 3 – Ensure <strong>Test</strong> Cases Have Requirement Traceability<br />
When creating your test plan, the best way to ensure you have enough test coverage for each<br />
requirement is to create a traceability matrix that shows the number of types of test cases for<br />
each requirement. By doing this, you will quickly spot requirements that do not have adequate<br />
test coverage or missing test cases.<br />
Best Practice 4 – Publish <strong>Your</strong> <strong>Test</strong> Cases to Developers Early<br />
Once your testers have completed their test cases, publish them to the programmers so that<br />
they can see the tests that will be run. <strong>Your</strong> programmers should review the test cases to<br />
ensure that their code will accommodate logic for each of the tests; this simple tactic will<br />
dramatically reduce re-work during the QA phase.
5<br />
<strong>Uniting</strong> <strong>Your</strong> <strong>Automated</strong><br />
<strong>and</strong> <strong>Manual</strong> <strong>Test</strong> <strong>Efforts</strong><br />
Want to learn more about this topic? Watch this movie to learn suggestions on how<br />
to include developers in the test case creation process.<br />
<strong>Uniting</strong> <strong>Your</strong> <strong>Automated</strong> <strong>and</strong> <strong>Manual</strong> <strong>Test</strong> <strong>Efforts</strong><br />
Let’s imagine that your automation engineers have automated your smoke <strong>and</strong> regression test<br />
cases <strong>and</strong> your manual test engineers have created a complete set of test cases that have great<br />
traceability <strong>and</strong> test coverage. The development team has just shipped the first version of the<br />
code to the QA team <strong>and</strong> plans to perform daily builds each day of the testing cycle. Here are<br />
some best practices to keep the QA phase operating efficiently.<br />
Best Practice 1 – Schedule <strong>Your</strong> Automation Runs Daily During the QA Phase<br />
Now that you have set up your automation test cases, it is important to run them each day so<br />
that you can quickly discover if the new build has broken any of the existing functionality.<br />
When doing this, there are a couple of approaches you can take. If your builds are being done<br />
by a continuous integration tool (such as <strong>Automated</strong> Build Studio, Hudson, Cruise Control, etc.),<br />
then you can launch your automated tests from the continuous integration tool.<br />
If you are doing builds manually or if you prefer to have the automation launch at a specific<br />
time, you can schedule them to launch using a scheduling tool such as <strong>SmartBear</strong>’s Software<br />
Application Lifecycle Management (ALM) tool, ALMComplete.<br />
A good scheduling tool should be able to launch the automated tests on a specific machine at<br />
specific times each day of the week <strong>and</strong> then log the results of the test run on dashboards, so<br />
that you can easily see how many automated tests ran, how many passed <strong>and</strong> how many failed.<br />
You also want to be able to see which tests failed, so your programmers can check the code to<br />
fix any issues the new build caused.
6<br />
Best Practice 2 – Create Reproducible Defects<br />
Nothing drains time in QA like reporting<br />
defects that are not reproducible. Each time a<br />
tester reports a defect that is not reproducible,<br />
it takes more time for the programmer to<br />
report that it is not reproducible, time for the<br />
tester to re-document how to reproduce it,<br />
<strong>and</strong> more time for the programmer to try<br />
again.<br />
<strong>Uniting</strong> <strong>Your</strong> <strong>Automated</strong><br />
<strong>and</strong> <strong>Manual</strong> <strong>Test</strong> <strong>Efforts</strong><br />
So how do we solve this? The best way is to<br />
publish a narrated movie that shows what you did to reproduce it. Do this with a free product<br />
called Jing (http://www.jingproject.com) that allows you to highlight your application, record<br />
the keystrokes, then produce a movie (with narration if you narrate it with a headset) that is<br />
accessible via a URL. Include the URL of the movie on the defect you send to the programmer<br />
<strong>and</strong> the programmer has everything they need to see your defect in action!<br />
Want to learn more about this topic? Watch this movie to learn how to unite your<br />
manual <strong>and</strong> automated test efforts.<br />
Optimizing <strong>Your</strong> <strong>Test</strong> <strong>Efforts</strong> during the QA Cycle<br />
During the QA phase, it is important to meet daily as a team for 15 minutes (referred to by<br />
Agile shops as a Daily Scrum Meeting) to assess your test progression <strong>and</strong> to prioritize defects<br />
so that the most important ones are addressed. If your test management <strong>and</strong> defect tracking<br />
tools have dashboards that show test progression, make use of those during your meeting by<br />
presenting them interactively during your meeting (use a projector or online conferencing to<br />
review those as a team).<br />
Best Practice 1 – Review <strong>Test</strong> Case Progression<br />
The first indicator you should review is how much progress<br />
the QA team is making towards running all the test cases<br />
for the release.<br />
To the right is an example of a dashboard that shows dayby-day<br />
how many test cases are run, how many passed,<br />
how many failed <strong>and</strong> how many are still awaiting run. A<br />
large number of failed test cases signal a quality problem.<br />
If you find that test cases are not being executed at a pace<br />
that allow you to finish all tests within your QA window,<br />
this knowledge allows you to adjust by adding more help or extending working hours to get it<br />
done.
7<br />
<strong>Uniting</strong> <strong>Your</strong> <strong>Automated</strong><br />
<strong>and</strong> <strong>Manual</strong> <strong>Test</strong> <strong>Efforts</strong><br />
Best Practice 2 – Prioritize Defects Daily<br />
The next indicator to review is the number of defects by priority <strong>and</strong> assignee. This information<br />
allows you to determine if specific programmers are overloaded with defect work <strong>and</strong> helps<br />
you to more evenly distribute the load. When prioritizing defects, we like to prioritize them<br />
based on severity <strong>and</strong> how important they are to the software release. The key to this tactic is<br />
to objectively define your severity levels so that it is clear how problematic they are. We use<br />
these severity levels:<br />
1-Crash (crashes the software)<br />
2-Major Bug (with no workaround)<br />
3-Workround (major defect with a workaround)<br />
4-Trivial Bug<br />
Based on these severities, you can choose what priority they should be fixed in (1-Fix ASAP, 2-<br />
Fix Soon, 3-Fix If Time). Below are some dashboards you might consider when evaluating<br />
defect priorities:<br />
In the graphs above, you can see that most defects are major with no workaround, which<br />
implies a quality issue. You will also see that too many defects are categorized as high priority,<br />
which means that your team needs to make tougher decisions on how your prioritize them to<br />
ensure that the most important ones are fixed first.
8<br />
<strong>Uniting</strong> <strong>Your</strong> <strong>Automated</strong><br />
<strong>and</strong> <strong>Manual</strong> <strong>Test</strong> <strong>Efforts</strong><br />
Evaluating defects by assignee can indicate if a<br />
specific programmer is overloaded with work.<br />
Want to learn more about this topic? Watch this movie to identify ways to optimize<br />
your testing effort during QA cycles.<br />
Using Retrospectives to Improve Future <strong>Test</strong>ing <strong>Efforts</strong><br />
Once your software release makes it to production, it is important to look back at the things<br />
you did right <strong>and</strong> the things you can improve upon so that you can take these “lessons learned”<br />
into the next development effort you embark on. This approach is sometimes referred to as a<br />
“post mortem” or “retrospective”.<br />
Best Practice 1 – Analyze <strong>Your</strong> Project Variances<br />
If you used tools to plan out your work efforts (programming <strong>and</strong> testing hours for each<br />
requirement) <strong>and</strong> you recorded the time each person spent on each requirement, you then<br />
have valuable information on how well your team is able to estimate tasks. Software Planner<br />
<strong>and</strong> many other project management tools have the ability to track estimated versus actual<br />
hours. Using these tools, you can capture the release analytics:<br />
Sprint Est Hrs Act<br />
Hrs<br />
Variance %<br />
Variance<br />
Release 9.0 – Sprint 1 441 586 145 32%<br />
Release 9.0 – Sprint2 655 548 -107 -19%<br />
Release 9.0 – Sprint 3 881 740 -141 -19%<br />
Release 9.0 – Sprint 4 636 698 62 10%<br />
Averages 653 643 -10 -1%<br />
In the example above, notice that the first sprint was under-estimated. In sprint 2, a correction
9<br />
<strong>Uniting</strong> <strong>Your</strong> <strong>Automated</strong><br />
<strong>and</strong> <strong>Manual</strong> <strong>Test</strong> <strong>Efforts</strong><br />
was made (based on the retrospective) so that estimated hours were buffered <strong>and</strong> the end<br />
result was that the sprint came in under variance. By collecting the variance information<br />
release-by-release <strong>and</strong> sprint-by-sprint (if using Agile), you can make adjustments by buffering<br />
estimates in upcoming releases.<br />
Best Practice 2 – Analyze Quality Assurance Metrics<br />
It is also important to track how many test cases were run <strong>and</strong> how many defects were<br />
discovered during the release. Below is an example of how we tracked this information for a<br />
prior release:<br />
Sprint # <strong>Test</strong> Cases Run # Defects<br />
Found/Fixed<br />
Release 9.0 – Sprint 1 107 15<br />
Release 9.0 – Sprint 2 129 217<br />
Release 9.0 – Sprint 3 172 239<br />
Release 9.0 – Sprint 4 79 533<br />
Total 488 1,004<br />
Best Practice 3 – Document <strong>Your</strong> Retrospective<br />
Equipped with the analytics discussed above in best practices 1 <strong>and</strong> 2, you are now ready to<br />
hold your Retrospective meeting. Schedule the meeting <strong>and</strong> ask everyone who participated in<br />
the software release to bring into the meeting a list of three things they think the team did well<br />
<strong>and</strong> three things the team can improve upon.<br />
During the retrospective meeting, go around the room <strong>and</strong> have each person discuss the three<br />
things done wrong <strong>and</strong> right. As each person presents their opinions, you will start to see<br />
commonalities (people will agree on the things done right <strong>and</strong> wrong), tally up the<br />
commonalities <strong>and</strong> score them.<br />
Once done, analyze the things the team thought could be improved on <strong>and</strong> create action items<br />
(assigned to specific people) to follow up with a plan to improve those things in the next<br />
release. Once done, document your retrospective (using MS Word or something similar) <strong>and</strong><br />
publish your retrospective in a central repository so that team members can review it in the<br />
future. If using Software Planner, you can use the Shared Documents area to store the<br />
retrospective <strong>and</strong> all team members can access it.<br />
When you begin the planning for your next release, be sure to access the retrospective to<br />
refresh your memory on the things done well (so that you can continue to do them well) <strong>and</strong> to<br />
remind yourself of the action items taken to improve the things that were not done well.
10<br />
<strong>Uniting</strong> <strong>Your</strong> <strong>Automated</strong><br />
<strong>and</strong> <strong>Manual</strong> <strong>Test</strong> <strong>Efforts</strong><br />
If you would like an example of a retrospective document, download it here.<br />
Want to learn more about this topic? Watch this movie to learn how to use<br />
retrospectives to improve future testing efforts.<br />
Summary<br />
So now you are armed with an arsenal of best practices to get the most out of your testing<br />
efforts. An important part of process improvement is using tools that make this process easier.<br />
In many of the examples of this whitepaper, you saw dashboard graphs that highlight<br />
important metrics your team needs to work most efficiently. Those dashboards were produced<br />
by ALMComplete, our ALM tool.<br />
For more information on ALMComplete, please visit us at www.<strong>SmartBear</strong>.com or contact us at<br />
978-236-7900 for a free trial or a personalize demo.
11<br />
<strong>Uniting</strong> <strong>Your</strong> <strong>Automated</strong><br />
<strong>and</strong> <strong>Manual</strong> <strong>Test</strong> <strong>Efforts</strong><br />
You may also enjoy these other resources in the <strong>SmartBear</strong> Software Quality Series:<br />
11 Best Practices for Peer Code Review<br />
6 Tips to Get Started with <strong>Automated</strong> <strong>Test</strong>ing<br />
Be Smart <strong>and</strong> join our growing community of over 100,000 development, QA <strong>and</strong> IT<br />
professionals in 90 countries at (www.smartbear.com/community/resources/).<br />
About <strong>SmartBear</strong> Software<br />
<strong>SmartBear</strong> Software provides enterprise-class yet<br />
affordable tools for development teams that care<br />
about software quality <strong>and</strong> performance. Our<br />
collaboration, performance profiling, <strong>and</strong> testing<br />
tools help more than 100,000 developers <strong>and</strong><br />
testers build some of the best software<br />
applications <strong>and</strong> websites in the world. Our users<br />
can be found in small businesses, Fortune 100<br />
companies, <strong>and</strong> government agencies.<br />
<strong>SmartBear</strong> Software<br />
+ 1 978.236.7900<br />
www.smartbear.com<br />
© 2011 <strong>SmartBear</strong> Software. All rights reserved. All other product/br<strong>and</strong> names are trademarks of their respective holders.