View Instructions - Davey Pumps
View Instructions - Davey Pumps
View Instructions - Davey Pumps

You also want an ePaper? Increase the reach of your titles
YUMPU automatically turns print PDFs into web optimized ePapers that Google loves.
<strong>Davey</strong> Water Products Pty Ltd<br />
Member of the GUD Group<br />
ABN 18 066 327 517<br />
Head Office and Manufacturing<br />
6 Lakeview Drive,<br />
Scoresby, Australia 3179<br />
Ph: +61 3 9730 9222<br />
Fax: +61 3 9753 4100<br />
Website: davey.com.au<br />
Customer Service Centre<br />
Ph: 1300 367 866<br />
Fax: 1300 369 119<br />
E-mail: sales@davey.com.au<br />
Interstate Offices<br />
Sydney • Brisbane • Adelaide<br />
Perth • Townsville<br />
International<br />
6 Lakeview Drive,<br />
Scoresby, Australia 3179<br />
Ph: +61 3 9730 9121<br />
Fax: +61 3 9753 4248<br />
E-mail: export@davey.com.au<br />
USA<br />
Website: daveyusa.com<br />
E-mail: export@davey.com.au<br />
<strong>Davey</strong> Water Products<br />
– New Zealand<br />
7 Rockridge Avenue,<br />
Penrose, Auckland 1061<br />
Ph: +64 9 570 9135<br />
Fax: +64 9 527 7654<br />
Website: daveynz.co.nz<br />
E-mail: sales@daveynz.co.nz<br />
<strong>Davey</strong> Spa – New Zealand<br />
2 Rothwell Avenue,<br />
North Harbour, Auckland 0632<br />
Ph: +64 9 415 8622<br />
Fax: +64 9 415 8621<br />
Website: spa-quip.co.nz<br />
E-mail: service@spa-quip.co.nz<br />
P/N 401336 -2 supersedes P/N 401336 & -1<br />
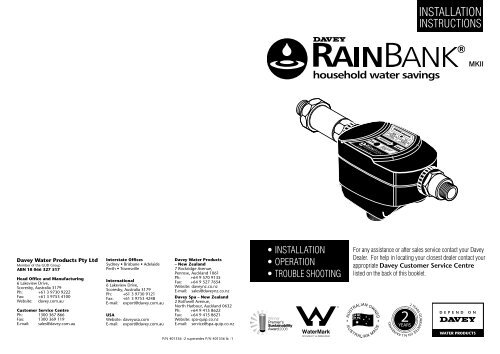
• InstallatIon<br />
• operatIon<br />
• trouble shootIng<br />
AT S 5200.477 Lic WMKA 22042<br />
InstallatIon<br />
InstructIons<br />
For any assistance or after sales service contact your <strong>Davey</strong><br />
Dealer. For help in locating your closest dealer contact your<br />
appropriate <strong>Davey</strong> Customer Service Centre<br />
listed on the back of this booklet.<br />
2<br />
YEARS<br />
2 YEARS GUARANTEE ON ALL RAINBANKS<br />
MKII
<strong>Davey</strong> commenced in 1934 and today, as <strong>Davey</strong> Water products, manufactures and distributes a<br />
comprehensive range of products for transfer, conservation, treatment and filtration of water.<br />
<strong>Davey</strong> has a dominant market share in australia and exports to more than 50 separate countries,<br />
servicing some of the toughest environmental and climatic conditions on the globe.<br />
<strong>Davey</strong> has maintained its commitment to research and development, resulting in innovative new<br />
products servicing specific and emerging market opportunities. Many of these products have received<br />
multiple awards for innovation and excellence which have led to our induction into the Manufacturing<br />
hall of Fame in Victoria.<br />
<strong>Davey</strong> maintains leadership in quality with an environmental focus by holding Iso 9000-2001<br />
accreditation and Iso 14000 environmental standard.<br />
<strong>Davey</strong> is today a wholly owned subsidiary of guD, a ‘top 200’ australian public company whose shares<br />
are listed on the australian stock exchange.<br />
now more than ever “Depend on <strong>Davey</strong>” reflects a business culture of dependable, innovative water<br />
solutions when and where you need them, supported by the best service and advice.<br />
DaVeY guarantee<br />
DAVEY WATER PRODUCTS GUARANTEE FOR AUSTRALIA & NEW ZEALAND<br />
<strong>Davey</strong> rainbank ® controller is guaranteed for a period of two years from the date of<br />
original purchase to be free of material or manufacturing defects. should any part fail<br />
as a result of such defects within this period, the controller will be repaired free of<br />
charge.<br />
TERMS AND CONDITIONS<br />
1. this guarantee applies to all states and territories of<br />
australia and new Zealand only and is subject to the<br />
provisions of the trade practices act (aust.), the goods<br />
and consumer protection legislation of the various<br />
australian states and the consumers guarantee act 1993<br />
(nZ) as applicable.<br />
2. the guarantee period commences on the date of original<br />
purchase of the equipment. evidence of this date of<br />
original purchase must be provided when claiming repairs<br />
under guarantee. It is recommended you retain all receipts<br />
in a safe place.<br />
3. this guarantee covers parts and workshop labour only.<br />
goods should be forwarded, with proof of date of original<br />
purchase, to an authorised <strong>Davey</strong> service centre freight<br />
paid.<br />
4. this guarantee is subject to due compliance by the<br />
original purchaser with all directions and conditions set<br />
out in the Installation and operating <strong>Instructions</strong>. Failure<br />
to comply with these instructions, damage or breakdown<br />
caused by fair wear and tear, negligence, misuse, incorrect<br />
installation, chemical or additives in the water, inadequate<br />
protection against freezing, rain or other adverse weather<br />
conditions, corrosive or abrasive water, lightning or<br />
high voltage spikes or through unauthorised persons<br />
attempting repairs are not covered under guarantee. the<br />
product must only be connected to the voltage shown on<br />
the nameplate.<br />
® <strong>Davey</strong> and rainbank are registered trademarks of <strong>Davey</strong> Water products pty ltd.<br />
rainbank patented.<br />
© <strong>Davey</strong> Water products pty ltd 2007.<br />
5. Without limiting the original purchaser’s entitlements<br />
under the trade practices act (aust.), the goods &<br />
consumer protection legislation of the various australian<br />
states, or the consumers guarantee act 1993 (nZ),<br />
<strong>Davey</strong> shall not be liable for any loss of profits or any<br />
consequential, indirect or special loss, damage or injury<br />
of any kind whatsoever arising directly or indirectly from<br />
the product or any defect.<br />
6. Where the trade practices act (aust.), the goods and<br />
consumer protection legislation of the various australian<br />
states and the consumers guarantee act 1993 (nZ) does<br />
not apply, <strong>Davey</strong> shall not be liable for any loss of profits<br />
or any consequential, indirect or special loss, damage or<br />
injury of any kind whatsoever suffered by the purchaser<br />
arising directly or indirectly from the product or any defect<br />
and the purchaser shall indemnify <strong>Davey</strong> against any<br />
claim by any other person whatsoever in respect of any<br />
such loss, damage or injury.<br />
7. nothing in this guarantee is intended to have the effect of<br />
contracting out of the provisions of the trade practices act<br />
(aust.), the goods and consumer protection legislation<br />
of the various australian states and consumers guarantee<br />
act 1993 (nZ) except to the extent permitted by the<br />
various acts and this guarantee is to be modified to the<br />
extent necessary to give effect to that intention.<br />
8. <strong>Davey</strong> may be collecting personal information from<br />
you in order to provide you with a service. <strong>Davey</strong> Water<br />
products pty ltd promises only to use this information in<br />
accordance with the provisions of the privacy act 1988<br />
(cth) and the privacy policy of <strong>Davey</strong> Water products pty<br />
ltd which is available at davey.com.au.<br />
2 35
contents<br />
about rainbank ® . the easy way to save water. 4<br />
two types of installation - quick reference 5<br />
how rainbank ® works 6<br />
how to install rainbank ® 7<br />
before you start 9<br />
Installation instruction 11<br />
pump outside tank option 12<br />
pump inside tank option 14<br />
Float switch installation 18<br />
Installation of submersible pumps 25<br />
priming pumps 26<br />
Maintaining rainbank ® 28<br />
trouble shooting rainbank ® 29<br />
Warnings 32<br />
<strong>Davey</strong> guarantee 35<br />
contact Details 36<br />
34 3
about raInbank ® .<br />
the easY WaY to saVe Water<br />
congratulations on your purchase of<br />
a high quality australian made <strong>Davey</strong><br />
rainbank ® automatic water controller.<br />
rainbank ® is patented and has been fitted<br />
to thousands of australian homes.<br />
• rainbank ® allows you to use water<br />
from your rainwater tank for your<br />
toilet, washing machine or garden<br />
whenever there is water in the tank.<br />
• If the tank water is exhausted<br />
rainbank ® automatically and<br />
seamlessly switches you over to mains<br />
water.<br />
• rainbank ® has an in-built “dual<br />
check valve” for low hazard back flow<br />
prevention.<br />
RainBank ® can save up to 40% of<br />
your home’s usage of mains water,<br />
which could be up to 100,000 litres<br />
of water a year.<br />
4m<br />
5m<br />
5m<br />
100,000 Litres<br />
Your actual savings depend on your roof<br />
catchment area, rainfall and the size of<br />
your tank.<br />
RainBank ® may allow you to claim<br />
tank rebates (when installed on<br />
existing homes). Check with your<br />
local water authority.<br />
In most areas of australia, having a<br />
rainbank ® and using rainwater for<br />
your toilet and washing machine allows<br />
you to claim tank rebates paid by state<br />
governments and some councils.<br />
RainBank ® is energy efficient and<br />
cheap to run.<br />
because rainbank ® only works when it is<br />
needed it uses very little energy.<br />
the daily power used to run a rainbank ®<br />
and pump system supplying two toilets in<br />
a three person dwelling is equivalent to:<br />
• a reverse cycle air conditioner for<br />
3 minutes<br />
• a clothes dryer for 3 minutes<br />
• a washing machine for 10 minutes<br />
• a tV or pc for 30 minutes<br />
4 33
WarnIngs<br />
• before installing your rainbank ®<br />
controller, please read all instructions<br />
carefully as failures caused by<br />
incorrect installation or operation are<br />
not covered by the guarantee. Your<br />
rainbank ® controller is designed<br />
to handle clean water. the system<br />
should not be used for any other<br />
purpose without specific referral to<br />
<strong>Davey</strong>. the use of the system to<br />
pump flammable, corrosive and other<br />
materials of a hazardous nature is<br />
specifically excluded.<br />
• WarnIng: Water freezing inside<br />
the rainbank ® will damage the unit.<br />
locate your rainbank ® and pump<br />
so that they are not susceptible to<br />
freezing.<br />
• rainbank ® must be installed and<br />
serviced by a licensed plumber.<br />
• check with your local water authority<br />
on water restrictions when your<br />
rainwater tank is connected to mains<br />
water.<br />
• Do not enter a empty rainwater tank<br />
- they may contain hazardous gases.<br />
• secure all openings to the rainwater<br />
tank to ensure it will not permit access<br />
to children.<br />
tWo tYpes oF<br />
InstallatIon<br />
1<br />
6<br />
2<br />
3<br />
Mains water supply<br />
1<br />
3/4” BSP Male thread<br />
2<br />
1<br />
3/4” BSP Male thread<br />
3<br />
4<br />
6<br />
Pump Power lead<br />
4<br />
RainBank ® Power lead<br />
5<br />
6<br />
7<br />
8<br />
9<br />
32 5<br />
In-tank optIon<br />
MoDel no. krbs1&2<br />
aboVe grounD optIon<br />
MoDel no. krb1,2,3&4<br />
8<br />
8<br />
2<br />
5<br />
5<br />
Stop valve<br />
9<br />
3<br />
Float switch<br />
4<br />
Manual start button<br />
9<br />
7<br />
Rainwater supply via pump<br />
Warning:<br />
Do not reconnect with<br />
mains water supply<br />
7<br />
Important:<br />
All pipework and outlet<br />
fittings from RainBank ® must<br />
be labelled to AS/NZS 3500<br />
6<br />
In-tank Option Model No. KRBS1&2<br />
Above Ground Option Model No. KRB1,2,3&4<br />
(see page 12) (see page 14)
hoW raInbank ® Works<br />
1. When there is demand for water<br />
from your toilet, washing machine or<br />
garden tap, rainbank ® senses<br />
this demand and checks the level of<br />
water in the rainwater tank.<br />
note: demand must be greater than<br />
1.5 litres per minute or mains water<br />
will be delivered.<br />
2. If there is rainwater in the tank<br />
rainbank ® switches on the pump.<br />
the pressure of the pump is<br />
sufficient to overcome the pressure of<br />
the mains water inside rainbank ®<br />
and this moves a plunger and allows<br />
the rainwater to flow.<br />
note: mains water pressure is not<br />
restricted.<br />
3. When there is no longer a demand for<br />
water, rainbank ® detects that water<br />
has ceased to move inside the pipes,<br />
switches off the pump and waits for<br />
another water demand.<br />
4. If rainbank ® senses a water<br />
demand and detects insufficient water<br />
in the rainwater tank it will<br />
automatically allow the mains water<br />
to flow.<br />
5. If there is a power failure during a<br />
demand for water rainbank ® will<br />
automatically supply the mains<br />
water as backup.<br />
What are the advantages of<br />
RainBank ® over conventional<br />
air-gap systems?<br />
• rainbank ® is totally hands off for<br />
your customer and needs no<br />
maintenance or adjustment.<br />
• rainbank ® is easy to install.<br />
• rainbank ® does not require mains<br />
water to be re-pressurised and<br />
therefore saves energy.<br />
• rainbank ® is WaterMark approved<br />
- this means plumbing inspections<br />
will be approved & your plumbers<br />
insurance should cover installation<br />
faults.<br />
• rainbank ® will provide mains water<br />
as backup when:<br />
- there is no rainwater<br />
- there is no electricity to run pump<br />
- the pump has been removed for<br />
servicing. air-gap systems rely on<br />
pumps to pressurise all water<br />
and do not function without<br />
them.<br />
Mains water is still in use when<br />
pump is running. possible cause<br />
- pump needs to be primed. stop pump<br />
and remove priming plug from front top of<br />
pump (right above water inlet) and allow<br />
all air to escape from pump. replace the<br />
priming plug when water dribbles out of<br />
hole (see page 26).<br />
Mains water is still in use when<br />
pump is running. possible cause<br />
- debris is caught inside rainbank<br />
preventing plunger mechanism from<br />
sealing completely. contact your plumber<br />
to fit a ‘Y’ strainer to system between tank<br />
& rainbank.<br />
Mains water is still in use when<br />
pump is running. possible cause<br />
- pump impeller blocked. have pump<br />
serviced. Fit first flush devices and ‘Y’<br />
strainer to pipework.<br />
Mains water not passing through<br />
RainBank ® . possible cause - rainbank ®<br />
installed backwards. Install rainbank ®<br />
according to installation & operating<br />
instructions. arrow on top of rainbank<br />
indicates direction of flow.<br />
Mains water not passing through<br />
RainBank ® . possible cause - debris<br />
is blocking inlet to rainbank ® . remove<br />
rainbank ® and clean inlet.<br />
OTHER SYMPTOMS:<br />
Mains water pressure and flow<br />
too low. possible cause - there is a<br />
check valve installed between rainbank ®<br />
and tank. remove check valve from<br />
plumbing.<br />
Pump hums. possible cause - pump is<br />
jammed or seized. have pump serviced.<br />
Water leaking from connection<br />
between pump and RainBank ® .<br />
possible cause - installer has failed<br />
to fit connection kit correctly. remove<br />
rainbank ® and re-install connection kit.<br />
Float switch pops out of tank.<br />
possible cause - hole in tank is too large<br />
or not tightened sufficiently.<br />
Mains water filling up tank. possible<br />
cause - debris caught inside rainbank ® .<br />
Install first flush devices and ‘Y’ strainer.<br />
6 31
1. Pump not plugged in.<br />
plug pump into base of rainbank ®<br />
and rainbank ® into power supply.<br />
2. No power supply to pump.<br />
contact electrician and have power<br />
restored.<br />
3. Float switch not connected to<br />
RainBank ® . plug float lead into<br />
base of rainbank ® . the connection<br />
lead is located next to the power lead<br />
coming from the rainbank ® . to<br />
confirm the connection is correct,<br />
depress ‘manual override’ button,<br />
pump<br />
will start.<br />
4. No water in tank.<br />
check water level in tank.<br />
5. Float switch located at water<br />
tank is installed incorrectly.<br />
check to see if the word “up” is facing<br />
up on float switch.<br />
6. Mains water supply not<br />
connected to RainBank.<br />
rainbank ® system must have a<br />
pressurised water supply connected to<br />
inlet. press ‘manual override’<br />
button to simulate mains water<br />
flowing. pump will start if rain water<br />
is available.<br />
SYMPTOM: PUMP WILL NOT SWITCH ON<br />
7. Mains supply to RainBank ®<br />
turned off. turn on mains water<br />
supply. press ‘manual override’<br />
button to simulate mains water<br />
flowing. pump will start is rain water<br />
is available.<br />
8. Pump is faulty.<br />
to confirm if the fault is within the<br />
pump, plug the pump directly into<br />
power point and check to see if it<br />
starts. If the pump starts plug the<br />
pump back into the rainbank ® and<br />
continue fault finding. If the pump<br />
does not start contact your supplier for<br />
further advice.<br />
9. Lead from float switch to pump<br />
broken or damaged.<br />
replace float and lead assembly.<br />
10. Float switch defective.<br />
contact your supplier for further<br />
advice.<br />
hoW to Install raInbank ®<br />
30 7<br />
!<br />
IMPORTANT<br />
because it involves mains water,<br />
rainbank ® may only be legally<br />
installed by a licensed plumber.<br />
hardwired rainbanks may also require<br />
an electrically qualified person to<br />
install and remove.<br />
Different types of RainBank ®<br />
Installations<br />
there are different ways a rainbank ® can<br />
be installed depending on your rainwater<br />
tank and pump configuration.<br />
INSTALLATION TYPE 1 - PAGE 16<br />
Mains In<br />
To House<br />
Tank: above ground<br />
Pump: outside tank<br />
Float switch: must be installed inside<br />
of tank<br />
Pump Kit: krb1,2,3&4<br />
FS<br />
INSTALLATION TYPE 2 - PAGE 21<br />
Mains In<br />
Mains In<br />
To House<br />
Tank: above ground<br />
Pump: submersible inside tank<br />
Float switch: incorporated with pump<br />
Pump Kit: krbs1&2<br />
INSTALLATION TYPE 3 - PAGE 22<br />
To House<br />
Tank: below ground<br />
Pump: submersible inside tank<br />
Float switch: incorporated with pump<br />
Pump Kit: krbs1&2
INSTALLATION TYPE 4 - PAGE 23<br />
Mains In<br />
Tank: below ground<br />
Float switch: this is a different type<br />
of float switch suitable for tanks that<br />
you don’t want to drill holes into. (part<br />
number 13961) see your <strong>Davey</strong> Dealer<br />
for details<br />
Pump Kit: krb1,2,3&4<br />
Float: part number 13961<br />
OTHER INSTALLATION TYPES<br />
note: there are some situations where an<br />
alternate method to sense the rainwater<br />
level is required.<br />
• tanks with a rubber or plastic<br />
membrane (check with tank<br />
manufacturer).<br />
• concrete tanks<br />
To House<br />
there is an alternative float switch that<br />
can be lowered into the top of concrete<br />
tanks. this is part number 13961.<br />
FV<br />
Different ways of installing the<br />
RainBank ® unit itself.<br />
• exposed installation against wall<br />
(under eaves).<br />
Mains In<br />
• encased installation with unit and<br />
pump inside cover.<br />
Mains In<br />
• Integrated installation incorporated as<br />
part of tank system.<br />
Mains In<br />
To House<br />
To House<br />
To House<br />
trouble shootIng<br />
raInbank ®<br />
SYMPTOM: PUMP WILL NOT SWITCH OFF<br />
1. Pump plugged directly into<br />
power outlet. plug lead from pump<br />
into base of rainbank ® as per<br />
installation instructions on pg 20.<br />
2. Water is still being used.<br />
check all taps, toilets and appliances<br />
connected to rainbank ® system to<br />
ensure they are turned off.<br />
3. Water is leaking on discharge<br />
side of RainBank ® system.<br />
check for leaks and repair.<br />
4. Rock or debris caught inside<br />
RainBank ® .<br />
call your plumber to fit a Y strainer<br />
- rainbank ® will need to be returned<br />
to <strong>Davey</strong>.<br />
8 29
MaIntaInIng raInbank ®<br />
rainbank ® does not need maintenance<br />
but there are things you can do to ensure<br />
its most reliable operation.<br />
• Fit a “first flush” system that ensures<br />
the first run of dirty rainwater does not<br />
go into the tank.<br />
• clean your gutters regularly.<br />
• remove branches that over hang your<br />
roof.<br />
• have a strainer fitted to your rainwater<br />
tank inlet and regularly check this for<br />
leaves and twigs, etc.<br />
• You should also check for debris in<br />
the bottom of your tank a few times a<br />
year and clean this out if necessary. a<br />
first flush system will greatly reduce<br />
the need for this action.<br />
! IMPORTANT MAINTENANCE<br />
PRECAUTIONS<br />
• <strong>Davey</strong> pump motors are fitted with an<br />
automatic thermal overload switch<br />
that stops the motor if the motor<br />
gets too hot to avoid damaging it.<br />
this automatically re-starts the motor<br />
when the temperature within the<br />
pump has dropped to a safe level.<br />
constant tripping of this switch<br />
indicates a problem e.g. low voltage<br />
at pump, etc.<br />
• this automatic thermal overload<br />
switch can start the pump without<br />
warning. always disconnect the<br />
controller and/or pump motor from the<br />
electrical supply before maintenance<br />
or repairs.<br />
• care should also be taken when<br />
servicing or disassembling pump to<br />
avoid injury from hot pressurised<br />
water. unplug the pump, relieve<br />
the pressure by opening a tap on the<br />
discharge side of the pump and allow<br />
any hot water to cool before<br />
attempting to dismantle.<br />
• Do not use petroleum based fluids or<br />
solvents (e.g. oils, kerosene,<br />
turpentine, thinners, etc on the plastic<br />
or seal components).<br />
• Do not use hydrocarbon based or<br />
propelled sprays around the electrical<br />
components of the controller.<br />
• During servicing use only approved<br />
non petrochemical based oring and<br />
gasket lubrication. If unsure consult<br />
your <strong>Davey</strong> dealer for advice.<br />
beFore You start<br />
IMPORTANT:<br />
• If you are in doubt about any aspect<br />
of your rainbank ® !<br />
kit’s suitability,<br />
check with your <strong>Davey</strong> dealer. For<br />
help in locating your closet dealer<br />
call the appropriate <strong>Davey</strong> customer<br />
service centre listed on the back of<br />
this booklet.<br />
• rainbank ® is designed to handle<br />
clean rainwater and mains water. It<br />
should not be used to interconnect as<br />
part of a bore water, dam water,<br />
grey water, stormwater or recycled<br />
water system.<br />
• Make sure the wiring, plumbing and<br />
the rainbank ® unit are protected<br />
from access by children and pets.<br />
Other things we recommend to<br />
maximise the performance and<br />
serviceability of your RainBank ® .<br />
• Fit a first flush system if possible to<br />
divert the initial run of water from the<br />
roof that may contain dirt and<br />
pollutants.<br />
• Fit a strainer to the top of your tank<br />
inlet to stop leaves entering the<br />
system.<br />
• Fit a 1 inch ‘Y’ strainer to the pipe<br />
work between the pump and<br />
rainwater tank – or between the pump<br />
and rainbank ® . this will ensure<br />
that debris from the tank will not<br />
build up inside rainbank ® , washing<br />
machines or toilet cisterns.<br />
• use at least 20mm or 3 ⁄4 inch<br />
plumbing to and from rainbank ® to<br />
reduce the effect of pipe friction.<br />
28 9
Make sure the delivery from<br />
rainbank ® to your home is within the<br />
following pipe length limits:<br />
pipe Max. pipe Max. pipe<br />
diameter length @ length @<br />
6 lpm flow 12 lpm flow<br />
15mm 28m 10m<br />
18mm 90m 27m<br />
20mm 235m 135m<br />
For each bend or tee you should reduce<br />
the above distances by 0.5m.<br />
• We recommend fitting isolation valves<br />
to the rainwater and mains water pipe<br />
so that the rainbank ® can be easily<br />
and conveniently removed if<br />
required. this saves both wasting<br />
rainwater and having to turn off the<br />
mains supply if the unit ever has to be<br />
removed.<br />
• While rainbank ® does have an in-built<br />
Dual check back flow prevention<br />
valve, some water authorities require<br />
an additional external back flow valve<br />
to be plumbed into the mains water<br />
delivery line, to prevent any possible<br />
contamination of mains water by<br />
rainwater, particularly if the tank is<br />
partially or fully submerged. check<br />
with your local water authority for their<br />
plumbing guidelines on rainwater<br />
tanks.<br />
Type 4 installations. External<br />
suction pump drawing from below<br />
ground tank.<br />
pump inlet should be at least (200mm)<br />
below the lowest water level for reliable<br />
operation.<br />
priming is as for type 1 installations.<br />
If there is a significant amount of water<br />
required to do this it can be a good idea<br />
to fit the highest area of the pipe with an<br />
access plug in a t piece so that the pipe<br />
can be filled more quickly with a bucket<br />
when repriming.<br />
10 27
prIMIng puMps<br />
Type 1 installations. Above ground<br />
tank and pump outside tank.<br />
1. remove the priming plug on the<br />
top of the pump and fill the casing<br />
and suction line with water then refit<br />
plug. If there is an isolation valve<br />
fitted on the delivery pipe from the<br />
rainwater tank (as recommended) this<br />
needs to be opened.<br />
If there is an air lock i.e. the pipe and<br />
pump casing is not fully filled with water,<br />
the pump may not draw water. If this is<br />
the case you should repeat the priming<br />
procedure. If the pump still does not draw<br />
properly this may be a fault in the way<br />
the delivery pipe is installed. the pump<br />
should be slightly higher than the pipe<br />
inlet and this should run up hill to the<br />
pump at a slight but consistent slope so<br />
that any air is expelled at the pump end as<br />
the pump is primed.<br />
2. hold down ‘manual override’ button<br />
on the rainbank to operate pump to<br />
clear trapped air. Make sure an outlet<br />
(tap) is open so that air and water can be<br />
dispelled. Make sure the mains water is<br />
turned off until the pump is fully primed.<br />
!<br />
IMPORTANT<br />
leaky joins can also cause a loss of<br />
prime.<br />
note: the pump must be below the float<br />
switch.<br />
Type 2 and 3 installations.<br />
Submersible pumps inside tank.<br />
provided the pump is sitting in sufficient<br />
water the pump will self prime and push<br />
air out of the taps and appliances that are<br />
used at the other end. to let this air out<br />
without causing damage it is important<br />
that:<br />
• all taps connected to the rainwater<br />
system are turned on<br />
• toilets connected to the system are<br />
flushed so the cistern fills and any air<br />
is cleared from the line.<br />
InstallatIon InstructIons<br />
Things you should be aware of:<br />
• before installing rainbank ® please<br />
read all instructions carefully as<br />
failures caused by incorrect<br />
installation are not covered under<br />
warranty.<br />
• rainbank ® is designed to handle<br />
clean water and should not be used<br />
for any other purpose without specific<br />
referral to <strong>Davey</strong>. the use of<br />
rainbank ® to pump flammable,<br />
corrosive or other materials of a<br />
hazardous nature will damage the<br />
system and void the warranty.<br />
• the pumping of abrasive materials<br />
will damage the system and void the<br />
warranty.<br />
• Water freezing inside the rainbank ®<br />
will damage the unit. locate your<br />
rainbank ® and pump so that they are<br />
not susceptible to freezing.<br />
• some insects such as small ants find<br />
electrical devices attractive for<br />
various reasons. If your controller or<br />
pump is susceptible to insect<br />
infestation you should implement a<br />
suitable pest control plan.<br />
• an inline ‘Y’ strainer between the<br />
pump (or before the pump) and the<br />
rainbank ® controller is<br />
recommended to stop foreign matter<br />
entering the unit and damaging it.<br />
• all pipe work and fittings should be<br />
labelled in accordance with local<br />
standards such as australian<br />
standard as/nZs 3500. this standard<br />
requires that all pipework containing<br />
rainwater is marked with green<br />
‘rainwater’ tape or stickers at 1<br />
meter intervals and every outlet that<br />
may deliver rainwater is to be<br />
permanently signed with ‘rain Water’<br />
signage or a green tap marked ‘rW’.<br />
• ensure all wiring, plumbing and the<br />
rainbank ® unit are protected from<br />
access by pets and/or children.<br />
• Mains electrical connections and<br />
checks must be made by a qualified<br />
electrician and comply with applicable<br />
local standards. the 12 volt<br />
connections need not be carried out<br />
by a qualified electrician, but should<br />
be done in compliance with applicable<br />
standards.<br />
• In accordance with as/nZs 3350 we<br />
are obliged to inform you that this<br />
controller and any pump controlled<br />
by it is not to be used by children or<br />
infirm persons and must not be used<br />
as a toy by children.<br />
26 11
7<br />
7<br />
puMp outsIDe tank<br />
optIon - oVerall<br />
6<br />
6<br />
4<br />
2<br />
8<br />
1<br />
7<br />
7<br />
6<br />
6<br />
Above Ground Option Model No. KRB1,2,3&4<br />
3<br />
9<br />
5<br />
MoDel no. krb1,2,3&4<br />
4<br />
2<br />
8<br />
In-tank Option Model No. KRBS1&2<br />
Above Ground Option Model No. KRB1,2,3&4<br />
3<br />
9<br />
5<br />
5<br />
3<br />
8<br />
9<br />
2<br />
4<br />
6<br />
1<br />
1<br />
2<br />
3<br />
4<br />
Mains water supply<br />
3/4” BSP Male thread<br />
3/4” BSP Male thread<br />
Pump Power lead<br />
RainBank ® 5<br />
Power lead<br />
6 Stop valve<br />
7 Float switch<br />
8 Manual start button<br />
9 Rainwater supply via pump<br />
Warning:<br />
Do not reconnect with<br />
mains water supply<br />
Important:<br />
All pipework and outlet<br />
fittings from RainBank ® must<br />
be labelled to AS/NZS 3500<br />
InstallatIon oF<br />
subMersIble puMps<br />
5<br />
3<br />
Cable<br />
8<br />
tie<br />
9<br />
2<br />
4<br />
6<br />
1. use teflon tape on the pipe<br />
to pump connection.<br />
In-tank Option Model No. KRBS1&2<br />
1<br />
2. secure the power cable to the delivery<br />
pipe with cable ties.<br />
3. place pump into tank.<br />
4. <strong>Davey</strong> recommends the fitting of<br />
floating inlets to submersible pumps<br />
to minimize any possibility of sludge<br />
intake. part number to suit pump<br />
D42a/b is FI-42.<br />
1<br />
2<br />
3<br />
4<br />
5<br />
6<br />
7<br />
8<br />
9<br />
Mains water supply<br />
3/4” BSP Male thread<br />
3/4” BSP Male thread<br />
Pump Power lead<br />
RainBank ® RainBank Power lead<br />
® Power lead<br />
Stop valve<br />
Float switch<br />
Manual start button<br />
Rainwater supply via pump<br />
Warning:<br />
Do not reconnect with<br />
mains water supply<br />
Important:<br />
All pipework and outlet<br />
fittings from RainBank ® Important:<br />
All pipework and outlet<br />
fittings from RainBank must<br />
be labelled to AS/NZS 3500<br />
® must<br />
be labelled to AS/NZS 3500<br />
12 25<br />
Union<br />
PVC pipe<br />
Handle<br />
Pump<br />
Float switch<br />
! IMPORTANT<br />
Do not pull on power lead. Fit a<br />
rope to handle for lowering and<br />
raising pump.
Step 3 – plumb up your suction<br />
plumbing ensuring that the lowest point<br />
in the inlet pipe is at least 200mm below<br />
the lowest water level and at least 100mm<br />
above the base of the tank.<br />
Step 4 – Install the float switch (part<br />
number 13961). the float end should be<br />
set up so it can fall no lower than 100mm<br />
above the level of the lowest point in the<br />
inlet pipe so the pump will always be shut<br />
off well before it can run dry or draw in<br />
air.<br />
this is secured to the pump suction<br />
pipe with cable ties. allow no more than<br />
100mm of cable between the float and the<br />
lowest cable tie.<br />
the plug end should be plugged into the<br />
float switch inlet on the underside of the<br />
rainbank ® unit in step 8.<br />
Step 5 – align the rainbank ® for easy<br />
fitting to the plumbing.<br />
Step 6 – connect rainbank ® to the<br />
pump.<br />
Step 7 – connect rainbank ® to the<br />
plumbing.<br />
Step 8 – connect all leads.<br />
Step 9 – test the unit - page 21.<br />
puMp outsIDe tank<br />
optIon - close up<br />
24 13<br />
TO TOILETS<br />
AND/OR<br />
LAUNDRY<br />
(do not mix/cross-connect<br />
with mains water supply)<br />
Manual start<br />
button<br />
3/4" BSP<br />
male thread<br />
MAINS<br />
WATER SUPPLY<br />
3/4" BSP<br />
male thread<br />
Power to pump via<br />
3 pin socket - plug the<br />
rainwater pump in here.<br />
1" BSP<br />
male thread<br />
Incoming power<br />
to RainBank ®<br />
via 3 pin plug<br />
RAINWATER<br />
SUPPLY<br />
from discharge<br />
of rainwater pump<br />
12 volt connection<br />
for rainwater level switch<br />
40mm<br />
Suction from<br />
tank to pump<br />
WARNING: DO NOT FIT CHECK VALVES BETWEEN RAINBANK ® , PUMP AND TANK, UNLESS PUMP<br />
IS ABOVE MAXIMUM WATER LEVEL OF TANK.
7<br />
7<br />
puMp InsIDe tank<br />
optIon - oVerall<br />
6<br />
6<br />
4<br />
2<br />
8<br />
Above Ground Option Model No. KRB1,2,3&4<br />
3<br />
9<br />
5<br />
MoDel no. krbs1&2<br />
5<br />
3<br />
2<br />
6<br />
In-tank Option Model No. KRBS1&2<br />
8<br />
9<br />
5<br />
4<br />
3<br />
1<br />
In-tank Option Model No. KRBS1&2<br />
8<br />
9<br />
2<br />
4<br />
6<br />
1<br />
1<br />
2<br />
3<br />
4<br />
1<br />
2<br />
3<br />
4<br />
5<br />
6<br />
7<br />
8<br />
9<br />
Mains water supply<br />
3/4” BSP Male thread<br />
3/4” BSP Male thread<br />
Pump Power lead<br />
RainBank ® Power lead<br />
Stop valve<br />
Float switch<br />
Mains water supply<br />
3/4” BSP Male thread<br />
Manual start button<br />
3/4” BSP Male thread<br />
Pump Power lead<br />
Rainwater supply via pump<br />
RainBank ® 5<br />
Power lead<br />
6 Stop valve<br />
7 Float switch<br />
8 Manual start button<br />
9 Rainwater supply via pump<br />
Warning:<br />
Do not reconnect with<br />
mains water supply<br />
Warning:<br />
Do not reconnect with<br />
mains water supply<br />
Important:<br />
All pipework and outlet<br />
fittings from RainBank ® must<br />
be labelled to AS/NZS 3500<br />
Important:<br />
All pipework and outlet<br />
fittings from RainBank ® must<br />
be labelled to AS/NZS 3500<br />
You should carry out the following<br />
steps as per the instructions for<br />
Installation Type 1<br />
Step 2 – Work out the position of your<br />
rainbank ® with regard to distance to<br />
power. the float switch lead is not an<br />
issue here.<br />
Step 4 – align the rainbank ® for easy<br />
fitting to the plumbing. Fit <strong>Davey</strong> wall<br />
bracket.<br />
Step 5 – connect rainbank ® to your<br />
submersible pump as per instructions on<br />
page 25.<br />
Step 6 – connect the rainbank ® to the<br />
plumbing.<br />
Step 7 – connect all leads (no float<br />
switch lead to plug in)<br />
Step 8 – test the unit - page 21<br />
INSTALLATION TYPE 4<br />
Below ground tank with pump<br />
above tank and suction lift<br />
IMPORTANT<br />
• under australian standard 3500<br />
collecting/storing rainwater in a<br />
buried tank is considered a medium<br />
level hazard. even though rainbank ®<br />
!<br />
has a built-in dual check back flow<br />
valve you may be required to fit<br />
additional backflow protection valves<br />
to satisfy this requirement.<br />
• this type of installation uses a<br />
different type of float switch designed<br />
for use with concrete tanks (part<br />
number 13961).<br />
The following sections of the Type<br />
1 installation instructions are<br />
applicable to Type 4 installations.<br />
Step 1 – evaluate and select the best<br />
pump site as close to the water source<br />
and water level as possible.<br />
Step 2 – Work out the position of your<br />
rainbank ® with regard to distance to<br />
power. the float switch lead will need to<br />
be the concrete tank version p/n 13961<br />
for lowering into a below ground tank<br />
– do not use the standard float switch<br />
supplied with rainbank ® .<br />
14 23<br />
Mains In<br />
To House<br />
FV
• Failure to prime the submersible<br />
pump prior to connection of the pump<br />
to rainbank ® can cause an air lock<br />
that may prevent the pump operating<br />
properly.<br />
The following sections of the Type<br />
1 installation instructions are<br />
applicable to Type 2 installations.<br />
Step 2 – Work out the position of your<br />
rainbank ® with regard to distance to<br />
power. the float switch lead is not an<br />
issue here.<br />
Step 4 – align the rainbank ® for easy<br />
fitting to the plumbing and fit <strong>Davey</strong> wall<br />
bracket if required.<br />
Step 5 – connect rainbank ® to your<br />
submersible pump as per instructions on<br />
page 25.<br />
Step 6 – connect the rainbank ® to the<br />
plumbing as for Installation type 1 on<br />
page 19.<br />
Step 7 – connect all leads as per<br />
Installation type 1 on page 20. there is<br />
no float switch lead as this is fitted to the<br />
submersible pump.<br />
Step 8 – test the unit - page 21.<br />
INSTALLATION TYPE 3<br />
below ground tank with submersible<br />
pump D42a/b & D53a/b<br />
Mains In<br />
To House<br />
IMPORTANT<br />
• under australian standard 3500<br />
collecting/storing rainwater in a<br />
buried tank is considered a medium<br />
level hazard. even though rainbank ®<br />
!<br />
has a built-in dual check back flow<br />
valve, you may be required to fit<br />
additional backflow protection valves<br />
to satisfy this requirement – check<br />
with your local council as to their<br />
guidelines on rainwater tank<br />
installation and backflow prevention.<br />
there is no need for a separate float<br />
switch as this comes attached to the<br />
submersible pump and does not plug<br />
into the rainbank ® unit.<br />
puMp InsIDe tank<br />
optIon - close up<br />
22 15<br />
TO TOILETS<br />
AND/OR<br />
LAUNDRY<br />
(do not mix/cross-connect<br />
with mains water supply)<br />
Manual start<br />
button<br />
3/4" BSP<br />
male thread<br />
MAINS<br />
WATER SUPPLY<br />
3/4" BSP<br />
male thread<br />
Power to pump via<br />
3 pin socket - plug the<br />
rainwater pump in here.<br />
1" BSP<br />
male<br />
thread<br />
Incoming power<br />
to RainBank ®<br />
via 3 pin plug<br />
RAINWATER<br />
SUPPLY<br />
from discharge<br />
of auto submersible<br />
rainwater pump<br />
WARNING: DO NOT INSTALL CHECK VALVES BETWEEN PUMP & RAINBANK ® .
INSTALLATION TYPE 1<br />
Above ground tank and pump<br />
outside tank. Suitable kit models:<br />
KRB1,2,3&4<br />
Mains In<br />
To House<br />
FS<br />
tools you will need<br />
• adjustable spanner 2” or 50mm<br />
(across flats)<br />
• second adjustable spanner 2” or<br />
50mm (across flats)<br />
• thread tape<br />
• 22mm spade bit or hole saw to drill<br />
hole in tank for float switch. to avoid<br />
leaks and possible failure of the<br />
sealing grommet it is important that<br />
you use this exact size.<br />
• If you are mounting the rainbank ®<br />
to a wall as a bare installation you<br />
will need the <strong>Davey</strong> rainbank ® wall<br />
mounting bracket<br />
(part number 13829).<br />
STEP 1 - PUMP POSITION<br />
evaluate and select the best pump site.<br />
this must be below the lowest anticipated<br />
level of the float switch and this level<br />
should be at least 100mm above the base<br />
of the tank to avoid sludge being drawn<br />
into the pump.<br />
!<br />
the pump site should be well drained and<br />
have a firm base. a concrete slab 600mm<br />
x 600mm is ideal.<br />
STEP 2 - RAINBANK ® POSITION<br />
Work out where the rainbank ® will be<br />
positioned.<br />
check that there is a power point within<br />
reach of the 3 metre power lead.<br />
IMPORTANT<br />
Do not use long extension leads as they<br />
cause substantial voltage drop, poor<br />
performance and can lead to motor<br />
overload.<br />
check that the float switch lead<br />
(5m long) will reach the rainbank ® .<br />
STEP 3 - FLOAT SWITCH<br />
Fit float switch to rainwater tank.<br />
Top<br />
Bottom<br />
Level switch stem<br />
Compression nut<br />
Sealing grommet<br />
Bayonnet join<br />
Sealing nut<br />
to protect against electrical surges and<br />
lightening strike damaging rainbank ® or<br />
its pump we strongly recommend the use<br />
of a suitable surge protection device and<br />
residual current devices.<br />
STEP 8 - TESTING<br />
test the operation of rainbank ® .<br />
1. With the mains connected and the<br />
rainwater tank empty turn on one<br />
of the taps in the laundry that feed<br />
the washing machine or flush the<br />
toilet. Mains water should flow<br />
normally. the pump should not turn<br />
on. the ‘status’ light should glow<br />
‘red’ to indicate that mains water is<br />
being used. When this is completed<br />
turn off tap.<br />
2. Fill the rainwater tank with sufficient<br />
water to activate or cover the float<br />
switch.<br />
3. check that the pump is correctly<br />
primed and there are no air locks that<br />
will interfere with its operation as per<br />
the <strong>Davey</strong> instructions. this is<br />
essential for the proper operation of<br />
the unit. see the instructions on how<br />
to do this for all types of <strong>Davey</strong> pump<br />
in the priming section on page 26.<br />
4. turn on a tap or flush a toilet in<br />
the rainwater system. the pump<br />
should run and deliver rainwater.<br />
allow to run for several minutes to<br />
clear air from pipes. the ‘status’ light<br />
will now glow ‘green’.<br />
5. remove the float switch connection<br />
from the rainbank ® – this should<br />
stop the pump and confirms that<br />
the float switch and power<br />
connections have been made correctly<br />
– refit the float switch connection. the<br />
‘status’ light will now glow ‘red’.<br />
press the manual override button<br />
to operate the pump if needed. the<br />
‘status’ light will glow ‘yellow’<br />
while the manual override button is<br />
depressed.<br />
6. check for leaks around rainbank ® , the<br />
pump, pipework and fittings.<br />
INSTALLATION TYPE 2<br />
Above ground tank with<br />
submersible pump inside eg:<br />
KRBS1&2 Mains In<br />
16 21<br />
To House<br />
! IMPORTANT<br />
• this type of pump comes with its own<br />
float switch system to detect water<br />
level so it is not necessary to drill the<br />
tank to fit a float switch.
• It is highly recommended that an<br />
isolation valve be fitted to where the<br />
mains water enters rainbank ® and<br />
between the pump and the rainwater<br />
tank. this facilitates easy removal<br />
of the unit if required without turning<br />
off the household water or losing<br />
stored rainwater.<br />
• Do not use thread sealing compounds,<br />
hemp or pipe glue.<br />
• all rainbank plumbing fittings feature<br />
rotating unions that require bracing.<br />
• If your access to the bottom of the<br />
rainbank ® unit is difficult you may<br />
have to connect the 12 volt connection<br />
from the float switch before the<br />
plumbing is connected.<br />
connect all leads.<br />
MAINS<br />
WATER<br />
SUPPLY<br />
Incoming power to RainBank®<br />
via 3 pin plug<br />
STEP 7<br />
1. connect the pump power lead to<br />
the three-pin socket underneath<br />
rainbank ® .<br />
IMPORTANT<br />
this must connect to the rainbank ®<br />
controller not the power point. If the<br />
pump is connected to the power point<br />
the pump will run constantly,<br />
shortening the life of the pump and<br />
potentially running the pump dry.<br />
2. connect the three-pin power plug from<br />
the rainbank ® !<br />
to your power point.<br />
3. connect the 12 volt lead from the float<br />
switch to its flying lead; in the<br />
underside of the unit. this is<br />
not necessary if you are using a<br />
submersible pump as the float switch<br />
is already part of the pump.<br />
RAINWATER<br />
SUPPLY<br />
12 volt connection<br />
for float switch<br />
TO TOILETS<br />
AND LAUNDRY<br />
Power to pump via<br />
3 pin socket<br />
! IMPORTANT<br />
• the level switch is suitable for<br />
installation in polyethylene and<br />
fibreglass tanks. It can be fitted in<br />
steel tanks but cutting through the<br />
zinc alum or colourbond coating of<br />
the tank exposes bare steel and this<br />
can rust. check with the tank<br />
manufacturer before drilling.<br />
• the float switch is designed to be<br />
installed from the outside of the tank.<br />
there is no need to get inside the<br />
tank.<br />
• the sealing grommet of the float<br />
switch is designed to work in a<br />
maximum tank wall thickness of<br />
25mm. It is not suitable for concrete<br />
or very thick plastic walled tanks.<br />
there is an alternative float switch<br />
that can be lowered into the top of<br />
these types of tanks (<strong>Davey</strong> part<br />
number 13961).<br />
Work out the correct position for<br />
the hole for the float switch. With a<br />
corrugated profile tank wall this is<br />
on the upper flat section of the profile<br />
as shown below.<br />
Note: Ensure level sensor is installed<br />
with ‘UP’ facing up<br />
Centre hole on flat section of profile<br />
Diameter of hole must be 22mm.<br />
Work out the correct location of the float<br />
switch relative to the pump outlet.<br />
the float switch location should also be:<br />
• at least 40mm above the pump inlet.<br />
• placed away from the rainwater entry<br />
into the tank so that the incoming flow<br />
does not interfere with the operation<br />
of the switch.<br />
before cutting the hole check again<br />
that the 5m lead from the float switch<br />
will reach the rainbank ® and plug<br />
comfortably into it.<br />
20 17<br />
150<br />
40<br />
100<br />
Slab<br />
To<br />
Pump
1. Drill a 22mm hole in the side of the<br />
tank in the correct position. a spade<br />
drill is the best tool for this job.<br />
ensure all swarf is removed from the<br />
hole. If installing the switch in a<br />
corrugated tank you should make sure<br />
that it is installed on the flat section<br />
between the radii as shown below.<br />
Drill Hole<br />
ø 22mm<br />
2. ensure the compression nut is<br />
loosened so that the sealing grommet<br />
is not expanded. remove the sealing<br />
nut and insert the switch into the hole<br />
as below.<br />
Insert Float<br />
3. the switch will not work properly if it<br />
is not properly orientated. Make<br />
sure the word “up” is seen at the very<br />
end of the switch body. now tighten<br />
the compression nut to expand the<br />
seal (as shown below).<br />
bellow deforms<br />
inside tank<br />
‘UP’<br />
Tighten Compression Nut<br />
4. ensure that the switch is still correctly<br />
orientated. With the word “up”<br />
visible, screw on and tighten the<br />
sealing nut to finish the installation of<br />
the float switch.<br />
Tighten Sealing Nut<br />
RAINBANK ® TOP ENTRY FLOAT<br />
SWITCH - P/N 13961<br />
rainbank ® top entry float switches are an<br />
alternative method of rainwater tank level<br />
indication, especially useful for below<br />
ground tanks, concrete tanks or any tank<br />
that does not suit the standard side entry<br />
rainbank ® float switch.<br />
NOTE: THE VERTICAL POSITION OF<br />
THE FLOAT SWITCH IN RELATION<br />
TO THE PUMP WATER INLET IS<br />
CRITCAL<br />
1. Measure the distance from the top of<br />
the tank (a) to the highest point of the<br />
tank outlet to the pump (b).<br />
D<br />
C<br />
2. Mark on the float switch cable a length<br />
equal to a-b minus 200 millimeters or<br />
distance (b) to (D).<br />
3. Drill a hole in the top of the tank<br />
large enough to suit a cable grommet<br />
or strain relief grommet (F) - not<br />
supplied.<br />
4. snap off retainer clip (c) from top of<br />
weight (D).<br />
5. position retainer clip 100mm from<br />
float ball (e).<br />
6. slide weight (e) over retaining clip and<br />
firmly snap into position.<br />
7. lower weight into tank and feed top of<br />
cable through hole drilled in step 3.<br />
8. Fasten with cable grommet to<br />
previously D measured length (a) to (b).<br />
E<br />
100<br />
100<br />
C<br />
D<br />
E<br />
B<br />
E<br />
100<br />
100<br />
A<br />
D<br />
E<br />
B<br />
F<br />
100<br />
100<br />
STEP 4 - CHECK PIPE WORK<br />
Make sure the final assembled position<br />
of your rainbank ® will align well with the<br />
mains and rainwater pipe.<br />
the pump and rainbank ® should be<br />
assembled so that the mains water<br />
supply to the unit and rainwater outlet to<br />
toilets and laundry connect easily to the<br />
plumbing on the same level.<br />
STEP 5 - CONNECT PUMP TO<br />
RAINBANK ®<br />
connect your pump to the rainbank ®<br />
1. screw rotary coupling into outlet of<br />
F<br />
pump (teflon tape not required).<br />
STEP 6 - CONNECT PIPES<br />
connect the rainbank ® to the mains water<br />
and delivery pipe plumbing.<br />
!<br />
IMPORTANT<br />
• to allow easy connection it is strongly<br />
recommended that you have flexible<br />
A copper pipes that allow some<br />
movement so that they can line<br />
up exactly with the mains water and<br />
D<br />
rainwater 100<br />
Eoutlet.<br />
these pipes must be<br />
100<br />
B 3 ⁄4 inch in diameter.<br />
18 19<br />
D<br />
C<br />
E<br />
A<br />
D<br />
100<br />
E<br />
100<br />
B<br />
A<br />
F<br />
A<br />
D<br />
100<br />
E<br />
100<br />
B<br />
A<br />
D<br />
E<br />
B