PEB & PESB Valve - Rain Bird
PEB & PESB Valve - Rain Bird
PEB & PESB Valve - Rain Bird

You also want an ePaper? Increase the reach of your titles
YUMPU automatically turns print PDFs into web optimized ePapers that Google loves.
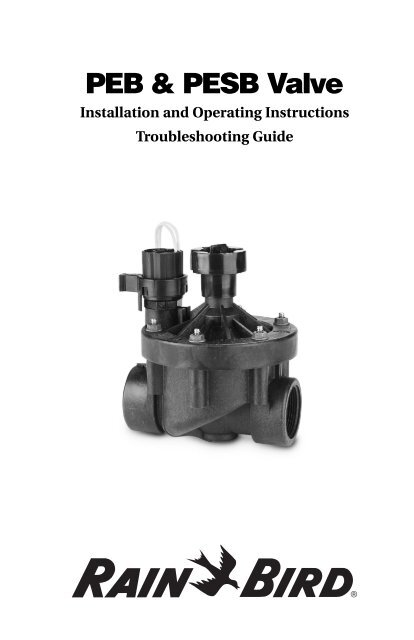
<strong>PEB</strong> & <strong>PESB</strong> <strong>Valve</strong><br />
Installation and Operating Instructions<br />
Troubleshooting Guide
INSTALLATION & OPERATING INSTRUCTIONS<br />
1. Flush main line thoroughly before installing valves.<br />
2. Install valve onto main line. Ensure inlet side is connected<br />
to main line and outlet side is connected to lateral line. Note<br />
arrow on valve indicating direction of water flow. Solenoid<br />
should be on the downstream side of the valve.<br />
3. Use two wraps “Teflon Tape” along the full length of the inlet<br />
and outlet pipe threads. Do not use pipe thread or pipe<br />
dope compound. Thread inlet pipe and fitting into the inlet<br />
port of the valve and hand tighten. Thread outlet pipe and<br />
fitting into the outlet port of the valve and hand tighten. Do<br />
not exceed two turns beyond hand tight.<br />
4. Connect one solenoid wire to the controller common wire<br />
and the other to the controller power wire. Use only watertight<br />
wire connectors, like RAIN BIRD ST-03.<br />
5. After installing valves, slowly open water supply at point of<br />
connection. <strong>Valve</strong>s may discharge water momentarily, then<br />
shut off.<br />
6. To activate the valve using the internal manual bleed feature,<br />
turn the solenoid handle counter clockwise 1 ⁄4 to 3 ⁄4 turn<br />
or until you hear water flowing through the valve. To close<br />
valve, turn the solenoid handle clockwise 1 ⁄4 to 3 ⁄4 turn and<br />
wait a moment for the valve to close. Only hand tighten the<br />
solenoid to close the valve.<br />
7. To activate the valve using the external manual bleed feature,<br />
turn the bleed screw on the top of the valve counter<br />
clockwise. Water will leak externally into the valve box to<br />
relieve bonnet pressure and open the valve. Turning the<br />
bleed screw clockwise will seal the o-ring and the valve will<br />
shut off momentarily.<br />
8. For automatic valve operation, turn on the controller that<br />
has been wired to the valve according to the controller operating<br />
instructions, as controllers operate differently.<br />
1
9. Use the flow control handle to adjust the amount of water<br />
flowing through the valve. Counter clockwise turns increase<br />
flow; clockwise turns decrease flow. Close the valve before<br />
making large flow adjustments, then activate the valve to<br />
fine tune flow adjustments. Good adjustment practice,<br />
when not intentionally trying to limit the flow, is to turn the<br />
flow control stem (from the full up position) clockwise until<br />
resistance is felt on the flow control stem handle.<br />
10. If necessary, install <strong>Rain</strong> <strong>Bird</strong>’s pressure regulating module<br />
PRS-B according to the installation manual.<br />
Internal Bleed<br />
Handle<br />
PRS-B Module<br />
Accessory<br />
Outlet<br />
Controller Wires<br />
2<br />
External Bleed<br />
Screw<br />
Flow Control<br />
Handle<br />
Inlet
TROUBLESHOOTING GUIDE<br />
1. Sprinkler heads emit water when valve is turned off.<br />
Dirt or debris is lodged on the diaphragm seat.<br />
Remove bonnet and diaphragm to dislodge debris.<br />
Solenoid is not fully closed after manual operation.<br />
Turn solenoid handle clockwise to fully seated position.<br />
Solenoid o-ring is damaged or twisted.<br />
Turn off the water supply and turn the solenoid counter-clockwise<br />
to remove and inspect the o-ring. Remove any debris,<br />
then reset or replace the o-ring as necessary.<br />
Diaphragm is damaged or not properly aligned.<br />
Turn off the water supply and remove the bonnet. Check alignment<br />
of the diaphragm with the valve body and positioning tabs.<br />
Inspect the diaphragm for nicks or damage, then realign or<br />
replace diaphragm as necessary.<br />
Dirt is interfering with proper solenoid operation.<br />
Turn off the water supply and turn the solenoid counter-clockwise<br />
to remove and flush solenoid seating bowl in bonnet with<br />
clean water. Rinse solenoid bottom in clean water. For internal<br />
cleaning, remove the white retainer using a small flat screwdriver.<br />
Remove the plunger and screen and rinse with clean<br />
water. Return plunger, spring and retainer to solenoid. Return<br />
solenoid to bonnet by turning the solenoid clockwise.<br />
Solenoid is shorted or damaged.<br />
Turn off water supply and turn the solenoid counter-clockwise to<br />
remove. Replace with new solenoid by turning clockwise.<br />
3
2. Water will not shut off.<br />
Controller may be operating the valve automatically.<br />
Check controller to confirm it is turned off.<br />
<strong>Valve</strong> is set in the manual “ON” position.<br />
Use finger-tight pressure to turn the solenoid clockwise to the<br />
“OFF” position. CAUTION: Over-tightening risks the possibility<br />
of damaging the solenoid seat. Re-tighten bleed screw on top<br />
of valve if leakage is observed. Verify that the o-ring is not damaged.<br />
Diaphragm filter screen is blocked.<br />
Turn off the water supply and remove the bonnet. Inspect the<br />
diaphragm filter screen located on the bottom of the diaphragm.<br />
Remove debris, rinse screen in clean water and return<br />
diaphragm and bonnet to valve body.<br />
Solenoid is shorted or damaged.<br />
Turn off water supply and turn the solenoid counter-clockwise to<br />
remove. Replace with new solenoid by turning clockwise.<br />
3. Low or inadequate flow condition.<br />
Flow control stem is turned down.<br />
Adjust flow control stem by turning counter-clockwise in order to<br />
allow the diaphragm to open further.<br />
Water pressure is being used elsewhere on the site.<br />
Check the water requirements of all areas using the same water<br />
supply.<br />
4
Too many sprinklers are operating at one time.<br />
Check to see that the controller is only running one valve at one<br />
time. The system hydraulics may only be capable of single<br />
valve operation. If you find that all the sprinklers are located on<br />
one circuit, an additional valve may be required to better meet<br />
maximum hydraulic flow rates.<br />
System gate or master valve is not fully open.<br />
Locate the gate or master valve and open.<br />
Obstruction in the mainline pipe.<br />
Isolate obstruction and remove.<br />
4. <strong>Valve</strong> will not turn on electrically.<br />
Controller not supplying power to valve.<br />
Check the controller for output power to the valve. If no power<br />
is detected at controller, then service controller. Check power<br />
input at the solenoid of the valve. If output is detected at the<br />
controller, but no input is detected at the solenoid, then a power<br />
wire is broken or damaged. Isolate and repair.<br />
Main water supply is turned off.<br />
Locate main gate or master valve and open.<br />
Solenoid problem.<br />
If power input is detected at solenoid, but valve still is not operating,<br />
then turn off the water supply. Without cutting wires,<br />
swap solenoids with the next valve (if present). If other solenoid<br />
operates valve, replace solenoid. If other solenoid does not<br />
operate valve, continue troubleshooting.<br />
5
Flow control stem is turned all the way down.<br />
Adjust the flow control stem by turning it counter-clockwise until<br />
water flows through the valve, but do not leave the stem in a full<br />
up position. While water is flowing through the valve, turn the<br />
flow control stem (from the full up position) clockwise until resistance<br />
is felt on the flow control stem handle. Then turn the flow<br />
control stem handle counter-clockwise one turn, as the valve<br />
will operate more effectively with the flow control stem handle in<br />
this position.<br />
5. <strong>Valve</strong> with PRS-B Pressure Regulating Module.<br />
Consult the PRS-B instruction manual for additional troubleshooting<br />
information.<br />
For further assistance, please call the <strong>Rain</strong> <strong>Bird</strong> Spec Hotline at<br />
1-800-458-3005.<br />
6
USA<br />
<strong>Rain</strong> <strong>Bird</strong> Sales, Inc.<br />
Contractor, Landscape Drip,<br />
and Accessories Divisions<br />
970 W. Sierra Madre<br />
Azusa, CA 91702 USA<br />
Phone: (626) 963-9311<br />
Fax: (626) 812-3411<br />
<strong>Rain</strong> <strong>Bird</strong> Sales, Inc.<br />
Commercial Division<br />
4261 South Country Club Road<br />
Tucson, AZ 85714 USA<br />
Phone: (520) 741-6100<br />
Fax: (520) 741-6146<br />
<strong>Rain</strong> <strong>Bird</strong> Distribution Corp.<br />
970 W. Sierra Madre<br />
Azusa, CA 91702 USA<br />
Phone: (626) 812-3430<br />
Fax: (626) 812-3618<br />
<strong>Rain</strong> <strong>Bird</strong> Distribution Corp.<br />
1883 Massaro Boulevard<br />
Tampa, FL 33619 USA<br />
Phone: (813) 628-6400<br />
Fax: (813) 628-0366<br />
<strong>Rain</strong> <strong>Bird</strong> Sales, Inc.<br />
Customer Support Center<br />
6640 S. Bonney Avenue<br />
Tucson, AZ 85706 USA<br />
Phone: (520) 434-6200<br />
Fax: (520) 434-6289<br />
<strong>Rain</strong> <strong>Bird</strong> Technical Service<br />
Phone: (800) BIRDSVC<br />
(800) 247-3782 (USA only)<br />
<strong>Rain</strong> <strong>Bird</strong> Spec Hotline<br />
Phone: (800) 458-3005<br />
(USA only)<br />
<strong>Rain</strong> <strong>Bird</strong> International, Inc.<br />
145 North Grand Avenue<br />
Glendora, CA 91741 USA<br />
Phone: (626) 963-9311<br />
Fax: (626) 963-4287<br />
Recycled Paper.<br />
<strong>Rain</strong> <strong>Bird</strong>. Conserving more than water.<br />
International<br />
Regional Offices<br />
<strong>Rain</strong> <strong>Bird</strong> in South Africa<br />
P.O. Box 1260<br />
Strubens Valley 1735<br />
South Africa<br />
Phone: 27-11-958-1930<br />
Fax: 27-11-958-1931<br />
<strong>Rain</strong> <strong>Bird</strong> in Southeast Asia<br />
C-212 Marina Bay, Asiaworld<br />
Aguinaldo Highway, Paranaque<br />
Metro Manila 1703<br />
Philippines<br />
Phone: 63-2-803-8188<br />
Fax: 63-2-552-3108<br />
<strong>Rain</strong> <strong>Bird</strong> in the Middle East<br />
Sonesta Business Center<br />
Sonesta Hotel<br />
4 Tayaran Street, Nasr City<br />
Cairo<br />
Egypt<br />
Phone: 202-340-4091<br />
Fax: 202-263-5731<br />
<strong>Rain</strong> <strong>Bird</strong> in Latin America<br />
4424 Flintlock Loop<br />
Lakeland, Florida 33809 USA<br />
Phone: (941) 682-6252<br />
Fax: (941) 686-9634<br />
<strong>Rain</strong> <strong>Bird</strong> in Japan/Korea<br />
Contact <strong>Rain</strong> <strong>Bird</strong> Australia<br />
Offices<br />
<strong>Rain</strong> <strong>Bird</strong> Canada Enterprises, Ltd.<br />
347 Fairbrooke Court, R.R. #2<br />
Arnprior, Ontario<br />
Canada K7S 3G8<br />
Phone: (613) 623-9002<br />
Fax: (613) 623-9715<br />
<strong>Rain</strong> <strong>Bird</strong> Australia Pty., Ltd.<br />
P.O. Box 3149<br />
Doncaster East<br />
Victoria 3109<br />
Australia<br />
Phone: 61-39-846-7500<br />
Fax: 61-39-846-5570<br />
<strong>Rain</strong> <strong>Bird</strong> Europe S.A.R.L.<br />
B.P. 72000<br />
13792 Aix-en-Provence CEDEX 3<br />
France<br />
Phone: 4-42-24-44-61<br />
Fax: 4-42-24-24-72<br />
® Registered trademark of <strong>Rain</strong> <strong>Bird</strong> Sprinkler Mfg. Corp.<br />
® 1998 <strong>Rain</strong> <strong>Bird</strong> Sprinkler Corp. 12/98 P/N 231583