TELOS VX
TELOS VX
TELOS VX

You also want an ePaper? Increase the reach of your titles
YUMPU automatically turns print PDFs into web optimized ePapers that Google loves.
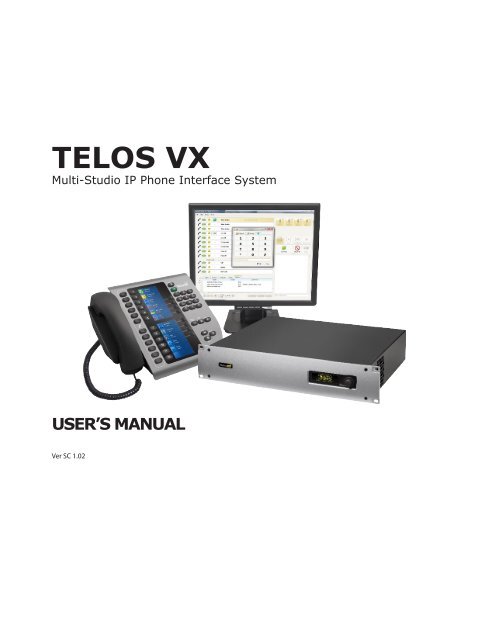
<strong>TELOS</strong> <strong>VX</strong><br />
Multi-Studio IP Phone Interface System<br />
USER’S MANUAL<br />
Ver SC 1.02
Telos <strong>VX</strong> Manual<br />
© 2011 TLS Corporation. Published by Telos Systems/TLS Corporation. All rights reserved.<br />
Trademarks<br />
Telos Systems, the Telos logo and <strong>VX</strong> are trademarks of TLS Corporation. All other<br />
trademarks are the property of their respective holders.<br />
Notice<br />
All versions, claims of compatibility, trademarks, etc. of hardware and software products not made<br />
by Telos mentioned in this manual or accompanying material are informational only. Telos Systems<br />
makes no endorsement of any particular product for any purpose, nor claims any responsibility<br />
for operation or accuracy. We reserve the right to make improvements or changes in the products<br />
described in this manual which may affect the product specifications, or to revise the manual without<br />
notice.<br />
Warranty<br />
This product is covered by a two year limited warranty, the full text of which is included in this manual.<br />
Updates<br />
The operation of the <strong>VX</strong> is determined largely by software. We routinely release new versions to add<br />
features and fix bugs. Check the Telos web site for the latest. We encourage you to sign-up for the<br />
email notification service offered on the site.<br />
Feedback<br />
We welcome feedback on any aspect of the Telos <strong>VX</strong>, or this manual. In the past, many good ideas<br />
from users have made their way into software revisions or new products. Please contact us with your<br />
comments.<br />
Service<br />
You must contact Telos before returning any equipment for factory service. We will need the serial<br />
number, located on the back of the unit. Telos Systems will issue a Return Authorization number<br />
which must be written on the exterior of your shipping container. Please do not include cables or<br />
accessories unless specifically requested by the technical support engineer at Telos. Be sure to<br />
adequately insure your shipment for its replacement value. Packages without proper authorization<br />
may be refused. US customers please contact Telos technical support at +1-216-622-0247. All other<br />
customers should contact your local representative to make arrangements for service.<br />
We support you...<br />
By Phone / Fax:<br />
You may reach our 24/7 Support Team anytime around the clock by calling +1-216-622-0247.<br />
For billing questions or other non-emergency technical questions, call +1-216-241-7225 between 9:30<br />
AM to 6:00 PM USA Eastern Time, Monday through Friday.<br />
Our fax is +1-216-241-4103.<br />
By E-Mail:<br />
Technical support is available at Support@Telos-Systems.com.<br />
All other inquiries at Inquiry@Telos-Systems.com.<br />
Via World Wide Web:<br />
The Telos Web site has a variety of information which may be useful for product selection and support.<br />
The URL is www.Telos-Systems.com<br />
10 9 8 7 6 5 4 3 2 1
Telos Systems USA<br />
Telos Systems<br />
1241 Superior Avenue E<br />
Cleveland, OH 44114 USA<br />
+1-216-241-7225 (phone)<br />
+1-216-241-4103 (fax)<br />
+1-216-622-0247 (24/7 Technical Support)<br />
Support@Telos-Systems.com<br />
Inquiry@Telos-Systems.com<br />
Notices and Cautions<br />
This symbol, wherever it appears, alerts you to the presence<br />
of uninsulated, dangerous voltage inside the enclosure –<br />
voltage which may be sufficient to constitute a risk of shock.<br />
This symbol, wherever it appears, alerts you to important<br />
operating and maintenance instructions. Read the manual.<br />
CAUTION:<br />
THE INSTALLATION AND SERVICE INSTRUCTIONS IN THIS MANUAL ARE FOR USE BY QUALIFIED<br />
PERSONNEL ONLY. TO AVOID ELECTRIC SHOCK, DO NOT PERFORM ANY SERVICING OTHER THAN<br />
THAT CONTAINED IN THE OPERATING INSTRUCTIONS UNLESS YOU ARE QUALIFIED TO DO SO.<br />
REFER ALL SERVICING TO QUALIFIED PERSONNEL.<br />
WARNING:<br />
TO REDUCE THE RISK OF ELECTRICAL SHOCK, DO NOT EXPOSE THIS PRODUCT TO RAIN OR<br />
MOISTURE.<br />
USA CLASS A COMPUTING DEVICE INFORMATION TO USER. WARNING:<br />
This equipment generates, uses, and can radiate radio-frequency energy. If it is not installed and<br />
used as directed by this manual, it may cause interference to radio communication. This equipment<br />
complies with the limits for a Class A computing device, as specified by FCC Rules, Part 15, Subpart<br />
J, which are designed to provide reasonable protection against such interference when this type of<br />
equipment is operated in a commercial environment. Operation of this equipment in a residential<br />
area is likely to cause interference. If it does, the user will be required to eliminate the interference<br />
at the user’s expense. NOTE: Objectionable interference to TV or radio reception can occur if other<br />
devices are connected to this device without the use of shielded interconnect cables. FCC rules<br />
require the use of shielded cables.<br />
CANADA WARNING:<br />
“This digital apparatus does not exceed the Class A limits for radio noise emissions set out in the<br />
Radio Interference Regulations of the Canadian Department of Communications.”“Le present appareil<br />
numerique n’emet pas de bruits radioelectriques depassant les limites applicables aux appareils<br />
numeriques (de Class A) prescrites dans le reglement sur le brouillage radioelectrique edicte par le<br />
ministere des Communications du Canada.”
Table of Contents<br />
TeloS <strong>VX</strong> manual | iii<br />
We support you... . . . . . . . . . . . . . . . . . . . . . . . . . . . . .i<br />
1 Welcome 1<br />
Note from Steve . . . . . . . . . . . . . . . . . . . . . . . . . . . . . 1<br />
What’s the Big idea? . . . . . . . . . . . . . . . . . . . . . . . . . . . 2<br />
The <strong>VX</strong> Engine . . . . . . . . . . . . . . . . . . . . . . . . . . . . . . 3<br />
The VSet Phone Controller . . . . . . . . . . . . . . . . . . . . . . . . 4<br />
<strong>VX</strong> Producer Windows Software Application . . . . . . . . . . . . . . . . 4<br />
Console Controllers . . . . . . . . . . . . . . . . . . . . . . . . . . . 5<br />
3rd-Party Producer Applications . . . . . . . . . . . . . . . . . . . . . 5<br />
The Acoustic Echo Canceller . . . . . . . . . . . . . . . . . . . . . . . . 5<br />
2 Installation and Configuration 7<br />
Connecting to PSTN Lines: Gateways & PBXs . . . . . . . . . . . . . . . . 7<br />
Using VoIP to Connect to the Telco Network . . . . . . . . . . . . . . . . 8<br />
What’s a ‘Line’? . . . . . . . . . . . . . . . . . . . . . . . . . . . . . 8<br />
Livewire for audio I/O . . . . . . . . . . . . . . . . . . . . . . . . . . 9<br />
Step-by-step . . . . . . . . . . . . . . . . . . . . . . . . . . . . . . 9<br />
The Engine Network . . . . . . . . . . . . . . . . . . . . . . . . . . . 9<br />
The front panel OLED/knob interface . . . . . . . . . . . . . . . . . . . 9<br />
Network Connections . . . . . . . . . . . . . . . . . . . . . . . . . . 10<br />
More on the Network . . . . . . . . . . . . . . . . . . . . . . . . . . 10<br />
VSet Installation. . . . . . . . . . . . . . . . . . . . . . . . . . . . . 11<br />
System Configuration . . . . . . . . . . . . . . . . . . . . . . . . . . 11<br />
Selectable and Fixed Lines . . . . . . . . . . . . . . . . . . . . . . . . 11<br />
Studios and Shows . . . . . . . . . . . . . . . . . . . . . . . . . . . 12<br />
Configuration Web Pages. . . . . . . . . . . . . . . . . . . . . . . . . 12<br />
Home Page . . . . . . . . . . . . . . . . . . . . . . . . . . . . . . . 13<br />
SIP Configuration . . . . . . . . . . . . . . . . . . . . . . . . . . . . 14
iv |<br />
TeloS <strong>VX</strong> manual | iv<br />
Regarding <strong>VX</strong> and SIP . . . . . . . . . . . . . . . . . . . . . . . . . . 14<br />
Main page - General Configuration . . . . . . . . . . . . . . . . . . . . 15<br />
Default Username, Password, and IP settings . . . . . . . . . . . . . . . . 16<br />
Overall Studio Configuration Page. . . . . . . . . . . . . . . . . . . . . 17<br />
Individual Studio Configuration Pages(Part1) . . . . . . . . . . . . . . . . 17<br />
Individual Studio Configuration Pages (Part 2) . . . . . . . . . . . . . . . 18<br />
GPIO . . . . . . . . . . . . . . . . . . . . . . . . . . . . . . . . . . 19<br />
Overall Show Configuration . . . . . . . . . . . . . . . . . . . . . . . . 20<br />
Individual Show Configuration Pages . . . . . . . . . . . . . . . . . . . 20<br />
<strong>VX</strong> in the News and Production rooms . . . . . . . . . . . . . . . . . . . 21<br />
Using the <strong>VX</strong> to replace ‘Couplers’ . . . . . . . . . . . . . . . . . . . . . 21<br />
Hybrid page - Audio Processing and metering . . . . . . . . . . . . . . . 21<br />
Assigning sounds & Tones – The Tones page . . . . . . . . . . . . . . . . 23<br />
SIP and DTMF . . . . . . . . . . . . . . . . . . . . . . . . . . . . . . 24<br />
Logging . . . . . . . . . . . . . . . . . . . . . . . . . . . . . . . . 25<br />
Firmware updates . . . . . . . . . . . . . . . . . . . . . . . . . . . . 27<br />
Backing up and restoring Engine configuration . . . . . . . . . . . . . . . 27<br />
Backing/restore configuration settings. . . . . . . . . . . . . . . . . . . 27<br />
VSet Phone Configuration . . . . . . . . . . . . . . . . . . . . . . . . 28<br />
3 Operation 29<br />
VSet Operation . . . . . . . . . . . . . . . . . . . . . . . . . . . . . 29<br />
Select Studio and Show . . . . . . . . . . . . . . . . . . . . . . . . . 30<br />
Set Talent or Producer Mode . . . . . . . . . . . . . . . . . . . . . . . 30<br />
The Line Info Field . . . . . . . . . . . . . . . . . . . . . . . . . . . . 30<br />
Next indicator . . . . . . . . . . . . . . . . . . . . . . . . . . . . . . 30<br />
Fader number . . . . . . . . . . . . . . . . . . . . . . . . . . . . . . 30<br />
Line name . . . . . . . . . . . . . . . . . . . . . . . . . . . . . . . 30<br />
Caller ID . . . . . . . . . . . . . . . . . . . . . . . . . . . . . . . . 30<br />
Time . . . . . . . . . . . . . . . . . . . . . . . . . . . . . . . . . . 31<br />
Action ‘hint’. . . . . . . . . . . . . . . . . . . . . . . . . . . . . . . 31<br />
Line Status Icons . . . . . . . . . . . . . . . . . . . . . . . . . . . . 31<br />
Line Button Columns. . . . . . . . . . . . . . . . . . . . . . . . . . . 32
TeloS <strong>VX</strong> manual | v<br />
Hold Button. . . . . . . . . . . . . . . . . . . . . . . . . . . . . . . 32<br />
Drop button. . . . . . . . . . . . . . . . . . . . . . . . . . . . . . . 33<br />
Lock . . . . . . . . . . . . . . . . . . . . . . . . . . . . . . . . . . 33<br />
Next Button and Function . . . . . . . . . . . . . . . . . . . . . . . . 33<br />
Block All . . . . . . . . . . . . . . . . . . . . . . . . . . . . . . . . 33<br />
Numeric Keypad. . . . . . . . . . . . . . . . . . . . . . . . . . . . . 34<br />
Re-dial Function . . . . . . . . . . . . . . . . . . . . . . . . . . . . 34<br />
Fader Assign . . . . . . . . . . . . . . . . . . . . . . . . . . . . . . 34<br />
Take it Easy . . . . . . . . . . . . . . . . . . . . . . . . . . . . . . . 34<br />
Operation with the Element Console . . . . . . . . . . . . . . . . . . . . 34<br />
4 The <strong>VX</strong> Producer Application 37<br />
Introduction . . . . . . . . . . . . . . . . . . . . . . . . . . . . . . 37<br />
Installation . . . . . . . . . . . . . . . . . . . . . . . . . . . . . . . 37<br />
Set-up: Studio and Show . . . . . . . . . . . . . . . . . . . . . . . . . 39<br />
Managing Calls . . . . . . . . . . . . . . . . . . . . . . . . . . . . . 39<br />
Handset . . . . . . . . . . . . . . . . . . . . . . . . . . . . . . . . 39<br />
On-air . . . . . . . . . . . . . . . . . . . . . . . . . . . . . . . . . 40<br />
The Line Info Field . . . . . . . . . . . . . . . . . . . . . . . . . . . . 40<br />
Drop, Hold, and Hold Ready Buttons . . . . . . . . . . . . . . . . . . . . 40<br />
Selectable Lines . . . . . . . . . . . . . . . . . . . . . . . . . . . . . 41<br />
Lock/Unlock Button and Function . . . . . . . . . . . . . . . . . . . . . 41<br />
Fader Assign Buttons . . . . . . . . . . . . . . . . . . . . . . . . . . 41<br />
Next Button and Function . . . . . . . . . . . . . . . . . . . . . . . . 42<br />
Block All . . . . . . . . . . . . . . . . . . . . . . . . . . . . . . . . 42<br />
Fixed Lines . . . . . . . . . . . . . . . . . . . . . . . . . . . . . . . 42<br />
Recording, Editing, and Playing Calls . . . . . . . . . . . . . . . . . . . 42<br />
Playing. . . . . . . . . . . . . . . . . . . . . . . . . . . . . . . . . 43<br />
Editing . . . . . . . . . . . . . . . . . . . . . . . . . . . . . . . . . 43<br />
Files . . . . . . . . . . . . . . . . . . . . . . . . . . . . . . . . . . 43<br />
Host/Producer Text Chatting . . . . . . . . . . . . . . . . . . . . . . . 44
vi |<br />
5 Notes, Resources, Additional Information 45<br />
The Acoustic Echo Canceller . . . . . . . . . . . . . . . . . . . . . . . . 45<br />
Telco Services and Interfaces . . . . . . . . . . . . . . . . . . . . . . . 47<br />
VoIP: SIP Trunking . . . . . . . . . . . . . . . . . . . . . . . . . . . . 47<br />
IP Centrex and Hosted PBX Services . . . . . . . . . . . . . . . . . . . . 48<br />
Number portability in the US and Canada . . . . . . . . . . . . . . . . . 48<br />
Circuit-Switched Interfaces . . . . . . . . . . . . . . . . . . . . . . . . 48<br />
FXS/FXO . . . . . . . . . . . . . . . . . . . . . . . . . . . . . . . . 48<br />
E&M Trunks . . . . . . . . . . . . . . . . . . . . . . . . . . . . . . . 49<br />
T1/E1 . . . . . . . . . . . . . . . . . . . . . . . . . . . . . . . . . 49<br />
ISDN PRI . . . . . . . . . . . . . . . . . . . . . . . . . . . . . . . . 49<br />
ISDN BRI . . . . . . . . . . . . . . . . . . . . . . . . . . . . . . . . 50<br />
Axia Element Console as <strong>VX</strong> Controller . . . . . . . . . . . . . . . . . . . 50<br />
Installation . . . . . . . . . . . . . . . . . . . . . . . . . . . . . . . 51<br />
Configuring the Element to Control the <strong>VX</strong> . . . . . . . . . . . . . . . . . 51<br />
What’s next? . . . . . . . . . . . . . . . . . . . . . . . . . . . . . . 55<br />
Beyond Edison’s Legacy . . . . . . . . . . . . . . . . . . . . . . . . . 56<br />
Specifications . . . . . . . . . . . . . . . . . . . . . . . . . . . . . . 56<br />
System . . . . . . . . . . . . . . . . . . . . . . . . . . . . . . . . . 56<br />
Audio Performance . . . . . . . . . . . . . . . . . . . . . . . . . . . 57<br />
Controllers . . . . . . . . . . . . . . . . . . . . . . . . . . . . . . . 58<br />
<strong>VX</strong> Engine . . . . . . . . . . . . . . . . . . . . . . . . . . . . . . . 58<br />
IP/Ethernet Connections . . . . . . . . . . . . . . . . . . . . . . . . . 58<br />
Processing Functions. . . . . . . . . . . . . . . . . . . . . . . . . . . 58<br />
Studio Audio Connections . . . . . . . . . . . . . . . . . . . . . . . . 59<br />
Telco Connections . . . . . . . . . . . . . . . . . . . . . . . . . . . . 59<br />
Resources . . . . . . . . . . . . . . . . . . . . . . . . . . . . . . . . 59<br />
Internet Speed tests . . . . . . . . . . . . . . . . . . . . . . . . . . . 59<br />
Internet VOIP Jitter Test . . . . . . . . . . . . . . . . . . . . . . . . . 59<br />
Packet “sniffer” . . . . . . . . . . . . . . . . . . . . . . . . . . . . . 59<br />
VoIP Soft phone” SIP PC clients . . . . . . . . . . . . . . . . . . . . . . 59
TeloS <strong>VX</strong> manual | vii<br />
Open Source PBX Distributions . . . . . . . . . . . . . . . . . . . . . . 59<br />
Commercial PBX Products . . . . . . . . . . . . . . . . . . . . . . . . 60<br />
Gateway products and suppliers . . . . . . . . . . . . . . . . . . . . . 60<br />
VoIP/SIP equipment suppliers . . . . . . . . . . . . . . . . . . . . . . 60<br />
Telephony Discussion and VOIP news sites . . . . . . . . . . . . . . . . . 60<br />
SIP Information and suggested reading . . . . . . . . . . . . . . . . . . 60<br />
Books . . . . . . . . . . . . . . . . . . . . . . . . . . . . . . . . . 61<br />
SIP Providers . . . . . . . . . . . . . . . . . . . . . . . . . . . . . . 61<br />
Local Number Portability in the USA and Canada . . . . . . . . . . . . . . 62<br />
Introduction to SIP’s insides for the Curious. . . . . . . . . . . . . . . . . 63<br />
The Parts of a SIP System. . . . . . . . . . . . . . . . . . . . . . . . . 64<br />
Addressing . . . . . . . . . . . . . . . . . . . . . . . . . . . . . . . 65<br />
How SIP Works . . . . . . . . . . . . . . . . . . . . . . . . . . . . . 67<br />
The State of SIP, and its Future . . . . . . . . . . . . . . . . . . . . . . 68<br />
IAX as a SIP Alternative . . . . . . . . . . . . . . . . . . . . . . . . . . 69<br />
Using <strong>VX</strong> with the Asterisk PBX . . . . . . . . . . . . . . . . . . . . . . 69<br />
Asterisk software: Distributions . . . . . . . . . . . . . . . . . . . . . . 70<br />
Hardware . . . . . . . . . . . . . . . . . . . . . . . . . . . . . . . . 71<br />
Expansion Cards. . . . . . . . . . . . . . . . . . . . . . . . . . . . . 72<br />
1 Get your ‘distro’ . . . . . . . . . . . . . . . . . . . . . . . . . . . . 73<br />
2 Get loaded: Install Asterisk . . . . . . . . . . . . . . . . . . . . . . . 73<br />
Log in to the Console for the first time . . . . . . . . . . . . . . . . . . . 75<br />
3 Confirgure Asterisk. . . . . . . . . . . . . . . . . . . . . . . . . . . 77<br />
Trunks . . . . . . . . . . . . . . . . . . . . . . . . . . . . . . . . . 81<br />
Outbound Calls . . . . . . . . . . . . . . . . . . . . . . . . . . . . . 84<br />
Connect your <strong>VX</strong> to Asterisk . . . . . . . . . . . . . . . . . . . . . . . . 84<br />
Make a test call on your VSet . . . . . . . . . . . . . . . . . . . . . . . 85<br />
<strong>VX</strong> Tech Cheat sheet – Default IP numbers, passwords, etc. . . . . . . . . . 85<br />
Default Passwords . . . . . . . . . . . . . . . . . . . . . . . . . . . . 85<br />
Default IP Addresses . . . . . . . . . . . . . . . . . . . . . . . . . . . 86
viii |<br />
SIP Parameters . . . . . . . . . . . . . . . . . . . . . . . . . . . . . 86<br />
TCP/IP Ports and protocols used by the <strong>VX</strong> System . . . . . . . . . . . . . . 86<br />
VSet telephone . . . . . . . . . . . . . . . . . . . . . . . . . . . . . 86<br />
Default username and password . . . . . . . . . . . . . . . . . . . . . 86<br />
TCP/IP Ports and protocols used by the VSet Telephone . . . . . . . . . . . 86<br />
Power Over Ethernet (PoE) . . . . . . . . . . . . . . . . . . . . . . . . 86<br />
<strong>VX</strong> FAQ . . . . . . . . . . . . . . . . . . . . . . . . . . . . . . . . . 87<br />
Application Example - WKSU . . . . . . . . . . . . . . . . . . . . . . . 92<br />
A1 Warranty 95
1 Welcome<br />
Note from Steve<br />
133 years ago this past summer, a tinkerer from<br />
Ohio scratched a kid’s rhyme into tin foil wrapped<br />
around a cylinder. Despite the less than hit-grade<br />
content , the warbly tone, and the lack of bass<br />
response, Tom Edison’s demonstrations astounded<br />
guests and founded the audio entertainment<br />
industry. Only a year before, a gentleman aptly<br />
named Bell had been the first boss to interrupt an<br />
employee with a telephone call, birthing speech<br />
communication by wire. Until the 1980s, sound<br />
reproducers continued to work pretty much the way<br />
Edison’s did, and telephones the way Al Bell’s did;<br />
wiggly Grooves for the former and wiggly electrical<br />
currents for the latter. Why did these technologies<br />
remain in stasis for over a century, before eventually<br />
entering a wildly innovative phase only a couple<br />
of decades ago? The answer is to be found in<br />
Moore’s law, which predicted a half-century ago that<br />
silicon processing power would double every year.<br />
Modified to 18 months, it has been on course since,<br />
and is expected to continue to for at least a few<br />
decades into the future. Think of all the ways this<br />
has touched both your professional and work lives.<br />
Digital audio workstations, automation systems, and<br />
mobile phones are all beneficiaries of this remarkable<br />
progress. The Internet, too, since processing<br />
chips are at the heart of network routers, switches,<br />
servers, PCs and smartphones. (Notwithstanding<br />
The Great Moore’s Law Compensator in desktop<br />
PCs, which suggests that bloat in PC applications<br />
has taken much of what Moore’s Law has given.<br />
Fortunately, we can avoid this in our “embedded”<br />
designs.) So why are we still mostly using telephone<br />
technology scarcely different from Bell’s ancient<br />
prototypes. A nodding acquaintance with history<br />
shows this often to be the case. A technology is<br />
good enough – and good enough suffices. Traditions<br />
grow roots, and the incremental improvement<br />
offered by an innovation is not sufficiently enticing<br />
to displace people from their comfort zones.<br />
| 1<br />
But eventually, the capability of a new technology<br />
– or constellation of technologies – reaches beyond<br />
incremental, enabling a fundamental re-thinking<br />
of possibilities. Then POW!, that’s when the world<br />
changes. That is just what is happening now.<br />
Robert Lucky of Bell Labs observed a couple of<br />
decades ago that this ever-increasing power of<br />
digital processing was going to affect communication<br />
more than computation – and that there was<br />
a much stronger driver for change in the former.<br />
The Internet and smartphones have proven him<br />
resoundingly correct.<br />
Such is the situation exactly now with regard to onair<br />
phones. We now have the tools to achieve what<br />
was only imagination until recently. As you might<br />
know, I’ve been doing this stuff for a long time, so it<br />
is particularly satisfying to see it all coming together.<br />
With the <strong>VX</strong>, we’ve wedded the capability of modern<br />
networking to the remarkable power of today’s<br />
digital processing to bring the benefits of the resulting<br />
synergy to broadcast facilities.<br />
As you discover what the <strong>VX</strong> can do, I trust you will<br />
appreciate how it can enhance the appeal of your<br />
listener interaction segments. It does everything<br />
older systems did smoother, easier, better, and at<br />
lower cost. But it also paves the way for a richer,<br />
more natural connection with your listeners as the IP<br />
platform becomes the basis for tomorrow’s creative<br />
applications. It will be interesting to see what comes<br />
next.<br />
Warm regards,<br />
Steve Church, Founder, Telos Systems and Telos<br />
Alliance.April, 2011
2 | Section 1<br />
What’s the Big idea?<br />
Is it not a bit strange that many computer-laden, all-digital broadcast studios connect<br />
to the PSTN (Public Switched Telephone Network) using technology invented<br />
in the day of phones with hand-cranks and bulbous “ringers”? Where else in pro<br />
audio do we mix two audio directions on a connection, forcing us to imperfectly<br />
pry the two apart in our interface gear? Where else do we use blasts of 100 AC Volts<br />
for signaling? This becomes even stranger when you consider that the core of the<br />
telephone network is also digital, with sophisticated internal signaling systems and<br />
independent audio paths. Surely we can do better than this ancient bell-banging and<br />
analog audio mash-up stuff in our contemporary telephone interfaces.<br />
That was the idea of ISDN, and it was a good one, as far as it went. The telephone<br />
network had begun to transition to digital in the 1960s and by the 80s, the conversion<br />
of the switching and internal transmission was nearly 100% complete in many<br />
countries. The idea of domestic data communication was just getting underway.<br />
Remember bulletin-boards and 1200 Baud modems? The inventors of ISDN reasoned<br />
that if they could pass the full 64kbps rate of the network to users, they’d be<br />
thrilled with the amazing speed! And, with two channels, you could simultaneously<br />
talk and look up recipes. YouTube had apparently not entered their imagination.<br />
In the modern networked world, The Telos <strong>VX</strong> gets with the program. It is the next<br />
generation multi-studio phone system from Telos, providing a powerful, simple, and<br />
cost-effective way to share phone lines across a number of studios using standard<br />
IP technology. It offers a number of advanced features to enhance production of talk<br />
shows and active DJ use of phones.<br />
For years, you have been asking for an uncomplicated way to share phone lines<br />
around a facility to multiple studios. And we are always hearing that you need a<br />
way to better integrate the studio system with your office phone PBX. Finally, the<br />
VoIP-based Telos <strong>VX</strong> lets us do this.<br />
We’re the studio phones company. We’re also the IP-Audio company. With the<br />
introduction of the Telos <strong>VX</strong>, we are marrying the two, creating an exciting new<br />
approach to broadcast studio phones.<br />
The Telos <strong>VX</strong> is a scalable system that provides a solution for stations with modest<br />
needs, while being able to grow to support facilities that have large numbers of<br />
Telco lines and studios.<br />
The standards-based SIP/IP interface makes all the things we’ve wanted to do<br />
possible. Passing calls between your office PBX and on-air system is easily<br />
accomplished. Sharing Telco service to both the business offices and studios?<br />
Sharing lines among studios?<br />
Check, and check. A pure digital connection to the Telco keeps audio clean and<br />
maintains isolated send and recieve signal paths. In studios with an AoIP audio<br />
infrastructure, an IP-based telephone system is icing on the cake. Dozens of inputs<br />
and outputs are connected with a single RJ-45. And you profit in other ways:<br />
♦ A single on-air phone system server can supply all the studios in your facility<br />
with rich telephone capability.
The <strong>VX</strong> Engine<br />
WelCome | 3<br />
♦ A common wiring and Ethernet switch infrastructure serves both your studio<br />
audio and telecom needs.<br />
♦ On-air VSet controllers have rich capability owing to their connection over IP.<br />
♦ Screening software running on PCs connect over the same network, and can<br />
include integrated softphones, thus smoothing operations and saving the<br />
money that would otherwise have to be spent on hardware phones.<br />
♦ Mixing console control surfaces can incorporate phone system controllers<br />
that need no additional connection; their signaling just rides on the network<br />
connection already there. Rich status information can be displayed either on<br />
the phone control module or the console’s main screen.<br />
♦ Recording and playback of DJ + telephone conversations are simplified. PCbased<br />
editors send and receive audio directly over the network using their native<br />
Ethernet connections.<br />
♦ Receiving Telco service via IP may be much less expensive than the<br />
traditional ways.<br />
The diagram shows a typical installation, hinting at the possibilities inherent<br />
in the system.<br />
A 2U rack-mount device with enormous processing power, the <strong>VX</strong> Engine provides<br />
all the call control and audio processing needed for the system. It supports dozens
4 | Section 1<br />
of telephone lines and many studios. Its two gigabit Ethernet ports provides a costeffective<br />
interface to both telephone lines and studio audio via Livewire AoIP.<br />
Call processing is sophisticated and flexible. Lines may be readily shared among<br />
studios. A web interface allows easy assignment of lines to “shows”, which can<br />
then be selected by users on the studio controllers. Each studio can provide its own<br />
Program-on-Hold.<br />
Audio processing features also have taken a leap forward. There is a hybrid per line,<br />
allowing multiple calls to be conferenced and aired simultaneously with excellent<br />
quality. Each line is also equipped with AGC, automatic EQ processing, and override<br />
ducking.<br />
All connections to the Engine are via two Ethernet jacks that are extended with an<br />
Ethernet switch to support a wide variety of peripherals: telephone lines, Livewire<br />
studio audio, VSet phones, <strong>VX</strong> Producer PC applications, console-integrated controllers,<br />
etc.<br />
The VSet Phone Controller<br />
While you can control the <strong>VX</strong> with PC applications and mixing consoles. Most<br />
systems will include one or more Telos VSets. These are the phone-like controllers<br />
that have handsets for off-air conversations.<br />
The IP-based VSet has two large, high-contrast color LCD panels that provide line<br />
status, and caller information. Caller description text that is entered into the <strong>VX</strong><br />
Producer PC application will show up on the LCD near the line select buttons.<br />
For the comfort of familiarity, the <strong>VX</strong> can work like a traditional Telos controller, with<br />
calls being selected, held, and dropped in the way to which operators have grown<br />
accustomed.<br />
But because the <strong>VX</strong> system has a hybrid per line, it is often desirable to spread<br />
multiple calls over a number of faders, using one for each call so that operators<br />
can control each line’s level individually. The VSet offers this possibility. It is also<br />
possible to hard-assign individual lines to fixed faders, such as for VIP calls.<br />
<strong>VX</strong> Producer Windows Software Application<br />
The <strong>VX</strong> Producer application takes studio phone operations to a higher plane. It<br />
provides the usual call screening functions for phone-active broadcasts – but with<br />
a number of enhancements enabled by the IP nature of the system. The integrated<br />
softphone uncomplicates the producer’s life, since the PC interface is used for all<br />
operations, including answering and making calls, assigning priority, writing notes,<br />
etc. It also reduces cost, as no hardware phone need be installed.<br />
It has a built-in audio recorder/editor. A producer can record and edit a phone call<br />
without leaving the application. The resulting audio files can be easily sent to the<br />
talent PC for quick and convenient airing. We imagine that this simple, but powerful<br />
feature could add an interesting new element to many call-in situations. Callers who<br />
don’t have time to “wait their turn” could be quickly recorded and carefully edited.<br />
Perhaps montages could be created to open segments. Removing the need to wait<br />
might encourage comments from higher-quality callers.<br />
Because Livewire audio is available at the PC via standard LW Driver software, a<br />
producer can readily record calls for later play. These could be edited with a PC
WelCome | 5<br />
application running on the same machine. When a file has been produced, it can be<br />
sent to the on-air studio over the network.<br />
Thus, the one Ethernet cable is used for:<br />
♦ Telephone audio for the softphone, via Livewire.<br />
♦ Livewire audio for the recording of calls.<br />
♦ Transfer of recorded call files from the producer to the studio.<br />
♦ Data messages between the PC and the <strong>VX</strong> main box for line selection, etc.<br />
♦ Data messages such as call notes and IM between the producer and on-air<br />
studio.<br />
♦ Possibly, database lookup of caller information, such as how many times<br />
they have called, the quality of their contribution, whether they have won any<br />
contests, etc.<br />
♦ Web browsing, email, etc.<br />
This is the power of IP realized. To accomplish this level of functionality with older technologies<br />
would have been impractical.<br />
Console Controllers<br />
Integrating phone line selectors into the studio mixing console is an operatorpleasing<br />
feature that is easy to accomplish in a networked studio. As this is written<br />
in March 2011, the following consoles have <strong>VX</strong>-compatible call control modules<br />
available.<br />
♦ Axia Element Console<br />
♦ Axia IQ Console<br />
3rd-Party Producer Applications<br />
The <strong>VX</strong> uses an open protocol for control, which permits non-Telos software applications<br />
to be used in place of, or to augment, the Telos <strong>VX</strong> Producer application.<br />
Broadcast Bionics and NeoSoft offer such applications.<br />
The <strong>VX</strong> system components are linked via a standard Ethernet switch. In Livewireenabled<br />
studios, this will already be present and no additional switch would be<br />
needed. Facilities that already have a VoIP PBX would also probably have a suitable<br />
switch in place.<br />
The Acoustic Echo Canceller<br />
A new acoustic echo canceller algorithm solves the longstanding problem of<br />
feedback and echo when a loudspeaker-to-microphone acoustic path is required in<br />
the studio, such as when DJs prefer to record calls without using headphones or<br />
when guests need to hear calls without headphones. The AEC in the Telos <strong>VX</strong> is a<br />
remarkable new development. Its performance is shockingly impressive, permitting<br />
very high loudspeaker volume with no noticeable feedback or return echo. (If you’ve<br />
already experienced the Axia intercom system, you know what we’re talking about…)
2 Installation and Configuration<br />
| 7<br />
The diagram shows a generic installation that could be used in a typical studio. Two Ethernet<br />
switches are employed to keep the isolation between the WAN and LAN ports on the <strong>VX</strong><br />
Engine. The LAN port carries the Livewire audio and everything else but the VoIP, which is on<br />
the WAN port. Telco lines enter two ways: From the PSTN via a gateway and from a SIP VoIP<br />
provider over an IP network. Livewire Nodes provide analog, AES, and/or GPIO connections to<br />
traditional studio equipment. They could be thought of as another kind of ‘gateway’. And just<br />
as with the Telco gateway, they are not needed when the studio equipment can accept AoIP<br />
natively. For an example of this sort of installation, see Axia Element Console as <strong>VX</strong> Controller<br />
in Section 5.<br />
Connecting to PSTN Lines: Gateways & PBXs.<br />
‘PSTN’ is an acronym for ‘Public Switched Telephone Network’, the traditional telephone<br />
network that includes POTS, ISDN, and T1 as ‘last-mile’ connection technologies.<br />
The <strong>VX</strong> system connects to Telco lines using industry standard SIP (Session Initiation Protocol).<br />
This means it is compatible with a wide variety of VoIP services, gateways, and PBXs. Gateways<br />
are used to interface PSTN lines to SIP. This is how analog POTS and ISDN lines connect<br />
to the <strong>VX</strong>. Gateways are off-the-shelf for POTS, T1/E1, and both BRI and PRI ISDN. These can<br />
be rack-mount units that support large numbers of connections or low-cost desktop boxes that<br />
interface a few POTS lines.
8 | Section 2<br />
The “gateway” could also be a full-up IP PBX, such as from Cisco, Digium (Asterisk), and many<br />
others. In this case, compatible VoIP phones can be used for general office locations. SIP lets<br />
you move calls between the office and studio systems with no audio degradation. A PBX such<br />
as Asterisk could add additional capability, such as automated attendant functionality. With<br />
appropriate cards, Asterisk makes an excellent gateway to T1 and ISDN PRI Telco lines.<br />
Using VoIP to Connect to the Telco Network<br />
Recognizing the growth in market share of VoIP PBXs, Telcos are beginning to offer “SIP Trunking”<br />
service, which delivers phone network connectivity directly over a controlled IP link. With<br />
this service, you wouldn’t need a gateway.<br />
While it remains a niche in early 2011, SIP trunking is growing in support from both PBX<br />
vendors and carriers. Over time, this will almost certainly reduce the use of the older POTS and<br />
T1 trunking. Eventually, it may replace it completely. See the Resources section for a list of SIP<br />
VoIP providers that we’ve tested with.<br />
What’s a ‘Line’?<br />
Grandstream GXW4004 4-port FXO gateway<br />
While we are talking about Telco lines and VoIP services, we should take a moment to consider<br />
– just what is a ‘line’ these days? Use of the word ‘line’ is becoming bothersome at this point in<br />
telecom history. Back when an analog line was associated with a single telephone number, the<br />
word had a clear meaning. When you ordered ten lines, you received ten physical wire pairs<br />
and had ten telephone numbers. (Yes, “roll-over” rotary service exposed only one number to<br />
the public, but the others were still there.) ISDN was the first step on the path to trouble. We<br />
engineers began to speak of a BRI “line” with two “voice channels”. But producers and hosts<br />
still communicated with each other as if channels were lines, saying things like, “The treehugger<br />
is on line 3. Do you want to take him now?” We knew that meant BRI line 2, channel 1,<br />
or T1 channel 8, but users had no clue.<br />
ISDN PRI made matters yet more knotty, since the telephone number and physical channel<br />
were divorced. Now we are faced with SIP trunking and other IP-based services, where a single<br />
link (which might be connected via one, two, or more physical copper pairs, or an optical cable,<br />
or via a wireless system) might carry any number of voice channels. (And what is going to<br />
happen when phone numbers become obsolete, as they already are for VoIP applications such<br />
as Skype?)<br />
Users, blissfully unaware of all this, will undoubtedly continue with their conditioned habit,<br />
referring to a certain caller as being on a particular line. Thus is the word ‘line’ destined to join<br />
‘dial’ in a peculiar departure from original meaning.<br />
In this manual, we refer to “lines’ as your users would. Usually that means a particular telephone<br />
number that is probably associated with a button on the VSet phone and/or console<br />
controller. To keep the ambiguity down, we’ll try to remember to call the physical links “connections”<br />
or “interfaces”. And we’ll sometimes refer to ‘calls’ when the sense points more to<br />
the conversation than the connection.
Livewire for audio I/O<br />
InSTallaTIon anD ConFIGuRaTIon | 9<br />
The <strong>VX</strong> uses Livewire for all audio I/O. For studios that are already Livewire-based, this approach<br />
saves money and simplifies installation. With its simple support of bi-directional audio<br />
flow, Livewire is ready for hassle-free mix-minus.<br />
When needed, traditional audio connections are provided via Axia Livewire Nodes. These<br />
come in both analog and AES3 versions. Because they are networked, they can be located<br />
where convenient, either in individual studios or in a central rack room. Each standard Node<br />
connects eight stereo audio inputs and eight outputs. The many audio converters and connectors<br />
that would be needed to interface the multiple hybrids and program-on-hold inputs are<br />
reduced to a single Ethernet RJ-45.<br />
Livewire is both an elegant technical solution and an unprecedented value. Only one Ethernet<br />
RJ-45 connects dozens of bi-directional audio channels and rich control.<br />
Step-by-step<br />
There is a lot of information in the pages that follow. Here’s the (very) abridged version of what<br />
you need to do to get your <strong>VX</strong> system up and running.<br />
1. If you will not be using an existing network to support the <strong>VX</strong>, install the Ethernet switch,<br />
or switches, depending upon your needs.<br />
2. Mount the Engine and set the IP address or accept the default. Make the network connections.<br />
3. Install and configure your gateways if you will be using them to interface to POTS, ISDN,<br />
or T1 PSTN lines. If you will be using VoIP trunking for your Telco connection, get it<br />
connected and gather the IP and registration password info.<br />
4. Get a web browser going and do the system configuration.<br />
5. Move on to install and configure the <strong>VX</strong>set phones and <strong>VX</strong> Producer software application.<br />
Then to any other controllers you have in your system, such as integrated console<br />
controller modules.<br />
The Engine and Network<br />
The front panel OLED/knob interface.
10 | Section 2<br />
The Engine front panel display gives at-a-glance status information. The main screen is<br />
pictured above. It shows the IP number for the LAN (Livewire) port, its connection speed and<br />
status. The overall status and CPU temperature are also indicated. The knob lets you scroll<br />
through the menu pages.<br />
Among the menus is one that lets you change the IP address and another that shows the status<br />
of the Livewire audio channels.<br />
The main screen, shown at power-up, is pictured above. To see any of the other pages /menus,<br />
push, and then rotate the knob to show each in turn. Pushing the knob enters you into the<br />
menu that is displayed. Editing items inside menus, such as the IP address, is similar - navigate<br />
to the specific item you want to change by rotating the knob, then push it to choose the item,<br />
such as the IP address. In the case of the IP address, select from among the digits by rotating<br />
the knob, then pushing. Finally, rotate and push to enter the value you want. (yeah, this isn’t<br />
the most convenient of user interfaces, but you shouldn’t have to use it; the web interface,<br />
once available, is much more friendly. The reason for the IP address entry here on the front<br />
panel is to avoid the circularity that you need the IP address to connect a web browser, in order<br />
to enter the IP address. (should the default not work, for some reason.) We think you’ll also<br />
find it convenient at times to have the IP address displayed on the front panel.<br />
Network Connections<br />
The <strong>VX</strong> Engine has two RJ-45 Ethernet jacks on the rear panel. Both are 100/1000 auto-speed<br />
setting. The upper (LAN) port is for Livewire audio and, by default, everything else, such as PCs<br />
used for web-based configuration, VSet phone controllers, producer PCs, and console controllers.<br />
This can be connected to an existing Livewire network or to a new, dedicated, network<br />
that you create to serve only the <strong>VX</strong> system, which could be as simple as a single Ethernet<br />
switch.<br />
For audio to work, there must be at least one Livewire device capable of supplying clocking<br />
on the Livewire network. Normally, this would be a Livewire audio Node. The Axia Element<br />
console Powerstation can supply this clock.<br />
More on the Network<br />
An appeal of the Ethernet/IP approach to building studios is that you can make them as simple<br />
or elaborate as your needs require. The components of a <strong>VX</strong> system: the Engine, VSet phones,<br />
console controllers, and PCs are networked together using standard, off-the-shelf Ethernet<br />
switches. A small <strong>VX</strong> system might have only a single Ethernet switch as the ‘”network<br />
infrastructure”, while a large full-facility setup could have dozens of switches and an IP router<br />
or two.<br />
The Ethernet switch on the Engine’s LAN port must be Livewire capable. That is, it needs to<br />
support multicast. Switches that are not multicast-capable usually flood multicast traffic such<br />
as Livewire audio streams to all ports, potentially overwhelming devices like PCs and printers<br />
- So you don’t want to plug the <strong>VX</strong> LAN port into an office network after Livewire outputs are<br />
enabled! ! Multicast-capable switches will not propagate the Livewire traffic to ports that are<br />
not subscribed to a particular audio channel. Thus blocking the high-volume traffic from places<br />
it is not wanted. A suitable switch would be the Cisco 2960G or another from that family. The<br />
switch that is part of the Axia Element PowerStation is also suitable. Of course; the <strong>VX</strong> and<br />
Axia consoles were designed to work smoothly together.<br />
For the initial, out-of-the-box, configuration, the foregoing is not a concern. You can safely use<br />
a simple Ethernet switch or an existing LAN to get your configuration PC to the <strong>VX</strong> LAN port<br />
because, by default, there is no Livewire traffic flowing. Only after you assign Livewire outputs
in configuration, as described below, will this be a concern.<br />
InSTallaTIon anD ConFIGuRaTIon | 11<br />
The lower, WAN (Wide Area Network) port is isolated from the Livewire port and thus provides<br />
a firewall, ensuring that no traffic can pass from the Wide Area network, often connected to the<br />
Internet to access VoIP, to the studio Livewire network.<br />
Out of the box, the defaults for the network connections are:<br />
VSet Installation<br />
♦ The WAN port is disabled. To use it, you must enable it on the Main configuration page,<br />
as described below, and move the services you want to use to it, also on the Main<br />
configuration page.<br />
♦ All services – HTTP web access, SIP/VoIP, VSet audio and control, and Livewire audio<br />
I/O – are provided via the LAN port.<br />
♦ No Livewire inputs or outputs are assigned or enabled. You do this on the Studios<br />
configuration page.<br />
VSets are normally connected to the Livewire/LAN Engine port via the Ethernet switch linked to<br />
this port.<br />
The VSet is powered over the Ethernet connection. This is 48v according the PoE (Power over<br />
Ethernet) standard. The power consumption is 15.4W. Power may be supplied by the standard<br />
PoE injector we include with the VSet or it can come from an Ethernet switch that is equipped<br />
to provide PoE. If a PoE switch is used, ensure that the Ethernet cabling is not so long that it<br />
causes too much voltage drop. Some Axia products, such as the PowerStation and IQ console,<br />
have ports that provide PoE.<br />
♦ Connect the Ethernet and confirm that that the LEDs near the jack are indicating correctly.<br />
The ?? green LED should be on solid, showing a good connection. The yellow LED<br />
should be flashing, showing data flowing.<br />
♦ After a few seconds, the LCD screens should come to life. If they do not, the likely<br />
problem is with the PoE supply or cable.<br />
♦ Press the Menu button and navigate to Setup. Enter the IP number you have assigned<br />
to the phone and the netmask value. (Most often, this may be kept at the default<br />
255.255.255.0. ??)<br />
♦ Enter the IP number of the <strong>VX</strong> Engine to which the VSet will connect.<br />
System Configuration<br />
Selectable and Fixed Lines<br />
The <strong>VX</strong> supports the concept of both ‘Selectable’ and ‘Fixed’ lines. It is possible to have a mix<br />
of both.<br />
Selectable lines are used for an operation style like traditional Telos systems, where there was<br />
a line selector before the hybrid or hybrids. Hybrids were expensive, which meant that we<br />
were not able to have one dedicated to each line. This limitation is now over, and we can provide<br />
a hybrid and other processing functions for each line. (Yeeeaaa! – Progress with a capital<br />
‘P’. Nevertheless, operators are used to the operating paradigm that the old “1A2” key phones<br />
made so widely-known, where you have a column of buttons and pressing one takes a line
12 | Section 2<br />
and drops the one that was active before. For that reason, we have kept this operation style as<br />
the default for the <strong>VX</strong>. We have also kept the “lock” function that lets an operator conference<br />
multiple lines and keep VIP callers on-air while coming and going with others. This also allows<br />
selective holding and dropping of conferenced lines.<br />
Multiple calls that are assigned to a single fader have individual hybrids/processing and are<br />
actively conferenced within the <strong>VX</strong> Engine using an internal mix-minus matrix. Calls assigned<br />
to different faders would normally be conferenced via a mix-minus matrix of some kind within<br />
the studio mixing console.<br />
With fixed lines, there is a one-to-one correspondence between Telco lines and console faders.<br />
A particular telephone number is always associated with a particular button on the VSet phone<br />
and a particular fader on the console. It is as if each line had its own hybrid. This allows VIP<br />
and hotlines to have fixed and dedicated console faders. Perhaps this will be an easier operating<br />
paradigm for stations that often have multiple lines conferenced together on-air.<br />
You could configure a system to have only fixed lines and no selectable lines. Each line would<br />
have its own dedicated fader. This is, in fact, the way most large European stations have operated<br />
their phone interfaces for years.<br />
This approach has become more practical as we move away from analog lines since the<br />
“lines” are virtual and the cost for a telephone number added to the ISDN, T1, or SIP trunk<br />
pool is much less than the cost of an analog line – usually less than $1 per month.<br />
Fixed line calls would normally be conferenced via a mix-minus matrix of some kind within the<br />
studio mixing console.<br />
Studios and Shows<br />
The <strong>VX</strong> system can support multiple studios and can share lines among them.<br />
A studio is a collection of controllers and other devices that are used together, usually to serve<br />
one studio: <strong>VX</strong>sets, <strong>VX</strong> Producer applications on PCs, Audio input and output Nodes (if any),<br />
GPIO interfaces (if any), and console controllers (if any).<br />
A show is a pre-configured profile that can be selected by users. It assigns the lines to buttons<br />
and such. This is the mechanism that lets you move lines from studio to studio.<br />
Studios and shows are configured via the web interface to the <strong>VX</strong> Engine. Interfaces such as<br />
the VSet and the <strong>VX</strong> Producer let operators select the studio and show they want to use.<br />
Configuration Web Pages<br />
To access the configuration Web pages, find or connect a PC to the network that the <strong>VX</strong> Engine<br />
is connected to. Start a web browser and open a connection to the <strong>VX</strong> Engine by entering<br />
http://192.168.0.200 into the browser’s address field (assuming the default IP number has not<br />
been changed and that your PC is on the same subnet).
Home Page<br />
InSTallaTIon anD ConFIGuRaTIon | 13<br />
This is the page you will see upon initial connection. Select the pages you want by clicking on<br />
the menu at the left side of the page. If this is a new installation, start with the Main page, then<br />
move to the SIP page, the Studios page, and then on to the Shows page. The purpose of each<br />
of the pages and how to use them is detailed below.
14 | Section 2<br />
SIP Configuration<br />
The SIP configuration on this page sets the IP address for the default SIP gateway. This may be<br />
overridden on a line-by-line basis in Show configuration.<br />
Regarding The <strong>VX</strong> and SIP<br />
Some details regarding the <strong>VX</strong>’s SIP implementation:<br />
♦ As of the time of writing, the <strong>VX</strong> supports the g.711 and 16-bit PCM codecs. g.711 is the<br />
usual PSTN codec, so ISDN or T1 connections will not suffer any transcoding loss. 16-bit<br />
PCM might be used for some PBXs. SIP automatically negotiates and selects a codec<br />
that is supported by both ends. We are working to support the wideband g.722 codec<br />
and others. When available, these will be added with a software update.<br />
♦ Implements RFC 3261 standard (but see below)<br />
♦ RFC 2671 MD5 digest authentication is supported.<br />
♦ RFC 2833 DTMFs is supported.<br />
♦ Supports SRV address lookups.<br />
♦ Has basic NAT support<br />
♦ Unlike some other SIP devices, the <strong>VX</strong> supports non-numeric “extensions”<br />
Things to be aware of:<br />
♦ NAT and SIP don’t work well together in general, in particular, symmetric NAT<br />
♦ There can be issues with domain names in Contact headers.<br />
♦ Redirects of REGISTER are not handled.)<br />
♦ No IPv4 multicast support.<br />
♦ Some complex routes involving multiple proxies are not handled correctly if the first<br />
proxy is not record-routing<br />
♦ Early <strong>VX</strong> versions did not support re-invites. When used with Asterisk, this parameter<br />
must be set ‘no’ in Asterisk. Although it will probably be working by the time you are<br />
reading this… (re-invite re-routes calls so that they are connected directly, rather than<br />
being passed through the Asterisk.)
InSTallaTIon anD ConFIGuRaTIon | 15<br />
♦ We saw a PBX that tried to call <strong>VX</strong> using a local tel:URI mapped to SIP address - that<br />
won’t work<br />
♦ MWI is not supported<br />
♦ Mapping of extensions to/from public numbers must be done on the PBX because there<br />
is no way to pass such information through SIP<br />
Main page - General Configuration<br />
Engine Name. Assigns the text name for this <strong>VX</strong> Engine. It becomes the Linux network name<br />
for the Engine.<br />
If you will not use the defaults for IP, Netmask, and Gateway, enter them here. IP addresses<br />
can be entered for both the LAN and WAN ports.<br />
Web Username and Password. Used for web access for configuration and monitoring. User-
16 | Section 2<br />
name is always ‘user’ and the default password is .<br />
LWCP Password. LWCP stands for Livewire Control Protocol, the way controllers communicate<br />
with the <strong>VX</strong> Engine. A password can be used to secure the Engine from being controlled by<br />
unauthorized devices. The <strong>VX</strong>set, for example, uses this password. By default, this is set to<br />
.<br />
WAN Services chooses which services are available on the WAN port. HTTP is for web access,<br />
LWCP is for controllers, and SSH is shell access to the Linux OS in the Engine. SIP/VoIP are<br />
always enabled on the WAN port when the port is enabled.<br />
NTP (Network Time Protocol) is the Internet standard for keeping devices synchronized to the<br />
correct time. The <strong>VX</strong> uses this to have accurate timestamps for logged events. Enter the IP<br />
number for the NTP server here An NTP server must be accessible on either the LAN or WAN<br />
port. The <strong>VX</strong> automatically finds the correct port. If the NTP server is outside of both the LAN<br />
and WAN local network segments, gateway must be set. You can use a domain name if a DNS<br />
server is configured and accessible. Under NTP Config are the settings for your location.<br />
Default Username, Password, and IP settings<br />
We put this info here under its own header, just to make it easy for you to find when surfing<br />
the table of contents…<br />
User: “user”<br />
Password: , that is, no password<br />
-’Network’ interface IP: 192.168.0.200<br />
- netmask: 255.255.255.0<br />
- state for the WAN connection is ON<br />
- default IP address for the WAN interface: 192.168.5.200<br />
- netmask for WAN interface: 255.255.255.0<br />
- Active ports on WAN interface by default are:<br />
- 5004 - SIP<br />
- 5060 – SIP<br />
- 10000-20000 - SIP RTP<br />
- 8080 – HTTP Server<br />
A computer on the same subnet as the ‘Network’ interface, (example 192.168.0.100) could log<br />
into the <strong>VX</strong> with this URL: http://192.168.0.200, while a computer on the same subnet as the<br />
WAN interface (example 192.168.5.2) could log on using http://192.168.5.200:8080 .<br />
Default user name is: user<br />
Default password is: <br />
Passwords are case sensitive<br />
If you change any of these, you might want to write the new values into this manual, here and<br />
elsewhere.
Overall Studio Configuration Page<br />
InSTallaTIon anD ConFIGuRaTIon | 17<br />
The Studios page lists all of the studios that you have configured for your system. It lets you<br />
add new ones. And it lists the Shows that studios are using.<br />
Individual Studio Configuration Pages (part 1)<br />
The individual Studio pages are to configure each studio. For each, you can choose how many<br />
faders you want to devote to selectable and fixed lines and you assign the Livewire channel
18 | Section 2<br />
numbers to each. Note that when you assign Livewire channels to outputs, Livewire streams<br />
will start to flow on the LAN network port. With a proper Ethernet switch, this is no concern,<br />
but should this port be connected to an office LAN or non-Livewire switch, there could be<br />
flooding from the audio traffic.<br />
Recall that Livewire channels carry audio in two directions, so both send and receive are<br />
covered at once. ‘Live Stereo’ should usually be chosen as the Mode to keep the delay as low<br />
as possible.<br />
One LW channel is used to feed Program on Hold to each studio. Since only one of the two<br />
Livewire audio directions is needed, you can choose which is appropriate for your studio<br />
set-up. From Source is the usual<br />
Individual Studio Configuration Pages (Part 2)
InSTallaTIon anD ConFIGuRaTIon | 19<br />
Advanced receive opens a new field where you can enter a LW channel number to which this<br />
Fader/LW channel will listen. Normally it will listen to the same LW number as it is sending<br />
to. With native Livewire consoles such as the Axia Element, this is what you need. But if you<br />
want to connect the <strong>VX</strong> to another console via an interface Node, the Node can generate only<br />
a “From source”, not a backfeed. For this case, choose Advanced receive and enter the LW<br />
channel number of one of Node’s sources.<br />
Each studio has an acoustic echo canceller available. The two inputs and the output are<br />
assigned to Livewire channels on this page. The output of the AEC is labeled Backfeed because<br />
the output of the AEC is what you usually would feed back to phones. For configuration<br />
purposes, you should think of the AEC as a separate block outside of other <strong>VX</strong> functions. There<br />
is no internal connection from/to the AEC and other <strong>VX</strong> signal paths.<br />
The Acoustic Echo Canceller helps with the problems that occur when you need to have loudspeaker<br />
monitoring of calls in the same room as the microphone feeding the phone. Without<br />
a canceller, the received caller audio would be returned to the caller as an annoying echo. (In<br />
the old days, this acoustic coupling would more probably cause feedback howl than echo,<br />
but today’s mobile phone and VoIP delays have made echo the trouble du jour. The canceller<br />
needs two inputs and produces one output. The Mic input is fed from the studio microphone.<br />
The reference input is the audio that needs to be cancelled - the received phone audio that is<br />
going to the monitor or preview loudspeaker. The output of the canceller goes to the <strong>VX</strong> phone<br />
feed input(s). (Why didn’t we just internally connect the canceller? Because the canceller works<br />
best when the reference input is after anything that is in the phone-to-speaker path, such as<br />
the volume control and mute. In a Livewire-equipped studio, it should not be too difficult to<br />
tap the needed signals. The canceller is low-distortion and full-fidelity, so it may be used with<br />
wideband codecs. More information on the Acoustic Echo Canceller is in Manual Section 5.<br />
GPIO<br />
GPIO (General Purpose Parallel Input/Output) control is possible. The Livewire channel assignment<br />
for this is done on this page. The electrical connection is made via Livewire GPIO Nodes,<br />
using the standard 5 inputs and 5 outputs per channel. You tell the system how many Livewire<br />
channels you will use with GPIO Channel Count. After you press apply, you will see entry<br />
fields for each of the channels. Specify the Livewire channel number you want to use for each<br />
and choose the functions you want to assign. GPIO Actions are inputs to the <strong>VX</strong> from some<br />
external source, which could be nothing more than a pushbutton. GPIO Indications are outputs<br />
from the <strong>VX</strong>. For example, there’s a Ringing Line could be used for a wall-mounted lamp and<br />
Delay dump was pressed to trigger a profanity delay unit. You can find the details regarding<br />
the corresponding pins of the GPIO connectors in the various GPIO Node manuals.
20 | Section 2<br />
Overall Show Configuration<br />
Individual Show Configuration Pages<br />
With the individual Show x configuration pages, you tell the system how to assign Telco lines<br />
to VSets and other controllers. You give each line a text name that appears on controllers. You<br />
decide if the line is to be Selectable (a number of lines switched into a few faders) or Fixed<br />
(one-to-one correspondence from lines to faders). You specify if a line is to be affected by the<br />
Block All function. Finally, you can override the default SIP gateway on a per-line basis.<br />
The SIP Number is like an extension number in a PBX system. It maps incoming calls to the<br />
line positions on the controllers.<br />
Near the top of the page, you see what studios are using this show.
<strong>VX</strong> in the News and Production rooms<br />
InSTallaTIon anD ConFIGuRaTIon | 21<br />
The flexibility of the <strong>VX</strong> extends to the newsroom and production studios. It’s easy to create<br />
a ‘studio’ in the <strong>VX</strong> that can be dedicated to a workstation or special need. Most newsrooms<br />
these days are simply PC workstations with a simple mixer off to the side. You can set up<br />
a hybrid for each of your workstations or production rooms. You can use the <strong>VX</strong> Producer<br />
software or <strong>VX</strong>set for the user interface. Or you could program the <strong>VX</strong> to automatically answer<br />
a call transferred to it.<br />
Using the <strong>VX</strong> to replace ‘Couplers’<br />
If your station uses “Pre-delay IFB (Interruptible FoldBack) Couplers or “listen lines”, the <strong>VX</strong><br />
can replace an entire wall of hardware, and by using DID (Direct Inward Dial) numbers instead<br />
of POTS lines, you can also save a lot of money each month by replacing those expensive<br />
analog lines.<br />
Create dummy studios for each coupler bank and shows with the phone number or extension<br />
you want to use and tick the auto-answer box next to it. Choose the audio feed from among<br />
the Livewire sources.<br />
The <strong>VX</strong> lends itself to creative solutions. As you become more comfortable with the system,<br />
we’re sure that you’ll find more of them. Please share them with colleagues at our website<br />
www.telos-systems.com/forums and check in to see what’s new.<br />
Hybrid page - Audio Processing and metering<br />
The <strong>VX</strong> has dynamics processing on both the send (from studio, to caller) and receive (caller)<br />
audio directions. Adjustments and meters are on the hybrid page.<br />
We recommend as a starting point +8 on the high EQ, +6 on the low EQ, 16 on the AGC (full),<br />
the caller ducking to 6dB, and the noise gate off.
22 | Section 2<br />
The send processing consists of a limiter and EQ. The purpose of the limiter is to protect<br />
the Telco line from the distortion that would result from clipping due to an audio overload.<br />
Livewire studio audio has a much larger dynamic range than telephone lines. We use a limiter<br />
rather than an AGC because we don’t want the system to increase low-level signals, which<br />
could cause feedback and sound unnatural to the caller.<br />
The receive processing includes ducking, an AGC, and dynamic EQ.<br />
Hybrid refers to the the traditional hybrid cancellation function; the removal of the send audio<br />
from the received caller audio, required due to the nature of analog Telco lines, where the two<br />
signal directions are combined on one circuit. In the VoIP world this should be done in the<br />
gateway, and is not required in the phone system itself, but we use the term “hybrid” here<br />
because it’s instantly understood. Some PBXs refer to the hybrid as an ‘LEC’ or Line Echo<br />
Canceller.<br />
The Call Audio Processing button allows you to enable or disable all of the audio processing<br />
features of <strong>VX</strong>, such as AGC, EQ, ducking, etc., all at once. Enabling this option will let you<br />
adjust the individual options below.<br />
Ducking. The purpose of this is both to improve the performance of the system with regard to<br />
feedback and echo as well as to provide an effect that many DJs and talk show hosts prefer –<br />
that the caller level is reduced when they speak. The ducker reduces the gain in either the send<br />
or receive path depending on who is talking at a given moment. There is a smoothing filter<br />
with time-constants tuned to make the effect as natural as possible. The amount of ducking is a<br />
user-adjusted variable value and may be defeated entirely if you choose.<br />
Caller AGC/EQ. Normalizes the level coming from telephone calls. A wideband AGC is used<br />
for consistency, followed a multi-band frequency-selective processor that provides spectral<br />
control for the best caller audio, balancing intelligibility and warmth. The Duck Control module<br />
communicates with the AGC module so that gain is not increased when the studio-side is<br />
sending audio. Leakage from the hybrid in this case could look like low-level telephone audio<br />
that needs to be boosted. If this happens, the effect of the hybrid and ducker would be undone.<br />
Send EQ. This is a simple EQ that rolls-off the low-end and has a peak at high-frequencies to<br />
improve intelligibility. This is designed to make the audio similar to what a caller would receive<br />
from a normal telephone. When wideband audio is fed directly into a telephone connection,<br />
there are often complaints that “it is hard to understand” because the low-frequency energy is<br />
masking the higher frequencies that are needed for intelligibility.<br />
A Sample Rate Converter is an essential part of the signal processing. The SRC is automatic<br />
and there are no controls or configuration. The SRC between the telephone processing and the<br />
studio-side audio adapts the telephone sampling rate to the 48kHz Livewire rate and allows the<br />
switching and mixing to be performed synchronously within the <strong>VX</strong> Engine. The SRC adapts a<br />
number of rates on the telephone side. The usual telephone rate is 8kHz, but newer wideband<br />
codecs making their way into telephony will have higher rates. The output (to Telco) rate of the<br />
send-side SRC is locked to the receive rate on the same line.
Assigning sounds & Tones – The Tones page<br />
InSTallaTIon anD ConFIGuRaTIon | 23<br />
SIP signaling is via a text message, not audio. This means the <strong>VX</strong> has to make its own sounds<br />
in response to various line status conditions. We provide default sounds, which are similar to<br />
the traditional tones generated by the PSTN, but you can upload your own to create a unique<br />
on-air ‘signature’.<br />
You can also use any sound you like to signal that a new call has been taken. This is actually<br />
a cool new feature made possible by modern technology. Rather than a new call appearing<br />
silently, the event can be accompanied by a signature sound. A story… Years ago, we installed<br />
a fancy new Telos system at Z-100, New York, replacing an old key phone setup. The new<br />
system had a mute function to remove the loud and annoying ‘clunk’ that banged out when<br />
each call was taken to air. On the first day, star morning DJ Scott Shannon called Frank Foti,<br />
the Chief Engineer, to complain he was missing his “kerchunk kerchunk”. He liked the clunk,<br />
saying it created a kind of dramatic “yer-outta-here” punctuation when he dismissed a call and<br />
took another. He would have loved this feature of the <strong>VX</strong>. We’ve included a key phone button<br />
punch sound in his memory.<br />
For line status (sometimes ‘called ‘call progress’ tones, The tone configuration page lets you<br />
choose either USA or Euro standard for the default tones You can upload your own sounds.<br />
Files to be uploaded must be 16-bit 48kHz to be compatible with the Livewire audio output.<br />
They should be either dual mono or stereo (You can have full-fidelity stereo sounds – yeah!)
24 | Section 2<br />
and be available on the PC that hosts the Web browser you are using to access the <strong>VX</strong>.<br />
They can be any length, but should normally be kept short to conserve memory (and to avoid<br />
annoying listeners…).<br />
Dial tone. This is only heard when a line button is pressed before a call is dialed.<br />
Ringback tone. Heard when dialing is completed and the called phone is ringing.<br />
Busy. Heard when the called phone is busy.<br />
Reorder. Signals that there are no call paths available in the PSTN, usually caused by congestion<br />
in links between central offices. In the USA, this is is the ‘fast busy’ - a dual-frequency tone<br />
of 480Hz and 620 Hz at a cadence of 0.25s on/0.25s off.<br />
Error. Usually caused by an incorrectly entered number, but can be from other problems in call<br />
setup.<br />
Call answered. Heard on-air when the called phone is answered.<br />
Off Hold. The sound that is played on-air when a call is taken to air from Hold by pressing a<br />
line-select button.<br />
Line switch. The sound that is heard when there is a call on-air, and a new call is taken to air<br />
by pressing a line-select button. This is the one Scott Shannon wanted.<br />
Caller hang up. A brief sound that is heard when an on-air caller disconnects.<br />
Caller Alert tone. Sent to caller when call is answered, or when caller is taken to air from hold,<br />
to inform the caller that they are now on-air. The Caller Alert sound is sent to the caller, not<br />
played on the air. Its purpose is to let a waiting caller know that it is his turn to talk. Since he<br />
has usually been listening on hold, he will have heard the host say “hello, you’re on the air” a<br />
few times before it really is his turn. Since this sound is played only to callers being switched<br />
to air, it clears the confusion. The Producer/call screener needs to explain this to callers.<br />
DTMF (on air). Dialling keypresses send call setup messages digitally to VoIP lines or gateways.<br />
Though they are not sent to the Telco line, standard DTMF (Dual Tone Multifrequency) tones<br />
are played on-air - but they are scrambled so that listeners are not able to easily detect the<br />
number being dialled. The correct DTMF tones are played to the VSet handset and loudspeaker.<br />
SIP and DTMF<br />
The <strong>VX</strong> uses standard SIP procedure for dialing. A SIP call setup message containing the<br />
number is sent to the IP network. The gateway to analog POTS lines generates the DTMF (Dual<br />
Tone MultiFrequency) audio signal that the PSTN uses to direct the call. A gateway to ISDN<br />
lines translates the SIP message to the equivalent ISDN call setup message. The <strong>VX</strong> does not<br />
generate DTMF audio. Likewise, the gateway translates call progress signals from analog tones<br />
or ISDN messages to SIP. The default is a simple ‘click’.<br />
There is sometimes the need to send DTMF to the PSTN after a call is connected, such as for<br />
automated attendant systems. In this case the <strong>VX</strong> sends a special SIP message that tells the<br />
gateway to generate the corresponding audio DTMF tones, according to the standard specified<br />
in the IETF (Internet Engineering task force) RFC2833.
Logging<br />
InSTallaTIon anD ConFIGuRaTIon | 25<br />
The <strong>VX</strong>’s logging capability is a powerful tool to track down problems –even those due to<br />
operator error – not that that ever happens.<br />
In the Logging config page you determine where logs are stored and how much detail is<br />
recorded.<br />
You can choose to store logs inside the <strong>VX</strong> or to an external PC on the network that is set up to<br />
handle Linux standard syslogs<br />
- If you choose the internal option, log messages will be kept in the <strong>VX</strong>’s RAM, so are limited in<br />
size. The advantage is convenience: You can view internally-stored logs with the System page<br />
log section, by default at http://192.168.0.7/log, A typical log is shown in the screen capture<br />
below.<br />
For basic troubleshooting, choose Log to Internal, then go to the Log page, clear all existing<br />
messages, then place a call or make the operation that’s causing trouble. Then return to the<br />
Log page to see the entries<br />
While you might be able to understand the log messages after some effort, we don’t expect<br />
you to do so. These are mostly intended for our support people, who would advise you as<br />
what settings to use for the capture and then interpret the result.<br />
With Log to Syslog, log messages are sent over your network to the Syslog server. Enter the IP<br />
address for your syslog server. Syslog servers need not be Linux machines. You can install a<br />
syslog server on a windows PC. One simple Windows app is at http://www.kiwisyslog.com/.<br />
A typical setting for diagnosing SIP problems would be to set the log level to Debug (extended).
26 | Section 2<br />
Fewer log messages will be generated if you set level to Debug (basic) Easier to read, but<br />
maybe missing detail that you need.<br />
If you want to adjust logging in detail, go into the Advanced page and select which modules to<br />
log, then select the DEBUG level for the module you want to trace. For example, if you want to<br />
trace what <strong>VX</strong> Producer or VSet is sending to the Engine, you might chose to select LWCPBE<br />
module log level to DEBUG.<br />
The three most interesting modules to log are:<br />
♦ AIF - <strong>VX</strong> front end communications with <strong>VX</strong> DSP part<br />
♦ CPSIP + SIP - SIP messages<br />
♦ LWCPBE - LWCP protocol for <strong>VX</strong> control<br />
Internet standard Network Time Protocol (NTP) is used to provide an accurate timestamp to the<br />
events captured in logs. For accurate timestamps, you need to have an NTP server accessible<br />
on your network and its IP address properly configured on the System page.
Firmware updates<br />
InSTallaTIon anD ConFIGuRaTIon | 27<br />
New firmware for the <strong>VX</strong> Engine is first obtained from Telos via email, Internet download, etc.<br />
It is then uploaded to the <strong>VX</strong> Engine using this page. You can have as many as five stored in<br />
the Engine at one time. On this page, you choose which of them will be active. Reboot the<br />
Engine after activating new firmware.<br />
Backing up and restoring Engine configuration<br />
Backup/restore configuration settings<br />
The backup file for configuration settings is stored on your local machine or on a removable<br />
drive attached to it.
28 | Section 2<br />
VSet Phone Configuration
3 operation<br />
VSet Operation<br />
Select Studio and Show<br />
If these have not been already selected, this should be done as the first step before using the<br />
VSet. Press the Menu button to access the menu functions. The LCD will show the various<br />
items that can be changed. Select the studio and show you want and then exit the menu by<br />
pressing the Menu button.<br />
| 29
30 | Section 3<br />
Set Talent or Producer Mode<br />
The VSet should be set to Talent mode when it is located in the studio and is used to put calls<br />
on the air. Producer mode is for a VSet that is being used by a producer to screen calls. In<br />
Producer mode, calls cannot be put on-air and are protected from being dropped. The function<br />
of the right line button column is different in the two modes to serve the needs of each type of<br />
operator, as described below.<br />
Press the menu button to access the menu functions. The LCD will show the various items that<br />
can be changed. Select Talent or Producer and then exit the menu functions by pressing the<br />
menu button.<br />
The Line Info Field<br />
Each line has a corresponding portion of the LCD display to the right of the line button that<br />
shows status and info about that line.<br />
Next indicator<br />
The ‘>>’ symbol. Marks the line that will be taken when the next button is pressed.<br />
Fader number<br />
The yellow/orange rectangle near the status icon.<br />
Line name<br />
The first text line. This is the line name given during configuration.<br />
Caller ID<br />
This is either the incoming or outgoing caller ID, depending upon whether this line is incoming<br />
or dialed-out. The green arrow to the left of the text points left for incoming or right for<br />
outgoing.
Time<br />
The length of time the call has been ringing-in or on hold.<br />
Action ‘hint’<br />
opeRaTIon | 31<br />
(None active in the graphic.) Shows what line will be affected by drop and hold. Choose the<br />
line you want to drop or hold after pressing either of those buttons. This shown only when<br />
more than one is possible; this step is not needed when only one line is possible, when the line<br />
would be dropped or held immediately.<br />
Line Status Icons<br />
Dialing<br />
Shows when you are using the keypad to dial an outgoing call.<br />
Outgoing call in-progress<br />
The icon will be animated with the white highlight moving around when a call is<br />
in the process of being connected.<br />
Ringing-in<br />
On-air<br />
On-air and locked<br />
On handset
32 | Section 3<br />
Hold<br />
Ready Hold<br />
Used Elsewhere (in another studio)<br />
Line is blocked<br />
Line Button Columns<br />
Each line has 2 associated buttons to the left of the LCD.<br />
Pressing a left column line button puts a held or ringing caller on the handset.<br />
Press the right column button to put a held or ringing line on air, dropping any other unlocked<br />
calls. If a call is already on the air, pressing the right button locks the line, or if already locked,<br />
unlocks it. That is, it toggles between the two states. Not to worry; you cannot drop a call.<br />
In Producer mode you use the Ready Hold button (the one with the checkmark) to put lines<br />
in ready hold mode and assign priority for the Next function. See Next Button and Function.<br />
Ready hold works like normal hold, except the line status icon has the checkmark to indicate to<br />
operators that a call has been determined to be ready for air, normally by a producer/screener.<br />
Tip: You can re-order the next priority queue at any time. Put lines in Ready Hold - even those<br />
already in this state - in reverse order from the order you wish to air them. First, Screen hold<br />
the call to be aired last, then the call to be aired second to last and so on. You would screen<br />
hold the call that you want to be aired next last. At first blush, this may seem confusing, but it<br />
makes sense when you remember that the call held the longest goes first to air.<br />
Hold Button<br />
Holds a call that is ringing, on the handset, or on-air. If more than one line is in this category,<br />
there will be a small hold icon near the status icon on the lines that could be held. Press the<br />
line that you want to hold.
Drop button<br />
opeRaTIon | 33<br />
Drops a call that is ringing, active on the handset, or on-air. If more than one line is in this<br />
category, there will be a small drop icon near the status icon on the lines that could be held.<br />
Press the line that you want to drop.<br />
Lock<br />
Normally, taking a call to air causes any others on-air to be dropped. If you need to conference<br />
two or more calls, you can use the lock function.<br />
Press an already on-air line button to lock it. The line status icon will change to display the<br />
locked symbol. Pressing the button again unlocks the line and the lock icon goes away.<br />
Locked calls remain on-air until unlocked and then another call is taken to air or the call is<br />
dropped or held.<br />
The Drop and Hold buttons have no effect on a locked line.<br />
Tip: If configured in your system, fixed lines will probably be the better option for VIP calls that<br />
need to say on-air while you come and go with others. You will have a dedicated console fader<br />
for each of these calls, so you can control volume; switch them independently in and out of the<br />
conversation, etc.<br />
Next Button and Function<br />
The Talent next priority is:<br />
1. longest waiting ready hold<br />
2. longest waiting hold<br />
3. longest ringing-in<br />
The producer can manually override these and assign priority as desired.<br />
The producer mode next priority is:<br />
1. longest ringing-in<br />
In producer mode, Next does not take any held lines.<br />
Block All<br />
Pressing this button will cause all inactive and ringing lines to be dropped and blocked from<br />
accepting any calls. Calls on-air, on the handset, on hold and the fixed lines will not be affected.<br />
The usual application for this function is to let you prevent early callers from getting in<br />
on contests until after you’ve made the announcement and released the lines to accept calls.
34 | Section 3<br />
Pressing Block All again will release the lines and allow incoming calls.<br />
Numeric Keypad<br />
For dialing out, either on the handset or on-air. It works during an active call to generate tones<br />
for voice mail and other services.<br />
While a number is being composed, the digits will appear in the line info field. After a number<br />
is entered, the GO button causes the connection to be made, in similar fashion to a mobile<br />
phone.<br />
Re-dial Function<br />
After selecting a line, press the GO button before any digits are dialed. The last dialed number<br />
appears in the line info field. Pressing GO again causes dialing to start.<br />
Fader Assign<br />
Normally, when a call is taken, it goes to fader 1, but you can assign it to any of six console<br />
faders. (The number of possible faders depends upon your specific installation and configuration.)<br />
When a call is on-air, or before it is taken, the round fader assign buttons to the right of<br />
the LCD can be used to move the call to the desired fader. The number in the yellow rectangle<br />
in the line info field shows you which fader is or will be used.<br />
Fader assign is configurable to be enabled or disabled to keep the LCD uncluttered for people<br />
who will not use the feature.<br />
In our older on-air phone systems, we were limited by the cost of the day’s technology to one<br />
or two hybrids, so we only used one or two console faders. With the <strong>VX</strong> system, this limitation<br />
is removed. That means that you can assign a fader to each call if you want to do so, allowing<br />
independent control of each call’s volume.<br />
Take it Easy<br />
We’ve built a lot of flexibility into the <strong>VX</strong> system to support all the sophisticated things you<br />
might want to do. But you don’t have to use all the fancy-pants stuff when you don’t need it<br />
and a simpler subset will do.<br />
In the simplest case, when you are a talent supported by a producer, you could just use the<br />
Next and Drop buttons. You press the Next button to take calls in the sequence determined by<br />
your producer and you press the Drop button when you are finished with your last call and you<br />
want to stop taking more.<br />
One step up would have you pressing the right column line buttons to select the calls you<br />
want, one at a time. Again, when you are finished taking calls, you would press Drop. You<br />
could use the left column line buttons to talk with callers on the handset.<br />
At the next level, you would use either the lock function or the fixed line capability to conference<br />
calls.<br />
Operation with the Element Console<br />
The Axia Element console can be used to control both fixed and selectable lines from the <strong>VX</strong>.<br />
Selectable lines use the Element’s Call Control Module as the line selector. It can be used in<br />
either 12 or 24 line mode, depending upon configuration. In the former, two columns/faders
opeRaTIon | 35<br />
are used; in the latter, one column/fader. The same module is used for either 12 or 24 line<br />
operation. When 12 line mode, the left column of Status Symbols displays the line number and<br />
the right displays status. When configured in 24 line mode, each active line is numbered with<br />
the number being shown when the line is idle (replacing the idle “dot”). In the 12 line mode,<br />
the left row of buttons assigns lines to the left fader and the right row to the right fader. In the<br />
24 line mode, both rows assign lines to the left fader. To assign to the right fader, push on, off<br />
or preview on the right fader which activates flashing and displays PRESS LINE on the alpha<br />
display. Selecting a line assigns it to the right fader. To cancel the mode before selecting a line,<br />
press the right drop button or the right channel off button.<br />
When you need to be able to assign selectable lines to more than one or two faders, the Call<br />
Control Module can be expanded using one or more Phone Fader modules. The additional<br />
Phone fader channels will work like the right fader on the Call Control Module. You can quickly<br />
build multiple-line conferences on the fly, while keeping the usual one-call-after-another autodrop<br />
style operation on the left fader.<br />
In all cases, the keypad for dialing is on the Master Module. Pressing an options key on a fader<br />
channel with a phone line assigned activates the keypad in the master section and opens up<br />
some other phone-related options, such as the auto dial list. The keypad is also automatically<br />
activated to the fader channel that last seized a phone or codec line. However, when options is<br />
active on a phone or codec module, the keypad remains locked to that channel until options is<br />
deselected.<br />
Usually, a VSet phone will be used in the studio along with the console to allow handset<br />
conversations. Taking a line on the VSet will disconnect it from the Element, and vice-versa.<br />
The call will not be dropped.<br />
Fixed lines can be configured directly to Element faders. Phone Fader modules are preferred<br />
because the set, hold and drop buttons are useful. Note that using only fixed lines and Phone<br />
Fader modules would give you “Euro-style” operation, where each line has its own hybrid/<br />
fader and there is no line selector. There is no limit to fixed lines vs. selectable in the <strong>VX</strong>, so<br />
you can have as many as you have available console faders.<br />
Mix-minus is generated automatically in all Axia consoles. In Element mix-minus AUTO mode,<br />
the feed-to-source will be generated by the PGM-1 bus “minus” the caller audio when the<br />
channel is ON. When the channel is OFF, Talkback will be the source. Alternatively, Feed-to-<br />
Source can be fixed to P1, P2, P3, P4, SA, SB, SC or SD.<br />
You can assign a line to a specific fader by pushing the Set, OFF, ON, Hold, or PVW button on<br />
the fader channel before selecting the line. The fader channel alpha display will toggle between<br />
source type and LINE N after a line is assigned.
4 The <strong>VX</strong> producer application<br />
Introduction<br />
Installation<br />
The <strong>VX</strong> Producer application integrates:<br />
♦ Call screening and production communication<br />
♦ Recording, playing, and editing calls<br />
♦ A ‘softphone’ for talking with callers off-air<br />
Normally, it would be used by Producer/call screeners to communicate with callers and the<br />
on-air talent. Each would have a copy running on a PC near to them.<br />
The standard Windows installer is used to install the <strong>VX</strong> Producer application and the .Net<br />
framework, if needed. It also can install the Audacity audio editor.<br />
Remember that since the <strong>VX</strong> uses Livewire audio to carry the “handset audio” to your <strong>VX</strong><br />
producer PC, that the PC needs to be on a LAN subnet that carries Livewire traffic (the same<br />
subnet as the <strong>VX</strong> engine Network LAN port).<br />
You’ll need at least Windows XP Service Pack 2. ??<br />
| 37
38 | Section 4
Set-up: Studio and Show<br />
Managing Calls<br />
THe <strong>VX</strong> pRoDuCeR applICaTIon | 39<br />
The main window shows a list of the lines that are available for the selected show. It is divided<br />
into selectable and fixed line groups. (if both are configured for the selected show).<br />
Near the bottom of the screen is a tabbed list box, controls, and an audio level meter that are<br />
used for the recording and play functions.<br />
At the lower right is a window used for text chatting between the producer and talent.<br />
Handset<br />
Press the handset button to the left of any line to take the call to the ‘handset’ that is connected<br />
to the PC running the <strong>VX</strong> Producer application. (Often this will actually be a headset/mic.)<br />
If no call is ringing-in, the system assumes you want to dial out and opens a window to let you<br />
do that.<br />
Contacts<br />
History<br />
Dialing
40 | Section 4<br />
On-air<br />
Pressing this button takes a call to the studio mixing console. Your operation of the console<br />
determines whether the call is actually on-air or sent to preview or to somewhere else. Usually<br />
the studio mic (or microphones) are used to talk with a caller, whether on-air or not.<br />
If no call is ringing-in, the system assumes you want to dial out and opens a window to let you<br />
do that.<br />
The Line Info Field<br />
Fader number. Before a call is taken to air, this shows which fader it will be assigned to when<br />
it put on-air. After a call is on-air, this shows which fader is assigned to the call. The number<br />
changes when you move a call using the fader assign buttons.<br />
Next indicator. Shows which call will be taken when you press the Next button.<br />
Line status icon.<br />
Line name. This is the name that was given to the line during show configuration.<br />
Caller info. Text you enter into this area will appear on any other <strong>VX</strong> Producer applications and<br />
VSets that are assigned to the same studio. It automatically replaces the line name text.<br />
Telephone number. Shows incoming (caller ID) or outgoing (dialed) number. The small arrow<br />
near the number points left for incoming and right for outgoing numbers. It automatically<br />
replaces the line name text.<br />
Time. Shows time that a call has been waiting on hold, or if on-air, how long it has been on-air.<br />
Drop, Hold, and Hold Ready Buttons<br />
Drop disconnects a call that is ringing, active on the handset, or on-air. If more than one line is<br />
in this category, they will all be highlighted. Press the line that you want to drop. Or select the<br />
line you want to drop to highlight it and then press Drop.<br />
Hold puts a call that is ringing, active on the handset, or on-air into hold. If more than one line<br />
is in this category, they will all be highlighted. Press the line that you want to hold. Or select<br />
the line you want to hold to highlight it and then press Hold.
THe <strong>VX</strong> pRoDuCeR applICaTIon | 41<br />
Hold Ready puts a call that is ringing, on-air, on the handset, or on hold to the hold ready<br />
(screened) state.<br />
Selectable Lines<br />
Lock/Unlock Button and Function<br />
Normally, taking a call to air causes any others on-air to be dropped. If you need to conference<br />
two or more calls, you can use the lock function.<br />
Press an already on-air line button to lock it. The line status icon will change to display the<br />
locked symbol. Pressing the button again unlocks the line and the lock icon goes away.<br />
Locked calls remain on-air until unlocked and then another call is taken to air or the call is<br />
explicitly dropped or held.<br />
The Drop and Hold buttons have no effect on a locked line.<br />
Tip: If configured in your system, fixed lines will probably be the better option for VIP calls<br />
that need to say on-air while you come and go with others. You will have a dedicated console<br />
fader for each of these calls, so you can control volume; switch them independently in and<br />
out of the conversation, etc.<br />
Fader Assign Buttons<br />
In older on-air phone systems, we were limited to one or two hybrids (audio paths), so we only<br />
used one or two console faders. With the <strong>VX</strong> system, this limitation is removed. That means<br />
that you can assign a fader to each call if you want to do so, allowing independent control of<br />
each call’s volume.<br />
Normally, when a call is taken, it goes to “fader 1”, but you can assign it to any of six console<br />
faders. (The number of possible faders depends upon your specific installation and configuration.)<br />
When a call is on-air, or before it is taken, the round fader assign buttons to the right of<br />
the LCD can be used to move the call to the desired fader. The number in the yellow rectangle<br />
in the line info field shows you which fader is or will be used.<br />
Fader assign is configurable to be enabled or disabled to keep the LCD uncluttered for people<br />
who will not use the feature.
42 | Section 4<br />
Next Button and Function<br />
The Talent next priority is:<br />
1. longest waiting ready hold<br />
2. longest waiting hold<br />
3. longest ringing-in<br />
The producer priority is:<br />
1. longest ringing-in<br />
The producer can manually override these and assign priority as desired.<br />
Block All<br />
Fixed Lines<br />
Pressing this button will cause all inactive and ringing lines to be dropped and blocked from<br />
accepting any calls. Calls on-air, on the handset, on hold and the fixed lines will not be affected.<br />
The usual application for this function is to let you prevent early callers from getting in<br />
on contests until after you’ve made the announcement.<br />
Pressing Block All again will release the lines and allow incoming calls. The specific lines<br />
blocked are determined by install-time configuration. Normally, VIP and hotlines are excluded.<br />
These are usually used for VIP and hotlines. They have a different operating style from selectable<br />
lines and are independent from them. Here, each line has its own - fixed - fader. These will<br />
have been assigned when the system was installed. Taking a line will not drop others that are<br />
active. Drop and Hold need to be explicitly applied.<br />
Lock has no effect on fixed lines, since they are effectively always locked. Block All is usually<br />
configured to have no effect on fixed lines. Fader assign has no effect, since faders are permanently<br />
assigned.<br />
Note that a system could be configured to have only fixed lines. This would result in the<br />
operating style that many large European broadcasters favor. Each line would have its own<br />
‘hybrid’ and associated fader.<br />
Fixed lines also offer a selectable “auto answer” feature. This can be used for automatic feeds,<br />
news recording or “filing lines”, or “listen line coupler replacement.<br />
Recording, Editing, and Playing Calls<br />
Pressing the Record button starts a recording of the currently active phone call.
THe <strong>VX</strong> pRoDuCeR applICaTIon | 43<br />
In talent mode, this will be the “on-air” call. Usually, the audio will have been routed via the<br />
studio mixing console.<br />
In producer mode, this will be the call on the handset.<br />
You can choose if both the local mic audio and the phone are recorded or only the phone. In<br />
the former case, a stereo file will be produced.<br />
Enabling Auto Record causes the recorder to automatically make a new recording each time a<br />
call is taken.<br />
File names are automatically created by the system, but can be changed by writing over the<br />
default text after a right mouse click. The file will appear in the tabbed list box determined by<br />
Settings. Normally, a <strong>VX</strong> Producer in producer mode will put recorded files under the Producer<br />
tab and in studio mode, under the Studio tab (naturally). You can move files among the tabbed<br />
lists by either dragging them to the destination tab or using the Send button and drop-down list.<br />
The meter to left of the tabbed file list window shows the audio level as a recording is being<br />
made.<br />
Playing<br />
Select a file by clicking on it. Press the Play button. The audio will be sent to the PC’s output<br />
configured in Settings. Depending on the Settings configuration, the playback will be available<br />
on PC-connected loudspeakers or headphones, or it may be routed to a studio mixing console<br />
fader.<br />
Editing<br />
Select a file by clicking on it. Press the Edit button. The audio editor configured in Settings will<br />
open and the selected file will appear in the editing window (Audacity is the default). Audio<br />
input and output will be according to the editor’s configuration. Depending on the configuration,<br />
the payback will be available on PC-connected loudspeakers or headphones, or it may be<br />
routed to a studio mixing console fader.<br />
A stereo file will be passed to the editor when both a mic and phone audio are recorded. A<br />
mono file will be passed when phone-only record mode has been selected.<br />
Files<br />
The recorded audio files are physically stored on the local PC or on another PC or server<br />
accessible over the network. The location depends upon the file path configuration in the<br />
<strong>VX</strong> Producer settings menu.<br />
By default, files created in the studio will go the list under the Studio tab and files created by<br />
the producer will be saved under the Producer tab. The Ready tab holds files that are ready for<br />
air. The Import and Export tabbed lists are used to accept and send files to other people on the<br />
network. Again, the tab names and file locations depend upon your settings.
44 | Section 4<br />
The files are in standard .wav format that may be accessed by a variety of audio applications.<br />
Standard Windows file sharing allows access to the files across the network at the various<br />
machines.<br />
Host/Producer Text Chatting<br />
The window at the lower right lets people within a Studio communicate with each other. Type<br />
text into the lower field and it will appear on any other <strong>VX</strong> Producer applications selected to<br />
your studio.<br />
The ‘Studio’ and ‘Producer’ identifiers are added automatically. The colors for them can be<br />
configured in settings.<br />
Tech note: The <strong>VX</strong> Engine works as the “chat server”.
5 notes, Resources,<br />
additional Information<br />
The Acoustic Echo Canceller<br />
| 45<br />
You can learn how to connect the Acoustic Echo Canceller to your studio equipment in the<br />
Studio Configuration section. Here, we provide more detail on how it works and how to use it.<br />
A common annoyance in radio studio and TV studio operations is the feedback that often<br />
results from using a loudspeaker to listen to telephone calls. This comes from the acoustic<br />
coupling of the audio from the loudspeaker to the studio microphone that feeds to the caller.<br />
As well, echo might be heard by the caller. When a caller talks, the phone audio bounces<br />
around the studio and gets sent back. Due to the time-dispersion caused by the room and the<br />
round-trip transmission delay, this acoustic echo is distracting to the caller.<br />
In the past, when analog Telco lines were the norm and mobile phones were not yet attached<br />
to everyone’s ears , feedback was the usual problem, not echo per se. In earlier Telos hybrids,<br />
we addressed that with a combination of ducking, frequency shifting, and a basic canceller.<br />
That worked pretty well in its day, but Mobile phones and VoIP connections impose much<br />
more delay – and the problem has become more challenging. With the multiple-hundreds<br />
of milliseconds latency that can occur these days, an effective canceller must be part of the<br />
system when loudspeaker monitoring is expected.<br />
Fortunately, technology has come to the rescue. Modern Acoustic Echo Canceling is the<br />
answer. The audio at the studio microphone consists of the host’s voice combined with the<br />
unwanted telephone audio that is delivered to the room via the loudspeaker. An AEC removes<br />
the loudspeaker audio, leaving only the host. It does so by synthesizing the transfer function<br />
of the acoustic path. The reference (loudspeaker) signal is passed through this function and<br />
subtracted from the microphone signal, thus canceling the echoed telephone part of what the<br />
microphone picks up. AECs have been used in high-end audio and video conferencing systems<br />
for many years. High-end broadcast hybrids and on-air systems such as the Telos Delta, 2x12,<br />
and Nx12 have included a limited form of AEC. But only recently has AEC technology advanced<br />
to the stage where it is truly effective. Thankfully, it comes just when the added delay of mobile<br />
and VoIP connections make it near essential. The good news has been a result of both breakthroughs<br />
in the design of AEC algorithms and the ever-increasing power and lower-cost of the
46 | Section 5<br />
processor chips that are needed to implement them.<br />
These latest-generation cancellers are a miracle. You can have ear-splitting volume with very<br />
little of the caller audio making it back to the other end. They work with up to 20kHz audio<br />
bandwidth, so are ready for the wideband VoIP codecs now coming online. And they solve a<br />
longstanding problem: Older ‘time-domain’ AECs depended upon the acoustic path remaining<br />
invariant and could quickly degenerate into feedback when a microphone was slightly moved<br />
or the acoustic path changed from some other cause. The ‘frequency-domain’ technology used<br />
by the new AECs works just fine with moving microphones and other echo path changes.<br />
This new AEC technology is particularly useful for TV studio applications where it can be<br />
impractical to have talk show guests using earplugs. Today’s high-performance AECs let talent<br />
and guests listen to phone calls on foldback loudspeakers.<br />
AECs are provided within the <strong>VX</strong> Engine, but they are not connected into its internal signal<br />
paths. This is because they need to be placed in the signal paths between the studio loudspeakers<br />
and microphones. With Axia mixing consoles, the insert and return points are<br />
provided with Livewire channels and are installed by configuring the appropriate channel<br />
numbers. The AEC can be used with Non-LW consoles via LW Nodes connected to the appropriate<br />
audio signal paths.<br />
(??) AECs are possible from a single <strong>VX</strong> Engine. Additional Engines could be used to provide<br />
more. Please contact us to discuss your options, should you want to do this.<br />
There are three connections for each AEC:<br />
♦ Microphone input (from the studio mic)<br />
♦ Microphone output (feeds the console mic input that goes to the phone system)<br />
♦ Reference input (parallels the signal that feeds phone audio to the studio loudspeaker)<br />
If multiple mics are used, there must be an AEC dedicated to each of them.<br />
The AEC cancels audio that is put on the reference input so that it does not appear on the<br />
output. Without canceling, the output would be a mix of the studio mic and the delayed/echoed<br />
phone audio. After cancellation, only the mic audio will be present. That is; it creates a replica<br />
of the acoustic path, then passes the reference audio through it and subtracts the resulting<br />
filtered signal from the microphone feed.<br />
The AECs are full-range and low-distortion, so they can be put in an air signal path if need be.<br />
Nevertheless, we recommend that they be inserted only into the mic-to-phone path if possible,<br />
avoiding causing any trouble to mic-to-air fidelity. (There could be subtle frequency response
noTeS, ReSouRCeS, aDDITIonal InFoRmaTIon | 47<br />
alteration depending upon the echo path and other factors. Noise might also be added.)<br />
In a studio equipped with an Axia console, the needed signal connections are available via<br />
Livewire. Configure both the console and the <strong>VX</strong> Engine with LW channel assignments so that<br />
the correct connections are made. In a non-Axia studio, route the AEC connections to a LW Node<br />
by assigning the appropriate LW channels at both ends, and then connect the audio to/from the<br />
mixing console via analog or AES3 to the Node.<br />
To check if an AEC is working, call into the system and switch on the mic and loudspeaker.<br />
Adjust the mic level to normal and the loudspeaker to reasonable volume. Talk into the phone;<br />
listen for echo and assure that none is audible.<br />
Telco Services and Interfaces<br />
VoIP: SIP Trunking<br />
While it remains a niche in early 2011, SIP trunking is growing rapidly in support from both<br />
PBX vendors and carriers. Over time, this will almost certainly appreciably reduce the use of<br />
the older POTS and T1 trunking. Eventually, it may replace it completely.<br />
Whether the gateway to the PSTN is at your physical location or at another site should make<br />
no difference – as long as the IP path between you and the gateway has guaranteed QoS with<br />
sufficient bandwidth to support the maximum number of active connections you expect to<br />
have. In the case that the IP link is to be used for both telephony and data, the system must be<br />
designed so that phone calls have priority. In order to ensure this, there must be only one IP<br />
vendor between you and the PSTN, and this vendor must guarantee QoS in a properly written<br />
Service Level Agreement. Any time that IP service crosses from one vendor to another, all bets<br />
are off as to both the probability of achieving consistent good quality and having any chance of<br />
getting problems resolved.<br />
The other thing to look out for is what codec will be used. For calls that ultimately are carried<br />
by the PSTN, only the native g.711 codec is acceptable for broadcast applications. Anything<br />
else would involve transcoding and an unacceptable reduction in fidelity, especially audible<br />
when mobile phone calls are involved. These already have poor quality due to their low-rate<br />
14.4kbps codec. Passing this through g.711 within the PSTN and then yet another codec on the<br />
way to your studio over an IP link is asking for aural trouble.<br />
The <strong>VX</strong> natively supports the g.711 A-Law, g.711 µ-Law, and 16-bit linear) codecs. Almost all<br />
PBXs and gateways support these formats.<br />
Finally, you need to be sure that your equipment and the carrier’s gear can properly communicate.<br />
While SIP is a standard, vendors often enhance it with extensions that are not universally<br />
supported.<br />
One development that could help is a project called SIPconnect, undertaken by SIP Forum, a<br />
consortium of SIP vendors. The SIPconnect Interface Specification was launched by Cbeyond<br />
Communications in 2004 with support from Avaya, BroadSoft, Centrepoint Technologies,<br />
Cisco, and Mitel. It attempts to detail the interconnection specifications between IP PBXs and<br />
VoIP service provider networks. It specifies a reference architecture, required protocols and<br />
features, and implementation rules. It calls for the g.711 codec to be provided on all equipment<br />
and services.
48 | Section 5<br />
IP Centrex and Hosted PBX Services<br />
Just as it shouldn’t matter whether the PSTN gateway is on your premises or not, it also<br />
shouldn’t matter where your IP PBX is located. This is the principle that allows IP Centrex<br />
services or hosted PBX services to happen. These locate the hardware at the service provider’s<br />
site and remove the need for phone system equipment at your location. In the pure case, you<br />
would have only IP phones at your site, which would be plugged into an Ethernet switch,<br />
which would connect to the Internet via a router. The main advantage is that someone else is<br />
responsible for installation and maintenance of the back-end equipment. It might also be that a<br />
vendor of these services has invented a suite of applications that would be difficult to replicate<br />
at individual business sites.<br />
Number portability in the US and Canada.<br />
Number portability regulations allow you to move your existing numbers to the service provider<br />
of your choice. Unfortunately, our experience is that “choke” exchange numbers cannot<br />
be ported. We’ve tried with various carriers - all with the same disappointing result: a call on<br />
the day of the port explaining that it can’t be done.<br />
Circuit-Switched Interfaces<br />
When you order or configure a gateway, you need to know what kinds of interfaces you will be<br />
using to connect to the Telco network.<br />
FXS/FXO<br />
These are designations for the two ends of a standard analog POTS line. Most often these<br />
lines are used for basic home telephones. But they can also be used to link a PBX with a Telco<br />
central office.<br />
♦ An FXS (Foreign Exchange Station) interface emulates a circuit supplied by a Telco<br />
Central Office. An FXS supplies talk battery and detects an off-hook condition. It generates<br />
100Vac for a ringing indication. It provides dialtone and other call progress signals<br />
such as ringback and busy. It responds to DTMF (Dual Tone MultiFrequency) tones for<br />
dialing and may send caller ID information in modem-encoded audio.<br />
♦ A telephone, and anything that looks like a telephone, is an FXO (Foreign Exchange<br />
Office) device. An FXO device signals an off-hook condition by drawing loop current.<br />
It responds to ringing voltage. It provides dialing, either by old-fashioned pulsed loopinterruption<br />
or by DTMF. It may detect caller ID.<br />
An interesting limitation of FXS/FXO interfaces is that signaling from the FXS that a call has<br />
ended is sometimes not signaled, and the type of signaling varies around the world. In the<br />
USA, most Telco central offices interrupt the loop current when the call has ended, but some<br />
do not. And many PBXs do not. Eventually, dialtone will return, though, and this can be used<br />
as a disconnect signal, but there will be a many-second delay. This could cause glare, the<br />
condition where there is confusion between the CO and the PBX as to whether the line is free.<br />
A call could ring-in just when the PBX attempts to access the line for an outgoing call. In many<br />
other countries, an audio tone is sent on the line to indicate the end of the call. This lack of<br />
disconnect supervision results from the idea that there was no reason for a central office to<br />
hang up a phone by remote. This was a physical, human action performed by someone who<br />
knew that the conversation had ended and put reacted by replacing the receiver back in its<br />
cradle. The design was never intended to work for machine-to-machine connections.
noTeS, ReSouRCeS, aDDITIonal InFoRmaTIon | 49<br />
Actually, there are two types of off-hook signaling. On a loop-start line, when a phone goes<br />
off-hook, the circuit is closed, and the central office detects the change in current. This is the<br />
common residential format. Ground-start signaling is a small modification to the scheme to<br />
permit disconnect supervision and remove the possibility of glare, where a PBX mistakenly<br />
takes a ringing-in line for an outgoing call. . In an idle circuit, the central office provides -48v on<br />
the Ring wire and an open on the Tip wire. From the PBX side, Ring is grounded first, then the<br />
central office circuit must respond by grounding Tip. The PBX senses this, releases its ground,<br />
and maintains the connection by drawing loop current.<br />
E&M Trunks<br />
E&M trunks use two extra wires for signaling (the so-called Ear and Mouth connections). These<br />
solve the problems with glare and disconnect supervision. This scheme is nearly obsolete,<br />
but occasionally E&M interface cards are used to connect music-on-hold to VoIP PBXs. They<br />
are convenient for this purpose because the audio path is transformer isolated and there is no<br />
need to supply talk battery from the MOH source.<br />
T1/E1<br />
These are basic digital interfaces to the switched voice network, and are widely used. This is<br />
especially so in the USA, where T1 is nearly standard for large PBXs. In Europe, ISDN PRI is<br />
more widely employed. T1 transports up to 24 voice channels, while E1 supports as many as<br />
32. T1s are common in the USA and Japan, while E1s are provided by Telcos in most of the<br />
rest of the world. In addition to the audio, these digital circuits also carry basic signaling in<br />
CAS (Channel Associated Signaling) bits. This signaling emulates loop-start, ground-start, or<br />
E&M, depending upon configuration. Over a T1, 23 speech channels are offered, while an E1<br />
provides 30. They actually have 24 and 32 channels, respectively, but one or two of the channels<br />
are reserved for signaling communications.<br />
T1s can also be used for IP connections. In this case, all or part of a T1’s 1.544kbps capacity is<br />
used as a transparent pipe from the local IP router to the ISPs equipment. The phrase channelized<br />
T1 is sometimes used to distinguish a T1 that is intended for circuit-switched voice application.<br />
A fractional T1 is a service that uses a portion of the line’s full capacity. It is sometimes possible<br />
to order a T1 that is divided into a channelized portion and a data-transparent part for IP<br />
connectivity.<br />
ISDN PRI<br />
ISDN PRI (Integrated Services Digital Network Primary Rate Interface) uses the same underlying<br />
circuits as T1s and E1s. However, it employs sophisticated out-of-band signaling, which<br />
allows transfer of information such as calling number, codec type, clearing causes, and such.<br />
(It’s rather strange that non-ISDN T1 sends caller ID modem-encoded in the audio channel,<br />
no?) The speech paths are called B (bearer) channels, while the signaling is carried in D (data)<br />
channels. Almost all large VoIP gateways and PBXs support ISDN PRI lines. The signaling in<br />
the USA is a slightly different protocol than that used in Europe and other parts of the world.<br />
Your gateway will need to be set to match the protocol on your line. Normally in the USA, this<br />
would be NI-1 (National ISDN - 1), while Europe would use the Euro ISDN standard.<br />
You might hear the term QSIG in the context of ISDN PRI gateways. This is a signaling protocol<br />
that is yet more sophisticated than ISDN’s usual Q.931 protocol, and is layered on top of it. With<br />
the ascendancy of SIP, QSIG looks to be yet another valiant attempt falling by the wayside.
50 | Section 5<br />
ISDN BRI<br />
ISDN BRI (Basic Rate Interface) lines offer two B channels, supported by one D channel.<br />
These were intended as a residential replacement for POTS lines or for small businesses. One<br />
application envisaged by its inventors was to allow a simultaneous voice call and data connection.<br />
With DSL providing much higher data rates, ISDN BRIs are moving ever closer to obsolescence.<br />
Nevertheless, when they are available, they could be useful for small installations that<br />
need only a few lines. Most VoIP gateways have cards to interface with these lines. As with PRI<br />
lines, take care to set the gateway’s configuration to match the type of signaling that your line<br />
uses.<br />
Axia Element Console as <strong>VX</strong> Controller<br />
The Element console makes a perfect partner to the <strong>VX</strong>. (With apologies to our colleagues in<br />
the Axia division, who would prefer to put that the other way ‘round – “the <strong>VX</strong> makes a nice<br />
partner to the Element…” They would also point out that other Axia consoles, such as the IQ,<br />
are capable and compatible <strong>VX</strong> partners) Control and audio are tightly integrated for a talentleasing<br />
all-in-one place control of telephone operations. Both selectable and fixed lines are<br />
supported. For the former. The Element’s Call Control Module includes line select buttons and<br />
status icons. For the latter, Phone Fader modules have a couple of extra buttons to manage the<br />
Telco lines.<br />
Livewire makes it easy to connect the multiple inputs and outputs that the <strong>VX</strong>’s multi-hybrid<br />
capability affords.
Installation<br />
noTeS, ReSouRCeS, aDDITIonal InFoRmaTIon | 51<br />
The setup in the block diagram shows the Axia Powerstation as the core for the studio, providing<br />
the Ethernet switch function. The <strong>VX</strong> Engine LAN port attaches to one of the gigabit ports<br />
and the VSets to PoE (powered) ports. The Engine WAN port could have its own switch to<br />
connect the VoIP lines and gateways. Or the <strong>VX</strong> can be configured so that the LAN port could<br />
serve everything with no additional switch. The Powerstation could also link up with a central<br />
switch to pass audio to/from other locations in the facility.<br />
In the Element, Install or confirm the presence of the call control module and the faders you<br />
will be using for telephone operations. Some possible Element configurations are:<br />
♦ 1 Call Control module for 12 or 24 lines, 2 hybrids/faders<br />
♦ 1 Call Control module + 1 Phone fader module for 12 or 24 lines, 6 hybrids/faders<br />
♦ 2 Call Control module for 12 or 24 lines, 4 hybrids/faders.<br />
Note that a Call Control module is required even when no selectable lines will be configured.<br />
The fixed lines rely upon software linked to the Call Control Module.<br />
Configuring the Element to Control the <strong>VX</strong><br />
Element configuration is via web.<br />
Do the <strong>VX</strong> configuration first, and then move on to Element configuration.<br />
Things you will need to know about your <strong>VX</strong> in order to configure an Element as a controller<br />
are:<br />
♦ The <strong>VX</strong> Engine IP address<br />
♦ User name and password to access the <strong>VX</strong> Engine.<br />
♦ The <strong>VX</strong> Studio name you will connect to.<br />
♦ <strong>VX</strong> hybrids/Livewire output names and numbers you want to use in this studio<br />
♦ <strong>VX</strong> Show name if you want to load <strong>VX</strong> Shows from Element console profiles.<br />
There are three steps to configuring the Element for the <strong>VX</strong>, as follows.<br />
1. Set up the <strong>VX</strong>-to-Element connection. Open the Element’s Module Manager/Phone<br />
Channels web page. When you have the Caller Control Module installed, you will see the<br />
following at the top of the screen:
52 | Section 5<br />
Enter the <strong>VX</strong> Engine IP address into the Server Address field. Enter the <strong>VX</strong> Engine<br />
username and password. (default is ‘user’ and ) Prefix the IP address with ‘vx:’ as<br />
shown in the screenshot. This tells the Element that the phone server is a <strong>VX</strong>.<br />
If you don’t see this, or if the ID or Module information is incorrect, you will need to capture<br />
your current module configuration. This is normally done at the factory, but if you<br />
have installed the phone module yourself, do this before proceeding. To capture, press<br />
and hold the Help key on Element’s Navigation Module for 5 seconds, until CAPTURE<br />
appears in the source name displays. On the phone module, you will see the assigned ID<br />
number in the upper left line icon position. You can change this by pushing the adjacent<br />
line button. End the capture mode by pressing the Enter key on the navigation/monitor<br />
Module.<br />
2. Associate a <strong>VX</strong> Studio to an Element Show Profile. Navigate to the Show Profile you<br />
want to configure and click on Phone. Enter the <strong>VX</strong> Studio name you will use into the<br />
Host Name field.<br />
If you want the Element to load a <strong>VX</strong> Show when the profile is selected, enter the <strong>VX</strong><br />
Show name into Show Name field. If you leave it blank, the current one will be retained.<br />
Always leave the Show Password field blank. There is no password required for Shows<br />
in the <strong>VX</strong>, so none is needed from the Element.<br />
Normally, the left column of telephone line selection buttons on Element’s Call Controller<br />
selects lines for Hybrid 1, and the right column selects lines for Hybrid 2. You can<br />
reverse this by clicking Reversed Hybrid.<br />
The <strong>VX</strong> can be used in either 12 or 24 line mode. Select either Auto, 12 Lines, or 24 Lines<br />
with the Mode radio buttons. In 12 line mode, 12 lines are displayed on both columns of<br />
the Call Controller module. You use left key to answer line on Hybrid 1, right key to<br />
answer on Hybrid 2 (or other ones if more than two Hybrids are used). In 24 line mode
noTeS, ReSouRCeS, aDDITIonal InFoRmaTIon | 53<br />
both columns are used to display status of 24 lines. Both left and right column keys will<br />
answer line on Hybrid 1. (To answer a call on any other hybrid, you would use a fader<br />
SET key to choose the Hybrid.) Auto mode will set the number of lines that the <strong>VX</strong><br />
system permits for this show (if current show has up to 12 lines, the12 line mode will be<br />
used; if more, the 24 line mode will be used)<br />
Click ‘Save changes’ when you are done.<br />
3. Create the needed Source Profiles. Navigate back to the Source Profiles page. Click<br />
New Source Profile to create a new source profile. Choose the Primary Source audio<br />
channel that you configured for the <strong>VX</strong> Studio you are connecting to. In the channel list<br />
you should see the Livewire channel number and a short description of the Hybrids you<br />
configured in the <strong>VX</strong>. Choose the one you will use and give it an Element source name,<br />
such as “<strong>VX</strong>-Hybrid1” Select Phone for the Source Type, naturally.<br />
Leave the Show Password field blank. There is no password for Shows in the <strong>VX</strong>, so<br />
none is needed here.<br />
In the source profile options, leave Phone hybrid ip blank. (for the <strong>VX</strong>, the IP address is<br />
entered elsewhere) leave Phone line and Phone hybrid (NX12) at the default 0. “Use 2nd<br />
show (split mode for NX12) at the default, unchecked.
54 | Section 5<br />
The Phone Module ID field lets you select from the multiple phone modules that you<br />
may have installed in your Element. Normally, you will have just one, so select 1 from<br />
the drop-down box.<br />
For Hybrid Nr., select the hybrid that corresponds to the Primary Source audio you<br />
selected above. The <strong>VX</strong> supports an unlimited number of hybrids per studio. To find<br />
out what Hybrid number corresponds to the audio source you selected, go to <strong>VX</strong> Studio<br />
configuration and check the sequence number of the Selectable LW channel that you use<br />
as the audio source here. The first Selectable LW channel counts as Hybrid 1.<br />
Conferencing Allowed lets you decide if you want to permit locked-on lines for “lock”<br />
conferencing. Unless you specially wish to prohibit this type of conferencing, select yes<br />
from the drop-down box.<br />
Fixed Line lets you assign a line permanently to a specific fader channel, emulating a<br />
dedicated hybrid. Normally this is used with a 4-Phone Fader Module. If you want to use<br />
a Hybrid in this mode, then in the primary source field, you should choose one of the <strong>VX</strong><br />
system’s “fixed” hybrids that you set up in the <strong>VX</strong> studio configuration, Enter the Fixed<br />
Hybrid number in this field if you want to associate this source with a Fixed Hybrid.<br />
Leave both Phone line and Phone hybrid (for NX12) at the default 0. “Leave 2nd show<br />
(split mode for NX12) at the default, unchecked.<br />
The other fields in the Source Profile page are non-phone specific and can he configured<br />
as you choose. (See Chapter Two, Configuring Inputs, in the Element manual for info on<br />
these options.<br />
Repeat this procedure to create a source profile for each hybrid in your studio.<br />
You’ll now need to load the hybrid sources onto the fader channels. This can be done<br />
either manually or automatically using Show Profiles. We recommend that you make<br />
this assignment in each Show Profile which will use the phone system, since leaving<br />
manual assignment to air talent is asking for trouble!<br />
You’re now ready to load the hybrid sources onto the fader channels. This can be done<br />
either manually or automatically using a Show Profile. We recommend that you make<br />
this assignment in each Show Profile which will use the phone system, since leaving<br />
manual assignment to operators is asking for trouble!<br />
For normal operation, you would assign Hybrid 1 to he left fader channel of the Call
What’s next?<br />
noTeS, ReSouRCeS, aDDITIonal InFoRmaTIon | 55<br />
Controller, and Hybrid 2 to the right fader channel. Additional hybrids, if you have them,<br />
may be assigned to any channel on a 4-Fader Phone Module.<br />
Note: Within Element, each ‘phone’ type audio source has both an incoming (from<br />
caller) and associated backfeed (to caller) for automatic mix-minus generation. There<br />
are several configuration options that affect which audio sources are fed to the hybrid<br />
under various conditions; Refer to the Source Profile Options and Feed to Source Mode<br />
sections in Chapter 2 of the Element manual<br />
4. Push some buttons on the Element, marvel at how cool it is, and impress your staff. Use<br />
it to phone-up your Significant Other to congratulate her/him on her/his perspicacity and<br />
fine taste in mate selection.<br />
The first stage of the application of any new technology is to replicate the function of what<br />
came before, but once the new platform is in place, creative people invent new and unexpected<br />
ways to use it. IP is a potent enabler that has already showed us plenty of surprising things;<br />
it’s inevitable that more is on the way.<br />
The Telos <strong>VX</strong> represents an exciting change in direction for studio telephone operations. The<br />
open IP nature of the system, along with its rich user interfaces and a powerful platform, offers<br />
ongoing opportunities for enhancement of its capabilities.<br />
When the connection from a station’s listeners to its studios eventually evolves to become via<br />
IP as it is near certain to do, things could change appreciably. We’ve already touched on the<br />
possibility for higher fidelity. But that’s only the immediate and obvious next step. With an unconstrained<br />
pathway for data along with voice, a talk show’s producer or host could text chat<br />
with a caller prior to his being on the air, for example. There could be an automatic updating of<br />
the time a caller is planned to be on-air. There could be instant voting. A window could be kept<br />
open on listeners’ PCs that would deliver supplementary text or visual information. Peering<br />
yet further into the future, should video streaming catch-on; we might want both see and hear<br />
callers.<br />
Here are some other things we have in mind.<br />
♦ A gateway to Skype, allowing callers to connect via computer with higher quality than<br />
usual phones. It could be possible to exchange chat messages to update callers on how<br />
long they need to wait, etc.<br />
♦ Build in a texting (SMS) gateway to allow this form of communication with mobile<br />
phones.<br />
♦ Make a simpler <strong>VX</strong> phone for applications that don’t need the fancy LCD displays.<br />
We invite your suggestions and creative ideas.
56 | Section 5<br />
Beyond Edison’s Legacy<br />
The PSTN uses the g.711 codec. Its audio frequency response is limited to 3.4kHz. A modern<br />
reader might ask, “Why was such a low fidelity considered to be satisfactory for digital<br />
telephony?” Microphones, loudspeakers, and earphones have all had much better fidelity<br />
for many decades. Indeed, when the g.711 codec was standardized in the 1960s, FM radio<br />
was just getting going with its much superior 15kHz bandwidth. Mostly, the coding choice<br />
resulted from the legacy of the carbon button microphones that were ubiquitous in telephones<br />
throughout most of the early history of telephony. (Edison invented the carbon microphone<br />
and licensed it to the Bell System, which had only an impractical liquid-based microphone in<br />
its own portfolio.) This microphone works on the principle that acoustic pressure squeezes the<br />
carbon granules more closely together, thus lowering electrical resistance in proportion to the<br />
pressure. As you can imagine, it has a non-flat response curve with a 5db peak at 2kHz and<br />
hefty roll-offs below 300Hz and above 3kHz. They were mostly abandoned for all but telephone<br />
use in the late 1920s, but were standard in phones up to the 1980s. Old analog long-distance<br />
lines also had a lot of high-frequency attenuation owing to capacitive effects. When microwave<br />
radios were introduced to long-distance telephony, a decision had to be made as to what<br />
frequency range to accommodate in their FDM (Frequency Division Multiplex) scheme. There<br />
was, as always, a trade-off: more frequency response meant fewer channels. Since the microphones<br />
weren’t producing much in the way of high frequencies, why bother carrying them<br />
over the radio links? Thus, the radios were designed with narrow 4kHz carrier spacing. When<br />
the first digital T-Carrier systems where invented, it must have seemed perfectly natural to stay<br />
with the 3kHz or so audio bandwidth enshrined in the microwave link technology. A sampling<br />
rate of 8kHz with 8-bits (compressed) depth had a nice symmetry and delivered a satisfactory<br />
4kHz Nyquist response limit , so on with the show.<br />
The Electret capacitor microphones ubiquitous in today’s phones have frequency response<br />
well beyond 3kHz. IP networking combined with modern codecs allow the better fidelity to be<br />
transported. Some mobile phone applications, such as Apple’s ‘facetime’ are beginning to take<br />
advantage of this. The <strong>VX</strong> is ready and future software releases are likely to include support for<br />
high-fidelity telephone calls.<br />
Specifications<br />
System<br />
Maximum number of phone lines: 48, when used with aLaw or uLaw codecs for VoIP lines.<br />
(Higher quailty codecs, such as G.722, consume more system resources and result in a decreased<br />
number of total lines available.)<br />
Maximum phone callers on-air simultaneously : 16<br />
Number of hybrids: one per each active line
Audio performance<br />
AAnalog Line Inputs<br />
♦ Input Impedance: >40 k ohms, balanced<br />
♦ Nominal Level Range: Selectable, +4 dBu or -10dBv<br />
♦ Input Headroom: 20 dB above nominal input<br />
Analog Line Outputs<br />
♦ Output Source Impedance:
58 | Section 5<br />
<strong>VX</strong> Engine<br />
Crosstalk Isolation and Stereo Separation and CMRR<br />
♦ Analog Line channel to channel isolation: 90 dB isolation minimum, 20 Hz to 20 kHz<br />
♦ Analog Line Stereo separation: 85 dB isolation minimum, 20Hz to 20 kHz<br />
♦ Analog Line Input CMRR: >60 dB, 20 Hz to 20 kHz<br />
Controllers<br />
VSet12 telephone<br />
VSet6 telephone<br />
VSet1 telephone<br />
<strong>VX</strong> Producer Windows application<br />
Axia Element studio console<br />
Axia IQ studio console<br />
Neosoft Neowinners<br />
Broadcast Bionics PhoneBox <strong>VX</strong><br />
IP/Ethernet connections<br />
One 100BaseT/gigabit Ethernet via RJ-45 LAN connection<br />
One 100BaseT/gigabit Ethernet via RJ-45 WAN connection<br />
Processing Functions<br />
All processing is performed at 32-bit floating-point resolution.<br />
Send AGC/limiter<br />
Send filter<br />
Gated Receive AGC<br />
Receive filter<br />
Receive dynamic EQ<br />
Ducker<br />
Sample rate converter<br />
Line Echo Canceller (hybrid)<br />
Acoustic Echo Canceller (wideband)<br />
Power Supply AC Input<br />
♦ Auto-sensing supply, 90VAC to 240VAC, 50 Hz to 60 Hz, IEC receptacle, internal fuse<br />
♦ Power consumption: 100 Watts
Resources<br />
Operating Temperatures<br />
noTeS, ReSouRCeS, aDDITIonal InFoRmaTIon | 59<br />
♦ -10 degree C to +40 degree C,
60 | Section 5<br />
www.trixbox.org<br />
www.freepbx.org/<br />
www.asterisk.org/<br />
Commercial PBX Products<br />
www.microsoft.com/voip<br />
www.lg-nortel.com<br />
www.trixbox.org<br />
www.siemens.com/hipath<br />
www.mitel.com<br />
www.digium.com<br />
Gateway products and suppliers<br />
www.grandstream.com<br />
www.audiocodes.com<br />
www.cisco.com<br />
www.digium.com<br />
www.patton.com/voip/<br />
www.quintum.com<br />
VoIP/SIP equipment suppliers<br />
www.telephonydepot.com<br />
www.rockbottomvoip.com/<br />
Telephony Discussion and VOIP news sites<br />
www.sipforum.org<br />
www.telos-systems.com<br />
www.voipforums.com/<br />
www.voipuser.org/forum_index.html<br />
www.broadbandreports.com/forum/voip<br />
forum.voxilla.com/<br />
SIP Information and suggested reading<br />
A Request for Comments (RFC) is a memorandum published by the Internet Engineering Task<br />
Force (IETF) describing methods, behaviors, research, or innovations applicable to the working<br />
of the Internet and Internet-connected systems. The IETF adopts some of the proposals<br />
published as RFCs as Internet standards. These are available at: www.ietf.org/rfc. Among those
elevant to VoIP and SIP are:<br />
RFC 1889: Real Time Protocol (RTP)<br />
RFC 1890: Real Time Protocol Audio Video Profiles (RTP/AVP)<br />
RFC 2327: Session Description Protocol (SDP)<br />
RFC 2543: Session Initiation Protocol (SIP) – original version<br />
RFC 3261: Session Initiation Protocol (SIP) – latest version<br />
noTeS, ReSouRCeS, aDDITIonal InFoRmaTIon | 61<br />
A. H. Inglis. “Transmission Features of the New Telephone Sets,” Bell System Technical<br />
Journal 17 (1938): 358-380. (Just for fun. Waaay back, Mr. Inglis proposed “high-fidelity”<br />
phones, noting that cost was the only barrier to better audio quality in the telephone network<br />
and predicting it would become common in the future. Took awhile…)<br />
Books<br />
Henry Sinnreich and Alan B. Johnston. Internet Communications Using SIP, John Wiley &<br />
Sons, Inc., New York, 2001.<br />
Gonzalo Camarillo. SIP Demystified, McGraw-Hill, New York, 2002.<br />
Steve Church and Skip Pizzi. Audio over IP: Building Pro AoIP systems with Livewire, Focal<br />
Press, Burlington,MA and Oxford UK. 2010 (Mighty fine fellas, these guys. Good book, too!)<br />
Jonathan Davidson and James Peters. Voice over IP Fundamentals, Cisco Press, Indianapolis,<br />
2000.<br />
J. Alexander, C. Pearce, A. Smith, and D. Whetten, Cisco Call Manager Fundamentals 2nd<br />
Edition, Cisco Press, Indianapolis, 2006.<br />
D. Au, B. Choi, R. Haridas, C. Hattingh, R. Koulagi, M. Tasker, L. Xia. Cisco IP Communications<br />
Express: Call Manager Express with Cisco Unity Express, Cisco Press, Indianapolis, 2005.<br />
Oliver Hersent, David Gurle, and Jean-Pierre Petit, IP Telephony: Packet-Based Multimedia<br />
Communications Systems, Addison-Wesley, Reading, MA, 1999.<br />
Switching to VOIP – O’Reilly<br />
VOIP Hacking - O-Reilly<br />
Asterisk - O-Reilly<br />
SIP Providers<br />
Something that takes some time to get one’s head around is that SIP providers usually do not<br />
provide the IP network connection. The main service they perform is giving you a gateway<br />
to the PSTN. That is, they give you telephone numbers. The gateway need not be local to<br />
you. Indeed, you may be in California and find that your provider’s gateway is in New York.<br />
Providers also give you access to a “SIP server” that helps with obscure things like traversing<br />
‘NATs’ and taking care of “relocation services”. Because the SIP provider and network vendor<br />
are independent, it’s sometimes hard to know who to blame for troubles – or praise for good<br />
service. It’s a good idea to discuss network vendors with the SIP provider, since they have built<br />
up a lot of experience with clients around the country and often have insight into who best can<br />
deliver reliable Internet connectivity in your area.
62 | Section 5<br />
Visit the Telos Website for the latest information. The short list below was created in December<br />
2010 and the marketplace is changing rapidly. These are companies we or our clients have had<br />
direct experience with and report positively on their experiences. Most of these providers will<br />
allow you a free period to test their service in your environment (your ISP, with your switch,<br />
etc). Consider that some services work better in some areas than others. Usually it’s wise to<br />
choose a provider close to you physically.<br />
Having said that, some Telcos and other companies offer bundled IP network and SIP service.<br />
Generally, these are more expensive than the unbundled services, with the pitch that having<br />
a single vendor delivers higher reliability and one-stop troubleshooting. We have seen this<br />
approach more often outside the USA. It remains to be seen if the promise is fulfilled. We’ll<br />
keep our eye on it.<br />
BYOD (Bring Your Own device) Providers are recommended for broadcast application. Companies<br />
such as Vonage that supply an ATA (Analog Terminal Adapter) for each “line” do not<br />
provide “SIP credentials” for standards-based equipment such as the <strong>VX</strong> and are not oriented<br />
to serve customers with sophisticated requirements such as broadcast stations. They tend to<br />
be more expensive, as well. Broadcast users are better served by wholesale providers who<br />
deal with Telephony and IT professionals.<br />
VoicePulse is a smaller company that excels at providing tech support. They have proven<br />
themselves excellent at solving obscure problems that many providers will just ignore.<br />
They know Asterisk and can be counted on to give good advice. They don’t have phone<br />
numbers everywhere, but they probably won’t disappoint you. East and West Coast gateways<br />
are available. Local Number portability (LNP) is available.<br />
Bandwidth.com is used by at least one station running a <strong>VX</strong>, with solid performance being<br />
reported.<br />
Vitelity offers reliable and very cost effective DID numbers any many local exchange areas,<br />
and toll free and foreign numbers as well. Local number portability and SMS messaging are<br />
also offered.<br />
SipStation - with connectivity provided by Bandwidth.com they’ve proven to be very reliable<br />
and low cost.<br />
8x8 - Based in Silicon Valley, they deal mostly in hosted PBX service. Reliability is very good.<br />
Flowroute - Based in las Vegas offers very attractively priced DID numbers and special deals on<br />
blocks of 20, 50 and even hundreds of numbers.<br />
Local Number Portability in the USA and Canada<br />
Telephone number porting is fairly common these days, mainly due to the large number of<br />
wireless customers changing carriers and plans frequently and wanting to keep their phone<br />
numbers.<br />
Each carrier has its own rules and policies for number porting with the average port taking<br />
from 10 days to 3 weeks. It is important to note that high volume or “choke” numbers cannot<br />
be ported. You can try, but we haven’t seen it work yet. Usually, the order will be taken, a due<br />
date given, and then on the day of the port, you’ll get a call from the utility or provider informing<br />
you of the bad news.
noTeS, ReSouRCeS, aDDITIonal InFoRmaTIon | 63<br />
Porting is usually done in the morning, but special arrangements can be made with the carriers<br />
to port at a specific time. Once ported, your old POTS lines are automatically canceled by the<br />
old company. We have seen situations where CLECs and Wireless companies have some problems<br />
routing calls for the first few hours after a port, though this seems to be getting better.<br />
Don’t run crazy “win a house or car” contests on these providers, though they’re fine for<br />
request lines and even talk show call in numbers. If you plan to do heavy contesting with big<br />
prizes, it’s not nice and potentially dangerous to bring your carriers switching office down.<br />
Introduction to SIP’s insides for the Curious<br />
The following is a peek inside of SIP. There is no reason you need to know any of this to use<br />
the <strong>VX</strong>. It’s an excerpt from Steve and Skip’s book Audio over IP.<br />
SIP is fast rising to be the big-daddy buzz-acronym among telecom technology acolytes. SIP is<br />
how calls are set up over IP connections, so it is actually pretty important. Together with helpers<br />
like Proxy Servers and User Agents, SIP permits all the familiar telephone-like operations:<br />
dialing a number, causing a phone to ring, hearing ringback tones or a busy signal. It also<br />
enables next-generation capabilities such as finding people and directing calls to them wherever<br />
their location, Instant Messaging, and relaying so-called ‘presence’ (near the phone or not,<br />
do-not-disturb, etc.) information. SIP began, rather humbly, as a simple message protocol for<br />
setting up connections. But the term has grown to be an umbrella for the family of protocols<br />
and tools that have been developed by the IETF to enable VoIP telephony and related services.<br />
By the mid-1990s, audio and video were becoming routine on the Internet. Going beyond<br />
email, academic researchers were imagining on-line audio/video/whiteboard conferences<br />
where ideas could be shared live. It became clear that the Mr. Watson come here, I want to<br />
see you! function had to be done more efficiently than by shouting across the college quad or<br />
sending invitation mails. Thus was the IETF’s working group MMUSIC (Multiparty Multimedia<br />
Session Control) born. There had already been work within the telephone world that had<br />
resulted in an ITU standard, but Internet types didn’t much like it. “Too complicated,” they<br />
averred. “Too limited,” they sniffed. “Too Phone Company,” they huffed. So off they went to<br />
do it the Internet way. The document describing SIP was eventually published as proposed<br />
standard RFC 2543 in 1999. Work has been ongoing, with the latest version of the specification,<br />
as this is written, being RFC 3261.<br />
The SIP message protocol is similar to the Web’s HTTP (Hypertext Transfer Protocol), and<br />
shares some of its design principles: It is human readable and request-response structured. SIP<br />
even shares many HTTP status codes, including the familiar “404 not found.”<br />
Here is a typical SIP message:<br />
INVITE sip:skip@there.com SIP/2.0<br />
Via: SIP/2.0/UDP 4.3.2.1:5060<br />
To: Skip Pizzi <br />
From: Steve Church <br />
Call-ID: 4678995554545@4.3.2.1<br />
CSeq: 1 INVITE<br />
Contact: <br />
Content-Length: 126<br />
This is how Steve’s SIP client would signal to Skip’s that he wants to connect and speak with him.
64 | Section 5<br />
SIP works together with several other protocols and is only involved in the signaling portion<br />
of a communication session. SIP is a carrier for the SDP (Session Description Protocol), which<br />
describes the media content of the session, e.g. the codec being used, the bitrate, etc.<br />
SIP provides the following capabilities:<br />
♦ Determines the location of the endpoint: SIP supports address resolution, name mapping,<br />
and call redirection.<br />
♦ Determines the media capabilities of the endpoint, i.e., which codecs are available and<br />
supported: During a negotiation, SIP determines the best codec that can be used by the<br />
parties on the call.<br />
♦ Determines the availability of the called endpoint: If a call cannot be completed because<br />
the target endpoint is unavailable, SIP returns a message indicating this and why.<br />
♦ Establishes a session between the originating and called endpoints (if the call can be<br />
completed).<br />
♦ Handles the transfer and termination of calls: SIP supports the transfer of calls from<br />
one endpoint to another. During a call transfer, SIP establishes a session between the<br />
transferee and a new endpoint (specified by the transferring party), and terminates the<br />
session between the transferee and the transferring party.<br />
The Parts of a SIP System<br />
Like most things based on IP, SIP was designed to be modular. Implementers can pick-andchoose<br />
among the following elements to build the system they need.<br />
SIP Clients: Sometimes called User Agents or endpoints. These can be hardware phones or<br />
“softphones” (phone applications running on PCs).<br />
Gateways: When needed, gateways translate between the IP network side and the switchedcircuit<br />
Telco side, providing physical, electrical, signaling and audio interface.<br />
Proxy server: Receives SIP requests from a client and forwards them on the client’s<br />
behalf. Basically, proxy servers receive SIP messages and forward them to the next SIP<br />
server in the network. Proxy servers can provide functions such as authentication, authorization,<br />
network access control, routing, reliable request retransmission and security.<br />
Redirect server: Provides the client with information about the next hop or hops that a<br />
message should take, and then the client contacts the next-hop server or client directly.<br />
Registrar server: Processes requests from clients for registration of their current location.<br />
Registrar servers are often co-located with a redirect or proxy server.<br />
While SIP-enabled endpoints are able to connect directly to each other, SIP servers provide a<br />
number of valuable services, including the following:<br />
♦ Register SIP client devices<br />
♦ Register individual human users for access to their services<br />
♦ Perform authentication, authorization, and accounting (when needed)<br />
♦ Look up the address of the far-endpoint<br />
♦ Support user mobility across networks and devices
♦ Support for multipoint conferencing<br />
♦ Support presence information<br />
♦ Inform users as to call progress<br />
noTeS, ReSouRCeS, aDDITIonal InFoRmaTIon | 65<br />
♦ Communicate requests for QoS to various network elements, such as IP routers<br />
While the various servers above could run on individual machines and could even be physically<br />
separated by thousands of kilometers, in usual practice they are often just software<br />
elements of an application running on a single machine. As we’ll see, many small IP PBXs<br />
include the Gateway as well, making a one-box solution that includes everything needed for a<br />
small office installation.<br />
An example a SIP Server being used in the broadcast world comes from the Telos Z/IP codec<br />
family, which uses a Telos-developed, enhanced SIP Server, called (naturally) Z/IP Server. The<br />
server is provided as a service on the Internet, but may also be installed by users who prefer<br />
to maintain their own. In addition to basic SIP functions (registration, address look-up), the Z/IP<br />
server offers additional services:<br />
♦ Allows display and dialing by simple text name. Keeps a database of names and performs<br />
DNS/IP look-up upon a dialing request from an endpoint codec.<br />
♦ Maintains group lists created by users. Upon entering a group name and password, the<br />
list is displayed on endpoint codecs so that users aren’t burdened with having to enter<br />
or upload lists manually.<br />
♦ Provides geolocation services by associating IP numbers with physical location. Allows<br />
display of a routing map on the codec LCD display.<br />
♦ Upon request, keeps a record of network performance in order to assist in troubleshooting<br />
problems caused by QoS impairments.<br />
Many products that support SIP for its standards-based interconnection capability do not have<br />
an internal architecture corresponding to the SIP specifications, so you would not see these SIP<br />
server components listed therein – or they might be included, but not labeled according to the<br />
standard names bulleted above. Instead these functions would just be provided as part of the<br />
system “black box.” Cisco and Microsoft VoIP products fall into this category, for example.<br />
Addressing<br />
SIP addresses, also called SIP URIs (Uniform Resource Identifiers), are in the form sip:user@<br />
host. The user portion of the address can be a text name or a telephone number, and the host<br />
portion can be a domain name or an IP address. The address resolution process normally<br />
begins with a URI and ends with a username at an IP address. Just as with email, the sender<br />
needs no information about the physical location or IP address of the receiver. This is one of<br />
the powerful features of SIP – it automatically implements portability and mobility.<br />
Examples of valid SIP addresses:<br />
The usual form is an email address prefixed by ‘sip:’:<br />
sip:joesmith@company.com<br />
You can call a PBX telephone at a business this way:
66 | Section 5<br />
sip:123@telos-systems.com (extension phone 123 at Telos Systems)<br />
If you don’t have a name or extension, you might want to contact the receptionist:<br />
sip:receptionist@telos-systems.com<br />
Here’s an internal machine-to-machine message, such as from an on-air phone system to a<br />
PBX or gateway to initiate a PSTN call:<br />
sip:12162417225@168.123.23.1<br />
Note that in this case, an IP number is provided to identify the concrete machine that is to<br />
receive the message. You usually don’t want to use DNS for this because it takes time for the<br />
look-up step, and because there may well not be a DNS name associated with a machine being<br />
used as a telephone server.<br />
To assist readability, SIP lets you use ‘+’, ‘-‘, and ‘.’ separators. It removes them prior to processing:<br />
sip:+1-216-241-7225@telos-systems.com<br />
As you can see, SIP bridges the telephone and Internet worlds. Both Web-type and PSTN<br />
telephone number addresses are possible, and users on either network can reach those on the<br />
other.<br />
Often, address resolution involves multiple steps and SIP-message hops. A DNS (Domain<br />
Name Service) server, a SIP proxy server and a SIP redirect server might all be involved in a<br />
single name resolution, for example.<br />
A few other points of interest regarding SIP: Some servers associated with SIP systems can<br />
accept unformatted text names, but this is not part of the standard.<br />
URIs are not URLs. URIs are independent of the location of the named object. Email addresses<br />
are an example of URIs. In SIP, a Request-URI is defined to indicate the name of the destination<br />
for the SIP Request (INVITE, REGISTER, etc.). URLs (Universal Resource Locator) describes the<br />
location of a resource available on the Internet. For example, http://www.telos-systems.com is<br />
the URL for a Web home page. It is resolved by DNS to a concrete IP address.<br />
PSTN telephone numbers are sometimes called ‘E.164’ numbers, a designation applied in an<br />
ITU-T standard that describes the format of telephone numbers to be used worldwide. ENUM<br />
(E.164 NUmber Mapping) is the Internet service used to look up the URI associated with a<br />
particular E.164 telephone number. It’s part of the DNS system. SIP can use ENUM to locate the<br />
VoIP system associated with a telephone number that accepts incoming calls.
How SIP Works<br />
noTeS, ReSouRCeS, aDDITIonal InFoRmaTIon | 67<br />
As we’ve seen, SIP is a simple, text-based protocol. It uses requests and responses to arrange<br />
for communication among the various components in the network, and ultimately to establish<br />
a connection between two or more endpoints.<br />
SIP at its simplest. An IP phone calls another directly.<br />
But this is not the real world. Almost always, there are SIP servers of various kinds in the<br />
picture. When a user initiates a call, a SIP request is sent to a SIP server (either a proxy or a<br />
redirect server). The request includes the address of the caller and the address of the intended<br />
called party. In more sophisticated scenarios, users register with a registrar server using their<br />
assigned SIP addresses. The registrar server provides this information to the location server<br />
upon request.<br />
From time to time, a SIP user might move between end systems. The location of the user can<br />
be dynamically registered with the SIP server. Because the end user can be logged in at more<br />
than one station, and because the location server can sometimes have inaccurate information,<br />
it might return more than one address for the end user. If the request is coming through a<br />
SIP proxy server, the proxy server tries each of the returned addresses until it locates the end<br />
user. If the request is coming through a SIP redirect server, the redirect server forwards all the<br />
addresses to the caller in the Contact header field of the invitation response.<br />
When communicating through a proxy server, the caller sends an INVITE request to the proxy<br />
server and then the proxy server determines the path and forwards the request to the called party.<br />
Since we usually need to reach phones that are connected to the PSTN, gateways will be<br />
involved in real world systems. These translate SIP signaling to the PSTN’s requirements: loop<br />
current, DTMF, and ring detect for POTS lines, set-up messages for ISDN, etc.
68 | Section 5<br />
A SIP call set-up to the PSTN via a SIP server and a gateway to POTS lines.<br />
SIP messages may be carried by UDP or TCP. SIP has its own built-in reliability mechanisms, so<br />
it doesn’t need TCP’s reliability services. Most SIP devices such as phones and PC clients use<br />
UDP for transmission of SIP messages. PBXs on LANs almost always use UDP because LANs<br />
don’t drop packets and there is no need to incur the overhead of TCP. Transport Layer Security<br />
(TLS) protocol is sometimes used to encrypt SIP messages. TLS runs on top of TCP. (This is the<br />
protocol used with HTTP to make the secure HTTPS used for secure Web transactions.)<br />
Not shown in our transaction examples is the media negotiation that is part of the INVITE/200<br />
OK/ACK sequence. Through this process, endpoints decide which codec to use. The Session<br />
Description Protocol (SDP) defined by RFC 2327 is the way codecs are offered and (hopefully)<br />
accepted by the other end. Usually, the caller sends an SDP message along with its INVITE,<br />
listing the codecs it is prepared to use. The far end chooses one of them and tells the caller<br />
which it prefers in the 200 OK response. The caller can let the far end propose a codec by not<br />
sending an SDP message in its INVITE. It is possible that the two endpoints have no codec in<br />
common and the connection is unable to proceed, but systems are designed so that this does<br />
not happen. For example, almost all phones, gateways and SIP Telco services have G.711 as a<br />
supported codec, so this is an insurance policy that two endpoints will find common ground.<br />
Within a PBX system, designers usually choose one codec as a standard for the system and<br />
stick with it for all connections. For example, the Telos <strong>VX</strong> studio system uses 8kHz samplingrate,<br />
16-bit uncompressed PCM internally for all calls that connect to the PSTN.<br />
The State of SIP, and its Future<br />
SIP is not often used as it was intended by its developers. Most PBXs that have SIP interfaces<br />
don’t use SIP servers at their core. All use their own rough equivalents, designed independently.<br />
So what went awry? The SIP schemers were certainly far-ahead thinkers, who wanted their<br />
protocol to support rich media, mobility, portability, sophisticated endpoints, etc. The problem<br />
seems to have been a lack of a certain “practicality.” For example, consumer PC-to-PC VoIP
noTeS, ReSouRCeS, aDDITIonal InFoRmaTIon | 69<br />
products needed to solve the problem of firewall and NAT traversal, which has been addressed<br />
quite slowly within the SIP working groups. Meanwhile, Skype’s developers solved it quickly<br />
and effectively. Then there is the problem of supporting all the features a vendor wants to<br />
employ to differentiate its product. It’s unsurprisingly faster to just implement it your own way<br />
rather than waiting for the idea to make its way through a committee, who might well not see<br />
things your way.<br />
At Telos, we faced this problem in the design of the <strong>VX</strong> system. We needed a lot of things<br />
specific to the studio environment that are not supported in SIP’s structures. So we designed<br />
our own protocols for use within the boundaries of our system. But we use SIP at the border of<br />
the system to connect with other vendors’ products – and eventually to the Telco network. This<br />
is just the strategy Cisco, Microsoft, and almost all PBXs vendors have followed.<br />
And now this process is emerging as SIP’s great value. It’s the glue that ties systems together.<br />
Studio systems can talk with PBXs for the first time. PBXs can talk with each other. And eventually<br />
they will all be able to talk to Telco networks, smoothly and fluently. SIP’s inventors got<br />
something right.<br />
IAX as a SIP Alternative<br />
SIP is not the only game in town. The Inter-Asterisk eXchange (IAX) protocol is an alternative<br />
to SIP for interconnections between both VoIP servers and for client-server communication.<br />
IAX2 (as the current version is named) uses a single UDP data stream (usually on port 4569) to<br />
communicate between endpoints, both for signaling and data. The voice traffic is transmitted<br />
in-band, in contrast to SIP, which uses an out-of-band RTP stream for audio. IAX2 supports<br />
multiplexing channels over a single link. When trunking, data from multiple calls are merged<br />
into a single set of packets, meaning that one IP datagram can deliver control and audio for<br />
more than one call, reducing the effective IP overhead without creating additional latency.<br />
As IAX’s name indicates, it was invented by the Asterisk people as a way to trunk calls between<br />
one Asterisk server and another. It has escaped from Asterisk and is now supported in a variety<br />
of softswitches and by a few VoIP carriers. Its main advantage is its bandwidth efficiency and<br />
simpler firewall configuration, since all traffic flows through a single port.<br />
Using <strong>VX</strong> with the Asterisk PBX<br />
Asterisk is a great way to provide extra flexibility and power to your <strong>VX</strong> installation. The<br />
software is inexpensive or free and runs on a standard PC. It’s an open source project, having<br />
been created by teams and individuals from around the world, often volunteers. Despite this,<br />
we’ve found it to be reliable. At Telos we count on it daily to network our sites throughout the<br />
world. A few <strong>VX</strong> installations are already using it. You’ll find that it’s a useful tool if you want<br />
to do Interactive Voice Response systems, support on or-off-site VoIP telephones, call detail<br />
recording, failover systems, ISDN PRI channel splitters, and such. With appropriate hardware,<br />
Asterisk can also be used as a gateway. For example, you may need to peel a few channels<br />
off of a PRI to send them over to the <strong>VX</strong>, while the others feed a PBX. An ISDN PRI card in an<br />
Asterisk box and some configuration would get this done.<br />
Because it connects to the <strong>VX</strong> using Ethernet, audio remains clean. Many channels of audio<br />
and SIP signaling are interfaced over a single Ethernet link.<br />
Telos has people on-staff and access to consultants who are experienced with Asterisk and<br />
who can help you with regard to integrated Asterisk/<strong>VX</strong> installations. Feel free to call us with<br />
your questions and suggestions.
70 | Section 5<br />
Here are some ways our clients are using Asterisk:<br />
♦ To automatically play a disclaimer or informational message to callers before your<br />
producer or talent answer.<br />
♦ As a programmable ISDN PRI gateway. Use with the PRI/T1 that feeds your office PBX,<br />
and redirect some of the DID numbers to your <strong>VX</strong> or to a voice mail/Interactive Voice<br />
Response system running on Asterisk.<br />
♦ To block unwanted callers by implementing a ‘blacklist’ based on caller ID.<br />
♦ To create your own off-site ‘extensions’ over the Internet. It’s great for news bureaus,<br />
sales offices, or even reporter’s homes.<br />
♦ To create a private ‘tie trunk network’ between co-owned stations to reduce costs<br />
♦ To have a backup Telco service by ordering a few inexpensive SIP lines or trunks to use<br />
in case of loss of a T1.<br />
♦ To get rid of expensive toll free numbers or foreign exchange lines. Order SIP lines from<br />
a distant city that your station covers. SIP lines can cost as little as $1.50 a month. Also,<br />
SIP lines don’t have all the extra charges for city taxes and other “junk fees”.<br />
♦ Use the Asterisk call detail reports as a research tool. The reports tell you who called,<br />
when they called, where they called from, and how long the call was. The data can be<br />
exported to a csv formatted file that is imported into a spreadsheet or database application<br />
for further processing.<br />
Asterisk software: Distributions<br />
Asterisk runs on Linux. You can download Linux from many websites and then add Asterisk to<br />
the operating system. Or you can load The OS and Asterisk from an all-in-one distribution disk.<br />
You can also buy an Asterisk “appliance” pre-loaded from companies like Fonality (Trixbox)<br />
and others. If you have one of these, Skip on to the next section titled “Log in to the web GUI<br />
for the first time”.<br />
A ‘distribution’ is an organized and maintained collection of open-source programs, these are<br />
available on an ISO image file that is burned to a CD and booted, automatically formatting the<br />
hard drive and creating the entire system from “bare metal.”<br />
Distributions can include the Linux OS, the Asterisk components, GUI tools, and specialty<br />
modules that the creators of the distribution deem useful. Choose one that has what you value.<br />
If this is your first experience with Asterisk, we suggest keeping it simple. If you know a “Linux<br />
guru,” his assistance may be helpful, but not essential. Linux has come a long way over the<br />
past few years, and is now perhaps even easier and faster to install than Windows. You’ll also<br />
find that you can go years without a reboot due to its excellent stability.<br />
We’ve had success using the “PBX in a Flash” distribution. It is feature-rich, well maintained<br />
and documented, and tends to be kept more current than other distributions. It’s more<br />
maintainable than some other distributions and tough to “break”. Basic configuration is done<br />
through a built-in web server and a powerful “happy face” web front end called FreePBX.<br />
Another choice that looks good is the Digium product called Phonevox. This is a ready-to-go<br />
software and hardware VoIP PBX from the main developers of Asterisk. Because it is a commercial<br />
product, it has support from the vendor.
Hardware<br />
noTeS, ReSouRCeS, aDDITIonal InFoRmaTIon | 71<br />
Unless you are experienced and confident, we advise you to buy a pre-built, configured, s/wloaded,<br />
and supported Asterisk machine such as the one Digium sells. Nevertheless, we offer<br />
the following gratuitous advice for those of you who decide to go it alone.<br />
You are building a machine that will need to be more reliable than most of your regular file<br />
servers. You don’t want to be rebooting your phone system! We like to use a 4u Rack Mount<br />
Chassis with generous cooling and a higher end power supply. 4U cases are inexpensive,<br />
roomy, usually have good cooling with low noise fans, have good filtering options and can accommodate<br />
just about any mother board. We like to use SATA drives in removable caddies for<br />
easy full system backups. Choose a mother board with PCI slots if you intend to use expansion<br />
cards such as for T1 line interfaces.<br />
Choose a server-grade motherboard. We usually go with on-board video to reduce costs. The<br />
CPU need not be the biggest, baddest, fastest thing out there, but it should be in the “sweetspot”<br />
with regard to price/performance.<br />
We often put an extra Ethernet card in the machine or buy a motherboard with two Ethernets<br />
on the board. One is configured one for the “inside” (LAN)” and one for the “public” (WAN),<br />
similar to the <strong>VX</strong>.<br />
2-4G of RAM is fine, but more is better. Hard disks should be server-grade and kept well-cooled<br />
for longest life. The goal is to assemble a machine that can run for 5 years or more. We are<br />
aware of Asterisk servers that have run continuously for three years or more, and hardware<br />
that is still in service after 15 years.<br />
Server grade doesn’t mean exotic RAIDs or multiple processors; a ‘low-end’ basic server will<br />
be fine. You’ll find that the more common the hardware, the better supported it will be by<br />
Linux and the fewer problems you will have with compatibility. Stay away from ‘Bleeding<br />
Edge’ hardware, but spend a few extra bucks on a better CPU heatsink/fan or power supply.<br />
We’ve learned over the years that the most common failures are fans, power supplies and<br />
optical disks. If you treat hard disks well (mainly, keep them cool) they’ll be more likely to last.<br />
Also many newer power supplies have an ‘80+’ logo. This means that they are better than 80%<br />
efficient, which means less power consumed and less waste heat. As a general rule, buy a<br />
larger power supply than you think you’ll need.<br />
If you are the extra-careful sort, consider building two identical boxes - or at least keep a spare<br />
identical motherboard and set of peripherals, such as Telco interface or Ethernet cards, onhand.<br />
The convenient availability of a given motherboard and some kinds of PC hardware will<br />
usually be less than a year at the current pace of development.
72 | Section 5<br />
Keep any filters clear and inspect the machine periodically to see if ‘dust bunnies’ are collecting<br />
anywhere. Do a full backup using the Linux ‘DD’ (full disk image bit copy, or ‘clone’)<br />
command once in a while (quarterly/annually), or after you are satisfied that any major change<br />
you’ve made should be retained (after a trial period). Consider that the hard drives might hold<br />
users’ voicemail, asterisk configuration, and call records. There is a good backup utility that<br />
will automatically make regular backups of the unique data (and whatever you specify). Think<br />
of this as an ‘incremental backup’.<br />
There will probably be spare capacity, so you could use your Asterisk server to provide other<br />
services you need, such as centralized logging using Syslog, or a Network Time Protocol (NTP)<br />
server.<br />
Expansion Cards<br />
Because Asterisk has become so popular, there are a variety of expansion cards available that<br />
can be used with it.<br />
The one we use most often is the ISDN PRI / T1/ E1 “Tormenta 2 or 3” type card, available<br />
from a number of vendors. ISDN PRI and T1 or E1 use the same card, since ISDN employs T1<br />
or E1 as the underlying transport. A four-port PCI card is available from Phoniceq, inc (www.<br />
phoniceq.com) for about $350. Quality and service from the company have been excellent.<br />
They also offer a number of other cards, including for ISDN BRI. The company offers examples<br />
of use and driver packages that simplify installation.<br />
Asterisk creators Digium also offer a wide range of card types and support options.<br />
www.digium.com/en/products/digital/<br />
We don’t recommend installing analog interface cards within an Asterisk server. While there’s<br />
nothing wrong with the cards, we think it’s better to use external gateways to interface POTS<br />
lines and Telephones such as the small ‘appliance’ gateways from Cisco/Sipura, Grandstream,<br />
AudioCodes, Patton, and others that go straight to SIP/Ethernet. Another way to go for more<br />
than 8 lines is to repurpose a ‘Channel Bank’ with a T1 interface and connect it to A T1 card in<br />
the Asterisk. Channel banks are available at reasonable cost on ebay and from used equipment<br />
suppliers. It should be equipped with an FXO (Foreign Exchange Office) interface if you plan to<br />
terminate analog lines from a Telco. Channel banks use different interfaces, so be sure that you<br />
get the right hardware configuration.<br />
Better is to avoid analog lines altogether and use a digital connection, either IP/SIP, ISDN PRI,<br />
or T1/E1. All are ‘four wire”, maintaining send/receive isolation.. ISDN PRI is the usual choice in<br />
both the USA and Europe.
noTeS, ReSouRCeS, aDDITIonal InFoRmaTIon | 73<br />
Following is a step-by-step guide to setting up Asterisk. With the hardware in place, you are<br />
ready to move on to getting the software installed and configured.<br />
1 Get your ‘distro’<br />
The most popular are at:<br />
♦ www.digium.com<br />
♦ pbxinaflash.net<br />
♦ www.trixbox.org<br />
♦ www.freepbx.org<br />
Download your distribution. We’ll proceed assuming that you’re using PBX in a Flash, henceforth<br />
‘PIAF’. It’s a few hundred megabytes. Once you have it saved on your hard drive, you’ll<br />
need to burn it to a CD. It’ll have a file name that ends with .iso and you’ll have to use your CD<br />
burning software to “burn an ISO image”. This procedure varies depending on what burning<br />
software you have installed on your machine (Nero, etc), so if you haven’t done this, we suggest<br />
‘googling’ the search term “burn an iso image with” and add your burning software name<br />
at the end. Many people have had difficulty with this process in the past and you’ll find clear<br />
instructions there. It’s important that you burn the ‘image’ and not just copy files. The CD that<br />
you create will boot up by itself and will wipe out anything on the installed hard drive. Before<br />
booting, check the bios in your machine to be sure that CD-ROMs are bootable. If the machine<br />
is recent, no action should be necessary.<br />
2 Get loaded: Install Asterisk<br />
Put your freshly-burned PBX-In-A-Flash disc into the CD-ROM drive and start the machine. You<br />
may need to press the space bar when the machine asks if you would like to boot from the<br />
CD-ROM. If you have trouble, check the boot menu in your BIOS. Sometimes you have to set<br />
a BIOS menu option to allow CD-ROM booting. Most newer boards allow CD booting because<br />
Windows and Linux are distributed on CD-ROM. Have an Ethernet cable plugged into your new<br />
machine, as the system will attempt to download the latest updates at the end of the installation.<br />
You should have the machine connected to a router that has a DHCP server so that the<br />
machine can configure itself with the parameters that your router gives. If you are using two<br />
or more Ethernet cards, the new system will only attempt to use one of them for the automatic<br />
updates, usually the onboard one or the card with the lowest MAC address. It may ask you to<br />
choose one. It’s no big deal If you guess wrong because you can change it later (and get the<br />
updates) or configure it all manually.<br />
The procedure will start by copying all of the files needed for the basic operating system into a<br />
RAM disk that is used for the install. You’ll be asked a few questions along the way:<br />
From the text menu, select an install type. Take the default by pressing the ENTER key. This<br />
selects the ‘Default’ installation. It will remind you that the machine will be wiped completely.
74 | Section 5<br />
Select the US keyboard (or the keyboard of your choice) when prompted, then press the <br />
key to advance to the “OK” prompt. After this selection, the GUI starts up. Move your mouse to<br />
verify that it works.<br />
The system asks how you want to use the disk. It points out that You have chosen to remove all<br />
partitions (ALL DATA) on the following drives . If you’re sure that this is OK (and<br />
it should be), select “Yes”.<br />
You’ll be asked your time zone. Select the correct one and click “Next”<br />
Next, you’ll be asked to enter your root password. It is case sensitive! Enter and confirm it as<br />
asked. Then click Next
TIP<br />
noTeS, ReSouRCeS, aDDITIonal InFoRmaTIon | 75<br />
Be sure to remember your root Password. You’ll need it later to continue the system setup.<br />
Centos installation commences (this is the operating system). The drive will be formatted<br />
and the installation and program files are copied. The operating system will be installed and<br />
then Asterisk and the PBX in a Flash files. Enjoy a sip of your favorite beverage as the process<br />
continues over the next few minutes,<br />
Eventually, you’ll see a message congratulating you and that “Installation is complete”. Not<br />
so fast... The operating system is installed, but there is the second part of the installation: the<br />
Asterisk and PIAF! Don’t worry, the system is running from a “kickstart” script that that will do<br />
all of the ugly stuff for you. Keep that beverage handy.<br />
Remove the CD-ROM and click “reboot”<br />
The system will shut down and restart. It will then offer you Please choose one of the following<br />
options: Choose ‘A’ (recommended option.This will begin a download of the latest<br />
version of PIAF. At this point, the system expects that you have it plugged into a network with<br />
a router that has DHCP and it will attempt to grab an IP address, netmask, gateway address,<br />
and Domain Name Server (DNS) address. If your Internet connection isn’t working, the install<br />
will appear to bomb at this point. This is not a disaster! But more than likely it will just work,<br />
then you’ll see it download the updates and continue to compile the program over the next 20<br />
minutes or so (depending on your machine and connection speed).<br />
Don’t interrupt the process. It may look like not much is going on, but watch the activity of your<br />
hard drive LED. It should blink periodically. Messages on the screen will update every once in a<br />
while. The system will firmly suggest that you do not press any keys to interrupt this process.<br />
Upon completion, the system will reboot by itself and you’ll then see the colorful PIAF “splash<br />
screen” followed by a normal boot up that should leave you with a login prompt.<br />
TIP<br />
You can always choose the defaults unless you’ve “gone off the reservation” and are trying to<br />
do something unusual or complex (in which case you’re probably smarter that your writer.<br />
In other words, “you’re on your own!” Google and your “Linux geek” are your best friends.<br />
The good news is that many people have done what you’re doing and have had the same<br />
problems that you have. Fortunately, they often share solutions on the web.<br />
Log in to the Console for the first time<br />
No, not the mixing console! Console is the Linux term for the command line interface. You’ll be<br />
greeted with a friendly (if spartan) login screen that looks like this:<br />
CentOS release 5.5 (Final)<br />
Kernel 2.6.18-194.8.1.e15 on an x86_64<br />
pbx login:_<br />
Enter ‘root’ and hit <br />
Password:_<br />
Enter the password that you set for root earlier in the setup and hit .
76 | Section 5<br />
You should get a full page status screen that shows version numbers, services running and an<br />
OK or other summary.<br />
Then, at the bottom of the screen you’ll see:<br />
root@pbx:~ $_<br />
Type ‘help-pbx’ and , you’ll get a list of commands. First, Let’s set up your ethernet IP<br />
address and get this box on your network so that you can get it going fully.<br />
At the ‘$’ prompt, type ‘netconfig’ and . You’ll get a blue screen (not like in windows,<br />
don’t worry!) asking if you’d like to set up networking. Press the space bar if the “YES” button<br />
is highlighted, (the is used to toggle between yes and no). The next screen has a place<br />
to enter an IP address, netmask, default gateway and name server, or a check box that you can<br />
select with a spacebar tap that enables DHCP so that your router or DHCP server can assign an<br />
address for you. We suggest that you assign a static address, as this machine is a server that<br />
will always be online and running. Below is our configuration; change this for your network<br />
On our lab network, the router is on 192.168.0.1. We use a class C netmask of 255.255.255.0<br />
and the DNS server at 8.8.8.8 works almost everywhere and is fast, so it’s used often.<br />
Use the key to advance to the OK button and to select it.<br />
At the prompt root@pbx:~$_<br />
Type ‘ifup eth0’ and hit return. There will be a short pause and then you’ll get the prompt back.<br />
Your ethernet interface (eth0) should now be up and working.<br />
If you’re connected to the Internet, type ‘ping yahoo.com ’ and if you’re successful,<br />
you’ll get your ping returned from yahoo.com. To stop the pinging, hold down control and hit<br />
‘c’ (Ctrl-c). You should get the prompt back again. This little test proved two things: that you<br />
have internet connectivity and that your DNS name resolution worked. (it looked up the IP<br />
address for yahoo.com and gave your box the ip address for them). If you reboot the machine,<br />
the eth0 interface will come up automatically from now on.<br />
Please be aware that this tool only configures a single Ethernet card. If you have more, you can<br />
configure them later.<br />
TIP<br />
Is your system really slow at certain points or does it seem to stop? DNS is used for many<br />
things in Linux. If it isn’t available, many services will be VERY slow. Minutes-long pauses<br />
waiting for name resolution timeout are not uncommon and some things will appear to stop<br />
working entirely. So if you have long pauses while working with your system, lack of DNS is<br />
a probable cause. If you plan to run your system without DNS, you’ll want to fill in the ‘hosts’<br />
table with any addresses that might be logged or ‘talked to’ by the system. It is found at ‘/etc/<br />
hosts’. You can edit the file using ‘mc’ (Midnight Commander) or other editors like pico and vi.<br />
Follow the examples in the file.
Set the passwords for various features<br />
noTeS, ReSouRCeS, aDDITIonal InFoRmaTIon | 77<br />
At the shell (command) prompt, type passwd-master and then . You’ll be prompted to<br />
enter the password twice. If they match, the password is set. Save these or choose passwords<br />
that you won’t forget. Do the same for the following commands:<br />
passwd-maint<br />
passwd-wwwadmin (you’ll use this one most often)<br />
passwd-meetme<br />
passwd-webmin<br />
Turn some services off for now<br />
At the shell prompt, type ‘disable-iptables’ and then , then type ‘disable-fail2ban’ and<br />
hit . These are security tools that could get in your way until you’re fully set up. If you<br />
run your machine behind a router or firewall, you won’t need these anyway.<br />
3 Configure Asterisk<br />
Asterisk needs to be configured for your application. There is plenty of information on this<br />
topic on the Asterisk site. In brief, the steps are:<br />
5. Set up trunks.<br />
6. Set up outbound routes.<br />
We’ll work through a simple example in the following pages.<br />
We prefer to use SIP extensions rather than SIP trunks to connect Asterisk lines to the<br />
<strong>VX</strong> because they are more flexible. For example, station SIP signaling conveys caller ID,<br />
which the <strong>VX</strong> can display and use. SIP trunks, on the other hand, do not pass CID. The<br />
<strong>VX</strong> supports the required SIP registration when you enter the authentication password<br />
on the show configuration pages.<br />
By default, Asterisk uses SIP Reinvites. This causes the <strong>VX</strong> or VoIP phone to make a direct<br />
connection to the Telco, bypassing Asterisk’s processing when compatible codecs are present<br />
at both ends. This is generally a good idea, but it can be troublesome because it forces the <strong>VX</strong><br />
to change the IP address and other parameters for the line source. Early <strong>VX</strong> versions did not<br />
support re-invites, but this should be fixed as you read this. Until re-invites are supported, the<br />
Asterisk ‘canreinvite’ parameter should be set to ‘no’ (in later versions of Asterisk, those are<br />
two options: ‘directmedia’ and ‘directrtpsetup’)<br />
When Asterisk and <strong>VX</strong> are on the same subnet, Asterisk’s NAT (Network Address Translation)<br />
support should be set to ‘no’.<br />
It remains to be seen if, and how well, Asterisk will support wideband codecs. Until this is<br />
clarified, and when the <strong>VX</strong> supports wideband codecs, it might be required to keep Asterisk out<br />
of a wideband call path.<br />
Let’s get started…
78 | Section 5<br />
Log in to the web GUI<br />
Point your browser to your Asterisk server address, being sure that your computer is on<br />
the same subnet. For example, if your Asterisk box is on 192.168.0.248 with a netmask of<br />
255.255.255.0 and your browser computer is on 192.168.0.11 or any IP with the same first three<br />
bytes 192.168.0 and the last byte between 2 and 254, accompanied by the same netmask as the<br />
Asterisk box’s, you are good. Supply the login credentials and you should see the screen below:<br />
Click on the admin virtual slide switch at the bottom left of the page and the menu will change<br />
to the one below. You may be asked for your username and password to access this. Use<br />
‘wwwadmin’ and the password that you set earlier, then click OK. You should see the screen<br />
below.
Use ‘FreePBX’ to do some administration chores<br />
noTeS, ReSouRCeS, aDDITIonal InFoRmaTIon | 79<br />
Click on FreePBX Administration and you’ll see a new menu that supports almost all of the<br />
features you’ll regularly use in Asterisk. You’ll do most of your setup from this menu.<br />
Here’s what we’re going to do next:<br />
♦ Create an extension that we’ll later use with the <strong>VX</strong>.<br />
♦ Set up a trunk to accept incoming calls and to be used to make outgoing calls.<br />
♦ Set up an ‘inbound route’ to tell incoming calls how to get to our extension on the <strong>VX</strong>.<br />
♦ Set up an outbound route so that you can make calls out<br />
Then we’ll use the <strong>VX</strong> web interface to use the line that we created and then make a test call.<br />
Finally, we’ll create a trunk from the PSTN and route calls from that trunk to our extension, all<br />
by using the web GUI. We’ll go a step at a time from this point.<br />
Create an extension or two<br />
To get comfortable with Asterisk, create an extension or two to use for testing. You can use the<br />
extension to test your connection with the <strong>VX</strong> and just to check for signs of life. You deserve to<br />
experience some action after all that work loading and configuring.<br />
Click on Extensions and then click on Add Extension. The “Device field will default to Generic<br />
SIP Device. Accept this by clicking on the Submit button. Then, Fill in the extension number<br />
you’d like to use, then the display name and outbound caller ID. This is what callers will see<br />
when you call them from this extension. Interestingly, it can be just about anything. Some<br />
phone companies screen to be sure that you’re sending a properly formatted area code and<br />
phone number, while others will take anything - a 4 digit extension, a single digit, your lucky<br />
lotto numbers, whatever.
80 | Section 5<br />
Scrolling down the page some more we see some more options. Most of these are optional,<br />
except for “secret”. By default the ‘nat’ field is set to “Yes”, be sure to change it for use with<br />
the <strong>VX</strong> or any extension to be used “inside” your firewall. This is another name for password.<br />
Scrolling further...<br />
We see Recording Options and Voice Mail settings (You can record all calls or the extension<br />
user can dial a code while on the line to initiate recording of that call. Recording is optional, of<br />
course. Below the field marked Secret is another called DTMFmode, which should default to<br />
RFC2833. Leave this as is. The default is the preferred method of handling DTMF tone transmission.<br />
RFC2833 uses SIP messages to pass detected DTMF tones along to the other end of a<br />
call, rather than generating audio tones locally.<br />
The Voicemail system in Asterisk offers all the usual capability. You could enable it on our<br />
about-to-be-created extension 2222 here so that you could see some of what it can do. Set the<br />
password. We set up this mailbox to automatically send us a wave file of any messages left<br />
to the email address in the field below. The audio quality of the recordings is impressive and<br />
usable for on-air playback. This is also optional. scrolling further down...
We are finally at the bottom of the page for extension 2222.<br />
noTeS, ReSouRCeS, aDDITIonal InFoRmaTIon | 81<br />
We enable the Vmx Locater. This is useful as it allows callers to be transferred to number<br />
inside or even outside of the system if 0, 1 or 2 is pressed. Here ‘0’ is programmed to send<br />
callers to the station operator, ‘1’ send the caller to our imaginary cell phone and ‘2’ transfers<br />
the caller to our imaginary “personal assistant” at extension 5667. If you do use these options,<br />
be sure to mention pressing ‘0’ for the operator in your outgoing voicemail message. You<br />
probably don’t want to use these optional features for request lines or public call in numbers,<br />
but... they’re there and work well if you have the need.<br />
If you’re happy with all of the above, click on the Submit button. The entry will be created and<br />
stored but not activated until you click on the orange bar at the top of the screen that appears<br />
when ever you have ‘unapplied’ changes. Don’t worry, applying changes won’t drop any calls<br />
or interrupt any conversations in progress.<br />
Trunks<br />
Since we now have an extension, let’s make it so you can call somebody or get called. To do<br />
this, we’ll need to way to and from the Public Switched Telephone Network or PSTN. The provider<br />
of SIP here was Vitelity, who provides “cut and paste” trunk set up data on their website<br />
for subscribers. Most providers do this. The next screenshot shows how Vitelity suggests that<br />
their trunk be set up.
82 | Section 5<br />
In our example here, we only use Vitelity for incoming calls, so the ‘Outgoing Dial Rules’ are<br />
irrelevant. We could insert a period in the Dial Rules box that would simply pass whatever<br />
digits were dialed down the trunk to Vitelity. Keep in mind that this is just the trunk setup, and<br />
that there still has to be inbound and outbound routes to get calls into and out of the switch.<br />
For incoming calls, this is done with an inbound route that matches digits sent be the provider,<br />
the Direct Inward Dial number itself and telling it “where to go”, in our case, to an extension.
noTeS, ReSouRCeS, aDDITIonal InFoRmaTIon | 83<br />
The DID number for our example “Talk Line” is 7605138255. We leave the Caller ID Number<br />
blank because we want it to work from ANY number, and entering a number would cause it<br />
to ONLY work from the number in that field. Rumor has it that a FreePBX programmer added<br />
this feature so that his “X Girlfriend” could get “special treatment”, like being sent to a special<br />
‘ring forever’ extension. We don’t need this right now, but it could come in handy later (possibly<br />
depending on your personal situation). Leave the rest alone and scroll down further...<br />
We are routing callers who dialed 7605130999 directly to Extension 2222 on the <strong>VX</strong>. Click<br />
submit and then apply the changes. We could also send those calls to any of the other options,<br />
such as “Misc Destinations: Mental Health Hotline” or “Joe’s Voicemail” These destinations<br />
can be created and added by you in the FreePBX GUI.<br />
Remember that if the show that uses extension 2222 is not selected on the <strong>VX</strong> (through the<br />
VSet or <strong>VX</strong> Producer software) calls to 2222 or the DID number routed to it will receive an “All
84 | Section 5<br />
Circuits Busy” recording from Asterisk, because all circuits are busy as there is nowhere for the<br />
call to go.<br />
Outbound Calls<br />
Below, we decide to use ‘9’ to dial outside the PBX, so we cleverly name the route ‘9_outside’<br />
to make it clear later what the thing does. In the “Dial Patterns’ box we enter ‘9|.’ What this<br />
does is match the leading 9 from the number dialed, let’s call it 913115552368, deletes the<br />
9 (everything ahead of the pipe symbol ‘|’ is deleted) then the ‘.’ represents the rest of the<br />
number dialed (13115552368) and passes that number to the trunk selected at the bottom of<br />
the outbound route page, in this case, our Vitelity trunk.<br />
Connect your <strong>VX</strong> to Asterisk<br />
We’re going to assume that you’ve done the basic setup of your <strong>VX</strong>. That means you’ve got<br />
audio going and a VSet phone connected and talking to your <strong>VX</strong> engine, and it’s on the same<br />
network as your Asterisk box.<br />
Log into your <strong>VX</strong> engine with the web browser, and select SIP > Lines:<br />
Earlier, we created extension 2222 using FreePBX. It is a SIP Line rather than 5600 (above it on<br />
the screen shot below) which is a SIP trunk. We set 2222 to register with the Asterisk server<br />
(which is the default ‘Domain’) at 192.168.0.248. Accept the default which is ‘0’ and the <strong>VX</strong> will<br />
register as often as Asterisk says it must). Auth user is typically your extension number and Auth<br />
Password, should be the same as your ‘secret’ from the PBX in a Flash Extensions setup page.<br />
Though the <strong>VX</strong> supports SIP trunks as well as SIP extensions (lines), extensions are probably<br />
better for you to use than trunks. First, SIP lines each have their own outgoing caller ID,<br />
programmable per line in Asterisk. Trunks will only send the extension number for caller ID, or<br />
the same the caller ID for all of the numbers on the trunk, which can be confusing. People have<br />
become used to getting accurate caller ID on their mobile phones, etc. You may wish to hide or<br />
substitute caller ID on ‘Private lines’ or hotlines. Another feature of SIP lines is the registration<br />
feature. With it, the system knows that an extension is ready and available for calls.
noTeS, ReSouRCeS, aDDITIonal InFoRmaTIon | 85<br />
The information screen on <strong>VX</strong> will show the current status of all of your lines and trunks. Find<br />
this under Studios and the Studio name, here “New Studio 1”. Notice below, that extension<br />
2222 (and all of its multiple appearances) is OK and registered. The others say ‘OK’ and trunk.<br />
This is because the trunk is ‘assumed’ to be present. Extension 2222 has been verified as<br />
present.<br />
Now we’ll go to the <strong>VX</strong> Shows page and look at the show that we built earlier. It has a 6 line<br />
‘hunt group’ for extension 2222 and a couple of “back lines” or hot lines. It’s a ‘hunt group’<br />
because there are 6 line keys set to extension 2222. Optionally, we could have the ‘busy all’<br />
box checked only for extension 2222, our ‘public caller’ lines. Only these lines will be busied<br />
out when we press the “block all” key on the VSet or activate that feature from <strong>VX</strong> producer.<br />
In this example, that’s what we did.<br />
Make a test call on your VSet<br />
Pick up a line using your VSet, and dial ‘1234’ and press the GO button. If you are using PBX in<br />
a Flash, you should hear a congratulatory recorded message from the Asterisk. Then try dialing<br />
‘2222’ One of your 2222 lines should ring and you’ll hear a ringback tone in the handset or on<br />
the studio output. Congratulations!<br />
<strong>VX</strong> Tech Cheat sheet – Default IP numbers, passwords, etc.<br />
Default Passwords:<br />
<strong>VX</strong> Engine username = user , password = <br />
VSet Telephone username = user , password =
86 | Section 5<br />
Default IP Addresses:<br />
<strong>VX</strong> Engine ‘Network’ interface = 192.168.0.200 (front panel settable)<br />
<strong>VX</strong> Engine ‘WAN’ interface IP address = 192.168.5.200 (front panel settable, may be disabled)<br />
SIP Parameters<br />
Codecs supported as of early 2011: g.711 alaw and ulaw. g.722 pending.<br />
SIP Trunks<br />
SIP Stations<br />
TCP/IP Ports and protocols used by the <strong>VX</strong> System<br />
♦ 80 HTTP (TCP/Network Port only)<br />
♦ 22 SSH (TCP)<br />
♦ 5004 SIP (UDP)<br />
♦ 5060 SIP (UDP)<br />
VSet telephone<br />
♦ 8080 HTTP (TCP/WAN Port only)<br />
♦ 20518 Livewire ports<br />
♦ Port numbers may be changed on the WAN interface for security and flexibility.<br />
VSet Telephone default IP address: 192.168.0.201 (front panel settable)<br />
Default username and password:<br />
username = user<br />
password = <br />
telnet requires no password<br />
TCP/IP Ports and protocols used by the VSet Telephone:<br />
80 HTTP (TCP/Network Port only)<br />
23 Telnet (TCP)<br />
20518 Livewire port<br />
Power Over Ethernet (PoE)<br />
The VSet uses standard 802. Power Over Ethernet (POE) and consumes 15.4 watts Please<br />
consider this relatively high power consumption rate when choosing your POE source.
<strong>VX</strong> FAQ The Telos <strong>VX</strong> uses VoIP. What does that mean to me?<br />
noTeS, ReSouRCeS, aDDITIonal InFoRmaTIon | 87<br />
Let’s define what “uses VoIP” means. The <strong>VX</strong> uses it in two distinct ways: One: it can connect<br />
to Telco services using standard SIP VoIP. You benefit from having options –connecting to PBXs<br />
digitally, to ISDN and analog lines via gateways, etc., etc.With <strong>VX</strong> you can finally integrate your<br />
on-air phones with office phone systems from a variety of vendors. Getting Telco service from<br />
VoIP dial tone providers means that your audio quality and hybrid null will be much better as<br />
VoIP dial tone is delivered “4 wire” without hum, noise, and loop loss. Building on ubiquitous<br />
VoIP standards means a variety of third party hardware can offer flexibility. And you might<br />
save a lot of money getting service this way. Two: <strong>VX</strong> system components connect to each<br />
other over standard IP/Ethernet networks with all the advantages that brings. For example, in<br />
Livewire-equipped facilities, one RJ-45 jack connects dozens of audio channels and rich control<br />
to phones-like controllers, PC applications, integrated console controllers, etc.<br />
So I can use the <strong>VX</strong> with my regular 1MB POTS lines? How? Can I use ground start lines for<br />
incoming calls only?<br />
You can do that, and it’s not difficult. You only need a POTS gateway device. However, we<br />
encourage using digital delivery for the best sound quality.<br />
What about ISDN BRI and PRI lines?<br />
If you have ISDN now and want to keep it, again there are gateways available. However, it is<br />
often cheaper to port these numbers to a VoIP dial tone provider. All of these options are worth<br />
considering.<br />
So I can experiment with SIP VoIP trunks? Why would I want to do that?<br />
Actually, we recommend it! We think that you’ll find that they work better than you may have<br />
expected, as many of the VoIP problems we have seen are caused by limitations of analog<br />
terminal adaptors (IP to POTs gateway devices)! Since these are not needed with a VoIP-based<br />
system such as the <strong>VX</strong>, that class of problem is eliminated. There are a number of inexpensive<br />
ways to try VoIP without risk. You can also get VoIP-delivered numbers from distant area codes<br />
and exchanges. If you’re paying mileage for foreign exchange lines or have national toll free<br />
numbers, you’ll definitely want to consider this option.<br />
I can’t put a flasher across a VoIP line, so how can I flash a light when the hotline rings?<br />
This same issue arises with ISDN, so beginning with our TWOx12 we included a GPIO output<br />
for this function. The Not to worry – The <strong>VX</strong> has this capability. In fact, it has multiple oututs<br />
which can be assigned to any of your VoIP lines.<br />
I have been watching VoIP with interest. But reports I have heard about services such as Vonage<br />
are that sometimes they work well, but other times not. Frankly, I surprised to see Telos<br />
advocating it.<br />
We get this concern often and understand why you ask. The term Voice over Internet Protocol<br />
(VoIP) does not distinguish between “VoIP over the Internet” versus “Voice over other (managed)<br />
IP networks”. If you have been keeping up with the transition to IP Codecs, you probably<br />
have noticed the same terminology issue there. IP-based STLs over an IP T1 are just as reliable<br />
as traditional STLs over traditional TDM T1 circuits. You are completely right to be concerned
88 | Section 5<br />
about a VoIP trunk (or an STL) over the Internet, as that is not at all the same thing, and performance<br />
in that case could be variable. Inside the facility, on a LAN, all problems disappear, since<br />
you have plenty of bandwidth and full control over the network.<br />
So shared bandwidth is the only problem with VoIP?<br />
Well, there’s audio quality. In the early days VoIP used a lot of compression, with bit rates<br />
being as low as 6kbps. Needless to say, the resulting audio was not impressive. These low-rate<br />
codecs have mostly fallen by the wayside. The lowest-grade codec the <strong>VX</strong> supports is g.711,<br />
the standard for digital audio in the telephone network pre-IP. And you will eventually benefit<br />
from higher-fidelity codecs as these proliferate in the VoIP world.<br />
How does AoIP relate to VoIP?<br />
Despite the similar names and underlying technologies, they are very different with regard to<br />
performance and application. An analog phone line and a balanced 600Ω studio audio circuit<br />
are pretty much the same tech, but the applications and performance are very different. ’AoIP’<br />
has come to mean professional studio-grade audio networking - full-fidelity and usually with<br />
no compression. Low-delay and synchronized channels are other distinguishing characteristics.<br />
Another way the two differ is that AoIP uses an advertising/discovery protocol for receivers<br />
to find sources instead of the Session Initiation Protocol (SIP) that VoIP employs. AoIP<br />
uses a system-wide clock mechanism to support low-delay and tightly synchronized channels.<br />
Finally, AoIP often takes advantage of IP’s multicast capability to permit multiple receivers to<br />
listen to an audio source efficiently. AoIP is intended for managed, guaranteed-bandwidth<br />
networks, such as with an Ethernet switch as the core of a local area network<br />
And what about ‘IP codecs’?<br />
Now you are very close to VoIP! These use SIP for call setup and various codecs for compression,<br />
so are similar to VoIP telephones. In fact, they actually are VoIP telephones and can<br />
sometimes interoperate with them. They have better codecs than VoIP phones, though. AAC-<br />
ELD, in particular. Advanced IP codecs, such as our Z/IP, employ sophisticated technologies to<br />
overcome the Internet’s deficiencies. Dynamic buffering, error concealment and more clever<br />
stuff.<br />
I have read that some VoIP PBXs use IAX trunking. Can I use the <strong>VX</strong> with these?<br />
IAX is a protocol invented by the Asterisk people. It provides functions similar to SIP, but with<br />
more bandwidth efficiency. The <strong>VX</strong> doesn’t support IAX trunking at this time. But you can<br />
connect the <strong>VX</strong> to an Asterisk with SIP trunking or as multiple SIP extensions. There’s plenty<br />
of bandwidth on a LAN, so this works fine, while staying with a standards-based approach. We<br />
like Asterisk as a <strong>VX</strong> adjunct. It can add voice mail, automated attendant, blocking callers from<br />
caller ID, off-premise SIP extensions, and more, to a <strong>VX</strong> installation. Asterisk is free Linuxbased<br />
PBX software that runs on a PC. The <strong>VX</strong> and Asterisk PBX are an attractive combo we<br />
expect will become popular within the broadcast industry.<br />
How can I get reliable VoIP trunk lines? What is involved? Can you recommend a vendor?<br />
Yes, we can assist. We have been working closely with the <strong>VX</strong> beta sites and other early adopters<br />
of VoIP, so we have plenty of experience to share. There are several types of VoIP dialtone
noTeS, ReSouRCeS, aDDITIonal InFoRmaTIon | 89<br />
providers. You’ll want to consider how the service will be delivered to you; via the Internet<br />
(like Vonage), or via a dedicated IP circuit from the provider that includes a Service Level<br />
Agreement and guaranteed Quality of Service (as offered by a number of vendors including<br />
most of the traditional Telcos). For discussion of this and other matters, check the Telos web<br />
site on a regular basis as we continue post material on this and related topics.<br />
I know that SIP is supported by the new IP codecs. Will the <strong>VX</strong> be able to connect to my<br />
Zephyr/IP in the field? Other codecs?<br />
As we hinted above, Yes! The <strong>VX</strong> supports g.722 (7khz, ‘wideband audio’ and g.711 (3.4khz,<br />
“phone quality”).<br />
What about SIP, SDP, RTP, ENUM and UDP?<br />
We know that engineers are lifetime learners and encourage that. However, just as you probably<br />
don’t know much about “SS7” or “IUP” in the telephone network, understanding these<br />
details is optional. We do have White Papers on our web site to educate you on these, and<br />
other, terms. Start with the one here: You could read Steve and Skip’s AoIP book, too, for a fun<br />
and comprehensive coverage of this stuff.<br />
Here’s a paper on the adaptive IP codec: telos.systems.com/techtalk/Advanced%20Tech%20<br />
for%20IP%20Remotes_Church_Final.pdf<br />
Does Livewire technology come in to the <strong>VX</strong> picture?<br />
Yup. The <strong>VX</strong> takes VoIP on the Telco side and Livewire AoIP on the studio side. This makes<br />
integration with Axia consoles and networks easy and efficient. If you don’t already have a<br />
Livewire network, you would use Axia analog or AES audio ‘nodes’ to provide I/O in either format.<br />
Each node provides eight stereo inputs and eight stereo outputs to and from the system.<br />
Each Axia GPIO node provides 8 “groups” of 5 inputs and 5 outputs, covering the needs of 8<br />
studios. Telos Support is always available to help you specify exactly what you need. If you are<br />
new to Livewire Technology you may wish to skim through our Primer, here: http://www.<br />
axiaaudio.com/manuals/files/IntroToLivewire2.1.pdf<br />
So the two can live together side-by-side on the same LAN?<br />
Yes they can.<br />
So let’s talk caller audio quality? What does <strong>VX</strong> offer compared to the NX series and your<br />
legacy products?<br />
Advanced audio processing and the fact that you never have to overcome Telco loop losses or<br />
extra two to four wire conversions means that the voice quality is as good as it can be. Calls<br />
from mobile phone calls will be less than perfect at times, but <strong>VX</strong> extracts the best possible<br />
from them.<br />
You must have old-fashioned analog and ISDN circuit switched connections covered somehow, eh?<br />
How are callers on the VoIP trunks going to sound? What about echo? Won’t cell phones sound<br />
even worse than usual?
90 | Section 5<br />
The <strong>VX</strong> has enough processing horsepower to deal with even extreme echo situations, and<br />
four- wire Telco delivery means that the only external echo path is from the caller’s line, when<br />
it’s analog, and the caller’s handset. The <strong>VX</strong> uses Telos’ latest hybrid technology (5th generation),<br />
enhanced with the latest state of the art acoustic echo cancellation. Even when using<br />
open speakers, and changing levels during a call, the new algorithm makes feedback nearly<br />
impossible.<br />
Steve Church once told me that IP cell phones can sound *better* than usual 3 kHz circuit<br />
switched phone technology - something about G.722 dot something. Is this true?<br />
Right. Current Cisco VoIP phones, for example, support the g.722 codec. The <strong>VX</strong> supports this,<br />
as well. However, Steve was probably referring to “AMR Wide Band” also known as G.722.2.,<br />
sometimes called “HD Audio”. It’s 7khz and doesn’t sound at all like “phone audio” - in fact,<br />
it sounds better than regular G.722! AMR-WB is part of the new ITU standard for mobiles, so<br />
should grow over time. Meanwhile, some IP-based apps for mobiles are starting to use wideband<br />
codecs, such as MPEG-ELD in Apple’s ‘facetime app.<br />
*** See above g.722 warning above<br />
OK, I am starting to see the light. Cool stuff, but here’s the catch? Is <strong>VX</strong> hard to install and<br />
configure?<br />
Setup is via web. It may be little different than what you’re used to (or not) but it’s not difficult,<br />
and some customers never crack open the book to set it up. Power and flexibility do come with<br />
a little complexity, but we’ll always be at your side should you need us.<br />
There is no such thing as a free lunch - it must be hard to use then, I know there’s a catch... I<br />
really don’t have time to explain a new system to the air staff.<br />
We know! Rest assured it’s easier for your talent, not harder! We recognize that any time you<br />
change anything in a studio, there can be some transition time. While there are a lot of new<br />
features in the <strong>VX</strong>, your staff can use the basic stuff immediately because it works just like<br />
familiar and comfortable Telos gear. The color, hi-rez LCDs and seamless console integration<br />
(to Axia Element and IQ) enhance the user experience. As you read this, systems around the<br />
world are screening calls and putting them on the air without drama. Jocks and Talk hosts alike<br />
praise the <strong>VX</strong>!<br />
If I use an Axia console, it gets even better?<br />
Yes – that’s the ultimate - you start with the most flexible console/audio-platform and then add<br />
Smoothly integrated phones with the IP network powering it all. Sweet! The network delivers<br />
any of your Telco lines to any of your studios, in any combination. Any line is available in any<br />
studio at any time.<br />
I notice the <strong>VX</strong> engine has both a LAN and WAN connector; why is that?<br />
It’s a built-in firewall, isolating the VoIP connection from your studio network. We use this<br />
same approach in the iPort Livewire-WAN MPEG gateway.
What about call screener and database functions?<br />
noTeS, ReSouRCeS, aDDITIonal InFoRmaTIon | 91<br />
A basic Call Screening app, <strong>VX</strong> Producer, comes with the system. Other networked, PC-based<br />
apps, such as Broadcast Bionics’ PhoneBOX <strong>VX</strong> or NeoGroupe’s applications put information<br />
about your callers in front of your producers without the need for caller ID boxes, serial cables<br />
or other hassles.<br />
What about SMS messages and chat - Can they be integrated into my phone system?<br />
Using Broadcast Bionics Phone Box <strong>VX</strong>, yes! Telos has always built open systems to allow<br />
others to create their own visions around our gear.<br />
OK, so the catch has to be the price?<br />
The <strong>VX</strong> lets you leverage cheap networking to serve your entire facility. Since you don’t need<br />
hardware boxes for each studio, cost is surprisingly reasonable. You’ll use the <strong>VX</strong> in your<br />
on-air studios to replace older multi-line systems, and you’ll use it to replace hybrids in newsrooms<br />
and production studios. You might also decide to eliminate walls full of ‘couplers’ for<br />
pre-delay IFB dial-up lines and Transitioning your Telco service might save you a lot of scratch.<br />
We seen stations saving thousands of dollars a month (no kidding) by eliminating POTS lines,<br />
with their taxes and fees.<br />
Anything else cool about the <strong>VX</strong>?<br />
Did we mention the color LCD user interface on the new VSet phone/control surface? Producers<br />
and talent love it!<br />
Fancy gear like this has to be trouble, no?<br />
<strong>VX</strong> is simpler than a multiple-box approach. With fewer components, it’s more reliable. At the<br />
time of this writing, no <strong>VX</strong> engine at a radio station has crashed, ever. We’ll probably have a<br />
contest to see who has the longest ‘uptime’. Right now, it’s 6 months - but that system was<br />
installed 6 months ago…
92 | Section 5<br />
Application Example - WKSU<br />
WKSU is a non-commercial FM radio station affiliated with Kent State University. It features<br />
NPR, APM and PRI programming, classical music, regional news and, on weekends, folk music.<br />
The station serves the Akron and Cleveland radio markets with its main FM service and six<br />
repeaters The main FM and four full power repeaters each host four full-time HD Radio channels:<br />
a simulcast of the main service, a folk music channel, a classical service, and The WKSU<br />
News Channel. All of the programs are also streamed for Internet listeners.<br />
The office and studio facility is housed in a stand-alone building at the edge of the Kent State<br />
University campus.<br />
The two largest studios are equipped with Axia Element consoles. One of these is the main<br />
on-air control room, while the other is used for producing a variety of long-form programs,<br />
including an evening interview and call-in program.<br />
The <strong>VX</strong> currently serves these two studios.<br />
The main station call-in numbers are delivered via a SIP service offered by the VoIP provider<br />
bandwidth.com. IP network service is from the local Telco and is delivered over a T1 circuit,<br />
with the University’s Internet connection being a backup. A router located on the WKSU<br />
premises is configured for automatic backup. 20 telephone numbers are delivered over the SIP<br />
service, which may be used for both incoming and outgoing calls. Despite the leading-edge<br />
nature of SIP Telco service, CE Chuck Poulton and network administrator Dan Kuzinsky ??<br />
report that it has proven reliable and has delivered excellent audio quality, perhaps because<br />
call audio is maintained 4-wire (independent send and receive audio paths) and digital from<br />
the PSTN to the studio. The PSTN g.711 coding is maintained until it is converted to the highfidelity<br />
Livewire format in the <strong>VX</strong> system.<br />
Two analog lines from the local Telco connect to the studio IP system via a Grandstream 4-line-<br />
FXO gateway. Another two lines are brought into the gateway from the University’s NEC PBX.<br />
An FXO interface card could have been installed into the Asterisk, but a dedicated external<br />
device was chosen as a measure to optimize audio quality. Fortunately, the NEC PBX provides<br />
“disconnect supervision” via a momentary break in loop current. The gateway was configured<br />
to respond to this. (if that hadn’t been possible, the gateway would have to be configured to<br />
respond to the return of dialtone.)<br />
In the other direction, two dialtones are provided from the VoIP side to the Nortel PBX via a<br />
Linksys two-line ATA (Analog terminal Adapter) – an FXS gateway that converts VoIP to analog,<br />
including talk battery, generating ringing, etc. WKSU has a number of phones on the PBX and<br />
this puts a couple of the VoIP numbers on phone buttons.<br />
An Asterisk PC-based PBX is installed functionally “in front” of the <strong>VX</strong> to provide a basic<br />
automatic answer and IVR (Interactive Voice Response) function. Callers are greeted with a<br />
welcome message and a choice of leaving a message, going on the air, or speaking to the<br />
receptionist. When a caller chooses the option “go on the air,” the call is passed to the <strong>VX</strong>,<br />
where it may either be directly answered on-air or be fielded by a producer. This IVR function<br />
is created through a web GUI for Asterisk called ‘FreePBX’<br />
Calls are routed from Asterisk to the <strong>VX</strong> via SIP/VoIP over the LAN. The Asterisk is configured<br />
to provide a SIP extension for each line that connects to the <strong>VX</strong>. (SIP trunks could have been<br />
used, but extensions are more capable - for example, they can pass Caller ID.<br />
The Asterisk PC is equipped with three Ethernet ports. One is connected to the LAN and normally<br />
used for all input and output. Another is directly connected to the networks that deliver<br />
VoIP calls as a backup. pfsense, a software router, is installed on the machine to perform the<br />
routing to select the active VoIP path and provide the automatic backup.
noTeS, ReSouRCeS, aDDITIonal InFoRmaTIon | 93<br />
The <strong>VX</strong> Producer application is used for call screening and communication between the<br />
producer and air talent.<br />
Two Cisco 2960G Ethernet switches provide the networking. One is on the Livewire (LAN) side<br />
of the <strong>VX</strong> and the other is on the VoIP (WAN) side.
94 | Section 5<br />
Incoming Call flow to <strong>VX</strong> via Asterisk Open Source PBX<br />
DID numbers from SIP Provider<br />
(311) 555-2368<br />
(311) 555-9467<br />
(311) 555-1067<br />
DID Numbers from ISDN PRI<br />
(311) 555-7200-7299<br />
(311) 555-1300-1399<br />
Numbers from POTS Gateway<br />
(311) 950-1022<br />
(311) 976-1234<br />
(311) 853-1212<br />
(311) 958-1114<br />
Example Call:<br />
(311) 555-2368 called from a<br />
cell phone in Barstow, California<br />
(760) 256-8463<br />
Cell carrier routes the call to the SIP<br />
provider over the Public Switched<br />
Telephone Network as the number<br />
translates to the SIP provider.<br />
Asterisk SIP Trunk<br />
Digits sent include<br />
Caller ID and 10<br />
Digit DID number<br />
Asterisk Zaptel or<br />
DAHDI type trunk<br />
Digits sent include<br />
Caller ID and 4-10<br />
Digit DID number<br />
Incoming Call flow to <strong>VX</strong> via Asterisk Open Source PBX<br />
DID numbers from SIP Provider<br />
(311) 555-2368<br />
(311) 555-9467<br />
(311) 555-1067<br />
DID Numbers from ISDN PRI<br />
(311) 555-7200-7299<br />
(311) 555-1300-1399<br />
Numbers from POTS Gateway<br />
(311) 950-1022<br />
(311) 976-1234<br />
(311) 853-1212<br />
(311) 958-1114<br />
Example Call:<br />
(311) 555-2368 called from a<br />
cell phone in Barstow, California<br />
(760) 256-8463<br />
Cell carrier routes the call to the SIP<br />
provider over the Public Switched<br />
Telephone Network as the number<br />
translates to the SIP provider.<br />
Asterisk SIP or IAX2<br />
type trunk. Digits sent<br />
include Caller ID and<br />
extension number that<br />
calls to POTS line are<br />
"auto forwarded" to.<br />
(311) 555-2368 with<br />
Caller ID of (760) 256-<br />
8463 is received.<br />
The SIP provider sends<br />
the call to the Asterisk SIP<br />
trunk because 555-2368<br />
is registered to the trunk<br />
belonging to the subscriber.<br />
Caller ID and the 10 digit<br />
DID number are sent to the<br />
Asterisk SIP trunk belonging<br />
to the Subscriber.<br />
Asterisk SIP Trunk<br />
Digits sent include<br />
Caller ID and 10<br />
Digit DID number<br />
Asterisk Zaptel or<br />
DAHDI type trunk<br />
Digits sent include<br />
Caller ID and 4-10<br />
Digit DID number<br />
Asterisk SIP or IAX2<br />
type trunk. Digits sent<br />
include Caller ID and<br />
extension number that<br />
calls to POTS line are<br />
"auto forwarded" to.<br />
(311) 555-2368 with<br />
Caller ID of (760) 256-<br />
8463 is received.<br />
The SIP provider sends<br />
the call to the Asterisk SIP<br />
trunk because 555-2368<br />
is registered to the trunk<br />
belonging to the subscriber.<br />
Caller ID and the 10 digit<br />
DID number are sent to the<br />
Asterisk SIP trunk belonging<br />
to the Subscriber.<br />
Asterisk Switch<br />
Asterisk Extensions<br />
May be SIP or ZAPTEL<br />
or DAHDI hardware such<br />
as expansion cards or<br />
a Channel bank. Most often<br />
used to create analog<br />
extensions.<br />
Asterisk Trunk or trunks:<br />
May be SIP, IAX2, ZAPTEL<br />
or Dahdi Hardware such as<br />
expansion cards.<br />
(311) 555-2368 is routed<br />
to extension 2368 on the<br />
Asterisk switch. All info sent<br />
is passed onto the Vx.<br />
The Asterisk switch receives<br />
the digits and attempts to<br />
"match" the DID number to<br />
an "Incoming route". If matched<br />
the call is sent further to either<br />
and extension, trunk or special<br />
treatment in the system, such as<br />
voice mail or a busy signal if there<br />
are no free trunks or buttons at the<br />
far end.<br />
Vx Engine or<br />
Telephone sets<br />
Vx Engine or<br />
trunks to other<br />
PBX's<br />
Ext 2368 rings<br />
and shows<br />
(760) 256-8463<br />
as calling number<br />
on Vx.<br />
The Vx receives 2368<br />
and ringing commences<br />
while the Caller ID data<br />
is displayed along with<br />
the ringing indication.<br />
A "ringing line" lamp<br />
flashes, triggered by a<br />
GPIO interface as set in<br />
the Vx engine "Studio"<br />
definition.<br />
Vx Engine or<br />
Telephone sets<br />
Vx Engine or<br />
trunks to other<br />
PBX's<br />
Ext 2368 rings<br />
and shows<br />
(760) 256-8463<br />
as calling number<br />
on Vx.<br />
The Vx receives 2368<br />
and ringing commences<br />
while the Caller ID data<br />
is displayed along with<br />
the ringing indication.<br />
A "ringing line" lamp<br />
flashes, triggered by a<br />
GPIO interface as set in<br />
the Vx engine "Studio"<br />
definition.
A1 Warranty<br />
Telos <strong>VX</strong> LIMITED WARRANTY<br />
WaRRanTy | 95<br />
This Warranty covers “the Products, ” which are defined as the various audio equipment,<br />
parts, software and accessories manufactured, sold and/or distributed by TLS Corp.,d/b/a Telos<br />
Systems (hereinafter “Telos Systems”).<br />
With the exception of software-only items, the Products are warranted to be free from defects<br />
in material and workmanship for a period of two years from the date of receipt by the end-user.<br />
Software-only items are warranted to be free from defects in material and workmanship for a<br />
period of 90 days from the date of receipt by the end-user.<br />
This warranty is void if the Product is subject to Acts of God, including (without limitation)<br />
lightning; improper installation or misuse, including (without limitation) the failure to use<br />
telephone and power line surge protection devices; accident; neglect or damage.<br />
EXCEPT FOR THE ABOVE-STATED WARRANTY, <strong>TELOS</strong> SYSTEMS MAKES NO WARRANTIES,<br />
EXPRESS OR IMPLIED (INCLUDING IMPLIED WARRANTIES OF MERCHANTABILITY AND<br />
FITNESS FOR A PARTICULAR PURPOSE).<br />
In no event will Telos Systems, its employees, agents or authorized dealers be liable for<br />
incidental or consequential damages, or for loss, damage, or expense directly or indirectly<br />
arising from the use of any Product or the inability to use any Product either separately or in<br />
combination with other equipment or materials, or from any other cause.<br />
In order to invoke this Warranty, notice of a warranty claim must be received by Telos Systems<br />
within the above-stated warranty period and warranty coverage must be authorized by Telos<br />
Systems. If Telos Systems authorizes the performance of warranty service, the defective<br />
Product must be delivered, shipping prepaid, to: Telos Systems, 1241 Superior Ave., Cleveland,<br />
Ohio 44114.<br />
Telos Systems at its option will either repair or replace the Product and such action shall be the<br />
full extent of Telos Systems’ obligation under this Warranty. After the Product is repaired or<br />
replaced, Telos Systems will return it to the party that sent the Product and Telos Systems will<br />
pay for the cost of shipping.<br />
Telos Systems’ authorized dealers are not authorized to assume for Telos Systems any additional<br />
obligations or liabilities in connection with the dealers’ sale of the Products.